Testing, Testing

It’s kind of sad. Now that recipe development for the new book is coming to an end, I won’t get to have my daily email and phone conversations with my two cross-testers, Jessica and Eliza. I mentioned a few weeks ago that Eliza, my best friend from childhood, is my chief “citizen” tester. (And that her family and friends are enthusiastic tasters. Right about now, though, I bet they’re happy they’re not eating quite as many vegetables!).

But before the recipes get to Eliza (and after I’ve created, tested, and retested them), they go to Jessica Bard. Jessica is a professional chef, food stylist, cooking teacher and recipe tester. She’s a graduate of the Culinary Institute of America in Hyde Park, NY; worked on the CIA’s cookbooks for five years, and also is a former member of my staff at Fine Cooking magazine. So you could say that I have confidence in Jessica because of her professionalism and experience, and that would be so true. But it would only be a small part of the story.

Anybody who knows the effervescent (and always busy) Jessica Bard enjoys being around her. Her cheery, upbeat attitude and great sense of humor got me (and many of the rest of the Fine Cooking staff) through some pretty stressful times back in the day. When Fast, Fresh & Green came along, I knew I wanted her (and her positive energy) to be part of the experience of creating my first cookbook. (And then, of course, my second!)

The thing I admire most about Jessica is that she lives in the world, if you know what I mean. She embraces it all. Jessica and her husband Callum Benepe live in a cool barn they restored on her family’s property in Milan, N.Y. Jessica’s Dad lives next door. There is a constant stream of people coming and going, always enjoying Jessica’s food. Jessica created and tends an amazing vegetable garden, a space that inspired me, more than any other, to do my own big garden. One summer I went up to her place for a day just to imbibe what she knows about growing things. (That’s us back inside, above left, after some gardening–getting ready to cook together.)

There’s a whole list of other amazing creations spawned by Jessica’s never-resting imagination—including beautiful cakes and regular contributions to the Halloween parade in Greenwich Village—not to mention her own recipes. But probably my favorite creation is her recent collaboration with Callum—baby Grace! That’s Grace with a bowl of peanut noodles from the new book in the photo at left. When she’s not at day care, she’s an excellent taster!

I bring all this up because someone who’s going to cross-test recipes for a cookbook needs more than just excellent cooking and communication skills. It can’t be a person whose realm is the rarefied restaurant kitchen. It has to be someone who can know intuitively, when making a recipe, whether this is something a home cook would enjoy doing (or would even begin to tackle), whether the results are rewarding for the effort put in, and whether or not it’s the kind of thing a cook would want to serve to his or her friends and family. Jessica can tell me if I need to reduce the heat, add more acid, or use a different pan to fix a problem in a recipe (and she will!)—but she can also tell me if a recipe feels like it fits with the rest of the book or whether her husband or mother-in-law enjoyed eating it. (This is something Eliza brings to the table, too—she cooks for a big family daily, entertains at the drop of a pin, and gets lots of feedback.)

Lastly, Jessica is super-organized. Since I am ridiculously organized and a chronic list maker, it takes a lot to stay one step ahead of me–but Jessica does. I wouldn’t even know how to create the kind of recipe spreadsheets she keeps!

One particularly valuable thing she developed for us is the Recipe Test Evaluation Sheet (snapshot in the middle above). She created this for Fast, Fresh & Green and she and Eliza both have used it for Fresh & Green for Dinner. I thought blog readers might be interested in this, as I know from the frequent questions I get that recipe development is a mystery to most folks (more on that another time!). Here are some of the questions we have on the form:

  • Name of tester, Date of Test, Name of recipe,
  • Equipment—Type of oven or cooktop used (gas, electric, induction, convection)
  • Equipment—Pots, pan, utensils used (did you have the equipment recommended in this recipe?)
  • Ingredients—Did you have trouble finding any in this recipe? Any issues with measurements?
  • Method—How long did it take you to both prep and cook this recipe?
  • Method—Were the directions clear? (Consider timing, temperatures and doneness descriptions.) If not, please specify how they could be clearer and mark up the recipe.
  • Results—Was the serving size accurate? Did you like the results? Taste? Aroma? Appearance? Presentation?
  • 1-5 Taste Score 1 (bad) 2 (not to my taste) 3 (decent) 4 (good) 5 (excellent)
  • Any other comments?

  • So it’s not hard to see why I am so appreciative of the time, energy, and attitude commitment that both Jessica and Eliza have provided for me this time around. (I can’t tell you how many trips to the grocery store these guys have made, since the law of recipe testing is that you will never find all the ingredients in just one place. And then there’s that grilling in the snow…) I only hope we can all work together on another book very soon. That sounds crazy, I know, after the pace we’ve been working. But it’s been a lot of fun, too.

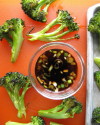
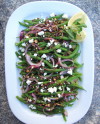
    By the way, both Jessica and Eliza were kind enough to take test photos of recipes along the way. Along with my photos (one from all three of us at the top of this blog), they’ll go in the package with the manuscript to my publisher, Chronicle Books, to help jumpstart the planning process for the real photo shoot.

    Green Cauliflower & Red Watercress–The Lure of Colorful Veggies on a Dark & Drizzly Winter Day

    I’ve always been a sucker for colorful vegetables. But hand me another dark, drizzly day, and you’ll find me going gaga at the grocery store for anything chartreuse…or fuchsia…or sunset orange. I need the color to stimulate my senses. The other day I saw a cool display of red watercress—something I’ve never seen before—and lurched towards it without even thinking. I brought it home and promptly mixed it with some pale lemony baby bibb (above right) for a delicious and pretty salad. That worked out pretty well.

    But sometimes I get myself in trouble. Take this whole green cauliflower thing (above left). I love this stuff, which I happen to call Broccoflower®. Because that’s what it’s labeled at my grocery store. I included a side dish recipe for it in Fast, Fresh & Green, and developed a pasta recipe with it for my next book. The problem came when I asked my cross-testers, Jessica and Eliza, to go find Broccoflower® in their grocery stores. Initially they both said they couldn’t find it. But both had the presence of mind to call me from the grocery store and describe what they did see. So after cell-phone exchanges and emailed photos, we determined that what both of them found was a very similar vegetable labeled “green cauliflower.”

    It turns out that Broccoflower®  is a registered trademark of Tanimura & Antle, a produce company that brought the variety (a cauliflower with some broccoli genes) over from Holland more than 20 years ago. Tanimura & Antle also has an orange cauliflower they call “Fiestaflower.” Meanwhile, another big produce company, Andy Boy, has begun marketing green cauliflower, orange cauliflower, and purple cauliflower in the last few years under those basic names. (All of these are purported to have the antioxidants you’d expect would pair with those colors.) As far as I can tell, Broccoflower® and green cauliflower are virtually the same thing. Whew. I was getting a little worried that I’d have to take the new recipe out of the book.

    It’s not just the color of green cauliflower (aka Broccoflower®) that I love. To my palate, it tastes a bit less cabbagey and a tad sweeter than white cauliflower. And when you cut it, the stems are a bit firmer—more broccoli-esque. And in general, I think it holds up better in cooking. Its florets are firmer than those of cauliflower, which can get a bit crumbly.

    Green cauliflower caramelizes beautifully in the sauté pan or roasting pan, so if you find some, crank up the heat. Then treat it to lemon, garlic (or another allium like scallions or leeks), and Parmigiano—three flavors it loves. (I’ve included a sample side dish recipe, below.) Serve it with roast pork or chicken, or turn it into a pasta sauce with a little chicken broth or pasta-cooking water and more olive oil or butter. It’s pretty darn tasty, which shouldn’t be surprising—I find the most colorful veggies taste the best, too.

    Lemony Green Cauliflower with Scallions & Parmigiano

    For this recipe, cut the florets on the small side—no more than about 1 1/2 inches long. It also helps browning if you cut whole florets in half—that cut side will have maximum contact with the hot pan and get very caramelized (see photo). Feel free to adjust the amount of lemon (or add a bit of lemon zest) here. And if you want a slightly saucier dish, deglaze the pan (to scrape up the flavorful browned bits) by pouring a bit  more chicken broth, water, or wine (diluted) in at the end. You can also enhance the sauce with a bit more cold butter.

    ____________________________________________

    2 tablespoons low-sodium chicken broth or water

    3 teaspoons fresh lemon juice

    12 ounces (3/4 pound) green cauliflower florets (a little less than one small head, cut into small florets)

    2 tablespoons unsalted butter

    1 tablespoon extra-virgin olive oil

    1 teaspoon kosher salt

    1/4 cup sliced scallions  (white and light green parts only) plus 1 tablespoon sliced green tops for garnish

    2 tablespoons coarsely grated Parmigiano Reggiano  (I use a food processor to chop coarsely)

    ________________________________________

    Combine the chicken broth or water with 2 teaspoons of the lemon juice and put it near your stove. In a 10-inch (3-quart) straight-sided stainless steel sauté pan, heat the olive oil and 1 tablespoon of the butter over medium heat. When the butter has melted, add the green cauliflower florets and the salt and toss and stir well. (A silicone spoonula works well for this.) Cover the pan and cook, stirring occasionally, until all the florets are browned in places, about 6 to 7 minutes. (There will be moisture accumulating inside the lid and it will drip down to deglaze the pan a little bit. But don’t worry if the pan is getting brown.)

    Uncover, carefully pour in the chicken broth or water and lemon mixture, and immediately put the lid back on (beware of steam). Cook until most of the liquid has steamed off or been absorbed, about 30 seconds. Uncover, turn the heat to low, and add the remaining tablespoon of butter, the remaining teaspoon of lemon juice, and the scallions. Cook, stirring gently, until the butter has melted and the scallions have softened, 1 to 2 minutes.

    Remove the pan from the heat and transfer all the green cauliflower and scallions to a serving dish or dishes. Sprinkle with the Parmigiano and the scallion tops and serve.

    Serves 3

    On the Menu: Roasted Butternut Squash with Cranberry-Ginger Butter and Toasted Walnuts

    A few weeks ago I mentioned my imaginary friend Shorty. Things have gotten worse. Now I have a whole bunch of imaginary friends. I had a party and invited them over two nights ago. It was a spur of the moment thing, so there was no time to invite real friends.

    I had been making my black bean chili all afternoon—one of the last recipes for the new book, and one I’m particularly excited about. But once I had a big pot of the stuff on my hands around 6 o’clock, I realized I needed to get an accurate read on the portion sizes—not just of the chili, but of the rice, the vegetables, and the garnishes that go with it. So I made all the accompaniments and then started putting out little bowls (each for a half-size portion), figuring I’d kill many birds with one stone. (Our pet, Ellie the Lovebird, with whom I have a tenuous relationship, did not like this analogy.)

    Not only did I want to test proportions, but I wanted to test different taste combinations. So I put little name cards next to the bowls as a fun way to indicate the different combinations. “I think I’ll blog about this,” I told Roy, who was looking at me with amusement. “No, I think I should write the next blog,” he said, “about what it’s like to live with a cookbook writer on deadline.” Needless to say, I’m keeping him far away from the keyboard.

    Happily both Roy and I and all of the imaginary guests (or as best as we can figure) liked all of the chili combinations. But everyone’s favorite vegetable topping for the bean chili was roasted butternut squash. I nibbled on the squash as we were cleaning up (the guests did not hang around to do the dishes), and I thought about what a delicious side dish roasted butternut is, simply diced up and cooked on high heat. But even better, a super-quick flavored butter (my favorite has lots of chopped dried cranberries, fresh ginger, and a little lime in it) turns this earthy-sweet vegetable into a real star. So I’m passing along that recipe—since I can’t share the chili recipe just yet.

    The only problem with this recipe is portion size (ack—the bane of my existence!). Even if you scooch up the amount of raw squash to 1 1/4 lbs. (any more than this amount on one large sheet pan will steam, not roast), you still only wind up with about enough to serve 3 people as a side, because this is so tasty. At least you won’t have to invite any imaginary friends to eat the leftovers.

    Roasted Butternut Squash with Cranberry-Ginger Butter & Toasted Walnuts

    ______________________________________________

    1 to 1 1/4 lb. peeled butternut squash, cut into 1/2-inch dice

    3 tablespoons extra-virgin olive oil

    Kosher salt

    2 tablespoons unsalted butter

    3 tablespoons chopped dried cranberries

    1 teaspoon chopped fresh ginger

    1/4 teaspoon finely grated lime zest

    ½ teaspoon fresh lime juice; more if needed

    2 tablespoons finely chopped toasted walnuts

    2 teaspoons chopped fresh cilantro (optional)

    ________________________________________

    Preheat the oven to 450°F. Line a large heavy-duty rimmed sheet pan with a piece of parchment paper. In a mixing bowl, toss the squash with the olive oil and 1 teaspoon salt. Spread the squash in one layer on the sheet pan. Roast, flipping once with a spatula after about 18 minutes, until the squash are tender and  brown on the bottom and around the edges, about 12 minutes more or 30 to 32 minutes total.

    Meanwhile, melt the butter in a small saucepan over low heat and add the cranberries, the fresh ginger, and the lime zest. Stir well and cook to soften the cranberries a bit, about 1 minute. Take the saucepan off the heat while waiting for the vegetables to finish roasting.

    Transfer the squash to a mixing bowl. Reheat the cranberry butter to loosen it up if necessary. Add the ½ teaspoon lime juice, stir, and pour and scrape all of the cranberry butter into the bowl with the squash. Toss thoroughly but gently. Taste and add up to ½ teaspoon more lime juice if desired. Add the walnuts and cilantro (if using) and toss again. Serve right away.

    Serves 3 (maybe 4!) as a side

    Counting my Blessings: A Year in Veggies–Plus a Book, a Blog and a Best Friend, too

    I have everything in the world to be grateful for and nothing I dare complain about as 2010 turns into 2011 tonight. It was a year of firsts for me: I launched my first website/blog in February (hello sixburnersue!); my first cookbook, Fast, Fresh & Green, was published in April; and Roy and I sold our first vegetables out of our first market garden in June. Plus, in September we moved into an old farmhouse—something I’ve always dreamed of (literally—I’ve had visions in my head of just this kind of old place). Who knows how long we’ll be in the house, but for now it feels just right.

    But there’s one thing that’s not new this year, and it’s the thing I think most about (and am most grateful for) every year on this day. Because December 31 is my best friend’s birthday. Eliza (who I call Lou because it rhymes with Sue—something we schemed up as kids)  lives in York, Maine, now, but we grew up together in Washington, D.C. I, in fact, was waiting for Eliza when she came along six months after I was born. Our Moms got to know each other while they were both pregnant and became good friends. As soon as we could sit up, they plopped us on the floor together, and we haven’t stopped giggling since.

    Over the years, wherever we’ve lived (New York or California, Rhode Island or Colorado, Boston or Washington), we’ve never lost touch. Eliza has been my number one supporter through many crises—she is patient and understanding and the most people-smart person I know (she’s got more friends than I can count and she’s a great mom, too). And, guess what? She’s a great cook! Just a few months ago she agreed to be my chief “citizen” tester for the new book, so I am particularly grateful for her help just now. (And for Chip, Nathalie, Katie & James’ tastebuds, too.) So I’m taking the opportunity today not just to celebrate a wonderful year (the pictures tell the story), but a wonderful lifetime of friendship, too. Happy Birthday, Lou (aka Eliza Peter)! Now, what would I do if my best friend didn’t like to cook?!!!

    Snow Days and Side Dishes

    Even though I don’t have to go to school any more (or even to an office, for that matter), I still get that giddy feeling when it snows. A snow day! Oh boy! A day off! “Uh, Susie,” I then remind myself, “You don’t get a day off. You’re a freelancer.” Oh, right. A freelancer with a book deadline in less than two months.  Well, that didn’t stop me from venturing out into the fury on Monday to take pictures (that’s our backyard, above, at about 3 p.m.) or on Tuesday in the flurries to take more pictures (front window, about 1p.m.).

    Yes, I will do anything to procrastinate. But I did deliver 8 new recipes to my cross-tester (that’s cross-tester, not cross-dresser) on Sunday night, and I’ve been cranking away on five more since then. So, you know, I have to take a break every once in a while. All of this is a lame way of explaining why there is no Christmas recipe going up on the blog tonight. The blog recipe that I had in mind (Christmas Carrots for a Crowd) did not quite make it into the kitchen line-up today between Orecchietti with Lemony Broccoflower and Roasted Tomato Galettes (recipes for the new book, which, of course, I can’t publish here—nor would you want to eat them with your prime rib, anyway!).

    I had hoped my new kitchen angel (left), an early Christmas present to myself, might somehow make the days stretch longer for me, so I could fit more in. But no such magic today. At least we are past the solstice now, as here in the Far East, the sun sets at 4 and it’s hard not to feel like the day is over when darkness comes—though that’s normally the time I’m gearing up to do one last test for the day.

    At any rate, I don’t have many recipes on the site that are suitable for large crowds, but just in case you’re dining with a small, intimate group, and just in case you haven’t finalized your menu (I know, I’m late in the game here), the least I can do is suggest some favorite and appropriate holiday sides already posted on sixburnersue.com:

    I think the most popular recipe on this site may be these Braised Fingerlings with Crispy Sage & Tender Garlic. So yummy and a classic update for serving with beef tenderloin. A Bed of Buttery Leeks and Spinach would be a great landing spot for a few slices of tenderloin, too. For prime rib? This Yukon Gold and Celery Root Gratin. Or the Potato Galette with Fresh Rosemary …and Roasted Cauliflower, too. For roast turkey? Caramelized Turnips, Potatoes & Carrots or the Mashed Yukon Gold Potatoes with Roasted Garlic. Ham? Slow-Sauteed Green Beans with Shallots & Bacon or a double recipe of Roasted Brussels Sprouts with Nutty Lemon-Maple Brown Butter. Salmon? Maybe this Baby Bok Choy recipe or a double recipe of Popeye’s Garlic Spinach.

    Whatever you decide to cook, I hope you have lots of kitchen angels to help. Merry Christmas from Sixburnersue and snowy Martha’s Vineyard!

    Christmas Presents Past and Future

    Today I made up an imaginary friend named Shorty. I was writing a head note for a recipe (one that involves short-grain brown rice) and was fresh out of clever things to say. This is what happens when you agree to write a book quickly—your creativity gets taxed mightily. So much so, in fact, that no new recipe blog is coming forth from me today.

    Instead I decided to write (quickly) about the other thing that is very much on my mind—Christmas shopping. I have, in fact, barely done any yet, which is Not Good. I can’t do much about that right this minute, but I thought maybe I could help you, since probably you have an equivalent of a book deadline hanging over you and are behind with your own efforts. Or maybe some wonderful friend or your husband or your mother wants to know what you want for Christmas.

    Here are five ideas. They just happen to be some of my favorite kitchen tools. People often ask me about kitchen equipment. Sometimes the questions are real stumpers, like whether they should buy the newest combined microwave-convection-infrared-lightspeed-oven, whereupon I stare at them blankly since I haven’t been in the market for a new stove in 10 years. But when it comes to simple kitchen tools, I can babble on (my specialty).

    My very favorite thing is a pink-handled knife from Kyocera. Well, honestly, it’s not the color of the handle that did it for me (yes, pink is my favorite color), though I do love the fact that every purchase of this knife sends $5 to the Susan G. Komen Breast Cancer Foundation. It’s the ceramic blade—so darn sharp, and it has been that way every day that I’ve used it for the past five years (which is almost every day). The Santoku-shaped blade is only 5 1/2 inches long, so this isn’t your big chopping knife; I think of it more as a utility knife. I use it for thin-slicing potatoes, cutting up broccoli florets, slivering garlic, halving Brussels sprouts, trimming green beans…lotsa things.

    The tool I use most in the kitchen—maybe even more than my ceramic knife—is a pair of OXO tongs. Three pairs, actually (two 9-inchers, one 12-incher.) I think I first got attached to tongs when I worked in restaurant kitchens, where pot holders don’t exist. (Come to think of it, neither do most common kitchen utensils.) You can use tongs to pull out hot oven racks and sheet trays, turn over delicate veggies or meats while sautéing, move anything around in a pan, or, of course, to handle anything on the grill. I particularly like the grip and the locking mechanism on the OXO Good Grips tongs.

    I eat and cook with a lot of eggs, so I’ve messed around with many whisks. The silicone-coated balloon whisk from Le Creuset is the most efficient whisk I’ve ever used. I flick it around a few times and voila, my eggs are perfectly mixed. It’s a little bottom-heavy so occasionally it does fall out of a bowl, but I love it (and its color) nonetheless.  I probably don’t need to say anything about silicone spatulas other than, if you only have one or two—buy more! I have them in a rainbow of colors and sizes (I like a spoonula shaped one, too) from both OXO and Le Creuset. I still have my wooden spoons, but they spend more time looking good in an old ceramic baked-bean jar than my silicone spatulas, which hit the pans (especially nonstick ones) every day.

    Lastly, I don’t know what I ever did without a Microplane® zester for zesting lemons, limes, and oranges. I love to use zest as a flavor booster in pan sauces, rice dishes, salad dressings, flavored butters…and this tool just makes getting that feathery zest (minus the bitter pith) a breeze. Use it for finely grating Parmigiano, too. I like my funky original one so much that I haven’t invested in one of the many newer ones with comfortable handles, but you could.

    One last Christmas idea: Buy a goat! No, I haven’t completely lost it—yet. I just happen to love this idea: Instead of (or in addition to) giving an actual material gift to one of your friends,  OXFAM America will let you “buy” (make a donation in a certain amount) a gift (in your friend’s name) for a community in need. ($25 will buy a school lunch program for one child, $30 a vegetable garden for one family. The goat—a great source of milk, fertilizer and food in hardscrabble areas, is $50!) Your friend will get a Christmas card letting him or her know the donation has been made. I’m not saying you need to skip the kitchen goodies—just that one of these cards tucked next to the spatulas in a Christmas stocking might be in the true spirit of things.

    Wherever your gift buying or gift giving leads you this holiday season, I hope you can keep that true spirit close by. Spend time with your friends—and not just the imaginary ones!

    P.S.  Oops, I almost forgot. I know this is really not in the true spirit of Christmas (blatant self promotion—I don’t think so), but remember that Fast, Fresh & Green makes a great Christmas present, too! Be sure to try and patronize your local bookstore this season if you can.

    Winter Skies & Parsnip Fries

    With the sudden cold this week came a change in the sky. I looked up at twilight and there were those magical trees, spindly and Fantasia-esque, their branches bare and brittle, silhouetted against the bluer-than-blue sky of a December afternoon on the Vineyard. This windblown tree-scape of the Island winter might seem austere to some, but it’s comforting to me, and I’m glad it’s arrived—if seemingly overnight. This is the very vista that enveloped me when I arrived here three winters ago, spent and unsure. It offered me a wide-open gift of calm and space. The gnarly trees led me into the woods, down paths to hidden coves and rocky beaches, through tufted fields, around lichen-licked stone walls, up bumpy hills to breathtaking views. I’d always been afraid of the woods, but here, with sparkly views peeking through the leafless Beetlebungs and stubborn scrub oaks, I forged ahead and gained courage and confidence.

    Now my favorite season on the Vineyard brings another intangible perk—friends circle together and catch up after the busy season. There are potlucks and indoor markets and special events like the winter film festival. But as it happens, you most often run into your friends at the post office and the grocery store. Me, I am at the grocery store a lot. So I get to see lots of friends, and I also get a peek at what everyone’s cooking.

    The other day I ran into my hen-whisperer friend, Katherine Long. Not only does she have the most amazing chickens, chicken coops, and chicken eggs (of course), but she is a cook extraordinaire, so I love chatting with her. She was clutching a bag of parsnips. “Mom’s coming,” she said matter-of-factly. “And she wants veggies. I’m thinking maple-mustard parsnips.” “Perfect!” I said to her, “And what a coincidence…” I instantly remembered that I’d developed a delicious recipe for maple-mustard glazed parsnips for Fast, Fresh & Green, but that it was one I had to excise from the book (I wrote too many recipes, naturally).

    Suddenly I had parsnips on the brain. I started to feel bad that I’d mentioned sweet potato fries last week, and hadn’t given poor parsnips their due. Parsnips, in fact, make excellent oven fries, though they are much drier than sweet potatoes. And they’re delicious sautéed, though all that sugar makes them brown up fast.

    The next day I went straight to the Winter Farmers’ Market and bought the last bunch of freshly dug parsnips Morning Glory Farm had brought with them. (Copious greens still attached.) I’m sure there are more where those came from, as parsnips get sweeter when the ground freezes (the cold converts their starch to sugar), and they keep well in cold storage, too (kind of like the heartiest Islanders). Really, this pretty white root is the quintessential winter vegetable. So this week I’m offering up the recipe for the mustard-maple glazed parsnips and the directions for making the fries—to assuage my guilt for not having blogged about parsnips sooner. But also, to celebrate the arrival of winter—even if there is very little insulation in our charming little house and, it is, well, cold. I did say I loved winter on the Vineyard, didn’t I?

    How to Cut Parsnips

    I think parsnips look lovely and cook best when cut into long, thin pieces. I call these pieces “sticks,” and that’s a fine goal to aim for, but in reality many pieces will have tapered edges and some will be thicker than others. For small or medium sized parsnips, I don’t bother to cut the woody core out—it cooks up just fine. First I cut the long parsnip in half, crosswise, right about where it goes from fat to skinny. I quarter the skinny end lengthwise and usually wind up with 4 pieces between 1/4 and 3/8 inch thick. (Pieces on the skinnier side are a bit better for the sauté; you can cut the fries a bit fatter.) With the fat end of the parsnip, I cut a very thin sliver off of one side so that I can roll it over and stabilize it. Then I cut it lengthwise into planks (see top left in photo). Then I lay the planks down and cut them into sticks.

    Maple-Mustard Glazed Parsnips

    The trick to sautéing the parsnips in this recipe is to moderate the heat so that the veggies are cooking through and browning at the same time. On my stove, the ideal heat is around medium, but sometimes I wind up turning the heat down to medium-low to slow down the browning while the steaming catches up. But everyone’s stove is different, so keep an eye on the veggies. If they are browning too quickly (before they begin to lose their opacity), turn the heat down a bit. Lower and slower is better than higher and faster in this case. The easy maple-mustard glaze gives these a depth and richness that could stand up well to a hearty braise like a pot roast.

    ______________________________

    2 tablespoons maple syrup
    2 teaspoons Dijon mustard
    2 tablespoons extra-virgin olive oil
    1 tablespoon unsalted butter
    1 pound parsnips, trimmed, peeled and sliced into sticks 2 to 4 inches long and between 1/4- and 3/8-inch wide
    kosher salt

    _______________________________

    In a small bowl, whisk together the maple syrup and the mustard and set near the stove. Arrange a serving dish near the stove as well.

    In a large (12-inch) nonstick skillet, heat the olive oil and butter over medium heat. Add the parsnips and 1/2 teaspoon salt, and cook, stirring gently and frequently (a silicone spatula works well), until the parsnips lose their opacity, become golden brown all over, and are tender, 15 to 17 minutes. (The parsnips will begin browning after 6 to 8 minutes. If they are browning too quickly—before they lose their opacity—turn the heat to medium-low. After stirring each time, spread the parsnips out in the pan so that they have maximum contact with the heat.)

    Remove the pan from the heat and immediately add the maple-mustard mixture. Stir right away as the mixture reduces and coats the vegetables. Immediately transfer the parsnips and any sauce in the pan to a serving bowl. Let cool for a minute or two, taste and season with more salt if desired. Serve right away.

    Serves 3 as a side dish

    Roasted Parsnip Fries

    When you buy a 1-lb. package of parsnips at the grocery, it will often contain more like 1 1/4 lb. Weigh your roots at home if you can, as 1 lb. is about the maximum for roasting on a large sheet pan. (The parsnips will steam rather than roast if they are too crowded. Use two pans if necessary.) The lime-maple drizzle here is very tasty, but optional. You could season the fries with spiced salt or serve with some other kind of dipping sauce, like honey-mustard.

    ______________________________

    1 pound parsnips, trimmed, peeled, and cut into sticks 2 to 3 inches long and 3/8-inch/1-cm wide
    2 tablespoons extra-virgin olive oil
    kosher salt
    1 teaspoon fresh lime juice (optional)
    2 teaspoon maple syrup (optional)
    sea salt for sprinkling (optional)

    _______________________________

    Preheat the oven to 450 degrees F. Line a large rimmed heavy-duty baking sheet with parchment paper. In a mixing bowl, combine the parsnip sticks with the olive oil and 1/2 tsp. kosher salt. Toss well and spread in one layer on the baking sheet. Roast until the “fries” are nicely browned (mostly on the bottoms) and tender, about 20 minutes. (If the pan is crowded, they can take 30 to 35 minutes. Check frequently as browning goes fast.) Let cool for a couple minutes on the sheet pans and then sprinkle with a bit more salt. Or combine the lime juice and maple syrup (if you like), drizzle over the fries, and season with coarse salt. Eat right away.

    Serves 3 as a side dish

    Beyond Fries—Sweet Potatoes Star in a Slow-Sauté

    Sweet potatoes are having their moment—at least according to a recent article by my favorite New York Times reporter, Kim Severson. It seems their new fame is largely due to the popularity of sweet potato fries. These fries (mostly deep-fried like regular potato fries) have popped up on both upscale and chain restaurant menus all over the country in the past couple of years. I am one of those willing victims who eats these things; but more often I roast them at home in the oven using the recipe I created for Fast, Fresh & Green. (I posted that recipe here last spring when the book came out. It has a yummy limey dipping sauce that goes with it.)

    But I’ve long been a fan of sweet potatoes cooked many different ways—especially any method that allows them to caramelize a bit, like slow-sautéing. So I thought this week I’d make some slow-sautéed sweet potatoes and share that recipe here, in honor of the humble tuber’s new (but hopefully not fleeting) fame.

    All this attention has some real perks for cooks and eaters alike. For cooks, there are now more varieties of sweet potatoes available at groceries and farmers’ markets. I love the Gem and Garnet sweet potatoes I find. Their flesh is moist and very tasty. But according to the North Carolina Sweet Potato commission’s website, there are actually hundreds of varieties of sweet potatoes from white-fleshed to deep purple. (Visit their site to see cool photos of a dozen kinds.) The perk for eaters, which I didn’t realize until reading Severson’s article, is that sweet potatoes, sweet as they are, are actually full of complex carbohydrates (as opposed to simple sugars) which don’t spike insulin, so they are recommended for diabetics and dieters alike. They’re also very high in beta-carotene, Vitamin E, and fiber.

    All that, plus sweet potatoes are easy to prep. There’s very little waste, and most often I don’t peel them. So whether you’re looking for great flavor, fun cooking, or better health, sweet potatoes have something to offer.

    Caramelized Sweet Potatoes & Onions with Cider Butter

    Once you’ve gotten the hang of the slow-sauté, you can vary this recipe by adding some diced apple halfway through cooking, or by adding a bit of minced fresh ginger or garlic at the end of cooking (fold in and let soften for a minute or two). You can also add toasted chopped nuts at the end. However, the simple cider butter is really all you need for a delicious finish.

    _______________________________________________________

    4 tablespoons unsalted butter

    2 tablespoons extra-virgin olive oil

    1 1/2 pounds sweet potatoes (about 2 fairly big ones), unpeeled, cut into 1/2-inch dice (about 5 cups)

    1 teaspoon kosher salt

    2 small onions (about 8 ounces), cut into 1/2-inch dice, about 1 1/2 cups

    1/2 cup apple cider

    1/4 tsp. cider vinegar

    2 teaspoons chopped parsley (optional)

    _______________________________________________________

    Cut 2 tablespoons of the butter into 8 pieces and refrigerate it to keep it cold.

    In a large (12-inch) nonstick skillet, heat 1 tablespoon of the butter and the olive oil over medium-high heat. Add the sweet potatoes and 1 teaspoon kosher salt. (The pan will look crowded.) Stir well. (A silicone spoonula works great for this.) Reduce the heat to medium, cover loosely, and cook, stirring and flipping occasionally with a flat-edged spatula, for 15 minutes. The sweet potatoes will start browning after about 10 minutes, and you’ll be scraping up some brown stuff off the bottom of the pan—no worries. Listen to the pan; you should hear a gentle sizzle, not a loud one, as the sweet potatoes cook. If the vegetables are browning too quickly, reduce the heat a bit to maintain that gentle sizzle. If you can barely hear the sizzle, turn the heat up a bit.

    Uncover, add 1 more tablespoon butter, the onions and 1/4 tsp. salt, and continue to cook, stirring and flipping more frequently as browning goes faster. Adjust the heat down slightly if necessary (and add a little more oil to the pan if it seems dry). Cook until the vegetables are all tender and the onions are lightly browned, about another 10 to 12 minutes.  Remove the pan from the heat.

    Meanwhile, in a small saucepan, bring the apple cider to a boil over medium-high heat. Reduce to a simmer and cook until it is reduced to about 3 tablespoons—it will be slightly more viscous. Add the cider vinegar and reduce the heat to the very lowest setting so that the liquid is hot but not simmering. Remove the cold butter pieces from the fridge and begin adding them to the hot liquid, a few pieces at a time. After each addition, whisk the butter until it dissolves and becomes creamy. Finish adding the butter and whisking until you have a creamy sauce. Do not turn the heat up or the butter will separate while melting. Keep the sauce warm over the very lowest heat if necessary.

    Drizzle the sauce over the sweet potatoes, toss well and serve garnished with the chopped parsley (if using).

    Serves 4

    My Favorite Tip (And Recipe) For Thanksgiving Mashed Potatoes

    One of the best things about working at Fine Cooking magazine all those years was the wealth of great tips I gleaned from the chefs, cookbook authors and other amazing cooks we worked with to produce the stories. One of my favorite Thanksgiving “A Ha!” moments was discovering how to keep the mashed potatoes warm. After you finish making them, put them in the top pan of a double boiler, or even better, in a large, wide shallow stainless steel (heatproof) mixing bowl. Cover with foil or a lid and hold over gently simmering water for up to 2 hours! You’ll need to check the water every once in a while, but there are a couple of great things about this tip. First, the people who have a thing about being served less than piping-hot food (you know who you are, Dad) will be very happy. Secondly, you, as the cook, will not have to worry about making the mashed potatoes (along with everything else) at the last minute.

    Of course, there are a few other tips to making good mashed potatoes. Probably the most important is not to over-mash. If you overwork potatoes (especially Russets), the starch will turn to glue. Usually, a stand mixer on high speed is the culprit here, so I always mash my potatoes with a hand-held masher. (We don’t mind ours a little rough; I also prefer to use Yukon Golds.) But a food mill will give you the most beautiful potato puree.

    But instead of going on and on (for once I will stop myself!), I thought instead I’d offer my favorite mashed potato recipe for a crowd (below), and you can take a few more clues from that. (This one happens to included roasted garlic—yum—but you could leave it out.)

    I hope everyone has a wonderful Thanksgiving holiday, and if you need help with your menu, I’d recommend checking out Fine Cooking’s Thanksgiving Menu planner, which not only has a ton of great recipes, but will generate a shopping list and time line for you after you select the recipes for your menu. Of course the Baking Gratins chapter in Fast, Fresh & Green has some delicious ideas, too. And if you’re looking for quick vegetable side dishes, remember to tune in to The Martha Stewart Show on the Hallmark Channel on Wednesday, November 24 at 10 a.m. to see me roasting squash, turnips, and Brussels sprouts!

    Mashed Yukon Gold Potatoes with Roasted Garlic

    The roasted garlic in this recipe makes these potatoes irresistible, but you can use the proportions here to make perfectly delicious mashed potatoes without the garlic if you like. This recipe yields a lot – enough to serve 10 people at Thanksgiving. (I originally developed this for a holiday issue of Edible Vineyard magazine.) But you can easily cut it in half to serve it some other time.

    _________________________________________________

    4 pounds Yukon Gold potatoes, unpeeled, cut into 1-inch pieces

    1 tablespoon plus 1 teaspoon kosher salt

    10 tablespoons unsalted butter, at room temperature

    Cloves from 2 heads roasted garlic (for directions, see below)

    1 ¼ cups heavy cream, at room temperature

    _________________________________________________

    In a Dutch oven or other large, wide cooking pot, combine the potatoes, 1 tablespoon kosher salt, and enough cold water to cover the potatoes by about 2 inches. Bring the water to a boil, reduce to a simmer, and cook until the potatoes are tender, a total of about 25 to 30 minutes.

    Drain the potatoes in a colander and return them to the cooking pot over very low heat. Toss the potatoes around for a few seconds to allow some of the excess moisture to steam off a bit. Add all of the butter, the garlic cloves, 1 teaspoon kosher salt, and 3/4 cup of the heavy cream. Using a hand masher and moving around the pot in a clockwise manner, mash the potatoes until they are coarsely mashed. Continue adding cream and mashing until the potatoes are mostly smooth. They will have a creamy texture with just a slight chunkiness and yummy bits of skin and garlic throughout. Towards the end of mashing, switch to using a heatproof silicone spatula to smooth the potatoes out a bit.  Serve hot right away or keep warm over simmering water (covered) for up to 2 hours.

    _________________________________________________

    To Roast Garlic: Heat the oven to 350 degrees. Take a very sharp chef’s knife and chop off about the top 3/4-inch of a head of garlic. (Or chop off enough so that each clove is slightly exposed). Leave the head in tact (do not separate the cloves) and place it on a double layer of aluminum foil. Drizzle the head (or the two heads, as in the case of the recipe above) with olive oil and wrap the aluminum foil up around the head. Place the package in a small casserole dish or on a small sheet pan and put it in the oven. Roast for 45 minutes or until the cloves are just tender and soft through. Let cool at least 15 to 20 minutes before squeezing the garlic cloves out of their skins by applying pressure to the base of the head.

    So Much for the Simple Life: A Second Book & A Date with Martha Stewart

    I moved to Martha’s Vineyard three years ago for a Simpler Life, and I got it. Granted I wasn’t any Paris Hilton, but I did have a lot of pointy-toed high-heeled shoes and frilly skirts. These days, I am most comfortable (and most often) stomping around in my muck boots and my blue jeans. For me, these boots have come to symbolize the freedom and peace I feel on the Island.

    This past Saturday was a great example of what I love about my new life. We woke up, pulled on our boots, and trotted over to the Ag Hall (the big barn-like structure where the Fair and lots of other cool local events are held) to check out the indoor Winter Farmers’ Market. (We live right across the street from the Ag Hall now.) The indoor market, only in its second year, has already worked itself into the fabric of the year-round community, and it’s a great place to go to see friends, get a cup of coffee and stand around the fireplace, maybe buy a bar of Island-made goat soap or a quart of Island-made yogurt or even a piece of Island-made chocolate. And there are veggies like nobody’s business, since our warm Island fall extends the growing season right through to December. I restrained myself and walked out with only one bunch of beautiful turnips. (On a typical Saturday morning in my old life, I’d be in the car racing up and down Route 1 or I95, trying to cram in errands I couldn’t do during the week.)

    So I was going to blog about the market and the turnips this week, but then, since there was an even cooler event that happened Saturday night (at the Ag Hall again, of course), I thought for a moment I might write about that! Our local nonprofit, Island Grown Initiative, held a pig- and chicken-roast fundraiser called “Local Meat is Good to Eat—But There’s More to Life than Chicken.” The group, which has been very successful in introducing a mobile poultry processing unit to the island (and increasing the number of chickens raised here), has received a state grant to do a feasibility study for a potential USDA four-legged humane slaughter facility on the Vineyard. The fundraiser was planned as a way to bolster the grant money. The food was amazing, but the community spirit even more affecting. IGI had expected 150 to 200 people—and 400 members of the community showed up! (And $12,000 was raised.) I felt really proud and grateful to be part of that community. But truthfully, showing up at a delicious pig roast for a good cause might fit well with my idea of a simpler life, but what these folks are doing for the farming (and entire community) on this Island is anything but simple. But that’s the way life goes; the good stuff only comes with hard work and a fair dose of complication.

    So ultimately, after procrastinating on writing this blog, I decided not just to focus on the market or the fundraiser. Because life, no matter where you live and how you approach it, is never all that simple. This is very much on my mind right now for two reasons.

    First, a month or so ago, I was asked to write a new book—quickly. The publishers of Fast, Fresh & Green, Chronicle Books, were so happy with this first book of mine that they figured why not publish a follow-up book (sort of a sequel—though I keep thinking that I hope this one is better than Jaws 2!) in the Spring of 2012. So I gave them a proposal for Fresh & Green for Dinner, a collection of vegetable-driven main dishes, and lo and behold, I got a February 15 (2011!) deadline. Yikes. This of course, is both great and scary at the same time. And anything but simple. I am now pushing myself at a pace that I don’t really like—working day and night to get recipes written, developed (which means several tests on my part), cross-tested, and edited. (Grilled pizza, anyone?) I’m feeling just a little bit like I did in my old life—speedy (though that could be from all the coffee I drink). But that’s okay. Because I’m grateful that I have a job (crazy as it is) that lets me live where I want to—in this beautiful place.

    Secondly, there’s another not-so-simple reality to being a cookbook author: Publicity. And when you get an opportunity to appear on a national TV show—especially one that’s hosted by a fabulous cook—you don’t say no. So on the morning of Wednesday, November 24—the day before Thanksgiving—I’ll be standing next to Martha Stewart, telling her (like she doesn’t already know!) and a live studio audience, about quick-roasting vegetables. It’s a prime spot for a cookbook author, since Thanksgiving is the number one cooking holiday, and I’m excited that I’ll be able to talk about something that really is easy to pull off on Thanksgiving. (Quick-roasted vegetables can pop in the oven after the turkey comes out and cook in the amount of time the turkey needs to rest.) I’ll be cooking the popular Vanilla and Cardamom Glazed Acorn Squash Rings, and yes, turnips! (Roasted Turnips & Pears with Rosemary-Honey Drizzle), as well as Roasted Brussels Sprouts with Orange Butter Sauce, all from Fast, Fresh & Green. (You can get the first two recipes online here, from a recent article in Martha’s Vineyard magazine.) If you want to watch, I’ll be on the 3rd and 4th segments (the show starts at 10 a.m. on the Hallmark Channel and I believe repeats at 1 p.m. Oops–no I’m wrong about that. It repeats at 2 pm that day. The 1 pm show is a repeat of the day before!). Roy and I will be taking Libby down to New York for the night, and the two of them will get to be a part of the live audience (and maybe visit backstage, too!). Somebody is pretty excited, let me tell you…

    In the past, I dreaded TV appearances. But I’m in a different spot now and am really anticipating this with joy, not in small part because I know my friends and family will share in the excitement. But also, the producers of The Martha Stewart Show are real pros, and I feel lucky to be on a quality program that values home cooking. So while it wasn’t in my plans to get on the ferry, drive down I95, and put on my public face (no pointy-toe shoes, though) the day before Thanksgiving, I’m there. It was, afterall, a simple decision.

    Vegetables, flowers, and serenity with Susie Middleton