Category Archives: The Recipes

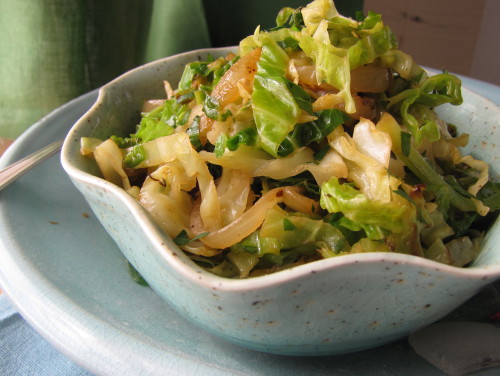
Quick Sautéed Cabbage Recipe for St. Patrick’s Day

If you’re getting around to planning your St. Patrick’s menu a little late like me, here’s something to help—a quick and easy sautéed cabbage recipe. I’ve never been one for the traditional boiled cabbage that often goes along with the corned beef on this holiday. In fact, I didn’t learn to love cabbage until I cooked it hot-and-fast–in a sauté pan, in a stir-fry pan, on a griddle—anything where I could bring out its sweeter side with a little browning.

Sautéed cabbage is not only (much) tastier than boiled cabbage, but it’s less fussy to cook. The basic recipe really doesn’t need much embellishment either, since browning accentuates the nutty flavor of cabbage. But after you’ve tried this and made it part of your repertoire, you can perk it up by adding sautéed apples to it, by tossing in a bit of ginger or garlic, or by playing around with the deglazing broth by sub-ing in white wine, lemon, or apple cider for the rice vinegar and soy sauce.
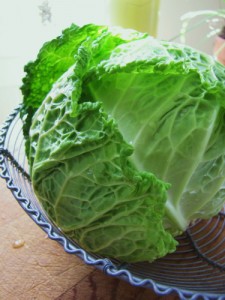
Regular old green cabbage would be just fine here, but I’m crazy about its crinkly-leaved cousin, Savoy cabbage (right). Savoy wilts in a hot pan a bit quicker than regular cabbage, and has a slightly richer flavor and lighter texture.

To make Colcannon: To make a delicious version of this Irish mashed potato and cabbage dish, make mashed potatoes using Yukon gold potatoes, cream, and butter (and plenty of salt). Hand mash for a coarse texture. Fold in some or all of the cooled Quick-Sautéed Savoy Cabbage (lightly chopped first if you like). You can also substitute leeks for the onions in the sautéed cabbage recipe, but you will need a bit more cooking fat and time to soften them before adding the cabbage.

Quick-Sautéed Savoy Cabbage

___________________________________

2 tablespoons chicken broth
½ teaspoon rice wine vinegar
¼ teaspoon low-sodium soy sauce
¼ teaspoon sugar
2 tablespoons unsalted butter
1 tablespoon extra-virgin olive oil
1 medium onion (4 to 5 ounces), thinly sliced
kosher salt for seasoning
½ head Savoy cabbage, cored and very thinly sliced (about 8 to 9 ounces)
2 teaspoons chopped fresh parsley (optional)

___________________________________

Combine the chicken broth, rice wine vinegar, soy sauce, and sugar in a small bowl. In a 10-inch straight-sided sauté pan over medium-high heat, melt 1 tablespoon of the butter with 1 tablespoon of the olive oil. When the butter is foamy, add the onion and a pinch of salt and sauté, stirring, until the onions are somewhat softened and just beginning to brown, 2 to 3 minutes. Add all of the cabbage and ½ teaspoon salt and stir well. Cook, stirring only occasionally, until the cabbage is limp and browned in spots (the bottom of the pan will be very brown and the onions will be brown), about 5 to 6 minutes.

Remove the pan from the heat and immediately stir in the chicken broth mixture and the remaining 1 tablespoon butter. Stir until the butter has melted, scraping up some of the browned bits on the bottom of the pan. Let the cabbage sit in the pan for two minutes and stir again. (The cabbage will release a little more moisture and you’ll be able to incorporate a bit more of the browned bits.) Add the parsley, stir again, and transfer to a serving dish. Serve right away.

Serves 3-4

Candidate for Cutest Veg: Baby Bok Choy

This week I’m in major recipe-development and photo-shoot mode, as I’ve got some last-minute assignments from magazines that need spring vegetable recipes. So I have been tiptoeing off to the grocery store, hoping none of my locavore friends see me pouring over the out-of-season vegetables in the produce section. I’m not sure why I feel guilty, as we’ve definitely done our best to make do with our winter CSA veg (and we STILL have some in the fridge and in the attic). We deserve a little fresh green stuff. But I hate the fact that it’s shipped from so far away. It’s one of the most ironic parts of my job—I encourage people to eat and cook seasonally, but often I’m developing recipes out of season.

Well, I guess it’s not so bad this time—spring is right around the corner; I actually saw a forsythia bush in bloom yesterday. (It was wedged between two barns, so I think it must have its own micro-climate, as the rest of Martha’s Vineyard is still chilled by the cold Atlantic waters swirling around us.) But next week I’ve got an assignment to work on some summer recipes, and talk about challenging—ripe, juicy tomatoes in March?

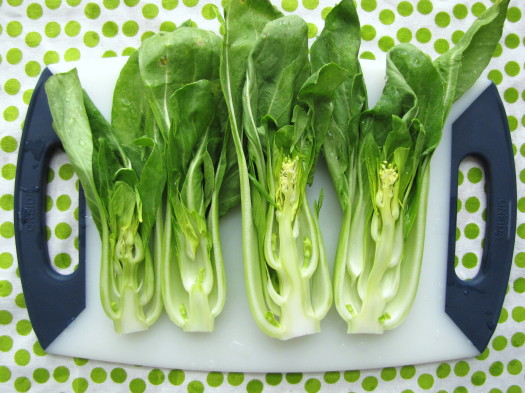
Anyway, when I got home the other day with all these pretty green things—peas and sugar snap peas and fresh mint and frilly lettuce—I got a little giddy. There’s something about the color green that knocks my socks off. And there’s one particular spring green that really tickles me. It’s baby bok choy. These mini-versions of the big honking Asian cabbage barely resemble their big sisters. They’re slender, curvy, and petite—about 6 to 7 inches long—and their color is a soothing mix of celadon and shamrock. Best of all, their fabulous flavor borrows from the nutty side of arugula and the tangy bite of a mellow mustard. (In the photo above, you can see that these baby bok choy were starting to bolt (sprout flowers). The good news is that they still taste good, unlike some bolted greens that become unbearably bitter.)

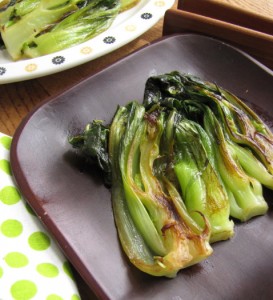
It won’t surprise you that I take this pretty green thing and brown the heck out of it. I’m like a broken record on that subject—browning green veggies almost always makes them sweeter. So I cut these babies in halves or quarters lengthwise (keeping the hint of that lovely shape—why slice these across and wreck that?), and sear them cut-side down, in a little combo of oil and butter. Then I finish cooking them (sort of part steaming, part braising), covered, in a little bit of liquid. You can easily add garlic, ginger, citrus, soy, or other flavorings to the liquid or at the end of cooking to fancy up the side dish. But this basic cooking method gives a perfectly delicious result.

Skillet Seared & Steamed Baby Bok Choy

Baby bok choy can vary in size a lot; choose heads that are all about the same size for this technique. If the heads are wider than 2 inches, cut them in quarters, rather than halves, for cooking.

___________________________

¼ cup chicken broth
1 teaspoon soy sauce
½ teaspoon honey
1 Tbs. vegetable oil
1 Tbs. unsalted butter
4 baby bok choy (6 to 7 inches long, 2 inches wide), about 10 to 12 ounces, trimmed, cut in half lengthwise, washed and spun dry
¼ tsp. kosher salt

__________________________

Combine the chicken broth, the soy sauce, and the honey in a glass measuring cup and whisk to combine well. In a 10-inch straight-sided sauté pan that has a lid, heat the vegetable oil and ½ tablespoon of the butter over medium heat. When the butter has melted and is bubbling, sprinkle the ¼ teaspoon salt over the pan. Arrange the bok choy, cut-side down (or one cut side down), in one layer in the pan. (They will be snug.) Cook, without stirring, until the undersides of the bok choy are deeply browned, 6 to 7 minutes.

Carefully pour the liquids into the pan and cover immediately. Simmer until the liquid is almost completely reduced (a teaspoon or two will be left), 5 to 6 minutes. (Check occasionally to make sure the liquids don’t reduce entirely and start to burn.) Uncover, remove the pan from the heat, and transfer the bok choy to a serving platter. Add the remaining ½ tablespoon butter and a tablespoon of water and stir well with a silicone spatula or wooden spoon as the butter melts, scraping any browned bits off the bottom of the pan. Scrape and pour the pan sauce over the bok choy.

Serves 2 to 3

Bitter Gets Sweet (I Swear!): A Recipe for Caramelizing Turnips In a Cast Iron Skillet

I know you are thinking I have lost my mind. Last week it was celery root; this week it’s turnips. “Can’t she write about something delicious—or something my family will actually eat?” I hear you asking. I’m sorry, but I just couldn’t pass up the chance to tell you about this—the absolutely most delicious way to cook turnips.

In fact, I’ve already written about this technique—slow-sautéing in a cast-iron skillet—once this week. I moonlight as an occasional blogger over at the Huffington Post’s Green Page, and this week I’ve been participating in their latest challenge—The Week of Eating In. At first I felt a little silly saying, “Sure, I’ll eat in for a week,” since I already cook and eat most of my meals at home. (Plus I just recently posted my opinion on why I think everyone else should cook at home more, too!) But then I realized I could help other people in the challenge by posting tasty ideas for cooking veggies at home.  And since I had just made my slow-sautéed turnips, potatoes, carrots, and onions for like the 12th time this winter, I figured I’d share that yummy idea on Huff Post.

Over here, I wanted to post the whole recipe (and a few more photos), and to also let you know that there are many more “slow-sautés” coming in my cookbook, Fast, Fresh, & Green. The recipes in the book were developed for a straight-sided stainless steel sauté pan, since I think more people own them than cast-iron pans. But cast-iron is so perfect for this kind of dish, because it captures and distributes heat so evenly, that I wanted you to be able to try it if you can. (You can get a pre-seasoned Lodge cast iron skillet for about $15.)

I start this kind of sauté by dicing (pretty small but not too fussy) whatever roots I’ve got on hand and piling them into the skillet with lots of olive oil and herb sprigs. The pan will be really crowded at first—that’s okay. As the vegetables cook, they brown and steam at the same time (and they shrink quite a bit). I always add some aromatic allium—onion, leeks, or shallots—about halfway through cooking for added moisture and flavor.

But the most important thing I do is to keep my ears tuned to the sizzling in the pan. It should be a steady, perky sizzle—but nothing too explosive sounding. The sizzle’s your cue to how fast the veggies are cooking. You want them to brown and steam at about the same rate, because your ultimate goal is deeply browned (yes, caramelized) vegetables that are cooked through, too. This is much easier than I’m making it sound. All you need to do is stir every once in awhile and maybe adjust the heat once or twice. The veggies will be done in about 35 to 40 minutes—but you’ll have plenty of time to make whatever else you’re having for dinner while they’re cooking. (By the way, for vegetarians, these sautés are hearty enough to plunk in the middle of the plate.)

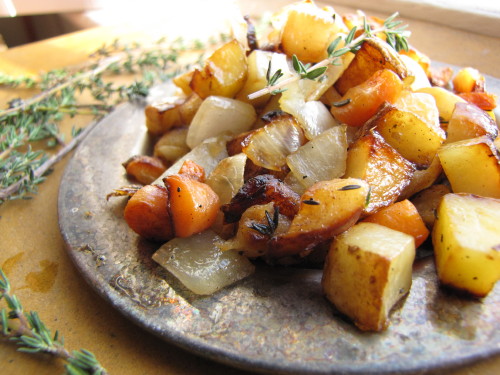
Caramelized Turnips, Potatoes, & Carrots with Onions & Thyme

If you don’t have a cast iron pan, you can make this recipe in a 10-inch straight-sided sauté pan (stainless interior). The browning won’t be quite as even, and you might need to add a bit more oil, but the results are still very tasty.

___________________________________________________________

3 tablespoons extra-virgin olive oil, more if needed

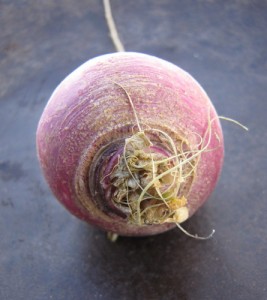
½ pound purple-topped turnips, trimmed but not peeled, cut into ½-inch dice

½ pound Yukon Gold potatoes, unpeeled, cut into ½-inch dice

½ pound carrots, trimmed and peeled, cut into ½-inch dice

½ teaspoon kosher salt, more if needed

5 to 6 thyme sprigs

1 medium onion (about 5 ounces), cut into medium dice

___________________________________________________________

In a 10 or 11-inch cast iron skillet, heat the 3 tablespoons olive oil over medium-high heat. Add the turnips, potatoes, carrots, salt, and herb sprigs and stir and toss well to combine and to coat with the oil. (The pan will look crowded.) Reduce the heat to medium and cook, stirring and flipping occasionally with a metal spatula, for about 20 minutes. (Listen to the pan—you should hear a gentle sizzle, not a loud one. If the vegetables are browning too quickly, reduce the heat a bit to maintain that gentle sizzle. If they seem dry, add a bit more olive oil.) Add the diced onion and continue to cook, stirring and flipping with the spatula, until the vegetables are deeply browned and tender all the way through, about another 15 minutes. Remove the herb sprigs before serving. Taste and season with more salt if you like.

Serves 3 to 4


Ten (Yes, 10) Things to Do with Celery Root

Count your blessings. So you’re stuck with six celery roots the size of footballs? At least they’re edible. Seriously, I know it’s hard to figure out what to do with these things; I’ve had quite a few on my hands recently thanks to my winter CSA share from Whippoorwill Farm. So last week I posted my favorite recipe for a creamy celery root and potato gratin, but I thought you might like a few more ideas, too. So here goes. (Be sure to try the oven roasted “chips.”)

1. Slice celery root into thin matchsticks (or grate it coarsely) and toss it (raw) into a winter salad of endive, sliced pears, toasted walnuts, and blue cheese.

2. Make roasted celery root “chips.” Slice the root in half and then into quarters; then slice each quarter as thinly as possible. (A santoku knife is great for this). Toss the pieces in enough olive oil to coat, sprinkle with salt, spread on a heavy-duty sheet pan; and roast at 350°F until they are mostly a deep golden brown, with some white left. (I think the darker ones are crispier, but too dark and they’ll taste bitter.) Let them cool on the sheet pan to finish crisping up. Sprinkle with more salt and snack on the couch with your favorite DVD.

3.  Since celery root and potatoes are such a great match, use them together in a hearty winter soup. Sauté lots of sliced leeks in butter, add cubed celery root, potatoes, and chicken or vegetable broth, simmer until tender, puree, and enhance with a touch of cream, a little lemon zest, lots of chopped fresh parsley and crispy croutons.

4. Apples and celery root are also happy partners. Use them raw together in a salad, or try roasting them first and adding them to a warm escarole salad with crispy strips of ham and a warm Dijon vinaigrette.

5.  Make a celery root “galette” by lining a tart pan with a couple layers of thinly sliced circles of celery root and gruyere cheese. Bake at 400°F until browned and tender. (Cover for the first half of cooking.) Let cool and slice into wedges.

6. Try a “quick braise” of celery root. Brown diced celery root in a combination of butter and olive oil in a sauté pan, then add just enough liquid (a little broth spiked with apple cider), cover and reduce the liquid to finish cooking the vegetables. Uncover, toss with a little spiced butter, and serve warm.

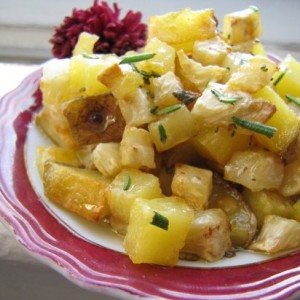
7. Instead of chips, you can also dice celery root for roasting. Make a quick weeknight side dish of roasted celery root and Yukon Gold potatoes with honey and rosemary. Cut the vegetables into ½-inch dice, toss in olive oil and salt, and roast on a sheet pan at 425°F until browned and tender. Dress lightly with a combination of melted butter, honey, and chopped fresh rosemary.

8. Celery root  is also a good flavor match with seafood.  A bed of celery root puree for a sear-roasted fish filet is delicious. Cut the root (and a few small potatoes) into pieces and simmer them with a few small garlic cloves until tender. Puree the vegetables with a little of the cooking liquid, a bit of cream, and salt and pepper.

9. Instead of a puree, make a celery root “mash” by hand-mashing cooked celery root and potatoes together with butter and milk and a little sautéed garlic. Serve with pot roast.

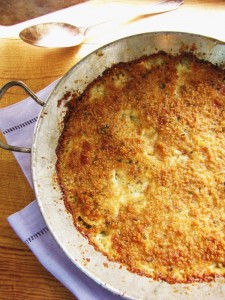
10. For an elegant holiday side dish—or even a hearty weeknight main dish with a salad—make my recipe for a celery root and potato gratin I use a combination of heavy cream and chicken broth so it is rich but not too heavy; this is a good dish to introduce celery root to folks.

Cinderella Celery Root

It’s a guy thing. Bigger is better. I had a chef-boss once, Lenny. He was about 6’ 6” and a former Hell’s Angel, a fairly imposing guy. When it was his turn to make the meatloaf, he’d fill an entire sheet pan (the restaurant kind, you know—the size of a football field) with two big fat long loaves, which we’d sell by the slice. (This was a glamorous establishment, you can tell.) When it was my turn, I’d shape the meatloaf into cute little “mini” loaves. At first Lenny just scowled at me, but then he figured out he could slap a higher price on mine and call it a day. “Girls,” he’d say, and shake his head.

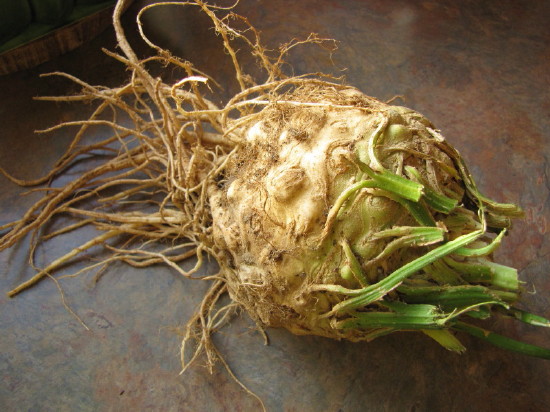
So when my friend Roy offered to pick up my CSA share the other week and returned with two of the most ginormous celery roots I had ever seen, I didn’t say anything. I just chuckled. You know, it’s always risky to have someone else select your produce for you, but this is a guy I trust implicitly. After all, he can pick out a ripe cantaloupe from a mile away, and I certainly can’t do that. Anyway, in this particular case, bigger can be an advantage, so all was fine.

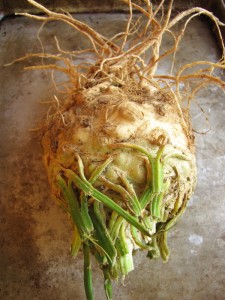
Celery root has an image problem, it’s true. It needs a marketing makeover, starting with its true name—celeriac. Eek. Who wants to eat something that sounds like a medical condition? I say, call it Cinderella, because beneath the drab wardrobe—that gnarly skin—beauty awaits.  (And versatility.) Ironically, it’s probably the skin that scares people away, yet it’s actually much easier and quicker to hack off the tops and sides of a celery root with a sharp knife than it is to, say, laboriously peel a butternut squash. So don’t be afraid to go at it; just choose the biggest roots. Since that tough skin also tends to burrow down into the flesh in places, you can wind up devastating a small root by the time you cut off all the skin. A bigger root will yield a higher flesh-to-skin ratio.

The cool thing is, once you get to that crisp, white, celery-scented flesh, your options are wide open. You can roast or sauté it, add it to stews and braises, and even eat it raw in salads. (See 10 Things To Do with Celery Root.) But my favorite thing to slip it into is a creamy gratin. This darn thing is so hardy it could be dinner with a salad. But it loves a slice of pot roast nearby, too.


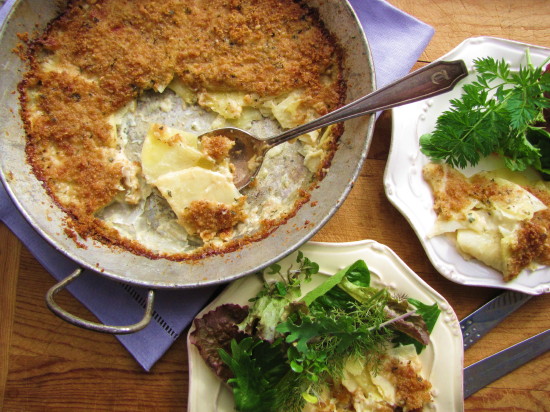
Yukon Gold and Celery Root Gratin
 
This hearty side dish could easily be the star of the meal with a nice green salad on the side.
Author:
: side dish
Serves: 4
Ingredients
  • ½ teaspoon unsalted butter
  • ¾ cup fresh breadcrumbs
  • 1 tablespoon extra-virgin olive oil
  • 1½ teaspoons chopped fresh thyme
  • ¼ cup finely grated Parmigiano Reggiano
  • Kosher salt
  • ¾ cup heavy cream
  • ½ cup plus 2 tablespoons low-sodium chicken broth
  • 1 teaspoon Dijon mustard
  • ½ pound Yukon Gold potatoes (about 2 large or 3 medium), peeled
  • ½ pound (8 ounces, about ¾ of a large peeled root) celery root, trimmed and thoroughly peeled
  • Freshly ground black pepper
  • ¾ cup grated Gruyère or Swiss cheese
Directions
  1. Preheat the oven to 350 ° F. Rub a 5- or 6-cup shallow gratin dish (or a 9.5 inch round pie plate) with the butter.
  2. In a small bowl, combine the breadcrumbs with the olive oil, a big pinch of salt, ½ teaspoon of the chopped thyme, and 2 tablespoons of the Parmigiano.
  3. In a liquid measure, combine the cream, broth, and mustard.
  4. Cut the potatoes in half lengthwise and turn the halves cut side down on a cutting board. With a sharp knife, slice the halves across as thinly as you can (between 1/16 and ⅛ inch is ideal) so that you have thin half-moon pieces. Cut the celery root into quarters, and slice it as thinly as the potato.
  5. Put the potatoes and celery root in the mixing bowl. Add ¾ teaspoon salt, several grinds of fresh pepper, the gruyere or Swiss cheese, the remaining Parmigiano, the remaining 1 teaspoon thyme, and the cream mixture. Mix well. Using your hands, lift the potatoes out of the bowl and transfer them to the gratin dish, arranging them as evenly as possible. Pour and scrape the liquids and anything remaining in the bowl into the gratin dish and distribute everything evenly, adjusting the potatoes as necessary to get an even top. Using your palms, press down on the potatoes to bring the liquids up and around them as much as possible. (It won’t necessarily completely cover them.) Cover the top evenly with the breadcrumb mixture.
  6. Bake until the potatoes are tender when pierced with a fork (check the middle of the dish as well as the sides), the breadcrumbs are brown, and the juices around the edges of the gratin have bubbled down and formed a dark brown rim around the edge, 55 to 65 minutes. Let cool for about 15 minutes before serving.

The Perfect Match: Carrots + Stir-Fry Pan

I didn’t always love carrots, but two things changed that.  First, I grew my own carrots last summer—and toted home fistfuls of freshly dug carrots from my CSA farm every week. These sweet and crunchy little wonders bore no resemblance in taste or texture to the poly-bagged grocery store carrots harvested light-years ago and shipped from a galaxy far, far away.

Secondly, when I started writing my vegetable cookbook, Fast, Fresh & Green, I figured the familiar and friendly carrot would need to star in at least a few side dishes. So I cooked carrots—a lot. In the back of my mind were bad memories of overcooked (mushy) and under-flavored (wan and vegetal) carrots from bad convention dinners and childhood TV dinners.

I needed to erase that memory. I figured that any method that let the carrots brown up a little first (caramelization=deep, sweet flavor) and then just cook through until barely tender would do the trick. Stovetop braising, roasting, sautéing—these methods all worked, but I discovered that the hands-down easiest and most efficient way to get great carrot flavor fast is stir-frying.

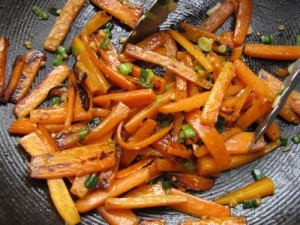
By stir-frying, I don’t mean leaping flames and a professional wok. I mean a wide, round, bowl-shaped non-stick stir-fry pan (my favorite is a Circulon) on a home burner. These pans are great for two reasons—the large surface area lets more vegetables come in contact with the hot pan for more browning, but at the same time, the depth and slope of the bowl allows the vegetables to steam a bit while they cook, too.  (The pan should be moderately full for the veggies to do that steamy thing—too empty, and the veggies will tend to burn.)

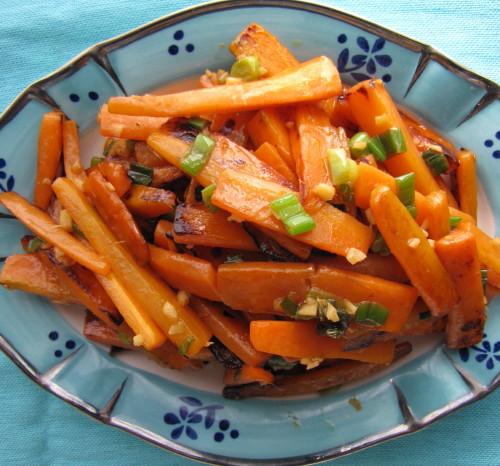
Cooking carrots in a stir-fry pan is such a no-brainer that I was sort of embarrassed to espouse the technique in my book. But who doesn’t like easy? And the result is so fabulous—deeply browned around the edges and just cooked through,  the carrots are nutty and sweet tasting. You can finish off the carrots simply with chopped fresh ginger and a squeeze of lime, or go crazy with flavors.

I do get a teensy bit fussy (or so my mother says) about how I cut my carrots for a stir-fry. I like slender sticks; they don’t have to be perfect—just try to keep them all about the same thickness.

Gingery Stir-Fried Carrots with Cranberry and Orange

Serves 3

1 pound carrots

1 tablespoon cranberry juice (unsweetened)

1 tablespoon fresh orange juice

1/8 teaspoon balsamic vinegar

½ teaspoon kosher salt

1 tablespoon vegetable oil

¼ cup (about 2 small) sliced scallions, white and green

2 teaspoons minced fresh ginger

pinch red pepper flakes

1 teaspoon unsalted butter

Trim and peel your carrots and cut them into sticks that are 2 to 3 inches long, and between ¼ and 3/8 inch thick. Combine the cranberry juice, orange juice and balsamic vinegar in a small bowl.

In a large (12-inch) nonstick stir-fry pan, heat the vegetable oil over medium-high heat. When the oil is hot (it will loosen up), add the carrots and salt and stir well with tongs. Cook, stirring only occasionally and spreading out the vegetables after every stir, until the carrots are browned in places (they should have lost their stiffness; some will be slightly blackened), about 10 minutes. Adjust the heat up if the carrots are not browning after a couple minutes; lower the heat if the carrots are browning too much after five or six minutes.

Turn the heat to low, add the scallions and ginger, and stir until fragrant, about 30 seconds. Turn off the heat, add the cranberry/orange/balsamic combo and stir until the liquids have mostly reduced and been absorbed. Take the pan off the heat, add the butter, and toss and stir gently until it melts. Serve warm.

What Fingerling Potatoes Want: Something Saucy

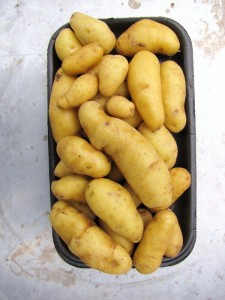
If you listen to conventional wisdom, you might think roasting is the only way to go when it comes to cooking fingerling potatoes. Now, I am usually the poster-girl for roasting (potatoes or anything else), and I’d like not to be burned at the stake for potato heresy, but I think fingerling potatoes are usually better braised or simmered, or, yes, boiled—any method that involves a little liquid.

I hate to generalize, because there are, in fact, many different varieties of fingerling potatoes. Fingerlings themselves aren’t a variety, but more of a type of potato, defined by their size and shape—small, knobby, and elongated. Their flavor is usually rich and concentrated, but the color of their skin and flesh, as well as their starch content, can vary quite a bit from variety to variety. (Popular varieties include Russian Banana, Purple Peruvian, Ruby Crescent, and French Fingerling.)

The varying starch level is why some fingerlings lean towards being fluffy and dry (like a Russet potato), while others have creamy or waxy flesh (like a Red Bliss potato).  Unless you cook with the same variety a lot, it’s hard to always know exactly what you’re getting at the store (or the farmers’ market) or how it will behave in the dry heat of the oven. While I’ve had bad experiences with Russian Bananas over-drying when roasted, I’ve never had a fingerling that wasn’t perfectly delicious when cooked with a wet-heat method.  

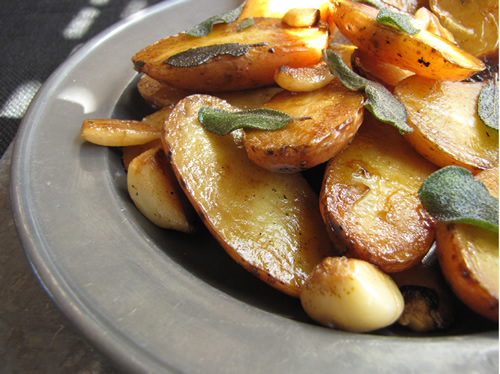
That’s why I love a stovetop braise for fingerlings. First you brown the halved potatoes cut-side down in a little butter and olive oil so that they get that nice caramel color and flavor. Then you pour a bit of chicken broth over them and cover the pan (a straight-sided saute pan works best here). As the potatoes finish cooking in the broth, the broth simmers down to a bit of a glazey consistency. The recipe I’ve included here uses sage and garlic to add more flavor, but fingerlings cooked this way are delicious even without the extras.

And if you love fingerlings so much that you need more ideas for using them, see my post on more delicious ideas for using fingerlings.

Braised Fingerlings with Crispy Sage & Tender Garlic

For this dish, choose fingerlings that are all about the same thickness (length doesn’t matter) so that they will all cook in about the same amount of time.

Serves 3

—————————————————————————————–

1 tablespoon unsalted butter
1 tablespoon extra-virgin olive oil
25 large sage leaves
8 garlic cloves, lightly smashed and peeled
12 ounces (about six to eight) fingerling potatoes, cut in half lengthwise
½ teaspoon kosher salt, more for seasoning
½ cup low-sodium chicken broth
½ to 1 teaspoon sherry or malt vinegar

—————————————————————————————–

In a large (10-inch) straight-sided skillet with a lid, heat the butter and olive oil over medium-high heat. When the butter has melted and is foaming, add the sage leaves and cook, stirring a bit, until the sage leaves have turned color and are crispy and the butter is golden brown, about 2 minutes. (Watch carefully so that they don’t burn; they will stiffen and curl and turn grey as they crisp up.) Remove the pan from the heat and transfer the sage leaves with a fork or tongs to a plate.

Put the pan back over medium to medium-high heat and immediately add the garlic and potatoes. Season them with the ½ teaspoon salt and toss them in the butter/oil mixture. Arrange the potatoes cut side down, cover the pan loosely with the lid (leaving the lid a bit askew for some steam to escape), and cook until the bottoms of the potatoes are nicely browned, 8 to 10 minutes. (Move the pan around occasionally for even browning.)

Add the chicken broth and cover with the lid partially askew again. Bring the broth to a gentle simmer and cook until the broth has reduced to just a tablespoon or two, about 10 to 15 minutes. Remove the lid, turn the heat off, and transfer the potatoes and garlic to a serving dish. Add the vinegar to the pan and stir and scrape with a wooden spoon to get up any browned bits. Immediately pour the pan drippings over the potatoes and garlic and garnish with the crispy sage leaves. Sprinkle a little more kosher salt over all.

More Delicious Ways to Cook Fingerling Potatoes

A while back I posted my favorite way to cook fingerling potatoes–the stovetop braise–and a yummy sample recipe, Braised Fingerlings with Crispy Sage and Tender Garlic. But the reality is, thanks to my CSA at Whippoorwill Farm here on Martha’s Vineyard, I was swamped with fingerling potatoes last summer and fall, so happily, I have a few other suggestions for using them. I figured I’d pass them on to you here, as many are good options for winter cooking, too.

  • Boiled fingerlings hold their shape really well, so use them (cut in half or other pieces) in warm salads (like with frisee, bacon, and a poached egg or a garlic crostini) or other composed salads like a grilled tuna or salmon Niçoise.
  • Cut into a few chunks and boiled, fingerlings are then perfect for “crushing” or smashing with roasted garlic and a bit of cream (or sour cream), butter, and chives.  These smashed potatoes make a perfect bed for beef stew.
  • Make a quick and delicious fish chowder by starting with sautéed leeks, simmering chopped fingerlings in the same pot, adding corn kernels and pieces of cod or haddock, and finishing with chopped fresh dill, a dash of cream, a squeeze of lemon, and lots of fresh pepper.
  • If you like the hands-off cooking of oven-roasting, don’t despair. You can oven-braise fingerlings by laying them flat, cut-side down, in an oiled Pyrex baking dish. Season with salt, dot with a few dabs of butter, and pour enough chicken broth in the pan to cover the potatoes. Cover with aluminum foil and cook (at about 375°F) until the potatoes are almost tender. Remove the foil and cook until the broth has reduced almost completely and the potatoes are browned. There’ll be some nice glazy stuff on the bottom of the pan.
  • Dice fingerlings and sauté slowly in lots of oil in a cast iron skillet until browned all around and tender through. Season with lots of salt. Voila, crispy “fried” fingerlings. Add sautéed onions and crush a bit for a more hash-like dish.
  • Most fingerlings have such outstanding “potato” flavor (nutty, earthy, and rich), that they’re perfect in cold potato salads, too. Try one with fresh peas, mint, and a light lemony-mayonnaise and yogurt mix in springtime.
  • The firm texture of cooked fingerlings makes them perfect for simple Indian curries, too. Add shrimp, peas, and chopped fresh cilantro to make dinner.

Walk-Away Beets: Recipe for Diversion

I work at home. Translation: I love a distraction. The kitchen? Definitely the number one destination for diversion.  Even on days when recipe developing is not on my to-do list, I like to wander in to my favorite room and concoct a little something every few hours. Something quick, something that might work for our dinner later.  Even better, something that might last for a few days.

Roasted baby beets (so ruby-red pretty) are the ultimate in quick-to-make,  slow-to-cook vegetable condiments.  By vegetable condiments (no, I haven’t lost my mind) I mean stuff like caramelized onions and roasted tomatoes—things that are so great to have in the fridge for tossing in salads, onto pizzas, into tacos—that sort of thing. Okay, so maybe roasted beet wedges are not quite as versatile as roasted tomatoes, but they do juicy-up a salad and give you a great excuse to warm up goat cheese or to toast pecans (just add arugula and lemon vinaigrette). Plus, maybe you’ve got excess CSA-beet syndrome like me. Remarkably, mine (wrapped in a damp cloth and stored in a zip-top bag) have kept for months in the veg drawer of my fridge.

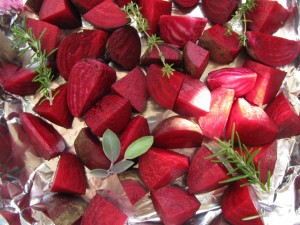
But today, icy-blue cold as it is outside, it just seemed like a good opportunity to turn on the oven. I knew I wouldn’t feel too guilty spending the 10 minutes it takes to quarter a pound of baby beets (no peeling necessary–that skin is perfectly edible when roasted), toss them with a little olive oil and salt, throw in a few herb sprigs, and wrap them up in a tidy little aluminum foil packet.  Inside the foil, they steam-roast (getting both tender and caramelized), and you don’t need to do much more than pop one in your mouth after they come out of the oven.

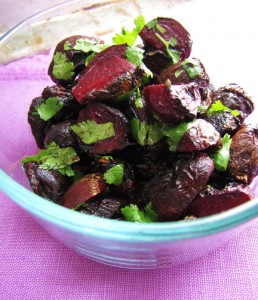
There is one extra flavor step you can take. This morning, I let mine cool and then dunked them in a marinade-ish dressing of orange and lemon juices, a little vinegar and maple syrup, and a bit of chopped fresh mint. They’ll loll around in that dressing for days, soaking up flavor in a bowl in the fridge, making themselves coyly available to the nearest taker.


Walk-Away Beets

 Serves 4

1 pound baby beets, washed but not peeled, ends trimmed, halved or quartered to all be about equal-sized wedges

2 tablespoons extra-virgin olive oil

½ teaspoon kosher salt

6 tiny sprigs of thyme, short branches of rosemary, or little clusters of sage

For the marinade:

2 teaspoons fresh lemon juice

2 teaspoons fresh orange juice

¼ teaspoon white balsamic vinegar

¼ teaspoon maple syrup or honey

kosher salt

2 teaspoons roughly chopped mint, cilantro, basil, parsley or a combination

Heat the oven to 375 degrees. Line a small roasting pan with aluminum foil, and measure out two other large pieces and arrange them in a “+” inside the pan. Toss the beet wedges, the olive oil, the salt, and the herb sprigs together in a mixing bowl. Arrange the contents of the mixing bowl in the center of the intersection of the two pieces of foil, and fold the foil up to form a tighly wrapped package.

Roast the beets for 1 ½ hours. Carefully avoiding the steam, lift the foil away to peek at the beets and to skewer one or two with the tip of a paring knife. If the knife slides in easily (and the bottoms of the beets are wrinkled and brown), they’re done. If not (and they often need more time), reseal the foil package and continue cooking for 20 to 30 minutes more until tender.

Let the beets cool a bit, toss all the marinade ingredients together, combine the marinade and beets, and stow in fridge for future snacks. Or add to your dinner salad of arugula, mache, or mixed greens with toasted nuts.

Playing Dress-Up: Roasted Brussels Sprouts Get Spiffy with Tangy Brown Butter


By now, you’ve probably drunk the koolaid and are indoctrinated into the magical powers of roasted brussels sprouts. This  ordinarily whiffy and less-than-taste-bud-pleasing vegetable gets a new life from the alchemy of the oven. The roasted result is nutty-delicious, the texture of the leaves fluttery-flaky-crispy, and the possibilities for seasoning endless. And shoot, cooking them is so damn easy. Maybe too easy–sometimes it’s tempting to forget that there are pitfalls to roasting brussels sprouts. Number one: They can dry out. To avoid this, cut your sprouts in half (not in quarters), and roast them cut-side down. This allows the bottoms (or cut-sides) to get caramelized, but also keeps moisture from escaping. Normally, I like to spread veggies out when roasting, but a little coziness is okay when roasting sprouts. All that togetherness means they steam a bit while roasting.  I even use a pyrex baking pan sometimes, instead of my usual roasting favorite–the heavy-duty sheet pan.

Lastly, don’t forget the flavor boosts. You can add onions or shallots or hearty herbs to the roasting pan, but lately I’m liking the option of adding flavor after the sprouts are cooked. I make a brown butter and spike it with lemon or lime and maple or honey….some fresh herbs, and definitely nuts. Nuts. Nuts. Nuts. No flavor pairs as well with roasted brussels sprouts as toasted nuts–especially hazelnuts and pecans. (If you don’t like nuts, no worries, though. Spiked brown butter is just fine.) Brown butter is easy to make; you simply melt butter until the milk solids begin to brown. Keep an eye on things though, as the brown butter will quickly darken and will eventually burn if ignored.

For this recipe, choose smaller sprouts, and beware those monstrous mini-cabbages masquerading as sprouts in the grocery store (not sure where they come from). The smaller ones will cook more evenly throughout.

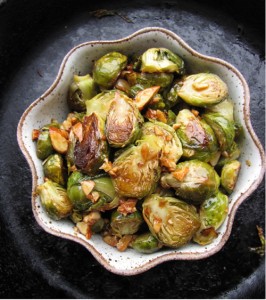
Roasted Brussels Sprouts with Nutty Lemon-Maple Brown Butter

Serves 2 to 3

——————————————————————————–

2 tablespoons unsalted butter
10 ounces small Brussels sprouts, cut in half
1 tablespoon extra-virgin olive oil
½ teaspoon kosher salt
2 tablespoons coarsely chopped pecans, walnuts, or hazelnuts
1 tablespoon maple syrup
1/2 teaspoon lemon juice

——————————————————————————–

Heat the oven to 400°F. Melt 1 tablespoon of the butter in the microwave or in a small pan on the stovetop. Toss the Brussels sprouts with the melted butter, the olive oil, and the kosher salt, and spread them in one layer, cut-side down, in a heavy-duty baking pan or casserole dish (Pyrex is fine).

Roast the sprouts until they are deeply browned on the bottom and tender when poked with a paring knife, about 25 minutes.

Meanwhile, heat the remaining tablespoon of butter with the chopped nuts in a small saucepan over medium heat. Stir and watch carefully until the nuts and the butter turn a light golden brown. Remove from the heat, pour in the maple syrup and lemon juice (the syrup will immediately boil and reduce), and scrape out into a heat-proof dish (to prevent further cooking). The mixture will be syrupy.

Pour and scrape the nut-butter-syrup over the roasted sprouts, toss well, and serve warm.