Tag Archives: Garlic

Mustard Greens Are the New Baby Bok Choy – Really!

Who knew baby bok choy was such a star? It seems to be the most popular vegetable on the Island right now, and the little bit of it I planted in May is pretty much gone. I have another young patch coming along, but it prefers cool temps, so I’m afraid the weather might be too hot when it matures. In the meantime, while I wait for my next cooking green to get big enough to harvest (Swiss chard is close), I’m picking mustard greens to sell.

I’ve noticed that since I wrote “Mustard Greens” on the farm stand sign (instead of “Baby Bok Choy”), we’ve had fewer people pulling into the driveway. Well, harrumph! Doesn’t everybody know how tasty mustard greens are, too?! Okay, seriously, if I were to be honest I’d have to tell you that mustard greens are not as groovy as baby bok choy. For one thing, they don’t have that stand-up texture. But they are strangely delicious in a very arresting kind of way. If you like spicy mustard of any sort—and you’re looking for a powerhouse nutritional kick—give mustard greens a try. (They’re not only purported to lower cholesterol, but they contain unique cancer-fighting phytonutrients and lots of Vitamins A, C, and K.)
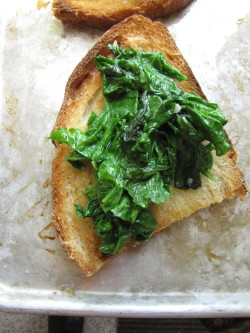
I especially like the young tender leaves I’m harvesting now because they don’t need par-boiling—just a quick turn in the sauté pan. Super quick and easy. Ginger and garlic both are natural partners for mustard greens, and not surprisingly, the spicy greens do really well with just a touch of something creamy to offset the zing. For me that creamy thing is often goat cheese. I’ve been making a really simple lunch/snack of toasted or grilled bread with sautéed mustard greens and a bit of warm goat cheese on the top (recipe below). I guess I have goat cheese on the brain these days, too.
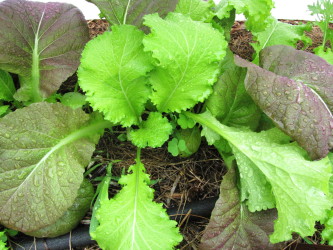
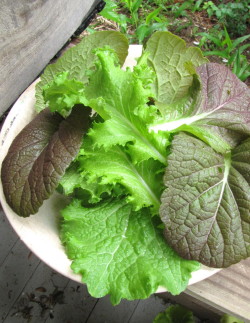
There’s one last reason why mustard greens are my heroes this spring. For some reason those wily flea beetles danced right past them on their way to the Tuscan Kale. (This was not good news for the kale, unfortunately.) Normally flea beetles feast on anything in the brassica family, including the milder mustard relatives, mizuna and tat soi (in the photo at right, top), that I put in my salad mixes. But they didn’t linger on the mustard greens, leaving them nice-looking enough to sell. Whew. The greens grow so quickly, too, that I’ve been able to harvest baby leaves for salad and come back the next day to find the rest of the leaves on the plant 6 inches tall–perfect for cooking. You could live on this stuff. Really.

Toast with Sautéed Mustard Greens and Warm Goat Cheese

This recipe is more like a thought-starter, so feel free to jiggle it around as you like. You probably have a favorite method for toasting or grilling good bread, too, so use it.  This makes a nice snack or light lunch for one person, but scale it up as much as you want to serve more, or turn it into a crostini for starters. Remove the tough stems from the mustard leaves before ripping them into smaller pieces. If you only have mature, large mustard greens, you would want to parboil them 3 to 4 minutes first and drain well before sautéing.

1 oval slice Artisan bread (about 6 or 7 inches long and cut 1/2-inch thick), cut into two pieces

extra-virgin olive oil

kosher salt

1/2 teaspoon minced garlic

2 to 3 ounces mustard greens, stems removed, leaves torn into small pieces (about 2 cups), washed and spun dry

2 tablespoons crumbled fresh goat cheese (or queso fresco or other cheese if you prefer)

Heat the oven broiler on high and arrange a rack 4 to 6 inches from the heating element. Put the bread on a baking tray or cookie sheet. Brush one side of the bread with a little olive oil, sprinkle with a little salt, and broil until lightly browned. Set the toast aside on the sheet tray. (You can lightly brown the other side, too, if you wish, though leaving the bread a little soft in the middle is nice.)

In a small skillet, heat 1 teaspoon olive oil over medium heat. Add the garlic and cook, stirring, just until softened and fragrant, about 30 seconds. Add the mustard leaves and a pinch of salt and cook, stirring, until wilted, about 1 minute. Remove from the heat.

Pile the mustard greens on each of the two bread pieces and crumble the goat cheese or other cheese on top. Place back under the broiler and cook just until the goat cheese is warmed and softened.

Serves 1

My Favorite Tip (And Recipe) For Thanksgiving Mashed Potatoes

One of the best things about working at Fine Cooking magazine all those years was the wealth of great tips I gleaned from the chefs, cookbook authors and other amazing cooks we worked with to produce the stories. One of my favorite Thanksgiving “A Ha!” moments was discovering how to keep the mashed potatoes warm. After you finish making them, put them in the top pan of a double boiler, or even better, in a large, wide shallow stainless steel (heatproof) mixing bowl. Cover with foil or a lid and hold over gently simmering water for up to 2 hours! You’ll need to check the water every once in a while, but there are a couple of great things about this tip. First, the people who have a thing about being served less than piping-hot food (you know who you are, Dad) will be very happy. Secondly, you, as the cook, will not have to worry about making the mashed potatoes (along with everything else) at the last minute.

Of course, there are a few other tips to making good mashed potatoes. Probably the most important is not to over-mash. If you overwork potatoes (especially Russets), the starch will turn to glue. Usually, a stand mixer on high speed is the culprit here, so I always mash my potatoes with a hand-held masher. (We don’t mind ours a little rough; I also prefer to use Yukon Golds.) But a food mill will give you the most beautiful potato puree.

But instead of going on and on (for once I will stop myself!), I thought instead I’d offer my favorite mashed potato recipe for a crowd (below), and you can take a few more clues from that. (This one happens to included roasted garlic—yum—but you could leave it out.)

I hope everyone has a wonderful Thanksgiving holiday, and if you need help with your menu, I’d recommend checking out Fine Cooking’s Thanksgiving Menu planner, which not only has a ton of great recipes, but will generate a shopping list and time line for you after you select the recipes for your menu. Of course the Baking Gratins chapter in Fast, Fresh & Green has some delicious ideas, too. And if you’re looking for quick vegetable side dishes, remember to tune in to The Martha Stewart Show on the Hallmark Channel on Wednesday, November 24 at 10 a.m. to see me roasting squash, turnips, and Brussels sprouts!

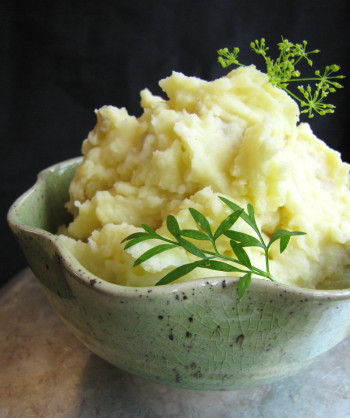
Mashed Yukon Gold Potatoes with Roasted Garlic

The roasted garlic in this recipe makes these potatoes irresistible, but you can use the proportions here to make perfectly delicious mashed potatoes without the garlic if you like. This recipe yields a lot – enough to serve 10 people at Thanksgiving. (I originally developed this for a holiday issue of Edible Vineyard magazine.) But you can easily cut it in half to serve it some other time.

_________________________________________________

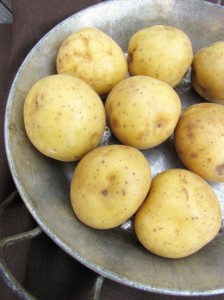
4 pounds Yukon Gold potatoes, unpeeled, cut into 1-inch pieces

1 tablespoon plus 1 teaspoon kosher salt

10 tablespoons unsalted butter, at room temperature

Cloves from 2 heads roasted garlic (for directions, see below)

1 ¼ cups heavy cream, at room temperature

_________________________________________________

In a Dutch oven or other large, wide cooking pot, combine the potatoes, 1 tablespoon kosher salt, and enough cold water to cover the potatoes by about 2 inches. Bring the water to a boil, reduce to a simmer, and cook until the potatoes are tender, a total of about 25 to 30 minutes.

Drain the potatoes in a colander and return them to the cooking pot over very low heat. Toss the potatoes around for a few seconds to allow some of the excess moisture to steam off a bit. Add all of the butter, the garlic cloves, 1 teaspoon kosher salt, and 3/4 cup of the heavy cream. Using a hand masher and moving around the pot in a clockwise manner, mash the potatoes until they are coarsely mashed. Continue adding cream and mashing until the potatoes are mostly smooth. They will have a creamy texture with just a slight chunkiness and yummy bits of skin and garlic throughout. Towards the end of mashing, switch to using a heatproof silicone spatula to smooth the potatoes out a bit.  Serve hot right away or keep warm over simmering water (covered) for up to 2 hours.

_________________________________________________

To Roast Garlic: Heat the oven to 350 degrees. Take a very sharp chef’s knife and chop off about the top 3/4-inch of a head of garlic. (Or chop off enough so that each clove is slightly exposed). Leave the head in tact (do not separate the cloves) and place it on a double layer of aluminum foil. Drizzle the head (or the two heads, as in the case of the recipe above) with olive oil and wrap the aluminum foil up around the head. Place the package in a small casserole dish or on a small sheet pan and put it in the oven. Roast for 45 minutes or until the cloves are just tender and soft through. Let cool at least 15 to 20 minutes before squeezing the garlic cloves out of their skins by applying pressure to the base of the head.

A Great Tip+Fresh Spinach=Popeye’s Garlic Spinach Recipe

Cooks love tips—anything that makes life in the kitchen easier, tastier, more fun. I once did a TV tour where all I did was demonstrate cooking tips (of course with no stove or running water) on morning TV shows all over the country. This was somebody else’s great idea, not mine, as I was sent off to do this with almost no media training. Fortunately, I was usually on for about 30 seconds between the local political scandal and the weather, so I’m sure nobody watched.  However, in one place—Fort Worth, Texas—where I am happy to say they place a great value on cooking at home—I was on for 12 whole minutes. This required a little bit of effort to prepare for (and I’m not talking about the serious make-up they applied to me before I went on the air. I looked like Susiezilla). I had to expand my 30-second schpeel into a “top ten tips” kind of thing—and talk a whole lot more slowly!

The host (and the viewers) loved that tip demo, and I remembered this when I was getting ready for my book signing at Bunch of Grapes bookstore last Friday night. I was asked to speak for 30 minutes (normally this would be the time when a fiction or non-fiction author would read from his or her work), and I didn’t want to bore everyone to death. Plus, I am always better in front of a crowd if I have something to do with my hands. So I did a tip demo.

I peeled fresh ginger with a spoon. Made pretty squash ribbons with a hand-held julienne peeler. Zested a lemon with a Microplane zester. Cut the bottom of a potato off to stabilize it first before slicing it thinly. Stacked basil leaves, rolled them like a cigar, and sliced them across into a “chiffonade.” That sort of thing. Once again, I got positive feedback from folks, and one friend asked me if I could post more of these tips on my blog. “Just give us a short blog every once in a while with a quick tip.” Quick I am good at, short I am not. So while this blog could really begin with the next paragraph, I’ve made you all suffer through these words to get to the tip. Someday I will get it right.

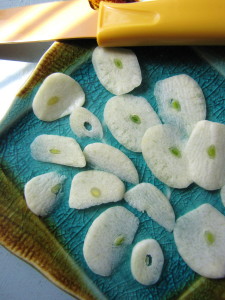
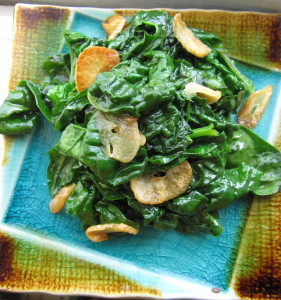
Here’s the tip. It’s about using fresh garlic. Instead of always chopping or mincing fresh garlic, try slicing whole cloves very thinly with a paring knife. These slivers, when gently sautéed in olive oil (keep the heat fairly low to prevent overbrowning), turn into delicious golden “chips.” Not only do the chips make for tasty nubbins in your final dish, but they gently infuse the olive oil with subtle garlic flavor. That olive oil, in turn, imparts a nice garlic flavor to whatever (ideally a green leafy vegetable) you next add to the pan.  (Minced garlic releases so much juice that it not only risks burning more quickly but can overpower a dish with intense garlic flavor).

I use this method (and these yummy garlic chips) to make my version of the classic side dish, garlicky sautéed spinach. (I named mine for Popeye.) The only other trick to my side dish is—your guessed it—really fresh spinach. By fresh I mean spinach still on its stems, in a bunch (not in a plastic bag). I realize how convenient bagged spinach is, and I’m all for using it when I’m making a big lasagna or that sort of thing. But to enjoy a simple spinach side dish, treat  yourself to a bunch of fresh flavor (that was a typo, I meant fresh spinach…or maybe I really did mean flavor). I especially like the variety with bodaciously crinkly leaves that give your side dish a little body, even when wilted. And I do mean wilted—that’s my last tip. Don’t overcook spinach. Just toss it in the infused oil until it collapses. Done.

Popeye’s Garlic Spinach For Two

____________________________________

1 tablespoon extra-virgin olive oil

1 bunch fresh spinach (10 to 12 ounces), stemmed, washed well, and spun dry

3 medium-large garlic cloves, peeled, ends trimmed, and cut into very thin slices (1 1/2 to 2 scant tablespoons garlic “chips”)

1/4 teaspoon kosher salt

1 teaspoon unsalted butter

____________________________________

Heat the olive oil in a medium (9- to 10-inch) nonstick skillet over medium-low heat. When the oil is hot (it will loosen up), add the garlic slices and stir with a silicone spatula to distribute them in the oil. Turn the heat to low and cook, stirring frequently to keep the garlic covered in the oil, until the garlic softens and loses its white color, and the smallest pieces become light brown, while the larger pieces are just starting to become a light golden color, 6 to 7 minutes (don’t overcook the garlic or it will become bitter). You should smell a pleasant garlicky aroma, nothing acrid. Add half of the spinach and the salt and stir and fold the spinach with tongs until most of it is wilted and dark green, 1 to 2 minutes. Add the other half of the spinach and stir well again until the spinach is mostly all wilted, another minute or two. Take the pan off the heat, add the butter, and stir again to melt the butter and incorporate it with the spinach. Transfer the spinach with all of the garlic pieces to a serving bowl or bowls.

Serves 2

What Fingerling Potatoes Want: Something Saucy

If you listen to conventional wisdom, you might think roasting is the only way to go when it comes to cooking fingerling potatoes. Now, I am usually the poster-girl for roasting (potatoes or anything else), and I’d like not to be burned at the stake for potato heresy, but I think fingerling potatoes are usually better braised or simmered, or, yes, boiled—any method that involves a little liquid.

I hate to generalize, because there are, in fact, many different varieties of fingerling potatoes. Fingerlings themselves aren’t a variety, but more of a type of potato, defined by their size and shape—small, knobby, and elongated. Their flavor is usually rich and concentrated, but the color of their skin and flesh, as well as their starch content, can vary quite a bit from variety to variety. (Popular varieties include Russian Banana, Purple Peruvian, Ruby Crescent, and French Fingerling.)

The varying starch level is why some fingerlings lean towards being fluffy and dry (like a Russet potato), while others have creamy or waxy flesh (like a Red Bliss potato).  Unless you cook with the same variety a lot, it’s hard to always know exactly what you’re getting at the store (or the farmers’ market) or how it will behave in the dry heat of the oven. While I’ve had bad experiences with Russian Bananas over-drying when roasted, I’ve never had a fingerling that wasn’t perfectly delicious when cooked with a wet-heat method.  

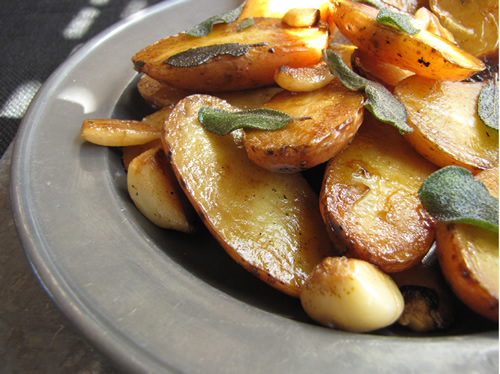
That’s why I love a stovetop braise for fingerlings. First you brown the halved potatoes cut-side down in a little butter and olive oil so that they get that nice caramel color and flavor. Then you pour a bit of chicken broth over them and cover the pan (a straight-sided saute pan works best here). As the potatoes finish cooking in the broth, the broth simmers down to a bit of a glazey consistency. The recipe I’ve included here uses sage and garlic to add more flavor, but fingerlings cooked this way are delicious even without the extras.

And if you love fingerlings so much that you need more ideas for using them, see my post on more delicious ideas for using fingerlings.

Braised Fingerlings with Crispy Sage & Tender Garlic

For this dish, choose fingerlings that are all about the same thickness (length doesn’t matter) so that they will all cook in about the same amount of time.

Serves 3

—————————————————————————————–

1 tablespoon unsalted butter
1 tablespoon extra-virgin olive oil
25 large sage leaves
8 garlic cloves, lightly smashed and peeled
12 ounces (about six to eight) fingerling potatoes, cut in half lengthwise
½ teaspoon kosher salt, more for seasoning
½ cup low-sodium chicken broth
½ to 1 teaspoon sherry or malt vinegar

—————————————————————————————–

In a large (10-inch) straight-sided skillet with a lid, heat the butter and olive oil over medium-high heat. When the butter has melted and is foaming, add the sage leaves and cook, stirring a bit, until the sage leaves have turned color and are crispy and the butter is golden brown, about 2 minutes. (Watch carefully so that they don’t burn; they will stiffen and curl and turn grey as they crisp up.) Remove the pan from the heat and transfer the sage leaves with a fork or tongs to a plate.

Put the pan back over medium to medium-high heat and immediately add the garlic and potatoes. Season them with the ½ teaspoon salt and toss them in the butter/oil mixture. Arrange the potatoes cut side down, cover the pan loosely with the lid (leaving the lid a bit askew for some steam to escape), and cook until the bottoms of the potatoes are nicely browned, 8 to 10 minutes. (Move the pan around occasionally for even browning.)

Add the chicken broth and cover with the lid partially askew again. Bring the broth to a gentle simmer and cook until the broth has reduced to just a tablespoon or two, about 10 to 15 minutes. Remove the lid, turn the heat off, and transfer the potatoes and garlic to a serving dish. Add the vinegar to the pan and stir and scrape with a wooden spoon to get up any browned bits. Immediately pour the pan drippings over the potatoes and garlic and garnish with the crispy sage leaves. Sprinkle a little more kosher salt over all.