Tag Archives: Cauliflower

An Indian Curry with Cauliflower, Spinach, Tomatoes, and Coconut Milk – And the Miracle of Chickpeas

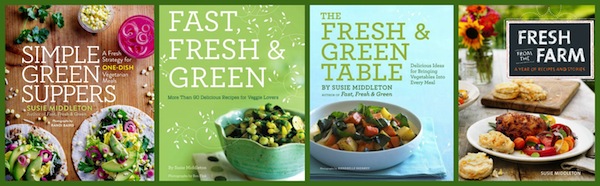
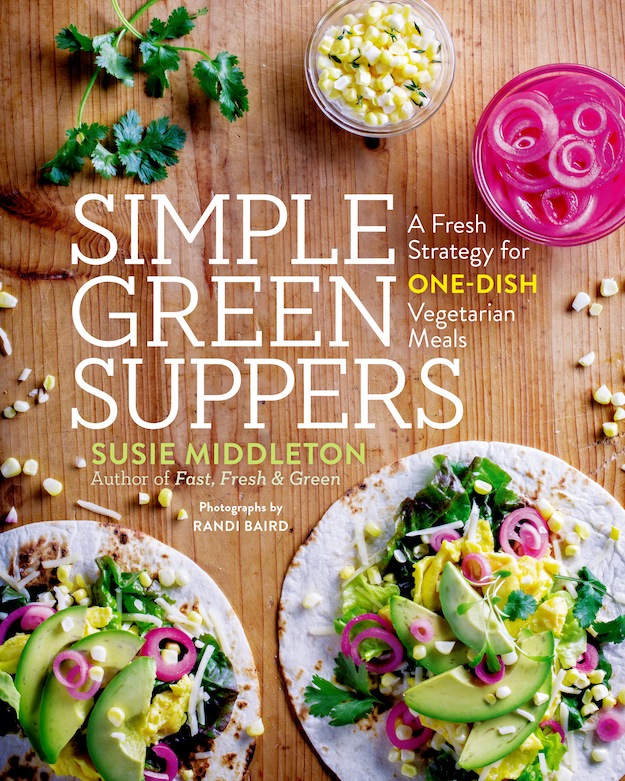
Weeknight. Cooking. Strategy. Three words we all wrestle with, but that I hope will soon bring a smile to your face when you get a hold of Simple Green Suppers: A Fresh Strategy for One-Dish Vegetarian Meals. Lately, with all the distractions, I barely noticed that the pub date for my fourth cookbook is sneaking up, and now we have just two months to go. (April 11—yay!)

I’m pretty darn excited, because I think this is the most useful cookbook I’ve written since Fast, Fresh & Green, and honestly, these days, useful is good. Useful is something we can wrap our heads around.

Heck, lately I’ve even realized that smarter cooking might be able to help us alleviate one problem in this country—food waste. (In American households, 27 million pounds of food a year gets tossed.) But I’ll offer some tips on that in a later blog.

Right now, I want to assure you that flavor comes first. Recipes that taste good and work well are the ones you will make again. When I can create great flavor, show a new technique, and offer a way to streamline weeknight cooking, I’m extra happy. Because I want you to cook more, enjoy cooking, and eat well.

So let’s talk about chickpeas—those incredibly versatile, protein-rich legumes that do it all. Despite the Ottolenghi-inspired elevation of chickpeas to a sexy star ingredient (very welcome stateside after many years of unfortunate mistreatment), I still have many friends who tell me they’re not crazy about chickpeas. I think this is because the texture, the liquid, and the flavor of canned chickpeas can be off-putting. Canned chickpeas can be a bit mushy and slippery, and some brands have a slight metallic or funky taste—or too much sodium. Doing a taste comparison of brands can go a long way towards eliminating some of these problems. I’ve found I really like Westbrae Natural Organic Garbanzos, so I stock up on them when I find them. And rinsing helps a lot, too.

It’s great to keep canned chickpeas around for convenience; I’d never suggest that you don’t. But I will tell you that of all the beans and legumes I cook and eat, chickpeas are the one I most frequently cook myself.

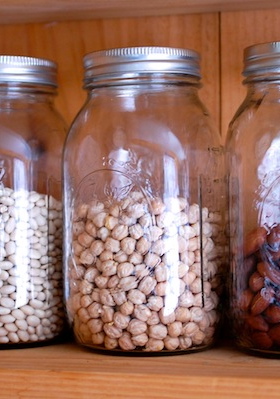
In fact, I toss a couple cups of dried chickpeas into a mixing bowl, cover with water, and stick in my fridge most Saturday nights. (That’s the overnight soak that people are fond of complaining about, when in reality it’s just a habit to form, and one that takes less than 2 minutes to accomplish.) At some point on Sunday, I drain them, put them in my pasta pot, cover with lots of water, add a bay leaf, a garlic clove, and maybe a sprig or two of thyme, bring to a simmer, and cook for about an hour. Then I add a little salt and continue cooking for 15 to 30 more minutes until the chickpeas are tender to the bite. (If I have to add more boiling water, I do.) I drain them, cool them, pop them in a storage container, refrigerate, and voila!–I  have chickpeas for the week. Very little hands-on cooking time for a big payoff.

Chickpeas that you cook yourself will not only have a better flavor and texture than canned ones, but they will keep longer as well—5 to 7 days in the fridge. For a vegetarian, having a protein like this already cooked and in the fridge cuts weeknight supper prep time down considerably.

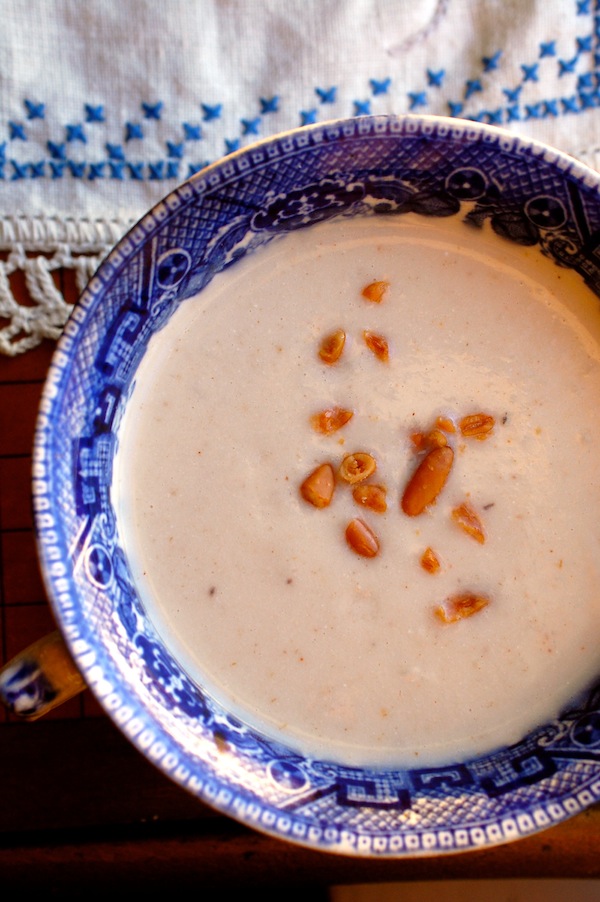
And now those chickpeas are ready for their biggest trick—one that ordinary beans and lentils cannot perform: Browning. Yes, this is the real reason I love chickpeas so much: You can sauté or roast them until they take on a golden brown color and toasty, even nuttier, flavor. And you know, I love brown!! When I discovered that chickpeas could do this, I was ecstatic. Because the flavor is killer. The crunchy texture of roasted chickpeas is a fun bonus.

The good news is that you can sauté or roast either home-cooked or well-drained canned chickpeas. So if you’re new to vegetarian eating, look at it this way: If you’re making a quick weeknight stir-fry or sauté or braise, you can replace the shrimp, the chicken, or the beef with chickpeas. Chickpeas can also be part of a delicious hash, and they make a great base for quesadilla and burrito fillings. Sautéed and spiced chickpeas and veggies, along with some toasted nuts and fresh herbs, turn cooked whole grains (another great make-ahead) into a million different suppers. Marinated or dressed (don’t leave them rolling around naked and lonely), they turn a chopped or warm salad into a filling supper.

But enough already. I think at this point you’d just like a delicious recipe to try all this out, so here is a favorite Indian curry from the book. I think you’ll love it.

And I’ll be back in a couple weeks with another teaser recipe and more tips for weeknight vegetarian suppers to keep you excited about the book. And if you haven’t preordered your copy—or asked your independent bookstore to order some—please do. Click on this link.

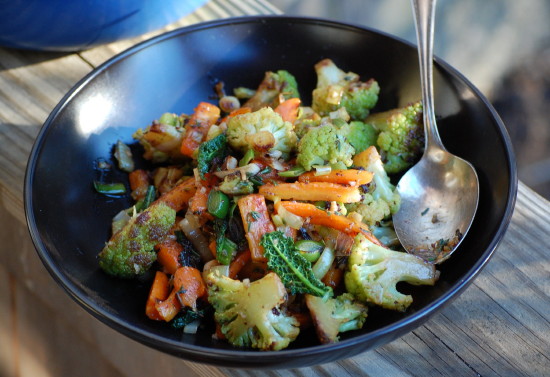
Indian Curry with Chickpeas, Cauliflower, Spinach, Tomatoes, and Coconut Milk

One fall night I set out to cook a comforting Indian curry that would have all the things I love in it, starting with sautéed chickpeas and cauliflower and ending with a slightly creamy coconut-tomato sauce. In between, a mix of ginger, garlic, and curry spices (as well as fresh spinach) would provide backbone. I decided to use my handy stir-fry pan, because it’s great for sautéing and simmering. After a little chopping, I started cooking. Fifteen minutes later, I was so happy: I loved it! Leftovers were delicious, too. Be sure to use fresh curry powder. This dish is filling on its own, but you could serve it with rice or naan if you like.

Serves 2 to 3

3 tablespoons grapeseed or vegetable oil

One 15-ounce can chickpeas, drained, rinsed, and dried (or about 1 1/3 cups cooked chickpeas)

¾ teaspoon kosher salt, plus a pinch

3 cups cauliflower florets (1- to 1½-inch pieces, cut so that most have a flat side)

1 cup sliced yellow onion (about 1 medium-large onion, cut lengthwise)

1 tablespoon minced fresh garlic

1 tablespoon minced fresh ginger

1½ teaspoons Asian chili-garlic paste

2 teaspoons curry powder

2 teaspoons packed dark brown sugar

½ teaspoon ground cumin

3 cups packed baby spinach

½ cup canned crushed tomatoes

1 cup canned full-fat coconut milk (preferably organic), well stirred

¼ cup finely chopped fresh cilantro


In a large (12-inch) nonstick stir-fry pan, heat 1 tablespoon of the oil over medium-high heat. When the oil is hot, add the chickpeas and ¼ teaspoon salt. Cook, stirring occasionally, until all the chickpeas are golden and have some brown spots on them, 5 to 6 minutes. Transfer the chickpeas to a large plate.

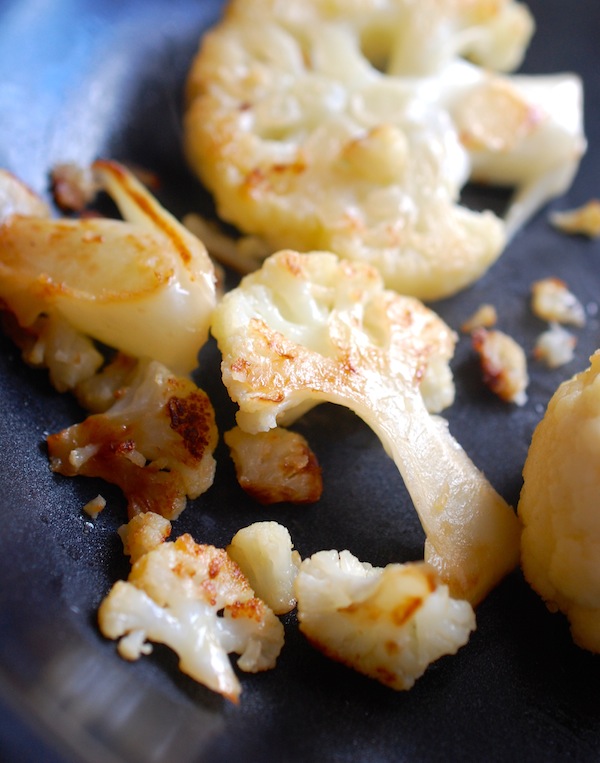
Return the pan to medium-high heat and add 1 tablespoon of the oil. When the oil is hot, add the cauliflower and ½ teaspoon salt. Stir, cover, and cook, uncovering to stir occasionally, until the cauliflower pieces are browned in spots and have lost their whiteness (they will be softened but still crisp), about 5 minutes. (If the cauliflower is browning too quickly, reduce the heat to medium. If your pan does not have a lid, use a baking sheet or the bottom of a large skillet.) Transfer the cauliflower to the plate with the chickpeas.

Return the pan to medium-high heat and add the remaining 1 tablespoon of oil, the onion, and a pinch of salt. Cook, stirring, until the onions are browned in spots but haven’t lost all their stiffness, about 3 minutes. Add the garlic, ginger, chili-garlic paste, curry powder, brown sugar, and cumin. Stir well to combine, and fry the spices for 30 seconds. Add the spinach, tomatoes, and coconut milk and stir well to incorporate the spices with the liquids and to soften the spinach. Add the cooked cauliflower and chickpeas and simmer, stirring, for 1 minute. Stir in the cilantro and remove the pan from the heat.

Serve hot or very warm in two or three bowls.

Recipe From Simple Green Suppers by Susie Middleton, © 2017 by Susie Middleton. Reprinted by arrangement with Roost Books, an imprint of Shambhala Publications, Inc. Boulder, CO.

Photo of Indian Curry by Randi Baird © Randi Baird

A Recipe for Cauliflower Soup with Tahini & Toasted Pine Nuts + Ten More Cauliflower Recipes

cauli color onecup threeMy dad gave me a copy of the cookbook Jerusalem for Christmas. Now I want to go to Jerusalem. Okay, so that’s not happening any time soon. Anyway, the ingredients and recipes that arise out of such a fascinating mix of cultures are alluring. I’m at least going to buy a jar of za’atar spice mix and a bottle of pomegranate molasses, neither of which I’ve had in my pantry in years. (And I learned that fresh za’atar is actually hyssop, which technically, we could grow and dry here).

Coincidentally, I’ve had 2014’s vegetable darling, cauliflower, on the brain. (For some reason, the endless lists generated by the food trend police all seem to mention cauliflower, as if it hadn’t had a full and happy life before now.) For me, I just naturally think of cauliflower in winter, when it’s snowy and 8 degrees outside. I guess it’s the winter white thing. Hence, I can gladly offer you a collection of cauliflower recipes I’ve put forth in winters past (see links below).

But yesterday, I decided to make a slightly Jerusalem-esque cauliflower soup, since it occurred to me that if a touch of tahini and a smattering of pine nuts are good with a cauliflower sauté or salad, they might be nice with a creamy (“creamy,” though no cream—only yogurt) soup. (And, I do still have a can of tahini and a bag of pine nuts in my larder!)

Once again, the winter darkness conspired against me to shoot a decent photo in natural light, but you’ll have to trust me on this one. The soup is lovely—comforting and pleasing enough for most to enjoy (even Roy). I had it for dinner with an avocado and arugula salad. Yum.

Quick farm report: Chickens are hanging in there. Feral cat has baby kitten housed in former pig pen. Roy is leaving food for them. Farmer wants to adopt kitten. Will keep you posted. Let’s all hope for warmer weather. Mice are in hiding.

DSC_4370_1Oh, and here are the links, in addition to the soup below, for my other delicious cauliflower (and broccoflower—or green cauliflower—which I like even better!) recipes:

Broccoflower and Cremini Mushrooms with Garlic and Rosemary
Honeyed Cauliflower with Toasted Almonds
Roasted Cauliflower, Potato, Mushroom & Green Bean Gratin
Roasted Cauliflower with Double Lemon Ginger Dressing and a Spritz of Arugula
Lemony Green Cauliflower with Scallions and Parmigiano
Roasted Cauliflower with Garlic-Lime Cilantro Butter
Teeny Veggie Stir Fry with Thai Sauce
Broccoflower, Carrot & Leek Ragout with Thyme, Orange & Tapenade
Quick-Roasted Cauliflower with Zesty Orange-Olive Dressing
Roasted Cauliflower, Cremini, Gruyere and Rosemary Gratin


___________________________________________________________________________________________

cauli fiveCauliflower Soup with a Touch of Tahini & Toasted Pine Nuts

I added a teaspoon each of ground cumin and ground coriander to this soup, but you could replace a little of the cumin with ground ginger or go with just garam masala. You could also add some heat anyway you like. Instead of the yogurt and lemon juice, you could finish this with coconut milk and lime juice.

Serves 4 to 6

2 tablespoons unsalted butter
1 tablespoon extra-virgin olive oil
1 large head cauliflower (about 2 ½ pounds), cored, trimmed, and very roughly cut into large florets or pieces (about 8 cups or 1 ½ pounds)
Kosher salt
1 generous tablespoon finely chopped fresh garlic
1 generous tablespoon finely chopped fresh ginger
1 scant teaspoon ground cumin
1 teaspoon ground coriander
4 cups low-sodium chicken broth
3 cups water
3 tablespoons Tahini (well-mixed first)
¼ cup thick plain Greek yogurt (I use nonfat)
1 to 2 teaspoons fresh lemon juice
1/3 cup toasted pine nuts

In a large (6-quart) Dutch oven, heat 1 tablespoon of the butter and the olive oil over medium heat. Add the cauliflower pieces and 1 teaspoon salt. Cook, stirring only occasionally (to let browning happen), until all the cauliflower pieces have got some bits of golden browning on all sides (they’ll be less stiff, too), about 12 to 14 minutes.

Add the remaining tablespoon of butter, the fresh garlic and ginger, and stir until fragrant, about 1 minute. Add the cumin and coriander and stir well. Add the chicken broth and the water and stir well to scrape up the browned bits stuck to the bottom of the pan. Bring to a simmer, cover loosely, and cook for 15 minutes. Remove from the heat and let sit for 10 to 15 minutes.

Meanwhile, get out your blender and a dish towel and set a large heat-proof bowl by the blender. Put 1/3 of the soup plus 1 tablespoon tahini in the blender. (For safety reasons, you don’t want to fill the blender too much.) Cover the lid with a dishtowel to prevent splattering, but keep a small vent hole open. Puree until smooth. Transfer to bowl. Repeat with two more bathes of soup, adding 1 tablespoon of tahini to each batch as you puree, and transferring each batch to the bowl.

Rinse the Dutch oven and add the pureed soup back to it. Put the pot over medium-low heat and whisk in the yogurt and 1 teaspoon lemon juice. Let the soup get a bit warm, then taste it for salt and lemon, adding more of either if necessary. Continue to heat, stirring frequently, until hot enough to serve.

Spoon the soup into bowls and garnish with a generous amount of toasted pine nuts (I like a lot in order to have crunch in every spoonful!)

______________________________________________________________________________________________

Note: In an effort to streamline this recipe, I didn’t even start with sautéing onions (probably a first for me), nor did I roast the cauliflower first, which I really wanted to do. Instead I browned the cauliflower in the Dutch oven, added the fresh aromatics and spices, covered, and simmered. If you did want the added flavor that roasted cauliflower would bring, you could do that (and sauté some onions while the cauliflower cooks), but you will probably want to go with a little less liquid (maybe 5 1/2 cups instead of 7), since the cauliflower will be a smaller volume.

A Recipe for Roasted Cauliflower—In a Gratin

The savage weather has reached Biblical proportions. Yes, I am exaggerating, but today it is blowing so hard that I am fully expecting Auntie Em to ride by my window on her bicycle at any time. Frankly, I’d rather look out and see her than some random farm item that was once tethered to the ground.*

Well, there is no antidote to all this other than good warming winter food. (And chocolate—I have my new favorite, a 77% percent cocoa bar from Chocolove, by my side.) In the kitchen today I am making a cauliflower gratin, because I am still having cruciferous cravings. Don’t worry, I am not eating the chocolate and the cauliflower at the same time.

Because of my sweet tooth, I prefer cauliflower roasted, rather than prepared any other way. So today I was thinking about taking the extra step of putting roasted cauliflower into a gratin with Gruyère and rosemary—and then I realized I’d already developed a recipe like this for The Fresh & Green Table. (Yikes, sometimes I forget these things, which is a little scary.) That recipe spans the seasons a bit, since it includes green beans and potatoes as well as cauliflower and mushrooms. I decided to simplify a bit and stick to the colors of winter, partly because I had a monochromatic photo in my head. (I love shades of white. In the end the photos turned out yummy, but not so monochromatic.)

Anyway, the version I made today is just cauliflower and mushrooms. I call it a gratin but really it is more like gratinéed veggies. No major deep-dish casserole-y kind of thing here—just roasted veggies sprinkled with cheese, a little cream, and plenty of breadcrumbs and baked until bubbly. Rustic and delicious. The rosemary winds up being pretty fragrant, so sub in thyme if you’re not in a piney mood.

Tip: And here’s something to keep in mind when roasting cauliflower or broccoli. Cut through the florets (at least in half, or in thick slabs if they’re large) so that they have a flat side that can have full contact with the sheet pan. Glorious caramelization will occur where floret meets heat. (Witness photo above; floret has been flipped up after roasting.)


*P.S. I wrote this yesterday but was unable to get it posted until today. I am happy to report that Auntie Em and Toto did not fly by the window. However, one of the doors off the gas grill, some tree limbs, and a plastic tarp are all tangled up outside my window.

Roasted Cauliflower, Cremini , Gruyère and Rosemary “Gratin”

Take this idea and run with it—use whatever roasted veggies you like, sprinkle with a bit of cheese, cream, and breadcrumbs, and bake until bubbly.

________________________

3 tablespoons plus 2 teaspoons extra-virgin olive oil (plus more for rubbing pan)
3/4 cup coarse fresh breadcrumbs (I use an English muffin for this)
1 1/4 teaspoons chopped fresh rosemary
kosher salt
Florets from 1 small head cauliflower (about 14 ounces), each about 1 1/2 inches long and cut to have one flat side
8 ounces cremini mushrooms, quartered if large, halved if small
1/2 cup grated Gruyère cheese
1/2 cup heavy cream

________________________

Heat the oven to 450°F. Line a large heavy-duty rimmed sheet pan with parchment paper. Rub a little olive oil all over the inside of a small shallow gratin or baking dish. (I used a 9-inch round, but something about 1 1/2 quarts in volume works well.)

In a small bowl, combine the breadcrumbs, 2 teaspoons olive oil, 1/2 teaspoon chopped rosemary and a pinch of salt. Mix well and set aside.

In a mixing bowl, toss the cauliflower and mushrooms with the 3 tablespoons olive oil and 1/2 teaspoon kosher salt. Spread the vegetables out in one layer on the sheet pan (flip the florets so that they are cut-side down). Roast until the veggies are nicely browned and tender, about 28 to 30 minutes. Let the veggies cool for a few minutes and transfer them to the baking dish, arranging them in one snug layer.

Reduce the oven temperature to 425°F.

Sprinkle the remaining rosemary and the cheese over the vegetables in the pan. Drizzle the cream over the vegetables. Scatter the breadcrumb mixture over the top, leaving some vegetables peeking out.

Bake until the crumbs are well-browned and the cream has bubbled and reduced, leaving a thin brown ring around the edge, about 18 to 20 minutes. Serve hot or warm.

Serves 3

Winter Whites and Something Bright—Roasted Cauliflower with Double-Lemon Ginger Dressing

Guess I am a little late to the party. Here I have been thinking I have some extra-special arugula-growing talent, because mine is still alive in the garden in late January. (Yes, and I’ve reminded everyone of this in nearly every recent blog.) And never mind that it’s been incredibly mild this year—we  had 8 inches of snow on Saturday, so now we can officially call it winter. (Though it’s already back up to 45 degrees!) I got a huge kick out of digging under the snow (and the row cover) on Sunday to find the arugula still percolating  away underneath.

But it turns out that I don’t have a special talent—apparently arugula is about the heartiest green you can grow. And with just a little protection, you can keep it going through the coldest months around here if you give it a good head start in the fall. It will do most of its growing before December, but if you’ve planted enough, you can just keep harvesting it all winter. This is a very exciting concept for me—having salad greens all year ‘round. The arugula was more or less an accident this winter, but come this fall, I’ll deliberately plant mâche (also called lamb’s lettuce—mild, nutty, and delicious) and spinach, too, for winter harvesting.

Right now, though, I am eating arugula with everything that will stand still long enough. Today that meant roasted cauliflower, which I’ve been craving something bad. I’m not sure why, though I do have a thing about winter whites. I love the color white (I collect Ironstone dishes) and when the snow started falling, cauliflower and endive and baby turnips and pearl onions began floating through my mind. I finally bought a head of cauliflower today, and decided to pair it with something bright and zingy. I love citrus with veggies this time of year, and I remembered a great dressing I put together for a carrot salad (of all things!) in Fast, Fresh & Green. It stars one of my favorite ingredients—crystallized ginger—along with lemon zest, lemon juice, and orange juice. Just the combo to counter the intensely sweet, nutty flavors of roasted cauliflower. So I gave it a go. Turns out the dressing is terrific with cauliflower—but even better with arugula. (I used the greens as a bed for the roasted veggies). So I will use the dressing again with hearty winter green salads. But the cauliflower combo was just right today—a bright spot on a cool (not exactly cold) winter day.

Roasted Cauliflower with Double-Lemon Ginger Dressing and a Spritz of Arugula

For a printable version of this recipe, click here.

For another way to dress up roasted cauliflower, see the compound butter idea in this post. You will probably not use all of the ginger dressing—save any extra for a green salad. In summertime, the dressing would also be a great marinade for shrimp before they hit the grill.  A few toasted chopped almonds would make a nice addition to this dish. You could also pair the whole thing with some cooked whole grains, such as wheatberries, farro, or brown rice, to make a delicious vegetarian main dish salad.

1 pound cauliflower florets (from about 1 small head), each cut into pieces about 1 ½  inches long with one flat side (see photos)

3 tablespoons extra-virgin olive oil

3/4 teaspoon kosher salt

Double-Lemon Ginger Dresssing

2 cups (more or less) arugula leaves, washed and dried

Heat the oven to 475 degrees F. Line a large baking sheet with parchment paper. In a mixing bowl, toss the florets gently but thoroughly with the olive oil and salt. Spread the florets out on the sheet pan in one layer, flat side down. (Scrape any remaining salt and oil out of the bowl onto the florets). Roast until the bottom of the florets are well-browned and the tops are starting to brown, 20 to 24 minutes. (You can turn them once with tongs about ¾ way through cooking, but do leave the flat side in contact with the sheet pan for about the first 12 to15 minutes so that it will get nicely caramelized.)

Gently transfer the warm florets to a mixing bowl and drizzle with as much dressing as you like (start with about half; you will not use it all). Toss the arugula leaves with a teaspoon or two of the dressing and arrange the leaves on a platter or plates. Top with the dressed, roasted cauliflower and serve right away (the cauliflower cools quickly.)

Serves 3 to 4 as a side dish.

Double-Lemon Ginger Dressing

1 tablespoon olive oil

1 tablespoon finely minced crystallized ginger

2 teaspoons fresh lemon juice

2 teaspoons orange juice

1/2 teaspoon freshly grated lemon zest

pinch of kosher salt

Combine the olive oil, the ginger, the lemon juice, the orange juice, the lemon zest and the salt in a small bowl and whisk well. Re-whisk before dressing. Store any leftover dressing covered in the fridge.

Green Cauliflower & Red Watercress–The Lure of Colorful Veggies on a Dark & Drizzly Winter Day

I’ve always been a sucker for colorful vegetables. But hand me another dark, drizzly day, and you’ll find me going gaga at the grocery store for anything chartreuse…or fuchsia…or sunset orange. I need the color to stimulate my senses. The other day I saw a cool display of red watercress—something I’ve never seen before—and lurched towards it without even thinking. I brought it home and promptly mixed it with some pale lemony baby bibb (above right) for a delicious and pretty salad. That worked out pretty well.

But sometimes I get myself in trouble. Take this whole green cauliflower thing (above left). I love this stuff, which I happen to call Broccoflower®. Because that’s what it’s labeled at my grocery store. I included a side dish recipe for it in Fast, Fresh & Green, and developed a pasta recipe with it for my next book. The problem came when I asked my cross-testers, Jessica and Eliza, to go find Broccoflower® in their grocery stores. Initially they both said they couldn’t find it. But both had the presence of mind to call me from the grocery store and describe what they did see. So after cell-phone exchanges and emailed photos, we determined that what both of them found was a very similar vegetable labeled “green cauliflower.”

It turns out that Broccoflower®  is a registered trademark of Tanimura & Antle, a produce company that brought the variety (a cauliflower with some broccoli genes) over from Holland more than 20 years ago. Tanimura & Antle also has an orange cauliflower they call “Fiestaflower.” Meanwhile, another big produce company, Andy Boy, has begun marketing green cauliflower, orange cauliflower, and purple cauliflower in the last few years under those basic names. (All of these are purported to have the antioxidants you’d expect would pair with those colors.) As far as I can tell, Broccoflower® and green cauliflower are virtually the same thing. Whew. I was getting a little worried that I’d have to take the new recipe out of the book.

It’s not just the color of green cauliflower (aka Broccoflower®) that I love. To my palate, it tastes a bit less cabbagey and a tad sweeter than white cauliflower. And when you cut it, the stems are a bit firmer—more broccoli-esque. And in general, I think it holds up better in cooking. Its florets are firmer than those of cauliflower, which can get a bit crumbly.

Green cauliflower caramelizes beautifully in the sauté pan or roasting pan, so if you find some, crank up the heat. Then treat it to lemon, garlic (or another allium like scallions or leeks), and Parmigiano—three flavors it loves. (I’ve included a sample side dish recipe, below.) Serve it with roast pork or chicken, or turn it into a pasta sauce with a little chicken broth or pasta-cooking water and more olive oil or butter. It’s pretty darn tasty, which shouldn’t be surprising—I find the most colorful veggies taste the best, too.

Lemony Green Cauliflower with Scallions & Parmigiano

For this recipe, cut the florets on the small side—no more than about 1 1/2 inches long. It also helps browning if you cut whole florets in half—that cut side will have maximum contact with the hot pan and get very caramelized (see photo). Feel free to adjust the amount of lemon (or add a bit of lemon zest) here. And if you want a slightly saucier dish, deglaze the pan (to scrape up the flavorful browned bits) by pouring a bit  more chicken broth, water, or wine (diluted) in at the end. You can also enhance the sauce with a bit more cold butter.

____________________________________________

2 tablespoons low-sodium chicken broth or water

3 teaspoons fresh lemon juice

12 ounces (3/4 pound) green cauliflower florets (a little less than one small head, cut into small florets)

2 tablespoons unsalted butter

1 tablespoon extra-virgin olive oil

1 teaspoon kosher salt

1/4 cup sliced scallions  (white and light green parts only) plus 1 tablespoon sliced green tops for garnish

2 tablespoons coarsely grated Parmigiano Reggiano  (I use a food processor to chop coarsely)

________________________________________

Combine the chicken broth or water with 2 teaspoons of the lemon juice and put it near your stove. In a 10-inch (3-quart) straight-sided stainless steel sauté pan, heat the olive oil and 1 tablespoon of the butter over medium heat. When the butter has melted, add the green cauliflower florets and the salt and toss and stir well. (A silicone spoonula works well for this.) Cover the pan and cook, stirring occasionally, until all the florets are browned in places, about 6 to 7 minutes. (There will be moisture accumulating inside the lid and it will drip down to deglaze the pan a little bit. But don’t worry if the pan is getting brown.)

Uncover, carefully pour in the chicken broth or water and lemon mixture, and immediately put the lid back on (beware of steam). Cook until most of the liquid has steamed off or been absorbed, about 30 seconds. Uncover, turn the heat to low, and add the remaining tablespoon of butter, the remaining teaspoon of lemon juice, and the scallions. Cook, stirring gently, until the butter has melted and the scallions have softened, 1 to 2 minutes.

Remove the pan from the heat and transfer all the green cauliflower and scallions to a serving dish or dishes. Sprinkle with the Parmigiano and the scallion tops and serve.

Serves 3

Yoga & Roasted Cauliflower — Both are Good for You, Both are Delicious

I started taking yoga again last week. Actually, “Yoga on the Ball.” At first it made me giggle, bouncing around on this thing. The ball reminds me of the Hippity-Hop I had as a little girl. Back in those days, my parents would do anything to try to wear me out. I was Miss Energy. These days, not so much. But after I got over the giggles, I started to feel really good. What I need (or what my back, my hamstrings, and my tummy need) is stretching, and draping yourself over, under, and around this big round ball seems to make stretching easier and more effective. Very Cool.

Plus, I love my yoga teacher, M.J. Bindu Delekta, and she makes everything soulful and relaxing, even if it does involve putting on unflattering clothes and contorting your body into embarrassing positions. And she’s really into good food. Last week she announced to the yoga class that she highly recommended Susie’s cookbook, especially the roasted cauliflower. She has mentioned this roasted cauliflower to me a few times, so I know she is serious.  It reminded me that it might be a good idea to spread the word about roasted cauliflower beyond my yoga class. Plus, I happened to roast some this weekend for a recipe I’m working on, and I thought to myself, “Oh, roasted cauliflower, what a hot ticket you are! So sweet, so delicious, and yet, still cauliflower.” (Okay, I know I really am going nuts now, talking to cauliflower. I’m afraid I’ve been in the kitchen far too much lately.)

There is simply nothing difficult about roasting cauliflower. It’s not even hard to cut up a cauliflower into florets. And with my quick-roasting method (yes, lifted right from Fast, Fresh & Green), you can be popping these yummy bites right off the sheet pan and into your mouth in less than 30 minutes. But in case you’d actually like to serve these as a side dish, I’ve included a little seasoning idea—a Garlic-Lime-Cilantro butter—with the method below. For more ideas, check out the Orange-Olive Dressing on the roasted cauliflower in FFG, or try one of the other herb butters in the roasting chapter.

But I have to tell you just one last thing about M.J. and this whole yoga gig. The reason M.J. is so cool is not because she loves roasted cauliflower. It’s because she gives the best homework assignments ever. Last week she reminded us that we live on an Island and that we should visit the ocean if we haven’t lately. In fact she said, we should go to the beach, close our eyes, and practice pacing our breaths with the rhythm of the waves coming ashore. She even emailed us all this weekend to remind us of our homework. So today I got out of the kitchen and went to the beach. It just happened to be 70 degrees, and I got to dig my toes into surprisingly warm sand. I’m not sure I quite got my breathing in sync with the waves. But it was the best homework assignment I’ve ever had. So after you roast your cauliflower, go to the beach. Or walk in the woods. Check out the leaves. It’s all delicious.

_______________________________________________________

Roasted Cauliflower (with optional Garlic-Lime-Cilantro Butter)

I love this high-heat, sheet-pan roasting method for cauliflower. But I recently roasted cauliflower in a Pyrex pan at 425 degrees, and it came out just fine, too. It does brown up and it’s still tasty. But there’s no doubt that the cauliflower (and most veg) gets crisper on an aluminum sheet pan at higher heat. Because of the material and depth of a Pyrex pan, vegetables roast a little more slowly and come out a bit moister (not always a bad thing) from the steam they pick up from neighboring veg. Since cauliflower has a fair amount of moisture to give off, it’s one that I think really benefits from the open sheet pan.

1 pound cauliflower florets (from about 1 small head), each cut into pieces about 1 ½  inches long with one flat side (see photos)

3 tablespoons extra-virgin olive oil

¾ teaspoon kosher salt

Garlic-Lime-Cilantro Butter (optional, see below)

Heat the oven to 475 degrees F. Line a large baking sheet with parchment paper. In a mixing bowl, toss the florets gently but thoroughly with the olive oil and salt. Spread the florets out on the sheet pan in one layer, flat side down. (Scrape any remaining salt and oil out of the bowl onto the florets). Roast until the bottom of the florets are well-browned and the tops are starting to brown, 20 to 24 minutes. (You can turn them once with tongs about ¾ way through cooking, but do leave the flat side in contact with the sheet pan for at least the first 15 minutes so that it will get nicely caramelized.) Serve right away (they cool down quickly), or drizzle with the butter and transfer to a serving bowl.

To make Garlic-Lime-Cilantro Butter: In a small skillet, heat 1 tablespoon unsalted butter with 2 teaspoons extra-virgin olive oil and 1 teaspoon minced garlic over medium-low heat. When the butter has melted and the garlic has begun to smell fragrant, remove the skillet from the heat and mix in ½ tsp. freshly grated lime zest and ½ tsp. fresh lime juice. Stir in 1 tablespoon chopped fresh cilantro. Drizzle over cauliflower.

__________________________________________________________