Tag Archives: kale

Walking the November Road with The Farm Dog, and Other Clever Ways to Procrastinate and Contemplate

photo-539
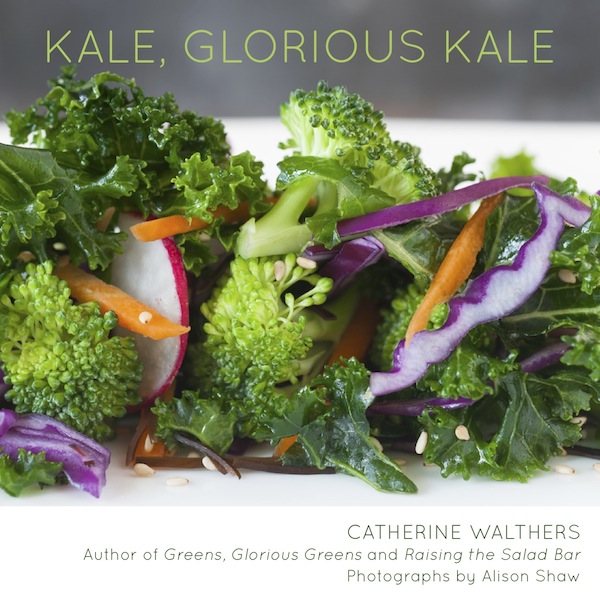
Now that our second photo shoot for the new cookbook is behind us, I am back to work in the kitchen and at the computer developing the last batch of recipes for the book. This means, of course, that (as with any self-propelled creative endeavor) there is some clever procrastinating to accomplish every day. You simply must get up from your computer or get out of the kitchen a few times a day to reboot your creativity!

DSC_0159

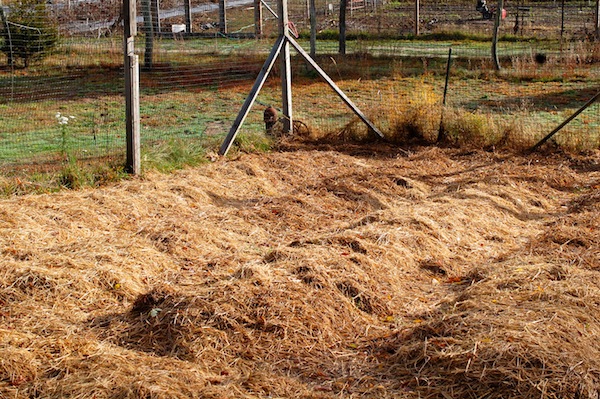
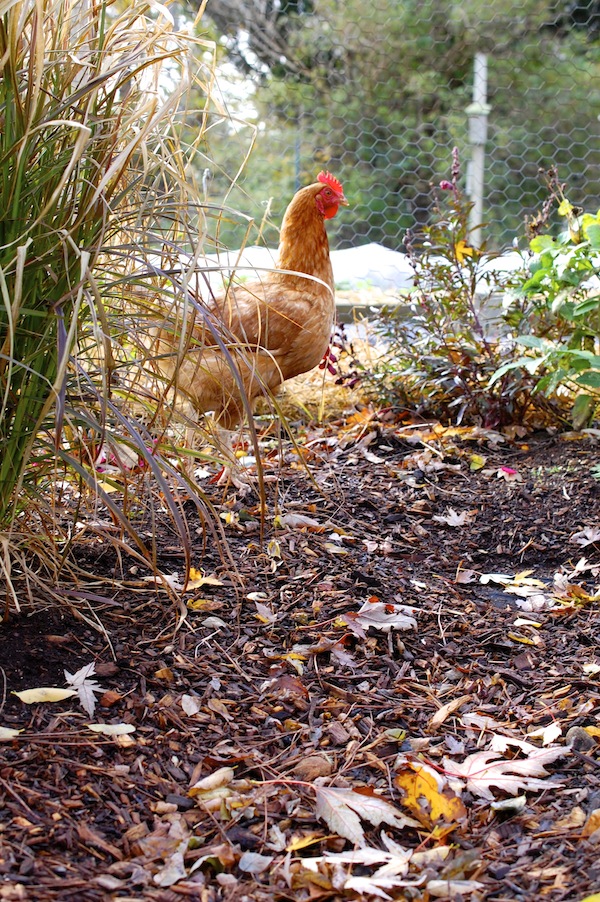
I’ve been spending an hour or two every day cleaning up and mulching the market garden, hauling the tomato vines out of the hoop house, ripping the twisted dried green bean vines off of the trellising, and moving strawberry plants around (they’re everywhere).

DSC_0166

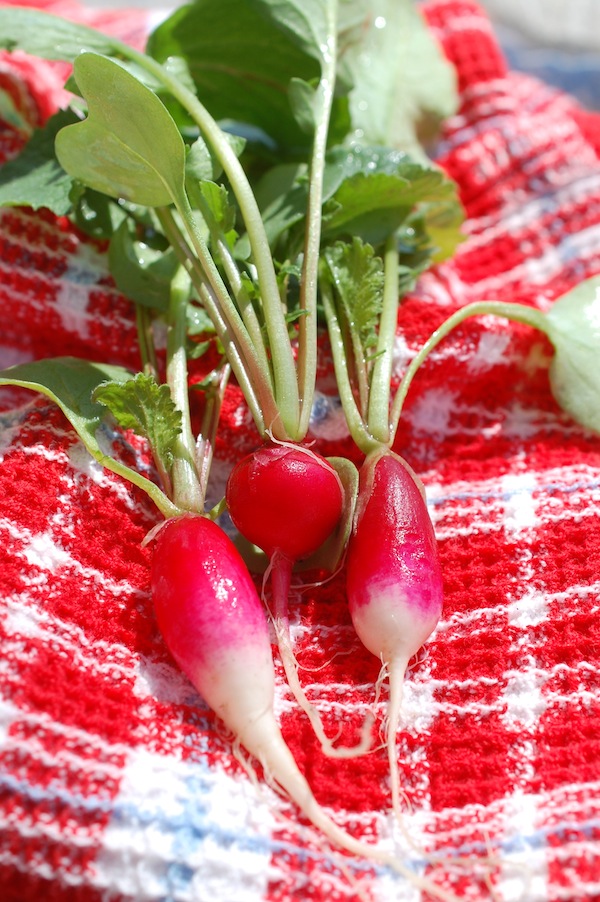
Incredibly, there are still things growing in the garden. Every year I am amazed at how temperate the Island is in late fall, with the warm ocean waters still surrounding us. But this year it has been especially warm.

DSC_0108
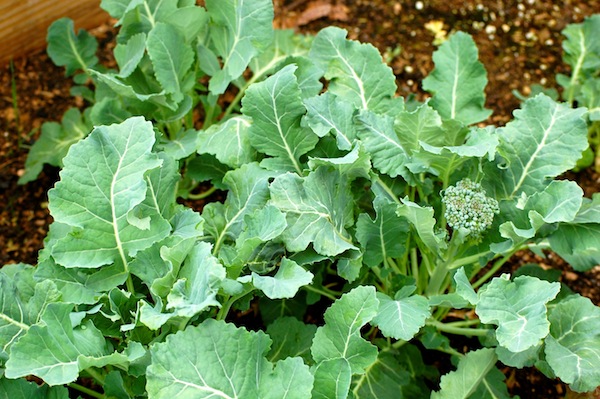
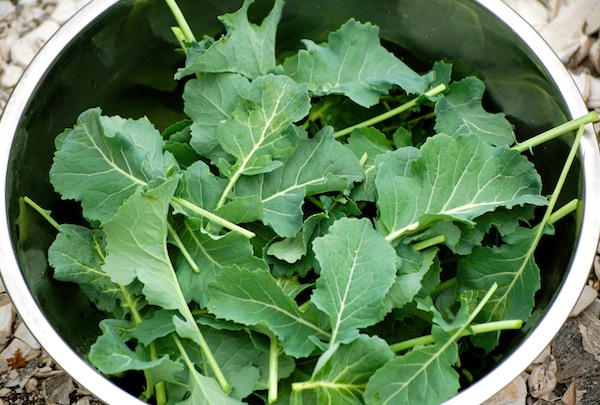
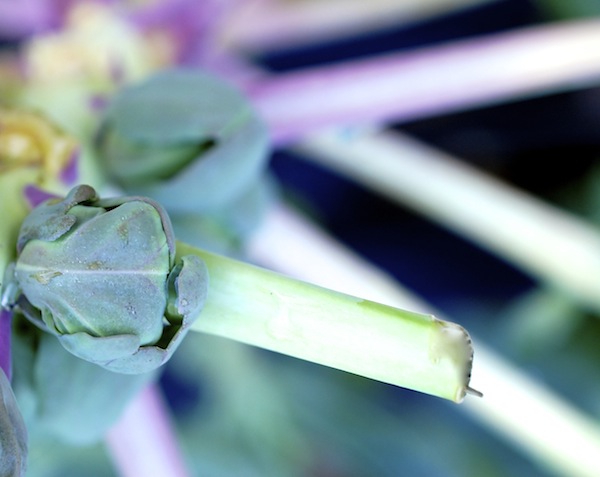
Since I topped off the Brussels sprouts plants, the little buds have grown bigger, and I’ve popped enough off the stalks to sell a pint or two at the farm stand a few times a week.

DSC_0080

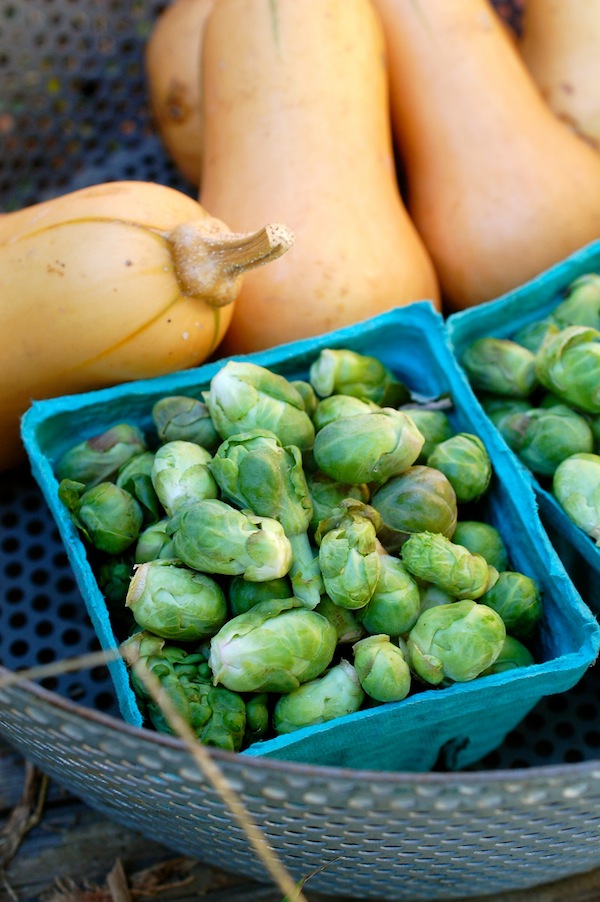
And I just pop the baby ones in my mouth, too; they are sweet, nutty and crunchy.

DSC_0103

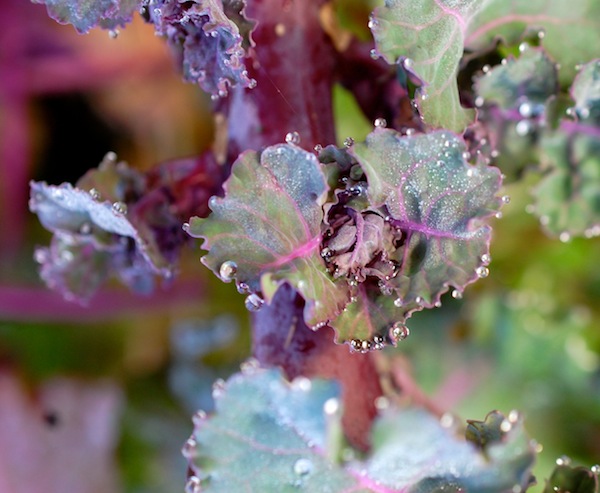
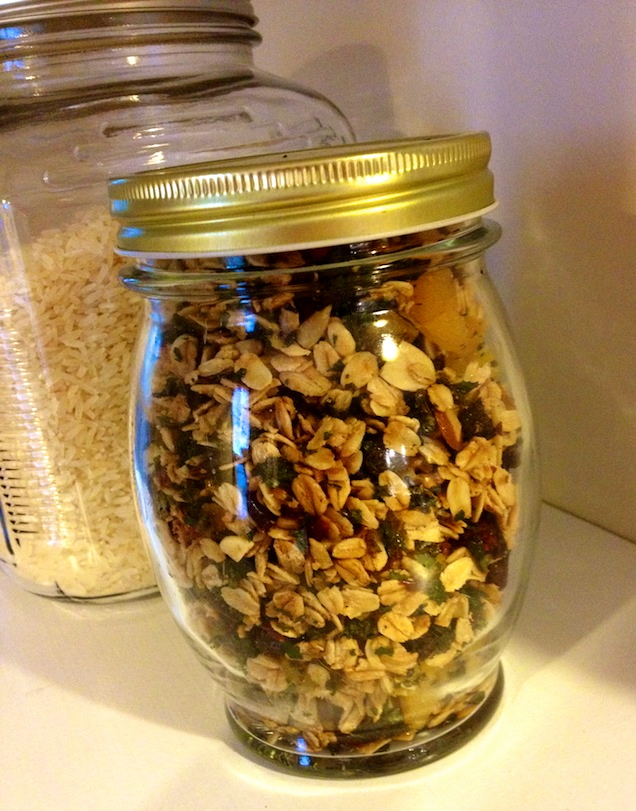
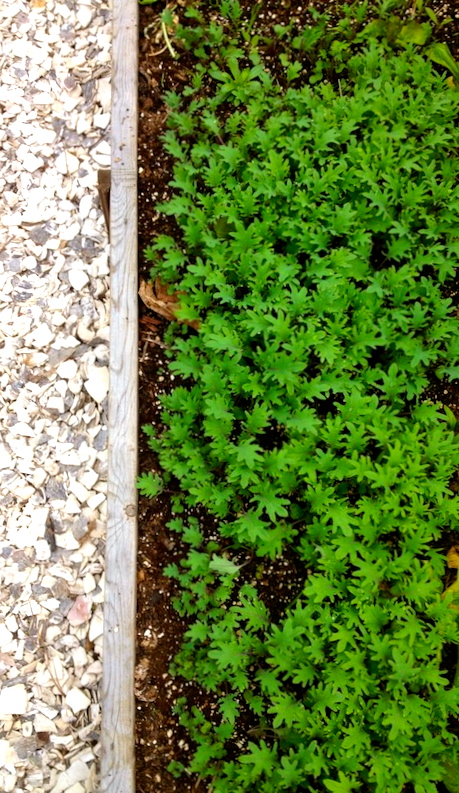
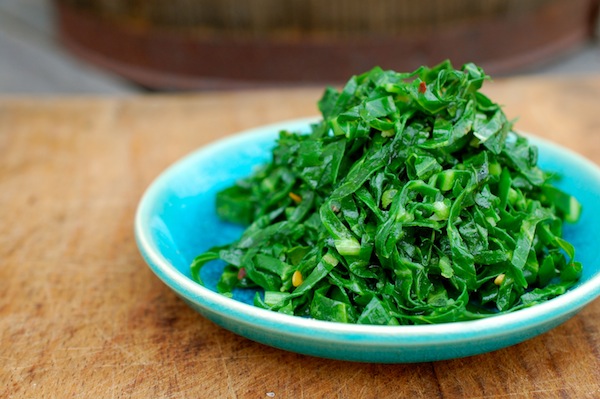
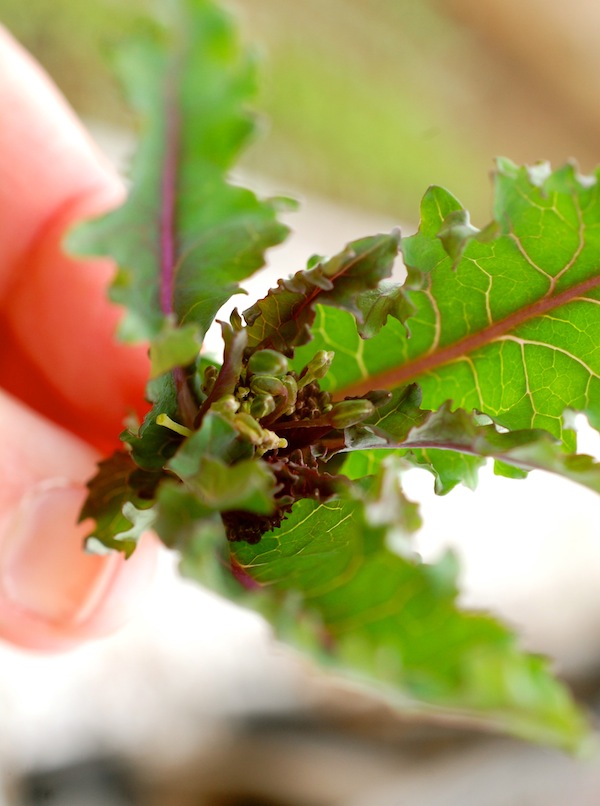
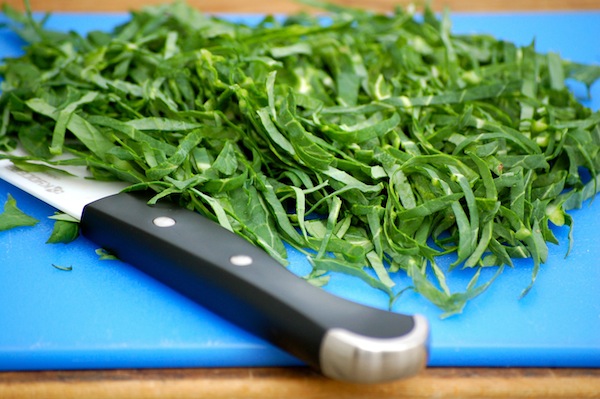
I even managed to grow a few kalettes; I was very excited about trying this new vegetable (a cross between kale and Brussels sprouts) when I got the seed, though I did read that they would take four months to mature. Unfortunately, I was late getting my plants in the ground, so the vegetables really only started to take shape a few weeks ago. I don’t know how much they will grow once the daylight seriously wanes, though I imagine they are pretty frost-hardy.

DSC_0103-2

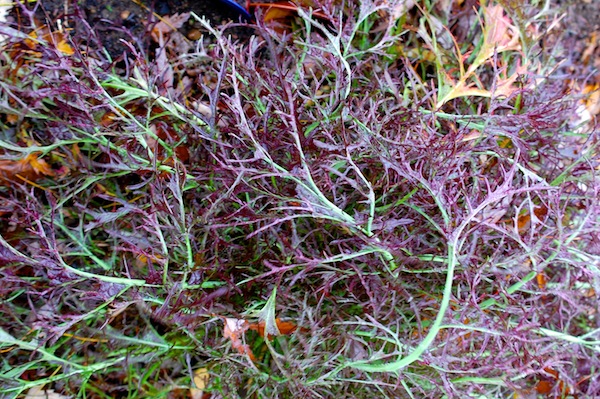
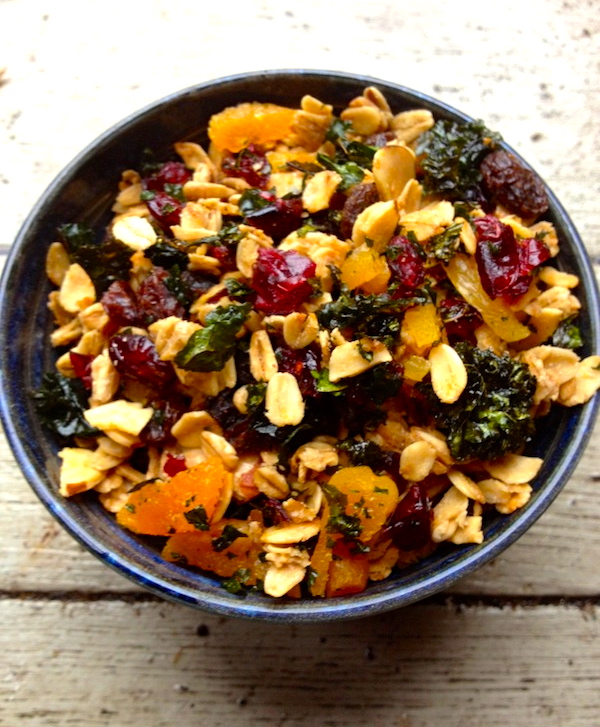
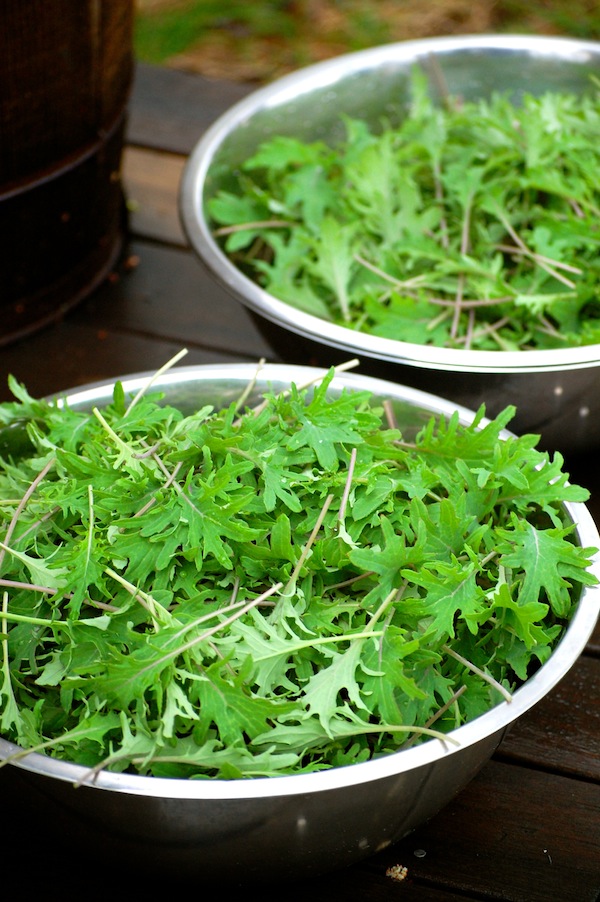
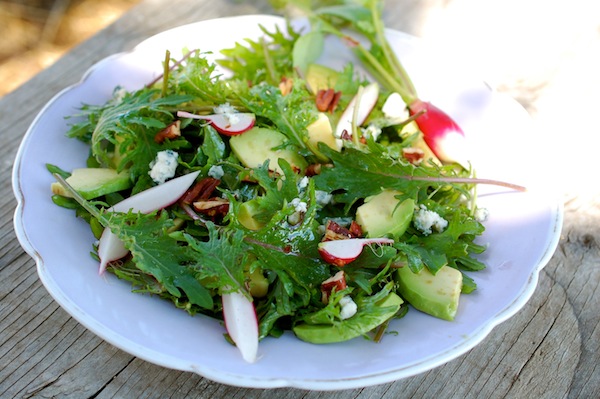
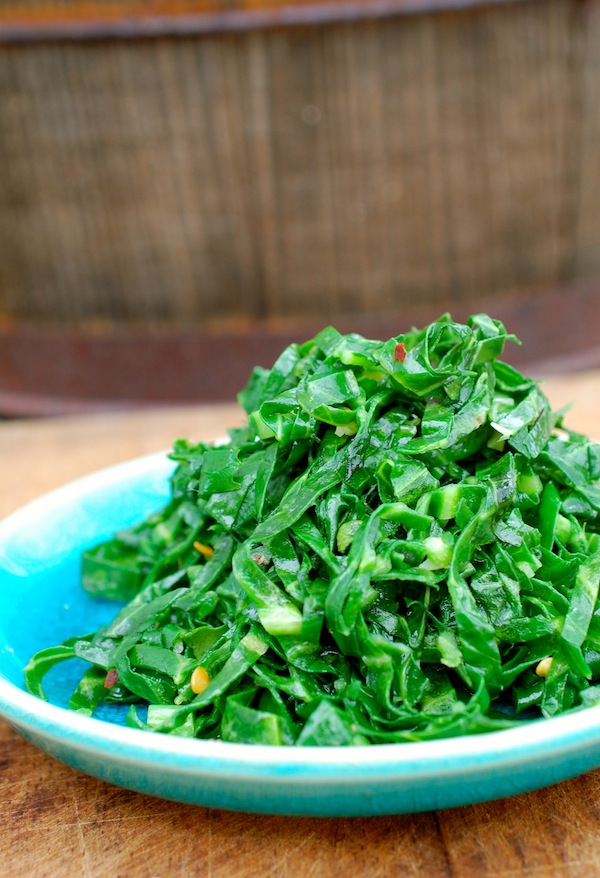
We’ve got a last patch of salad greens under cover, and there are a half dozen magnificent and terrifying Ruby Streaks mustard plants that I never cut back sprawling three-feet round in a spiky pinwheel of purple teeth.

DSC_0128

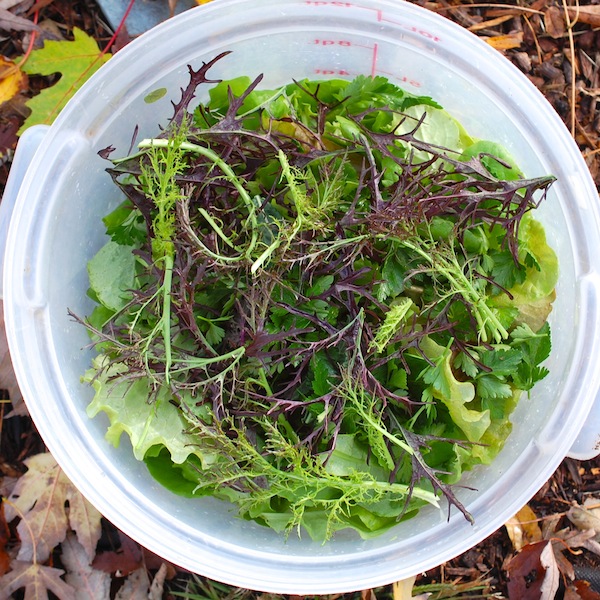
So once a week or so I can make a small batch of salad mix.

DSC_0161

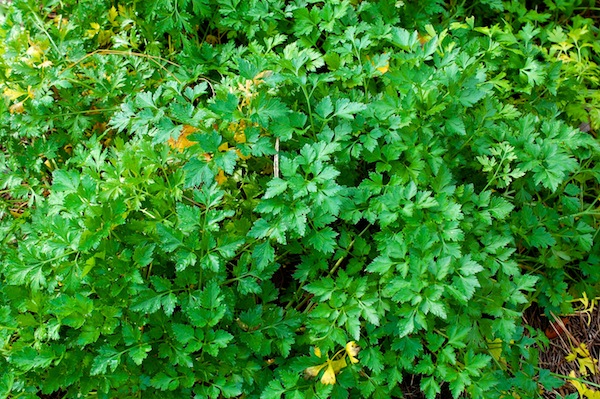
The parsley patch is epic.

DSC_0139

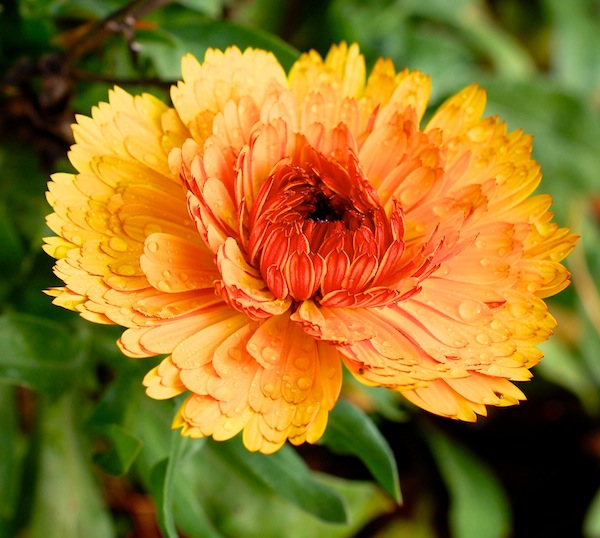
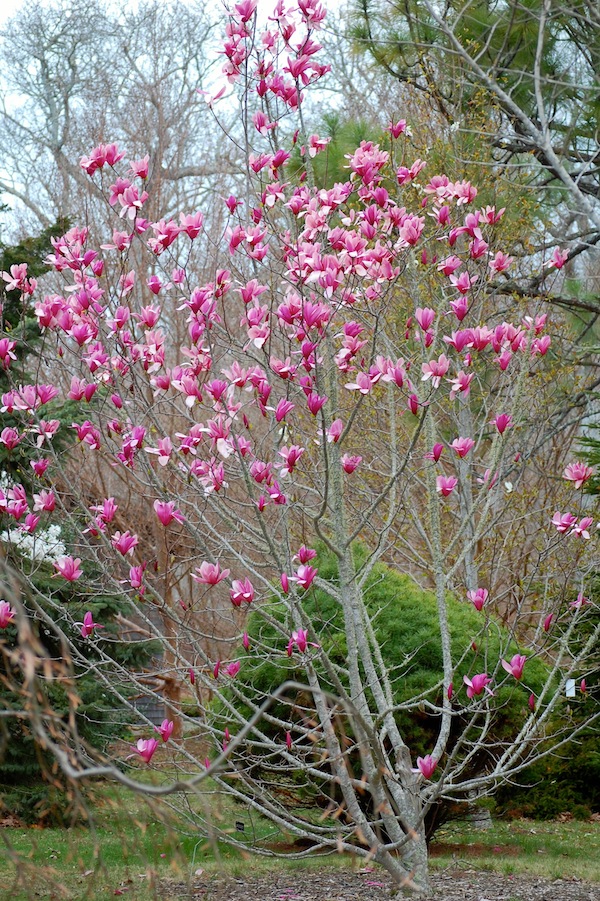
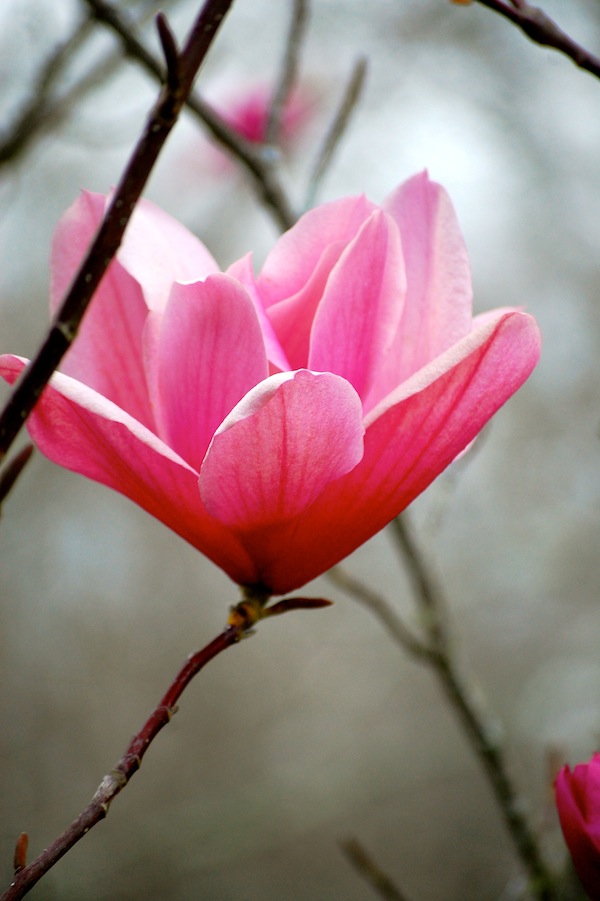
And, I have a bunch of flowers in my little secret side flower garden that seem to have no idea that winter is approaching.

DSC_0136

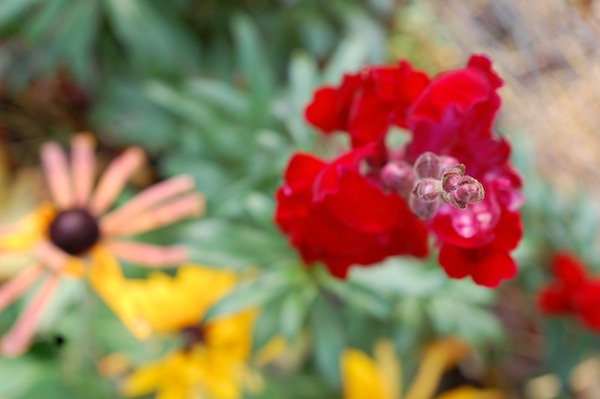
The calendula and snapdragons couldn’t be happier. I have to remember that—it really is cheering to have fresh flowers in November.

DSC_0147

Cheering is good, as I find November a bit foreboding and contemplation-inducing. Unlike my favorite month, October, when the buzz of summer is gone but the sky still swims with sun, November, with its spackle-grey horizon, its sticky wet leaves, its frisky wind gusts, is decidedly Act I of winter. I know how the rest of the play goes, and last year sitting in the seats until the curtain went up was torturous.

photo-540

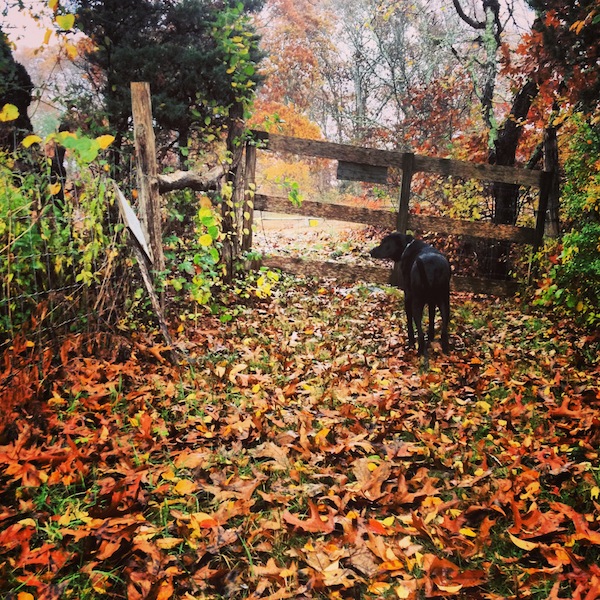
But I am trying not to project, as the best thing about November, as opposed to real winter, is the walking. I can still get outside, it’s relatively warm, and actually, all those sticky leaves on the ground are a gorgeous kaleidoscope of texture and patterns. My favorite procrastination activity is walking with Farmer along the Land Bank path behind the farm, down across Mill Creek and over to Old Courthouse Road.

Technically, the path is closed for hunting season, so there is a point when we get to a locked gate and we both stop and stare at each other. Should we turn around? Go around? Jump over? And if we do, should we take the right hand fork, or the left?

Every time we are there, I can’t help thinking of Robert Frost’s classic poem, The Road Not Taken (which can be interpreted several different ways). So I leave it with you today, in case you’re walking the November road, or just contemplating winter.

The Road Not Taken, by Robert Frost

Two roads diverged in a yellow wood,

And sorry I could not travel both

And be one traveler, long I stood

And looked down one as far as I could

To where it bent in the undergrowth;


Then took the other, as just as fair,

And having perhaps the better claim,

Because it was grassy and wanted wear;

Though as for that the passing there

Had worn them really about the same,


And both that morning equally lay

In leaves no step had trodden black.

Oh, I kept the first for another day!

Yet knowing how way leads on to way,

I doubted if I should ever come back.


I shall be telling this with a sigh

Somewhere ages and ages hence:

Two roads diverged in a wood, and I–

I took the one less traveled by,

And that has made all the difference.


Heirloom Seeds, A New Kale Cookbook, and A Passion for Veggies That Won’t Let Up

KaleGloriousKale_CVR_P6.jpg coverSafe to say I am pretty geeky about all things vegetable-y. I especially love to learn about new and different vegetable varieties. So when I got my hands on my friend Cathy Walther’s new kale cookbook, Kale Glorious Kale, I was in heaven. Right there on page four was this beautiful photo of nine different kinds of kale. We only grow three different kinds, but I would love to grow more. Down the road, farmer Rusty Gordon grows 13 different kinds at Ghost Island Farm. For the book, Cathy interviewed Rusty about growing kale, so I learned that Rusty’s favorite variety is Beira, a specialty kale originally from Portugal that resembles collard greens.

kale types screen shot

Cathy also touched base with legendary plant breeder Frank Morton, of Wild Garden Seed Co. in Philomath, Oregon. I know his name from the research I’ve done on lettuce varieties, but I didn’t realize that he had developed the lovely and tender White Russian kale, a cross between Red Russian and Siberian, and the sexy Red Ursa. He mentions that Red Ursa has particularly sweet stems, and that sugar tends to concentrate in stems. Throughout Kale, Glorious, Kale, Cathy goes on to feed my curiosity with flavor-pairing charts, technique tips, growing tips, and fun kale anecdotes, many appearing as “The Kale Chronicles” throughout the recipe chapters.

Cushaw in Freeman GardenFreeman Root Cellar-2As it happens, the same week I got Cathy’s book, I was invited to speak at Old Sturbridge Village, a very cool living history museum in central Massachusetts that replicates an 1830’s New England village. The museum is very active in preserving heritage breeds of animals and in growing and saving the seeds of heirloom vegetables. Much to my delight, the folks who invited me to speak that night brought along a selection of heirloom vegetables from the working farm in the village to display around the room. I could barely keep my eyes off this bounty, and later on, I asked OSV’s Debra Friedman to give me a little background on some of the vegetables. I think Deb knew I was pretty excited, because wouldn’t you know it, guess what showed up in my mailbox this week? Seeds! Boston Marrow Squash, Green Nutmeg Melon, Canada Crookneck Winter Squash, Jacob’s Cattle Bush Bean, Red Wethersfield Onion—oh, my! Roy is going to groan when I tell him we need more room for heirloom vegetables. I am pretty thrilled, though. Thanks Deb.

photo-178I think Roy is onboard with planting more kale, though. Which is a good thing, as I am excited about all the delicious ways to cook it that Cathy offers in her new book. I’ve already made Kale Granola (recipe below), and it rocks. I’m sort of a granola freak anyway, and since I’ve been late to embrace the crispy kale trend, this gave me a chance to do both at once. But with Kale and Feta Pizza; Kale Caesar Salad; Tortilla, Shrimp & Kale Soup; Cider-Braised Kale and Chicken; Kale Latkes; and Cathy’s already famous Kale, Pumpkin Seed and Bacon Brittle (yes!), there is a lot to look forward to.  (She even has a gorgeous section on kale cocktails.) That is, if I can stop reading the “Kale Chronicles” or gazing at Alison Shaw’s stunning photos.

There doesn’t seem to be a limit to the kick I get out of vegetables. Reading about them, growing them, cooking them, photographing them. In fact, I don’t see this passion losing steam any time soon. So stand by–now that I’m back indoors with time to cook, I’m tinkering again!

photo-177Cathy Walther’s Kale Granola from Kale, Glorious Kale (Countryman Press, Sept. 2014)

Cathy says in her headnote, “The combination of kale, oats and nuts is crunchy and satisfying. Everyone likes to munch on this as a snack—it doesn’t even seem to last until breakfast to top yogurt, mix with fruit or serve with milk. It’s easy to vary the nuts and the dried fruit with your favorites.


5 cups curly kale (stripped from stalk, chopped or torn into large bite-sized pieces, rinsed and dried well)

6 tablespoons virgin coconut oil, divided (see Cook’s Note)

¾ teaspoon kosher salt

¼ cup light brown sugar

6 tablespoons pure maple syrup

3 cups rolled oats

1 cup broken pecans, broken walnuts, or sliced almonds

½ cup sunflower seeds

¼ cup sesame seeds

1 cup dried cranberries, roughly chopped

¼ cup dried apricots, chopped into ¼-inch pieces

¼ cup raisins, roughly chopped


1. Preheat the oven to 300° F.

2. Make sure the kale is well dried. Place the kale in a bowl with 1 tablespoon of the coconut oil and ¼ teaspoon of the salt. Knead or massage with your hands until the coconut oil is rubbed on all the leaves. Set aside.

3. In a small bowl, whisk together the remaining 5 tablespoons of coconut oil, and the brown sugar, maple syrup and remaining ½ teaspoon of salt. In another larger bowl, combine the nuts, oats, and seeds.

4. Take 2 tablespoons of the wet ingredients and combine with the kale. Rub it over the leaves. Pour the rest over the oat mixture and mix very well until incorporated and the oats are completed covered.

5. Line two 12×17-inch baking sheets with parchment paper or a silicone mat. Place the oats on one sheet, spreading them out evenly, and the kale on the other sheet. (The kale seems to crisp up better separately, but you can mix the kale and oats together and it will work.) Bake all for 25 to 30 minutes, mixing two or three times to prevent the outer edges from burning, and also rotating the pans. I sometimes switch the oven setting to “convection bake” if the mixture doesn’t seem to be crisping up. Remove the kale when it is crispy, but not browned. Remove the oats when they are crispy or nearly crispy and before the nuts are burned. Both will get crispier once they sit on the counter to cool.

6. When cooled, combine the kale with the oats. Add the dried fruit. Pack into mason jars for storage.

Cook’s Note (on Coconut Oil) from Cathy: “I’ve switched to coconut oil instead of canola oil for making granola (though substitute canola or another vegetable oil if that is what you have). I love the subtle flavor coconut adds, and nutritionists are recommending its healthier properties. In warmer weather, coconut oil looks like an oil; in cooler weather it tends to solidify. For this recipe, if it has solidified, I usually put the jar in a saucepan of hot water until it becomes liquid again. Also, if you mix it with cold maple syrup it tends to solidify again, which makes it hard to coat the oats and kale, so I usually just have the maple syrup at room temperature or heat it up very slightly before mixing the liquid ingredients.”


Baby Kale, Avocado & Radish Salad—Susie’s Pink & Green #9

DSC_4756
photo-40Lately I have been obsessing about this Red Russian kale we are growing in the hoop house. I feel kind of silly, as it isn’t exactly a new thing—other farmers on the Island have been growing this variety and harvesting it young for a few years now. But I finally got around to planting a thick carpet of it (in order to harvest it as baby greens), and my, oh, my, is it tickling my fancy. It’s beautiful, yes. But tender, too. And almost sweet. (Even Roy likes it!) Which means now I have no business being cranky about kale salads. (I have come around on this, and even have a kale salad in Fresh from the Farm, but I am still not big on thick chewy mature kale leaves in salads—massaged, or not.)

I do think the hoop house kale is particularly tender, because it grows fast in those lovely conditions and doesn’t have to toughen up to the elements outside. But Red Russian kale is so delicious young, that I’d say, hoop house or not, rush out and buy yourself a packet of seeds and dump some in a pot of soil right now. In 28 days you’ll have a tender kale salad.

(If you live in Texas, maybe wait until fall’s cooler weather at this point.)

DSC_4602

DSC_4738Also, as most of you know, I am obsessed with the color pink. And this year we’re growing French Breakfast and Cherry Belle radishes in the hoop house, and they are nearly big enough to pull. Nearly big enough, yes. But since I am the boss, I get to pull them up whenever I want to.

In fact, since I realized I was heading towards yet another variation on a “pink and green” salad for my lunch today, I thought, “I’m going to put whatever I want in this salad!” So in went avocado, a few toasted pecans, a little blue cheese, and a drizzle of Perky’s Vinaigrette. Honestly, for your own variation, you could put just about anything you like in with that baby kale and it would be lovely.

DSC_4789If I sound like I am being obstinate, it’s because I have to go traveling again this week and am wishing I could just stay home and keep working outside until dark like Roy and I have been doing every night this week. (I’m not kidding, it really is satisfying.) But off I go so I’m having one last pink and green salad for the week.


DSC_4669And speaking of pink, we snuck off to get a quick peek at some trees in bloom at Polly Hill Arboretum Sunday afternoon (a stone’s throw from us).

I’d never seen this unusual magnolia, but fell in love with the pink blooms.

Of course.


DSC_4673


Super-Quick “Confetti” Greens + (Surprise!) Broccoli Leaves

DSC_4266Even if I do not, the hoop house loves this weather. Or I should say the hoop house greens do. They like the cold nights and the many daylight hours of fuzzy sunlight. “Fuzzy” means grey and overcast to me, so I am not so happy about it, especially because it is freakin’ windy here, and the daytime temps haven’t exactly been soaring, so working outside isn’t really pleasant.

DSC_4132

But the greens inside the hoop house don’t have to deal with the wind, and they prefer these overcast days to the super sunny ones when the house gets pot-boiling hot.

DSC_4177It did get hot a few days while I was away; I could tell because some of the greens bolted and flowered. I lopped off most of the flowers (including a few spent mini-broccoli heads) so that the greens could get their energy back and keep growing. In the process, I discovered that the flowers are delicious (especially the kale flowers), which I kept nibbling.

I’m not really sure, since I’ve never overwintered this many different kinds of greens in a hoop house, but I think the kale and collards may be flowering because the plants are aging and/or because of the day length, in addition to the heat.

But mostly, it has been cool and perfect for the greens, so the leaves are unbelievably tasty—nutty and sweet, not at all bitter. The broccoli leaves are my favorite—I can’t imagine why they aren’t sold in grocery stores or at farmers’ markets (maybe they are somewhere!). Harvested young and tender, they need absolutely no prep before tossing in the stir-fry pan.

DSC_4126

None of this I would have known if I hadn’t finally taken advantage of the hoop house to plant broccoli and collards, which I normally avoid due to the cabbage pests out in the garden.

But here’s the good news—you don’t have to have a garden or a hoop house to do what I’ve been doing with the greens lately: Cooking the quickest side dish in the history of Vegetables-Meet-Fire. The secret is simply rolling your leaves up and slicing them across very thinly with a sharp knife. The slicing takes care of any tough fibers and the resulting “ribbons” cook in a heartbeat. I’ve often done this with mature collards in the past, but you can do it with any leafy veg.

DSC_4222

To get started, you can follow the basic recipe that I wrote for Fast, Fresh & Green (and updated slightly), below. I often just go with garlic and red pepper flakes, so the vinegar/honey/parm combo is optional here. But you could try finishing with sesame oil, soy sauce and sesame seeds or with lemon and minced capers or olives—whatever you like.

The greens also make a nice bed for fish (or lamb—it is Easter I realize!), a good addition to pasta dishes or frittatas, a nice pizza or tart topping, and an interesting fold-in to mashed potatoes or slow-sauteed root veggies like carrots and turnips.

Speaking of Easter, if you need asparagus side dish ideas, click here for a my favorite braised asparagus recipe, here for a nice saute, and here for roasting and grilling directions. Oh, and here for a nice asparagus bread pudding brunch recipe and here for asparagus bisque!

DSC_4277Super-Quick Sautéed Greens,“Confetti”- Style

I love using my large nonstick stir-fry pan for this and for so many things, but a large nonstick skillet works fine. Just crank up the heat so that the greens cook very quickly.

__________________________________________________________

½ teaspoon sherry vinegar (optional)

½ teaspoon honey (optional)

½ large bunch collard greens, broccoli leaves or kale

1 to 2 tablespoons vegetable, peanut, grapeseed, or olive oil

1 teaspoon minced garlic

Big pinch crushed red pepper

½ teaspoon kosher salt, more to taste

Shaved or coarsely grated Parmigiano-Regianno (optional)

____________________________________________________________

Combine the sherry vinegar and honey in a small bowl (if using).

Remove the leaves from their stems by holding the stem with one hand and pulling the leaves away from it with the other. Rip the leaves completely in half lengthwise. You should yield about 4 ounces greens. Rinse the leaves and dry them well. Stack them up on top of each other, roll them up tightly cigar-style, and, using a very sharp knife, slice them across into very thin ribbons (about 1/8-inch wide).

In a large (12-inch) nonstick skillet or nonstick stir-fry pan, heat the oil over medium-high heat. Add the garlic and red pepper flakes and cook until the garlic is softened and fragrant, 15 to 30 seconds. Add the sliced greens and the salt, and juke the heat up a bit so that the pan stays pretty hot. Cook, stirring to incorporate everything in the pan, until the greens turn bright green (at first) and then a darker green and are somewhat wilted, about 1 minute (do not cook much longer or they will begin to toughen). Remove the pan from the heat and taste. Stir in the vinegar/honey mixture if using, and serve right away, garnished with the Parmigiano if you like.

Serves 2


It’s Pub Day! Celebrating Fresh from the Farm with a Winter Green Market Meatloaf Recipe

FFF square black sm collage b


This is it—Fresh from the Farm: A Year of Recipes and Stories is now officially published, as of this morning. Yippee!

I have no idea what this actually means. But I just learned that pub dates are apparently always on Tuesdays. Who knew?

My secret source revealed that the “pub” date is a date set in order to back up and create a “release” date, when the books begin to ship from the distribution warehouse. The scheduling masters try to work everything out (considering distance-to-travel, etc.) so that most of the books are in most of the outlets they’re supposed to be in by the “pub” date.

I like the idea of hundreds of boxes of Fresh from the Farms hopping on trucks and traveling far and wide to get to their destinations.

DSC_2568So to celebrate their safe arrival, I’m offering up what really and truly is one of my favorite recipes in the book—Winter Green Market Meatloaf. I named it that because I first made it with the goodies I got at our Winter Farmers’ Market—including onions, carrots, kale (yes, kale), local feta cheese, and local ground pork and beef. The meatloaf is terrifically moist and tasty, and the sauce on the outside has a great zing to it.

I also chose this recipe, because of course, it’s February, and meatloaf makes a little more sense than say, a corn sauté, or a strawberry crisp. But the cool thing about Fresh from the Farm, which is arranged seasonally in three sections, is that it spans almost the entire year, and the recipes in the fall section (like the meatloaf) are plenty appropriate for mid-winter, too.

I made the meatloaf yesterday so that I could take pictures of it (it’s not photographed in the book), and wound up sending half of it off with a couple of newspaper reporters who were here visiting the farm and talking with me about the book. (We have our big author event at Bunch of Grapes bookstore this Saturday at 3 pm, which I’m really excited about. Libby will be here and able to come with us, and I’ll be cooking up a storm this week to bring along plenty of recipe samples.)

For me, pub day is exciting, but considering the travel and the radio spots and all the other efforts coming up to promote the book, there’s no easing back. I am just looking ahead with an eye towards keeping my energy level up—while Roy and I also seriously begin to prepare for the growing season. Yikes. And while at first I thought it was a little strange to bring a book like this out in February, now I am really thankful that it gives me the window of opportunity to promote it this spring by doing some traveling before the farm gets really busy. Next stop: Washington, D.C., my hometown: A great event at La Cuisine on March 1, and the Dupont Circle Farmers’ Market on March 2. Maybe I’ll see some of you there!

Enjoy the meatloaf, and by the way, if you really want to make somebody happy on Valentine’s Day, this is a decidedly comforting way to do it. You could serve these mashed potatoes with it, or even the crispy smashed potatoes.

DSC_2576

Winter Green Market Meatloaf Recipe
 
Yes, there’s actually kale in this incredibly moist and flavorful meatloaf. (Feta cheese, too!) Tossing the veggies and plenty of garlic into the food processor makes a finely minced mixture perfect for lightening up meatloaf. I always eat at least a nibble of this warm out of the oven, but resting for a few minutes is a good idea; it will be easier to slice. It’s also delicious leftover, reheated or even cold, pâté style. Recipe copyright Susie Middleton, 2014, from Fresh from the Farm: A Year of Recipes and Stories (The Taunton Press, 2014.)
Author:
: main dish
Serves: 4 to 6
Ingredients
  • ¾ cup fresh breadcrumbs (about 1 English muffin)
  • 3 tablespoons milk
  • ½ cup ketchup
  • 2 tablespoons Worcestershire sauce
  • 2 tablespoons brown sugar
  • 1 tablespoon reduced sodium soy sauce
  • 1 tablespoon Dijon mustard
  • 1 large carrot (about 3 ounces), coarsely chopped
  • 1 small onion (about 4 ounces), coarsely chopped
  • 4 large cloves garlic, peeled
  • 1 small serrano pepper, cut into 3 or 4 pieces
  • 2 cups (packed) coarsely chopped kale (about 2 ounces)
  • 2 tablespoons unsalted butter
  • Kosher salt
  • 1 pound 80 to 85% ground beef
  • ½ pound ground pork
  • 3 ounces crumbled good-quality feta cheese
  • 1 large egg
  • Freshly ground black pepper
  • 2 tablespoons (lightly packed) chopped fresh oregano
Directions
  1. Heat the oven to 350°F. Line a large rimmed heavy-duty baking sheet with parchment paper.
  2. Put the breadcrumbs and milk in a small bowl and mix. Let sit. In a small bowl, whisk together the ketchup, Worcestershire, brown sugar, soy sauce, and Dijon.
  3. In the bowl of a food processor, combine the carrots, onions, garlic, serranos, and kale. Pulse until very finely chopped, scraping down the sides as necessary to incorporate the kale.
  4. In a medium (10-inch) nonstick skillet, melt the butter over medium-low heat. Add the chopped veggies and ½ teaspoon salt. (The pan will be crowded.) Cook, stirring, until gently softened and very fragrant, about 5 minutes. Transfer to a plate and let cool (about 10 minutes).
  5. In a large mixing bowl, combine the veggies, beef, pork, feta, egg, several grinds of pepper, the oregano, ½ teaspoon salt, the breadcrumb mixture, and 3 tablespoons of the ketchup mixture (reserve the rest for brushing on the loaf). Using your hands, mix all of the ingredients together thoroughly without mashing too much. Transfer the mixture to the baking sheet and shape into a long, narrow loaf about 9 inches long and 4 inches wide. Spoon the rest of the ketchup mixture down the length of the top of the loaf and gently spread or brush it over the sides.
  6. Bake the meatloaf until an instant-read thermometer registers 160° to 165°F, 55 to 60 minutes. Let rest for 5 minutes before slicing and serving.


Please note: The terrific finished food photos in the collage at top were taken by Alexandra Grablewski for Fresh from the Farm: A Year of Recipes and Stories (The Taunton Press, 2014).


Winter Garden Salad: A Template Recipe for Greens + Roots

If we didn’t have 150 pounds of pork in the freezer, I could eat a warm salad of winter greens and roasted veggies every night. (Roy, not so much.) This is one of those recipe/techniques that I unapologetically come back to again and again—Warm Winter Salad of Roasted Root Fries (The Fresh and Green Table), Warm Bistro Salad with Tiny Roasted Root Vegetables and Bacon Dressing (Fast, Fresh & Green), and Quick-Roasted Butternut Squash and Pear Salad with Ginger Lime Vinaigrette (coming in Fresh from the Farm), to name a few. (Hmmm, it appears I’m not averse to sneaking pork into these things, so you could certainly have your salad, and your bacon, too.)

The appeal of a warm salad with crispy, yummy roasted veggies served atop deep, dark greens with a bracing vinaigrette is the interplay between fresh and comforting. I also like the textural contrast, and to be honest, the visual appeal. These days, I don’t compose the salads so much as scatter-and-platter them. It’s a looser, more rustic look, and served family-style, more casual. But you can always arrange the salads on individual serving plates if you like.

It occurred to me this week that I should back up, look at the architecture of these salads, and come up with a template you could use, depending on whatever greens and winter veggies you’ve got hanging around.

Plus, I needed an excuse to show off my greens that are still alive in the market garden. (Ahem, again, unapologetic…) So this morning after my chicken chores (no frozen water—yay!), I took a bowl and scissors and collected a nice combo of mizuna, Ruby Streaks mustard, Russian kale, arugula, tat soi, parsley, a few baby bok choy leaves, and even a few carrot tops. It’s amazing what lives through freezing temperatures and unfortunate ice formations; the arugula is particularly hearty, and one of my lettuces, Winter Marvel, acts like it doesn’t even know its December. (Alas, soon enough, nothing will be growing, even if it stays alive, since we’re now down below the critical mark of 10 hours of daylight. I’ve got lots of lettuce and greens down in the hoop house which I am just hoping to keep alive and harvest sparingly until early February, when 10+hours returns and they’ll start growing again.)

Realistically, most of us will be harvesting greens for our winter salads from the grocery store, so here’s your chance to buy baby kale, escarole and frisee, sturdy spinach, and anything that’s got some backbone or body. Make your own custom mix, and try to steer away from bagged mixes of salad greens, which tend to be less fresh than heads or bunches and also contain filler lettuces which don’t hold up to warm vinaigrettes too well.

For your veggie mix, choose from sweet potatoes, potatoes, carrots, parsnips, turnips, rutabagas, beets, or butternut squash. Dice them quite small so that they’ll roast quickly; most won’t need peeling—but for the butternut. (For a pretty all squash-salad, you could use thinly sliced acorn and/or Delicata rings, which don’t need peeling and will also cook quickly.) Add diced pears or apples to the veggie mix if you want, and customize your salad with whatever toasted nuts and good quality cheeses you like. Use your favorite vinegar in the warm vinaigrette, and don’t be shy with a squeeze of lemon or lime to juice it up.

Here’s my template—I hope it will make a nice starting point for you. If you come up with a really delicious combo, I’d love to hear about it!

Warm Salad of Roasted Root Veggies and Winter Greens

Be sure to cut your veggies into evenly small pieces so they’ll all cook at the same rate. Don’t be tempted to crowd them on one pan, either—a little room around them will brown them up better. (Unless, of course, you want to cut this recipe in half, which is perfectly doable.) If you decide to include beets in your veggie mix, toss them with a little oil and salt separately from the rest or they’ll tend to color everything else.

___________________________

For the salad:

1½ to 1¾ pounds combination sweet potatoes (unpeeled), potatoes (unpeeled), carrots (peeled), parsnips (peeled), turnips (unpeeled), beets (unpeeled), butternut squash (peeled), firm-ripe pears (peeled), or Golden Delicious apples (unpeeled), cut into small dice (about 3/8-inch in diameter) (about 5 to 6 cups)

4 tablespoons extra-virgin olive oil

Kosher salt

6 to 7 cups combination sturdy mixed winter greens (such as baby kale, escarole, frisee, arugula, mustard, or tat soi)

¼ cup chopped toasted pecans, walnuts, almonds or hazelnuts

½ to 2/3 cup crumbled good quality blue cheese, feta cheese, goat cheese or 1/3 cup coarsely grated aged gouda or Parmigianno

3 tablespoons coarsely chopped dried cherries, cranberries, raisins, figs, pitted dates, or other dried fruit (optional)

For the vinaigrette:

1/3 cup extra-virgin olive oil

1 large shallot, sliced thinly

2 tablespoons sherry vinegar, balsamic vinegar, white balsamic vinegar, or cider vinegar

1 tablespoon maple syrup

1 teaspoon Dijon mustard

1 teaspoon fresh lemon or lime juice (more to taste)

½ teaspoons lemon or lime zest

1 teaspoon coarsely chopped fresh thyme leaves (or other herb of choice)

Kosher salt and freshly ground pepper

___________________________________

Preheat the oven to 450°F. Line two large rimmed heavy-duty baking sheets with parchment paper. In a large, wide mixing bowl, combine the veggies, the 4 tablespoons olive oil, and a scant teaspoon kosher salt. Toss well and spread in one layer on the two baking sheets. Roast, rotating the sheet pans once (and flipping the veg with a spatula if you like), until the veggies are nicely browned and tender, about 28 to 30 minutes. Let cool for a couple minutes on the sheet pans and then combine in a mixing bowl.

While the vegetables are roasting, put the greens in a wide heat-proof mixing bowl. Set out a serving platter or four serving plates.

Make the warm vinaigrette: Heat the 1/3 cup olive oil in a small nonstick skillet over medium heat. Add the sliced shallots and a pinch of salt and cook, stirring occasionally, until the shallots are browned and crisp, about 6 to 8 minutes. Take the skillet off the heat and remove the shallot rings with a fork, transferring them to a paper-towel lined plate. Let the oil cool for 3 to 5 minutes. Add the vinegar, the maple syrup, the Dijon, the juice, the zest, the herbs, ¼ teaspoon salt, and several grinds of fresh pepper. Whisk vigorously until the dressing is mostly emulsified. (Alternatively, first transfer the shallot-infused oil to a heat-proof Pyrex liquid measure, add the other ingredients and whisk well. This is a slightly less awkward way of making the dressing). Taste and adjust seasoning, adding more lemon or lime juice, salt or pepper as needed.

Season the greens with a sprinkling of kosher salt and drizzle over them a few tablespoons of the warm vinaigrette. (Be sparing at this point). Toss well, taste, and add a little more dressing if necessary. Arrange most of the greens on your platter or serving plates. Sprinkle with half of the nuts, cheese, and fruit.

Season the roasted veggies with a pinch more salt, and dress them lightly with 1 to 2 tablespoons of the vinaigrette. Toss well and scatter over the greens. Garnish with remaining nuts, cheese, fruit, greens, and reserved shallots. Serve right away, passing the remaining dressing if desired.

Serves 4

P.S. Farmer enjoyed harvesting greens this morning, too!


New at the Grocery Store: Baby Kale + 10 Ways to Use It

We are just going to ignore the fact that 7 inches of snow fell here last night and pretend that it truly is spring.

So let’s talk about spring greens, specifically baby kale. I am very excited that baby kale is finally making it into mainstream supermarkets. I’ve seen more of it just in the last couple months, since I first mentioned it in a blog post back in February. Now I’ve seen boxes (right) or bags of it in three different grocery store chains. (One to look for is Earthbound Farm’s Mixed Baby Kales.)

Mostly I am excited because baby kale is a much more versatile veggie than mature kale. (See ideas below.) It is also tastier, more tender, and a whole lot more palatable. Roy and Farmer both eat the stuff without blinking.

I’ve never been a big fan of the tough leaves of huge, curly-type kales, and in fact, when I wrote Fast, Fresh & Green four years ago, I insisted that everyone par-boil kale before using it in most other dishes, or confine it to soups and braises. I still think it’s a good idea to soften kale first before adding it to pastas or gratins, but now I don’t necessarily freak out when I see chefs and cooks “sautéing” raw kale. With a young or tender variety, a simple sauté is just fine. (But try “sautéing” the older, tougher leaves and you will still have something pretty chewy on your plate.) I’m even embracing kale salads!

I’m also kind of excited about this baby kale trend, because I’m quite sure it came straight from the farmers’ markets. Market growers have been selling baby kale for a while, first in baby salad green mixes and then on its own. I have to laugh, as I stumbled into selling mostly baby and small leaves of kale at our farm stand (see mix at top), because I have trouble controlling damage from cabbage worms, which for some odd reason like the older, bigger leaves better than the little tender ones. Also, I can harvest the first baby kale leaves very early in the spring time, so it gives me something to sell while I’m waiting for other things. In fact, I’ve got the first little leaves of Red Russian Kale forming in the hoop house now (left).

It’s also fun to see that the baby kale mixes in the grocery store are featuring a few different varieties of kale so folks can begin to notice the differences. The mix I bought yesterday has some baby Lacinato in it. This is the variety of kale (also called Tuscan Kale or Dinosaur Kale–shown growing at right) that really won my affection, and now I grow both a green and a purple variety of it.

Best of all, baby kale, whether you get it at the grocery store or the farm stand, is pretty much an instant side dish—even easier to prepare than spinach, since it is cleaner. (Small stems can be removed or not). Because kale grows upright, several inches off the ground, it doesn’t harbor dirt the way spinach does.

Okay, so here are some ideas for using baby kale. Why, you could practically eat the stuff every day. So now you have no excuses for avoiding this nutritional powerhouse:

1. Cook a simple sauté: Mince a clove of garlic and a half inch of fresh ginger, heat in olive oil with a few red pepper flakes until sizzling. Add kale leaves and a sprinkle of salt and toss until wilted.

2. Trick up the sauté: Do the above and add a combination of a couple teaspoons of balsamic vinegar, orange juice, and maple syrup in at the end. Stir and let thicken for a minute. Remove and eat right away. (Or sub soy sauce for the balsamic.)

3. Make a kale salad: Make a quick vinaigrette of fresh lemon juice, olive oil, a wee bit of anchovy (and/or a touch of honey) if you like, salt and fresh pepper. Toss the leaves well, rubbing the dressing in a bit with your hands. Let sit, then toss with crumbled fresh goat cheese or feta and toasted pine nuts or toasted almonds.

4. Make a frittata/savory bread pudding (like we did last night) with cubes of toasted English muffin, cheddar cheese, sausage, thyme, Dijon, and wilted baby kale. (Cook the sausage first and wilt the kale leaves with it.)

5. Make a topper: Put the salad (see No. 3 above) on top of grilled bread, pizza, toasted pita, naan or other flatbread.

6. Make a filler: Take the simple sauté (No. 1) and combine it with caramelized onions and a good aged cheese to make a yummy quesadilla filling or taco stuffing.

7. Make a quick soup: Infuse store-bought chicken broth with flavor by sautéing sausage, garlic, and shallots until brown. Simmer, add store-bought tortellini; add lots of kale leaves–and a dash of lemon or vinegar–at the end. Serve in shallow bowls, garnished with grated Parmigiano.

8. Pair with seafood: We eat a lot of our local bay scallops while they’re in season (now–soon to be over). I often do a quick scallop sauté (very high heat to cook them quickly, and again I use ginger and garlic, and usually a bit of lemon zest and/or orange juice) and fold kale leaves in at the end for a main-and-veggie-in-one supper, served over mashed potatoes or rice. You could do the same thing with shrimp. Or wilt the kale separately and use it as a bed for roast cod or salmon or halibut.

9. Try chips & drinks: Yes, you can make kale chips and green smoothies out of this stuff, too, but you’ll have to talk to someone else about that!

10. Don’t forget slaw: Add baby kale to coleslaw (right) or any other marinated veggie dish.


P.S. If you’re inspired and want to grow kale in your garden this year, here are three nice varieties: Red Russian, Lacinato, and Rainbow Lacinato. The latter—a cross between Lacinato and Redbor kale—is my favorite—a beautiful crinkly purple leaf with a tender texture. (You can get a hint of it in the couple of baby leaves shown in the top photo–the color is stunning.) Don’t spend money on kale starts (six-packs); it’s not necessary since kale germinates well and grows quickly. Sow seeds directly as soon as the soil warms up to about 50°. You can sow the seeds thickly if you are going to harvest baby greens, but later you’ll want to thin the plants to about 8 to 10 inches apart. You can let those plants grow and harvest new and bigger leaves all summer (and fall—and even into winter).


Photo below—greens from my friend Jessica Bard’s garden.


White-Out Weary, Cruciferous Cravings, Limey Green Slaw

At this point I am willing to admit that living in a drafty, un-insulated old farmhouse loses a bit of its appeal in early February. While I have been busy telling my friends out in the rest of the world that winters on Martha’s Vineyard are relatively mild and that we don’t get much snow, it seems that the tables have turned. Most days now it’s more like Duluth, where Roy spent some time as a toddler—swaddled in a snowsuit, 24-7. Here, we are swaddled in a succession of all-weather boots, a smorgasbord of hats and eternally wet gloves, and two heavy, fleece-lined canvas farm jackets. With Roy wielding the axe to crack the ice on the chicken water every morning, we are pretty scary looking. And that’s just when we’re outside! Inside the cold (yes, cold) house, our triple-fleece, double-thermal lounging attire makes us look like rejects from a bad L.L. Bean catalogue photo shoot.

The snow is beautiful. And I longed for it in December. But now that I hear we are going to get a bazillion inches of it (not to mention scary wind) on Friday, I’m thinking, enough, already. This will require even more creative thinking on how to keep the chickens supplied with unfrozen water. And about how to keep our frequent farm stand customers supplied with eggs without making them shovel a path to the back door. Perhaps we could put the wild bunnies to work. Every morning after fresh snow, there’s a virtual Etch-a-Sketch of rabbit tracks all around the yard, from coop to garden to barn to woods to fields and back. Drives Farmer crazy.

Also, we have to brush the snow off of the hoop house, lest it get too heavy, and, well, you can imagine what might happen. And that hoop house is my winter savior, so I’m very protective of it. I am so darned excited about what we’ve already got going in there, that I can barely stand it. My little baby bok choy and lettuce transplants are just cruising along. On sunny days, when the temperature inside the hoop house can get up to between 70 and 80, I can practically see the little green plants doing jumping jacks. On grey, drizzly, snowy, ice days, it takes most of the daylight hours just for the plants to unshrivel from the night’s cold. They’re under two layers of plastic, but still, cold is cold.

I’m longing to snatch some of those greens but I’ve held off to let them mature.  Fortunately there is still something green growing in the garden, under no cover at all. That would be miracle plant (and wonder food) kale, of course. A ridiculous plant, this kale. But a convenient one. Convenient because I’ve been messing around with kale salads lately. (I’ll let you know when I really and truly warm up to raw kale salads—I’m not quite there yet, but I’m working on it.) And also because this wicked February cold seems to be giving me strange cruciferous cravings. I only to want to eat Brussels sprouts or cabbage or kale every night. And even for lunch.

In fact, today I knew exactly what I wanted to do with a beautiful head of Savoy cabbage I saw at the grocery: Make one of my crunchy, limey slaws—and add a few of those sweet baby kale leaves from the garden to it. I happened to have a ripe avocado on deck, too, so a new variation on my original recipe was born. Green, green, green. Really green. Strangely refreshing on a cold day. I think it’s the antioxidants. Or maybe just the hopeful color. Or maybe it just tastes good. Whatever it was, I think I’d better go eat some more of it (and hope that it has magical powers) now that I’ve heard the latest forecast: Blizzard. Not just snow, but lots of it and lots of wind. Just what we love to hear on a farm. Stay tuned, and make some limey savoy and avocado slaw!

Savoy Slaw with Lime, Cilantro, Avocado & Toasted Pecans

Some groceries are now carrying baby kale leaves—snatch them up if you see them. If not, you can pluck tiny leaves from bigger bunches (even right off the stems of bigger curly kale) or very finely chop bigger leaves to add to this salady slaw. Or leave the kale out all together—or add more. Your choice!

_________________________________________

8 ounces very thinly sliced cored Savoy cabbage or regular green cabbage

1 ounce (about 1 cup) baby kale leaves or finely chopped or sliced large kale leaves (deribbed)

3 tablespoons plus 1 teaspoon fresh lime juice

1 tablespoon maple syrup, more to taste

1 teaspoon fresh lime zest

Kosher salt

1 firm-ripe avocado (2 if you like)

3 to 4 tablespoons roughly chopped fresh cilantro

3 to 4 tablespoons plain nonfat Greek yogurt

3 to 4 tablespoons finely chopped toasted pecans

_____________________________________

In a mixing bowl, toss together the cabbage, the kale leaves, the 3 tablespoons lime juice, the 1 tablespoon maple syrup, the lime zest and 3/4 teaspoon kosher salt. Let sit, tossing well with tongs every 5 to 10 minutes, for about 30 minutes.

Peel and slice the avocado. Then cut the slices into smaller pieces. In a small bowl, toss the avocado gently with the remaining teaspoon of lime juice and a pinch of salt.

To the cabbage mixture, add 3 tablespoons of the cilantro, 3 tablespoons of the yogurt, and 3 tablespoons of the pecans. Toss well and taste. Add a teaspoon or two more of maple syrup to balance the tang a bit, if you like. Add up to a tablespoon more yogurt for a slightly creamier slaw, and add a pinch more salt, if needed. Mix well and transfer to a serving bowl. Garnish with more cilantro and pecans.


Tuscan Kale with Blood Oranges: A Better Wintry Mix

The weather is seductively warm and balmy here today. We’ve hung the wash out on the line, started clearing brush in the yard, and snipped forsythia branches to force indoors. I know it’s going to turn freezing again this weekend, but I’m hoping we don’t get any more of that awful “wintry mix.” I think this is something the weathermen have dreamed up especially for the New England coastal islands this winter. Every time a big storm’s on the way, we watch the news expectantly, hoping to hear that we’ll awake to a beautiful blanket of snow the next morning. Instead, we always get the same news: “Stockbridge, you can expect 4 bazillion inches of snow. However, you folks down there on the Cape and Islands can expect a wintry mix: Sleet, freezing rain, ice.” Ugh. Instead of bright white, we get dull pewter.

Since I require bright color to keep me happy, I make up for the weather with vegetables. One of my favorite color combos is deep green and bright orange. This week at the grocery I spotted big bunches of leafy Tuscan kale right across the aisle from a bin of blood oranges, and thought bingo! What a great combo—a truly colorful wintry mix.

I’m surprised I haven’t written much on the blog yet about Tuscan kale, because it’s one of my favorite leafy greens, and we grew a lot of it last year, too. Unlike many leafy greens, Tuscan kale doesn’t bolt (go to flower), so you can keep harvesting from one plant for many weeks. It’s even better in the kitchen, because it has a much silkier texture and a less mineral-y flavor than regular curly kale. It’s lovely in soups, pastas, and gratins, but makes a versatile side dish, too.

If you want to cook (or grow) Tuscan kale, there’s just one problem. You will have to memorize a roster of names this green goes by so that you don’t miss it. When I first encountered this kale a few years back, I understood it to be Cavolo Nero, or black kale. Now it seems to be marketed most often as Lacinato; though you will also see it labeled Dinosaur kale to appeal to kids. I just stick with Tuscan kale. The good news is, despite the name confusion, it’s relatively easy to identify this kale by its looks. The leaves are long, straight, and quite narrow—and they have a distinctive webby, bumpy pattern on them.

When you get your Tuscan kale home, rinse the leaves, wrap them in a damp dish towel, cover with a big zip-top bag, and they’ll keep very well in the fridge for several days. You’ll need to pull or cut the woody stem out and chop the leaves before cooking. I don’t like the texture of rubbery, undercooked kale (of any sort), so I always cook my kales (Tuscan included) in boiling salted water just until they lose their unpleasant chewiness. This takes between 4 and 6 minutes for Tuscan kale. Taste a leaf after a few minutes and keep tasting so that you’ll know when the texture has changed. Drain the kale well and press excess moisture out. Then toss it with sauces (in or out of the sauté pan) or use in a gratin or pasta. (No need to pre-cook it if using it in soup.)

For the recipe I’ve included here, the colorful blood oranges (easily replaced with regular oranges) inspired a sweet and tangy sauce that includes my two favorite flavors with dark greens—maple syrup and balsamic vinegar. (Greens need vinegar or some other acid to cut through the earthy tones.) A generous hit of garlic completes this dish, which would be tasty with roast chicken or pork, or even with creamy polenta for a light veggie dinner.

Tuscan Kale with Orange-Maple-Balsamic Sauce

This recipe calls for segmenting a blood orange or orange—and it also calls for a tablespoon of the citrus juice. So segment your fruit first (over a bowl to catch the juices) and you can use some of the juice in the sauce mix. The segments will also continue to give off juice as they sit; feel free to include those juices in your final dish, too.

___________________________________
1 tablespoon maple syrup
1 tablespoon balsamic vinegar
1 tablespoon fresh blood orange or orange juice
1 large bunch (about 10 to 11 ounces) Tuscan kale
kosher salt
1 tablespoon extra-virgin olive oil
1/2 tablespoon unsalted butter
1 1/2 to 2 teaspoons minced fresh garlic
big pinch crushed red pepper flakes
1 blood orange or small orange, peeled and segmented
2 tablespoons coarsely chopped toasted walnuts or pine nuts

_______________________________________

In a small bowl, whisk together the maple syrup, balsamic vinegar, and blood orange or orange juice. Set aside.

Fill a Dutch oven or other 4-quart pot two-thirds full of water. Add two teaspoons salt to the water and bring it to a boil.

Remove the ribs from the kale by grabbing the rib with one hand and ripping the two leafy sides away with the other hand. (Or use a paring knife to slice along the stem to cut it away from the leaves.) Discard the stems and chop the leaves into bite-size pieces.

Add the kale leaves to the boiling water and cook for 4 minutes. Taste a leaf—if it still feels tough or a bit rubbery, continue to cook the leaves for 1 to 2 minutes more.

Drain the kale very thoroughly in a strainer in the sink. Press down on the kale to remove some excess liquid. (You can use a folded over dishtowel if the kale is too hot to touch.) Let sit for a minute and then transfer to a mixing bowl. Put the blood orange or orange segments in a separate smaller bowl.

Meanwhile, in a small nonstick skillet, heat the olive oil and butter over medium low heat. When the butter has melted, add the garlic and the red pepper flakes. When the garlic begins to simmer, cook for just about 1 minute longer (do not let the garlic brown). Stir in the maple-balsamic-orange mixture and turn the heat up a bit to bring the mixture to a simmer. Simmer just briefly—about 30 seconds—and remove the skillet from the heat. Spoon about 2 teaspoons of the sauce mixture over the citrus segments. Pour and scrape the remaining sauce over the kale, season with a pinch of salt, and stir well.

Arrange the kale on a warm serving platter, garnish with the blood oranges, and drizzle over any juices or sauce left in both of the bowls. Sprinkle the toasted walnuts over all and serve right away.

Serves 3 as a side dish.