Tag Archives: CARROTS

It’s Pub Day! Celebrating Fresh from the Farm with a Winter Green Market Meatloaf Recipe

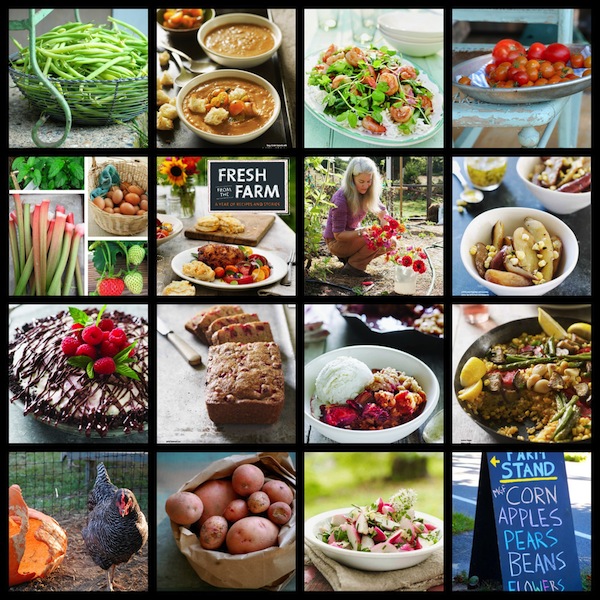
FFF square black sm collage b


This is it—Fresh from the Farm: A Year of Recipes and Stories is now officially published, as of this morning. Yippee!

I have no idea what this actually means. But I just learned that pub dates are apparently always on Tuesdays. Who knew?

My secret source revealed that the “pub” date is a date set in order to back up and create a “release” date, when the books begin to ship from the distribution warehouse. The scheduling masters try to work everything out (considering distance-to-travel, etc.) so that most of the books are in most of the outlets they’re supposed to be in by the “pub” date.

I like the idea of hundreds of boxes of Fresh from the Farms hopping on trucks and traveling far and wide to get to their destinations.
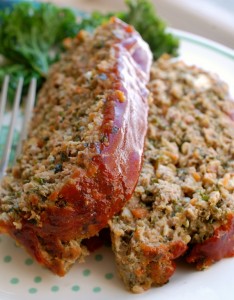
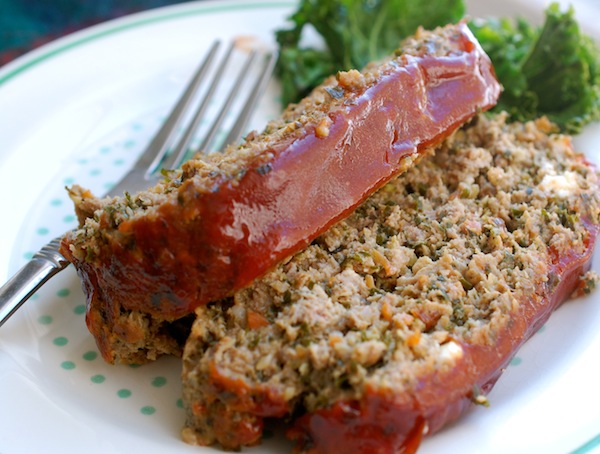
DSC_2568So to celebrate their safe arrival, I’m offering up what really and truly is one of my favorite recipes in the book—Winter Green Market Meatloaf. I named it that because I first made it with the goodies I got at our Winter Farmers’ Market—including onions, carrots, kale (yes, kale), local feta cheese, and local ground pork and beef. The meatloaf is terrifically moist and tasty, and the sauce on the outside has a great zing to it.

I also chose this recipe, because of course, it’s February, and meatloaf makes a little more sense than say, a corn sauté, or a strawberry crisp. But the cool thing about Fresh from the Farm, which is arranged seasonally in three sections, is that it spans almost the entire year, and the recipes in the fall section (like the meatloaf) are plenty appropriate for mid-winter, too.

I made the meatloaf yesterday so that I could take pictures of it (it’s not photographed in the book), and wound up sending half of it off with a couple of newspaper reporters who were here visiting the farm and talking with me about the book. (We have our big author event at Bunch of Grapes bookstore this Saturday at 3 pm, which I’m really excited about. Libby will be here and able to come with us, and I’ll be cooking up a storm this week to bring along plenty of recipe samples.)

For me, pub day is exciting, but considering the travel and the radio spots and all the other efforts coming up to promote the book, there’s no easing back. I am just looking ahead with an eye towards keeping my energy level up—while Roy and I also seriously begin to prepare for the growing season. Yikes. And while at first I thought it was a little strange to bring a book like this out in February, now I am really thankful that it gives me the window of opportunity to promote it this spring by doing some traveling before the farm gets really busy. Next stop: Washington, D.C., my hometown: A great event at La Cuisine on March 1, and the Dupont Circle Farmers’ Market on March 2. Maybe I’ll see some of you there!

Enjoy the meatloaf, and by the way, if you really want to make somebody happy on Valentine’s Day, this is a decidedly comforting way to do it. You could serve these mashed potatoes with it, or even the crispy smashed potatoes.

DSC_2576

Winter Green Market Meatloaf Recipe
 
Yes, there’s actually kale in this incredibly moist and flavorful meatloaf. (Feta cheese, too!) Tossing the veggies and plenty of garlic into the food processor makes a finely minced mixture perfect for lightening up meatloaf. I always eat at least a nibble of this warm out of the oven, but resting for a few minutes is a good idea; it will be easier to slice. It’s also delicious leftover, reheated or even cold, pâté style. Recipe copyright Susie Middleton, 2014, from Fresh from the Farm: A Year of Recipes and Stories (The Taunton Press, 2014.)
Author:
: main dish
Serves: 4 to 6
Ingredients
  • ¾ cup fresh breadcrumbs (about 1 English muffin)
  • 3 tablespoons milk
  • ½ cup ketchup
  • 2 tablespoons Worcestershire sauce
  • 2 tablespoons brown sugar
  • 1 tablespoon reduced sodium soy sauce
  • 1 tablespoon Dijon mustard
  • 1 large carrot (about 3 ounces), coarsely chopped
  • 1 small onion (about 4 ounces), coarsely chopped
  • 4 large cloves garlic, peeled
  • 1 small serrano pepper, cut into 3 or 4 pieces
  • 2 cups (packed) coarsely chopped kale (about 2 ounces)
  • 2 tablespoons unsalted butter
  • Kosher salt
  • 1 pound 80 to 85% ground beef
  • ½ pound ground pork
  • 3 ounces crumbled good-quality feta cheese
  • 1 large egg
  • Freshly ground black pepper
  • 2 tablespoons (lightly packed) chopped fresh oregano
Directions
  1. Heat the oven to 350°F. Line a large rimmed heavy-duty baking sheet with parchment paper.
  2. Put the breadcrumbs and milk in a small bowl and mix. Let sit. In a small bowl, whisk together the ketchup, Worcestershire, brown sugar, soy sauce, and Dijon.
  3. In the bowl of a food processor, combine the carrots, onions, garlic, serranos, and kale. Pulse until very finely chopped, scraping down the sides as necessary to incorporate the kale.
  4. In a medium (10-inch) nonstick skillet, melt the butter over medium-low heat. Add the chopped veggies and ½ teaspoon salt. (The pan will be crowded.) Cook, stirring, until gently softened and very fragrant, about 5 minutes. Transfer to a plate and let cool (about 10 minutes).
  5. In a large mixing bowl, combine the veggies, beef, pork, feta, egg, several grinds of pepper, the oregano, ½ teaspoon salt, the breadcrumb mixture, and 3 tablespoons of the ketchup mixture (reserve the rest for brushing on the loaf). Using your hands, mix all of the ingredients together thoroughly without mashing too much. Transfer the mixture to the baking sheet and shape into a long, narrow loaf about 9 inches long and 4 inches wide. Spoon the rest of the ketchup mixture down the length of the top of the loaf and gently spread or brush it over the sides.
  6. Bake the meatloaf until an instant-read thermometer registers 160° to 165°F, 55 to 60 minutes. Let rest for 5 minutes before slicing and serving.


Please note: The terrific finished food photos in the collage at top were taken by Alexandra Grablewski for Fresh from the Farm: A Year of Recipes and Stories (The Taunton Press, 2014).

 

Winter Garden Salad: A Template Recipe for Greens + Roots

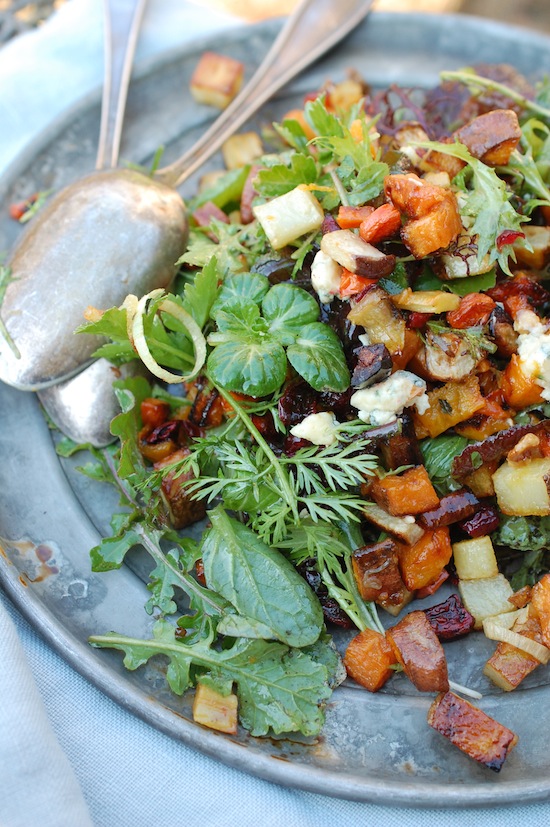
If we didn’t have 150 pounds of pork in the freezer, I could eat a warm salad of winter greens and roasted veggies every night. (Roy, not so much.) This is one of those recipe/techniques that I unapologetically come back to again and again—Warm Winter Salad of Roasted Root Fries (The Fresh and Green Table), Warm Bistro Salad with Tiny Roasted Root Vegetables and Bacon Dressing (Fast, Fresh & Green), and Quick-Roasted Butternut Squash and Pear Salad with Ginger Lime Vinaigrette (coming in Fresh from the Farm), to name a few. (Hmmm, it appears I’m not averse to sneaking pork into these things, so you could certainly have your salad, and your bacon, too.)

The appeal of a warm salad with crispy, yummy roasted veggies served atop deep, dark greens with a bracing vinaigrette is the interplay between fresh and comforting. I also like the textural contrast, and to be honest, the visual appeal. These days, I don’t compose the salads so much as scatter-and-platter them. It’s a looser, more rustic look, and served family-style, more casual. But you can always arrange the salads on individual serving plates if you like.

It occurred to me this week that I should back up, look at the architecture of these salads, and come up with a template you could use, depending on whatever greens and winter veggies you’ve got hanging around.

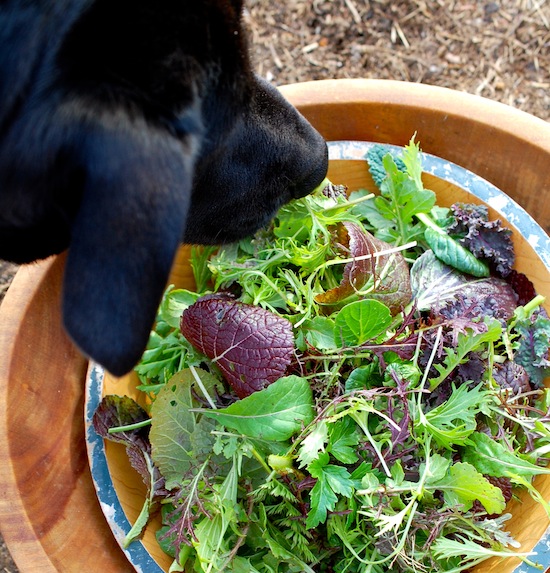
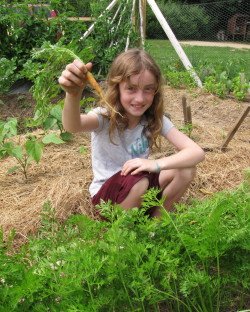
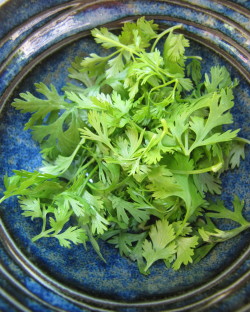
Plus, I needed an excuse to show off my greens that are still alive in the market garden. (Ahem, again, unapologetic…) So this morning after my chicken chores (no frozen water—yay!), I took a bowl and scissors and collected a nice combo of mizuna, Ruby Streaks mustard, Russian kale, arugula, tat soi, parsley, a few baby bok choy leaves, and even a few carrot tops. It’s amazing what lives through freezing temperatures and unfortunate ice formations; the arugula is particularly hearty, and one of my lettuces, Winter Marvel, acts like it doesn’t even know its December. (Alas, soon enough, nothing will be growing, even if it stays alive, since we’re now down below the critical mark of 10 hours of daylight. I’ve got lots of lettuce and greens down in the hoop house which I am just hoping to keep alive and harvest sparingly until early February, when 10+hours returns and they’ll start growing again.)

Realistically, most of us will be harvesting greens for our winter salads from the grocery store, so here’s your chance to buy baby kale, escarole and frisee, sturdy spinach, and anything that’s got some backbone or body. Make your own custom mix, and try to steer away from bagged mixes of salad greens, which tend to be less fresh than heads or bunches and also contain filler lettuces which don’t hold up to warm vinaigrettes too well.

For your veggie mix, choose from sweet potatoes, potatoes, carrots, parsnips, turnips, rutabagas, beets, or butternut squash. Dice them quite small so that they’ll roast quickly; most won’t need peeling—but for the butternut. (For a pretty all squash-salad, you could use thinly sliced acorn and/or Delicata rings, which don’t need peeling and will also cook quickly.) Add diced pears or apples to the veggie mix if you want, and customize your salad with whatever toasted nuts and good quality cheeses you like. Use your favorite vinegar in the warm vinaigrette, and don’t be shy with a squeeze of lemon or lime to juice it up.

Here’s my template—I hope it will make a nice starting point for you. If you come up with a really delicious combo, I’d love to hear about it!

Warm Salad of Roasted Root Veggies and Winter Greens

Be sure to cut your veggies into evenly small pieces so they’ll all cook at the same rate. Don’t be tempted to crowd them on one pan, either—a little room around them will brown them up better. (Unless, of course, you want to cut this recipe in half, which is perfectly doable.) If you decide to include beets in your veggie mix, toss them with a little oil and salt separately from the rest or they’ll tend to color everything else.

___________________________

For the salad:

1½ to 1¾ pounds combination sweet potatoes (unpeeled), potatoes (unpeeled), carrots (peeled), parsnips (peeled), turnips (unpeeled), beets (unpeeled), butternut squash (peeled), firm-ripe pears (peeled), or Golden Delicious apples (unpeeled), cut into small dice (about 3/8-inch in diameter) (about 5 to 6 cups)

4 tablespoons extra-virgin olive oil

Kosher salt

6 to 7 cups combination sturdy mixed winter greens (such as baby kale, escarole, frisee, arugula, mustard, or tat soi)

¼ cup chopped toasted pecans, walnuts, almonds or hazelnuts

½ to 2/3 cup crumbled good quality blue cheese, feta cheese, goat cheese or 1/3 cup coarsely grated aged gouda or Parmigianno

3 tablespoons coarsely chopped dried cherries, cranberries, raisins, figs, pitted dates, or other dried fruit (optional)

For the vinaigrette:

1/3 cup extra-virgin olive oil

1 large shallot, sliced thinly

2 tablespoons sherry vinegar, balsamic vinegar, white balsamic vinegar, or cider vinegar

1 tablespoon maple syrup

1 teaspoon Dijon mustard

1 teaspoon fresh lemon or lime juice (more to taste)

½ teaspoons lemon or lime zest

1 teaspoon coarsely chopped fresh thyme leaves (or other herb of choice)

Kosher salt and freshly ground pepper

___________________________________

Preheat the oven to 450°F. Line two large rimmed heavy-duty baking sheets with parchment paper. In a large, wide mixing bowl, combine the veggies, the 4 tablespoons olive oil, and a scant teaspoon kosher salt. Toss well and spread in one layer on the two baking sheets. Roast, rotating the sheet pans once (and flipping the veg with a spatula if you like), until the veggies are nicely browned and tender, about 28 to 30 minutes. Let cool for a couple minutes on the sheet pans and then combine in a mixing bowl.

While the vegetables are roasting, put the greens in a wide heat-proof mixing bowl. Set out a serving platter or four serving plates.

Make the warm vinaigrette: Heat the 1/3 cup olive oil in a small nonstick skillet over medium heat. Add the sliced shallots and a pinch of salt and cook, stirring occasionally, until the shallots are browned and crisp, about 6 to 8 minutes. Take the skillet off the heat and remove the shallot rings with a fork, transferring them to a paper-towel lined plate. Let the oil cool for 3 to 5 minutes. Add the vinegar, the maple syrup, the Dijon, the juice, the zest, the herbs, ¼ teaspoon salt, and several grinds of fresh pepper. Whisk vigorously until the dressing is mostly emulsified. (Alternatively, first transfer the shallot-infused oil to a heat-proof Pyrex liquid measure, add the other ingredients and whisk well. This is a slightly less awkward way of making the dressing). Taste and adjust seasoning, adding more lemon or lime juice, salt or pepper as needed.
Season the greens with a sprinkling of kosher salt and drizzle over them a few tablespoons of the warm vinaigrette. (Be sparing at this point). Toss well, taste, and add a little more dressing if necessary. Arrange most of the greens on your platter or serving plates. Sprinkle with half of the nuts, cheese, and fruit.

Season the roasted veggies with a pinch more salt, and dress them lightly with 1 to 2 tablespoons of the vinaigrette. Toss well and scatter over the greens. Garnish with remaining nuts, cheese, fruit, greens, and reserved shallots. Serve right away, passing the remaining dressing if desired.

Serves 4

P.S. Farmer enjoyed harvesting greens this morning, too!


Stormy Minestrone, A Recipe for Comfort

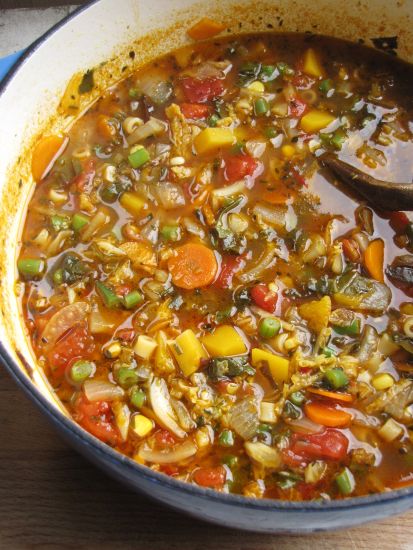
All I can think about today is soup. This may be because I have too many vegetables crowding up the fridge. After another round of recipe development and a pre-hurricane sweep of the garden, I am left with the clear makings of minestrone—everything from a five-pound bag of carrots to three awkwardly space-hogging baby fennel bulbs. I have a big basket of winter squash I keep stumbling over in the pantry, and I have a little handful of green beans I just plucked off the dying vines this morning. I even have a few cranberry beans that are finally ready to harvest, from plants that miraculously show very little storm damage.

Our storm damage, in fact, was minimal. Had circumstances been different—if Sandy hadn’t taken a left turn when she did—we would likely be facing a very different winter here on the farm. Instead the hoop house is still standing, the animals are all fine, and in fact, we have another flock of laying hens due to arrive here this week (more on that soon). So thankfully, Roy is building—rather than rebuilding. Now, of course, I hear that a big Nor ‘Easter is coming up the coast this week. So maybe we are not out of the woods yet. But still. I can’t stop thinking about Staten Island and the Rockaways and Seaside Heights. All those folks still without power and nights getting really chilly. And lots of friends on the coast of Connecticut with serious flood damage. We did have plenty of coastal erosion up here on the Island and flooding in the lowest harbor areas in the towns, but most homes were safe and dry (and warm).

Everyone knows it could have been different, though. One Island friend posted an idea on Facebook a couple days ago for a coats-and-warm-blankets drive, and seemingly overnight, boxes outside of Island businesses filled up with donations, and volunteers have come forward to drive the items down to a particularly hard-hit neighborhood in Queens.

I will be here, making hot and comforting soup, sort of a crazy response to feeling for other people who are cold. It’s like I have a sympathetic and not entirely imaginary chill that must be chased away. We human beings have strange responses to things—I know I can’t share my soup with those folks, but I’m hoping someone else will share their hot food with someone cold and hungry, and in the meantime I’m sending comfort-soup-karma out as best I can.

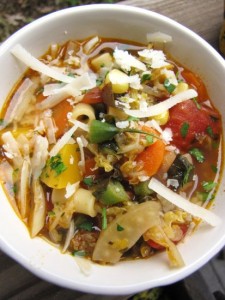
Here’s my Fall Farmers’ Market Minestrone recipe from The Fresh & Green Table. Deeply flavored without any meat at all, it’s a good starting point for comfort soup, but feel free to vary the veggies as you please.

Fall Farmers’ Market Minestrone  

Recipe copyright Susie Middleton, from The Fresh & Green Table (Chronicle Books, 2012).

The secrets to this meatless minestrone include lots of aromatic veggies and a Parmigiano rind. I usually finish the soup with grated Parmigiano and/or a bit of gremolata (a mix of freshly chopped parsley, lemon zest, and garlic). But if you don’t want to bother with the gremolata , it’s perfectly delicious without it.

______________________________

1/4 cup extra-virgin olive oil

2 cups medium-diced onions (about 1 large or 2 medium)

2 cups thinly sliced Savoy cabbage (about 1/4 small head)

1 cup thinly sliced fennel bulb (quartered and cored first, about 1/2 small bulb)

1 cup thinly sliced carrots (about 2 carrots)

Kosher salt

1 cup peeled, medium-diced butternut squash (about 4 to 5 oz.)

1 cup large-diced stemmed Swiss chard leaves (thinly slice stems separately and include them, too)

1 Tbsp. minced fresh garlic (plus 1/2 tsp. if making gremolata)

1 Tbsp. chopped fresh thyme

2 tsp. chopped fresh rosemary

1 tsp. ground coriander

1 Tbsp. tomato paste

1 14 1/2-oz. can diced tomatoes (I like Muir Glen), well drained

1 2-inch Parmigiano-Reggiano rind

½ cup ditalini pasta or other very small pasta

1 cup thinly sliced green beans (about 4 oz.)

½ to 1 cup fresh corn kernels (optional)

1 to 2 tsp. lemon juice

½ tsp. lemon zest (if making gremolata)

2 Tbs. chopped fresh parsley

1/3 cup coarsely grated Parmigiano Regianno

______________________________

a 5- to 6-quart Dutch oven or other large soup pot, heat the olive oil over medium heat. Add the onion, fennel, cabbage, carrots and 1 tsp. salt. Cover and cook, stirring occasionally, until the onions are softened and mostly translucent and the cabbage is limp, about 6 to 8 minutes. Uncover and continue cooking, stirring occasionally, until much of the cabbage is browning and the bottom of the pan is browning as well, about another 8 to 9 minutes.

Add the 1 Tbsp. garlic, the thyme, the rosemary, the coriander, and the tomato paste. Stir until fragrant, about 30 seconds. Add the butternut squash, the chard, the diced tomatoes, and 1 ½ tsp. salt and stir well until incorporated. Add the Parmigiano rind and 8 cups water.

Bring to a boil, reduce to a simmer, and cook, stirring occasionally, for 10 minutes. Add the ditalini and cook another 8 minutes. Add the green beans and the fresh corn (if using) and cook for 4 to 5 more minutes. Remove the pot from the heat, remove the Parmigiano rind, and stir in 1 tsp. of the lemon juice. Let cool for a few minutes; taste and adjust for salt, pepper, and lemon juice.

For the gremolata (optional), combine the 1 tsp. garlic, the lemon zest, and the fresh parsley in a small bowl.

Garnish each portion of hot soup with some of the gremolata or chopped parsely and some of the Parmigiano.

Yields 8 cups, Serves 6


Why Did The Chicken Fly the Coop? To Get to the Peas & Carrots, Of Course

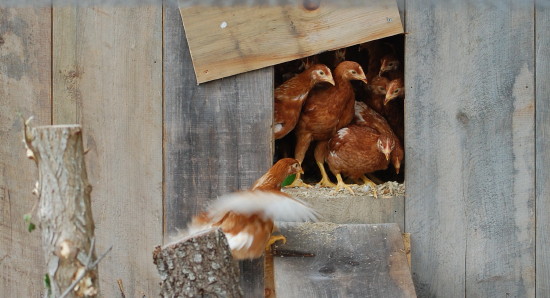
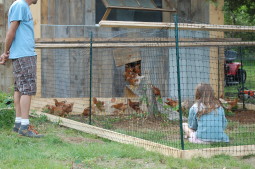
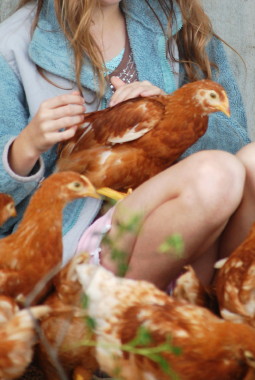
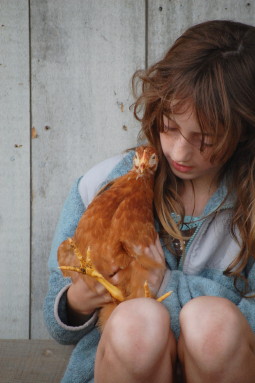
I’ve been running inside a lot this week to grab my camera. It’s been one photo moment after another on the farm. On Sunday, we let the babies out of their coop into a temporary outdoor pen—their first foray onto grassy turf. This was hysterical to watch. It took quite a few minutes for the first chicken to advance out onto the plank. Three or four followed, and then the first one changed her mind and turned around and headed back inside. It went on like this for a while—a few would venture out and then turn around. You could just imagine the conversations going on.  (Personally, I had the Cockney voices of the talking vultures in Disney’s animated version of The Jungle Book in my head.) “You go. No you go. No way—YOU go. Nuh-huh, I’m staying here.”

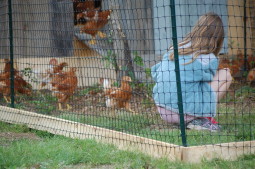
Libby waited patiently in the pen for them to come out, approach her, and eventually start hopping on her lap. She is very calm around animals and they trust her. I couldn’t get enough pictures of the interaction between them all.

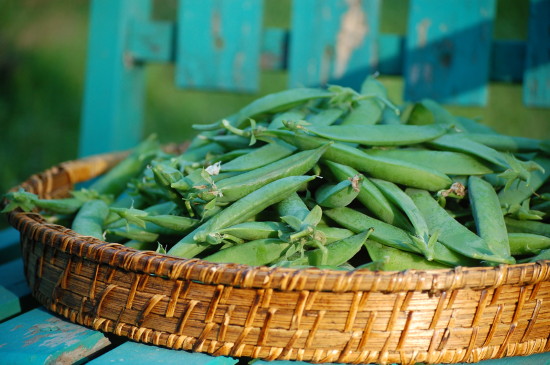
In the garden we are harvesting the most amazing peas and carrots, so I’m taking lots of pictures of these, too—while they last. I am so happy that I’ve finally figured out how to grow both of these veggies well. I just hope I can repeat the same success next year. (Or even this year with another round of carrots—which should have gone in the ground weeks ago!).

This morning I had fresh peas and carrots and strawberries for breakfast while I washed all the veggies. I smiled, thinking about peas and carrots, because they mean something special to Roy and me, and today is our anniversary. (The anniversary of our first date, that is, three years ago.) For some reason, when we were first dating, the movie Forrest Gump kept coming on TV. If you remember, Forrest says early on in the movie, “From that day on we was always together. Jenny and me was like peas and carrots.” Roy picked this up (in Forrest’s voice, of course) and started saying it to me a lot. Who knew what we’d be doing three years later! Peas + Carrots + 60 babies (baby chickens) + one amazing little girl=love.

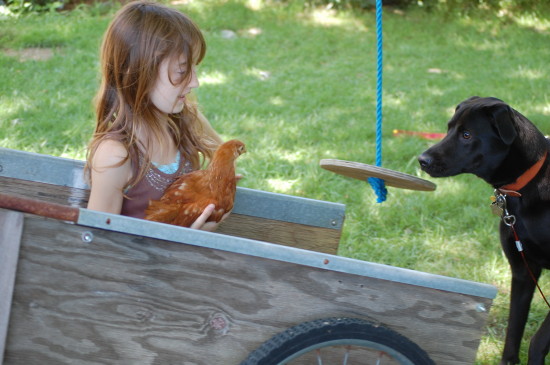
(And not to forget Farmer, who enjoyed Libby’s cart ride with one of the chickens.)

The Last Onion and The Teeny Tiny Stir-Fry

Roy, Farmer, and I spent an exhausting day off-Island  yesterday, driving around in the truck to assorted malls, stores, and appointments, loading up with supplies for various building projects, for the garden, and for life in general. By last night, coming back on the 6:15 boat, the three of us felt like we’d moved into the cab of the Ford, with Farmer’s kibble and water bowls on the floor, our empty coffee cups strewn all around, and the usual collection of reading material I can’t go anywhere without (several magazines, a few books, and a newspaper) covering every surface. One day off-Island was enough for us. We were ever so glad to get home.

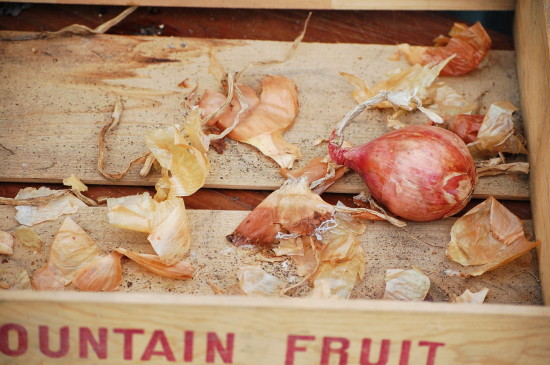
Quick dinner thoughts raced through my head as I stumbled into the barn to grab an  onion. In the dark my fingers fumbled around in the wooden crate, feeling for something hefty and round but only coming up with papery skins at first. Finally my hand settled on a little onion—the last one of our own, ordered from Dixondale Farms last February, planted last May, harvested last September, cured and stored all winter long. I am pleased we got all the way to February with our own onions, but I’m sad that it will be September before we see one again. Actually, maybe it will be sooner as I intend to overplant this year and harvest some bulbs as spring onions.

Onions (actually all of the lovely allium family, including leeks, scallions, chives and garlic) have been popping up on my radar a lot lately. Yesterday I leafed through a new issue of Martha Stewart Living magazine and my eyes fell on the most stunning photographs of alliums, courtesy of a feature called The Early Onion. Then I happened to watch a video on growing onions over at Vegetablegardener.com.  I  just placed my onion order for the garden, too. This year I’m going to grow a good storage onion called Copra, in addition to the gorgeous Ailsa Craig and Big Daddy onions I grew last year.

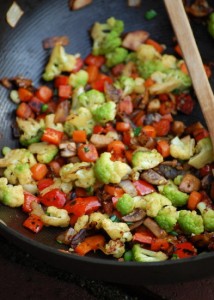
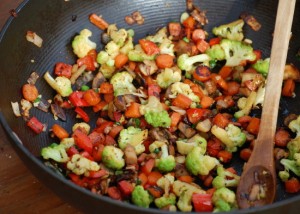
As much as I love to start vegetable dishes with some kind of allium (the promise of deep flavor), I knew I needed something more than my one little onion to get veggies on the table last night. So I did a fast fridge fly-through, retrieved a bit of broccoflower, some mushrooms, a carrot, and a bell pepper and focused on a technique I used for a a yummy veggie fried rice coming in The Fresh & Green Table. I diced all the veggies (including the onion) into very small pieces (no fussing here—exact dice are not necessary!) and heated a couple tablespoons of oil in my favorite (non-stick) stir-fry pan over medium-high heat. Once the oil was hot, I added the veggies, cranked up the heat to high, and started stirring. After about 3 minutes, I added a little chopped ginger and garlic, continued cooking for about 30 seconds, and brought the pan off the heat. The veggies were done!

This sounds like a no-brainer quick stir-fry, but there are two important things at work here. First, normally you wouldn’t throw onions and peppers into the pan at the same time as dense veggies like carrots and broccoflower. If all the veggies were cut into larger pieces, the softer veggies would be burned by the time the denser veggies softened up. But by cutting everything very small (and you can use most any vegetable except for the very densest) and turning the heat to high (after the veggies go in the pan—nonstick should not be heated beyond medium-high when empty), the cooking happens really fast. There’s an explosion of moisture as the veggies tumble around the pan, and that translates to steam to help tenderize the denser veggies a bit and to keep the softer ones from burning. You need to watch closely though, as somewhere between three and four minutes the steam transitions to smoke when excess moisture is used up. But by then the veggies are nicely browned and crisp-tender—perfectly delicious.

You can eat the veggies as is (plenty tasty) or you can add a little finishing sauce like the Thai-flavored one I’ve suggested below. Chopped fresh herbs are optional, too, depending on just how much of a rush you’re in. Without the sauce or herbs, you can be done, start to finish, in less than 15 minutes. Starting with three cups of veggies yields plenty for a side-dish for two, but you can up the amount a bit, stretch the cooking time a touch, and make a bit more for three or four.

Teeny Veggie Stir-Fry with Optional Sauce

For a printable version of this recipe, click here.

Serve these with rice and a flat-omelet egg for a vegetarian supper.

_____________________________

For the sauce:

1 tablespoon Thai fish sauce

1 1/2 teaspoons fresh lime juice

1 1/2 teaspoons brown sugar

1/4 teaspoons Asian chili-garlic sauce

For the stir-fry:

2 tablespoons vegetable or peanut oil

3 cups veggies, cut into small (3/8- to1/2-inch) pieces (Choose as many as you like, but at least four of the following for a total of 3 cups: bell peppers, onions, mushrooms, broccoli, cauliflower, cabbage, green beans, bok choy, snow peas, sugar snap peas, or carrots)

kosher salt

1 teaspoon minced fresh garlic

1 teaspoon minced fresh ginger

2 tablespoons thinly sliced scallions

1 to 2 teaspoons chopped fresh cilantro or mint (optional)

______________________________________

For the (optional) sauce:

In a small bowl, mix together the fish sauce, lime juice, 2 teaspoons water, brown sugar, and chili-garlic sauce.

For the stir-fry:

In a large (12-inch) nonstick stir-fry pan, heat the oil over medium-high heat. When the oil is hot (it will loosen up), add the 3 cups veggies and 3/4 teaspoon salt, turn the heat to high, and cook, stirring, until the veggies are crisp-tender, slightly shrunken, and lightly browned, about 3 minutes (4 at the most). Add the garlic, the ginger, and the scallions. Stir-fry briefly, just until fragrant, about 30 seconds. Remove the pan from the heat and carefully pour in the sauce mixture (if using). Stir until the sauce thickens and reduces slightly. Fold in herbs if using and serve right away.

Serves 2

Try Broccoflower in a Versatile Dutch-Oven Ragoût

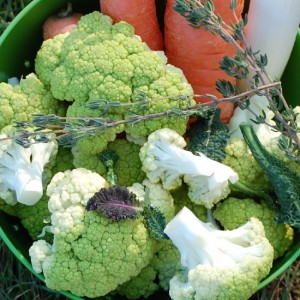
If it’s January, I must be cooking Broccoflower. I picked some up at the grocery the other day because, frankly, our vegetable larder of turnips, rutabagas, kale, and beets is starting to freak me out. Plus, I can never resist the lime-green color of Broccoflower, and I love its nutty flavor when browned, too. (Also, since we live in a small town and I shop at the same small grocery store every day after my post-office run, I’m beginning to worry that people might think we have a really unhealthy diet, since I rarely buy vegetables at the store any more. Checking out with Roy’s donuts, some Lucky Charms for Libby, and maybe some chocolate chips for me makes me a little self-conscious! Hence the need for the occasional head of Broccoflower.)

I’ve sautéed, roasted, stir-fried and quick-braised Broccoflower, but it’s very cold here today and I thought a ragoût would be satisfying. (When I say it’s cold today, I mean it’s calling-all-mice-inside cold. This morning a mouse was in the compost bowl in the pantry. He’d fallen in, obviously in search of yumminess, but since there was little more than coffee grinds and egg shells to feast on—anything green is going to the chickens or Cocoa Bunny right now—he’d tried to scamper back up the sides of the aluminum bowl. No luck. Roy switched on the light about 6:30 and left the little mouse to do a roller derby around the bowl until I got up. I put him back outside (tipping the bowl to let him escape), where he will most likely find his way straight back inside the house tonight. I feel a little bit like Fred Flintstone putting Dino outside the back door. Oh, well. At least Libby is not here to insist on a warm bed for Mousey.)

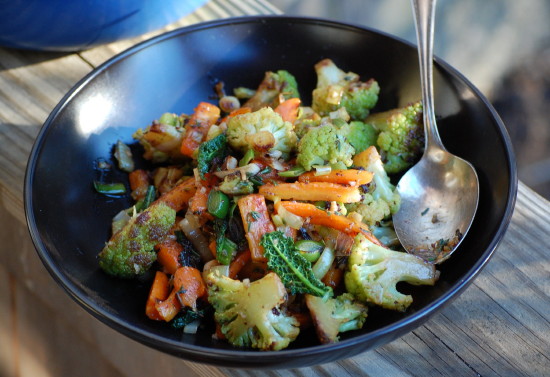
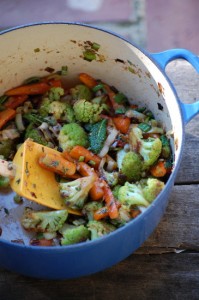
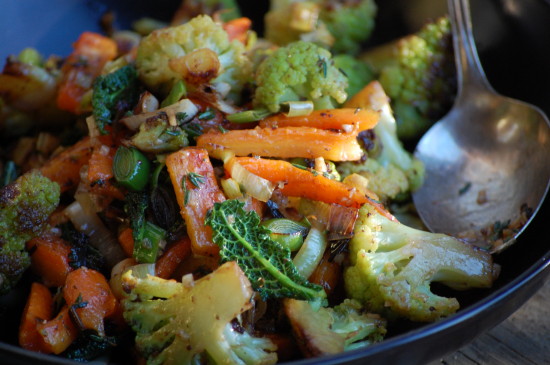
Anyway, since it was a ragoût day, I used the broccoflower in one of my Dutch-oven ragouts with some carrots, leeks, and baby kale (recipe follows). My “ragoûts” are not particularly saucy and they’re not heavy. They’re more like delightful “mélanges” of colorful veggies, finished with some bright flavors and a bit of butter to bring everything together. I use a Dutch oven to create some extra moisture, which, along with the browned bits on the bottom of the pan, contributes to the final flavor of the dish. Sautéing the hearty veggies in the Dutch oven means they steam and brown at the same time. I’ve used fingerling potatoes, Brussels Sprouts, baby artichokes, cauliflower and carrots successfully in these ragoûts, always adding an allium like onions, leeks, shallots or garlic, and something lighter and greener at the end for contrast, like peas or baby greens. So improvise as you please, using zest, vinegars, herbs and aromatics, and get ready for a satisfying veggie dish that can easily become a main course if served with a grain or over polenta. (The version below uses a small Dutch oven and yields just about enough for two small main dish portions or three sides. I was short on some ingredients or would have made a bigger batch, which you can easily do in a larger Dutch-oven.) And oh, by the way, this is top secret, but there are more of these ragout recipes coming in my new book, The Fresh & Green Table, later this year. But more on that topic soon!

Broccoflower, Carrot & Leek Ragout with Thyme, Orange & Tapenade

For a printable version of this recipe, click here.

If you want to double this recipe, use a larger Dutch oven (like a 6 or 7 quart). The little bit of tapenade here pairs deliciously with the Broccoflower but if you are not an olive person, feel free to mess around with the finishing sauce. (Use a dash of balsamic, soy or Worcestershire with the orange juice.) Whatever you do, be sure your cooking pot has a lid—you’ll need it to trap moisture to help cook the veggies. You can substitute cauliflower for the broccoflower, but it will take a bit longer to cook and may need a little more butter for moisture.

_____________________________________

2 teaspoons orange juice

1/2 teaspoon olive tapenade

1/4 to 1/2 teaspoon freshly grated lemon zest

2 tablespoons unsalted butter (1 tablespoon cut into 4 pieces and kept chilled in the refrigerator)

3 tablespoons extra-virgin olive oil, more if needed

1/2 pound carrots (or up to 10 ounces), peeled and cut into sticks 1 1/2 to 2 inches long and about 3/8 to 1/2-inch wide and thick

kosher salt

1/2 pound 1-inch Broccoflower florets, each cut in half to have one flat side

1 small leek, thinly sliced and washed (about 2/3 cup)

1 to 1 1/2 teaspoons minced garlic

handful baby kale leaves or other tender greens

2 teaspoons chopped fresh thyme

__________________________________________

In a small bowl, combine the orange juice, tapenade, lemon zest, and 1 tablespoon water.

In a small (4-quart) Dutch oven or other deep, wide pan, heat 1 tablespoon of the butter and 1 tablespoon of the olive oil over medium-low heat. Add the carrots and 1/2 tsp. salt. Cover and cook, stirring frequently but gently (a silicone spoonula works well), until the carrots are lightly browned and just tender (test with a paring knife), about 12 to 14 minutes. With a slotted spoon, transfer the carrots to a plate.

Add 1 tablespoon olive oil to the pan. When the oil is hot, add the Broccoflower and 1/2 teaspoon salt. Stir, cover, and cook, stirring frequently and gently, until all the florets are browned and mostly tender, about 6 to 8 minutes. (Don’t worry if the broccoflower absorbs all the fat at first—it will give off moisture as it continues to cook. Return the lid quickly after each stir.) With a slotted spoon, transfer the broccoflower to the plate with the carrots.

Turn the heat to low, add 1 more tablespoon of olive oil, and add the leeks and a pinch of salt. Cover and cook, stirring frequently, until the leeks are just softened and a bit browned, about 4 to 6 minutes. Add the garlic, stir, and cook until softened, about 30 seconds. Remove the pan from the heat or turn the heat off under the pan and immediately return the carrots and Broccoflower to the pan. Add the kale leaves and thyme and pour in the reserved orange juice mixture. Stir immediately, add the cold butter pieces, and continue stirring gently until the butter melts (just a few seconds). Transfer to a serving bowl and serve immediately.

Serves 2 to 3

An Early Christmas Present From the UK—Roasted Veggie “Bundles” (Bacon-Wrapped, Of Course!)

While I am not (as many people ask) related to Catherine, Duchess of Cambridge (formerly known as Kate Middleton), I am fond of many things British, especially in the “cookery” world. Two of my favorite cookbooks from this year are Plenty—Vibrant Vegetable Recipes from London’s Ottolenghi, and Tender—A Cook and His Vegetable Patch, by Nigel Slater. And all of Hugh Fearnley-Whittingstall’s books (most recently River Cottage Every Day) inspire me. These modern British chefs and food writers have a knack for appreciating good quality fresh ingredients and treating them simply but creatively.

Back when I lived closer to a big Barnes&Noble, where I could buy British magazines, my favorite purchase was Olive, the little sister magazine to BBC’s Good Food. Last week, as I culled through hundreds of my old cookbooks to put out for our yard sale, I came across a page I had ripped out of Olive probably five years ago. The picture still seduced me, so I taped it up over my kitchen counter, hoping to make the dish soon. In the meantime, I went online to see if the recipe resided on their website, and while I couldn’t find it, I did find 80 recipes for using parsnips—lovely! And so British.  (See my favorite things to do with parsnips here.)

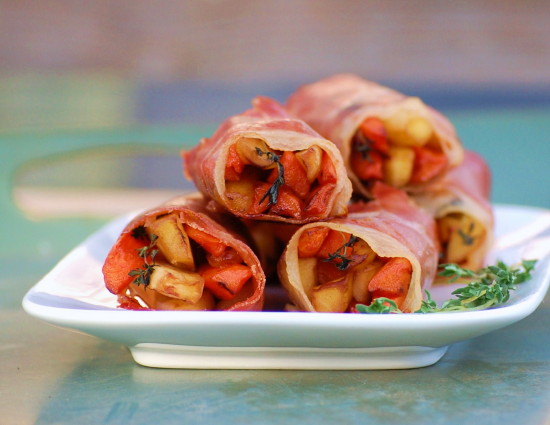
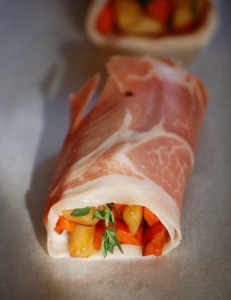
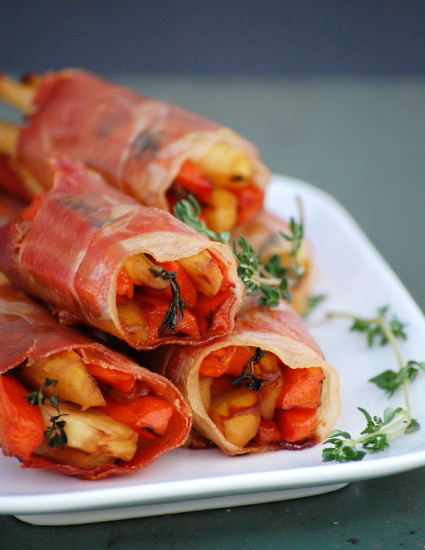
Yesterday I had a chance to make the dish, which was called “Roast” Vegetable Bundles in the magazine. I used that glorious photo and the simple instructions to develop a more detailed recipe, and I still think there is room for more improvisation here. The basic idea is a little package of carrots and parsnips, blanched and lightly glazed, wrapped in thinly sliced ham or bacon, and roasted to finish. The funny thing is, all along I was thinking what a great side dish this would be for a no-fuss Christmas Eve dinner with beef tenderloin. (I don’t see any reason why the bundles couldn’t be made up to the point of assembly and roasted just before serving.) But only this morning I noticed that the original recipe was part of a “Christmas Entertaining” section in the magazine. Of course!

Straight out I will tell you that the main reason I love these little bundles is the whole wrapping and rolling thing. Fun in the kitchen, you know. Plus, they look so darn cute (who wouldn’t love a little veggie present?), and I admit, I had a lot of fun photographing them. As far as the delicious factor goes, they are more than satisfying. The only tiny drawback I see is that I liked the flavor and texture of the little bundles I wrapped in pancetta better than those I wrapped in prosciutto. Since prosciutto isn’t as fatty, it naturally hardens up a bit when roasted. The pancetta renders beautifully when roasted, but since it comes in round slices, you need to overlap them carefully to form one longer piece to wrap the bundles. (The long prosciutto pieces are easier to roll up than the pancetta, and they stay tighter when cooked). I think next time I will ask the deli to slice my pancetta extra thin and maybe experiment with using 3 pieces together rather than 2. (You could vary the size of the bundles, too.) Also, I didn’t try bacon, though theoretically overlapping thin slices would work, just a little more messily.

Also, this recipe includes a step that’s unusual for me—par-boiling root vegetables. Normally I would slowly saute sticks of carrots and parsnips until tender, but I went along with the suggestion to par-boil here and then lightly glaze in a sauté pan, because I thought the veggies would hold up better when roasted. That turned out to be true, and I’m glad I did it.

For a special dish, this really doesn’t take that much time to prepare, and you could very easily double it for a crowd if your Christmas dinner plans are ambitious. I know, we just got through Thanksgiving, but I am one of those goofballs who loves everything Christmas. (Libby and I made Christmas cookies the day after Thanksgiving.) In fact, there’s nothing I like better than a British Christmas. That’s why I’m so excited by the cool advent calendar my sister sent me. If you feel like treating yourself to Christmas in London—on your computer—click here.

Roasted Carrot and Parsnip “Bundles” with Fresh Thyme, Maple & Pancetta

These veggies would be just as lovely with roast chicken or turkey as they would with Christmas beef. If you are working ahead, assemble the bundles and refrigerate covered. Bring to room temperature before roasting. This recipe, adapted from Olive magazine,  doubles or triples easily.

_____________________________

Kosher salt

4 medium carrots, about 9 ounces

4 medium parsnips, about 9 ounces

1 1/2 tablespoons unsalted butter

1 tablespoon maple syrup, more for brushing

1 teaspoon balsamic vinegar

8 very thin slices of prosciutto, or 16 or 24 very thin slices of pancetta

16 small thyme sprigs

________________________

Heat the oven to 400°F. Put a piece of parchment paper on a heavy-duty rimmed baking sheet.

Bring a large pot of salted water to a boil. Meanwhile, peel and trim the carrots and parsnips, and cut into sticks or batons that are each about 3 inches long and 1/2 inch wide. Add the veggies to the boiling water and cook for 4 minutes. Transfer to a couple layers of dish towels to drain and dry.

Heat the butter in a medium nonstick skillet over medium heat. When the butter has melted, add the 1 tablespoon maple syrup and the balsamic vinegar and stir. Transfer the veggies to the skillet and season with about 1/4 teaspoon kosher salt. Stir gently and turn the heat to medium high. Cook, stirring and tossing occasionally, until the veggies are browned in spots and a bit more pliable, about 7 to 9 minutes. Transfer to a large plate and spread out to cool.

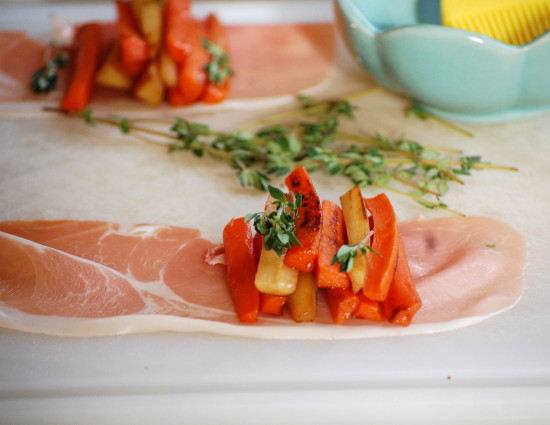
On a large cutting board or other surface, arrange the 8 slices of prosciutto in front of you. If using pancetta, arrange 8 groups of pancetta by slightly overlapping the slices.

Divide the veggies into eight portions and arrange each portion on top of the prosciutto or pancetta. (Rather than centering the veggies, place them about one third of the way over from the right side. This will make rolling easier.) Brush the bundle of veggies with a little maple syrup and arrange the thyme sprigs on them. Working right to left, roll up the veggies in the prosciutto or pancetta and transfer to the baking sheet.

Roast until the packages are browned around the edges (will be lots of browning underneath) and slightly shrunken, about 18 to 20 minutes. (This is enough to warm the veggies through, too.) Serve right away.

Makes 8 bundles; serves 4 as a side dish.


Best Roasted Brussels Sprouts + 10 Fave Thanksgiving Sides

This time last year I was preparing to be on television the day before Thanksgiving. (The Martha Stewart Show—I cooked quick veggie sides from Fast, Fresh & Green.) A few years back I did a satellite media tour around this time to promote Fine Cooking’s book How To Cook A Turkey. The year before that, I did a radio blitz for most of November and December to promote all the holiday tips and recipes on Fine Cooking’s website (which, if you haven’t looked lately, is by far the best place to go to plan your Thanksgiving menu. Check out the cool interactive Create Your Own Menu Maker. But I’m not biased or anything.) Well, you can imagine how relieved I am not to be PR-ing this holiday season. I did in fact just record some radio spots for Fine Cooking that will soon air on WGBH (I’ll keep you posted); but they were a whole lot of fun to do—and they didn’t require a new wardrobe or an anxiety attack.

So we are free and clear to have a simple and quiet Thanksgiving at the farmette (yippee!). I still have squash, rutabagas, onions, kale, arugula, herbs, and salad greens from the garden, plus green beans, corn, and roasted tomatoes that I froze, so we will be able to make most of the meal über-local. I will wander across the street to the West Tisbury Winter Farmers’ Market on Saturday to see if I can get the rest of what I need.

Regardless of where you plan to get your goodies, most of you, I know, have this one thing on your mind: What kinds of dishes can I cook that are easy and delicious, that everyone likes, and that will serve a decent-sized crowd? To that end, I’ve gathered a list of ten of my own favorite side dish recipes that serve at least six people (below). Some of these recipes reside on sixburnersue.com, but several are ones I developed a few years back for an “updated classics” story on Thanksgiving sides for (you guessed it) Fine Cooking magazine. And I also threw in a “create your own” creamy veggie soup from another FC article I did years ago, in case yours is the kind of family that likes to start the meal with an elegant soup (or needs options for vegetarians).

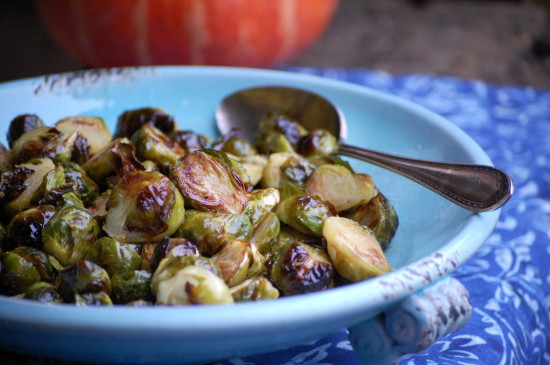
But for the tenth recipe on the list, I couldn’t resist posting my Roasted Brussels Sprouts with Orange Butter Sauce. This is a recipe I originally created for Fast, Fresh & Green but that I tweaked last year for the TV gig so that it would feed more people. I just remade it this morning and am happy to confirm that it is not only delicious, but possibly one of the fastest and easiest Thanksgiving side dishes ever to make.

Here’s my list:

1. Green Beans with Crispy Pancetta, Mushrooms, and Shallots

2. Roasted Turnips with Maple and Cardamom

3. Pomegranate-Balsamic-Glazed Carrots

4. Bourbon Sweet Potato and Apple Casserole with a Pecan Crust

5. Creamy Baked Leeks with Garlic, Thyme, and Parmigiano

6. Mashed Yukon Gold Potatoes with Roasted Garlic

7. Thanksgiving Gratin of Butternut Squash, Corn & Leeks

8. Potato Galette with Fresh Rosemary & Two Cheeses

9. Creamy Vegetable Soup (Pick Your Own Veggie!)

10. Roasted Brussels Sprouts with Orange Butter Sauce (see below)


Roasted Brussels Sprouts with Orange Butter Sauce

I’ve roasted Brussels sprouts a few different ways, but you can’t beat this method for volume (large rimmed sheet pans hold a lot), quickness (16 to 18 minutes in a 475° oven), and great results (by halving the sprouts and roasting them cut-side down, the tops and bottoms brown but the interiors steam). The flavorful butter sauce gives the nutty roasted sprouts just the right touch of tangy-sweet richness to make this completely holiday-worthy.

_________________________________________

2 lb. small Brussels sprouts, trimmed and halved lengthwise

1/4 cup extra-virgin olive oil

1 tsp. kosher salt

1 Tbsp. plus 1 tsp. balsamic vinegar

2 Tbsp. pure maple syrup

2 Tbsp. fresh orange juice

1 tsp. finely grated orange zest or lemon zest

4 Tbsp. cold unsalted butter, cut into 16 pieces and kept chilled

________________________________________________

Preheat the oven to 475˚F. Line two large heavy-duty rimmed sheet pans with parchment paper. In a mixing bowl, toss the Brussels sprouts with the 1/4 cup olive oil and 1 tsp. of the salt. Divide the sprouts between the two sheet pans and arrange them, cut-side down. Roast until brown and tender, 16 to 18 minutes. (The tops will be dark brown and crispy and the sprouts should feel tender when pierced with a paring knife.) Transfer the sprouts to a mixing bowl.

Combine the balsamic vinegar, maple syrup, orange juice, and orange zest in a small saucepan. Heat the mixture over medium heat just until it’s hot (you will see a bit of steam), but not simmering. Remove the pan from the heat and add the cold butter, several pieces at a time, whisking constantly until the mixture is smooth and creamy. (Don’t reheat the mixture or the butter will break and the sauce won’t be creamy.) Pour the sauce over the sprouts and stir thoroughly but gently until most of the sauce has been absorbed. Transfer the sprouts and any remaining sauce to a serving platter and serve right away.

Serves  8

Of Mice and Girls (And Baby Carrots, Too)

I’m always in a bit of a funk after Libby leaves. There’s a palpable void that I can’t quite describe, except that suddenly everything is much too quiet without her giggles and shrieks and pattering all around. After a few days we adjust and look forward to her next visit. But this time, after a particularly fun four-day holiday weekend, I’m missing her even more.

We did all the usual stuff you’d dream up for a swath of hot July days on Martha’s Vineyard—swimming at State Beach, heading up to Menemsha at sunset time for an instantly dripping chocolate-dipped soft-serve ice cream cone, hitting the arcade in Oak Bluffs for a round of games and prize-winning tickets. (I could have done without the giant inflatable Red Sox hammer, I’ll admit.)

But mostly we puttered around the farmette, where there’s no shortage of distractions for a girl with Libby’s expansive curiosity: Crickets, fireflies, chickens, bunnies, turkeys. Wild berries and wild flowers. Rope swing, sand pile, garden, farm stand. And the nice part is that the three of us can be outside within view of each other (I don’t have to worry about Libby) and working on different things. While I’m weeding in the garden and Roy’s cutting wood outside the shop, Libby will skip from spot to spot, stopping with news of the chickens or the discovery of a particularly interesting bug.

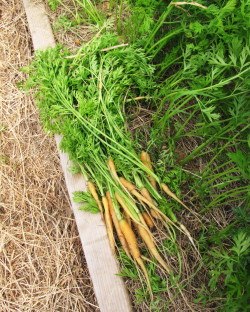
Occasionally, I’ll get lucky and Libby will help me in the garden. She’s particularly fascinated with the carrots, so thinning them was the perfect job for her this weekend. Together we held back the fronds and found the carrots that were too close together and held our breath to see what would come up when we tugged. Some were tiny, some were finger-sized, and some were just big enough for me to sauté up for dinner. The tops went to Cocoa and the chickens. (The not-quite-ready-for-prime-time carrots are just one of the many frustrations in my I-don’t-have-enough-stuff-to sell-at-the-farm stand-yet saga. I am tired of listening to myself complain about it, so I will leave that alone and just say that the baby squash and the baby carrots and the little bean plants had better be harvest-ready by next week!)

It’s a good thing I got Libby to help me with the carrots on Saturday, because on Sunday, along came Mousey. Roy and I have never seen Libby fall so hard for an animal. We thought she’d like the bunny, and we knew she’d love the chicks, but her heart now belongs to Mousey (for as long as Mousey remains breathing). Libby and I first saw Mousey scamper across the front step in the early morning. Later Mousey (not newborn, but probably only a few weeks old) stood frozen near the basement bulkhead doors. Dad found some old gloves and let Libby hold Mousey and feed her a bit of cheese. Several times we tried to return Mousey to wherever she came from, but she kept coming back to us. The discovery of Mousey’s expired brother, and the suspicion that a hawk or something else had gotten Mommy, confirmed that Mousey was an orphan. Soon Mousey had a comfy tissue-lined box to snuggle in and a saucer of local grass-fed cow’s milk to drink (only the best for Mousey). But mostly Mousey spent the day napping in Libby’s glove-lined hands, and I’m not sure who was happier—Libby or Mousey. Actually Mousey’s full name, according to Libby, is Lucky Mousey Joy. (Joy is Libby’s middle name.)

Libby’s mom Kelly is a really great sport about all this farm activity (and I so appreciate her sharing Libby with me), but I can only imagine what she was thinking when Roy and Libby got off the ferry with Mousey in a shopping bag. We could have kept Mousey here, of course, but she wanted to go with Libby, I’m quite sure.

Roy and I thought of Libby and Mousey as we ate our sautéed carrots last night (recipe follows). Hoping the days will fly by (and the carrots will grow big) until we see them both again. Well, Libby at least.

Every Night Sautéed Carrots

For a printable recipe, click here.

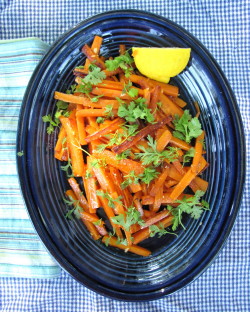
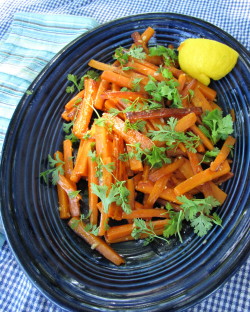
This is our house go-to method for weeknight carrots. Cooked over moderate heat in a covered skillet, the carrots get tender and lightly browned at the same time. I am picky about the way I cut carrots, as I think sticks hold together and brown up better than coins. Cutting sticks isn’t as hard as you’d think (see photo for progression) and they don’t need to be perfect. In this version, I use lemon, garlic, and cilantro (because I’ve tons of it in the garden) to season the carrots; but you could substitute lime, orange, ginger, mint or basil to customize these any night. Be sure to zest your lemon before juicing it.

_____________________________________________________

1 teaspoon fresh lemon juice, plus a couple lemon wedges for serving

1 teaspoon red wine vinegar

1/2 teaspoon honey

1 tablespoon unsalted butter, 1 teaspoon separated and chilled

2 teaspoons extra-virgin olive oil

1 pound carrots, peeled and cut into sticks 1/4 to 3/8 inch thick and 2 to 3 inches long

1/2 teaspoon kosher salt

1 teaspoon minced fresh garlic

1/4 teaspoon (packed) freshly grated lemon zest

2 tablespoons loosely packed fine cilantro leaves or 2 teaspoons chopped cilantro

________________________________________________________________

Put a serving dish near your stove. In a small bowl, combine the lemon juice, vinegar, and honey. Set aside.

In a large (12-inch) nonstick skillet, heat 2 teaspoons of the butter with the olive oil over medium heat. Add the carrots and salt and stir to coat. Cover the pan. (I use a sheet pan because my large skillet does not have a lid! It does not have to be a tight fit—letting a little air escape is good.) Cook, stirring occasionally at first and more frequently as the carrots begin to brown, until the carrots have shrunken, are just tender, and nicely browned on some sides, about 13 to 15 minutes. Uncover, reduce the heat to low, and add the garlic and lemon zest. Stir until fragrant, about 30 seconds. Drizzle the lemon juice mixture overall, toss, and remove the pan from the heat. Immediately transfer the carrots to the serving dish and garnish with the cilantro and the lemon wedges.

Bitter Gets Sweet (I Swear!): A Recipe for Caramelizing Turnips In a Cast Iron Skillet

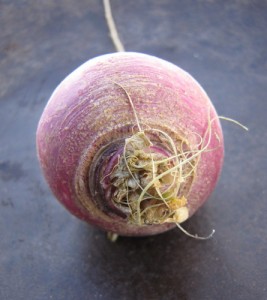
I know you are thinking I have lost my mind. Last week it was celery root; this week it’s turnips. “Can’t she write about something delicious—or something my family will actually eat?” I hear you asking. I’m sorry, but I just couldn’t pass up the chance to tell you about this—the absolutely most delicious way to cook turnips.

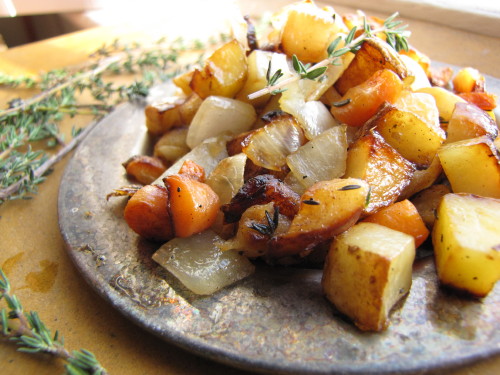
In fact, I’ve already written about this technique—slow-sautéing in a cast-iron skillet—once this week. I moonlight as an occasional blogger over at the Huffington Post’s Green Page, and this week I’ve been participating in their latest challenge—The Week of Eating In. At first I felt a little silly saying, “Sure, I’ll eat in for a week,” since I already cook and eat most of my meals at home. (Plus I just recently posted my opinion on why I think everyone else should cook at home more, too!) But then I realized I could help other people in the challenge by posting tasty ideas for cooking veggies at home.  And since I had just made my slow-sautéed turnips, potatoes, carrots, and onions for like the 12th time this winter, I figured I’d share that yummy idea on Huff Post.

Over here, I wanted to post the whole recipe (and a few more photos), and to also let you know that there are many more “slow-sautés” coming in my cookbook, Fast, Fresh, & Green. The recipes in the book were developed for a straight-sided stainless steel sauté pan, since I think more people own them than cast-iron pans. But cast-iron is so perfect for this kind of dish, because it captures and distributes heat so evenly, that I wanted you to be able to try it if you can. (You can get a pre-seasoned Lodge cast iron skillet for about $15.)

I start this kind of sauté by dicing (pretty small but not too fussy) whatever roots I’ve got on hand and piling them into the skillet with lots of olive oil and herb sprigs. The pan will be really crowded at first—that’s okay. As the vegetables cook, they brown and steam at the same time (and they shrink quite a bit). I always add some aromatic allium—onion, leeks, or shallots—about halfway through cooking for added moisture and flavor.

But the most important thing I do is to keep my ears tuned to the sizzling in the pan. It should be a steady, perky sizzle—but nothing too explosive sounding. The sizzle’s your cue to how fast the veggies are cooking. You want them to brown and steam at about the same rate, because your ultimate goal is deeply browned (yes, caramelized) vegetables that are cooked through, too. This is much easier than I’m making it sound. All you need to do is stir every once in awhile and maybe adjust the heat once or twice. The veggies will be done in about 35 to 40 minutes—but you’ll have plenty of time to make whatever else you’re having for dinner while they’re cooking. (By the way, for vegetarians, these sautés are hearty enough to plunk in the middle of the plate.)

Caramelized Turnips, Potatoes, & Carrots with Onions & Thyme

If you don’t have a cast iron pan, you can make this recipe in a 10-inch straight-sided sauté pan (stainless interior). The browning won’t be quite as even, and you might need to add a bit more oil, but the results are still very tasty.

___________________________________________________________

3 tablespoons extra-virgin olive oil, more if needed

½ pound purple-topped turnips, trimmed but not peeled, cut into ½-inch dice

½ pound Yukon Gold potatoes, unpeeled, cut into ½-inch dice

½ pound carrots, trimmed and peeled, cut into ½-inch dice

½ teaspoon kosher salt, more if needed

5 to 6 thyme sprigs

1 medium onion (about 5 ounces), cut into medium dice

___________________________________________________________

In a 10 or 11-inch cast iron skillet, heat the 3 tablespoons olive oil over medium-high heat. Add the turnips, potatoes, carrots, salt, and herb sprigs and stir and toss well to combine and to coat with the oil. (The pan will look crowded.) Reduce the heat to medium and cook, stirring and flipping occasionally with a metal spatula, for about 20 minutes. (Listen to the pan—you should hear a gentle sizzle, not a loud one. If the vegetables are browning too quickly, reduce the heat a bit to maintain that gentle sizzle. If they seem dry, add a bit more olive oil.) Add the diced onion and continue to cook, stirring and flipping with the spatula, until the vegetables are deeply browned and tender all the way through, about another 15 minutes. Remove the herb sprigs before serving. Taste and season with more salt if you like.

Serves 3 to 4