Tag Archives: Beans

Slow-Sautéed Green Beans, Before The Frost Comes

DSC_3498
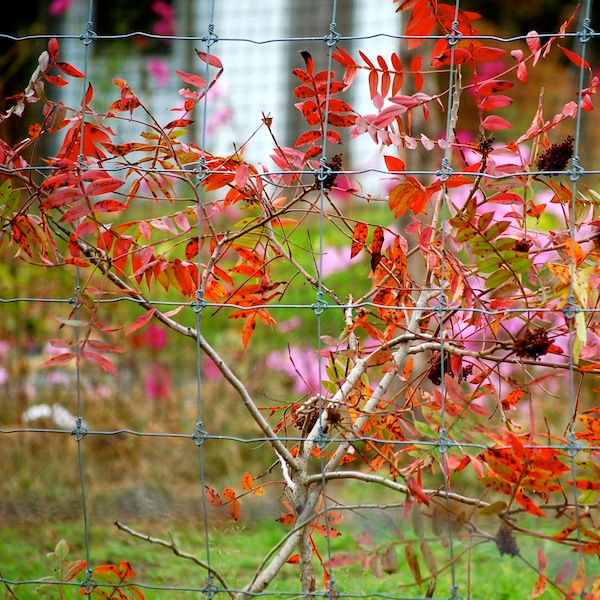
We’re in between the color and the cold right now.

DSC_3487

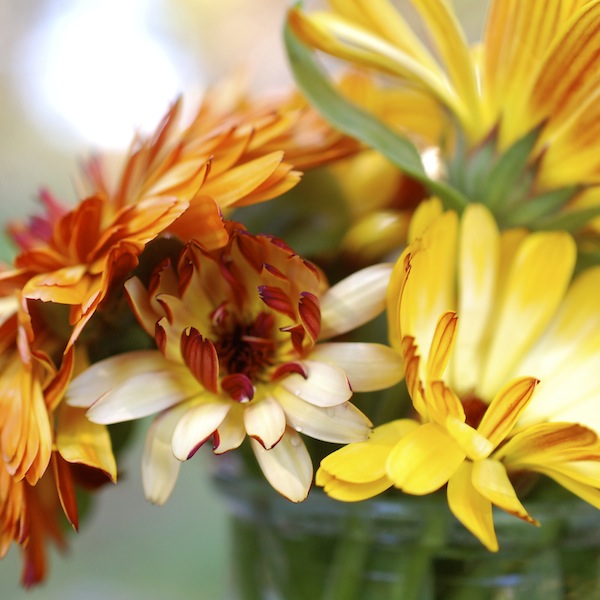
But no frost yet. So we still have flowers. Round two or three or four on the self-seeding calendulas.

DSC_3313

And we still have green beans. Yay. Rattlesnake pole beans. Double yay. Lucky we are that the trellis hasn’t blown over in this Nor ‘Easter whiffling past. But even if it had, I’d be out there picking through the vines on the ground.

photo-114

I can’t pick every day now, though, because the plants are flowering less and yielding less beans. It’s not efficient to spend time going up and down the row, squatting up and down to check every vine, if you’re not going to come away with much.

photo-116So when I do pick, some of the beans tend to be on the larger side. If they are really getting fat, I leave them, because the Rattlesnakes will eventually yield edible seeds. Some of them (see photo at right) are already plump and podding.

But if they are just a little bit beyond the filet-ish stage, I have my excuse for a slow-sauté. Every year I talk about slow-sautéed green beans on Sixburnersue. (Sorry.) I love the technique because it brings out the nutty, earthy, satisfying side of green beans, while adding the delicious side notes of aromatic veggies and herbs that cook in the pan, too. And though it certainly isn’t required, a bit of bacon, ham, or pancetta in the pan never hurts.

Last night I made a vegetarian version of one of these sautés with the Rattlesnakes, some shisito peppers, and shallots, and served it over polenta. But because my good camera is malfunctioning (it needs to be cleaned, but my car is also malfunctioning so getting to the camera shop is going to be tricky!), I don’t have a nice photo of the dish to show you. It is probably just as well, because while these beans are delicious, they aren’t the prettiest.

Of course, because I love the technique so much, I had to include it in Fresh from the Farm: A Year of Recipes and Stories. So I thought I’d share that recipe (Slow Sauteed Green Beans with Shiitakes and Prosciutto) with you here, even though when I wrote it we were growing Kentucky Wonder and Fortex pole green beans, not Rattlesnakes. Now that I’ve discovered Rattlesnakes, there’s no going back. But any green bean (pole or bush), as long as it isn’t too thin, will work here.  Get out your skillet and go for it.

Slow-Sautéed Green Beans with Shiitakes and Prosciutto

Recipe copyright Susie Middleton from Fresh From the Farm: A Year of Recipes and Stories.

You won’t believe how crowded the pan is when you first load it up with all these veggies; but with this terrific (and straightforward) technique, the veggies will slowly soften, brown, and shrink into a delicious and tender tangle of deep flavor. The browning will start happening fast in the second half of cooking, but don’t jump the gun and stop the cooking too soon. Just stir more frequently and really let everything get a deep brown color for the most lovely flavor.

 Serves 4

________________________________________________________________

2 teaspoons maple syrup

2 teaspoons sherry or white balsamic vinegar

3 tablespoons extra-virgin olive oil

1 pound green beans, trimmed

7 to 8 ounces shiitake mushrooms, stemmed and halved (or quartered if large)

8 cloves garlic, peeled and halved

2 ounces thinly sliced prosciutto, torn into small (1- to 2-inch) pieces

4 medium sprigs fresh rosemary

Kosher salt

___________________________________________________________________

In a small bowl, combine the maple syrup and vinegar.

In a large (12-inch) nonstick skillet, heat the olive oil over medium heat. Add the beans, mushrooms, garlic, prosciutto, rosemary, and 1 teaspoon salt. Toss well with tongs to coat. Cover the pan and cook, stirring occasionally, until all the green beans have turned bright green, are beginning to turn brown, and have begun to lose their stiffness, 10 to 12 minutes. Uncover and cook, stirring more frequently, until all the beans are very deeply browned (the mushrooms and garlic will be browned and tender, too), 15 to 17 more minutes. Remove the pan from the heat and taste a bean and a mushroom for salt. Season lightly if necessary (the mushrooms may have absorbed more of the salt). Stir in the maple-vinegar mixture. Remove the rosemary sprigs and transfer to a serving platter or plates. Eat right away.

Stormy Minestrone, A Recipe for Comfort

All I can think about today is soup. This may be because I have too many vegetables crowding up the fridge. After another round of recipe development and a pre-hurricane sweep of the garden, I am left with the clear makings of minestrone—everything from a five-pound bag of carrots to three awkwardly space-hogging baby fennel bulbs. I have a big basket of winter squash I keep stumbling over in the pantry, and I have a little handful of green beans I just plucked off the dying vines this morning. I even have a few cranberry beans that are finally ready to harvest, from plants that miraculously show very little storm damage.

Our storm damage, in fact, was minimal. Had circumstances been different—if Sandy hadn’t taken a left turn when she did—we would likely be facing a very different winter here on the farm. Instead the hoop house is still standing, the animals are all fine, and in fact, we have another flock of laying hens due to arrive here this week (more on that soon). So thankfully, Roy is building—rather than rebuilding. Now, of course, I hear that a big Nor ‘Easter is coming up the coast this week. So maybe we are not out of the woods yet. But still. I can’t stop thinking about Staten Island and the Rockaways and Seaside Heights. All those folks still without power and nights getting really chilly. And lots of friends on the coast of Connecticut with serious flood damage. We did have plenty of coastal erosion up here on the Island and flooding in the lowest harbor areas in the towns, but most homes were safe and dry (and warm).

Everyone knows it could have been different, though. One Island friend posted an idea on Facebook a couple days ago for a coats-and-warm-blankets drive, and seemingly overnight, boxes outside of Island businesses filled up with donations, and volunteers have come forward to drive the items down to a particularly hard-hit neighborhood in Queens.

I will be here, making hot and comforting soup, sort of a crazy response to feeling for other people who are cold. It’s like I have a sympathetic and not entirely imaginary chill that must be chased away. We human beings have strange responses to things—I know I can’t share my soup with those folks, but I’m hoping someone else will share their hot food with someone cold and hungry, and in the meantime I’m sending comfort-soup-karma out as best I can.

Here’s my Fall Farmers’ Market Minestrone recipe from The Fresh & Green Table. Deeply flavored without any meat at all, it’s a good starting point for comfort soup, but feel free to vary the veggies as you please.

Fall Farmers’ Market Minestrone  

Recipe copyright Susie Middleton, from The Fresh & Green Table (Chronicle Books, 2012).

The secrets to this meatless minestrone include lots of aromatic veggies and a Parmigiano rind. I usually finish the soup with grated Parmigiano and/or a bit of gremolata (a mix of freshly chopped parsley, lemon zest, and garlic). But if you don’t want to bother with the gremolata , it’s perfectly delicious without it.

______________________________

1/4 cup extra-virgin olive oil

2 cups medium-diced onions (about 1 large or 2 medium)

2 cups thinly sliced Savoy cabbage (about 1/4 small head)

1 cup thinly sliced fennel bulb (quartered and cored first, about 1/2 small bulb)

1 cup thinly sliced carrots (about 2 carrots)

Kosher salt

1 cup peeled, medium-diced butternut squash (about 4 to 5 oz.)

1 cup large-diced stemmed Swiss chard leaves (thinly slice stems separately and include them, too)

1 Tbsp. minced fresh garlic (plus 1/2 tsp. if making gremolata)

1 Tbsp. chopped fresh thyme

2 tsp. chopped fresh rosemary

1 tsp. ground coriander

1 Tbsp. tomato paste

1 14 1/2-oz. can diced tomatoes (I like Muir Glen), well drained

1 2-inch Parmigiano-Reggiano rind

½ cup ditalini pasta or other very small pasta

1 cup thinly sliced green beans (about 4 oz.)

½ to 1 cup fresh corn kernels (optional)

1 to 2 tsp. lemon juice

½ tsp. lemon zest (if making gremolata)

2 Tbs. chopped fresh parsley

1/3 cup coarsely grated Parmigiano Regianno

______________________________

a 5- to 6-quart Dutch oven or other large soup pot, heat the olive oil over medium heat. Add the onion, fennel, cabbage, carrots and 1 tsp. salt. Cover and cook, stirring occasionally, until the onions are softened and mostly translucent and the cabbage is limp, about 6 to 8 minutes. Uncover and continue cooking, stirring occasionally, until much of the cabbage is browning and the bottom of the pan is browning as well, about another 8 to 9 minutes.

Add the 1 Tbsp. garlic, the thyme, the rosemary, the coriander, and the tomato paste. Stir until fragrant, about 30 seconds. Add the butternut squash, the chard, the diced tomatoes, and 1 ½ tsp. salt and stir well until incorporated. Add the Parmigiano rind and 8 cups water.

Bring to a boil, reduce to a simmer, and cook, stirring occasionally, for 10 minutes. Add the ditalini and cook another 8 minutes. Add the green beans and the fresh corn (if using) and cook for 4 to 5 more minutes. Remove the pot from the heat, remove the Parmigiano rind, and stir in 1 tsp. of the lemon juice. Let cool for a few minutes; taste and adjust for salt, pepper, and lemon juice.

For the gremolata (optional), combine the 1 tsp. garlic, the lemon zest, and the fresh parsley in a small bowl.

Garnish each portion of hot soup with some of the gremolata or chopped parsely and some of the Parmigiano.

Yields 8 cups, Serves 6


You Say Borlotti, I Say Cranberry—Beans, That Is

Halfway through the summer, I gave into temptation and bought a new packet of seeds for the vegetable garden. (Like I really needed more seeds—we had so many left over from our order last winter that I have enough to start the entire garden next year.) Right around the time our first carrot row emptied out, I happened to spot some Italian Borlotti beans at the garden center down the road. I had to have them.

I’ve always wanted to grow shell beans. I think it’s the whole popping-them-out-of-the-pod thing. It seems so peaceful to me—an activity you definitely have to slow down to enjoy. But these particular shell beans are special. First off, they’re pink. I’m not kidding—my favorite color. The crimson pods and the magenta-dappled beans are way too charming to pass up. Secondly (and yeah, a bit more importantly), Borlotti beans (usually called Cranberry beans in the States) are delicious. Cooked fresh, their creamy, meaty texture is like no dried or canned bean you’ve ever eaten. The only bummer thing is that they lose that beautiful color when cooked.

Because I planted my Borlotti beans late in the season, I didn’t expect much. In fact, after a little initial weeding to help the baby plants along, I kind of ignored them as summer waned and fall got busy. But every once in a while I’d catch a glimpse of pink among the weeds, and I discovered that the plants were producing lots of pods. As soon as the pods started plumping up, I’d zipper one open every time I visited the garden. I was trying to figure out when to harvest them. Were the beans ripe? They seemed big enough, but many of them also had a pale greenish hue—hardly white with pink spots. I couldn’t find any info on the internet, but I finally got my answer, almost by accident.

I took a few pods home one day to photograph, and as I was lining them up on the patio, I noticed that even though all the pods were predominantly pink, some of them were mottled with green, some with white. The pods that had the most white—almost the color of candy canes—had the nice white and magenta speckled ripe beans inside. The pods that had a mottled green background color still had the greenish beans inside. And there were gradations along the way; it seems the pods gradually change color as the beans ripen. At last, I’d finally figured out a way to tell if the beans were ripe without having to pick the pod and open it up first.

Saturday Roy and Libby and I pulled up most of the Borlotti bean plants. We were in a rush, trying to get some tidying done in the garden before heading to the Bronx Sunday morning for a book signing I’d been asked to do at The New York Botanical Garden’s Edible Garden event. So I snipped the pods off the plants, stuffed them in a bucket, and crammed them into the fridge at home.

This afternoon I got a chance to (slow down and) sort through the pods, and happily, a majority of them were more pink than green. I shelled enough pods just to get two cups of beans, as I want to make them last. I almost hated to cook with them they were so pretty. But I wanted to prepare them the way I’ve had them in Italian restaurants—with lots of garlic and rosemary. I wasn’t disappointed; they were as delicious as I remember—the perfect thing with a warm green salad and some crusty bread. And the bonus: Since they’re fresh, they cooked in less than 30 minutes (no soaking). (And actually, despite turning grey, they were still quite pretty when I photographed them, too, though you will just have to believe me. Unfortunately, I accidentally erased and recycled those photos tonight. Glad I don’t do that very often!)

Depending on where you live, you may still see the fresh beans at farmers’ markets or natural food stores this fall. But even if you don’t get a chance to cook them fresh this year, keep an eye out for dried Borlotti (or Cranberry) beans. They’re a classic addition to all kinds of Italian soups and stews like Pasta Fagioli and Minestrone.

Fresh Cranberry Beans with Bacon, Rosemary & Garlic

For a light supper, serve these beans with a warm escarole, spinach, or arugula salad and some crusty bread. If you have pancetta (Italian bacon), it would be a more authentic substitute for bacon, so feel free to use it. And if you want to go meatless altogether, no worries. The beans are still full of flavor cooked with just the rosemary and garlic and without the meat.

2 cups (10 oz.) shelled fresh cranberry beans (from about 1 ¼ lbs. pods)
kosher salt
extra virgin olive oil
1 large clove garlic, smashed, plus 2 tsp. minced fresh garlic
2 smal sprigs fresh rosemary plus 1½ tsp. chopped fresh rosemary
2 slices bacon
1/2 tsp. sherry vinegar or white balsamic vinegar

In a medium saucepan, combine the cranberry beans, ½ tsp. kosher salt, the rosemary sprigs, the smashed garlic clove, and 3 cups water. Bring to a boil, reduce to a simmer, and cook gently until the beans are tender, about 20 to 25 minutes. (You should be able to mash them lightly with the back of a spoon.)

Transfer the beans with a slotted spoon to a bowl, and reserve the saucepan of cooking liquid. Remove the garlic and rosemary leaves from the beans.

In a medium heavy nonstick skillet, cook the bacon or pancetta over medium-low heat until the bacon is crisp, about 12 minutes. Transfer the bacon to paper towels to drain. Turn the heat to medium and add 1 Tbs. of extra-virgin olive oil to the skillet.

When the oil is hot, add the minced garlic, and cook, stirring, until the garlic is fragrant and softened, about 1 minute. Add the beans, ½ tsp. kosher salt, ½ tsp. of the chopped rosemary, and a small amount (about ¼ cup) of the cooking liquid. Turn the heat to medium-high and cook, stirring frequently, until most of the cooking liquid has simmered down or been absorbed, about 2 minutes. Add the sherry vinegar and another ½ tsp. chopped rosemary to the beans. Stir and transfer all the contents of the pan to a serving bowl and garnish with the bacon, crumbled, and the remaining ½ tsp. chopped rosemary. (If you don’t plan to eat all the beans tonight, save a little more of the cooking liquid to reheat them in tomorrow.)

Serves 3 to 4 as a side dish.

Slow-Sautéed Pole Beans with Shallots and Bacon — Not so Pretty, but Pretty Delicious

When the pole bean trellis blew down for the second time, we left it. Granted, we were a bit annoyed at the pole beans. They took a lifetime to germinate and what seemed like eternity to start yielding. Meanwhile the bush beans were churning out lovely filet beans by the pound every day.  We would have ignored the pole beans altogether except for this nagging voice I had in my head, “Pole beans are better than bush beans.” I grew up with this voice. My father’s.

My father and his mother (my grandmother Honey, who “put up” pole beans at the end of every summer) were always carrying on about the superiority of “pole beans” over bush beans. (Pole beans are green bean varieties like Kentucky Wonder that grow on vines as long as 12 feet, therefore needing support in the form of poles or some other trellising.)  I needed to find out the truth for myself, as it seemed to me that our bush beans (a variety from FedCo called Beananza) were pretty darn tasty—and oh-so-lovely to look at, too. The pole beans looked kind of gnarled up and blotchy the minute they appeared on the scene.

They didn’t get any prettier—but they did keep growing, even under the weight of a collapsed trellis. After neglecting them for a while (figuring we’d eventually till them back into the soil, as nitrate-fixing beans make great soil enhancements), we came along one day, lifted up the vines, and discovered dozens of big funky beans growing under them.  We surely weren’t going to sell these fallen beans, so I collected them that day—and every few days thereafter—and took them home for us. From the first time I picked them, I knew something was up. They just smelled “bean-y.” I realize that doesn’t sound too appealing, but I mean it in the best way—a really fresh, green, arresting aroma that followed through when I cooked them. It was green bean flavor times two! Really delicious. So now I have to tell my Dad he was right. Bummer.

The pole beans (at least the varieties we grew—Kentucky Wonder and Fortex) do present one cooking challenge:  their texture is a bit, well… I wouldn’t say tougher exactly, just more substantial, I guess. Toothsome, in a good way. To me that texture is a clue to cook the beans a bit longer and with some heartier flavors. But by longer cooking, I don’t mean boiling them to death. I mean something like slow-sautéing, where the beans get brown and tender and pick up the flavors of other ingredients in the pan, like the shallots and bacon in the recipe below. I made this recipe yesterday because it felt comforting and warm, and we’ve had a bit of a nip in the air up here. Plus, I had some particularly gnarly beans to deal with. So it may not look so pretty (though, yes, everything is supposed to be that brown—brown is where all the flavor is), but it did taste pretty delicious.

Slow-Sautéed Pole Beans with Shallots & Bacon

If you don’t have pole green beans, don’t worry. This recipe will work great with any mature green beans—just choose the largest beans you can find when you’re shopping. This method of “slow-sautéing” involves a crowded pan (the opposite of what you would think of for a quick sauté), but I promise you it works great. Keep the pan at a gentle sizzle—you can always slow browning down by lowering the heat. The end goal is veggies that are cooked through and nicely browned, too.

__________________________________

2 teaspoons orange juice

1 teaspoon red wine vinegar

3 tablespoons extra-virgin olive oil

12 ounces pole green beans, trimmed and cut into 2- or 3-inch pieces

4 large shallots, peeled and cut lengthwise into ½-inch wedges (keep a little of the stem end intact if you can)

2 ounces bacon (about 2 pieces), cut into 1-inch pieces

kosher salt

½ tablespoon unsalted butter

__________________________________

In a small bowl, combine the orange juice and vinegar and set aside. In a 10-inch straight sided skillet, heat the olive oil over medium heat. Add the beans, shallots, bacon, and a scant teaspoon of salt. Using tongs, toss to break up the bacon and to coat everything with the oil and salt. Reduce the heat to medium-low. Cook, stirring occasionally at first and a little more frequently after browning begins, until the vegetables are all very-well browned and limp (the bacon will be cooked through and some pieces will be crisp), about 22 to 25 minutes. Remove the pan from the heat, add the butter and the orange juice mixture, and immediately stir to incorporate the liquids and melting butter into the beans. Transfer the vegetables to a serving dish or individual plates and serve hot or warm.

Serves 3 to 4 as a side dish

It’s About the Green Beans, Stupid!

For all the complaining I did about green beans as a child, I can’t believe I’m growing (and eating) more of them these days than practically any other vegetable. My green bean complaints started early. First, my mom seemed stuck on serving those frozen, stringy “frenched” beans about five times a week, no matter what else was on the plate. (‘Very mushy texture’ is the best thing I can say about them.) After her Julia Child-cooking enlightenment period, my mom moved on to fresh beans—but we still ate them, boiled with butter, a lot. Then my Dad got into vegetable gardening, and his pride and joy were pole string beans. I remember one summer (I think I was 10) when it seemed like we ate nothing but green beans. Ack. I’m pretty sure there was then a period of about 20 years when I didn’t eat any green beans at all.

But eventually I became editor of Fine Cooking magazine, and as such, privy to all kinds of reader feedback and issue surveys. I noticed that every time we did a feature with green bean recipes in it, the article topped the popularity scales. Finally, I had to say to myself, “It’s about the green beans, stupid.” Yes, I admitted, green beans are the most popular, most well-liked vegetable on the planet (or at least in America).

Fortunately somewhere along the way I also learned to love green beans—mostly because I began to cook them in lots of different ways. (I roast, grill, braise, and sauté them in Fast, Fresh & Green.) But there’s no getting around the fact that boiling is the quickest, simplest, and most efficient method for cooking green beans perfectly. And also the easiest way to ruin them.

There’s only one way to tell if a bean is perfectly cooked—by tasting it. Tasting as you cook is one of those concepts that chefs hammer into your head in culinary school, so I just thought I’d pass it along to you without screaming or throwing pots. There really is a practical (and rewarding) reason to taste as you cook. Actually, two reasons: flavor and texture. Unless you taste as you go, you won’t catch the subtle changes in flavor and texture that heat (both dry and wet heat) imparts to food, and you won’t be able to make the necessary adjustments in seasoning and cooking times that recipe instructions simply can’t tell you to do.

Green beans are a great example. Undercooked green beans are rubbery; overcooked are mushy. If you are boiling beans, simply begin tasting them after a few minutes. At first you will have a hard time biting through them. As the texture softens, the green beans are closer to being perfectly cooked. When you can just bite through with no resistance, they’re done. (If you walk away to check your email at this point and come back 5 minutes later, you will be sorry.) Yes, you will have to sacrifice a few green beans to tasting.

The thing is, different sized (and different aged) beans cook at different rates, so you pretty much need to taste every batch every time you cook them. In our garden, we are now harvesting “filet” beans—lovely slender green beans that are similar to French haricots verts—and they cook in just a couple minutes. But yesterday, I bought regular green beans at the grocery store to test a recipe for this blog (below), and they took about 6 minutes to be perfectly done. So tasting’s the thing.

By the way, in case there was any doubt, green beans are just as popular on Martha’s Vineyard as everywhere else. Even on recent days when hardly anything else at the farm stand has sold, the filet beans have disappeared. So of course, what have we gone and done? Planted more. (Bush beans are quick to germinate, flower, and fruit.) And the pole beans are coming, too. Yikes, I am going to be surrounded by green beans… having Jack-and-The-Beanstalk nightmares, don’t ya know. What goes around comes around.

The technique for perfectly cooked green beans is embedded in the recipe below. If you don’t feel like green beans with a Greek flavor profile, simply cook the beans and dress them as you please while they’re still a bit warm. Brown better, lemon oil, pesto, your favorite vinaigrette—whatever you like.

Warm Green Bean Salad with Feta, Olives, & Almonds and Lemon-Oregano Vinaigrette

3 tablespoons plus ½ teaspoon extra-virgin olive oil
¼ medium red onion, peeled and very thinly sliced
Kosher salt
12 ounces (3/4 lb.) green beans, trimmed
1 tablespoon balsamic vinegar
1 scant teaspoon freshly grated lemon zest
½ teaspoon honey
fresh pepper
1 tablespoon chopped fresh oregano
1 tablespoon chopped, pitted Kalamata olives
1 to 2 tablespoons finely crumbled feta cheese
1 tablespoon finely chopped toasted almonds

In a small nonstick skillet, heat ½ teaspoon of the olive oil over medium-high heat. Add the sliced red onion and cook, stirring, until the onion has just softened (the smallest pieces will be wilted), about 2 minutes. Set the onions aside.

Fill a large saucepan half full with water and 2 teaspoons kosher salt. Arrange a few layers of dishtowels on a work surface to drain the beans. Add the beans to the boiling water and begin timing immediately. Boil until the beans are tender to the bite but still green, 5 to 8 minutes. (Begin tasting after 3 or 4 minutes; depending on the age of the beans and how quickly your stovetop brings water back to a boil, there can be a wide range in doneness times.) Drain the beans, or use tongs to lift them out of the water, and spread them out on the towels to let excess moisture drain and evaporate, about 5 minutes.

Make the dressing: Whisk together the 3 tablespoons olive oil, the balsamic vinegar, the lemon zest, the honey, 1/8 teaspoon kosher salt, and several grinds of fresh pepper in a glass measure or small mixing bowl. Add the chopped oregano and the chopped olives and stir or whisk again well to combine.

Arrange the cooled beans on a platter or in a shallow bowl and drizzle with all of the dressing. Arrange the red onions loosely over the beans and sprinkle with as much of the feta cheese and toasted almonds that you like. Serve slightly warm or at room temperature.

Serves 4