 We may be taking this Green Acres thing a little far, but we’re having fun. Actually, more fun than people really deserve to have. Our latest project is making our own maple syrup from the sugar maples in our yard. Or I should say, this is Roy’s latest project. He got all geared up about this, apparently having learned something about maple sugaring in 4H and Boy Scouts. (The crafty 4H part I can wrap my head around. But Roy—a Boy Scout? Well, we all have our mysteries.)
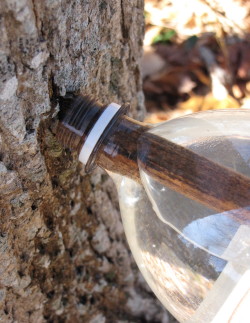
Anyhow, we have these two lovely mature sugar maples right out back, so Roy drilled one hole into each and inserted a tap fashioned from bamboo into each hole. (Mature sugar maples can take up to three taps.) With the cold nights and warmer days we’ve been having, the sap has been running like crazy. Roy’s solution to catching the sap (rather than the classic old-timey galvanized bucket we have that doesn’t look too sanitary) was to hang clean two-liter soda bottles over each tap. This works great—the narrow neck of the bottles keeps rain and other stuff out, while the weight of the running sap keeps the bottle clamped on to the tap. The bottles fill up in only a few hours though, so you’ve got to switch them often.
 As far as cooking down the sap into maple syrup—before I (briefly!) describe our experiments, my food-safety-culinary-professional-self has to issue a disclaimer: You should turn elsewhere for expert information if you want to try this at home. We are just messing around with making a little syrup for our own drizzling, but if you seriously want to learn more about this, you can check out this primer, or visit or call a small producer like these folks we just read about in the latest issue of Edible Boston.
We started with one key piece of knowledge: Sap to syrup is a 40 to 1 ratio, so if you wanted 1 quart of maple syrup, you’d need to start with 40 quarts. We have managed, through trial and error, to get 1 pint of deliciously maple-y syrup (on the lighter side but still tasty) by boiling down the sap in parts—once the first batch gets down to about an inch and a half of depth in the pot, we add another big batch of sap. We keep on reducing the liquid down this way by adding more sap, and after each reduction the remaining liquid gets a bit darker, a bit sweeter, and a bit more viscous. If you know anything about water, sugar, and syrup, you’ll know that this all has to do with increasing the ratio of sugar to water in the liquid, and that to get the proper end result, you’d need a hydrometer. (Maple syrup that will both keep and not form sugar crystals has a final sugar percentage of between 66 and 67percent). But for a small amount of something tasty, we managed without a hydrometer.
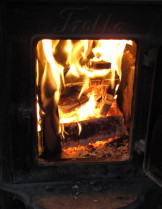
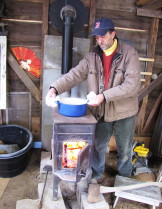
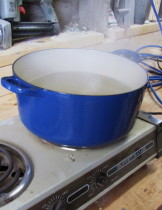 Any way you approach it, you will need to set up burners outside, and you will need a big heavy-duty pot. Our garage/barn/shop out back has both a wood stove and electricity. We tried using the wood stove and one of my cast iron Dutch ovens, but it couldn’t bring the liquid to a rolling boil. (Removing the stove cover would work—and would wreck my pot). So we switched to a portable electric twin burner we have and did most of the reducing on that in the shop. Roy brought the pot inside for the final reduction. But if you tried doing the whole thing inside, your ceiling paint would peel. (By the way, you will also need a fine-meshed filter to strain sugar sand out of the syrup.)
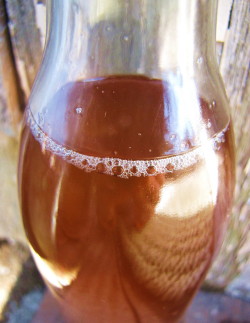
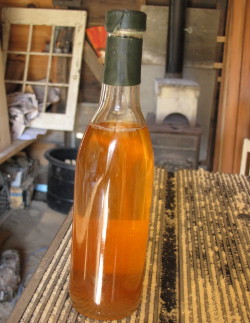
I, of course, let Roy do all the hard stuff. All I really did was clean a bottle so that we could take a pretty picture of the finished syrup—and then I could start drizzling it on everything, including vegetables (like the smoky sautéed cabbage and mushrooms we had last night). It’s no secret that I’m fond of maple syrup to the point of over-using it. (At least I can admit it. See these Swiss chard and Tuscan kale recipes on sixburnersue.com.)
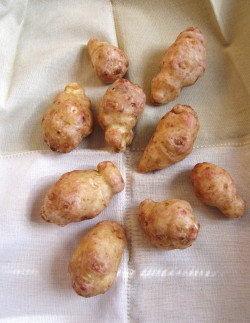
 But in my follies, I found one vegetable it doesn’t get along with—Jerusalem artichokes (aka sunchokes). I bought the sunchokes at Whole Foods when we were off-Island last week. I bought some kohlrabi, too, thinking I need to push myself into experimenting with some vegetables I tend to overlook or haven’t worked with much.
The plump knobby sunchokes were pleasing to look at and hold, but don’t smell like anything.(I am an obsessive sniffer.) Easy to chop and slice, too (they don’t need peeling). But my jury’s still out on the flavor. I’d like to try Thomas Keller’s easy-looking sunchoke soup in the latest issue of Vegetarian Times for a different approach (unfortunately the recipe’s not online), but my roasting experiments left me perplexed. (I started with roasting on the advice of cookbooks I consulted.)
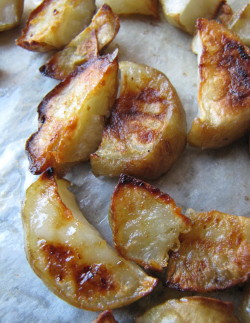
I cut the sunchokes into half-moons, tossed with oil and salt, and cooked at 425 on a sheet pan until tender and browned around the edges, about 20 minutes. While they were cooking, I made a quick rosemary-maple butter. When I tasted the roasted tubers, I had a feeling the maple butter was the wrong way to go—even with the rosemary and a touch of sherry vinegar in it. So I held off on tossing the two together.
I found the flavor of the roasted sunchokes to be intensely artichokey—but more in the artichoke leaf kind of way than the artichoke heart flavor. (I adore baby artichokes and artichoke hearts, and I know I may be splitting hairs here, but there really is a difference between the hearts and the leaves. This flavor was somehow overly vegetal and grassy, like the pulp on the leaves can be.) I loved the pieces with very crispy edges. (Probably no surprise, but I swear those crispy parts were more complex and less vegetal.). Realizing the maple butter was not going to cut the intensity, I made up a quick Asian dipping sauce similar to this one I use for crispy broccoli and I loved what the ginger and soy did with the roasted sunchoke flavor—that match worked for me.
 So I need to mess around more with sunchokes—and the next time I roast them, I’d definitely push the browning. But right now I can’t yet rave about them. Maybe one of you has had a different experience with these tubers (which are actually the root of a particular sunflower). Let me know. Me, I’ll keep drizzling our maple syrup on Brussels sprouts and green beans—and on my yogurt and berry parfaits!
