
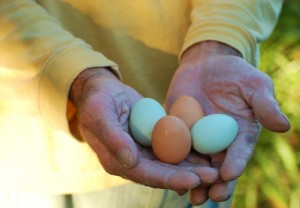
 It has come to our attention that our hens are, ahem, robust. Not fat or anything. Just happy and healthy—and, okay, a tad bit bigger than the rest of the birds that arrived at the post office together last April. (We split a day-old-chick order with friends, as the hatchery ships a minimum of 25 chicks.) Our friend Mary told us the other day that Perky, our Sicilian Buttercup, is at least 50 percent bigger than the other Buttercups in the batch. This is probably why our ladies have started laying eggs a little earlier than expected. So far only Sugar (the Aracauna) and Chippy (one of the Partridge Rocks) are making regular appearances in the nesting boxes, but we have a nice clutch of little blue and brown eggs to show for it. (The hens will be laying full-size eggs in a few weeks.)
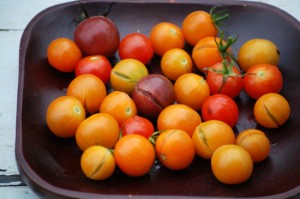 So the question is, what gives? Maybe since they’re only eight of them and they have lots of room to move around, the hens are just spreading their wings. But more likely it’s something they’re eating (or drinking—one theory is that maybe it’s our mineral-heavy well water). I think it’s the garden compost we give them—especially the Droppers and Splitters (left). These are the cherry tomatoes we can’t sell because they fall off the plants or split with too much moisture (like after a good rain—ugh.) I once had a black Lab who loved cherry tomatoes so much that he would stand on his puppy tippy-toes (or tippy-paws) to snarf the fruit off the plants through the garden fence. But I think these hens have Scout beat. They love those darn cherry tomatoes—especially the pulpy, seedy insides. Libby collects the Droppers from the garden and tosses them to the girls, who peck them open. And this week, alas, I’ve had more Splitters than I’d like to admit. We also feed the hens Honkers – the gangly green beans we find lurking in the shadows, beans that have grown so scary big that they look like witches’ fingers.
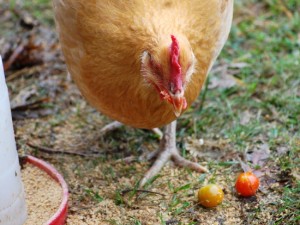 It makes me feel good that these tomatoes and beans don’t get wasted. In fact, since we collect the chicken manure for the compost pile, the hens are doing us a great favor by processing all this stuff. (Same goes for Cocoa Bunny, who is a greens-eating machine. Someone nicknamed her The Shredder for the way she eats leaves. The hens won’t touch mustard greens or kale, but Cocoa will devour them. And we collect her manure, too, so it’s all good. This whole circle of life thing makes me very happy. In fact, I just wrote an essay about it for Martha’s Vineyard Magazine.)
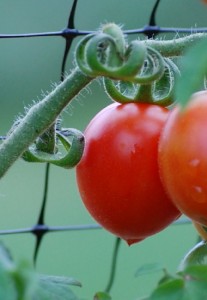 Don’t get me wrong, we also eat a lot of the funky vegetables. I slice the Honkers very thinly crosswise and stir-fry them. I pop the Splitters in my mouth while I’m harvesting. And then of course we also have to eat the veggies that have languished on the farm stand (thankfully, not so much). For instance, I’ve had trouble getting people to cozy up to the little baby plum tomatoes I’m growing (left). The variety is called Principe Borghese, and apparently it is used in Italy for sundried tomatoes. So I decided to try oven-drying them (or very slowly roasting them at low temps to approximate sun-drying), both to preserve some and to get a method down on paper to pass along at the farm stand.
They came out well—very intensely flavored and sort of semi-dried, still with a bit of moisture. (Everyone knows I am stupidly crazy about oven-roasting tomatoes, so I will just say right out, it wouldn’t be summer if I didn’t roast some sort of tomato! Click here for quick-roasted (“caramelized”) plum tomatoes or here for slow-roasted beefsteak tomatoes.)
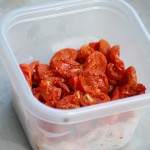
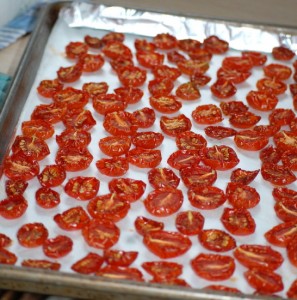 The problem was, in my attempt to sell these “Roasters”, I wrote up a little index card with directions for the oven-drying method and tucked it into a pint of the tomatoes on the farm stand. Only I suggested a six-hour cooking time instead of four hours. One of my friends took the bait, bought the tomatoes, cooked ‘em for six hours and found them to be very brittle! Oops. I screwed up. Should have been four hours. I did another batch to make sure and liked the four-hour result.
Of course, if you had a very low oven setting (or even better, a solar dehydrator), you could fully dry these tomatoes out and store them at room temp. With the method I used (below), you’ll need to refrigerate or freeze them. One sheet tray (which holds a couple pounds) gets you a nice stash, though, and I’ve been using them in everything from soups and pastas to salads and even the pot roast I’ve got in the oven right now. I think this method would also work well with large cherry tomatoes, though the cooking time would need to be shortened somewhat. I haven’t yet tried the bigger plum tomatoes this way. (Though next year I will grow them instead of these boutique-y things!)
 Here’s the method for Oven “Semi-Dried” Baby Plum Tomatoes: With a serrated knife, cut the tomatoes in half lengthwise. Place them, cut-side-up, on a parchment-lined heavy-duty baking sheet. Cook in a 250-degree oven for about 4 to 4 1/2 hours, or until they are shrunken and intensely colored. They will have lost most, but not all, of their moisture. They will collapse a bit more when you get them out of the oven. Let cool and refrigerate or freeze.

Hey Susie,
I would buy those tomatoes in a heartbeat! They do look perfect for roasting, my favorite as well. I enjoy your articles and blogs and wish I was a customer of yours daily/weekly. The chickens look like fun and so lucky to have you as the mother hen!
Hi Andrea! Thanks for your note. Hope all is well in Falmouth — I bet you have a few tomatoes of your own growing! Yes, the chickens are endlessly entertaining. Happy fall!