Category Archives: Favorite Techniques

An Indian Curry with Cauliflower, Spinach, Tomatoes, and Coconut Milk – And the Miracle of Chickpeas

Weeknight. Cooking. Strategy. Three words we all wrestle with, but that I hope will soon bring a smile to your face when you get a hold of Simple Green Suppers: A Fresh Strategy for One-Dish Vegetarian Meals. Lately, with all the distractions, I barely noticed that the pub date for my fourth cookbook is sneaking up, and now we have just two months to go. (April 11—yay!)
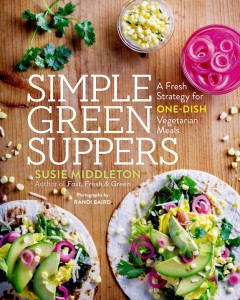
I’m pretty darn excited, because I think this is the most useful cookbook I’ve written since Fast, Fresh & Green, and honestly, these days, useful is good. Useful is something we can wrap our heads around.

Heck, lately I’ve even realized that smarter cooking might be able to help us alleviate one problem in this country—food waste. (In American households, 27 million pounds of food a year gets tossed.) But I’ll offer some tips on that in a later blog.

Right now, I want to assure you that flavor comes first. Recipes that taste good and work well are the ones you will make again. When I can create great flavor, show a new technique, and offer a way to streamline weeknight cooking, I’m extra happy. Because I want you to cook more, enjoy cooking, and eat well.

So let’s talk about chickpeas—those incredibly versatile, protein-rich legumes that do it all. Despite the Ottolenghi-inspired elevation of chickpeas to a sexy star ingredient (very welcome stateside after many years of unfortunate mistreatment), I still have many friends who tell me they’re not crazy about chickpeas. I think this is because the texture, the liquid, and the flavor of canned chickpeas can be off-putting. Canned chickpeas can be a bit mushy and slippery, and some brands have a slight metallic or funky taste—or too much sodium. Doing a taste comparison of brands can go a long way towards eliminating some of these problems. I’ve found I really like Westbrae Natural Organic Garbanzos, so I stock up on them when I find them. And rinsing helps a lot, too.
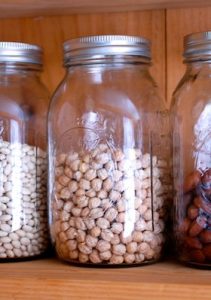
It’s great to keep canned chickpeas around for convenience; I’d never suggest that you don’t. But I will tell you that of all the beans and legumes I cook and eat, chickpeas are the one I most frequently cook myself.

In fact, I toss a couple cups of dried chickpeas into a mixing bowl, cover with water, and stick in my fridge most Saturday nights. (That’s the overnight soak that people are fond of complaining about, when in reality it’s just a habit to form, and one that takes less than 2 minutes to accomplish.) At some point on Sunday, I drain them, put them in my pasta pot, cover with lots of water, add a bay leaf, a garlic clove, and maybe a sprig or two of thyme, bring to a simmer, and cook for about an hour. Then I add a little salt and continue cooking for 15 to 30 more minutes until the chickpeas are tender to the bite. (If I have to add more boiling water, I do.) I drain them, cool them, pop them in a storage container, refrigerate, and voila!–I  have chickpeas for the week. Very little hands-on cooking time for a big payoff.

Chickpeas that you cook yourself will not only have a better flavor and texture than canned ones, but they will keep longer as well—5 to 7 days in the fridge. For a vegetarian, having a protein like this already cooked and in the fridge cuts weeknight supper prep time down considerably.

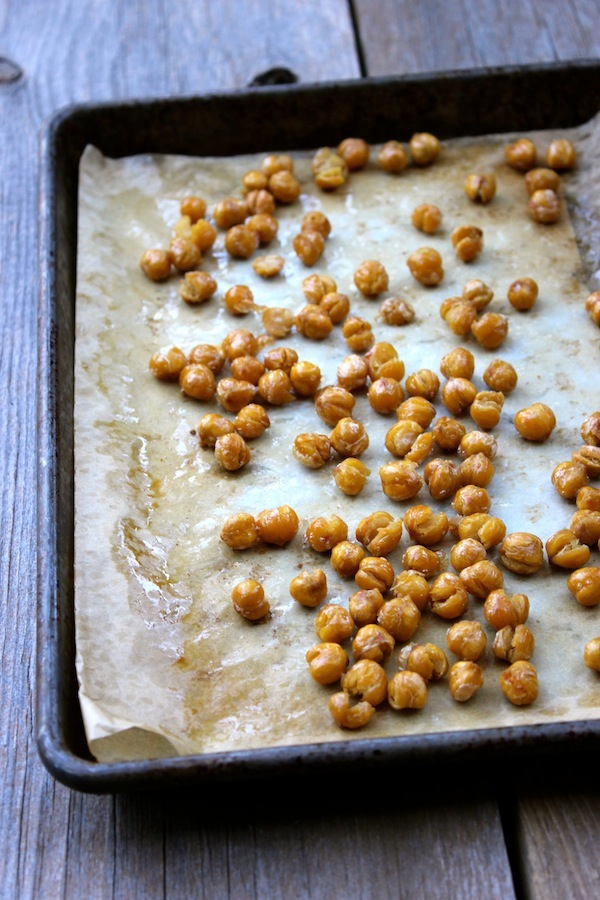
And now those chickpeas are ready for their biggest trick—one that ordinary beans and lentils cannot perform: Browning. Yes, this is the real reason I love chickpeas so much: You can sauté or roast them until they take on a golden brown color and toasty, even nuttier, flavor. And you know, I love brown!! When I discovered that chickpeas could do this, I was ecstatic. Because the flavor is killer. The crunchy texture of roasted chickpeas is a fun bonus.

The good news is that you can sauté or roast either home-cooked or well-drained canned chickpeas. So if you’re new to vegetarian eating, look at it this way: If you’re making a quick weeknight stir-fry or sauté or braise, you can replace the shrimp, the chicken, or the beef with chickpeas. Chickpeas can also be part of a delicious hash, and they make a great base for quesadilla and burrito fillings. Sautéed and spiced chickpeas and veggies, along with some toasted nuts and fresh herbs, turn cooked whole grains (another great make-ahead) into a million different suppers. Marinated or dressed (don’t leave them rolling around naked and lonely), they turn a chopped or warm salad into a filling supper.

But enough already. I think at this point you’d just like a delicious recipe to try all this out, so here is a favorite Indian curry from the book. I think you’ll love it.

And I’ll be back in a couple weeks with another teaser recipe and more tips for weeknight vegetarian suppers to keep you excited about the book. And if you haven’t preordered your copy—or asked your independent bookstore to order some—please do. Click on this link.

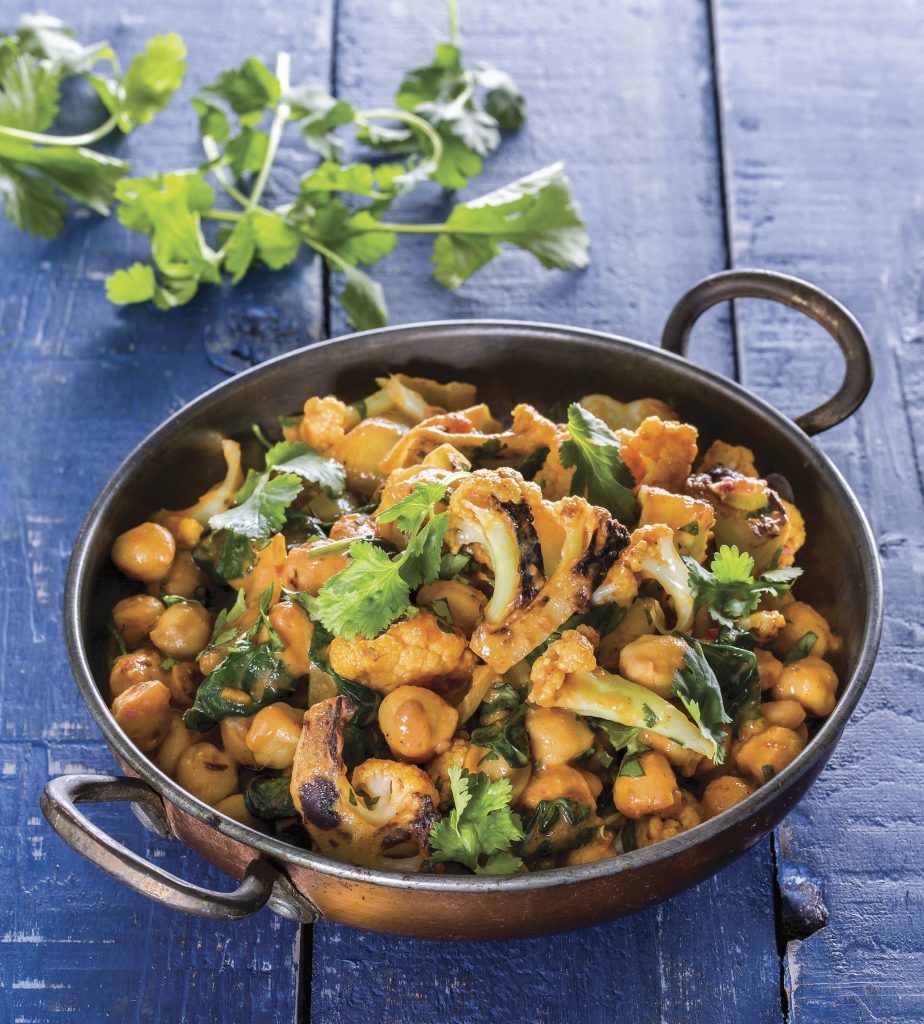
Indian Curry with Chickpeas, Cauliflower, Spinach, Tomatoes, and Coconut Milk

One fall night I set out to cook a comforting Indian curry that would have all the things I love in it, starting with sautéed chickpeas and cauliflower and ending with a slightly creamy coconut-tomato sauce. In between, a mix of ginger, garlic, and curry spices (as well as fresh spinach) would provide backbone. I decided to use my handy stir-fry pan, because it’s great for sautéing and simmering. After a little chopping, I started cooking. Fifteen minutes later, I was so happy: I loved it! Leftovers were delicious, too. Be sure to use fresh curry powder. This dish is filling on its own, but you could serve it with rice or naan if you like.

Serves 2 to 3

3 tablespoons grapeseed or vegetable oil

One 15-ounce can chickpeas, drained, rinsed, and dried (or about 1 1/3 cups cooked chickpeas)

¾ teaspoon kosher salt, plus a pinch

3 cups cauliflower florets (1- to 1½-inch pieces, cut so that most have a flat side)

1 cup sliced yellow onion (about 1 medium-large onion, cut lengthwise)

1 tablespoon minced fresh garlic

1 tablespoon minced fresh ginger

1½ teaspoons Asian chili-garlic paste

2 teaspoons curry powder

2 teaspoons packed dark brown sugar

½ teaspoon ground cumin

3 cups packed baby spinach

½ cup canned crushed tomatoes

1 cup canned full-fat coconut milk (preferably organic), well stirred

¼ cup finely chopped fresh cilantro


In a large (12-inch) nonstick stir-fry pan, heat 1 tablespoon of the oil over medium-high heat. When the oil is hot, add the chickpeas and ¼ teaspoon salt. Cook, stirring occasionally, until all the chickpeas are golden and have some brown spots on them, 5 to 6 minutes. Transfer the chickpeas to a large plate.

Return the pan to medium-high heat and add 1 tablespoon of the oil. When the oil is hot, add the cauliflower and ½ teaspoon salt. Stir, cover, and cook, uncovering to stir occasionally, until the cauliflower pieces are browned in spots and have lost their whiteness (they will be softened but still crisp), about 5 minutes. (If the cauliflower is browning too quickly, reduce the heat to medium. If your pan does not have a lid, use a baking sheet or the bottom of a large skillet.) Transfer the cauliflower to the plate with the chickpeas.

Return the pan to medium-high heat and add the remaining 1 tablespoon of oil, the onion, and a pinch of salt. Cook, stirring, until the onions are browned in spots but haven’t lost all their stiffness, about 3 minutes. Add the garlic, ginger, chili-garlic paste, curry powder, brown sugar, and cumin. Stir well to combine, and fry the spices for 30 seconds. Add the spinach, tomatoes, and coconut milk and stir well to incorporate the spices with the liquids and to soften the spinach. Add the cooked cauliflower and chickpeas and simmer, stirring, for 1 minute. Stir in the cilantro and remove the pan from the heat.

Serve hot or very warm in two or three bowls.

Recipe From Simple Green Suppers by Susie Middleton, © 2017 by Susie Middleton. Reprinted by arrangement with Roost Books, an imprint of Shambhala Publications, Inc. Boulder, CO.

Photo of Indian Curry by Randi Baird © Randi Baird

When Life Gives You Splitters, Make Tomato Confit

DSC_7815We’re growing a new variety of tomato (which shall remain nameless at this point, as it is not proving itself to be all that it was cracked up to be!), which tends to split. Especially after a lot of rain like we just had. (To be fair, there are some delicious tomatoes that have this trait. Inconsistent water wreaks havoc with tomatoes.)

I don’t like wasting all those splitters. Sadly, we used to feed them to Martha, Opti, Oreo, Sugar and the rest of our original hens. But they are no longer with us, and throwing one bowl of splitters into a yard of 200 hens is hardly fair, so I’ve had to think of other solutions.
DSC_7753

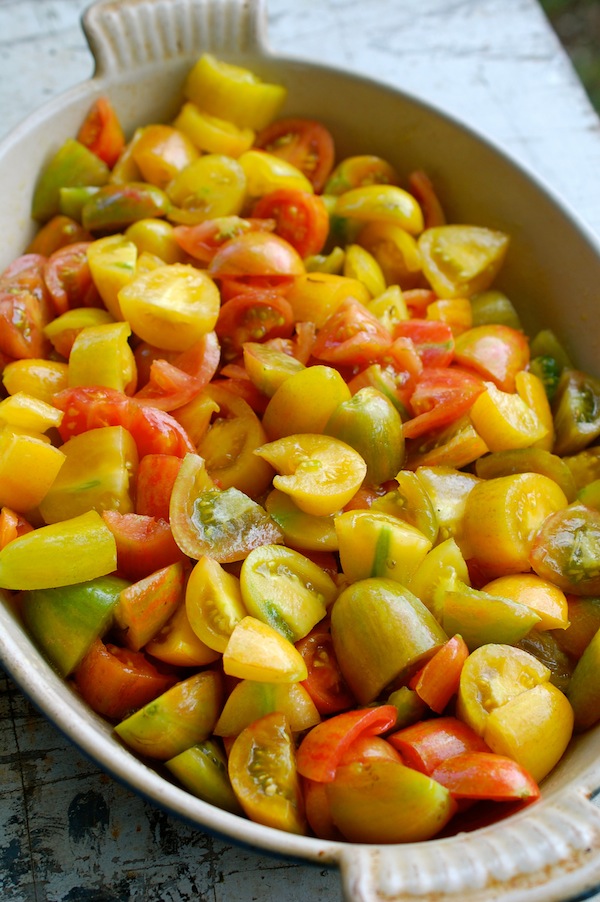
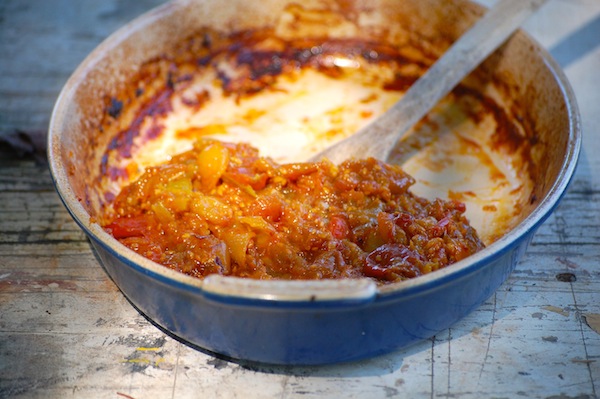
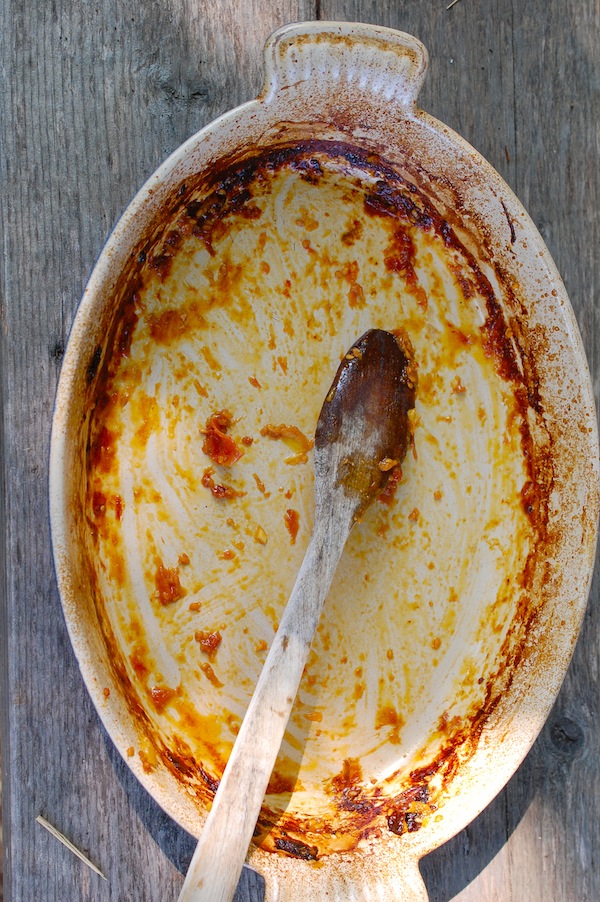
This week I simply cut them all up into chunks, tossed them with olive oil and salt, put them in a heavy roasting pan, and cooked them for about 2 hours at 300°. I checked on them from time to time, stirring and scraping. I cooked them until a lot of the moisture was gone and the texture was kind of jammy. At the very end, I folded in a little minced fresh garlic and a mixture of a small amount of balsamic vinegar and honey, and let the garlic soften and everything infuse for a couple minutes in the oven.

DSC_7772

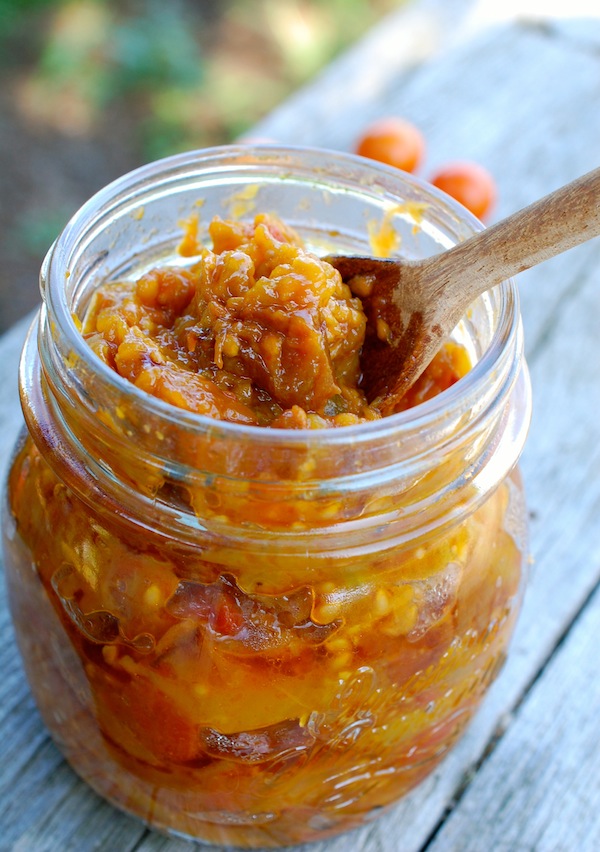
I left the cooked-down tomatoes to cool for a short spell in the pan, and then tasted. Delicious! Even though these tomatoes didn’t start out with a very robust flavor, roasting them down concentrated their flavor (as roasting always does!). The result was kind of a confit (really just a tomato jam or conserve), though with seeds and skins left in, it might not be everyone’s cup of tea. The seeds and skins don’t bother me, and considering how dead simple this is—and that it greatly extends the life of a bunch of tomatoes that otherwise would probably rot before you could eat them—it’s a no-brainer. You could literally do it with any tomatoes, any time.

DSC_7782

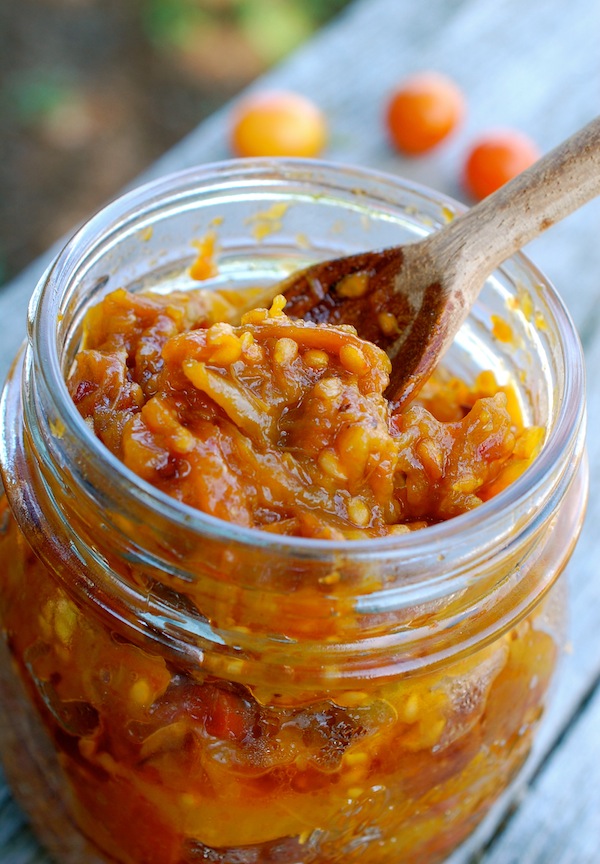
I put the confit in a cute jar just to photograph it—I was not intending to can it or keep it for very long. But I imagine it will keep at least a week in the fridge and would freeze just fine for longer. We’ve put it on top of grilled bread with warm goat cheese, and I’m planning to use the rest in a baked pasta. You could put some on top of scrambled eggs or in a quesadilla (yum), top a pizza or use it as a base for a flavorful rice dish. Why not?

DSC_7820


How to Cook a Pattypan, A Shisito, A Fairy Tale, A Fingerling

DSC_7564

We’re growing a few fun and different veggies this year—in addition to the old favorites—just to keep things interesting. (Fun and different=Cute names, too!)

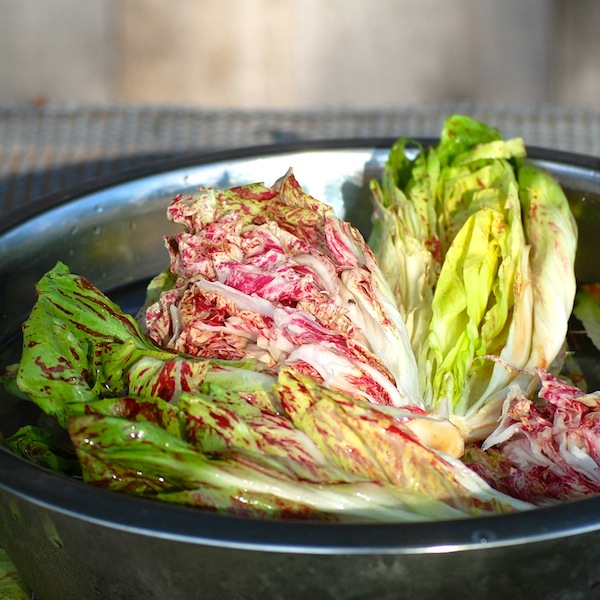
DSC_7426 The most beautiful? This Bel Fiore Radicchio.

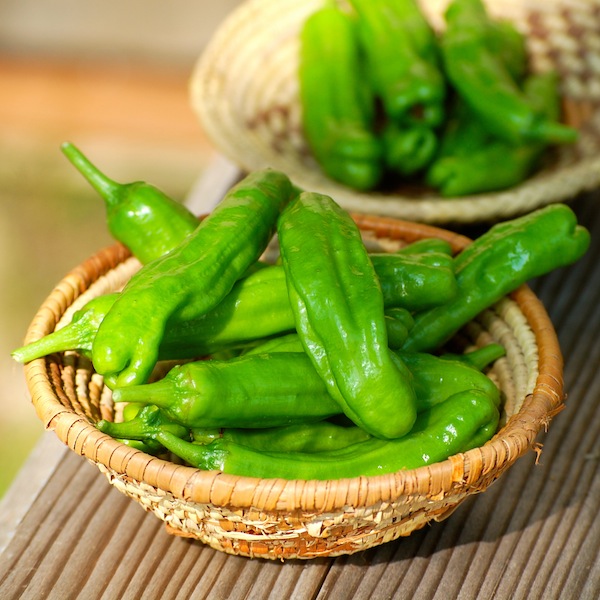
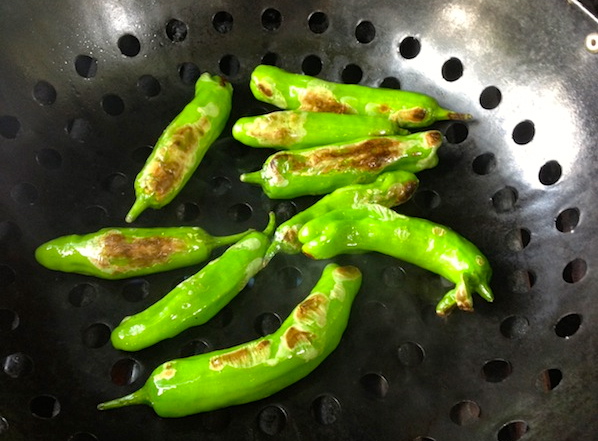
The most trendy? Shisito peppers. Well, oops, apparently (according to this hysterical mock restaurant menu on Eater.com) this trend is now passé in certain circles, or at least ubiquitous, which is never a good thing. But for a market gardener, a cook, or an eater, Shisito peppers are a total win-win-win. The plants are prolific, the cooking is super easy—just toss with oil, cook in a hot cast-iron pan or in a grill basket until blistered (a few minutes), and season with sea salt. Eat the whole thing—absolutely delicious. Summer-crowd appetizer friendly, too.

DSC_7204photo-72

The most colorful?

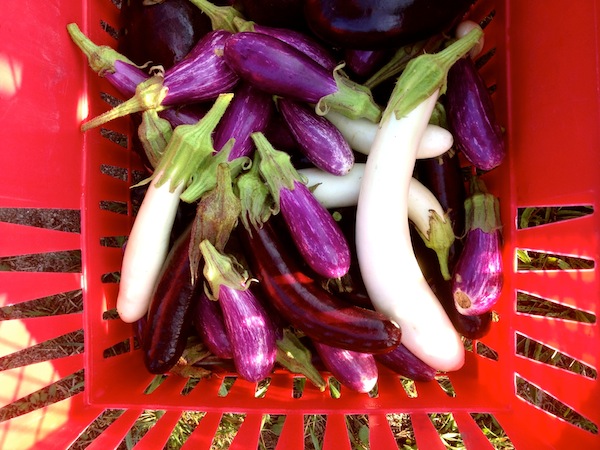
photo-77photo-76 Our crazy collection of eggplants, including new additions Orient Charm (the lavender beauty) and Hansel and Gretel (the mini purples and slim whites). The cute little Fairy Tales are still new to many shoppers, and I do get some questions about how to cook them. (Hopefully I can write a full blog on eggplants before the summer’s out—most of the slim eggplants are really interchangeable, though Fairy Tale most definitely has a creamier flesh than the others.)

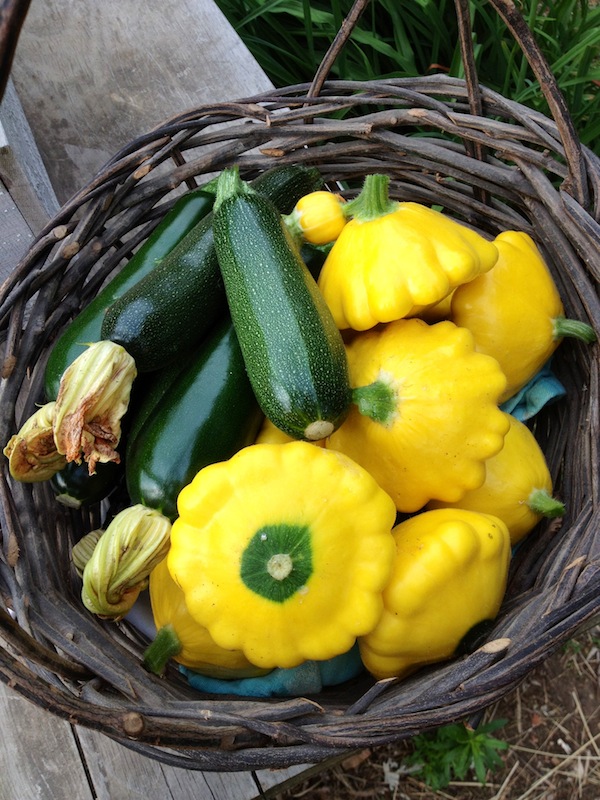
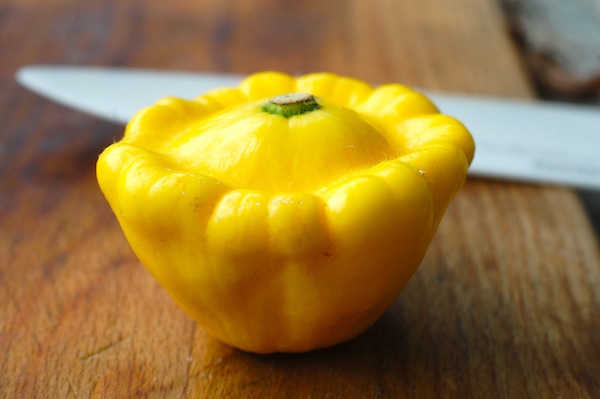
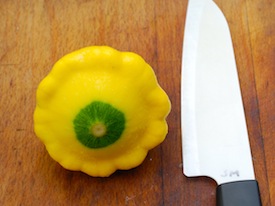
photo-74 And yet despite these less familiar vegetables, it’s something kind of classic (it’s a squash after all!) that seems to confound people the most. Every single day, I put all the green zucchini and the yellow pattypan squash in a big basket together. And every single day the zucchini quickly sell out before the pattypans. The pattypans do have their admirers—our Sunburst variety is so cheery—and there are some shoppers that exclaim, “Oh, my favorite!” and buy 5 or 6 at a time. But I finally realized it’s the shape that stumps many folks.

Because in reality, the texture of a pattypan is no different than a zucchini (as long as neither is overgrown) and you can dice or slice or grate or chop them both.  (The Sunburst pattypan, despite being yellow, does not have the seedy, watery texture of a crookneck or summer squash, but the firmer texture of a zucchini.) I think the flavor of a pattypan is actually a little sweeter than a zucchini.

DSC_7712

But when you look at a pattypan, especially a full-grown one, as opposed to the minis I’ve written about in the past (apparently my obsession with this subject has not waned), you do have to stop and think, now how am I going to cut this thing?

DSC_7690DSC_7700


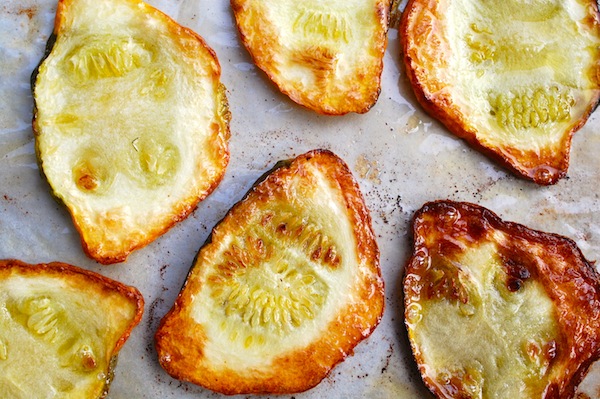
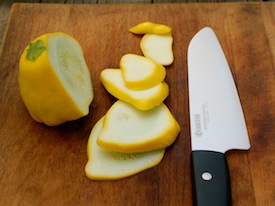
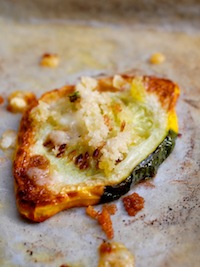
DSC_7572Hence, my first suggestion: Slice it and roast it. Specifically, slice it North Pole to South Pole (not through the equator), with one of the Poles being the stem end. Slice it thinly, but not too thinly, brush or toss the pieces with oil and salt, and roast in a 425° degree oven until golden brown and tender, 18 to 20 minutes, turning over with tongs once if you like (see finished photo at top of blog). In the last few minutes, you can sprinkle with a mixture of bread crumbs, Parmigianno and parsley if you like (right). Serve as a sidedish with a squeeze of lemon. Or sandwich a bit of goat cheese between warm slices when they come out of the oven and drizzle with a black olive vinaigrette. (There’s a recipe for Grilled Antipasto of Green and Yellow Zucchini with Black Olive-Lemon Vinaigrette in Fresh from the Farm. You can also grill, rather than roast, the slices (just cut them a little thicker).

The slice shape also works just dandy in a vegetable gratin like this one—just replace the zucchini slices with the pattypans.

DSC_7721 For smaller pattypans, cutting them in wedges (as if you were cutting a pie) gives you nice chunky pieces to stir-fry, sauté, or cook in a grill basket on the grill.  As with any summer squash that contains a fair amount of moisture, using relatively high heat will brown up the vegetable before it has a chance to get mushy. Caramelization brings out the sweetness, too. (Find a stir-fry recipe here.)

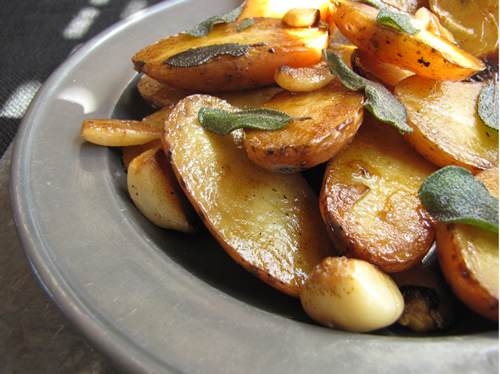
Now for those of you who’ve been asking about cooking those little Fingerling potatoes, I’ve got a treat for you. Click here!

braisedfingerlings


How DO You Cook Those Japanese Baby Turnips, Anyway?

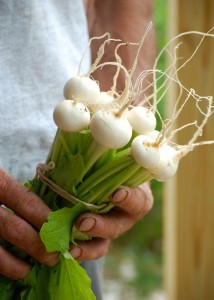
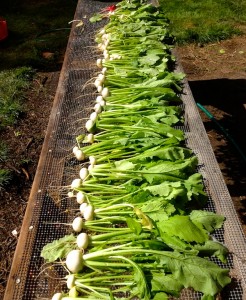
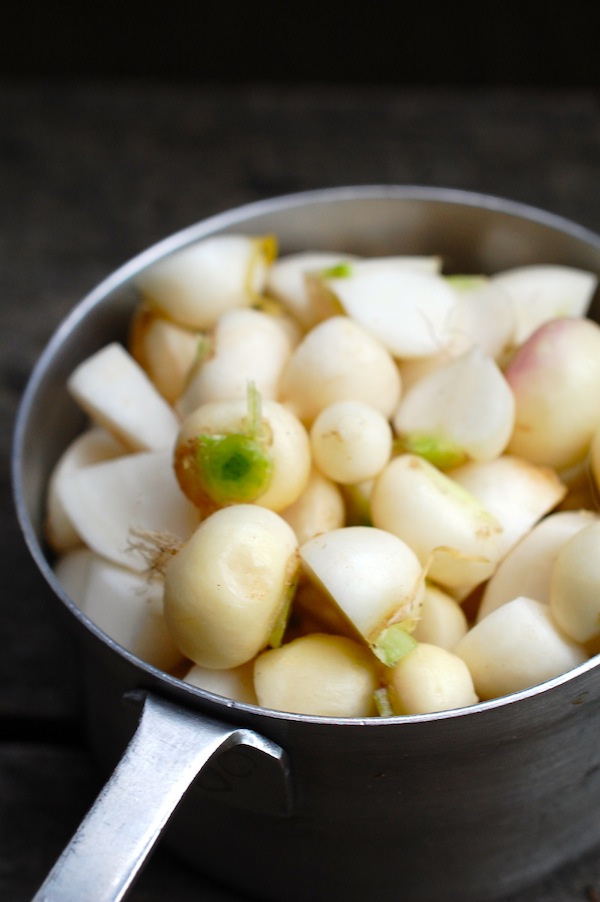
DSC_5455bunch 2We are just coming to the end of our first-ever harvest of Tokyo turnips, aka Japanese baby turnips. They aren’t really babies, but they are really delicious and beautiful and tender and juicy. (The greens are delicate and tasty, too.) We’ve never grown them (or a similar variety called Hakurei that’s popular at farmers’ markets) before, so I am pretty darn excited that they did well, and I can’t wait to grow more. I’m sure our cool weather helped, so I probably won’t seed again until fall.

It’s unusual for me to sell a vegetable at the farm stand that I haven’t cooked with much. And while I could certainly guess by the juicy raw texture and flavor that both minimal cooking (steaming, quick-braising, glazing) and browning (roasting, sautéing and stir-frying) would probably work with these, I couldn’t quickly reference one of my own recipes to help people cook them.

photo-64Fortunately, many of our farm stand customers are adventurous and competent cooks, so several of them forged ahead without me! One woman found a recipe for a nice sauté with potatoes in my fellow Island cookbook author friend Cathy Walther’s Greens, Glorious Greens, and on FaceBook, another cookbook author friend, Diane Morgan, suggested finishing a sauté with miso butter. I don’t have Cathy’s Greens book, though I know it’s a classic and well worth checking out, but I do have Diane’s award-winning Roots, and I can tell you there are more than a few really delicious recipes for turnip dishes in it, including one called Kashmiri-Style Turnips with Greens that led me to think I wasn’t crazy to want to pair cilantro (and ginger) with the baby turnips. The cilantro is flourishing in the cool spring garden, alongside the turnip bed.

Today (thank God for the rain!) I finally got a chance to mess around with the Japanese turnips in the kitchen. Since we had sold all the good-sized and blemish-free roots at the farm stand, I was left with only teeny-tiny roots and some bigger damaged roots, so I had no choice but to cut everything about ½-inch in size. (That meant no cutting for the teeniest mini-marbles.) But I think I would favor that size anyway—or wedges if all my roots were similar sized—for the quickest cooking. I did both a quick par-boil and a quick sauté, adding the greens only briefly to wilt at the end in the sauté , and with lemon and butter, found that the baby turnips really do make a super-quick spring side dish.

DSC_5438

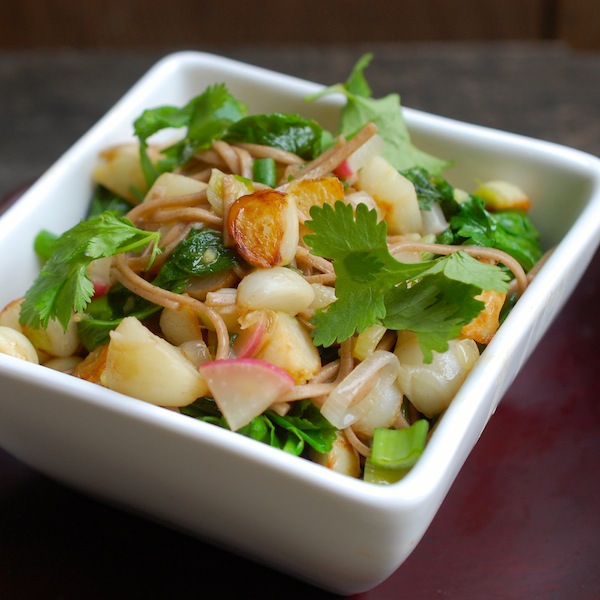
DSC_5233Then I indulged my desire to go Asian, and did a stir-fry with soba noodles—and ate the whole thing for lunch. (It would have served two easily with some grilled shrimp. Photos very top and below.) Originally I thought I might go all the way and turn it into an Asian noodle soup, as the greens would be so perfect for one of these. (And one small turnip—generally about 2 inches in diameter—has a lot of greens attached.) But I was afraid the turnip roots would get lost in the soup, so I kept it noodle-y. I’m including the recipe below in narrative form, as I wouldn’t want to give you a set-in-stone recipe without testing again with more uniform turnips and more exact proportions.


To make Soba Noodles with Stir-Fried Baby Turnips, Ginger & Cilantro: DSC_5470

Cook a handful of soba noodles separately in boiling water. (Follow the package directions, but shorten the cooking time a bit.) Drain and hold. Get out a non-stick stir-fry pan or a big non-stick sauté pan and heat just a couple teaspoons of vegetable oil (I used grapeseed oil) over medium heat. Add about a cup of diced baby turnip roots (trimmed) and a couple big pinches of kosher or sea salt. Cook, stirring, until lightly browned, about 5 minutes. Add a teaspoon of chopped fresh ginger, one-half teaspoon of chopped garlic, about ¼ cup thickly sliced spring onions or scallions, and a couple tablespoons of quartered, sliced radishes. (If I’d had a small Serrano pepper, I would have added a bit of it, chopped, too.)

Stir, cooking, until fragrant and a bit softened. Add a half cup of chicken broth or other broth and about 2 cups torn, stemmed turnip greens. Stir until the greens are wilted. Add the soba noodles and stir well to combine. Add a mix of fresh lemon (or lime) juice and soy sauce (one-half to one teaspoon of each or to taste) and a tablespoon or more of torn fresh cilantro leaves. Stir, remove from the heat, transfer to a serving bowl and garnish with a bit more cilantro and some sliced spring onion or scallion green tops.  (Serves 1 or 2)


photo-66P.S. I almost completely forgot. The first thing I actually did with the baby turnips a few days ago was to add them to one of my slow-sautes with carrots and potatoes. I’d forgotten I had a few in the fridge, and cut them just as a i was starting to cook the potatoes and carrots. They cook a little more quickly than purple-topped turnips, so you can certainly use them deliciously in one of these, but I might add them half-way through cooking.


Throwback Thursday: Ten Things to do with Celery Root

croot 2This week marks the 4-year anniversary of sixburnersue.com. Yay Sixburnersue! Whew. That’s a lot of blog posts. To celebrate, I’m going the “Throwback Thursday” route and reaching into the archives to repost one of the earliest—and believe it or not, most popular—posts I have done. And yes, I’m talking about celery root. The reason people frequently land on this post (actually two posts–you might want to read Cinderalla Celery Root first!) is pretty simple, I think: There isn’t a lot of great info out there about cooking celery root (celeriac). So when people search for it, they wind up here!

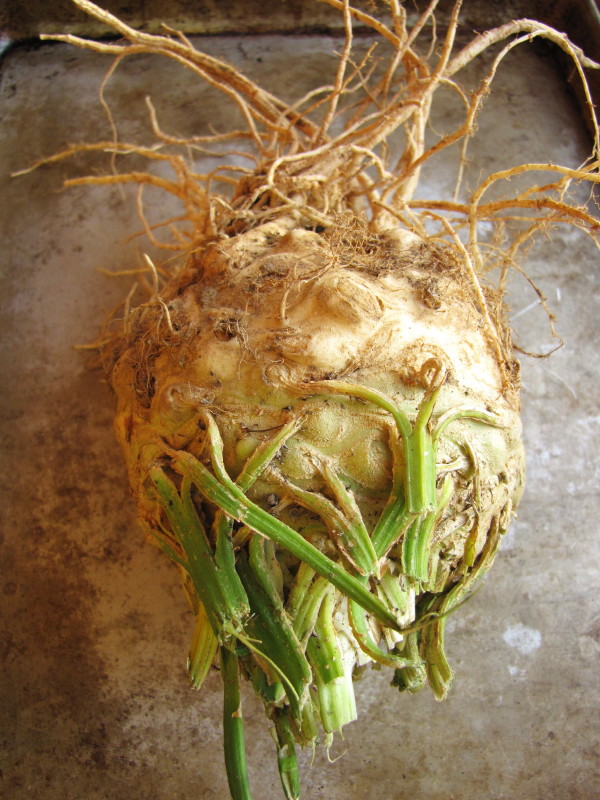
croot 3So, you’re in luck if you happen to be harboring a few of these hairy, gnarly looking roots. You can click straight through to the delicious Creamy Celery Root and Potato Gratin recipe. Or you can peruse this list of 10 ideas and get started down the road to celery root bliss!

1. Slice celery root into thin matchsticks (or grate it coarsely) and toss it (raw) into a winter salad of endive, sliced pears, toasted walnuts, and blue cheese.

2. Make roasted celery root “chips.” Slice the root in half and then into quarters; then slice each quarter as thinly as possible. (A santoku knife is great for this). Toss the pieces in enough olive oil to coat, sprinkle with salt, spread on a heavy-duty sheet pan; and roast at 350°F until they are mostly a deep golden brown, with some white left. (I think the darker ones are crispier, but too dark and they’ll taste bitter.) Let them cool on the sheet pan to finish crisping up. Sprinkle with more salt and snack on the couch with your favorite DVD.croot 4

3.  Since celery root and potatoes are such a great match, use them together in a hearty winter soup. Sauté lots of sliced leeks in butter, add cubed celery root, potatoes, and chicken or vegetable broth, simmer until tender, puree, and enhance with a touch of cream, a little lemon zest, lots of chopped fresh parsley and crispy croutons.

4. Apples and celery root are also happy partners. Use them raw together in a salad, or try roasting them first and adding them to a warm escarole salad with crispy strips of ham and a warm Dijon vinaigrette.

5.  Make a celery root “galette” by lining a tart pan with a couple layers of thinly sliced circles of celery root and gruyere cheese. Bake at 400°F until browned and tender. (Cover for the first half of cooking.) Let cool and slice into wedges.

6. Try a “quick braise” of celery root. Brown diced celery root in a combination of butter and olive oil in a sauté pan, then add just enough liquid (a little broth spiked with apple cider), cover and reduce the liquid to finish cooking the vegetables. Uncover, toss with a little spiced butter, and serve warm.

croot 57. Instead of chips, you can also dice celery root for roasting. Make a quick weeknight side dish of roasted celery root and Yukon Gold potatoes with honey and rosemary. Cut the vegetables into ½-inch dice, toss in olive oil and salt, and roast on a sheet pan at 425°F until browned and tender. Dress lightly with a combination of melted butter, honey, and chopped fresh rosemary.

8. Celery root  is also a good flavor match with seafood.  A bed of celery root puree for a sear-roasted fish filet is delicious. Cut the root (and a few small potatoes) into pieces and simmer them with a few small garlic cloves until tender. Puree the vegetables with a little of the cooking liquid, a bit of cream, and salt and pepper.

9. Instead of a puree, make a celery root “mash” by hand-mashing cooked celery root and potatoes together with butter and milk and a little sautéed garlic. Serve with pot roast.

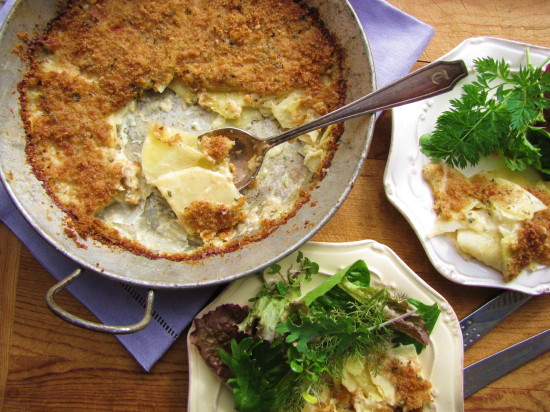
10. For an elegant holiday side dish—or even a hearty weeknight main dish with a salad—make my recipe for a celery root and potato gratin I use a combination of heavy cream and chicken broth so it is rich but not too heavy; this is a good dish to introduce celery root to folks.

IMG_3066_1

How to Make a Savory Rustic Tart with an Easy, Flaky Dough

xroastedtomatotartxTART DOUGH 20

My affection for buttery, flaky crusts and sweet, caramelized vegetables came together one magical day many years ago. I realized that the wonderfully easy food-processor tart dough I had learned as a young cook at Al Forno restaurant wasn’t just for dessert. As much as I like a good rustic fruit tart (and there is one to die for—Little Pear Crostatas with Hazelnut Crisp Topping—in Fresh from the Farm), I am always looking for a good destination for roasted or sautéed vegetables, too. And these fun-to-make, free-form tarts (no special pan needed) are perfect for showcasing all kinds of veggies.

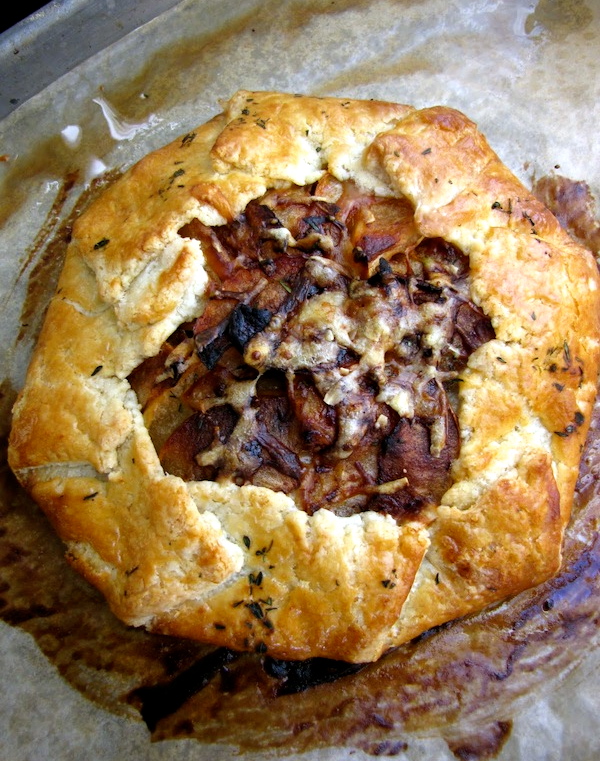
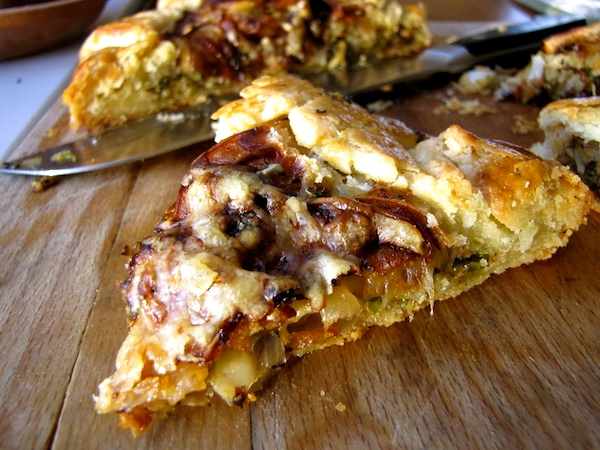
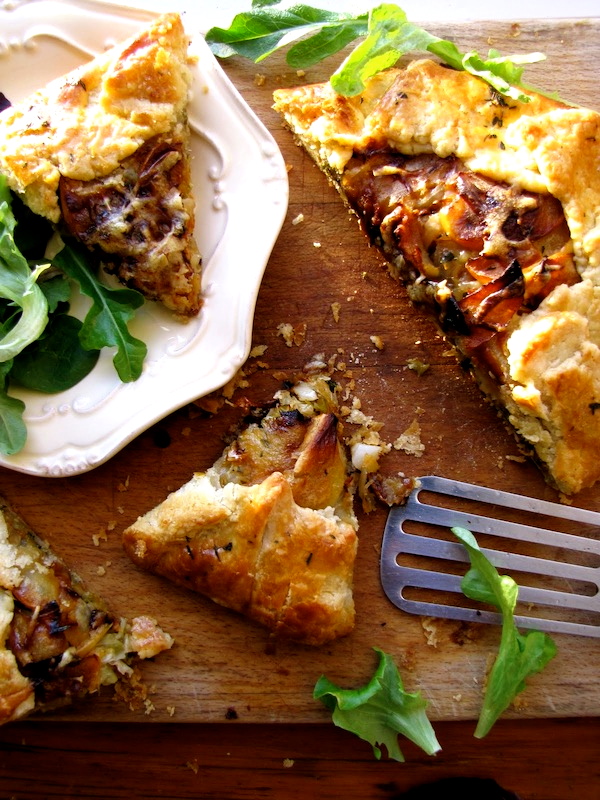
xTARTS Ratatouille 2I really played out this idea in The Fresh & Green Table with four delicious recipes—Roasted Ratatouille Tart with Goat Cheese & Mint; Seven-Treasure Roasted Winter Veggie Tart; Roasted Butternut Squash, Cranberry, Shallot & Pecan Tart; and Savoy Cabbage, Apple, Onion & Gruyere Tart (pictured here). And, not being able to help myself, I’ve done it again in Fresh from the Farm with one of my favorite ingredients, roasted tomatoes (see photo at top.)

I’ve never blogged about the tarts, though, because the recipes take up a lot of vertical space. With both the tart dough and the completed tart recipe needing to run together, your eyes would get tired!

But today I was organizing some old photos and came across a series of decent test photos that Roy and I took while developing the tarts for The Fresh & Green Table. I realized that publishing them would go a long way towards illuminating the technique of making the dough and assembling the tarts, so I’ve decided to go ahead and post these photos here today. (Therefore, if you’re looking at one of the tart recipes in my book, you can now get a little idea of what the process is like by looking here. Next I should probably do a video!)

You’ll also find the tart dough recipe after the photos. And I will put the recipe for the Savoy Cabbage, Apple, Onion & Gruyere Tart (the one in these process photos) in a separate post so that you can print it out on its own (and make it right now, while winter cabbage reigns supreme). One of these days I will also finally get my recipe formatting software working—and then the recipes will truly be print friendly. It’s on the list, I promise.

By the way, rustic tarts are also variously called crostatas and galettes.

Making and Assembling a Savory Rustic Tart

xTART DOUGH 2

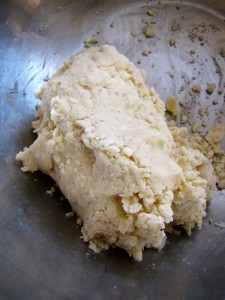
xTART DOUGH 1After pulsing the flour, salt, cold butter and a little ice water together in a food processor until the mixture looks like small pebbles, dump the mixture into a large mixing bowl. Use your fingers and the palm of your hand to knead the loose dough together into a mass.

xTART DOUGH 4xTART DOUGH 3

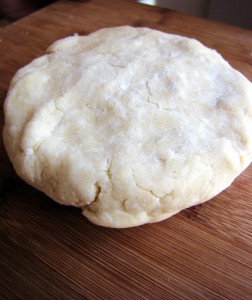
On a floured surface, pat and shape the dough into two flat disks, each about an inch thick. Wrap well in plastic and refrigerate for an hour or up to two days. Or freeze for a few weeks.


xTART DOUGH 5

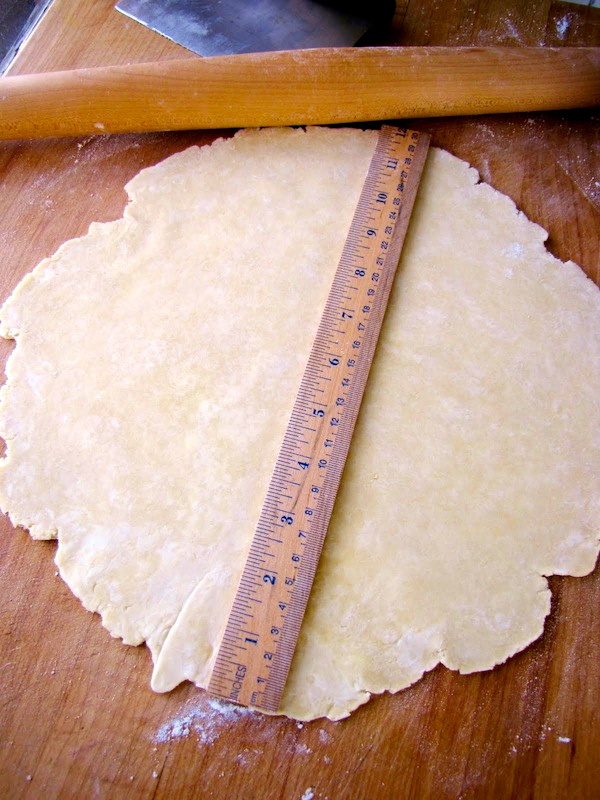
Remove dough from fridge 30 to 45 minutes before rolling. Flour a large surface, get out a ruler, and begin rolling the dough disk out, lifting the dough up, tossing a little more flour underneath, and giving it a quarter turn after every roll. The lifting and flour help prevent sticking; the turn helps with shaping a rough circle. (I like a French pin with tapered ends, which also helps to keep you from rolling over the edges of the dough, which will squish it.) Continue to roll the dough until you have a circle roughly 12-inches wide.
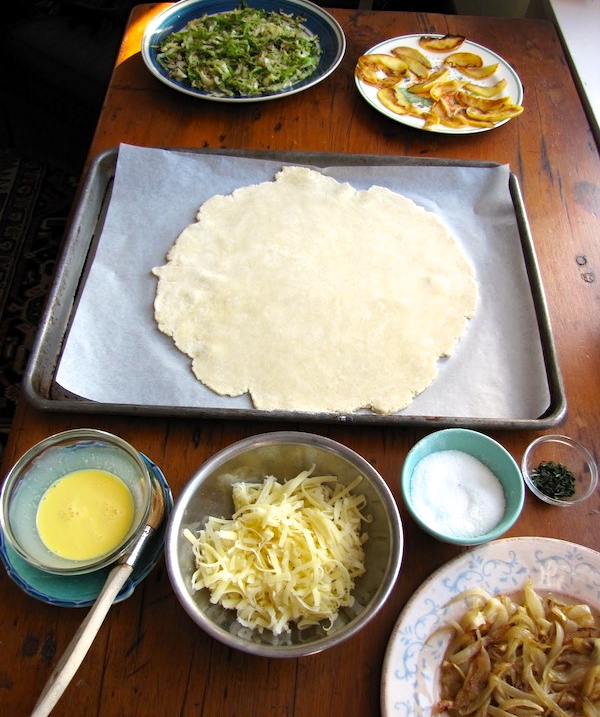
xTART DOUGH 6Transfer the dough to a parchment- lined heavy duty baking sheet.

Make an egg wash by combining an egg yolk and heavy cream.

Arrange all your filling ingredients around your baking sheet to make assembly easiest. (In most tart recipes, you can cook the filling ingredients during the time it takes for your dough to come back up to cool room temperature.)

xtart dough 8

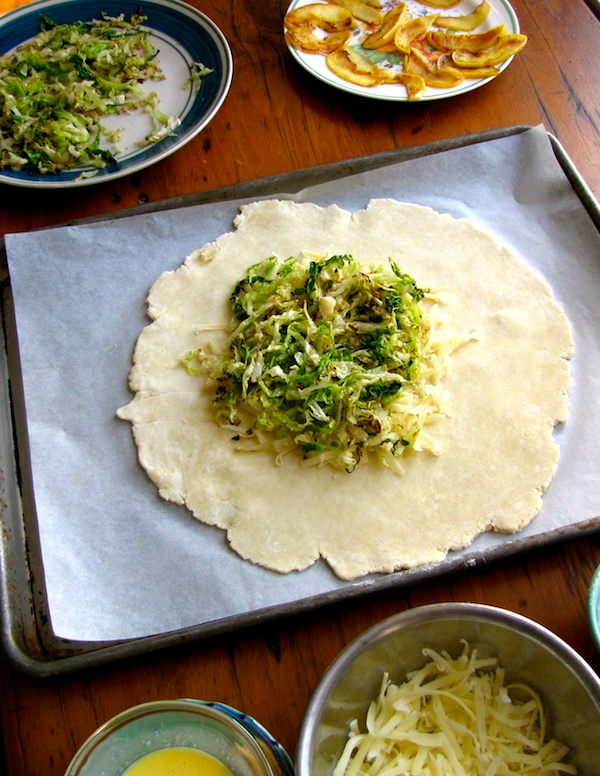
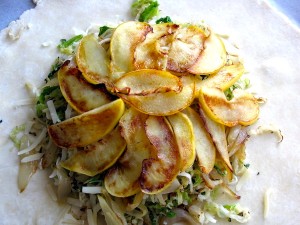
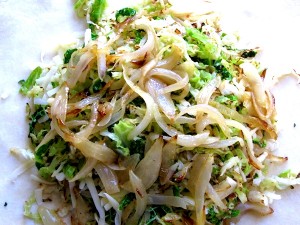
Arrange your first ingredient (usually cheese; in this case gruyere) in the center of the dough, leaving a 2-inch border all the way around. (Note, I could have done a much better job on this one–looks like 2 inches on one side and 4 on another! Maybe it was the camera angle.) Top with your next layer (in this case, sautéed cabbage).
xTART DOUGH 11xTART DOUGH 10Continue layering your filling ingredients until you are done.

xTART DOUGH 14

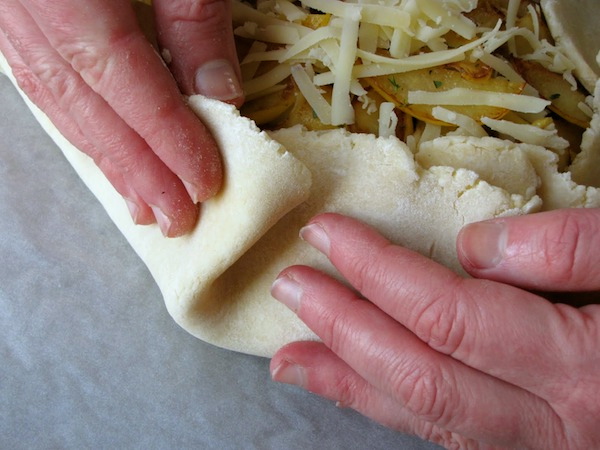
However you are most comfortable, pleat the edges of the dough up and over the filling.

xTART DOUGH 12

I often use the thumb and fingers of one hand to pinch while using the other hand to pull the dough up and begin the fold. (Okay, folks, by now you realize I don’t stand a chance at a career as a hand model. Yes, Roy took these pictures and those are my big hands!)


xTART DOUGH 16

xTART DOUGH 19


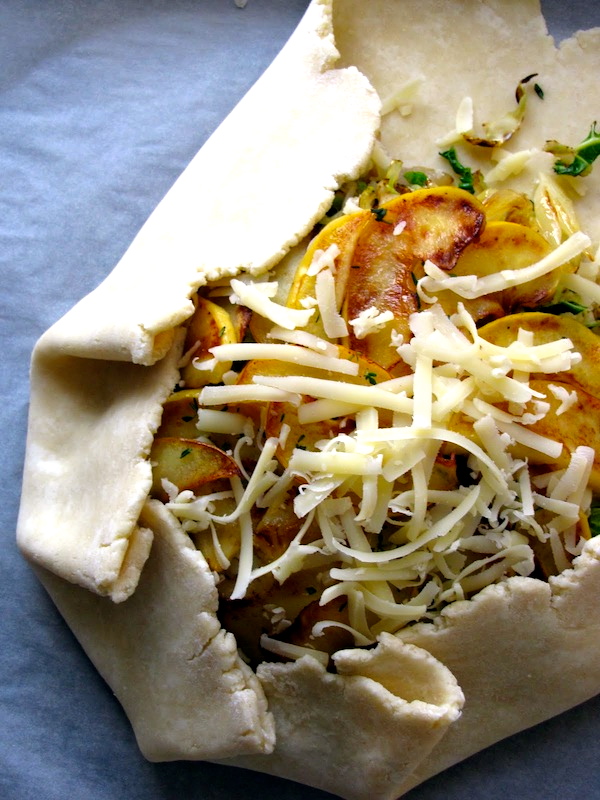
I find one pleat about every three  inches works well.  Continue pleating until the tart is contained. If cracks develop, don’t worry—you can pinch the dough together to seal it.

Brush the edges of the tart (and underneath the pleated folds) with egg wash. Sprinkle with herbs, a little cheese, or a bit of coarse salt.

xTARTS Cabbage 5


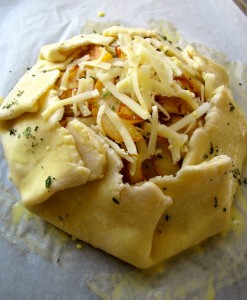
Bake until golden all over (see top photos) and brown and crisp on the bottom (check with a spatula). Depending on the size of the tart, this usually takes about 40 to 45 minutes at 400 degrees.

xTARTS Cabbage 2

Let cool for several minutes and cut into serving pieces. Salad or soup optional!


xTART DOUGH 4 xTARTS Ratatouille 2Savory Rustic Tart Dough Recipe

Easy, make-ahead, absolutely delicious. I swear, you no longer have to be afraid of pastry dough—of making it, rolling it out, shaping it—any of that. Yes, you’ll need a food processor (my favorite tool for making pizza dough, too), but oh, will you be happy with this ultra-buttery flaky crust.

The one thing you should keep in mind when making this dough is timing. It really works best to make the dough ahead. While it only takes 10 minutes to make, the dough needs to rest and chill in the fridge for at least an hour (and up to 2 days), and then, after taking it out of the fridge, it will need to warm back up to “cool” room temperature*, which will take about 45 to 55 minutes. So it’s a great idea to make the dough some morning or evening when you have just a few spare minutes. Pop it in the fridge and then when you’re ready to make a tart, you’ll only need to set aside the time it takes to warm it back up—and that’s the perfect amount of time to make your filling. It’s also really a joy to be able to reach in and grab that little wrapped present of dough already made up. (The dough will also keep in the freezer for 3 or 4 weeks.)

Makes enough dough for two 8- to 9-inch Rustic Tarts.

2 cups (9 ounces) unbleached all-purpose flour

1/2 teaspoon table salt

1/2 pound (16 Tbsp.) very cold unsalted butter, cut into ½-inch cubes

1/4 cup ice water

In the bowl of a food processor, combine the flour and salt. Pulse briefly to combine.

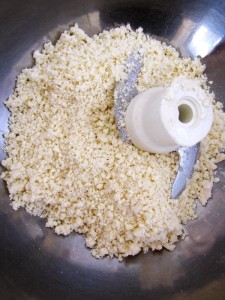
Add the cubes of butter. Pulse quickly about 20 times, or until the butter particles are quite small (like tiny pebbles). With the motor running, add the ice water in a steady stream. (This will take about 10 seconds). Stop the motor. Then pulse quickly six or eight times—just until the mixture begins to come off the sides of the bowl and clump together. The mixture will still be somewhat loose and crumbly—that’s okay. You will bring the dough together in the next step.

Turn the mixture out into a big mixing bowl and knead it briefly against the sides of the bowl to finish bringing it together into a dough. (Once you have incorporated all of the crumbs, knead once or twice to smooth out the dough just a bit. While you don’t want to over-handle the dough, you also don’t want to be afraid to handle it as much as you need to in order to bring all the bits of the dough together, as it will ultimately be easier to roll out.)

Divide the dough in half. (If you have a scale, you can weigh the dough pieces to make sure they’re of equal or close-to-equal weight. They should each weigh about 9 1/2 oz.)

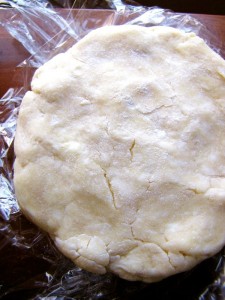
Shape each piece into a disk about 1-inch thick (and about 4 inches across). (Again, don’t be afraid to handle the disk just enough to smooth out cracks and make a tidy disk.) Dust lightly with flour, wrap in plastic, and refrigerate for at least 1 hour or up to two days. (You will need to remove the dough from the fridge 45 minutes before rolling it.)

Alternatively, you can freeze the dough for up to a month. Defrost it in the fridge overnight before using.

*NOTE: Depending on how long your dough disk has been refrigerated, it will most likely be between 50 and 42 degrees when you take it out. Anything in this range is rock hard. You’re looking for the dough to warm up to about 60 degrees. Don’t worry, you don’t have to take its temperature—it will be ready when it is still slightly cool but somewhat pliable. Again, depending on the temperature the dough was chilled to, and the temperature of your kitchen, this will take anywhere from 40 to 60 minutes—leaving 45 or so minutes is a good bet, but also don’t worry if you get behind. There is a decent window of time, and on all but the hottest of days (or kitchens), it can usually sit for up to 30 minutes more before it gets too warm.


Winter Garden Salad: A Template Recipe for Greens + Roots

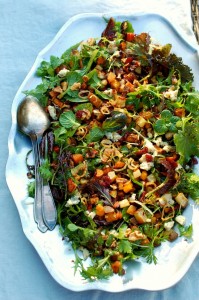
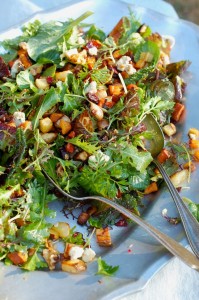
If we didn’t have 150 pounds of pork in the freezer, I could eat a warm salad of winter greens and roasted veggies every night. (Roy, not so much.) This is one of those recipe/techniques that I unapologetically come back to again and again—Warm Winter Salad of Roasted Root Fries (The Fresh and Green Table), Warm Bistro Salad with Tiny Roasted Root Vegetables and Bacon Dressing (Fast, Fresh & Green), and Quick-Roasted Butternut Squash and Pear Salad with Ginger Lime Vinaigrette (coming in Fresh from the Farm), to name a few. (Hmmm, it appears I’m not averse to sneaking pork into these things, so you could certainly have your salad, and your bacon, too.)

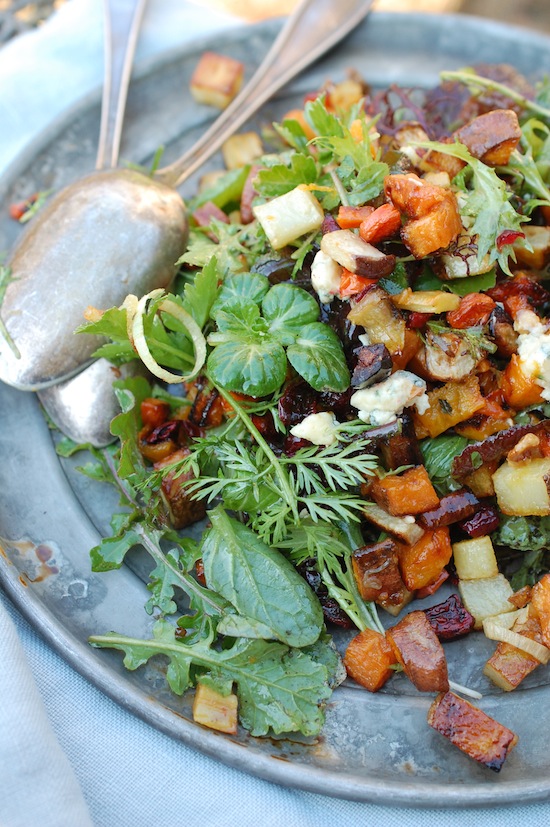
The appeal of a warm salad with crispy, yummy roasted veggies served atop deep, dark greens with a bracing vinaigrette is the interplay between fresh and comforting. I also like the textural contrast, and to be honest, the visual appeal. These days, I don’t compose the salads so much as scatter-and-platter them. It’s a looser, more rustic look, and served family-style, more casual. But you can always arrange the salads on individual serving plates if you like.

It occurred to me this week that I should back up, look at the architecture of these salads, and come up with a template you could use, depending on whatever greens and winter veggies you’ve got hanging around.

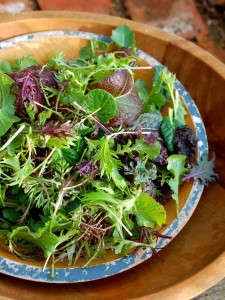
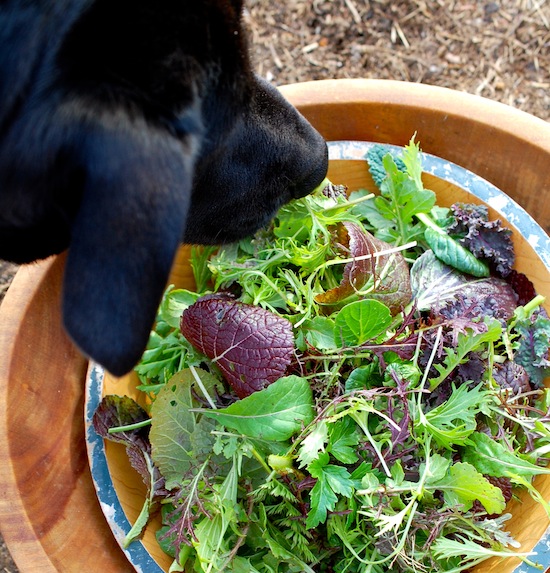
Plus, I needed an excuse to show off my greens that are still alive in the market garden. (Ahem, again, unapologetic…) So this morning after my chicken chores (no frozen water—yay!), I took a bowl and scissors and collected a nice combo of mizuna, Ruby Streaks mustard, Russian kale, arugula, tat soi, parsley, a few baby bok choy leaves, and even a few carrot tops. It’s amazing what lives through freezing temperatures and unfortunate ice formations; the arugula is particularly hearty, and one of my lettuces, Winter Marvel, acts like it doesn’t even know its December. (Alas, soon enough, nothing will be growing, even if it stays alive, since we’re now down below the critical mark of 10 hours of daylight. I’ve got lots of lettuce and greens down in the hoop house which I am just hoping to keep alive and harvest sparingly until early February, when 10+hours returns and they’ll start growing again.)

Realistically, most of us will be harvesting greens for our winter salads from the grocery store, so here’s your chance to buy baby kale, escarole and frisee, sturdy spinach, and anything that’s got some backbone or body. Make your own custom mix, and try to steer away from bagged mixes of salad greens, which tend to be less fresh than heads or bunches and also contain filler lettuces which don’t hold up to warm vinaigrettes too well.

For your veggie mix, choose from sweet potatoes, potatoes, carrots, parsnips, turnips, rutabagas, beets, or butternut squash. Dice them quite small so that they’ll roast quickly; most won’t need peeling—but for the butternut. (For a pretty all squash-salad, you could use thinly sliced acorn and/or Delicata rings, which don’t need peeling and will also cook quickly.) Add diced pears or apples to the veggie mix if you want, and customize your salad with whatever toasted nuts and good quality cheeses you like. Use your favorite vinegar in the warm vinaigrette, and don’t be shy with a squeeze of lemon or lime to juice it up.

Here’s my template—I hope it will make a nice starting point for you. If you come up with a really delicious combo, I’d love to hear about it!

Warm Salad of Roasted Root Veggies and Winter Greens

Be sure to cut your veggies into evenly small pieces so they’ll all cook at the same rate. Don’t be tempted to crowd them on one pan, either—a little room around them will brown them up better. (Unless, of course, you want to cut this recipe in half, which is perfectly doable.) If you decide to include beets in your veggie mix, toss them with a little oil and salt separately from the rest or they’ll tend to color everything else.

___________________________

For the salad:

1½ to 1¾ pounds combination sweet potatoes (unpeeled), potatoes (unpeeled), carrots (peeled), parsnips (peeled), turnips (unpeeled), beets (unpeeled), butternut squash (peeled), firm-ripe pears (peeled), or Golden Delicious apples (unpeeled), cut into small dice (about 3/8-inch in diameter) (about 5 to 6 cups)

4 tablespoons extra-virgin olive oil

Kosher salt

6 to 7 cups combination sturdy mixed winter greens (such as baby kale, escarole, frisee, arugula, mustard, or tat soi)

¼ cup chopped toasted pecans, walnuts, almonds or hazelnuts

½ to 2/3 cup crumbled good quality blue cheese, feta cheese, goat cheese or 1/3 cup coarsely grated aged gouda or Parmigianno

3 tablespoons coarsely chopped dried cherries, cranberries, raisins, figs, pitted dates, or other dried fruit (optional)

For the vinaigrette:

1/3 cup extra-virgin olive oil

1 large shallot, sliced thinly

2 tablespoons sherry vinegar, balsamic vinegar, white balsamic vinegar, or cider vinegar

1 tablespoon maple syrup

1 teaspoon Dijon mustard

1 teaspoon fresh lemon or lime juice (more to taste)

½ teaspoons lemon or lime zest

1 teaspoon coarsely chopped fresh thyme leaves (or other herb of choice)

Kosher salt and freshly ground pepper

___________________________________

Preheat the oven to 450°F. Line two large rimmed heavy-duty baking sheets with parchment paper. In a large, wide mixing bowl, combine the veggies, the 4 tablespoons olive oil, and a scant teaspoon kosher salt. Toss well and spread in one layer on the two baking sheets. Roast, rotating the sheet pans once (and flipping the veg with a spatula if you like), until the veggies are nicely browned and tender, about 28 to 30 minutes. Let cool for a couple minutes on the sheet pans and then combine in a mixing bowl.

While the vegetables are roasting, put the greens in a wide heat-proof mixing bowl. Set out a serving platter or four serving plates.

Make the warm vinaigrette: Heat the 1/3 cup olive oil in a small nonstick skillet over medium heat. Add the sliced shallots and a pinch of salt and cook, stirring occasionally, until the shallots are browned and crisp, about 6 to 8 minutes. Take the skillet off the heat and remove the shallot rings with a fork, transferring them to a paper-towel lined plate. Let the oil cool for 3 to 5 minutes. Add the vinegar, the maple syrup, the Dijon, the juice, the zest, the herbs, ¼ teaspoon salt, and several grinds of fresh pepper. Whisk vigorously until the dressing is mostly emulsified. (Alternatively, first transfer the shallot-infused oil to a heat-proof Pyrex liquid measure, add the other ingredients and whisk well. This is a slightly less awkward way of making the dressing). Taste and adjust seasoning, adding more lemon or lime juice, salt or pepper as needed.

Season the greens with a sprinkling of kosher salt and drizzle over them a few tablespoons of the warm vinaigrette. (Be sparing at this point). Toss well, taste, and add a little more dressing if necessary. Arrange most of the greens on your platter or serving plates. Sprinkle with half of the nuts, cheese, and fruit.

Season the roasted veggies with a pinch more salt, and dress them lightly with 1 to 2 tablespoons of the vinaigrette. Toss well and scatter over the greens. Garnish with remaining nuts, cheese, fruit, greens, and reserved shallots. Serve right away, passing the remaining dressing if desired.

Serves 4

P.S. Farmer enjoyed harvesting greens this morning, too!


Grill-Roasting Peppers in Mud Season or Any Season

Really, there’s no reason why you couldn’t grill-roast a bell pepper any old time of the year. But it’s just not something I think to do in early March. It’s yucky and mucky outside. My boots make an unfortunate sucking noise when I walk across the puddle-pocked yard, and the chickens are not happy with their squishy surroundings.

So why am I cooking outside? Recipe testing of course. This time I’m on deadline for a Vegetarian Times article which will run at the end of the summer when veggies and fruit are in all their glory. Right now? Not so much. I feel like an alien (and a hypocrite) buying out-of-season, flown-from-far-away peppers and tomatoes, but I signed on the dotted line, so I’m committed.

The good news is that the assignment forced us to get the grill repaired. It has been crippled since Farmer knocked it over the first week he called this place home. But now it’s back in top form, and I realized yesterday it would give me the opportunity to talk about my favorite way to roast a bell pepper.

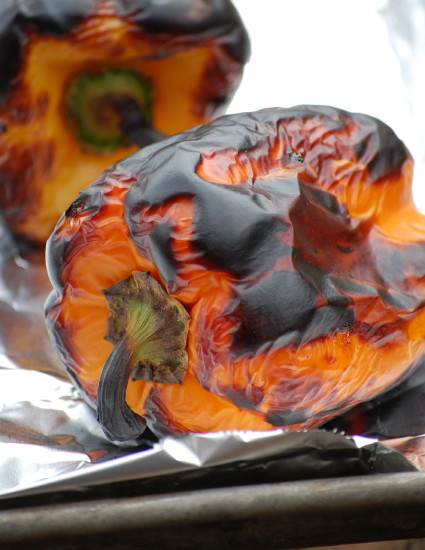
I’m not a big raw bell pepper fan (hence I don’t think I’ve ever blogged about one), but the smoky sweetness of a roasted pepper always appeals to me. Over the years I’ve roasted peppers many different ways—under the broiler, mostly, and sometimes over a gas flame or charcoal grill. But my favorite way is roasting in a covered gas grill. Not only is this method simple and hands-off (and yes, completely do-able in mud-season!), but it also yields a roasted pepper that’s easier to peel, because the skin really blisters and pops off, rather than getting too cooked and sticking to the pepper. The convected heat in a hot gas grill quickly surrounds the pepper on all sides and blackens it in less than 10 minutes. (A couple of flips with the tongs helps.) I take the peppers out when they’re mostly, but not completely, blackened so that they don’t overcook.

Below are quick directions you can follow. Once you’ve roasted and peeled your peppers, you can certainly keep them in the fridge for a couple days, although they are delicious warm. Cover them in olive oil or marinate them if you like. Use them as antipasto, rolled or stuffed with cheese or roasted veggies, or chopped up and added to other veggie or bean dishes for depth of flavor. If you’ve lucked in to a whole bunch of peppers, roast and puree them for soup.

To grill-roast and peel bell peppers:

Heat a gas grill on its highest setting. Go ahead and put the peppers on the grates and cover the grill as soon as you turn it on. (With this method, there’s no need to preheat the grill.) Check the peppers and turn them over every three minutes or so and remove them from the grill when they are blistered all over and blackened on most sides, about 8 to 10 minutes total.

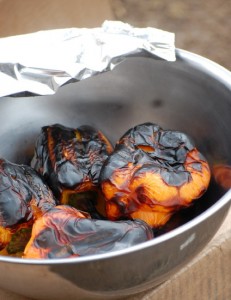
Put the peppers in a bowl and cover with foil. Let them sit for 10 minutes or up to 20 or so. (You could leave them longer, but they keep cooking in all that contained heat, so I think it is nicer to peel when the flesh still has a touch of firmness to it. You only really need 5 minutes or so to steam the peppers if you’re in a hurry.)

Over a bowl or plate, peel the blackened skin away. To remove the seeds, work over a strainer set in a bowl so that you can capture some of the delicious liquid. (If I’m going to be stuffing the peppers, I cut them in half carefully and leave the stems in. If not, I just remove the stems.) Use your fingers to niggle out all the seeds. If you like, cut or tear the peppers into lobes or strips. Whatever you do, don’t rinse the pepper under running water at any point. You will lose delicious flavor.

Tip of the Week: Toast (or Oven-Roast) Nuts for More Flavor

As a kid, I never liked nuts in my brownies. And I was never really tempted to eat those big hulking Brazil nuts that lurked in my grandmother’s candy dish. Even today, you won’t catch me snacking on raw nuts very often. But I use a surprising amount of toasted nuts in my savory cooking, especially with vegetables. I add them to crumb toppings for gratins; I stir them into grain dishes (brown rice with toasted pecans, farro with toasted hazelnuts, wheat berries with toasted walnuts), and I use them to garnish roasted veggies, sautés and soups. I especially like to toss them in green salads (almost every night), so for convenience I keep a few little containers of different toasted nuts in my fridge at all times.

It’s not surprising, considering my obsession with everything caramelized, that I prefer the flavor of toasted nuts. Once browned, nuts get a deeper, earthier, sweeter, and, well, nuttier, flavor. And toasting improves their texture, too. While some raw nuts can be a bit pasty, toasted nuts are crisp and snappy.

While I say these nuts are “toasted,” it would be more accurate to call them oven-roasted. You can toast nuts on the stovetop in a sauté pan, but it requires close attention and careful stirring—and your nuts will still not be evenly toasted. So I prefer the oven method below:

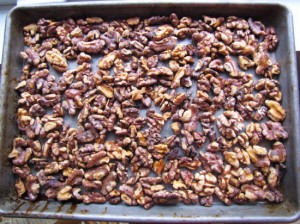
To toast nuts: Preheat your oven to 400 degrees. Leave nuts unchopped if you like, but I like to coarsely chop before toasting. (Don’t pulverize, though, or the nut “dust” will burn in the oven.) Spread the nuts in one loose layer on a heavy rimmed baking sheet and pop in the oven.

Alert your sniffer. That’s right, your nose. When the nuts begin to turn golden, they will start giving off that lovely nutty aroma. (So don’t stray too far from the kitchen.) Once you can smell them, they may still need a couple more minutes to get a really nice caramel color (most nuts will be toasted in 7 to 10 minutes). But keep an eye on them; golden brown is good—dark brown is heading towards bitter. Let the nuts cool on the baking sheet, then put them in a glass jar or other container to store in the fridge. Or freeze them. Either way, you’ll have a great little flavor/texture booster at the ready.

Tip of the Week: Make Fresh Bread Crumbs in a Coffee Grinder

Between the book, the blog, and magazine articles, I’ve developed at least 100 new recipes in the last six months. (Ninety-nine, I think, for vegetables, but I did get to do one dessert!) All that time in the kitchen made me super-aware of the many cool tips I’ve gleaned over the years, both from the great cooks I’ve worked with and from my own experience. Tips for making things easier, tastier, faster, or just plain niftier. I don’t always get to include my favorite tips in published recipes, so I thought it would be fun to share one here every so often. This week I’m starting with a tip (or two!) about making fresh bread crumbs.

Surprisingly, I use fresh bread crumbs a fair amount in vegetable dishes. I use them to make a topping (usually combined with a little Parmigiano, chopped fresh herbs, and olive oil) for oven casseroles, including gratins and baked pastas. And I use them to make a crunchy topping for a stovetop pasta or sautéed vegetables. For baking, I want to start with fresh, moist breadcrumbs, as they will toast in the heat of the oven. For stovetop dishes, I actually want to start with those same fresh, moist breadcrumbs. Rather than drying them out to make them crunchy, I “toast” them by frying them in just a little bit of butter or oil in a small nonstick skillet—much tastier. (I never buy packaged dry breadcrumbs—the texture is too fine and often they have unwanted added flavors.)

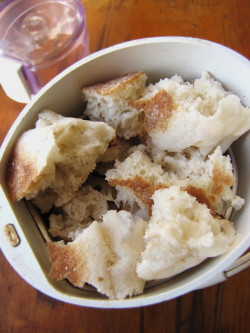
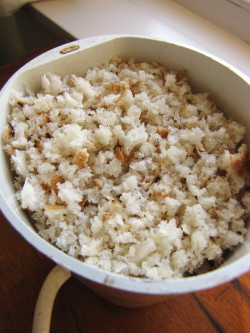
Either way, I always start with the same thing: bread I have whizzed in my coffee grinder. This little machine (mine is a Krups; $20 at Amazon) is incredibly efficient at ripping bread to shreds in seconds. I am partial to using English muffins for bread crumbs, because I love the generous texture they yield. I can rip up one fresh English muffin, whiz in the coffee grinder, and have fresh breadcrumbs in seconds. (I don’t over-whiz so that the crumbs stay somewhat coarse.) I also like to use up the ends of my sandwich loaves (which I collect in the freezer, where I keep most of my bread) by making them into bread crumbs. You can certainly turn artisan bread into bread crumbs, too, but it shouldn’t be more than a day or so old (unless it is coming from the freezer). Contrary to popular belief, rock-hard bread does not make good fresh breadcrumbs; it makes powder.

If I have lots of bits and ends on hand, I’ll use my food processor instead of my coffee grinder. A few quick pulses and I’ve got not just one cup but several cups of fresh bread crumbs. The food processor will work for small amounts, too. So if you don’t have a small coffee grinder that you can dedicate to cooking (it will chop spices and nuts too) rather than coffee, go ahead and use your food processor. Whatever you use, put any excess crumbs in a zip-top freezer bag and pop them in the freezer. There, they actually stay “fresh,” so that you can pull a half cup or so whenever you need it—they’ll defrost in seconds.