Category Archives: Ingredient IQ

Releasing the Pressure Valve – Now Off to the Fair

NOTHING LIKE RELEASING the pressure valve to flood the system with endorphins. I’ve been sort of floating around the last couple of days, freed from the anticipation of the event I moderated Wednesday.

It was a marvelous day all around, successful on all counts. You can see a handful of photos by my dear friend Jeanna Shepard over on the @cookthevineyard Instagram site. All three panelists were amazing, and Dr. Jessica B. Harris dropped some big news on us too, about another season of High on the Hog, and about the groundbreaking subject of the newest book she’s working on, which will weave the three threads of American cooking – Indigenous cooking, European immigrant cuisines, and African-American influence – into a historical narrative.

Me, Dr. Jessica B. Harris, Sam Sifton, Dawn Davis, Jane Seagrave 
Photo by Jeanna Shepard

Anyway, with that behind me and a short (very short) break in the constant deadline schedule, I have spent the last couple of days sleeping late, eating buttered cheese toast (Swiss levain from our Vineyard Baking Project bread CSA), catching up on garden maintenance, reading a good book (Cutting for Stone by Abraham Verghese — I never read it!), taking a little ride off-Island on Thursday with my partner, and, most importantly, obsessing about my Fair entries. 

The ride on Thursday was just the thing. It’s funny how hopping on the ferry and going for a quick off-Island jaunt can change your mindset when you live in the middle of what has become a pretty intense vacation destination. It’s nice to get away from the crowds on the Island, and a change of scenery is always uplifting. We took a drive along the coast (Buzzards Bay) through West and North Falmouth, past Snug Harbor and Old Silver Beach – so pretty.

But then once you’ve been in a big-box store or two (the budget toilet-paper-and-laundry-detergent-run which every Vineyarder does when off-Island), you can’t wait to get back on the ferry! 

But about my Fair entries. I was chatting with my co-worker and fellow gardener Steve at our editorial meeting Friday morning. I told him I entered way too many categories (14 in total), and he looked at me with his deliberate gaze and said, “You said the same exact thing last year!” Oy, so true I guess.

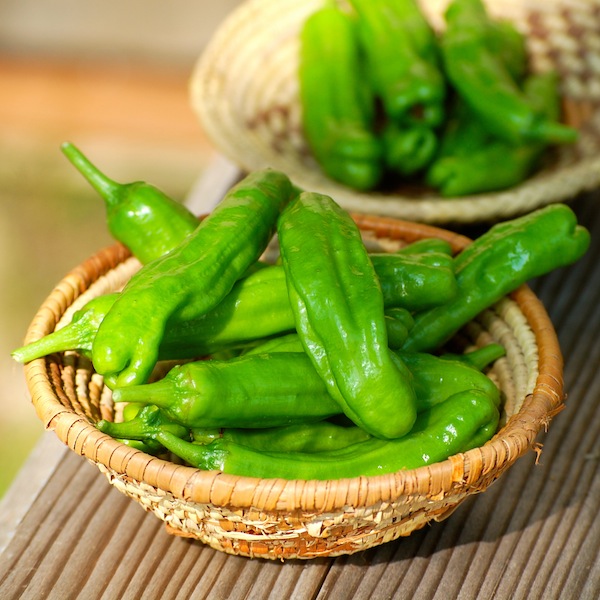
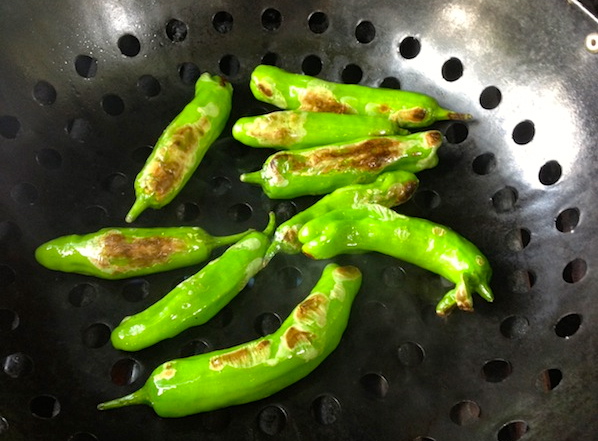
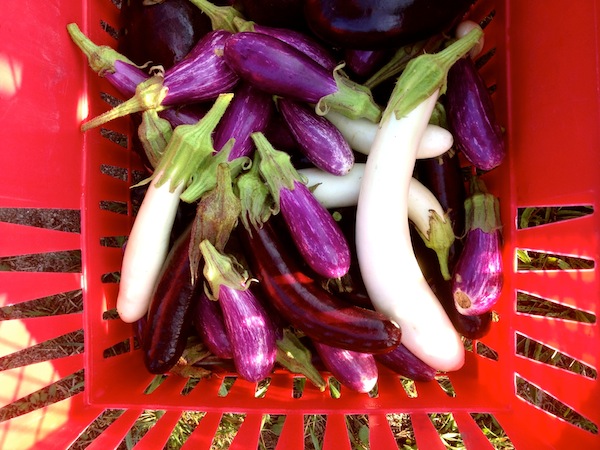
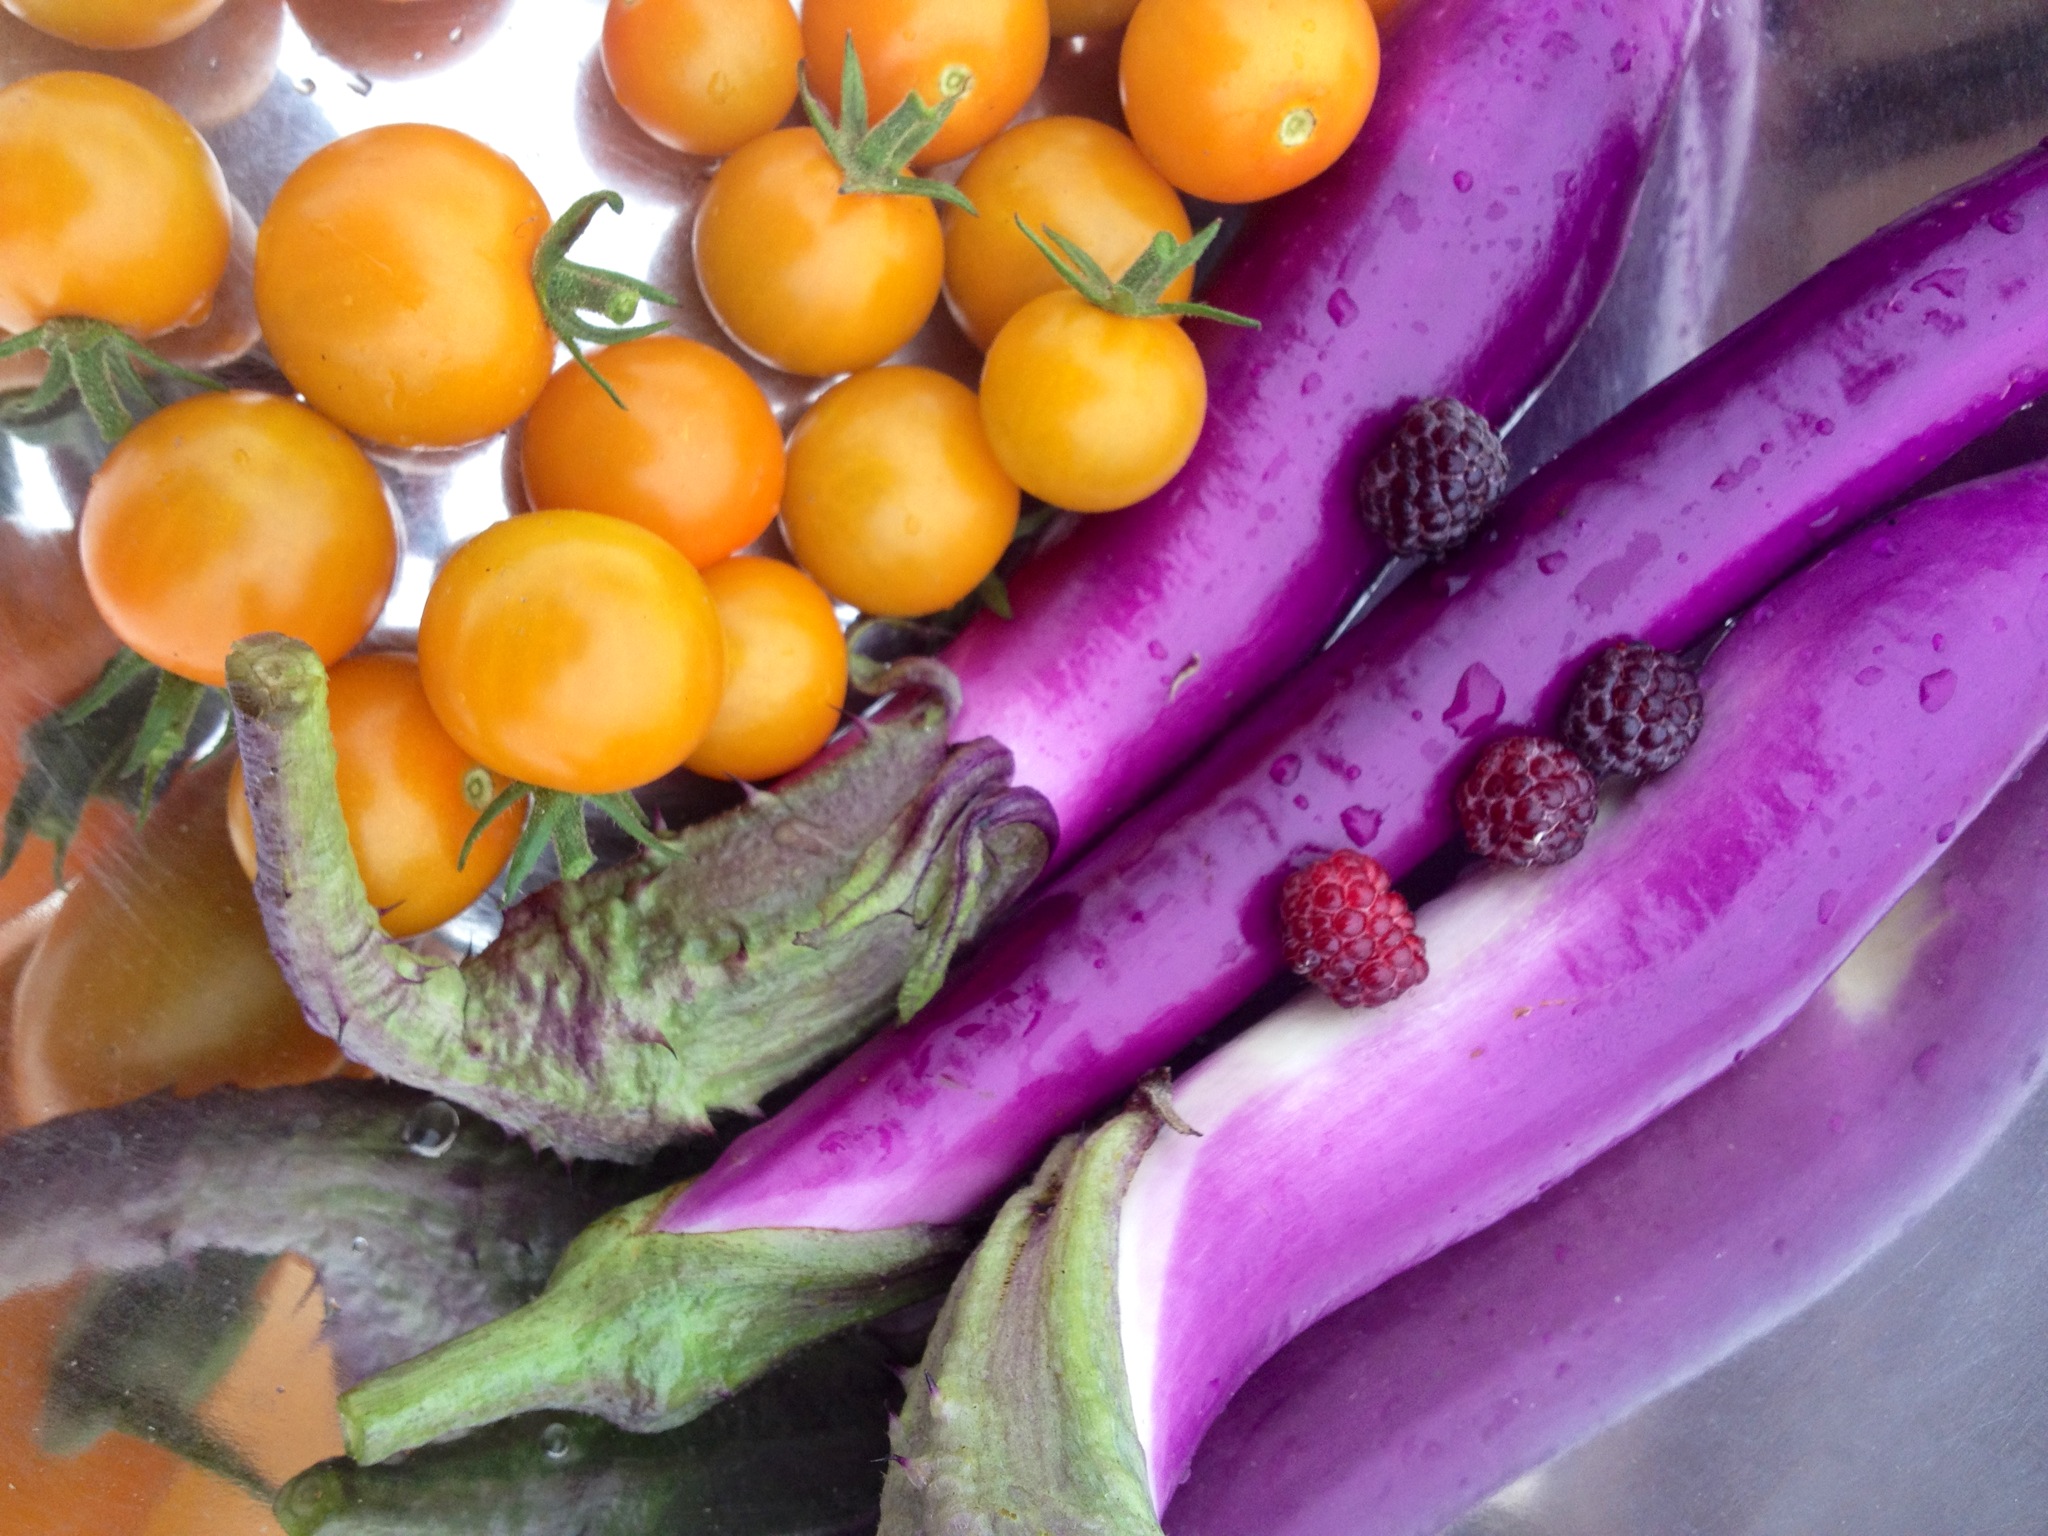
Anyway, this year I have entered more flower categories and less vegetables. I won’t have enough green beans, but I will enter cherry tomatoes (Sweet 100 and Sungold), roma tomatoes (Midnight), eggplants (Fairy Tale), and peppers (Shishitos).

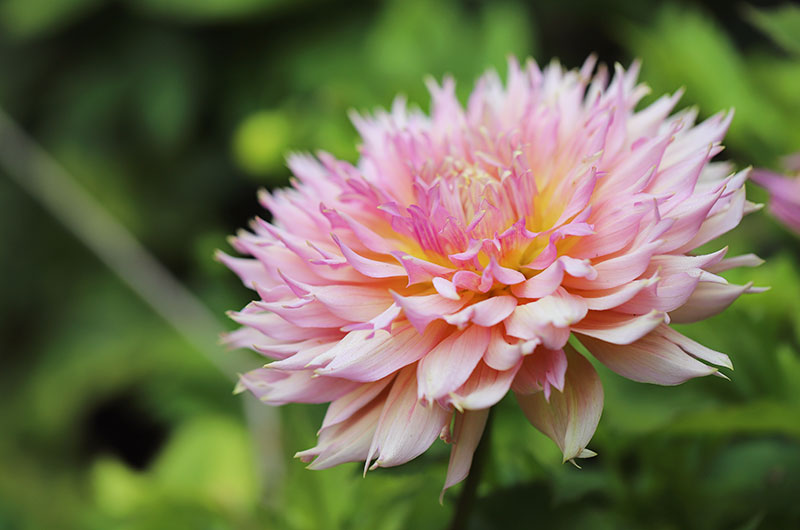
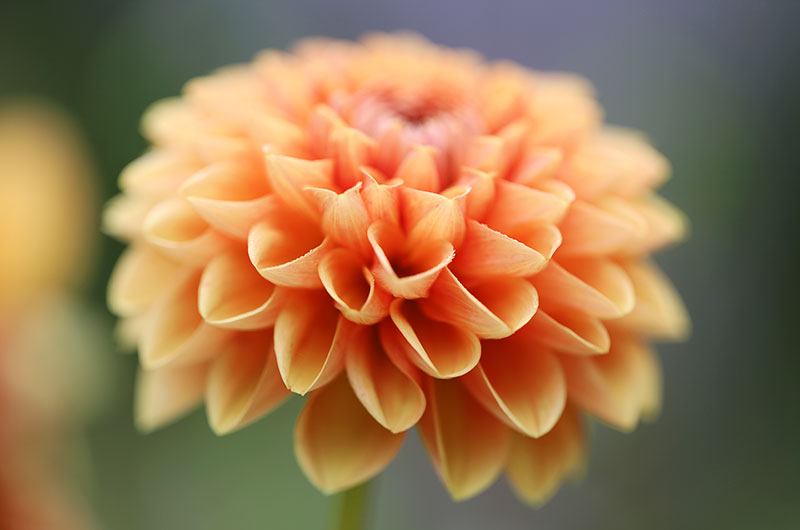
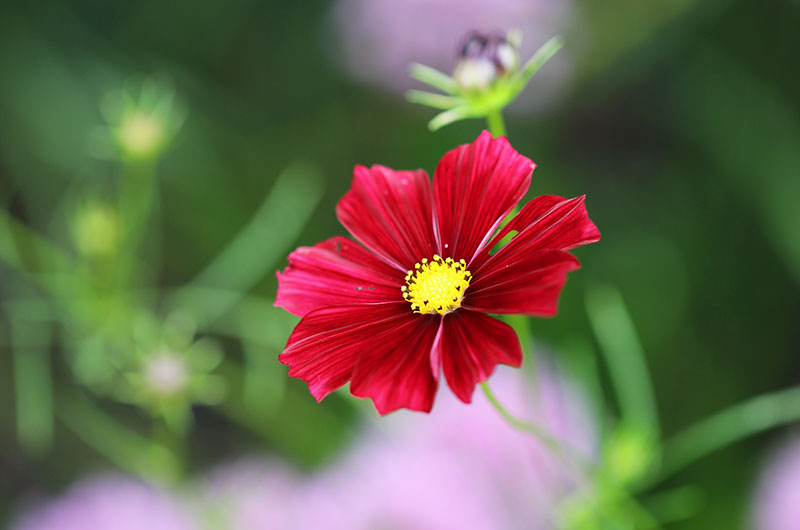
But not only am I entering two size categories in zinnias and dahlias (as well as cosmos, marigolds, and coneflowers), I am also entering two arrangement categories. One is the “tea cup” arrangement, which I’ve always wanted to do, because how cute is that? But the other is a more standard arrangement, which of course terrifies me, as I am still in pre-school (maybe kindergarten) when it comes to flower arranging.

And once again, I am entering everything in the commercial (not home grower) categories, partly because I am a former farmer and mostly because the requirements suggest that if you teach or lecture about vegetables or flowers, you must enter commercial, and technically I do that through writing and occasional demonstrations.

Being in the commercial category in vegetables used to be an advantage, as busy farmers would often not enter, and even if they did, there were far fewer of them than home growers.

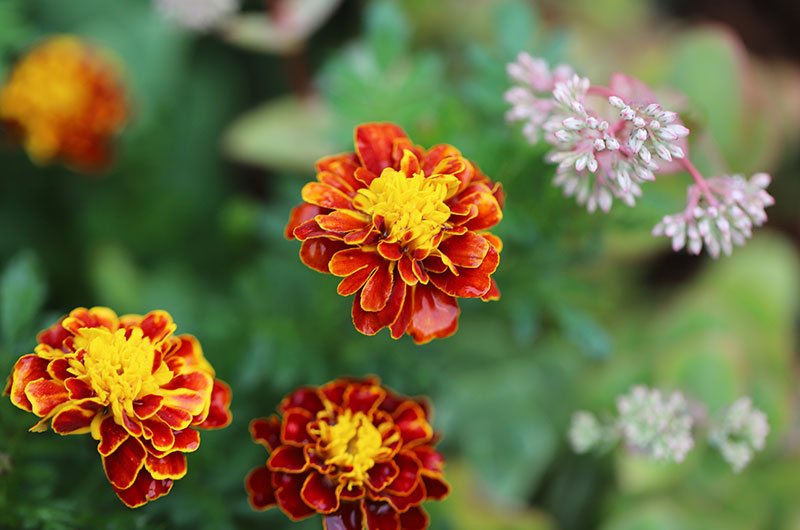
But these days we have so many young farmers on the Vineyard that I bet the categories will be crammed. And I can’t even begin to tell you how talented the flower arrangers are on this Island. So I won’t feel bad if I don’t get a ribbon in those, though there are opportunities where I might have a shot. (For instance, I doubt commercial flower folks will enter the marigold category!) We’ll see.

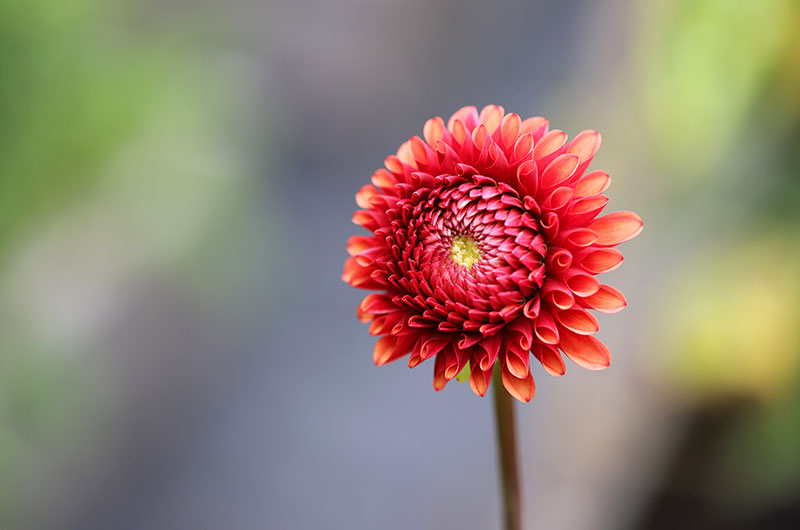
My friends on the Vineyard Dahlia Collective Facebook page are gearing up for the Fair so it should be interesting. The crazy humidity and the short window of time to put everything together puts a bit of pressure on the whole flower thing. I’ll probably pick as late as I can on Wednesday evening and put the flowers in buckets of water in the cool basement. Then I’ll get up super early on Thursday to do the arranging. Perishables are due at the Fair grounds by 8:30 a.m.

Delivering is always a fun event; you see your friends in line and get a peek at what everyone else is turning in. Then you go home and hold your breath until the hall opens later on Thursday.

We usually go over in the evening, cruise through the hall to check the ribbons and see all the beautiful quilts and pies and artwork, visit the magnificent teams of oxen in the animal barn, eat BBQ and french fries and ice cream at the picnic tables, and watch the Tilt-a-Whirl light up the night sky.

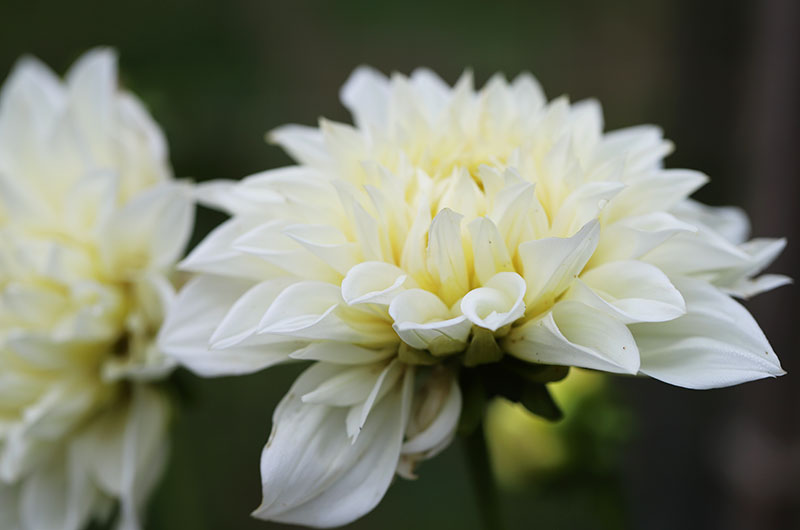
I’m just hoping this crazy Delta variant doesn’t throw a wrench in the Fair. Not so much for me, as I get a lot of joy out of my flowers every morning when I go out to the garden. (Those dinnerplate dahlias – OH MY!). But for the sake of the Ag Society. The Fair is their main fundraiser and they really need this to happen. Last year the Fair was virtual, and that was a bummer.

Plus, we all want it to happen simply for the good will it generates. From the pet show to the Firemen’s burgers, from sheep shearing to prize-winning pickles, the Fair is classic old-school Vineyard. To me it represents everything that I love about living here.

See you at the Fair!

LOOKING FOR RECIPES?

Visit cookthevineyard.com and sign up for the free weekly newsletter. (Something I do as part of my day job.)


If you arrived here from the internet and would like to subscribe to the Sixburnersue blog, click here.

This image has an empty alt attribute; its file name is SBSflowersprig2.jpg

A Few Small (and Big) Ways to Use Miso In Recipes


When I tiptoed over the mostly-vegetable line into the all-vegetarian world, I finally got friendly with miso. So when I wrote Simple Green Suppers, I took advantage of miso’s deep flavors in several different ways. Probably my favorite recipe is a simple Lemon Miso Butter (great on sautéed vegetables or in grain dishes), but I also use miso in a delicious Crystallized Ginger-Miso Dressing (on an asparagus and grapefruit salad, and more), and in soups and broths, including the wonderful Spring Miso Broth with Stir-Fried Asparagus, Romaine, Scallions, Tofu, and Mint recipe pictured above.

If you’re not friendly with miso yet, here’s a little background: Miso is a nutritious fermented bean paste, and making it is an ancient Japanese craft. Usually, fermentation begins with soybeans, salt, and koji (a fermenting fungus); sometimes grains or legumes like barley, rice, or chickpeas are added. The miso is aged for varying lengths of time; generally older misos will have more umami flavor and the saltiness will have mellowed somewhat.

The color of miso will tell you something, too. Generally, the lighter colored misos are the mildest (and most versatile). I use white (sometimes labeled yellow) shiro miso most often, especially for dressings and sauces (top right in photo below). But I also like the darker misos—in broths and soups especially. Great miso is now made in the U.S. In fact, my favorite miso is made right here in Massachusetts, by the South River Miso Company in Conway. I especially like their one-year azuki bean miso (bottom right below) and their three-year barley miso (middle bowl, below), but all of their varieties are delicious and worth seeking out.

However, you don’t have to go out of your way to find miso. Most major supermarkets and all natural food stores carry at least a small variety of misos. All misos have an alluring sweet-salty-funky flavor that’s hard to beat for flavor-boosting.

It’s fun to try out a range of misos; just know that you may need to use a little less of a darker miso or add a little more water (or other ingredients) to taste. A good starting point for soup is one tablespoon per cup of water. If you like, you can strain your broth if using a chunky artisan miso. Keep in mind that all miso pastes destined for soups should be dissolved in hot water, but never boiled. Boiling can destroy flavor and nutrients.

So now, time for you to get friendly with miso, too—though maybe you already are! Either way, I think you’ll enjoy these two recipes. (And you’ll have to get a copy of Simple Green Suppers for the soup recipe above. I know, what a tease. But just a friendly reminder if you haven’t pre-ordered the book–well, you could certainly do it now.)

Lemon-Miso Butter

Make this handy flavor-booster ahead; cover and keep in the fridge for up to a week. In Simple Green Suppers, I use this butter in a recipe for Stir-Fried Black Rice with Baby Bok Choy and Asparagus, and in a recipe for Parsnips and Creminis with Wheat Berries. But you can use it on any stir-fried or sautéed veggies or with rice; be sure to add the butter to the recipe while the veggies or grains are still hot. Double this recipe if you like. (If you need to soften butter quickly to make this, cut it into a few pieces and microwave for a few seconds, but don’t melt it.)

Makes ¼ cup

2 tablespoons unsalted butter, softened

2 tablespoons white (Shiro) miso

1 teaspoon freshly grated lemon zest

In a small bowl, combine the butter, the miso paste, and the lemon zest. Use a small silicone spatula or wooden spoon to mash together until well combined.

Recipe copyright Susie Middleton, from Simple Green Suppers: A Fresh Strategy for One-Dish Vegetarian Meals (Roost Books).

Crystallized Ginger-Miso Dressing

I have to admit this dressing is one of my favorite recipes. It features crystallized ginger with assists from lime, maple, and miso. I love it on an Asparagus, Grapefruit, and Sushi Rice recipe in Simple Green Suppers, but it is equally good with broccoli, green beans, cabbage, or lettuce. Double or triple if you like.

Yields about 1/3 cup

1 tablespoon rice vinegar

1 tablespoon plus 1 teaspoon fresh lime juice

1 tablespoon plus 1 teaspoon minced crystallized ginger

1 tablespoon maple syrup

1 tablespoon minced cilantro

1½ teaspoons white (Shiro) miso

In a small bowl, combine the rice vinegar, the lime juice, the crystallized ginger, the maple syrup, the cilantro, and the miso. Whisk well.

Recipe copyright Susie Middleton, from Simple Green Suppers: A Fresh Strategy for One-Dish Vegetarian Meals (Roost Books).

Top Photo by Randi Baird, Randi Baird Photography


An Indian Curry with Cauliflower, Spinach, Tomatoes, and Coconut Milk – And the Miracle of Chickpeas

Weeknight. Cooking. Strategy. Three words we all wrestle with, but that I hope will soon bring a smile to your face when you get a hold of Simple Green Suppers: A Fresh Strategy for One-Dish Vegetarian Meals. Lately, with all the distractions, I barely noticed that the pub date for my fourth cookbook is sneaking up, and now we have just two months to go. (April 11—yay!)

I’m pretty darn excited, because I think this is the most useful cookbook I’ve written since Fast, Fresh & Green, and honestly, these days, useful is good. Useful is something we can wrap our heads around.

Heck, lately I’ve even realized that smarter cooking might be able to help us alleviate one problem in this country—food waste. (In American households, 27 million pounds of food a year gets tossed.) But I’ll offer some tips on that in a later blog.

Right now, I want to assure you that flavor comes first. Recipes that taste good and work well are the ones you will make again. When I can create great flavor, show a new technique, and offer a way to streamline weeknight cooking, I’m extra happy. Because I want you to cook more, enjoy cooking, and eat well.

So let’s talk about chickpeas—those incredibly versatile, protein-rich legumes that do it all. Despite the Ottolenghi-inspired elevation of chickpeas to a sexy star ingredient (very welcome stateside after many years of unfortunate mistreatment), I still have many friends who tell me they’re not crazy about chickpeas. I think this is because the texture, the liquid, and the flavor of canned chickpeas can be off-putting. Canned chickpeas can be a bit mushy and slippery, and some brands have a slight metallic or funky taste—or too much sodium. Doing a taste comparison of brands can go a long way towards eliminating some of these problems. I’ve found I really like Westbrae Natural Organic Garbanzos, so I stock up on them when I find them. And rinsing helps a lot, too.

It’s great to keep canned chickpeas around for convenience; I’d never suggest that you don’t. But I will tell you that of all the beans and legumes I cook and eat, chickpeas are the one I most frequently cook myself.

In fact, I toss a couple cups of dried chickpeas into a mixing bowl, cover with water, and stick in my fridge most Saturday nights. (That’s the overnight soak that people are fond of complaining about, when in reality it’s just a habit to form, and one that takes less than 2 minutes to accomplish.) At some point on Sunday, I drain them, put them in my pasta pot, cover with lots of water, add a bay leaf, a garlic clove, and maybe a sprig or two of thyme, bring to a simmer, and cook for about an hour. Then I add a little salt and continue cooking for 15 to 30 more minutes until the chickpeas are tender to the bite. (If I have to add more boiling water, I do.) I drain them, cool them, pop them in a storage container, refrigerate, and voila!–I  have chickpeas for the week. Very little hands-on cooking time for a big payoff.

Chickpeas that you cook yourself will not only have a better flavor and texture than canned ones, but they will keep longer as well—5 to 7 days in the fridge. For a vegetarian, having a protein like this already cooked and in the fridge cuts weeknight supper prep time down considerably.

And now those chickpeas are ready for their biggest trick—one that ordinary beans and lentils cannot perform: Browning. Yes, this is the real reason I love chickpeas so much: You can sauté or roast them until they take on a golden brown color and toasty, even nuttier, flavor. And you know, I love brown!! When I discovered that chickpeas could do this, I was ecstatic. Because the flavor is killer. The crunchy texture of roasted chickpeas is a fun bonus.

The good news is that you can sauté or roast either home-cooked or well-drained canned chickpeas. So if you’re new to vegetarian eating, look at it this way: If you’re making a quick weeknight stir-fry or sauté or braise, you can replace the shrimp, the chicken, or the beef with chickpeas. Chickpeas can also be part of a delicious hash, and they make a great base for quesadilla and burrito fillings. Sautéed and spiced chickpeas and veggies, along with some toasted nuts and fresh herbs, turn cooked whole grains (another great make-ahead) into a million different suppers. Marinated or dressed (don’t leave them rolling around naked and lonely), they turn a chopped or warm salad into a filling supper.

But enough already. I think at this point you’d just like a delicious recipe to try all this out, so here is a favorite Indian curry from the book. I think you’ll love it.

And I’ll be back in a couple weeks with another teaser recipe and more tips for weeknight vegetarian suppers to keep you excited about the book. And if you haven’t preordered your copy—or asked your independent bookstore to order some—please do. Click on this link.

Indian Curry with Chickpeas, Cauliflower, Spinach, Tomatoes, and Coconut Milk

One fall night I set out to cook a comforting Indian curry that would have all the things I love in it, starting with sautéed chickpeas and cauliflower and ending with a slightly creamy coconut-tomato sauce. In between, a mix of ginger, garlic, and curry spices (as well as fresh spinach) would provide backbone. I decided to use my handy stir-fry pan, because it’s great for sautéing and simmering. After a little chopping, I started cooking. Fifteen minutes later, I was so happy: I loved it! Leftovers were delicious, too. Be sure to use fresh curry powder. This dish is filling on its own, but you could serve it with rice or naan if you like.

Serves 2 to 3

3 tablespoons grapeseed or vegetable oil

One 15-ounce can chickpeas, drained, rinsed, and dried (or about 1 1/3 cups cooked chickpeas)

¾ teaspoon kosher salt, plus a pinch

3 cups cauliflower florets (1- to 1½-inch pieces, cut so that most have a flat side)

1 cup sliced yellow onion (about 1 medium-large onion, cut lengthwise)

1 tablespoon minced fresh garlic

1 tablespoon minced fresh ginger

1½ teaspoons Asian chili-garlic paste

2 teaspoons curry powder

2 teaspoons packed dark brown sugar

½ teaspoon ground cumin

3 cups packed baby spinach

½ cup canned crushed tomatoes

1 cup canned full-fat coconut milk (preferably organic), well stirred

¼ cup finely chopped fresh cilantro


In a large (12-inch) nonstick stir-fry pan, heat 1 tablespoon of the oil over medium-high heat. When the oil is hot, add the chickpeas and ¼ teaspoon salt. Cook, stirring occasionally, until all the chickpeas are golden and have some brown spots on them, 5 to 6 minutes. Transfer the chickpeas to a large plate.

Return the pan to medium-high heat and add 1 tablespoon of the oil. When the oil is hot, add the cauliflower and ½ teaspoon salt. Stir, cover, and cook, uncovering to stir occasionally, until the cauliflower pieces are browned in spots and have lost their whiteness (they will be softened but still crisp), about 5 minutes. (If the cauliflower is browning too quickly, reduce the heat to medium. If your pan does not have a lid, use a baking sheet or the bottom of a large skillet.) Transfer the cauliflower to the plate with the chickpeas.

Return the pan to medium-high heat and add the remaining 1 tablespoon of oil, the onion, and a pinch of salt. Cook, stirring, until the onions are browned in spots but haven’t lost all their stiffness, about 3 minutes. Add the garlic, ginger, chili-garlic paste, curry powder, brown sugar, and cumin. Stir well to combine, and fry the spices for 30 seconds. Add the spinach, tomatoes, and coconut milk and stir well to incorporate the spices with the liquids and to soften the spinach. Add the cooked cauliflower and chickpeas and simmer, stirring, for 1 minute. Stir in the cilantro and remove the pan from the heat.

Serve hot or very warm in two or three bowls.

Recipe From Simple Green Suppers by Susie Middleton, © 2017 by Susie Middleton. Reprinted by arrangement with Roost Books, an imprint of Shambhala Publications, Inc. Boulder, CO.

Photo of Indian Curry by Randi Baird © Randi Baird

What One Vegetarian Really Eats (and Cooks)

DSC_0189A year ago this January, I hopped a very short fence. I went from eating not a lot of meat, to eating no meat at all. Technically, I became a vegetarian, though I have eaten the occasional fish or shellfish when it has been offered to me.

Now that I am in the thick of writing and editing the text and recipes for my vegetarian cookbook (which will come out in Spring 2017 from Roost Books), I am thinking hard about strategies and tips for readers. But I am also thinking about what fun I have had developing the recipes—how the creative challenge for this book has been the best yet, because it is has essentially given me a blueprint for eating.

I can’t wait (though I must—and, ahem, I must also finish the manuscript, complete the last photo shoot, and a list of other things…before it even gets to my editor!) for the book to come out so that I can cook from my own recipes every night. And sadly, I won’t be able to share any of those recipes with you until we get close to publication.

But I thought for those of you who are contemplating a shift, it might be interesting to share with you what one vegetarian really eats. (And I say really or actually, because this is not theoretical. Since I, like most year-round Islanders, cook the vast majority of my food at home, this is truly what I eat.) Remember, I’m not a nutritionist—my gig is cooking technique—and I’m only one person, so take it for what it is.

DSC_0217

I will say, though, that cooking vegetarian truly is a blast (if you like to cook), because the creative possibilities are endless. I never come at it from the “what can I replace the meat with” (in fact, I’m not big on meat-replacement type proteins); I always come at it from the “how I can turn these vegetables into a delicious, filling meal?”

Here are some of the things I eat and cook with on a regular basis (in addition to the obvious—vegetables!):

DSC_0197Nuts. Toasted. Toasted nuts have an almost cocoa-like umami thing going on, so they taste delicious and are very filling. Almonds are at the top of my list, with pecans and walnuts next. I stock pine nuts, hazelnuts, and, of course, peanuts and natural peanut butter. (Pepitas, too, which are seeds, not nuts.) I use nuts not just in salads, but in grain and bean dishes, too.

Chickpeas. Sheepishly, I have to admit that, like a lot of vegetarian converts, I have fallen totally in love with chickpeas. (I’m simmering a pot on the stove right now on this first snowy day in January, though I stock canned chickpeas, too.). In addition to the great flavor and rich texture, chickpeas have a distinct advantage over most other beans and legumes—they hold up well in all kinds of cooking. In fact, you can even brown them by sautéing or roasting; and as you know, I love browning because that means caramelization and extra flavor!

DSC_0199

Lentils. While I eat all beans (always soaked first before cooking, or canned), I’ve become more of a fan of lentils in the last year. For one thing, they cook very quickly—in less than 20 minutes in many cases. Secondly, you can now find black Beluga lentils and small French green (DuPuy) lentils in many more grocery stores, and I find the firmer texture of these more pleasing than that of the larger common brown lentils. Red lentils are also quick and delicious in soups and porridge-like dishes. And all lentils have assertive flavors that go well in soups, salads and sautés.

lent


DSC_0186Avocados. Yes, I know we think of avocadoes as a vegetable, but they are really something unto themselves (and technically a fruit), and I have to mention them because they have that uniquely rich and filling thing going on (good fat, don’t you know?). And, I eat a lot of them. On toast, in salads, with tortillas, in egg sandwiches. Alone with lemon and olive oil and salt. With chickpeas! And nuts!

Grains. I’ve always been a fan of grains, but I like them and use them even more now that I’ve figured out I can cook them ahead and hold them in the fridge or freezer, and that I can use them sometimes almost like a condiment, or as one of many ingredients in a dish. Sitting down to a big bowl of grains can get monotonous. Putting some grains in a salad, a soup, a taco, whatever, is much more interesting. My favorites are wheat berries, farro, short grain brown rice, and oats (granola for breakfast!) but I stock lots of (gluten-free) quinoa, as well as millet and many different kinds of rice.

DSC_0200

Eggs. I’m not vegan or dairy-free, so I still turn to eggs for some of my protein. (That may change at some point, but for now, I’m an egg eater.) The best thing about an egg (like a lot of these ingredients that play well with others) is that you can add one to just about anything. Sure, you can make a meal just on eggs, but you can also add an egg to a grain or bean dish, a broth or a sauté.

DSC_0224

Those are the things that I most often pair with vegetables to make my meals. (Remember, vegetables have protein, too.) I do eat pasta and bread , too, though I choose whole-grain when I can. And again, I often use these carbs in smaller amounts rather than in starring roles. But there’s nothing like a great piece of artisan multi-grain toast for transporting any number of veggie toppings to a great destination.

As for the vegetables themselves, I eat leafy greens every day. They are the easiest, quickest, and most flavorful vegetables to make a meal with. (The arugula in this picture was taken from plants still growing under hoops outside.) Alliums of all kinds (onions, shallots, garlic, scallions) make their way into almost everything I cook, and my fanaticism for tomatoes extends to this time of year with roasted tomatoes in the freezer and sundried tomatoes in the fridge. This time of year I also gravitate towards colorful root and winter vegetables like carrots, sweet potatoes, and butternut squash. Along with the aromatic ingredients I always keep around—citrus, fresh ginger, vinegars, hot sauces, spices, maple syrup and honey, miso, tahini, tamari, parmesan cheese—and any fresh herbs I can procure (my rosemary pot is indoors, still alive, for now!), I eat well.

DSC_0211

Happy eating and cooking to you, too, in this new year. And don’t forget the daily chocolate imperative. (My little bowl of chips, always by my side!)

DSC_0202


Our Best Turnip Harvest Ever & 3 Delicious Turnip Recipes

DSC_2469Flipping out, I am, about our beautiful turnip harvest. For the first time, we planted a lot of fall turnips–almost 200 linear feet, which translates to hundreds of turnips. Better still, the greens are lush and not riddled with pest holes. The bulbs are plump and beautiful and also (so far) pretty damage-free. (We harvested the first roots yesterday and more today.) With the drought we’ve had, we were forced to turn the sprinklers on every day, and I think maybe the turnips really appreciated it.

And while we still have pears in mind from last week’s post (I’m doing another batch of honey-vanilla-roasted as I write), I wanted to remind you of one of my favorite quick recipes for roasting turnips and pears together and finishing with rosemary before I forget! (I’m pretty psyched that we have pears and turnips together on the farm stand right now, but I keep forgetting to put copies of that recipe out there!) But there are two other great ways to use turnips here on Sixburnersue.com. The first is in a great-technique for a stovetop slow sauté, a recipe called Caramelized Turnips, Potatoes & Carrots, with Onion and Thyme. And the second is in a beautiful winter salad. I also have many more turnip recipes in my books, including Honey Roasted Baby Turnips with Cremini Mushrooms in Fresh From the Farm. That’s a super easy recipe. So if you stumble upon some fresh turnips this weekend at your fall farmers’ market, don’t say I didn’t let you know what to do with them!

DSC_2471

How to Cook a Pattypan, A Shisito, A Fairy Tale, A Fingerling

DSC_7564

We’re growing a few fun and different veggies this year—in addition to the old favorites—just to keep things interesting. (Fun and different=Cute names, too!)

DSC_7426 The most beautiful? This Bel Fiore Radicchio.

The most trendy? Shisito peppers. Well, oops, apparently (according to this hysterical mock restaurant menu on Eater.com) this trend is now passé in certain circles, or at least ubiquitous, which is never a good thing. But for a market gardener, a cook, or an eater, Shisito peppers are a total win-win-win. The plants are prolific, the cooking is super easy—just toss with oil, cook in a hot cast-iron pan or in a grill basket until blistered (a few minutes), and season with sea salt. Eat the whole thing—absolutely delicious. Summer-crowd appetizer friendly, too.

DSC_7204photo-72

The most colorful?

photo-77photo-76 Our crazy collection of eggplants, including new additions Orient Charm (the lavender beauty) and Hansel and Gretel (the mini purples and slim whites). The cute little Fairy Tales are still new to many shoppers, and I do get some questions about how to cook them. (Hopefully I can write a full blog on eggplants before the summer’s out—most of the slim eggplants are really interchangeable, though Fairy Tale most definitely has a creamier flesh than the others.)

photo-74 And yet despite these less familiar vegetables, it’s something kind of classic (it’s a squash after all!) that seems to confound people the most. Every single day, I put all the green zucchini and the yellow pattypan squash in a big basket together. And every single day the zucchini quickly sell out before the pattypans. The pattypans do have their admirers—our Sunburst variety is so cheery—and there are some shoppers that exclaim, “Oh, my favorite!” and buy 5 or 6 at a time. But I finally realized it’s the shape that stumps many folks.

Because in reality, the texture of a pattypan is no different than a zucchini (as long as neither is overgrown) and you can dice or slice or grate or chop them both.  (The Sunburst pattypan, despite being yellow, does not have the seedy, watery texture of a crookneck or summer squash, but the firmer texture of a zucchini.) I think the flavor of a pattypan is actually a little sweeter than a zucchini.

DSC_7712

But when you look at a pattypan, especially a full-grown one, as opposed to the minis I’ve written about in the past (apparently my obsession with this subject has not waned), you do have to stop and think, now how am I going to cut this thing?

DSC_7690DSC_7700


DSC_7572Hence, my first suggestion: Slice it and roast it. Specifically, slice it North Pole to South Pole (not through the equator), with one of the Poles being the stem end. Slice it thinly, but not too thinly, brush or toss the pieces with oil and salt, and roast in a 425° degree oven until golden brown and tender, 18 to 20 minutes, turning over with tongs once if you like (see finished photo at top of blog). In the last few minutes, you can sprinkle with a mixture of bread crumbs, Parmigianno and parsley if you like (right). Serve as a sidedish with a squeeze of lemon. Or sandwich a bit of goat cheese between warm slices when they come out of the oven and drizzle with a black olive vinaigrette. (There’s a recipe for Grilled Antipasto of Green and Yellow Zucchini with Black Olive-Lemon Vinaigrette in Fresh from the Farm. You can also grill, rather than roast, the slices (just cut them a little thicker).

The slice shape also works just dandy in a vegetable gratin like this one—just replace the zucchini slices with the pattypans.

DSC_7721 For smaller pattypans, cutting them in wedges (as if you were cutting a pie) gives you nice chunky pieces to stir-fry, sauté, or cook in a grill basket on the grill.  As with any summer squash that contains a fair amount of moisture, using relatively high heat will brown up the vegetable before it has a chance to get mushy. Caramelization brings out the sweetness, too. (Find a stir-fry recipe here.)

Now for those of you who’ve been asking about cooking those little Fingerling potatoes, I’ve got a treat for you. Click here!

braisedfingerlings


How DO You Cook Those Japanese Baby Turnips, Anyway?

DSC_5455bunch 2We are just coming to the end of our first-ever harvest of Tokyo turnips, aka Japanese baby turnips. They aren’t really babies, but they are really delicious and beautiful and tender and juicy. (The greens are delicate and tasty, too.) We’ve never grown them (or a similar variety called Hakurei that’s popular at farmers’ markets) before, so I am pretty darn excited that they did well, and I can’t wait to grow more. I’m sure our cool weather helped, so I probably won’t seed again until fall.

It’s unusual for me to sell a vegetable at the farm stand that I haven’t cooked with much. And while I could certainly guess by the juicy raw texture and flavor that both minimal cooking (steaming, quick-braising, glazing) and browning (roasting, sautéing and stir-frying) would probably work with these, I couldn’t quickly reference one of my own recipes to help people cook them.

photo-64Fortunately, many of our farm stand customers are adventurous and competent cooks, so several of them forged ahead without me! One woman found a recipe for a nice sauté with potatoes in my fellow Island cookbook author friend Cathy Walther’s Greens, Glorious Greens, and on FaceBook, another cookbook author friend, Diane Morgan, suggested finishing a sauté with miso butter. I don’t have Cathy’s Greens book, though I know it’s a classic and well worth checking out, but I do have Diane’s award-winning Roots, and I can tell you there are more than a few really delicious recipes for turnip dishes in it, including one called Kashmiri-Style Turnips with Greens that led me to think I wasn’t crazy to want to pair cilantro (and ginger) with the baby turnips. The cilantro is flourishing in the cool spring garden, alongside the turnip bed.

Today (thank God for the rain!) I finally got a chance to mess around with the Japanese turnips in the kitchen. Since we had sold all the good-sized and blemish-free roots at the farm stand, I was left with only teeny-tiny roots and some bigger damaged roots, so I had no choice but to cut everything about ½-inch in size. (That meant no cutting for the teeniest mini-marbles.) But I think I would favor that size anyway—or wedges if all my roots were similar sized—for the quickest cooking. I did both a quick par-boil and a quick sauté, adding the greens only briefly to wilt at the end in the sauté , and with lemon and butter, found that the baby turnips really do make a super-quick spring side dish.

DSC_5438

DSC_5233Then I indulged my desire to go Asian, and did a stir-fry with soba noodles—and ate the whole thing for lunch. (It would have served two easily with some grilled shrimp. Photos very top and below.) Originally I thought I might go all the way and turn it into an Asian noodle soup, as the greens would be so perfect for one of these. (And one small turnip—generally about 2 inches in diameter—has a lot of greens attached.) But I was afraid the turnip roots would get lost in the soup, so I kept it noodle-y. I’m including the recipe below in narrative form, as I wouldn’t want to give you a set-in-stone recipe without testing again with more uniform turnips and more exact proportions.


To make Soba Noodles with Stir-Fried Baby Turnips, Ginger & Cilantro: DSC_5470

Cook a handful of soba noodles separately in boiling water. (Follow the package directions, but shorten the cooking time a bit.) Drain and hold. Get out a non-stick stir-fry pan or a big non-stick sauté pan and heat just a couple teaspoons of vegetable oil (I used grapeseed oil) over medium heat. Add about a cup of diced baby turnip roots (trimmed) and a couple big pinches of kosher or sea salt. Cook, stirring, until lightly browned, about 5 minutes. Add a teaspoon of chopped fresh ginger, one-half teaspoon of chopped garlic, about ¼ cup thickly sliced spring onions or scallions, and a couple tablespoons of quartered, sliced radishes. (If I’d had a small Serrano pepper, I would have added a bit of it, chopped, too.)

Stir, cooking, until fragrant and a bit softened. Add a half cup of chicken broth or other broth and about 2 cups torn, stemmed turnip greens. Stir until the greens are wilted. Add the soba noodles and stir well to combine. Add a mix of fresh lemon (or lime) juice and soy sauce (one-half to one teaspoon of each or to taste) and a tablespoon or more of torn fresh cilantro leaves. Stir, remove from the heat, transfer to a serving bowl and garnish with a bit more cilantro and some sliced spring onion or scallion green tops.  (Serves 1 or 2)


photo-66P.S. I almost completely forgot. The first thing I actually did with the baby turnips a few days ago was to add them to one of my slow-sautes with carrots and potatoes. I’d forgotten I had a few in the fridge, and cut them just as a i was starting to cook the potatoes and carrots. They cook a little more quickly than purple-topped turnips, so you can certainly use them deliciously in one of these, but I might add them half-way through cooking.


Show & Tell: Top 10 Favorite Pantry Ingredients

IMG_1370


When I’m on the road talking about my cookbooks, I love to bring along my kit of favorite pantry ingredients and a few favorite tools. (Unlike a toothbrush or an iPad, though, bottles of olive oil, bunches of fresh herbs, and sharp kitchen instruments can be difficult to carry on to an airplane. So this dog-and-pony-show only travels by car.)

I find that it doesn’t matter whether I’m at a bookstore, a farmers’ market, or a kitchenware store—people everywhere are interested in flavor pairing, quick cooking solutions, and brand choices. So I tell cooks that if they keep a pantry and fridge stocked with a few really versatile, good-quality ingredients, they can make literally hundreds of different delicious vegetable dishes with whatever they happen to bring home from the farmers’ market, the grocery store, or the backyard garden.

Here’s what’s in my “kit:”

IMG_7895 IMG_2186

1)Aromatic veggies: Garlic, shallots, onions; fresh ginger; scallions. I begin almost every cooked veggie dish by laying down a base layer of flavor with sautéed or softened aromatic veggies—minced, diced, chopped or sliced. Sometimes I will add them part-way through cooking or even turn them into starring ingredients, but one or more of them is almost always present because of the deep and permeating flavor they provide (especially if they are caramelized). They’re also vital ingredients in raw preparations like vinaigrettes and salsas, and can be the backbone of a tasty marinade. I keep little bowls of garlic bulbs and shallots on my countertop, onions in a cabinet away from potatoes, and fresh ginger and scallions in the refrigerator.

Favorite low-tech tool: an ordinary spoon for peeling fresh ginger skin

lime DSC_3072


2)Lemons, limes, and other citrus—both juice and zest: Lemons are probably my all-time favorite supporting player in the kitchen. My go-to vinaigrette features lemon zest and juice, and I will very often finish a saucy vegetable dish like a braise or a soup with either zest or juice or both. The bright acidic flavor instantly revives dull or hidden flavors. Often I will substitute lime for lemon, and I’m particularly fond of using lime juice and zest to enhance (and cut the richness of) creamy dressings for potato salads, slaws, and cucumber salads. Fresh orange juice has great flavor but less acidity than lemons or limes so use it in combination with lemon or vinegar.

Quick finishing sauce: Combine 1 tablespoon citrus juice, ½ teaspoon fresh citrus zest, 2 teaspoons maple syrup or honey and 1 teaspoon soy sauce or balsamic vinegar. Double or triple amounts if you like. Drizzle over sautéed or stir-fried veggies just as you take the pan off the heat.

Favorite citrus tools: Microplane zester, OXO juicer.

DSC_33323) Parmigiano Reggiano cheese: A little bit of the real deal, with its nutty, salty flavor and crystalline texture adds depth and earthiness to any vegetable dish, whether it’s a baked potato gratin or a simple dish of roasted Brussels sprouts and walnuts. It’s expensive (sometimes painfully so), but it will be the last best quality cooking ingredient I give up before I go to the poor house. Substitutes can be lackluster at best, downright awful at worst. To get your last buck out of a piece of Parmigiano, simmer the rind with your broth when making your next minestrone.

Favorite way to cut: Surprisingly, though I love the range of handheld graters available for hard cheeses these days, I often turn to my food processor to chop Parmigiano into tiny pebbles. I like the bigger pieces and coarse texture for vegetable tarts and gratin or crostini toppings.

Tip: Identify true Parmigiano Reggiano by the branded name on the rind.

4) Fresh herbs. Nothing finishes a vegetable dish like a spoonful of chopped herbs or a handful of torn herb leaves. Like citrus zest, most tender fresh herbs add top notes and should be added at the end of cooking. Heat will take the oomph out of cilantro, basil, mint, parsley, chervil, and chives, so long cooking isn’t a great idea. Hardier herbs like thyme, rosemary, sage, and oregano are happy to go into a long-cooking dish. Their substantial oils will permeate the dish as it cooks.

If you can grow any herbs at all, please do. Even a pot or windowsill will offer you freshness, availability, and the ability to cut just the amount you want. And if you have even a small yard, just a few square feet will be enough room to plant one or two of the heartier herbs, many of which are perennial in milder parts of the country. But if you’re like most of us and have to get at least some of your herbs at the grocery store, take them out of their original packaging when you get them home. Wrap them in damp paper towels and store in zip-top bags. The exception is fresh basil. If it hasn’t been refrigerated yet, keep it in a jar of water at room temperature.

Tip: Use a very sharp knife when chopping herbs and don’t overchop or you will get bruised, blackened herbs that can get bitter.

IMG_0717 IMG_2180 - Copy


5)Extra-virgin olive oil and unsalted butter. I cook almost exclusively with extra-virgin olive oil and unsalted butter (usually a combination of both) since cooking fat adds flavor to a finished dish, and these are both flavorful. The exception is high heat, which destroys flavor compounds (and of course, burns butter, due to the milk solids, though adding some oil will drop the smoke point a bit). So I keep one other oil on hand for stir-frying—usually peanut oil or vegetable oil, sometimes grapeseed oil. Nut oils I save for vinaigrettes.

Tip: To settle on a moderately priced extra-virgin olive oil that can be a “house” brand for you, buy several and do your own side-by-side taste test. (Invite some friends and family.) You’ll be surprised at how different the flavors can be. I tend to like the richness of olive oils originating in Spain (which many do—check labels.)

6) Vinegars and other acids: Like citrus, vinegars and other acidic ingredients like hot sauce, tomato sauce, pickling juice, wine, and unsweetened fruit juices really add dimension and brightness to vegetable dishes. You don’t need to go crazy keeping a lot of these around. In fact, you can settle on a couple vinegars you like best and stick with those.

My favorite vinegars: sherry vinegar, white balsamic vinegar, malt vinegar.

7) Honey, maple syrup or other natural sweeteners. As I mentioned above, I love a quick little sweet-sour finishing sauce for veggies, so I am quick to reach for the maple syrup bottle. And sometimes just a drizzle of honey over something like roasted cauliflower is a lovely finishing note. So pick your favorite natural sweetener and store a bottle of it next to the vinegar.

8) Toasted nuts and dried fruit: I keep almonds, pecans, walnuts and pine nuts in the freezer and toast small batches of them to add to veggie dishes for interesting texture and deeper flavor. I find the flavor of toasted (or maybe I should call them roasted) nuts to be much more appealing than raw nuts. I also love adding chopped dried cranberries, cherries, apricots or figs to winter veggie dishes.

Tip: To toast nuts, spread them on a sheet pan and put in a 350°F oven until browned and fragrant, between 4 and 10 minutes, depending on the nuts. Keep an eye on them—deep golden brown is good; very dark brown is heading for bitter. And use your sniffer–you’ll be able to smell when the nuts are starting to get too brown.

DSC_3351 DSC_3345

9)Bonus “umami” condiments: To give veggies an added depth—almost a “meaty” flavor, I keep a few robust condiments (always in the fridge after opening) from each of my favorite cuisines. I could probably get by with just soy sauce and chili-garlic paste, but usually I have sesame oil, oyster sauce or fish sauce, capers, olives, sundried-tomatoes, and anchovies around, too. Plus coconut milk, canned tomatoes, and boxed broth in the pantry. All these condiments are bonus ingredients—you can certainly make delicious vegetable dishes without them.

10) Kosher salt and a good pepper grinder: I use Diamond Crystal kosher salt because I like feeling the large pieces in my hands as I season, but I also find that it dissolves well. I’m afraid that the perfect pepper grinder is still eluding me!

Of course there are other things in my pantry to stretch veggies further into main dishes—beans, grains, pastas. But for weeknight veggie sides, I can do just about anything with what I’ve listed here. And with the exception of the fresh herbs, pretty much everything can be shopped for infrequently and stored for several weeks at least.


Throwback Thursday: Ten Things to do with Celery Root

croot 2This week marks the 4-year anniversary of sixburnersue.com. Yay Sixburnersue! Whew. That’s a lot of blog posts. To celebrate, I’m going the “Throwback Thursday” route and reaching into the archives to repost one of the earliest—and believe it or not, most popular—posts I have done. And yes, I’m talking about celery root. The reason people frequently land on this post (actually two posts–you might want to read Cinderalla Celery Root first!) is pretty simple, I think: There isn’t a lot of great info out there about cooking celery root (celeriac). So when people search for it, they wind up here!

croot 3So, you’re in luck if you happen to be harboring a few of these hairy, gnarly looking roots. You can click straight through to the delicious Creamy Celery Root and Potato Gratin recipe. Or you can peruse this list of 10 ideas and get started down the road to celery root bliss!

1. Slice celery root into thin matchsticks (or grate it coarsely) and toss it (raw) into a winter salad of endive, sliced pears, toasted walnuts, and blue cheese.

2. Make roasted celery root “chips.” Slice the root in half and then into quarters; then slice each quarter as thinly as possible. (A santoku knife is great for this). Toss the pieces in enough olive oil to coat, sprinkle with salt, spread on a heavy-duty sheet pan; and roast at 350°F until they are mostly a deep golden brown, with some white left. (I think the darker ones are crispier, but too dark and they’ll taste bitter.) Let them cool on the sheet pan to finish crisping up. Sprinkle with more salt and snack on the couch with your favorite DVD.croot 4

3.  Since celery root and potatoes are such a great match, use them together in a hearty winter soup. Sauté lots of sliced leeks in butter, add cubed celery root, potatoes, and chicken or vegetable broth, simmer until tender, puree, and enhance with a touch of cream, a little lemon zest, lots of chopped fresh parsley and crispy croutons.

4. Apples and celery root are also happy partners. Use them raw together in a salad, or try roasting them first and adding them to a warm escarole salad with crispy strips of ham and a warm Dijon vinaigrette.

5.  Make a celery root “galette” by lining a tart pan with a couple layers of thinly sliced circles of celery root and gruyere cheese. Bake at 400°F until browned and tender. (Cover for the first half of cooking.) Let cool and slice into wedges.

6. Try a “quick braise” of celery root. Brown diced celery root in a combination of butter and olive oil in a sauté pan, then add just enough liquid (a little broth spiked with apple cider), cover and reduce the liquid to finish cooking the vegetables. Uncover, toss with a little spiced butter, and serve warm.

croot 57. Instead of chips, you can also dice celery root for roasting. Make a quick weeknight side dish of roasted celery root and Yukon Gold potatoes with honey and rosemary. Cut the vegetables into ½-inch dice, toss in olive oil and salt, and roast on a sheet pan at 425°F until browned and tender. Dress lightly with a combination of melted butter, honey, and chopped fresh rosemary.

8. Celery root  is also a good flavor match with seafood.  A bed of celery root puree for a sear-roasted fish filet is delicious. Cut the root (and a few small potatoes) into pieces and simmer them with a few small garlic cloves until tender. Puree the vegetables with a little of the cooking liquid, a bit of cream, and salt and pepper.

9. Instead of a puree, make a celery root “mash” by hand-mashing cooked celery root and potatoes together with butter and milk and a little sautéed garlic. Serve with pot roast.

10. For an elegant holiday side dish—or even a hearty weeknight main dish with a salad—make my recipe for a celery root and potato gratin I use a combination of heavy cream and chicken broth so it is rich but not too heavy; this is a good dish to introduce celery root to folks.

IMG_3066_1

Of Fish Gifts and Fingerlings

Really, it is too hot to write a blog. (No, my “office” in the old farm house is not air conditioned.) I thought I’d seen heat, what with growing up in Washington, D.C., and spending summers in North Carolina in un-airconditioned cabins. But I guess I’m old. And I guess farming is really one of the worst activities to do in a heat wave (or humidity wave, I should say). I keep trying to get up earlier and earlier to harvest, but it doesn’t matter what time I get up—it’s already hot. (Doing anything in the middle of the day is out of the question.)

Today, three tee-shirts and two (outdoor) showers later, I’m sitting at my desk, but really none the cooler.

Earlier in the week, I was all blasé about this heat thing, and actually did some cooking. In fact, I turned on both the oven and the stove (several burners). I was all excited because our neighbor Ralph Savery brought us a bucket of quahogs. First I made a quick chowder with some of our fingerling potatoes, onions, and fresh thyme. Delicious. The next night I made spicy linguine with clams. There are still a few clams left, which Roy is threatening to turn into Clams Casino—if we ever turn the oven (or broiler) back on at this point.

Back in the old days (before-Susie, before-farming), Roy got to go fishing every once in a while. Even the two of us would occasionally harvest mussels or go crabbing. Not anymore. Luckily, friends take pity on us and bring us stuff. I am grateful.

A few weeks ago, a new friend brought me a double-bonus: A very freshly filleted piece of blue fish caught that morning by her husband Jeff, and a copy of her new cookbook, Living off the Sea. Melinda Fager and her family spend summers on Chappaquiddick Island, and make their meals almost exclusively off what they catch and forage. Before I’d even met Melinda, I was asked to review the galleys of her book this past winter. I fell in love with the photos, the stories, and with the recipes—simple, fresh, and perfectly in tune with casual summer living. So if Roy doesn’t get his hands on those last clams, I’m going to make her Stuffed Quahogs. (And I’ve got quite a few other recipes from Living off the Sea tagged—from Blueberry Bread to “Blue Dogs” to Victoria’s Chappaquiddick Gumbo.)

In the spirit of making the most of what you’ve got, I’ve also been cooking a lot of our own fingerlings. Every time we pull a plant, we get a bunch of little tiny tubers in addition to the bigger potatoes that everyone loves. I think the tiny tubers are the cutest darn things, and I’ve tried packaging up and selling them in half-pints. But they don’t move too fast, I think because many of our farm-stand shoppers are cooking for a crowd and don’t think they’ll stretch.

But I’m suspecting that folks also may be wondering what to do with them. Well, not only are they the quick dinner’s best friend (boiled and dressed in less than 10 minutes, no peeling), but they make especially tasty roasted potatoes (before photo above). With that ratio of skin-to-flesh, they get all crunchy and poppy. Libby gives them a 10. We just toss them with olive oil, fresh rosemary, and a little MV Sea Salt, spread them in one layer, and roast at 400 degrees F for 25 to 30 minutes. (If you don’t have teeny-tiny potatoes, try cutting red potatoes into small dice—they’ll roast up nice and toasty, too.)

But don’t try that tonight if you live on the East Coast in an un-airconditioned home. Turn on the grill or go to the beach and wait for the thunderstorms to blow us through a little cool air. And then, by all means, turn your ovens back on!