All posts by Susie Middleton

Hold the Green Beans, Olive the Berkshire Pig Loves Pizza

One of the very coolest things about the vegetable garden we will tend this summer is that it lies squarely between a hog pen and a goat yard. All summer long we’ll be in the good company of Olive the Berkshire pig, who is (cross your fingers), hopefully pregnant, so we’ll be joined by some little black piglets, too. Soon, Thunder the boar will also be back at Native Earth. He’s been on loan to another local farm for the last three months.

The goats, who are the very cute mini-goats known as pygmies, will probably move around a bit, as they have a job to do—clearing brush. But they’ll be close enough for us to say hi to every day. And these gals are expecting, too, thanks to a new billy goat who’s joined them.

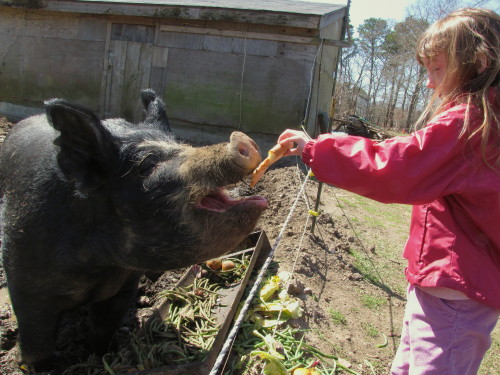
Besides the goats and pigs, there are sheep and hens and guinea fowl and ducks and geese and I- don’t- know-what-else at the farm. I am beside myself with excitement. Anyone who knows me well will tell you that I get kind of goofy about pigs and goats, and pretty much every other kind of farm animal. I’m just crazy about them. Fortunately, Roy and his daughter Libby (with Olive, above) share this passion of mine. We dropped by the farm today, ostensibly to add some kitchen scraps to the compost pile. But secretly we’d brought along a few slices of last night’s pizza (plain cheese) to offer to Olive, even though we understand she’s getting plenty to eat right now. Hopefully we won’t get in trouble. We just thought it’d be nice to make friends early on. It seemed to work. Olive smiled. So did Libby.

On our way home from Native Earth, we stopped in at Whiting Farm to see the newborn lambs. The Whitings’ sheep are a handsome breed known as Cheviots, and even the babies have distinctively upright ears. Allen Whiting let Libby help him bottle-feed a lamb who’s not getting quite enough milk from Mom. Libby asked if he had named the lambs, and he explained that he usually doesn’t, as most of these lambs will become meat. Libby understood that, just as she did when we mentioned the piglets would be raised for meat. “Bacon?” she asked. Yes, really, really good bacon.

Between our vegetable garden and being around the farm, Libby’s going to learn a lot about where her food comes from this summer. (Jamie Oliver would be proud!) We’ve picked out some vegetables—like baby carrots and mini-pumpkins—just for her, and she’s hoping we’ll get a hen or two for her to help take care of. (She loves fresh eggs, too.) I can’t help but feel grateful for this: The chance for her to learn and be challenged—while we all spend time together outdoors—is just one more bonus to our vegetable garden project.

Slipping Leeks into the Skillet: “Sweat” first, then Sauté

Like Peter Rabbit sneaking into Mr. McGregor’s vegetable patch, I tiptoed into a friend’s garden yesterday and heisted some leeks. I didn’t get caught, and it was pretty thrilling, so, I don’t know, I may turn into a petty criminal.

Seriously, I sort of had permission for this particular heist. When my friend left the Island late last fall to spend the winter in California, he implored me to help myself to any garden stragglers. I stopped occasionally for some lettuce and other greens, then forgot all about the garden until yesterday, when I drove past it on my way to pick up some fresh eggs at a nearby farm. I looked out the window and couldn’t believe what I saw—a row of green leafy leek tops sticking out of the grey, crackly earth. What a courageous vegetable, I thought, to brave the winter we’ve had—the winter of a gazillion snowflakes and a billion rain drops, the winter of anemometer-breaking winds, beach-busting surf, and canceled ferries. I couldn’t just leave the leeks there—or not all of them, anyway. They deserved to be cooked. So I dug up a few, and oh, how good it felt to harvest a vegetable. Who says nothing’s in season in March?  (I hear that parsnips are even better after a long winter.)

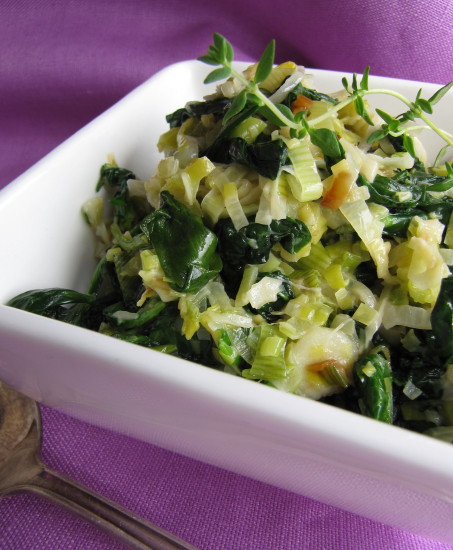
I took my leeks home, sliced them up, rinsed them well, and treated them to a luxurious buttery, steamy, simmer in a skillet until they were soft and most of the moisture had evaporated. Then I kept cooking them a bit until they were lightly browned. (Leeks like to be “sweated” in a little liquid before they’re sautéed. They give off a slightly sticky substance that can cause them to stick to the pan or cook unevenly if they’re not started off with enough fat or liquid.) Next, I folded in a few handfuls of fresh spinach, tossed in a teaspoon of fresh thyme leaves, and added just a tablespoon of heavy cream to give the dish some body. Off the heat, I grated in a tiny bit of Parmigiano. What I wound up with was the perfect “bed” for a juicy steak, a grilled lamb chop, or a piece of grilled fish. This is a pretty richly flavored side dish, so a little goes a long way.  You can use some at dinner time and do as I did this morning—add the rest to an omelet. Delicious. It would be a great pizza or crostini topping, too.

_________________________________________

A Bed of Buttery Leeks & Spinach

3 medium leeks, white and lightest green parts (about 8 ounces)

2 tablespoons unsalted butter

1/4 teaspoon kosher salt, more to taste

2 cups (packed) washed and stemmed fresh spinach leaves, torn into smaller pieces if large (about 2 ½ ounces)

1 teaspoon lightly chopped fresh thyme

1 tablespoon heavy cream

2 tablespoons grated Parmigiano Reggiano (optional)

__________________________________________

Trim the ends from the leeks. Slice the leeks across into thin rings (about 1/8-inch thick), discarding any woody stem in the center. Put the sliced leeks in a bowl and cover them with tepid water. Swish them around a bit and let them sit. Lift the leeks out of the bowl and transfer to a colander. Drain and rinse the sand from the bowl, return the leeks to the bowl, and cover again with tepid water. Lift, drain and repeat one more time, leaving the leeks in the water the last time.

Heat the 2 tablespoons butter in a medium non-stick skillet over medium-low heat.  Lift the leeks out of the water and add them to the pan with whatever water is clinging to them. Season with ¼ teaspoon salt. Cook, stirring occasionally, until the leeks are limp and all of the liquid has evaporated, 10 to 12 minutes. Continue to cook, stirring frequently, until the leeks are very lightly golden brown, another 3 to 5 minutes. Add the spinach leaves and a pinch of salt and fold or stir them in with the leeks until they are wilted, about 1 minute. Add the fresh thyme and the cream and remove the pan from the heat. Gently stir until the cream is mostly absorbed into the dish and the thyme is well-distributed. Stir in the Parmigiano, if using. Taste for salt and serve warm.

Serves 2 as a side dish, 2 to 3 as a “bed” for fish, chicken, or beef

My Secret Urge to Be a Farmer: The Great Vegetable Growing Experiment Begins

I am pretty sure I didn’t turn out the way my parents had planned. They sent me to good schools and had high hopes for my future. When I was in college, my father announced that he had found the perfect graduate program for me. It was a combo law-school-and-business-school all rolled into one. Was he kidding? Sounded like pure hell to me. “Sorry, Dad,” I said, “I am going to New York to be a writer.” Yikes, could there be any words a father would rather not hear?

I give him a lot of credit for being a good sport then—and for standing by for the next 25 years as I pursued not one, but possibly two of the worst paying career choices a girl could make—publishing and cooking. I shifted back and forth from one to the other, finally managing to splice the two together to earn a halfway decent salary as the editor of a cooking magazine. But then I longed to be poor again and quit that job a couple years ago.

Now, unbelievably, I have found a third passion to pursue that very definitely has the potential to earn me even less money than the first two careers—growing vegetables. It could, however, be the most satisfying pursuit of all. Who wouldn’t want to play around in the dirt all day, sun screaming down from a perfect blue sky, little green edible jewels poking up all around you like candy spilled out from a piñata?

Okay, I know it’s not all like that. Not hardly. I went to work on a friend’s farm in upstate New York last summer to try and see if I had what it takes. I spent one entire week on my hands and knees weeding carrot seedlings. My friends were really polite and claimed that I “saved” the carrot crop, but all I could think about was how slow and out of shape I was, and how hard (REALLY hard) they worked.

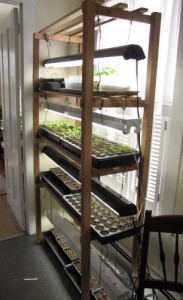
Still, I can’t get this growing urge to go away. I’ve had little vegetable gardens over the years, but this year I’ve really gone and done it. Along with my partner Roy Riley, I’ve rented a big plot from my friend Rebecca Gilbert over at Native Earth Teaching Farm here on Martha’s Vineyard.  By big, I don’t mean huge, as in acres; I mean big by backyard vegetable garden standards, about 2800 square feet. Much of that will be paths, of course; what Roy and I have drawn on paper is actually 16 beds, each 24 x 3 feet, plus two longish borders with perennial herbs. (So it’s really more like 1400 square feet.) Roy, thankfully, is a builder, so he has already started crafting useful garden stuff for us, like cold frames to harden off the seedlings (and the seed-starting shelves in the photo at right).

We’ll be growing peas, sugar snap peas, snow peas, pole beans, bush wax beans, tomatoes, eggplant, cucumbers, carrots, beets, onions, potatoes, winter and summer squash, lots of different kinds of cooking greens and salad greens, fresh herbs, and flowers. All winter long we’ve been hoarding vegetable gardening books from the West Tisbury library, ordering seeds and equipment, and figuring out a budget for this project. We’ve already started a few hundred seedlings inside, and we hover over them like ridiculously nervous parents.

Our plan is to help Rebecca get the farm stand (on North Road in Chilmark) to be a more robust destination for veggie-, herb-, and flower-hungry Up-Islanders. So Roy and I will be selling our harvest there, and possibly at a few other places. My goal is to see if there’s any way that this growing thing could become a permanent part (albeit a really tiny part) of my future livelihood. So while it’s not exactly farming, I’d be proud to call myself a grower if I can learn the secrets to this art. I’m optimistic and excited, because I know how much I’ll enjoy the process even if our yields are less than stellar the first year.

By the way, I realize this website (and blog) is supposed to be dedicated to cooking vegetables, so I’ll try not to get too sidetracked with talk about growing them. I will, however, give you an occasional update on the garden as the season gets going. Because, after all, what better excuse to develop more new vegetable recipes!

Quick Sautéed Cabbage Recipe for St. Patrick’s Day

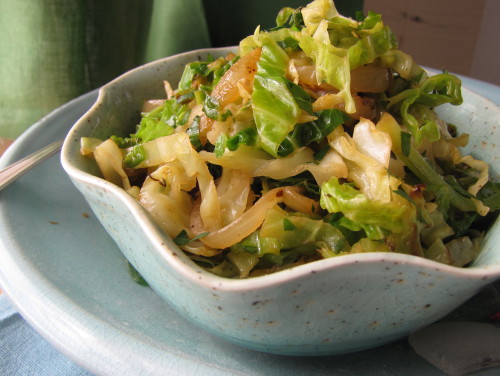
If you’re getting around to planning your St. Patrick’s menu a little late like me, here’s something to help—a quick and easy sautéed cabbage recipe. I’ve never been one for the traditional boiled cabbage that often goes along with the corned beef on this holiday. In fact, I didn’t learn to love cabbage until I cooked it hot-and-fast–in a sauté pan, in a stir-fry pan, on a griddle—anything where I could bring out its sweeter side with a little browning.

Sautéed cabbage is not only (much) tastier than boiled cabbage, but it’s less fussy to cook. The basic recipe really doesn’t need much embellishment either, since browning accentuates the nutty flavor of cabbage. But after you’ve tried this and made it part of your repertoire, you can perk it up by adding sautéed apples to it, by tossing in a bit of ginger or garlic, or by playing around with the deglazing broth by sub-ing in white wine, lemon, or apple cider for the rice vinegar and soy sauce.

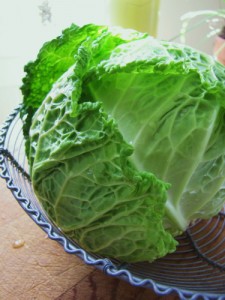
Regular old green cabbage would be just fine here, but I’m crazy about its crinkly-leaved cousin, Savoy cabbage (right). Savoy wilts in a hot pan a bit quicker than regular cabbage, and has a slightly richer flavor and lighter texture.

To make Colcannon: To make a delicious version of this Irish mashed potato and cabbage dish, make mashed potatoes using Yukon gold potatoes, cream, and butter (and plenty of salt). Hand mash for a coarse texture. Fold in some or all of the cooled Quick-Sautéed Savoy Cabbage (lightly chopped first if you like). You can also substitute leeks for the onions in the sautéed cabbage recipe, but you will need a bit more cooking fat and time to soften them before adding the cabbage.

Quick-Sautéed Savoy Cabbage

___________________________________

2 tablespoons chicken broth
½ teaspoon rice wine vinegar
¼ teaspoon low-sodium soy sauce
¼ teaspoon sugar
2 tablespoons unsalted butter
1 tablespoon extra-virgin olive oil
1 medium onion (4 to 5 ounces), thinly sliced
kosher salt for seasoning
½ head Savoy cabbage, cored and very thinly sliced (about 8 to 9 ounces)
2 teaspoons chopped fresh parsley (optional)

___________________________________

Combine the chicken broth, rice wine vinegar, soy sauce, and sugar in a small bowl. In a 10-inch straight-sided sauté pan over medium-high heat, melt 1 tablespoon of the butter with 1 tablespoon of the olive oil. When the butter is foamy, add the onion and a pinch of salt and sauté, stirring, until the onions are somewhat softened and just beginning to brown, 2 to 3 minutes. Add all of the cabbage and ½ teaspoon salt and stir well. Cook, stirring only occasionally, until the cabbage is limp and browned in spots (the bottom of the pan will be very brown and the onions will be brown), about 5 to 6 minutes.

Remove the pan from the heat and immediately stir in the chicken broth mixture and the remaining 1 tablespoon butter. Stir until the butter has melted, scraping up some of the browned bits on the bottom of the pan. Let the cabbage sit in the pan for two minutes and stir again. (The cabbage will release a little more moisture and you’ll be able to incorporate a bit more of the browned bits.) Add the parsley, stir again, and transfer to a serving dish. Serve right away.

Serves 3-4

Candidate for Cutest Veg: Baby Bok Choy

This week I’m in major recipe-development and photo-shoot mode, as I’ve got some last-minute assignments from magazines that need spring vegetable recipes. So I have been tiptoeing off to the grocery store, hoping none of my locavore friends see me pouring over the out-of-season vegetables in the produce section. I’m not sure why I feel guilty, as we’ve definitely done our best to make do with our winter CSA veg (and we STILL have some in the fridge and in the attic). We deserve a little fresh green stuff. But I hate the fact that it’s shipped from so far away. It’s one of the most ironic parts of my job—I encourage people to eat and cook seasonally, but often I’m developing recipes out of season.

Well, I guess it’s not so bad this time—spring is right around the corner; I actually saw a forsythia bush in bloom yesterday. (It was wedged between two barns, so I think it must have its own micro-climate, as the rest of Martha’s Vineyard is still chilled by the cold Atlantic waters swirling around us.) But next week I’ve got an assignment to work on some summer recipes, and talk about challenging—ripe, juicy tomatoes in March?

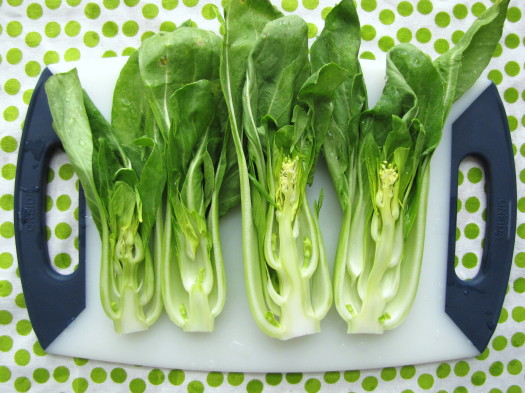
Anyway, when I got home the other day with all these pretty green things—peas and sugar snap peas and fresh mint and frilly lettuce—I got a little giddy. There’s something about the color green that knocks my socks off. And there’s one particular spring green that really tickles me. It’s baby bok choy. These mini-versions of the big honking Asian cabbage barely resemble their big sisters. They’re slender, curvy, and petite—about 6 to 7 inches long—and their color is a soothing mix of celadon and shamrock. Best of all, their fabulous flavor borrows from the nutty side of arugula and the tangy bite of a mellow mustard. (In the photo above, you can see that these baby bok choy were starting to bolt (sprout flowers). The good news is that they still taste good, unlike some bolted greens that become unbearably bitter.)

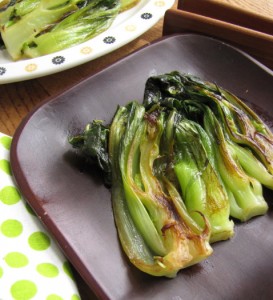
It won’t surprise you that I take this pretty green thing and brown the heck out of it. I’m like a broken record on that subject—browning green veggies almost always makes them sweeter. So I cut these babies in halves or quarters lengthwise (keeping the hint of that lovely shape—why slice these across and wreck that?), and sear them cut-side down, in a little combo of oil and butter. Then I finish cooking them (sort of part steaming, part braising), covered, in a little bit of liquid. You can easily add garlic, ginger, citrus, soy, or other flavorings to the liquid or at the end of cooking to fancy up the side dish. But this basic cooking method gives a perfectly delicious result.

Skillet Seared & Steamed Baby Bok Choy

Baby bok choy can vary in size a lot; choose heads that are all about the same size for this technique. If the heads are wider than 2 inches, cut them in quarters, rather than halves, for cooking.

___________________________

¼ cup chicken broth
1 teaspoon soy sauce
½ teaspoon honey
1 Tbs. vegetable oil
1 Tbs. unsalted butter
4 baby bok choy (6 to 7 inches long, 2 inches wide), about 10 to 12 ounces, trimmed, cut in half lengthwise, washed and spun dry
¼ tsp. kosher salt

__________________________

Combine the chicken broth, the soy sauce, and the honey in a glass measuring cup and whisk to combine well. In a 10-inch straight-sided sauté pan that has a lid, heat the vegetable oil and ½ tablespoon of the butter over medium heat. When the butter has melted and is bubbling, sprinkle the ¼ teaspoon salt over the pan. Arrange the bok choy, cut-side down (or one cut side down), in one layer in the pan. (They will be snug.) Cook, without stirring, until the undersides of the bok choy are deeply browned, 6 to 7 minutes.

Carefully pour the liquids into the pan and cover immediately. Simmer until the liquid is almost completely reduced (a teaspoon or two will be left), 5 to 6 minutes. (Check occasionally to make sure the liquids don’t reduce entirely and start to burn.) Uncover, remove the pan from the heat, and transfer the bok choy to a serving platter. Add the remaining ½ tablespoon butter and a tablespoon of water and stir well with a silicone spatula or wooden spoon as the butter melts, scraping any browned bits off the bottom of the pan. Scrape and pour the pan sauce over the bok choy.

Serves 2 to 3

Bitter Gets Sweet (I Swear!): A Recipe for Caramelizing Turnips In a Cast Iron Skillet

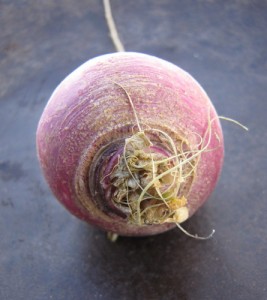
I know you are thinking I have lost my mind. Last week it was celery root; this week it’s turnips. “Can’t she write about something delicious—or something my family will actually eat?” I hear you asking. I’m sorry, but I just couldn’t pass up the chance to tell you about this—the absolutely most delicious way to cook turnips.

In fact, I’ve already written about this technique—slow-sautéing in a cast-iron skillet—once this week. I moonlight as an occasional blogger over at the Huffington Post’s Green Page, and this week I’ve been participating in their latest challenge—The Week of Eating In. At first I felt a little silly saying, “Sure, I’ll eat in for a week,” since I already cook and eat most of my meals at home. (Plus I just recently posted my opinion on why I think everyone else should cook at home more, too!) But then I realized I could help other people in the challenge by posting tasty ideas for cooking veggies at home.  And since I had just made my slow-sautéed turnips, potatoes, carrots, and onions for like the 12th time this winter, I figured I’d share that yummy idea on Huff Post.

Over here, I wanted to post the whole recipe (and a few more photos), and to also let you know that there are many more “slow-sautés” coming in my cookbook, Fast, Fresh, & Green. The recipes in the book were developed for a straight-sided stainless steel sauté pan, since I think more people own them than cast-iron pans. But cast-iron is so perfect for this kind of dish, because it captures and distributes heat so evenly, that I wanted you to be able to try it if you can. (You can get a pre-seasoned Lodge cast iron skillet for about $15.)

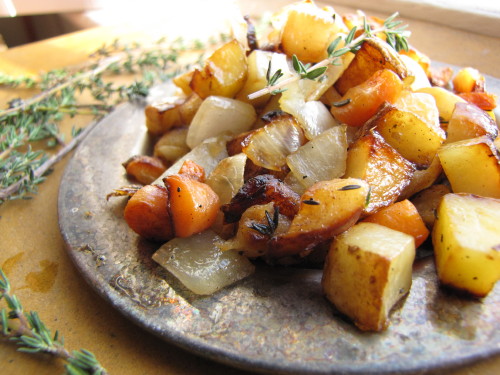
I start this kind of sauté by dicing (pretty small but not too fussy) whatever roots I’ve got on hand and piling them into the skillet with lots of olive oil and herb sprigs. The pan will be really crowded at first—that’s okay. As the vegetables cook, they brown and steam at the same time (and they shrink quite a bit). I always add some aromatic allium—onion, leeks, or shallots—about halfway through cooking for added moisture and flavor.

But the most important thing I do is to keep my ears tuned to the sizzling in the pan. It should be a steady, perky sizzle—but nothing too explosive sounding. The sizzle’s your cue to how fast the veggies are cooking. You want them to brown and steam at about the same rate, because your ultimate goal is deeply browned (yes, caramelized) vegetables that are cooked through, too. This is much easier than I’m making it sound. All you need to do is stir every once in awhile and maybe adjust the heat once or twice. The veggies will be done in about 35 to 40 minutes—but you’ll have plenty of time to make whatever else you’re having for dinner while they’re cooking. (By the way, for vegetarians, these sautés are hearty enough to plunk in the middle of the plate.)

Caramelized Turnips, Potatoes, & Carrots with Onions & Thyme

If you don’t have a cast iron pan, you can make this recipe in a 10-inch straight-sided sauté pan (stainless interior). The browning won’t be quite as even, and you might need to add a bit more oil, but the results are still very tasty.

___________________________________________________________

3 tablespoons extra-virgin olive oil, more if needed

½ pound purple-topped turnips, trimmed but not peeled, cut into ½-inch dice

½ pound Yukon Gold potatoes, unpeeled, cut into ½-inch dice

½ pound carrots, trimmed and peeled, cut into ½-inch dice

½ teaspoon kosher salt, more if needed

5 to 6 thyme sprigs

1 medium onion (about 5 ounces), cut into medium dice

___________________________________________________________

In a 10 or 11-inch cast iron skillet, heat the 3 tablespoons olive oil over medium-high heat. Add the turnips, potatoes, carrots, salt, and herb sprigs and stir and toss well to combine and to coat with the oil. (The pan will look crowded.) Reduce the heat to medium and cook, stirring and flipping occasionally with a metal spatula, for about 20 minutes. (Listen to the pan—you should hear a gentle sizzle, not a loud one. If the vegetables are browning too quickly, reduce the heat a bit to maintain that gentle sizzle. If they seem dry, add a bit more olive oil.) Add the diced onion and continue to cook, stirring and flipping with the spatula, until the vegetables are deeply browned and tender all the way through, about another 15 minutes. Remove the herb sprigs before serving. Taste and season with more salt if you like.

Serves 3 to 4


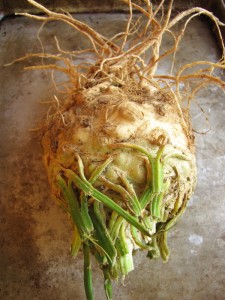
Ten (Yes, 10) Things to Do with Celery Root

Count your blessings. So you’re stuck with six celery roots the size of footballs? At least they’re edible. Seriously, I know it’s hard to figure out what to do with these things; I’ve had quite a few on my hands recently thanks to my winter CSA share from Whippoorwill Farm. So last week I posted my favorite recipe for a creamy celery root and potato gratin, but I thought you might like a few more ideas, too. So here goes. (Be sure to try the oven roasted “chips.”)

1. Slice celery root into thin matchsticks (or grate it coarsely) and toss it (raw) into a winter salad of endive, sliced pears, toasted walnuts, and blue cheese.

2. Make roasted celery root “chips.” Slice the root in half and then into quarters; then slice each quarter as thinly as possible. (A santoku knife is great for this). Toss the pieces in enough olive oil to coat, sprinkle with salt, spread on a heavy-duty sheet pan; and roast at 350°F until they are mostly a deep golden brown, with some white left. (I think the darker ones are crispier, but too dark and they’ll taste bitter.) Let them cool on the sheet pan to finish crisping up. Sprinkle with more salt and snack on the couch with your favorite DVD.

3.  Since celery root and potatoes are such a great match, use them together in a hearty winter soup. Sauté lots of sliced leeks in butter, add cubed celery root, potatoes, and chicken or vegetable broth, simmer until tender, puree, and enhance with a touch of cream, a little lemon zest, lots of chopped fresh parsley and crispy croutons.

4. Apples and celery root are also happy partners. Use them raw together in a salad, or try roasting them first and adding them to a warm escarole salad with crispy strips of ham and a warm Dijon vinaigrette.

5.  Make a celery root “galette” by lining a tart pan with a couple layers of thinly sliced circles of celery root and gruyere cheese. Bake at 400°F until browned and tender. (Cover for the first half of cooking.) Let cool and slice into wedges.

6. Try a “quick braise” of celery root. Brown diced celery root in a combination of butter and olive oil in a sauté pan, then add just enough liquid (a little broth spiked with apple cider), cover and reduce the liquid to finish cooking the vegetables. Uncover, toss with a little spiced butter, and serve warm.

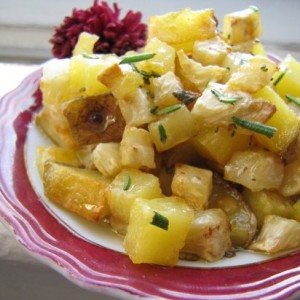
7. Instead of chips, you can also dice celery root for roasting. Make a quick weeknight side dish of roasted celery root and Yukon Gold potatoes with honey and rosemary. Cut the vegetables into ½-inch dice, toss in olive oil and salt, and roast on a sheet pan at 425°F until browned and tender. Dress lightly with a combination of melted butter, honey, and chopped fresh rosemary.

8. Celery root  is also a good flavor match with seafood.  A bed of celery root puree for a sear-roasted fish filet is delicious. Cut the root (and a few small potatoes) into pieces and simmer them with a few small garlic cloves until tender. Puree the vegetables with a little of the cooking liquid, a bit of cream, and salt and pepper.

9. Instead of a puree, make a celery root “mash” by hand-mashing cooked celery root and potatoes together with butter and milk and a little sautéed garlic. Serve with pot roast.

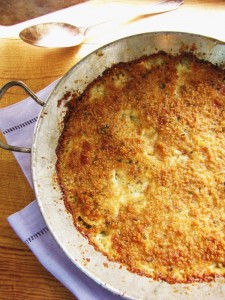
10. For an elegant holiday side dish—or even a hearty weeknight main dish with a salad—make my recipe for a celery root and potato gratin I use a combination of heavy cream and chicken broth so it is rich but not too heavy; this is a good dish to introduce celery root to folks.

Cinderella Celery Root

It’s a guy thing. Bigger is better. I had a chef-boss once, Lenny. He was about 6’ 6” and a former Hell’s Angel, a fairly imposing guy. When it was his turn to make the meatloaf, he’d fill an entire sheet pan (the restaurant kind, you know—the size of a football field) with two big fat long loaves, which we’d sell by the slice. (This was a glamorous establishment, you can tell.) When it was my turn, I’d shape the meatloaf into cute little “mini” loaves. At first Lenny just scowled at me, but then he figured out he could slap a higher price on mine and call it a day. “Girls,” he’d say, and shake his head.

So when my friend Roy offered to pick up my CSA share the other week and returned with two of the most ginormous celery roots I had ever seen, I didn’t say anything. I just chuckled. You know, it’s always risky to have someone else select your produce for you, but this is a guy I trust implicitly. After all, he can pick out a ripe cantaloupe from a mile away, and I certainly can’t do that. Anyway, in this particular case, bigger can be an advantage, so all was fine.

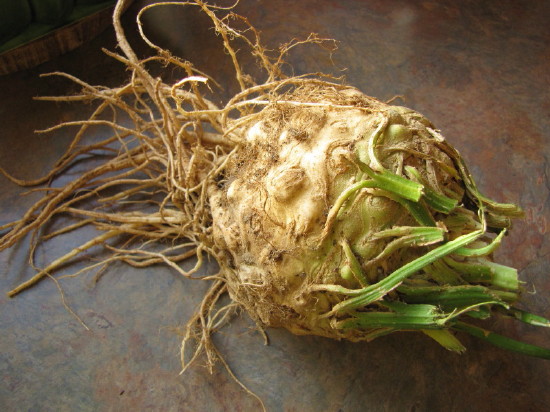
Celery root has an image problem, it’s true. It needs a marketing makeover, starting with its true name—celeriac. Eek. Who wants to eat something that sounds like a medical condition? I say, call it Cinderella, because beneath the drab wardrobe—that gnarly skin—beauty awaits.  (And versatility.) Ironically, it’s probably the skin that scares people away, yet it’s actually much easier and quicker to hack off the tops and sides of a celery root with a sharp knife than it is to, say, laboriously peel a butternut squash. So don’t be afraid to go at it; just choose the biggest roots. Since that tough skin also tends to burrow down into the flesh in places, you can wind up devastating a small root by the time you cut off all the skin. A bigger root will yield a higher flesh-to-skin ratio.

The cool thing is, once you get to that crisp, white, celery-scented flesh, your options are wide open. You can roast or sauté it, add it to stews and braises, and even eat it raw in salads. (See 10 Things To Do with Celery Root.) But my favorite thing to slip it into is a creamy gratin. This darn thing is so hardy it could be dinner with a salad. But it loves a slice of pot roast nearby, too.


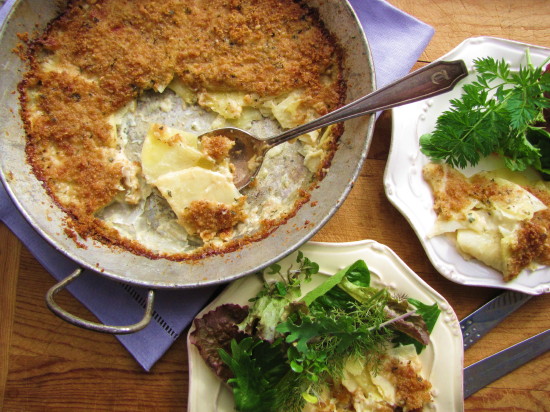
Yukon Gold and Celery Root Gratin
 
This hearty side dish could easily be the star of the meal with a nice green salad on the side.
Author:
: side dish
Serves: 4
Ingredients
  • ½ teaspoon unsalted butter
  • ¾ cup fresh breadcrumbs
  • 1 tablespoon extra-virgin olive oil
  • 1½ teaspoons chopped fresh thyme
  • ¼ cup finely grated Parmigiano Reggiano
  • Kosher salt
  • ¾ cup heavy cream
  • ½ cup plus 2 tablespoons low-sodium chicken broth
  • 1 teaspoon Dijon mustard
  • ½ pound Yukon Gold potatoes (about 2 large or 3 medium), peeled
  • ½ pound (8 ounces, about ¾ of a large peeled root) celery root, trimmed and thoroughly peeled
  • Freshly ground black pepper
  • ¾ cup grated Gruyère or Swiss cheese
Directions
  1. Preheat the oven to 350 ° F. Rub a 5- or 6-cup shallow gratin dish (or a 9.5 inch round pie plate) with the butter.
  2. In a small bowl, combine the breadcrumbs with the olive oil, a big pinch of salt, ½ teaspoon of the chopped thyme, and 2 tablespoons of the Parmigiano.
  3. In a liquid measure, combine the cream, broth, and mustard.
  4. Cut the potatoes in half lengthwise and turn the halves cut side down on a cutting board. With a sharp knife, slice the halves across as thinly as you can (between 1/16 and ⅛ inch is ideal) so that you have thin half-moon pieces. Cut the celery root into quarters, and slice it as thinly as the potato.
  5. Put the potatoes and celery root in the mixing bowl. Add ¾ teaspoon salt, several grinds of fresh pepper, the gruyere or Swiss cheese, the remaining Parmigiano, the remaining 1 teaspoon thyme, and the cream mixture. Mix well. Using your hands, lift the potatoes out of the bowl and transfer them to the gratin dish, arranging them as evenly as possible. Pour and scrape the liquids and anything remaining in the bowl into the gratin dish and distribute everything evenly, adjusting the potatoes as necessary to get an even top. Using your palms, press down on the potatoes to bring the liquids up and around them as much as possible. (It won’t necessarily completely cover them.) Cover the top evenly with the breadcrumb mixture.
  6. Bake until the potatoes are tender when pierced with a fork (check the middle of the dish as well as the sides), the breadcrumbs are brown, and the juices around the edges of the gratin have bubbled down and formed a dark brown rim around the edge, 55 to 65 minutes. Let cool for about 15 minutes before serving.

The Perfect Match: Carrots + Stir-Fry Pan

I didn’t always love carrots, but two things changed that.  First, I grew my own carrots last summer—and toted home fistfuls of freshly dug carrots from my CSA farm every week. These sweet and crunchy little wonders bore no resemblance in taste or texture to the poly-bagged grocery store carrots harvested light-years ago and shipped from a galaxy far, far away.

Secondly, when I started writing my vegetable cookbook, Fast, Fresh & Green, I figured the familiar and friendly carrot would need to star in at least a few side dishes. So I cooked carrots—a lot. In the back of my mind were bad memories of overcooked (mushy) and under-flavored (wan and vegetal) carrots from bad convention dinners and childhood TV dinners.

I needed to erase that memory. I figured that any method that let the carrots brown up a little first (caramelization=deep, sweet flavor) and then just cook through until barely tender would do the trick. Stovetop braising, roasting, sautéing—these methods all worked, but I discovered that the hands-down easiest and most efficient way to get great carrot flavor fast is stir-frying.

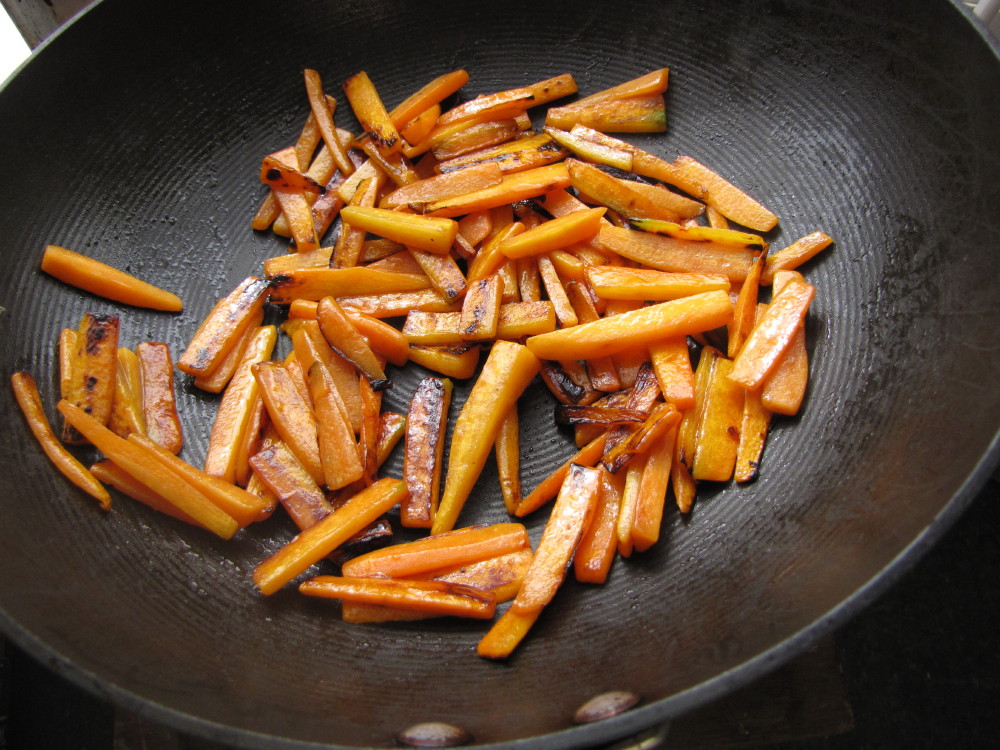
By stir-frying, I don’t mean leaping flames and a professional wok. I mean a wide, round, bowl-shaped non-stick stir-fry pan (my favorite is a Circulon) on a home burner. These pans are great for two reasons—the large surface area lets more vegetables come in contact with the hot pan for more browning, but at the same time, the depth and slope of the bowl allows the vegetables to steam a bit while they cook, too.  (The pan should be moderately full for the veggies to do that steamy thing—too empty, and the veggies will tend to burn.)

Cooking carrots in a stir-fry pan is such a no-brainer that I was sort of embarrassed to espouse the technique in my book. But who doesn’t like easy? And the result is so fabulous—deeply browned around the edges and just cooked through,  the carrots are nutty and sweet tasting. You can finish off the carrots simply with chopped fresh ginger and a squeeze of lime, or go crazy with flavors.

I do get a teensy bit fussy (or so my mother says) about how I cut my carrots for a stir-fry. I like slender sticks; they don’t have to be perfect—just try to keep them all about the same thickness.

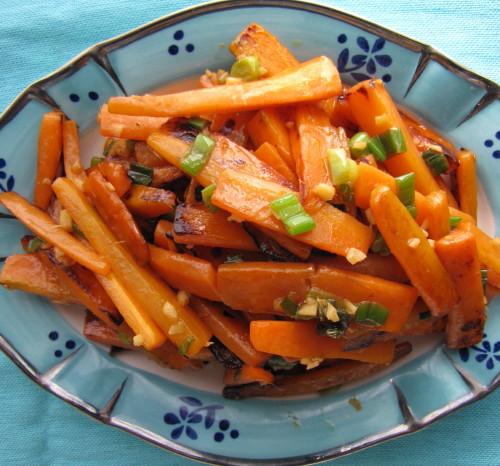
Gingery Stir-Fried Carrots with Cranberry and Orange

Serves 3

1 pound carrots

1 tablespoon cranberry juice (unsweetened)

1 tablespoon fresh orange juice

1/8 teaspoon balsamic vinegar

½ teaspoon kosher salt

1 tablespoon vegetable oil

¼ cup (about 2 small) sliced scallions, white and green

2 teaspoons minced fresh ginger

pinch red pepper flakes

1 teaspoon unsalted butter

Trim and peel your carrots and cut them into sticks that are 2 to 3 inches long, and between ¼ and 3/8 inch thick. Combine the cranberry juice, orange juice and balsamic vinegar in a small bowl.

In a large (12-inch) nonstick stir-fry pan, heat the vegetable oil over medium-high heat. When the oil is hot (it will loosen up), add the carrots and salt and stir well with tongs. Cook, stirring only occasionally and spreading out the vegetables after every stir, until the carrots are browned in places (they should have lost their stiffness; some will be slightly blackened), about 10 minutes. Adjust the heat up if the carrots are not browning after a couple minutes; lower the heat if the carrots are browning too much after five or six minutes.

Turn the heat to low, add the scallions and ginger, and stir until fragrant, about 30 seconds. Turn off the heat, add the cranberry/orange/balsamic combo and stir until the liquids have mostly reduced and been absorbed. Take the pan off the heat, add the butter, and toss and stir gently until it melts. Serve warm.

Don’t be a Wok Snob—You’ll Love this Stir-Fry Pan

It took me a while to cozy up to nonstick stir-fry pans—those wide, sloping pans that are shaped like a salad bowl as opposed to a conical, flat-bottomed wok. Like a lot of folks, I thought you could only really use a wok for stir-frying.  And in a way, that’s true. A non-stick stir-fry pan won’t give you wok-seared vegetables. But it will give you something delicious. The trouble with wok cooking at home is that most of us don’t have the recessed burners and leaping flames needed to surround the sides of the pan. With that conical, flat-bottomed shape on a home stove, veggies tend to cook unevenly.

This thing called a stir-fry pan does something pretty cool, even if it’s not exactly stir-frying. Something, in fact, that’s a boon to weeknight veggie cooks. It browns and steams at the same time, producing deliciously flavored and cooked-through veggies. It’s perfect for somewhat dense vegetables (like broccoli, cauliflower, and carrots) that benefit from the added flavor of browning, but that need some moisture to cook through. (See Gingery Stir-Fried Carrots with Cranberry and Orange.) The huge and continuous surface area of the stir-fry pan means that the veggies get lots of contact with heat so that they get a chance to brown up. But the slope and depth of the bowl also mean that the veggies steam a bit as they’re tossed around together. All you have to do is stir.

The pan does an equally stellar job on quicker-cooking veggies like asparagus, pepper, onions, and mushrooms. And it’s the perfect vessel for cooking greens like chard, spinach, and bok choi, though you won’t get browning with these veg.

Over the years, I’ve also had to overcome my aversion to nonstick interiors. (I’m still really partial to stainless-steel-lined pans—like my favorite straight-sided sauté pan—for anything that’ll you’ll want to finish with a pan sauce. The yummy brown stuff that builds up on the bottom of the stainless steel pan is the foundation for the tastiest of sauces.) But for a simple stir-fry, I like the fact that I don’t have to use as much oil in the nonstick pan, and that the whole experience is less sticky and more fluid.

It’s true that this pan isn’t going to give you wok-seared results; but what it does deliver is something pretty delicious.  My favorite nonstick 12-inch stir-fry pan is a Circulon, available on Amazon for about $40.