Category Archives: How-To

How to Make a Savory Rustic Tart with an Easy, Flaky Dough

xroastedtomatotartxTART DOUGH 20

My affection for buttery, flaky crusts and sweet, caramelized vegetables came together one magical day many years ago. I realized that the wonderfully easy food-processor tart dough I had learned as a young cook at Al Forno restaurant wasn’t just for dessert. As much as I like a good rustic fruit tart (and there is one to die for—Little Pear Crostatas with Hazelnut Crisp Topping—in Fresh from the Farm), I am always looking for a good destination for roasted or sautéed vegetables, too. And these fun-to-make, free-form tarts (no special pan needed) are perfect for showcasing all kinds of veggies.
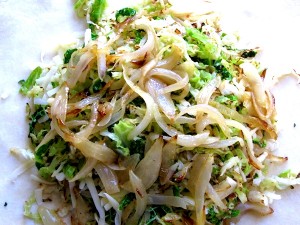
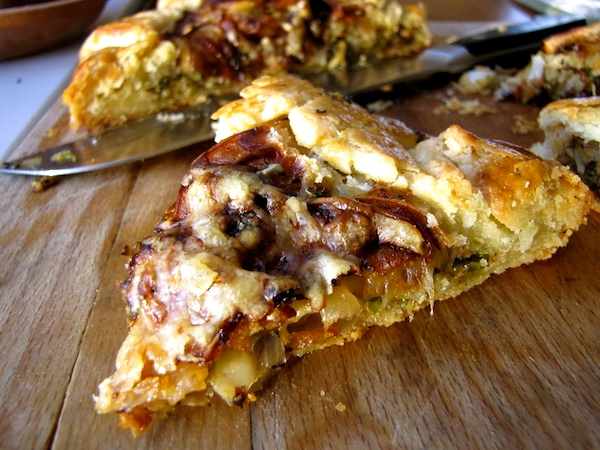
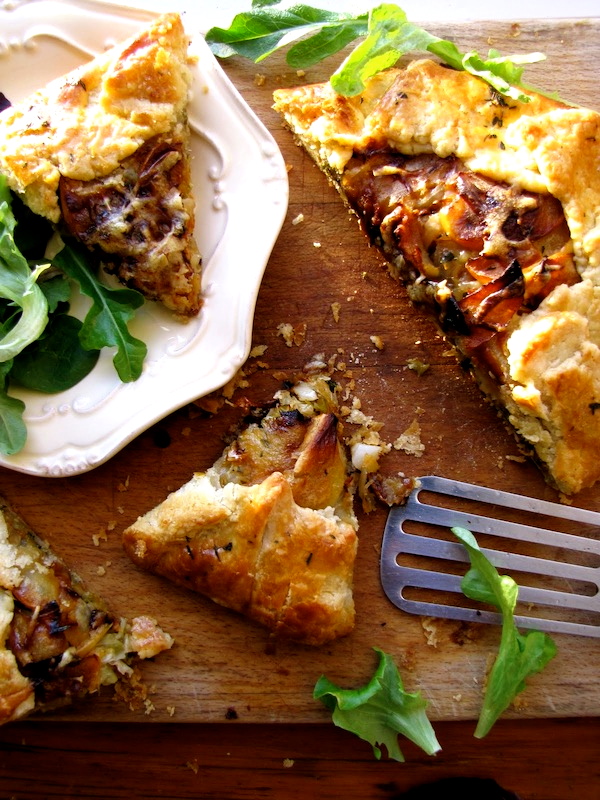
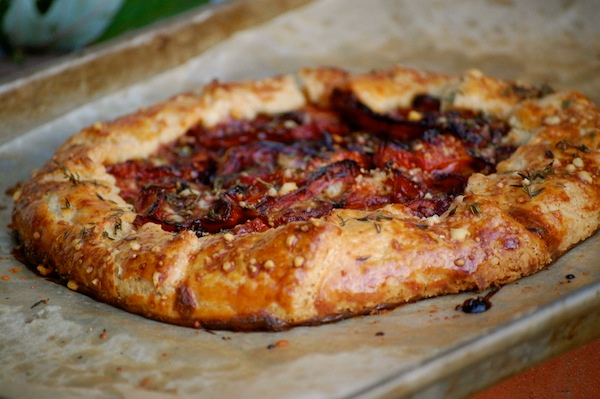
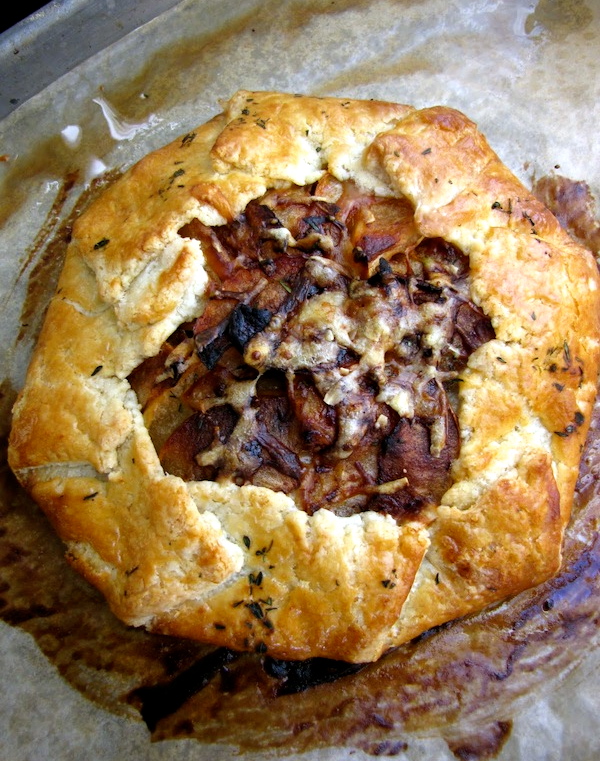
xTARTS Ratatouille 2I really played out this idea in The Fresh & Green Table with four delicious recipes—Roasted Ratatouille Tart with Goat Cheese & Mint; Seven-Treasure Roasted Winter Veggie Tart; Roasted Butternut Squash, Cranberry, Shallot & Pecan Tart; and Savoy Cabbage, Apple, Onion & Gruyere Tart (pictured here). And, not being able to help myself, I’ve done it again in Fresh from the Farm with one of my favorite ingredients, roasted tomatoes (see photo at top.)

I’ve never blogged about the tarts, though, because the recipes take up a lot of vertical space. With both the tart dough and the completed tart recipe needing to run together, your eyes would get tired!

But today I was organizing some old photos and came across a series of decent test photos that Roy and I took while developing the tarts for The Fresh & Green Table. I realized that publishing them would go a long way towards illuminating the technique of making the dough and assembling the tarts, so I’ve decided to go ahead and post these photos here today. (Therefore, if you’re looking at one of the tart recipes in my book, you can now get a little idea of what the process is like by looking here. Next I should probably do a video!)

You’ll also find the tart dough recipe after the photos. And I will put the recipe for the Savoy Cabbage, Apple, Onion & Gruyere Tart (the one in these process photos) in a separate post so that you can print it out on its own (and make it right now, while winter cabbage reigns supreme). One of these days I will also finally get my recipe formatting software working—and then the recipes will truly be print friendly. It’s on the list, I promise.

By the way, rustic tarts are also variously called crostatas and galettes.

Making and Assembling a Savory Rustic Tart
xTART DOUGH 2

xTART DOUGH 1After pulsing the flour, salt, cold butter and a little ice water together in a food processor until the mixture looks like small pebbles, dump the mixture into a large mixing bowl. Use your fingers and the palm of your hand to knead the loose dough together into a mass.

xTART DOUGH 4xTART DOUGH 3

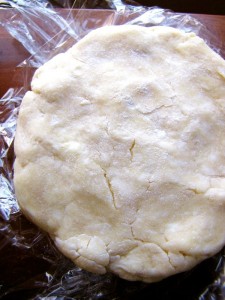
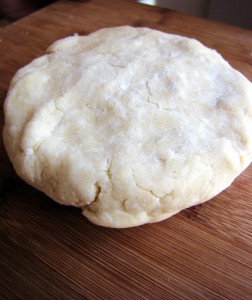
On a floured surface, pat and shape the dough into two flat disks, each about an inch thick. Wrap well in plastic and refrigerate for an hour or up to two days. Or freeze for a few weeks.


xTART DOUGH 5

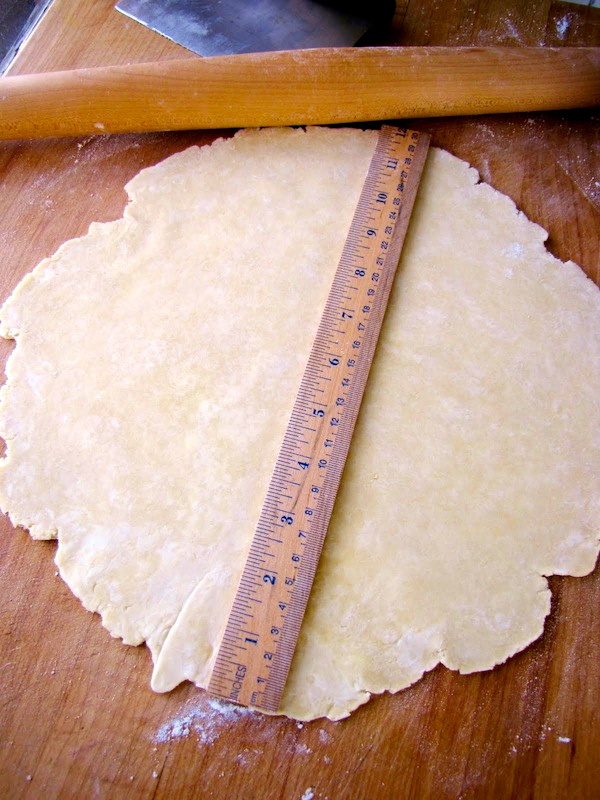
Remove dough from fridge 30 to 45 minutes before rolling. Flour a large surface, get out a ruler, and begin rolling the dough disk out, lifting the dough up, tossing a little more flour underneath, and giving it a quarter turn after every roll. The lifting and flour help prevent sticking; the turn helps with shaping a rough circle. (I like a French pin with tapered ends, which also helps to keep you from rolling over the edges of the dough, which will squish it.) Continue to roll the dough until you have a circle roughly 12-inches wide.
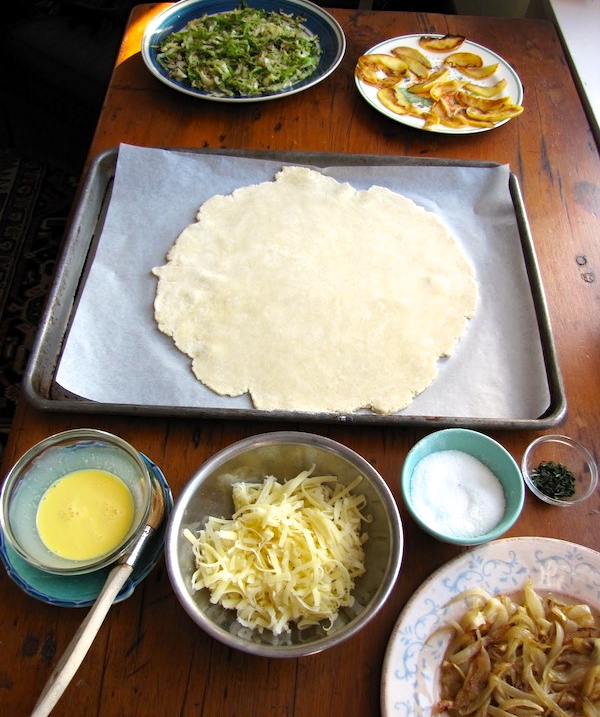
xTART DOUGH 6Transfer the dough to a parchment- lined heavy duty baking sheet.

Make an egg wash by combining an egg yolk and heavy cream.

Arrange all your filling ingredients around your baking sheet to make assembly easiest. (In most tart recipes, you can cook the filling ingredients during the time it takes for your dough to come back up to cool room temperature.)

xtart dough 8

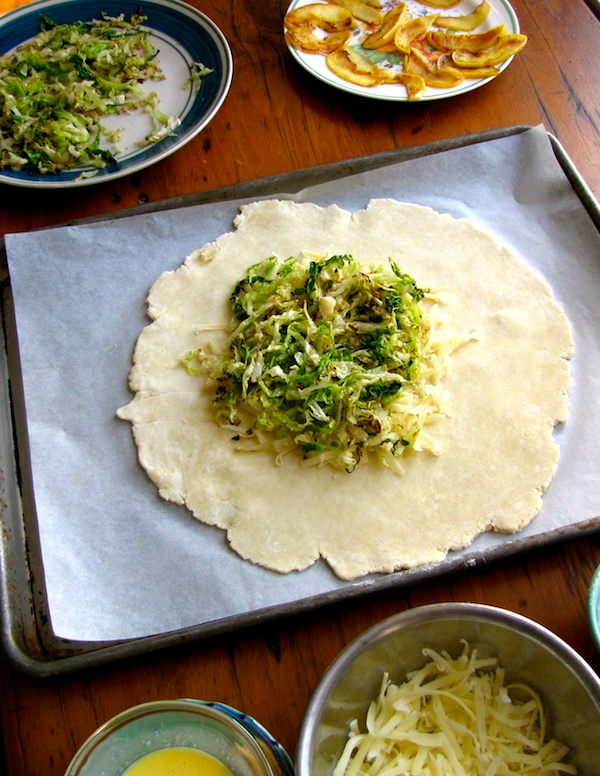
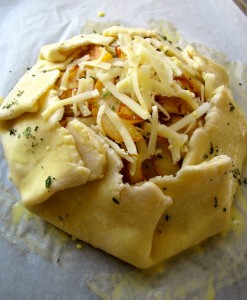
Arrange your first ingredient (usually cheese; in this case gruyere) in the center of the dough, leaving a 2-inch border all the way around. (Note, I could have done a much better job on this one–looks like 2 inches on one side and 4 on another! Maybe it was the camera angle.) Top with your next layer (in this case, sautéed cabbage).
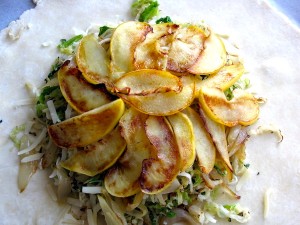
xTART DOUGH 11xTART DOUGH 10Continue layering your filling ingredients until you are done.

xTART DOUGH 14

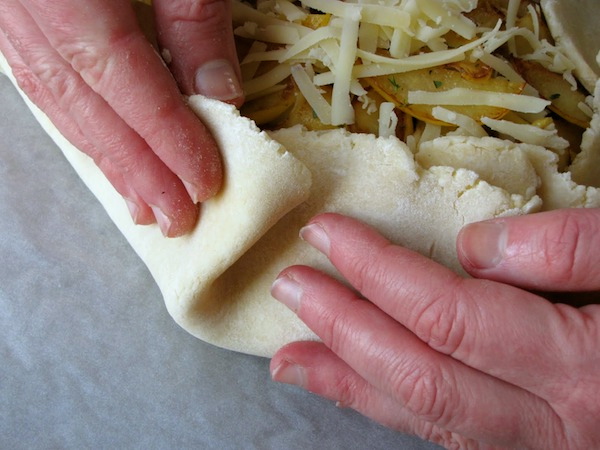
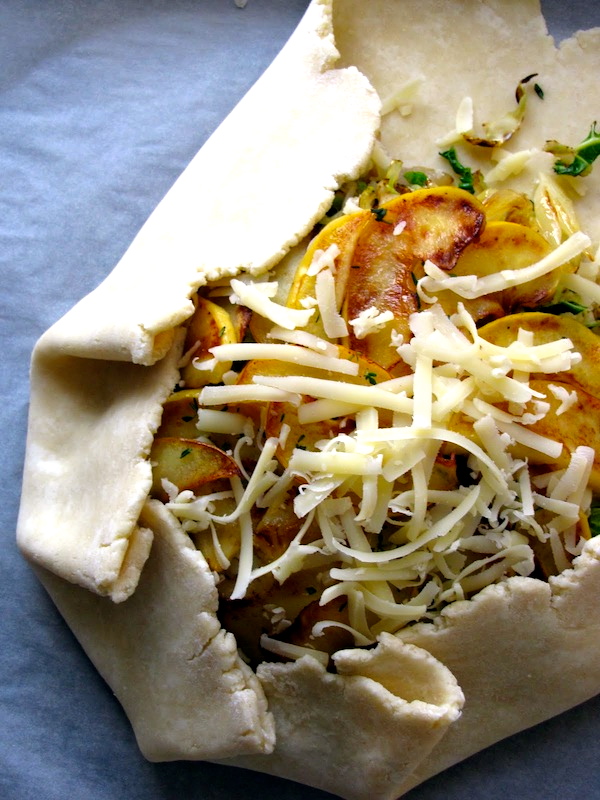
However you are most comfortable, pleat the edges of the dough up and over the filling.

xTART DOUGH 12

I often use the thumb and fingers of one hand to pinch while using the other hand to pull the dough up and begin the fold. (Okay, folks, by now you realize I don’t stand a chance at a career as a hand model. Yes, Roy took these pictures and those are my big hands!)


xTART DOUGH 16

xTART DOUGH 19


I find one pleat about every three  inches works well.  Continue pleating until the tart is contained. If cracks develop, don’t worry—you can pinch the dough together to seal it.

Brush the edges of the tart (and underneath the pleated folds) with egg wash. Sprinkle with herbs, a little cheese, or a bit of coarse salt.

xTARTS Cabbage 5


Bake until golden all over (see top photos) and brown and crisp on the bottom (check with a spatula). Depending on the size of the tart, this usually takes about 40 to 45 minutes at 400 degrees.

xTARTS Cabbage 2

Let cool for several minutes and cut into serving pieces. Salad or soup optional!
 

xTART DOUGH 4 xTARTS Ratatouille 2Savory Rustic Tart Dough Recipe

Easy, make-ahead, absolutely delicious. I swear, you no longer have to be afraid of pastry dough—of making it, rolling it out, shaping it—any of that. Yes, you’ll need a food processor (my favorite tool for making pizza dough, too), but oh, will you be happy with this ultra-buttery flaky crust.

The one thing you should keep in mind when making this dough is timing. It really works best to make the dough ahead. While it only takes 10 minutes to make, the dough needs to rest and chill in the fridge for at least an hour (and up to 2 days), and then, after taking it out of the fridge, it will need to warm back up to “cool” room temperature*, which will take about 45 to 55 minutes. So it’s a great idea to make the dough some morning or evening when you have just a few spare minutes. Pop it in the fridge and then when you’re ready to make a tart, you’ll only need to set aside the time it takes to warm it back up—and that’s the perfect amount of time to make your filling. It’s also really a joy to be able to reach in and grab that little wrapped present of dough already made up. (The dough will also keep in the freezer for 3 or 4 weeks.)

Makes enough dough for two 8- to 9-inch Rustic Tarts.

2 cups (9 ounces) unbleached all-purpose flour

1/2 teaspoon table salt

1/2 pound (16 Tbsp.) very cold unsalted butter, cut into ½-inch cubes

1/4 cup ice water

In the bowl of a food processor, combine the flour and salt. Pulse briefly to combine.

Add the cubes of butter. Pulse quickly about 20 times, or until the butter particles are quite small (like tiny pebbles). With the motor running, add the ice water in a steady stream. (This will take about 10 seconds). Stop the motor. Then pulse quickly six or eight times—just until the mixture begins to come off the sides of the bowl and clump together. The mixture will still be somewhat loose and crumbly—that’s okay. You will bring the dough together in the next step.

Turn the mixture out into a big mixing bowl and knead it briefly against the sides of the bowl to finish bringing it together into a dough. (Once you have incorporated all of the crumbs, knead once or twice to smooth out the dough just a bit. While you don’t want to over-handle the dough, you also don’t want to be afraid to handle it as much as you need to in order to bring all the bits of the dough together, as it will ultimately be easier to roll out.)

Divide the dough in half. (If you have a scale, you can weigh the dough pieces to make sure they’re of equal or close-to-equal weight. They should each weigh about 9 1/2 oz.)

Shape each piece into a disk about 1-inch thick (and about 4 inches across). (Again, don’t be afraid to handle the disk just enough to smooth out cracks and make a tidy disk.) Dust lightly with flour, wrap in plastic, and refrigerate for at least 1 hour or up to two days. (You will need to remove the dough from the fridge 45 minutes before rolling it.)

Alternatively, you can freeze the dough for up to a month. Defrost it in the fridge overnight before using.

*NOTE: Depending on how long your dough disk has been refrigerated, it will most likely be between 50 and 42 degrees when you take it out. Anything in this range is rock hard. You’re looking for the dough to warm up to about 60 degrees. Don’t worry, you don’t have to take its temperature—it will be ready when it is still slightly cool but somewhat pliable. Again, depending on the temperature the dough was chilled to, and the temperature of your kitchen, this will take anywhere from 40 to 60 minutes—leaving 45 or so minutes is a good bet, but also don’t worry if you get behind. There is a decent window of time, and on all but the hottest of days (or kitchens), it can usually sit for up to 30 minutes more before it gets too warm.



Winter Garden Salad: A Template Recipe for Greens + Roots

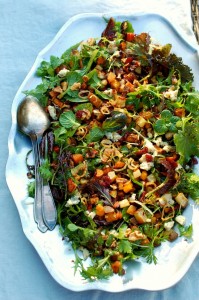
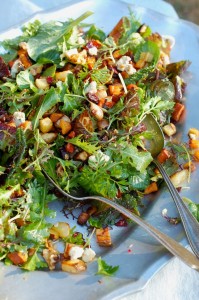
If we didn’t have 150 pounds of pork in the freezer, I could eat a warm salad of winter greens and roasted veggies every night. (Roy, not so much.) This is one of those recipe/techniques that I unapologetically come back to again and again—Warm Winter Salad of Roasted Root Fries (The Fresh and Green Table), Warm Bistro Salad with Tiny Roasted Root Vegetables and Bacon Dressing (Fast, Fresh & Green), and Quick-Roasted Butternut Squash and Pear Salad with Ginger Lime Vinaigrette (coming in Fresh from the Farm), to name a few. (Hmmm, it appears I’m not averse to sneaking pork into these things, so you could certainly have your salad, and your bacon, too.)

The appeal of a warm salad with crispy, yummy roasted veggies served atop deep, dark greens with a bracing vinaigrette is the interplay between fresh and comforting. I also like the textural contrast, and to be honest, the visual appeal. These days, I don’t compose the salads so much as scatter-and-platter them. It’s a looser, more rustic look, and served family-style, more casual. But you can always arrange the salads on individual serving plates if you like.

It occurred to me this week that I should back up, look at the architecture of these salads, and come up with a template you could use, depending on whatever greens and winter veggies you’ve got hanging around.

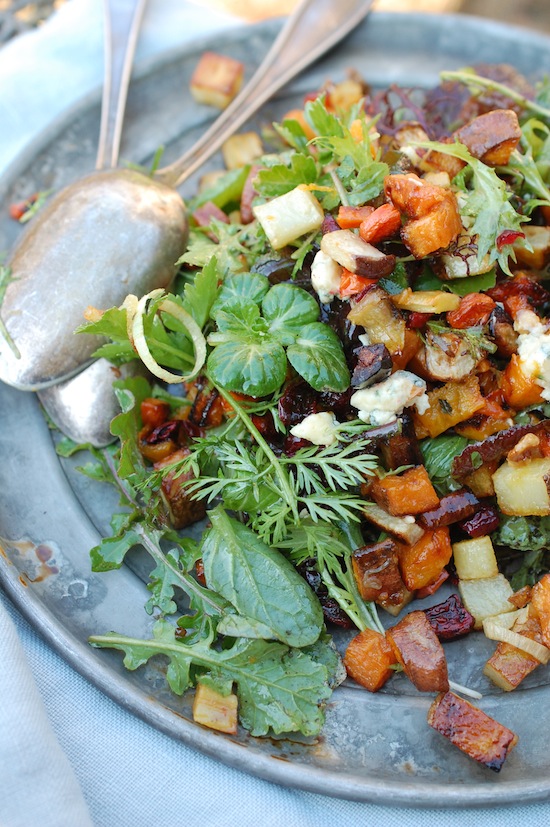
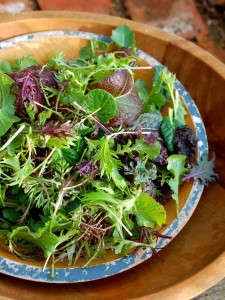
Plus, I needed an excuse to show off my greens that are still alive in the market garden. (Ahem, again, unapologetic…) So this morning after my chicken chores (no frozen water—yay!), I took a bowl and scissors and collected a nice combo of mizuna, Ruby Streaks mustard, Russian kale, arugula, tat soi, parsley, a few baby bok choy leaves, and even a few carrot tops. It’s amazing what lives through freezing temperatures and unfortunate ice formations; the arugula is particularly hearty, and one of my lettuces, Winter Marvel, acts like it doesn’t even know its December. (Alas, soon enough, nothing will be growing, even if it stays alive, since we’re now down below the critical mark of 10 hours of daylight. I’ve got lots of lettuce and greens down in the hoop house which I am just hoping to keep alive and harvest sparingly until early February, when 10+hours returns and they’ll start growing again.)

Realistically, most of us will be harvesting greens for our winter salads from the grocery store, so here’s your chance to buy baby kale, escarole and frisee, sturdy spinach, and anything that’s got some backbone or body. Make your own custom mix, and try to steer away from bagged mixes of salad greens, which tend to be less fresh than heads or bunches and also contain filler lettuces which don’t hold up to warm vinaigrettes too well.

For your veggie mix, choose from sweet potatoes, potatoes, carrots, parsnips, turnips, rutabagas, beets, or butternut squash. Dice them quite small so that they’ll roast quickly; most won’t need peeling—but for the butternut. (For a pretty all squash-salad, you could use thinly sliced acorn and/or Delicata rings, which don’t need peeling and will also cook quickly.) Add diced pears or apples to the veggie mix if you want, and customize your salad with whatever toasted nuts and good quality cheeses you like. Use your favorite vinegar in the warm vinaigrette, and don’t be shy with a squeeze of lemon or lime to juice it up.

Here’s my template—I hope it will make a nice starting point for you. If you come up with a really delicious combo, I’d love to hear about it!

Warm Salad of Roasted Root Veggies and Winter Greens

Be sure to cut your veggies into evenly small pieces so they’ll all cook at the same rate. Don’t be tempted to crowd them on one pan, either—a little room around them will brown them up better. (Unless, of course, you want to cut this recipe in half, which is perfectly doable.) If you decide to include beets in your veggie mix, toss them with a little oil and salt separately from the rest or they’ll tend to color everything else.

___________________________

For the salad:

1½ to 1¾ pounds combination sweet potatoes (unpeeled), potatoes (unpeeled), carrots (peeled), parsnips (peeled), turnips (unpeeled), beets (unpeeled), butternut squash (peeled), firm-ripe pears (peeled), or Golden Delicious apples (unpeeled), cut into small dice (about 3/8-inch in diameter) (about 5 to 6 cups)

4 tablespoons extra-virgin olive oil

Kosher salt

6 to 7 cups combination sturdy mixed winter greens (such as baby kale, escarole, frisee, arugula, mustard, or tat soi)

¼ cup chopped toasted pecans, walnuts, almonds or hazelnuts

½ to 2/3 cup crumbled good quality blue cheese, feta cheese, goat cheese or 1/3 cup coarsely grated aged gouda or Parmigianno

3 tablespoons coarsely chopped dried cherries, cranberries, raisins, figs, pitted dates, or other dried fruit (optional)

For the vinaigrette:

1/3 cup extra-virgin olive oil

1 large shallot, sliced thinly

2 tablespoons sherry vinegar, balsamic vinegar, white balsamic vinegar, or cider vinegar

1 tablespoon maple syrup

1 teaspoon Dijon mustard

1 teaspoon fresh lemon or lime juice (more to taste)

½ teaspoons lemon or lime zest

1 teaspoon coarsely chopped fresh thyme leaves (or other herb of choice)

Kosher salt and freshly ground pepper

___________________________________

Preheat the oven to 450°F. Line two large rimmed heavy-duty baking sheets with parchment paper. In a large, wide mixing bowl, combine the veggies, the 4 tablespoons olive oil, and a scant teaspoon kosher salt. Toss well and spread in one layer on the two baking sheets. Roast, rotating the sheet pans once (and flipping the veg with a spatula if you like), until the veggies are nicely browned and tender, about 28 to 30 minutes. Let cool for a couple minutes on the sheet pans and then combine in a mixing bowl.

While the vegetables are roasting, put the greens in a wide heat-proof mixing bowl. Set out a serving platter or four serving plates.

Make the warm vinaigrette: Heat the 1/3 cup olive oil in a small nonstick skillet over medium heat. Add the sliced shallots and a pinch of salt and cook, stirring occasionally, until the shallots are browned and crisp, about 6 to 8 minutes. Take the skillet off the heat and remove the shallot rings with a fork, transferring them to a paper-towel lined plate. Let the oil cool for 3 to 5 minutes. Add the vinegar, the maple syrup, the Dijon, the juice, the zest, the herbs, ¼ teaspoon salt, and several grinds of fresh pepper. Whisk vigorously until the dressing is mostly emulsified. (Alternatively, first transfer the shallot-infused oil to a heat-proof Pyrex liquid measure, add the other ingredients and whisk well. This is a slightly less awkward way of making the dressing). Taste and adjust seasoning, adding more lemon or lime juice, salt or pepper as needed.

Season the greens with a sprinkling of kosher salt and drizzle over them a few tablespoons of the warm vinaigrette. (Be sparing at this point). Toss well, taste, and add a little more dressing if necessary. Arrange most of the greens on your platter or serving plates. Sprinkle with half of the nuts, cheese, and fruit.

Season the roasted veggies with a pinch more salt, and dress them lightly with 1 to 2 tablespoons of the vinaigrette. Toss well and scatter over the greens. Garnish with remaining nuts, cheese, fruit, greens, and reserved shallots. Serve right away, passing the remaining dressing if desired.

Serves 4

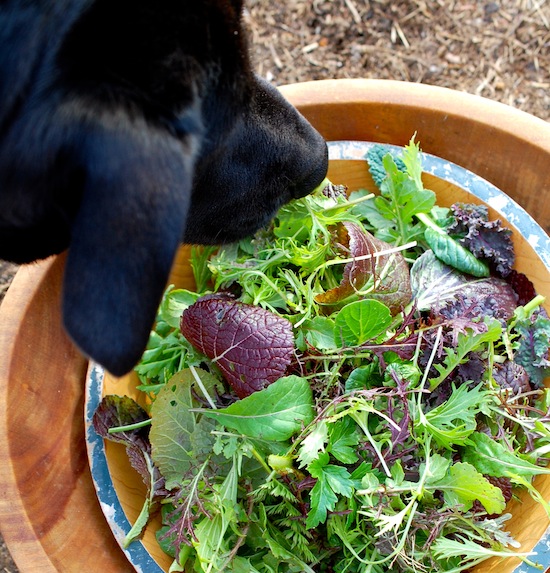
P.S. Farmer enjoyed harvesting greens this morning, too!


Undercover: Health Insurance for Garden Seedlings

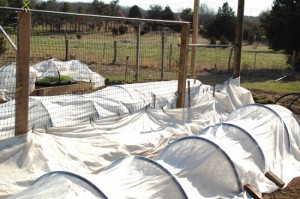
The garden looks like a morgue right now, I’m sorry to say. It’s not that anything’s dead—yet. (And I hope it stays that way, though we are really pushing things this year.) It’s just that most everything we’ve planted is under row cover, for one reason or another, and the billowy white fabric sort of looks like sheets over, well, you get the picture.

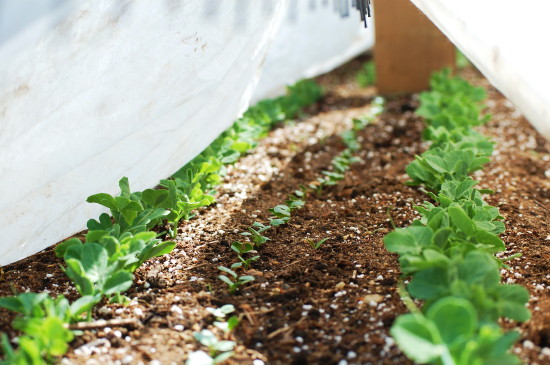
It doesn’t help that all the pretty stuff is hidden. At least a couple times a day I have to go peek—usually at the peas, which I find unbearably beautiful and promising as they unfurl their wings. (Plus, I am very proud of how well they germinated and the fact that I’ve managed to get radishes and lettuce into this raised bed, too. So I just have to stare at it all, you know.) I also have to remove the covers to water, but then I tuck everything back in, using clothespins, fabric pins, bricks, rocks—a motley assortment of things to keep the fabric down while the fierce Vineyard wind tries mightily to rip it off.

I had to laugh, because one of my favorite garden bloggers (and another former magazine editor), Margaret Roach, posted about row cover this past week, too. Read her informative interview with Paul Gallione of Johnny’s Seeds to learn some different uses for row cover. I also discovered, when I went looking for a “proper” definition of row cover (“sponbonded polyester” is it), an earnest blog site, Whiz Bang Row Cover Hoop System, which goes into great detail about hoop-supported row cover.

We are not quite so technical. We order our medium-weight row cover (Agribon 19) from Johnny’s Seeds or FedCo in big rolls. Then we go to the plumbing supply store and buy 50 or 100 feet of 3/4-inch PVC pipe and cut it into the right lengths using a ratchet cutter like this. Because we splurged on new fabric this spring (our old stuff has a lot of holes in it—fine for wind and some cold protection, but not for pest protection), I am using mostly bricks and stones to hold down the new fabric right now. The fabric pins are more secure, but you have to be careful about poking so many holes in the fabric, which then let tiny bugs in.

That brings me around to the main reasons we use row cover: wind, cold, and bugs. The bugs actually came first. I experimented with row cover our first season to keep flea beetles and cabbage worms from decimating all the brassica crops—especially my greens like mizuna, bok choy and kale. It worked well as long as I kept the row cover in good shape and securely on most of the time. Last year I wasn’t so diligent, and I paid the price. I never covered the kale at all, and I had some very beautiful Brussels Sprouts stalks until I took the row cover off of them in late August after the storm. A few weeks later, not having paid close attention, I realized the cabbage worms had settled in for a feast.

I’ve also used row cover over newly planted carrot seeds in the past, so I am trying that again this year, only earlier. Theoretically the cover keeps a downpour from washing the tiny carrot seeds away. But we’ve hardly had a shower, much less a downpour, all spring so this may be a mute point.

But the main reason we are using so much row cover this spring is to protect newly transplanted lettuce and greens from wind and cold. The medium-weight row cover only offers a few degrees of warmth, but it makes a difference while the roots are struggling to establish themselves. And protecting them from the dry wind we’ve been having is huge. The wind not only breaks the fragile seedling stems, but it also dries the soil out very quickly. And since the soil is so dry anyway, I’d like the little bit of water I’m adding not to evaporate more quickly than it has to.

Lastly, the reason the peas are under cover is crows (and other birds). Newly germinating peas are delicious bird snacks, so until the peas get tall enough to start clinging on to the mesh we’ve hung for them, they’ll be under cover. Peas love cool weather so they don’t need heat protection, but they appreciate the tiny microclimate under the row cover anyway. And the radishes and lettuce next to them are especially happy. The row cover on the pea bed is a real pain in the neck though. Because the trellis runs down the middle of the bed, hoops are not an option. Instead we wrap the row cover all the way around the raised bed like swaddling and then hold the middle up above the peas by clipping it to the trellis mesh with clothespins.

Is all this worth it? Well, considering we have hundreds (maybe thousands) of seedlings out there right now, I hope so. The goal is a nice harvest of greens to open the farm stand with on Memorial Day. So we’ll keep you posted—there are any number of hurdles (or hoops) to jump through (or over) before we get there!

Grill-Roasting Peppers in Mud Season or Any Season

Really, there’s no reason why you couldn’t grill-roast a bell pepper any old time of the year. But it’s just not something I think to do in early March. It’s yucky and mucky outside. My boots make an unfortunate sucking noise when I walk across the puddle-pocked yard, and the chickens are not happy with their squishy surroundings.

So why am I cooking outside? Recipe testing of course. This time I’m on deadline for a Vegetarian Times article which will run at the end of the summer when veggies and fruit are in all their glory. Right now? Not so much. I feel like an alien (and a hypocrite) buying out-of-season, flown-from-far-away peppers and tomatoes, but I signed on the dotted line, so I’m committed.

The good news is that the assignment forced us to get the grill repaired. It has been crippled since Farmer knocked it over the first week he called this place home. But now it’s back in top form, and I realized yesterday it would give me the opportunity to talk about my favorite way to roast a bell pepper.

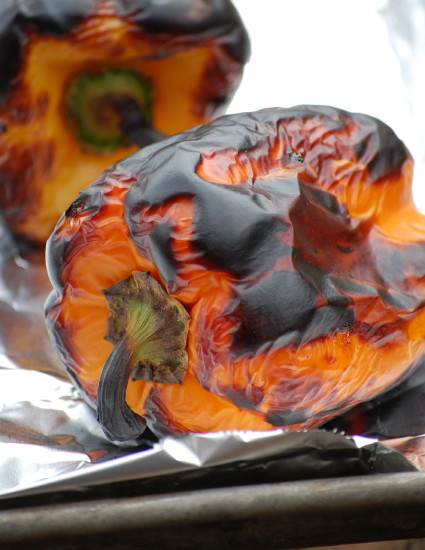
I’m not a big raw bell pepper fan (hence I don’t think I’ve ever blogged about one), but the smoky sweetness of a roasted pepper always appeals to me. Over the years I’ve roasted peppers many different ways—under the broiler, mostly, and sometimes over a gas flame or charcoal grill. But my favorite way is roasting in a covered gas grill. Not only is this method simple and hands-off (and yes, completely do-able in mud-season!), but it also yields a roasted pepper that’s easier to peel, because the skin really blisters and pops off, rather than getting too cooked and sticking to the pepper. The convected heat in a hot gas grill quickly surrounds the pepper on all sides and blackens it in less than 10 minutes. (A couple of flips with the tongs helps.) I take the peppers out when they’re mostly, but not completely, blackened so that they don’t overcook.

Below are quick directions you can follow. Once you’ve roasted and peeled your peppers, you can certainly keep them in the fridge for a couple days, although they are delicious warm. Cover them in olive oil or marinate them if you like. Use them as antipasto, rolled or stuffed with cheese or roasted veggies, or chopped up and added to other veggie or bean dishes for depth of flavor. If you’ve lucked in to a whole bunch of peppers, roast and puree them for soup.
To grill-roast and peel bell peppers:

Heat a gas grill on its highest setting. Go ahead and put the peppers on the grates and cover the grill as soon as you turn it on. (With this method, there’s no need to preheat the grill.) Check the peppers and turn them over every three minutes or so and remove them from the grill when they are blistered all over and blackened on most sides, about 8 to 10 minutes total.

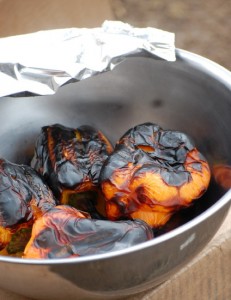
Put the peppers in a bowl and cover with foil. Let them sit for 10 minutes or up to 20 or so. (You could leave them longer, but they keep cooking in all that contained heat, so I think it is nicer to peel when the flesh still has a touch of firmness to it. You only really need 5 minutes or so to steam the peppers if you’re in a hurry.)

Over a bowl or plate, peel the blackened skin away. To remove the seeds, work over a strainer set in a bowl so that you can capture some of the delicious liquid. (If I’m going to be stuffing the peppers, I cut them in half carefully and leave the stems in. If not, I just remove the stems.) Use your fingers to niggle out all the seeds. If you like, cut or tear the peppers into lobes or strips. Whatever you do, don’t rinse the pepper under running water at any point. You will lose delicious flavor.

For Stress-Free Veggie Grilling, Grab a Basket

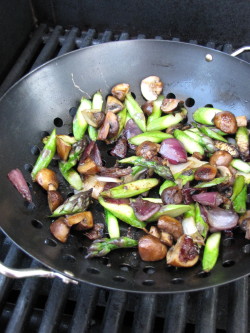
Between rain drops this week, we’ve been firing up the grill a fair amount. My very favorite place to shop for veggies – the farm stand at Morning Glory Farm – finally opened up for the season. So I saddled up the Honda, headed down to Edgartown, and robbed the place. Not literally of course. But I did come away with a stash of valuable veggies, things that Morning Glory is already harvesting from their own fields and greenhouses. Among other items (like a tee shirt and a strawberry muffin), I nabbed baby bok choy, purple-tipped asparagus, scallions, and tiny mustard greens.

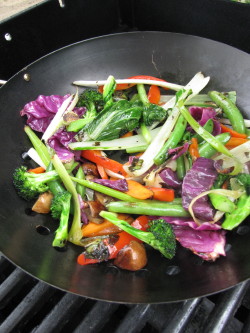
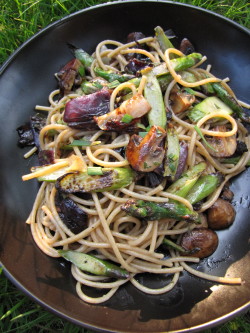
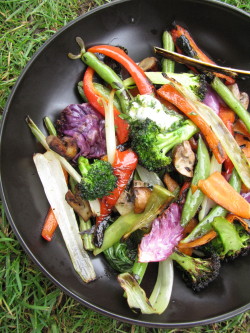
Since we’ve been working in the garden late every day, I’ve been dreaming up simple dinner ideas, too. (For a dozen weeknight ideas, read the blog I wrote for the Huffington Post this week.) I love grilled veggies, but sometimes prepping veggies for the grill, and then standing vigil over them patiently, is just a little more time than even I’m willing to give. So this week I grabbed my grill basket to make life easier. And I wound up improvising a number of different veggie dishes, using both my Morning Glory haul and the contents of my refrigerator veggie bin. (Just two samples–in the basket above, and finished, below.)

Grill baskets are inherently destructible. They won’t last forever, so don’t bother spending a lot of money on one. Just buy one—you won’t be sorry. (Mine is a particularly cheap, lightweight one that I picked up at a housewares store. But this new stainless steel one from Weber looks like a good bet.) Basically, using a grill basket is like stir-frying on the grill. But better. Because you don’t have to pay close attention. Stirring every three or four minutes, as opposed to every 30 seconds, is just fine. As long as you follow a few guidelines, you can cook practically any combination of your favorite veggies in about 10 minutes of mostly hands-off time.

Here are a few tips for cooking veggies in a grill basket:

1. Choose a combination of veggies that are loosely similar in density and moisture content. Broccoli, cauliflower, carrots, sugar snap peas, young beans, bok choy, broccoli raab are all fine. (Yeah, I’m defining density very loosely here). Don’t use potatoes or roots other than carrots here. It’s also fine to throw in a hearty leafy green like cabbage or radicchio—delicious if you don’t mind a few charred edges. But don’t use delicate greens like spinach here unless you toss the leaves in at the end of cooking.

2. Cut all those veggies into pieces about the same size. Then augment them with at least some peppers, onions or mushrooms—aromatic veggies that give off moisture as they cook. The aromatics not only spread flavor around but they help all the other veggies cook, too.

3. Estimate how many veggies you’ll need by putting the raw veg into the (cool) basket. Mine feels fullish with 3 to 4 cups veggies. You want your basket to be slightly overcrowded. With the grill lid-down (and only occasional stirring), the indirect (oven-like) heat of the grill, along with the moisture the crowded veggies will give off to each other, will help cook the veggies cook through while they brown.

4. Be sure the veggies are thoroughly (but not excessively) coated with oil. You need the oil to draw the heat in and cook the veggies. Season with kosher salt, too.

5. Preheat the grill with the grill basket in it for 5 to 10 minutes. Cook over medium heat (unless your grill is really old and slow—then medium-high.) The veggies are done when they are all limp, tender (some will be crisp-tender), and gently browned in places.

6. When the veggies come off the grill, you can do almost anything with them. We like to toss them with a compound butter (fresh herbs, citrus zest, salt), which is quick and easy to make. Then sometimes we take it a step further and toss the seasoned veg with whole wheat spaghetti or another pasta and call it dinner (or a big part of dinner). If you like the compound butter idea, I’ve included a formula below for making one. You might not use the whole batch on the veggies; use any extra with your eggs in the morning or on a steak tomorrow night.
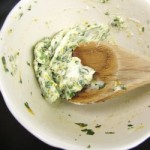
Compound Herb Butter: In a small bowl, combine 2 tablespoons well-softened butter with 1/2 tsp. citrus zest, 1/8 teaspoon kosher salt, 1 1/2 teaspoons finely chopped fresh tender herbs (chives, mint, parsley, cilantro, basil), and 1 teaspoon honey or maple syrup (optional). Mash with a wooden spoon until well-combined. Store tightly covered in the fridge for up to 3 or 4 days.

Tip of the Week: Toast (or Oven-Roast) Nuts for More Flavor

As a kid, I never liked nuts in my brownies. And I was never really tempted to eat those big hulking Brazil nuts that lurked in my grandmother’s candy dish. Even today, you won’t catch me snacking on raw nuts very often. But I use a surprising amount of toasted nuts in my savory cooking, especially with vegetables. I add them to crumb toppings for gratins; I stir them into grain dishes (brown rice with toasted pecans, farro with toasted hazelnuts, wheat berries with toasted walnuts), and I use them to garnish roasted veggies, sautés and soups. I especially like to toss them in green salads (almost every night), so for convenience I keep a few little containers of different toasted nuts in my fridge at all times.

It’s not surprising, considering my obsession with everything caramelized, that I prefer the flavor of toasted nuts. Once browned, nuts get a deeper, earthier, sweeter, and, well, nuttier, flavor. And toasting improves their texture, too. While some raw nuts can be a bit pasty, toasted nuts are crisp and snappy.

While I say these nuts are “toasted,” it would be more accurate to call them oven-roasted. You can toast nuts on the stovetop in a sauté pan, but it requires close attention and careful stirring—and your nuts will still not be evenly toasted. So I prefer the oven method below:

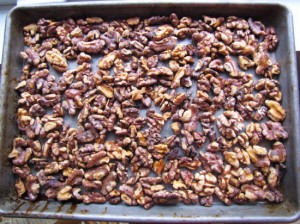
To toast nuts: Preheat your oven to 400 degrees. Leave nuts unchopped if you like, but I like to coarsely chop before toasting. (Don’t pulverize, though, or the nut “dust” will burn in the oven.) Spread the nuts in one loose layer on a heavy rimmed baking sheet and pop in the oven.

Alert your sniffer. That’s right, your nose. When the nuts begin to turn golden, they will start giving off that lovely nutty aroma. (So don’t stray too far from the kitchen.) Once you can smell them, they may still need a couple more minutes to get a really nice caramel color (most nuts will be toasted in 7 to 10 minutes). But keep an eye on them; golden brown is good—dark brown is heading towards bitter. Let the nuts cool on the baking sheet, then put them in a glass jar or other container to store in the fridge. Or freeze them. Either way, you’ll have a great little flavor/texture booster at the ready.

Tip of the Week: Make Fresh Bread Crumbs in a Coffee Grinder

Between the book, the blog, and magazine articles, I’ve developed at least 100 new recipes in the last six months. (Ninety-nine, I think, for vegetables, but I did get to do one dessert!) All that time in the kitchen made me super-aware of the many cool tips I’ve gleaned over the years, both from the great cooks I’ve worked with and from my own experience. Tips for making things easier, tastier, faster, or just plain niftier. I don’t always get to include my favorite tips in published recipes, so I thought it would be fun to share one here every so often. This week I’m starting with a tip (or two!) about making fresh bread crumbs.

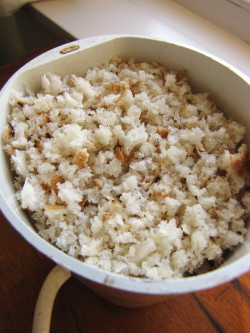
Surprisingly, I use fresh bread crumbs a fair amount in vegetable dishes. I use them to make a topping (usually combined with a little Parmigiano, chopped fresh herbs, and olive oil) for oven casseroles, including gratins and baked pastas. And I use them to make a crunchy topping for a stovetop pasta or sautéed vegetables. For baking, I want to start with fresh, moist breadcrumbs, as they will toast in the heat of the oven. For stovetop dishes, I actually want to start with those same fresh, moist breadcrumbs. Rather than drying them out to make them crunchy, I “toast” them by frying them in just a little bit of butter or oil in a small nonstick skillet—much tastier. (I never buy packaged dry breadcrumbs—the texture is too fine and often they have unwanted added flavors.)

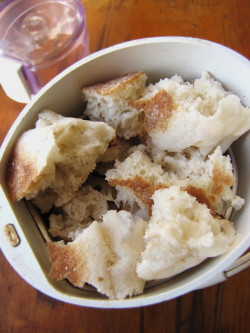
Either way, I always start with the same thing: bread I have whizzed in my coffee grinder. This little machine (mine is a Krups; $20 at Amazon) is incredibly efficient at ripping bread to shreds in seconds. I am partial to using English muffins for bread crumbs, because I love the generous texture they yield. I can rip up one fresh English muffin, whiz in the coffee grinder, and have fresh breadcrumbs in seconds. (I don’t over-whiz so that the crumbs stay somewhat coarse.) I also like to use up the ends of my sandwich loaves (which I collect in the freezer, where I keep most of my bread) by making them into bread crumbs. You can certainly turn artisan bread into bread crumbs, too, but it shouldn’t be more than a day or so old (unless it is coming from the freezer). Contrary to popular belief, rock-hard bread does not make good fresh breadcrumbs; it makes powder.

If I have lots of bits and ends on hand, I’ll use my food processor instead of my coffee grinder. A few quick pulses and I’ve got not just one cup but several cups of fresh bread crumbs. The food processor will work for small amounts, too. So if you don’t have a small coffee grinder that you can dedicate to cooking (it will chop spices and nuts too) rather than coffee, go ahead and use your food processor. Whatever you use, put any excess crumbs in a zip-top freezer bag and pop them in the freezer. There, they actually stay “fresh,” so that you can pull a half cup or so whenever you need it—they’ll defrost in seconds.

Christmas Presents Past and Future

Today I made up an imaginary friend named Shorty. I was writing a head note for a recipe (one that involves short-grain brown rice) and was fresh out of clever things to say. This is what happens when you agree to write a book quickly—your creativity gets taxed mightily. So much so, in fact, that no new recipe blog is coming forth from me today.

Instead I decided to write (quickly) about the other thing that is very much on my mind—Christmas shopping. I have, in fact, barely done any yet, which is Not Good. I can’t do much about that right this minute, but I thought maybe I could help you, since probably you have an equivalent of a book deadline hanging over you and are behind with your own efforts. Or maybe some wonderful friend or your husband or your mother wants to know what you want for Christmas.

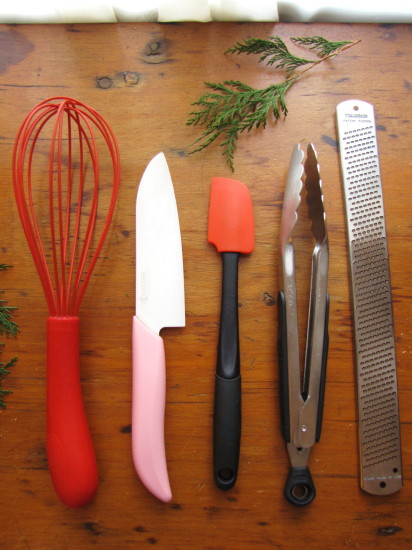
Here are five ideas. They just happen to be some of my favorite kitchen tools. People often ask me about kitchen equipment. Sometimes the questions are real stumpers, like whether they should buy the newest combined microwave-convection-infrared-lightspeed-oven, whereupon I stare at them blankly since I haven’t been in the market for a new stove in 10 years. But when it comes to simple kitchen tools, I can babble on (my specialty).

My very favorite thing is a pink-handled knife from Kyocera. Well, honestly, it’s not the color of the handle that did it for me (yes, pink is my favorite color), though I do love the fact that every purchase of this knife sends $5 to the Susan G. Komen Breast Cancer Foundation. It’s the ceramic blade—so darn sharp, and it has been that way every day that I’ve used it for the past five years (which is almost every day). The Santoku-shaped blade is only 5 1/2 inches long, so this isn’t your big chopping knife; I think of it more as a utility knife. I use it for thin-slicing potatoes, cutting up broccoli florets, slivering garlic, halving Brussels sprouts, trimming green beans…lotsa things.

The tool I use most in the kitchen—maybe even more than my ceramic knife—is a pair of OXO tongs. Three pairs, actually (two 9-inchers, one 12-incher.) I think I first got attached to tongs when I worked in restaurant kitchens, where pot holders don’t exist. (Come to think of it, neither do most common kitchen utensils.) You can use tongs to pull out hot oven racks and sheet trays, turn over delicate veggies or meats while sautéing, move anything around in a pan, or, of course, to handle anything on the grill. I particularly like the grip and the locking mechanism on the OXO Good Grips tongs.

I eat and cook with a lot of eggs, so I’ve messed around with many whisks. The silicone-coated balloon whisk from Le Creuset is the most efficient whisk I’ve ever used. I flick it around a few times and voila, my eggs are perfectly mixed. It’s a little bottom-heavy so occasionally it does fall out of a bowl, but I love it (and its color) nonetheless.  I probably don’t need to say anything about silicone spatulas other than, if you only have one or two—buy more! I have them in a rainbow of colors and sizes (I like a spoonula shaped one, too) from both OXO and Le Creuset. I still have my wooden spoons, but they spend more time looking good in an old ceramic baked-bean jar than my silicone spatulas, which hit the pans (especially nonstick ones) every day.

Lastly, I don’t know what I ever did without a Microplane® zester for zesting lemons, limes, and oranges. I love to use zest as a flavor booster in pan sauces, rice dishes, salad dressings, flavored butters…and this tool just makes getting that feathery zest (minus the bitter pith) a breeze. Use it for finely grating Parmigiano, too. I like my funky original one so much that I haven’t invested in one of the many newer ones with comfortable handles, but you could.

One last Christmas idea: Buy a goat! No, I haven’t completely lost it—yet. I just happen to love this idea: Instead of (or in addition to) giving an actual material gift to one of your friends,  OXFAM America will let you “buy” (make a donation in a certain amount) a gift (in your friend’s name) for a community in need. ($25 will buy a school lunch program for one child, $30 a vegetable garden for one family. The goat—a great source of milk, fertilizer and food in hardscrabble areas, is $50!) Your friend will get a Christmas card letting him or her know the donation has been made. I’m not saying you need to skip the kitchen goodies—just that one of these cards tucked next to the spatulas in a Christmas stocking might be in the true spirit of things.

Wherever your gift buying or gift giving leads you this holiday season, I hope you can keep that true spirit close by. Spend time with your friends—and not just the imaginary ones!

P.S.  Oops, I almost forgot. I know this is really not in the true spirit of Christmas (blatant self promotion—I don’t think so), but remember that Fast, Fresh & Green makes a great Christmas present, too! Be sure to try and patronize your local bookstore this season if you can.

Don’t be a Wok Snob—You’ll Love this Stir-Fry Pan

It took me a while to cozy up to nonstick stir-fry pans—those wide, sloping pans that are shaped like a salad bowl as opposed to a conical, flat-bottomed wok. Like a lot of folks, I thought you could only really use a wok for stir-frying.  And in a way, that’s true. A non-stick stir-fry pan won’t give you wok-seared vegetables. But it will give you something delicious. The trouble with wok cooking at home is that most of us don’t have the recessed burners and leaping flames needed to surround the sides of the pan. With that conical, flat-bottomed shape on a home stove, veggies tend to cook unevenly.

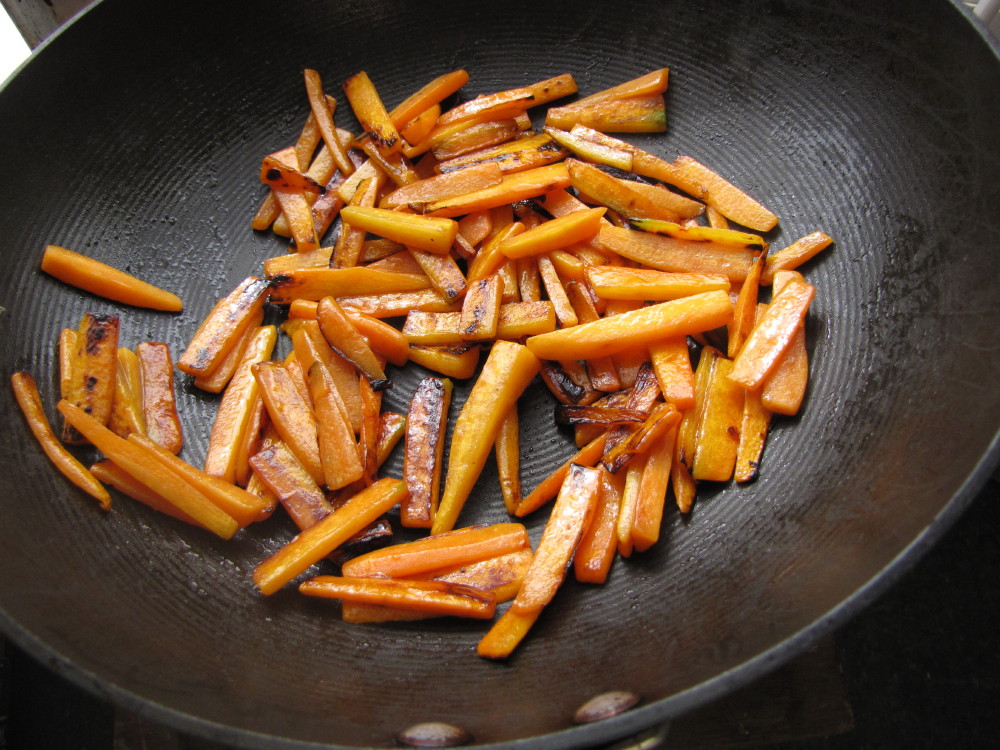
This thing called a stir-fry pan does something pretty cool, even if it’s not exactly stir-frying. Something, in fact, that’s a boon to weeknight veggie cooks. It browns and steams at the same time, producing deliciously flavored and cooked-through veggies. It’s perfect for somewhat dense vegetables (like broccoli, cauliflower, and carrots) that benefit from the added flavor of browning, but that need some moisture to cook through. (See Gingery Stir-Fried Carrots with Cranberry and Orange.) The huge and continuous surface area of the stir-fry pan means that the veggies get lots of contact with heat so that they get a chance to brown up. But the slope and depth of the bowl also mean that the veggies steam a bit as they’re tossed around together. All you have to do is stir.

The pan does an equally stellar job on quicker-cooking veggies like asparagus, pepper, onions, and mushrooms. And it’s the perfect vessel for cooking greens like chard, spinach, and bok choi, though you won’t get browning with these veg.

Over the years, I’ve also had to overcome my aversion to nonstick interiors. (I’m still really partial to stainless-steel-lined pans—like my favorite straight-sided sauté pan—for anything that’ll you’ll want to finish with a pan sauce. The yummy brown stuff that builds up on the bottom of the stainless steel pan is the foundation for the tastiest of sauces.) But for a simple stir-fry, I like the fact that I don’t have to use as much oil in the nonstick pan, and that the whole experience is less sticky and more fluid.

It’s true that this pan isn’t going to give you wok-seared results; but what it does deliver is something pretty delicious.  My favorite nonstick 12-inch stir-fry pan is a Circulon, available on Amazon for about $40.