
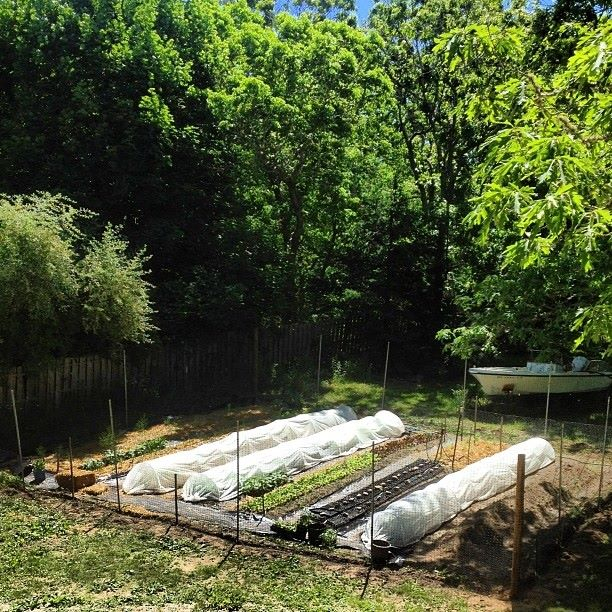
This is very cool, I promise, and constitutes the best possible excuse for the delay (again!) in blog posts: We have plowed, tilled, composted, dug, fenced, planted, mulched, and irrigated 4500 square feet of market garden space in exactly two months. During that time, we’ve also harvested from the earliest plantings and even turned a few beds over. (And opened a little farmstand.) I say “we” because I’ve had help from all over in this endeavor, and I feel proud that I set this challenge for myself, made a plan, and then reached out for help at every step of the way.
If you’re interested in a brief overview of how it went, read the timeline below. But life is short, so if you’re like me and in a rush, just take a quick glimpse at the photos (which are a mixed bag, considering I’m still short a camera lens and using an old phone, too!), and you’ll get an idea of the progress.
And then, please come visit the farm stand if (or when) you’re on the Island. I’ll be open every day now, from about 8:30 am to 7:30 pm. (Self-serve.) Many folks don’t realize that I’m not at the old farm and that I’m starting up a new business, so I can use your kind word of mouth to let Islanders and visitors know of my new location. I still have mostly just greens (chard, kale, salad mix, etc.), but peas and squash (and much more) are coming.
Directions: I’m in West Tisbury on State Road, on the left just past Island Farms Road (a little bit up the road from Vineyard Gardens) if you’re coming from Vineyard Haven. The property has a long stone wall along State Road and two driveways. Take the first driveway (if coming from VH) or the second (if coming from West Tis.). The farm stand is right behind the stone wall. You will see my chalkboard sign on the road. We don’t have a farm name yet, but you’ll see “Sixburnersue” on the farm stand!
The Timeline:
In early April, property owner Trip Barnes and I walked around and decided where the gardens would go. We chose three areas that had enough sunlight (LOTs of trees here) and that could be reached from a water source. There wasn’t just one area big enough for me, so we staked out three. All were covered with sod/grass, meaning they would need a lot of work to become garden beds. There was also a fourth, very small area, that had been a vegetable garden, which I immediately pounced on to get started since it didn’t need to be plowed.
We then set about finding a farmer who could come with a plow and turn the soil over in each of the three spots. (Farmers are pretty short on time in the springtime.)
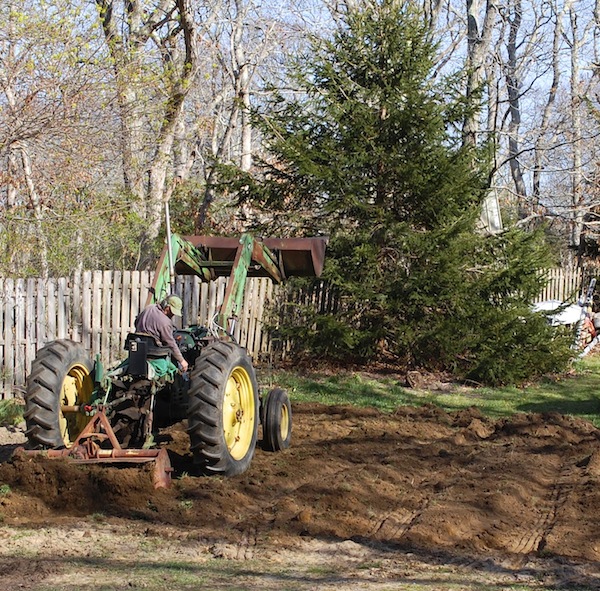
On April 24 and 25, farmer Andrew Woodruff of Whippoorwill Farm came out and plowed and tilled each garden area to break the sod apart and loosen the soil to a good depth. (Yay Andrew!)
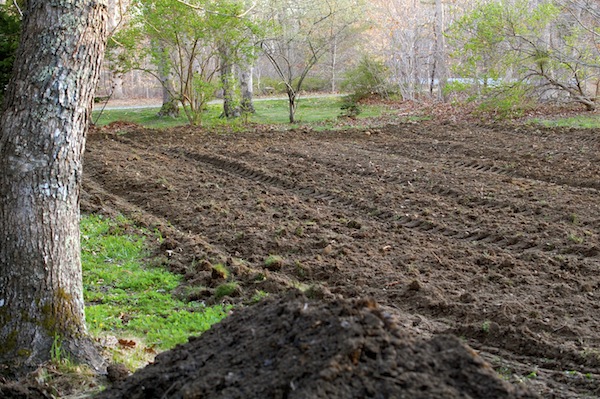
Andrew left me with two good-sized piles of compost, which I then shoveled over each garden area. Next I called my friend Jim Costello to come with his powerful rototiller and turn the soil once more. We then had soil that looked plantable. (Yay Jim!)

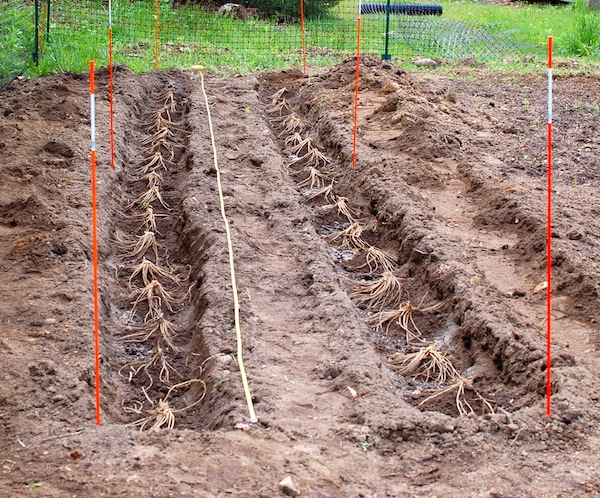
The next and biggest challenge was fencing. I quickly erected some temporary fencing around the two smallest gardens so that I could get started on making beds and pathways. (And do things like get an asparagus bed started and onions in the ground!)
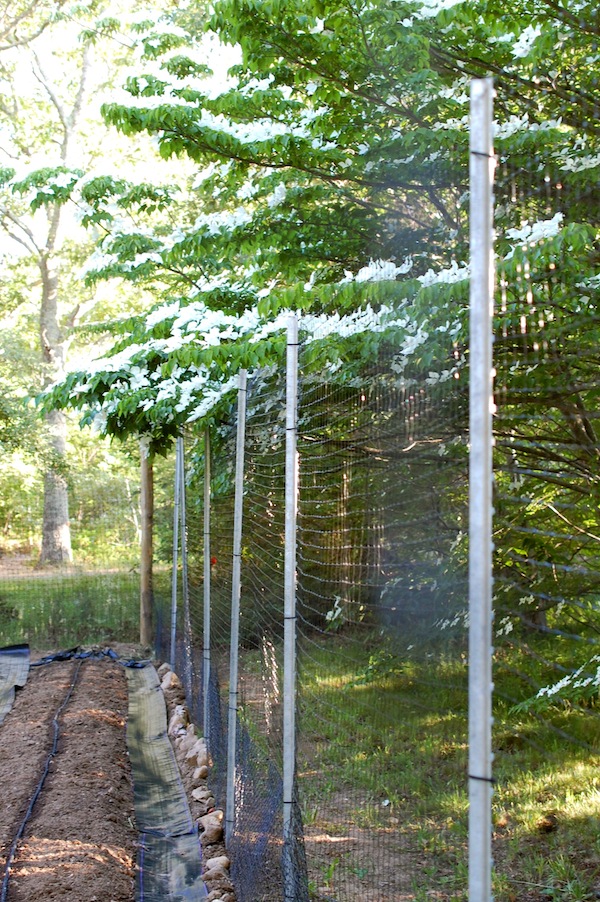
Then I made my fencing plan. I wanted tall (7- to 8-foot) deer fencing around the two bigger gardens and medium-height fencing around the flower garden (the third area). And I wanted to double up on the bottom with 3-foot chicken wire buried 6 to 8 inches (rabbits and rodents).
Trying to balance time and budget (shipping heavy rolls of fencing and fence posts to the Island can get very expensive), I finally ordered the mesh fencing online from a reasonable source. (I measured about 16 times to make sure that the 330-foot rolls were going to do the trick.)
But I still needed to find 40 heavy duty fence posts—that I could afford and also manage to get in the ground. This took a while, but through another farmer friend, I found out that another farmer on the Island, Mitchell Posin, was the Island dealer for a fencing company.
I talked to Mitch and we settled on 9-foot galvanized metal T posts. I would need to sink them 2 feet, so that would work with my 7.5-foot high deer fencing. Mitch put the order in and also told me that he’d be happy to give me some of his round wooden posts (9-footers) for the corners of my gardens. (Yay Mitch!)
The fence posts missed their first ride to the island but managed to hitch a ride in the back of Andy the Sheep Shearer’s truck the next week. (Andy comes from New Hampshire to the Island twice a year to shear most of the Island’s sheep and to do demonstrations as well.) I was sure glad to hear that he had arrived. We piled in Trip’s truck one foggy morning and ran up to Allen Sheep Farm to pick up the posts from Mitch.
Now I had posts and fencing, but I had to figure out how to build this fence (and include a gate for each garden). In the end, I wound up going back to Allen Sheep Farm and borrowing a tool called a T-post driver from Mitch. It’s a heavy metal sleeve, or tube, with handles, that you place over the stake. Then you pull (more like bang—it is very loud) the driver down on the stake several times until the stake is far enough in the ground.
Help came next from my next door neighbor, Lena (who used to have a horse farm), and a woman visiting from Canada named Elizabeth (who still lives on a horse farm). Both of these brave women helped me figure out how to get the heavy driver onto the heavy (tall) stake before raising it up, and each volunteered to hold the stake in place while I stood on the ladder and banged the darn thing in. It was exciting when the first post went in, and even more exciting when the 40th post went in—thanks to help from two more ladies, Terra, and Helen.
Helen is the young woman helping me out on the farm this summer, and I have nicknamed her Super Farm Chick, because she is one hard worker. Together we did the rest of the hard work to get those fences done. The most tedious part was digging the trench around each area to bury the chicken wire (another friend, Ann, joined us for the last of it). Actually hanging and zip-tieing the deer fencing and chicken wire went pretty smoothly. Helen and I got so good at this by the end that we decided we could hire ourselves out as fence builders (ha!). And we had fun with the fact that the fence was almost entirely built by women. (Yay girls!) (I wish I had photos of all this.)
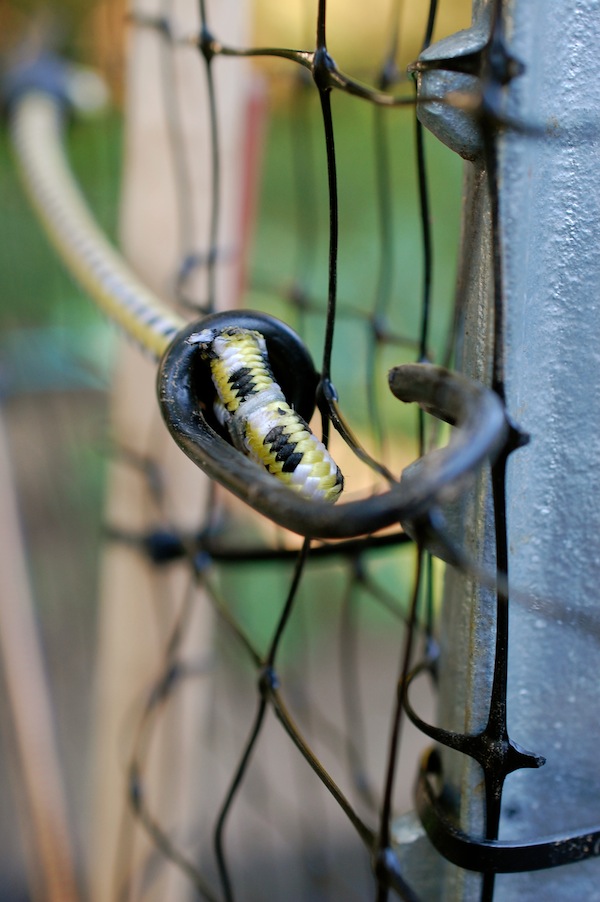
I had wanted to do something fun for the garden gates—I had my eye on two old screen doors—but I had to improvise for the short term and make the gates (or doors) out of the fencing material, some dowels, and some bungee cords for closing. Not pretty, but functional.
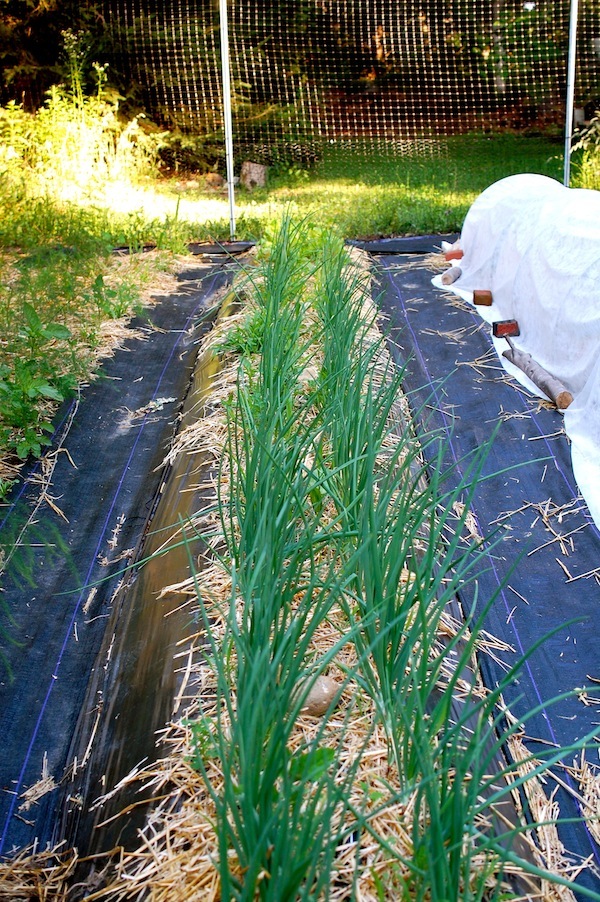
After the fencing was done, Helen and I got going on the serious planting. I had already (with help from a friend’s son, Oliver), dug the paths and raised beds for the first garden so that I could get all my greens in . (I grew a very successful crop of baby bok choy in this garden, and I was happy to sell some of it and some beautiful Japanese turnips to State Road Restaurant. I’ve been harvesting lettuce, kale, chard and spinach from that garden, too.)
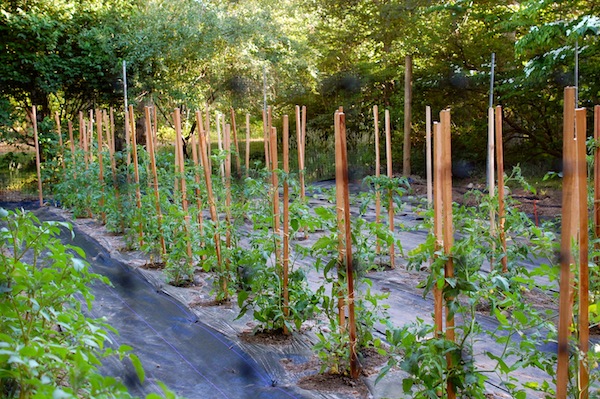
Oliver and I had also gotten the potatoes in the ground out in the biggest garden. (Yay Oliver!) I knew deer didn’t like potatoes so I wasn’t worried about planting them without the fence up. Interestingly, not long after the potatoes sprouted, we saw deer tracks right through the bed. So I knew I was doing the right thing in planning on tall fencing—especially for that garden, where the tomatoes would go.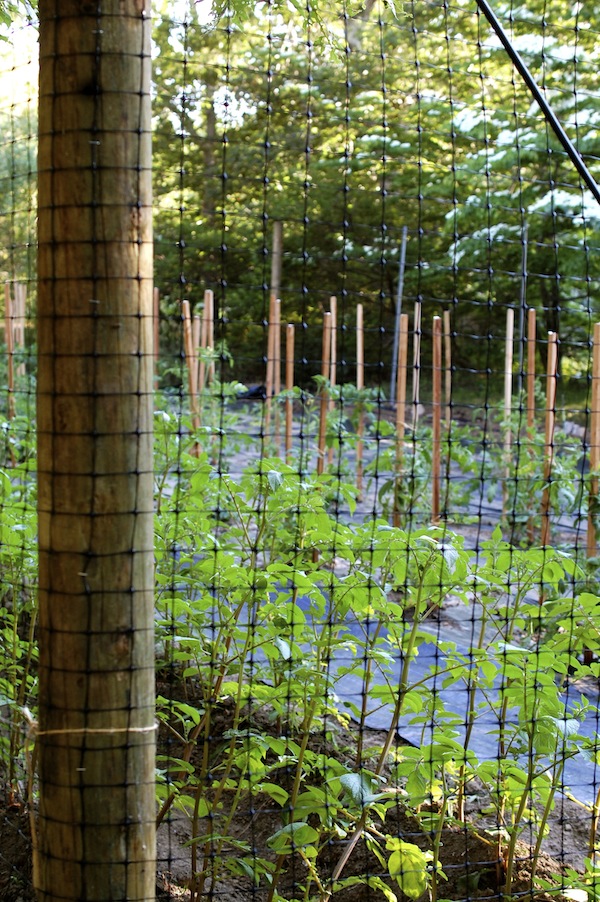
But now Helen and I were staring at 75 tomato plants, 60 eggplants, 60 squash plants, 30 cuke seedlings, and untold numbers of flowers (about 300 maybe?) that needed to get in the ground. In my zeal, I had started everything (both under lights inside and in my little mini tunnel outside) about the same time I always start, not thinking about how delayed I’d be in getting everything in. So all my plants were leggy and busting out of their pots (and needing to be watered twice a day). To get those plants in, there would be more shoveling to make raised beds, a lot of weed mat barrier and plastic to staple down, stakes to pound in, and lots of drip hoses (a whole other story) to set up.
It sounds so easy to just “get the plants in the ground” but there are dozens of things that need to happen before that little hole is dug and the seedling popped out of its pot.
But now I am happy to say that as of this afternoon, it is pretty much all done.
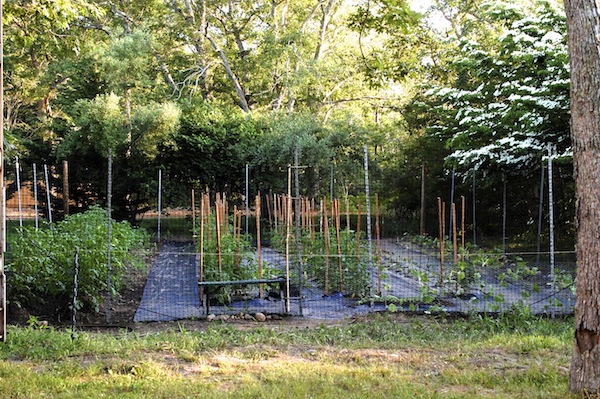
All but a couple random flats of seedlings (and some extra tomatoes, which have been moved to bigger pots for the farm stand) are in the ground. Weed mat barrier is down in every path in each garden. Drip hoses are down and the irrigation, though jury-rigged, is functioning. Sunflower and nasturtium and cilantro seeds planted around everywhere to attract the good bugs and bees.
Whew. Now we just have to go back to the first garden and do some weeding and thinning and turn some beds over. Bok choy out, yellow beans in.
Oh how I have missed your stories. I have been doing my Iowa garden thing in similar ways, but on our family farm. I tried 20 new tomato varieties this year and even have fennel growing. Your garden is just beautiful. Keep writing and posting pictures!
WOW!!!!!!! You work so hard and it shows. And what great helpers you have. It takes a village to complete such tasks. I love your stand and frequent it often. Thank you Susie <3
Susie, you are awesome and obviously have a tremendous amount of determination! I admire you greatly and wish that I could come to the island to visit your gardens! We are going to California next week (from New Hampshire) to hopefully find a new home near our son. Our daughter is disabled and will need to live near her brother as my husband and I are getting older and eventually won’t be here to help her.
I love this story. You’ve built a fabulous community–the foundation for a farmer’s life. I hope you are having a great summer and that your stand is a huge success!!
xo, Lori
Lori, you are always so encouraging — thank you!
Hope you and yours are having a great summer, too!
Hi Ethel– always so nice to hear from you and I am glad you are going to be near your son. Always hard to move but it sounds like the right thing. Thank you for all your kind words and stay in touch! Susie
Joannie, you have been supporting me for 8 years now–I couldn’t do it without you!!
WOw—Helen, 20 new varieties–I wish I had room to do that–maybe some day! Fennel is so cool. You’re giving me ideas for next year! Take care, SUsie