Category Archives: Ingredient IQ

Summer’s First Basil Pesto—And 10 Things To Do With It

A nice couple stopped by the farm stand early this morning while I was still getting the veggies and herbs set up. “We’re in need of basil,” they announced. “How much?” I said. “About this much,” the man gestured, hands open as if he were about to pass a basketball. “Okay, I’ll go pick it for you if you’ve got a second. You can go take a look at the baby goats if you like.”

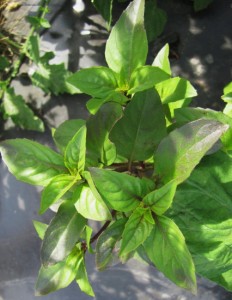
Off they went and I headed to the garden to harvest the basil. We’ve got sweet basil, lime basil, Thai basil (right), and purple basil, all flourishing in the semi-shade among the tomato plants. Those tomatoes, so spindly when we transplanted them, are now lush and vigorous, covered with little yellow blossoms and tiny green fruits. We planted 40 tomato plants, and basil between each, so basil is something we have oodles of. I was so happy to be able to go out and harvest something I grew myself and hand it over to some appreciative folks who wanted and needed it.

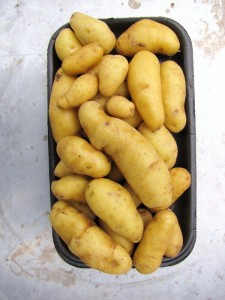
This whole weekend has been like that. Out by the road, we have a new sign that Roy made, and with the crush of visitors to the Island for the July 4th holiday (and those adorable baby goats), the farm stand is hopping. This morning we sold our first harvest of fingerling potatoes, and yesterday we couldn’t keep bunches of carrots around for longer than it took to pull them out of the ground.  I get goose bumps just thinking about it—I’ve always wanted to grow and sell vegetables, and now here we are actually doing it. Only wish we had planted more, as we can already see we’ll run out of carrots (and lots of stuff) well before the next planting can mature.

Now I have another dilemma. We’re going to a potluck party this afternoon, and I, of course, have to bring something garden-y, something vegetable-y—something you’d expect the author of a vegetable cookbook who grows vegetables to bring to a potluck. But I don’t want to harvest anything we can sell!! So I thought about that basil. There’s plenty of it, and the more you pick it, the bushier it gets. So last night I made my first batch of pesto for the summer.

I had the Parmigiano and the olive oil, but my pine nuts were rancid. After swearing at the Stop ‘n Shop, I decided to make pesto without nuts.  (I don’t know why I go anywhere near that grocery store, except that last weekend I had a cooking demonstration to do at Morning Glory Farm, and needed a lot of pine nuts for a Swiss chard dish. Two out of the three jars I bought were bad. Yuck. Be sure to smell nuts before you use them, and when you buy them fresh, store them in the freezer if you’ll not be using them all right away.)

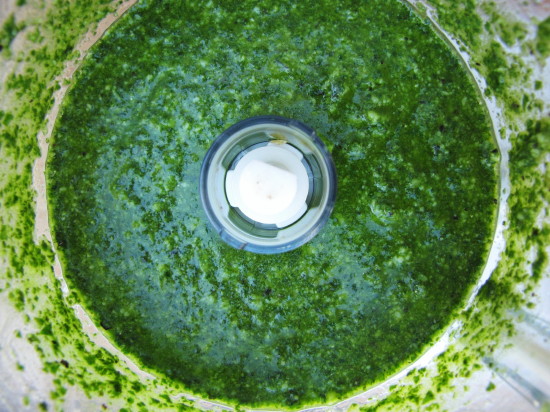
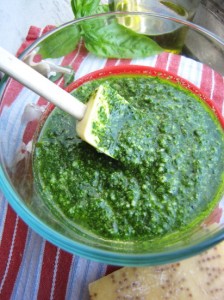
My pesto came out plenty tasty. (I added a little parsley, too, to keep it a bit greener.) So you can certainly make pesto without pine nuts, or you can substitute walnuts or almonds. But ideally, I not only like to use the pine nuts, but I also like to toast them first to pump up the flavor. Here’s the basic basil pesto recipe I usually follow (more or less!). I find the food processer easiest for making a quick pesto. Following the recipe are some ideas for what to do with your pesto once you make it.

Food Processor Basil Pesto
________________________________________

A 1-inch chunk of Parmigiano or ¼ cup grated Parmigiano

1 clove garlic

¼ cup toasted pine nuts

3 cups packed fresh basil leaves

1 tablespoon plus ½ cup extra virgin olive oil

kosher salt

several grinds of fresh pepper

___________________________________________

Get out your food processor. (I have a smallish one I like to use. Not tiny, but not huge.)

If your Parmigiano is a chunk, cut off about a 1-inch piece and process that until it is nicely grated. (Grating Parmigiano in the food processor turns it into fine sandy pebbles, giving a bit more body to something like pesto than finely grated cheese would.) Add the garlic clove and process until minced.

If you’re using grated Parmigiano (and make sure it is Parmigiano, not the pre-grated fake stuff, which will taste like dust, or worse), start by putting the garlic clove in the processor first and processing it until minced. Then add the grated cheese. Next, add all of the toasted pine nuts and process.

Add all of the basil, a good pinch of salt, several grinds of fresh pepper and a tablespoon or so of the olive oil. Process until very pasty. Then, with the processor running, gradually add the rest of the olive oil—or as much as you like—through the feed tube to get a nice, smooth pesto. Adding the olive oil with the motor running will help the pesto emulsify a bit for a more creamy texture. Taste again and add more salt and pepper to taste if you like.

Yields about 1 cup.

How to use your pesto:

  • In a vinaigrette. Combine with white balsamic vinegar, a little lemon juice and a bit more olive oil. Drizzle on grilled vegetables, green beans or new potatoes.
  • On pizza. Use as a base instead of tomato sauce. Add sliced cherry tomatoes and fresh mozzarella.
  • In sandwiches. Sure, you can use it on bread, but try it in a different kind of sandwich—one made with two slices of grilled eggplant or grilled zucchini. After cooking the veggies, let them cool and put a bit of goat cheese or mozzarella and some pesto between two slices for a fun appetizer or side dish.
  • On pasta, of course! Toss with warm angel hair or linguine, fresh peas, and grilled shrimp. Yum.
  • With fish. Top a white fish fillet like halibut or striper with a bit of pesto and some fresh breadcrumbs before baking.
  • On crostini. Slice and toast baguette, spread with pesto, top with a slice of fresh mozzarella and a roasted or sundried tomato.
  • With soup. Swril a little pesto into a cold carrot or potato or tomato soup. Or drizzle some into a seafood chowder.
  • In a dip. Layer softened goat cheese, pesto, chopped sundried tomatoes, and chopped toasted pine nuts in a wide, straight-sided dish (4 or 5 inches across, a few inches deep). Repeat the layers. Serve with crackers or bread.
  • With eggs. Add a little pesto to omelettes, frittatas, or even scrambled eggs.
  • On tomatoes. Dress up the classic tomato and fresh mozzarella antipasto with pesto instead of fresh basil and a smattering of pitted Nicoise olives.

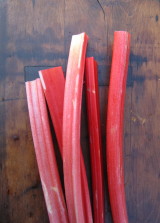
Fruit or veg? Crisp or chutney? Rhubarb Does Double Duty

Technically, I said I was going to write about fruit as well as vegetables when I started this blog. So I could give myself permission to write about rhubarb—if it were a fruit. Which it’s not. (Technically it’s a vegetable).

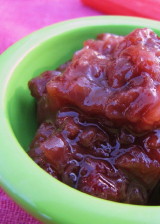
And technically I could have given you a crisp recipe, but I usually use Karen Barker’s great Rhubarb Brown Sugar Crumble recipe over on the Fine Cooking website. So instead I’m offering up my favorite savory concoction, Rhubarb-Dried Cherry Chutney.  (It’s quick and easy to make and would be really great if you’re grilling pork tenderloin or even chicken this weekend).

And technically (sorry, but I’m lacking in a diverse vocabulary today) I should have blogged about rhubarb when it first poked out of the ground here in late April. But I didn’t. Time slips, you know. Or skids. Or something.

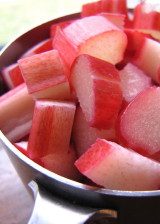
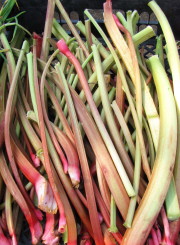
Fortunately, judging by the picture I took at our farmers’ market last year (stalks, above right), rhubarb is still thriving in June.

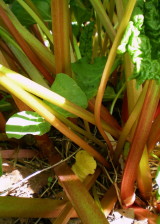
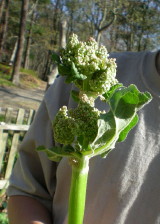
I took the other photos in April a couple years ago when I first got to the Island. (Not technically, but actually.) I was so fascinated by these bushy plants, which I sometimes found growing near old farmhouses, that I often stuck my camera down beneath their leafy canopies to capture the luminous underworld below, a forest of pink and pale green stalks writhing in dappled sunlight. The flowers (not edible) were a surprise to me, too.

If I had ever snatched any of this farmhouse rhubarb (which I didn’t), I would’ve been sure to trim all the leaves away before cooking. It annoys me to no end when I see rhubarb stalks for sale with the (toxic) leaves still attached. Do not eat the leaves. Period.  And know that the stalks themselves are quite tart. Delicious, but tart. They must be cooked with something sweet, and preferably lots of it.

Sure, sweet strawberries are the classic partner for rhubarb. But in reality, rhubarb appears on the scene so many weeks ahead of fresh (local) strawberries, that it’s nice to have a recipe or two on hand that showcases rhubarb alone. A crisp maybe, or a chutney.

Rhubarb & Dried-Cherry Chutney

_________________________________

1 cup medium-diced fresh rhubarb

½ cup small-diced onion

1⁄4 cup coarsely chopped dried cherries

1⁄4 cup granulated sugar

1⁄4 cup sherry vinegar

1 Tbs. honey

1⁄2 tsp. finely grated lemon zest

1⁄4 tsp. kosher salt

_________________________________

Combine all the ingredients in a small saucepan. Bring to a boil over medium-high heat, cover, and simmer over medium to medium-low heat until the onions are mostly translucent and the juices are beginning to thicken, about 5 minutes. Uncover and simmer, stirring frequently with a heatproof spatula, until very thick, another 6 to 8 minutes. Let cool completely in the pan before storing in an airtight container in the refrigerator for up to 2 weeks.

Yields about 1 cup.

Ten (Yes, 10) Things to Do with Celery Root

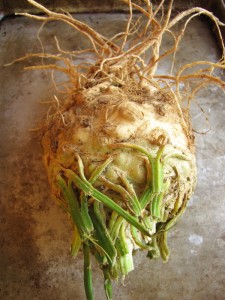
Count your blessings. So you’re stuck with six celery roots the size of footballs? At least they’re edible. Seriously, I know it’s hard to figure out what to do with these things; I’ve had quite a few on my hands recently thanks to my winter CSA share from Whippoorwill Farm. So last week I posted my favorite recipe for a creamy celery root and potato gratin, but I thought you might like a few more ideas, too. So here goes. (Be sure to try the oven roasted “chips.”)

1. Slice celery root into thin matchsticks (or grate it coarsely) and toss it (raw) into a winter salad of endive, sliced pears, toasted walnuts, and blue cheese.

2. Make roasted celery root “chips.” Slice the root in half and then into quarters; then slice each quarter as thinly as possible. (A santoku knife is great for this). Toss the pieces in enough olive oil to coat, sprinkle with salt, spread on a heavy-duty sheet pan; and roast at 350°F until they are mostly a deep golden brown, with some white left. (I think the darker ones are crispier, but too dark and they’ll taste bitter.) Let them cool on the sheet pan to finish crisping up. Sprinkle with more salt and snack on the couch with your favorite DVD.

3.  Since celery root and potatoes are such a great match, use them together in a hearty winter soup. Sauté lots of sliced leeks in butter, add cubed celery root, potatoes, and chicken or vegetable broth, simmer until tender, puree, and enhance with a touch of cream, a little lemon zest, lots of chopped fresh parsley and crispy croutons.

4. Apples and celery root are also happy partners. Use them raw together in a salad, or try roasting them first and adding them to a warm escarole salad with crispy strips of ham and a warm Dijon vinaigrette.

5.  Make a celery root “galette” by lining a tart pan with a couple layers of thinly sliced circles of celery root and gruyere cheese. Bake at 400°F until browned and tender. (Cover for the first half of cooking.) Let cool and slice into wedges.

6. Try a “quick braise” of celery root. Brown diced celery root in a combination of butter and olive oil in a sauté pan, then add just enough liquid (a little broth spiked with apple cider), cover and reduce the liquid to finish cooking the vegetables. Uncover, toss with a little spiced butter, and serve warm.

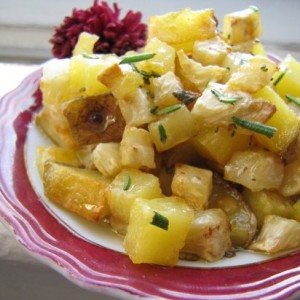
7. Instead of chips, you can also dice celery root for roasting. Make a quick weeknight side dish of roasted celery root and Yukon Gold potatoes with honey and rosemary. Cut the vegetables into ½-inch dice, toss in olive oil and salt, and roast on a sheet pan at 425°F until browned and tender. Dress lightly with a combination of melted butter, honey, and chopped fresh rosemary.

8. Celery root  is also a good flavor match with seafood.  A bed of celery root puree for a sear-roasted fish filet is delicious. Cut the root (and a few small potatoes) into pieces and simmer them with a few small garlic cloves until tender. Puree the vegetables with a little of the cooking liquid, a bit of cream, and salt and pepper.

9. Instead of a puree, make a celery root “mash” by hand-mashing cooked celery root and potatoes together with butter and milk and a little sautéed garlic. Serve with pot roast.

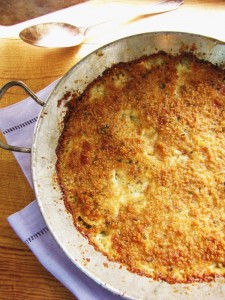
10. For an elegant holiday side dish—or even a hearty weeknight main dish with a salad—make my recipe for a celery root and potato gratin I use a combination of heavy cream and chicken broth so it is rich but not too heavy; this is a good dish to introduce celery root to folks.

More Delicious Ways to Cook Fingerling Potatoes

A while back I posted my favorite way to cook fingerling potatoes–the stovetop braise–and a yummy sample recipe, Braised Fingerlings with Crispy Sage and Tender Garlic. But the reality is, thanks to my CSA at Whippoorwill Farm here on Martha’s Vineyard, I was swamped with fingerling potatoes last summer and fall, so happily, I have a few other suggestions for using them. I figured I’d pass them on to you here, as many are good options for winter cooking, too.

  • Boiled fingerlings hold their shape really well, so use them (cut in half or other pieces) in warm salads (like with frisee, bacon, and a poached egg or a garlic crostini) or other composed salads like a grilled tuna or salmon Niçoise.
  • Cut into a few chunks and boiled, fingerlings are then perfect for “crushing” or smashing with roasted garlic and a bit of cream (or sour cream), butter, and chives.  These smashed potatoes make a perfect bed for beef stew.
  • Make a quick and delicious fish chowder by starting with sautéed leeks, simmering chopped fingerlings in the same pot, adding corn kernels and pieces of cod or haddock, and finishing with chopped fresh dill, a dash of cream, a squeeze of lemon, and lots of fresh pepper.
  • If you like the hands-off cooking of oven-roasting, don’t despair. You can oven-braise fingerlings by laying them flat, cut-side down, in an oiled Pyrex baking dish. Season with salt, dot with a few dabs of butter, and pour enough chicken broth in the pan to cover the potatoes. Cover with aluminum foil and cook (at about 375°F) until the potatoes are almost tender. Remove the foil and cook until the broth has reduced almost completely and the potatoes are browned. There’ll be some nice glazy stuff on the bottom of the pan.
  • Dice fingerlings and sauté slowly in lots of oil in a cast iron skillet until browned all around and tender through. Season with lots of salt. Voila, crispy “fried” fingerlings. Add sautéed onions and crush a bit for a more hash-like dish.
  • Most fingerlings have such outstanding “potato” flavor (nutty, earthy, and rich), that they’re perfect in cold potato salads, too. Try one with fresh peas, mint, and a light lemony-mayonnaise and yogurt mix in springtime.
  • The firm texture of cooked fingerlings makes them perfect for simple Indian curries, too. Add shrimp, peas, and chopped fresh cilantro to make dinner.