Category Archives: main dishes

Asparagus, Eggs & Croissants in a Recipe for Easter Brunch

Every year around Easter time (and believe it or not, this is sixburnersue.com’s third Easter), I start writing something about asparagus, even though we’re still weeks away from harvesting any local asparagus. I’ve always reassured myself that at least the vegetable is now in season in California; and after all, that’s where most of the country’s asparagus comes from—during the proper asparagus season. (Or at least it used to.) I’ve always found it ridiculous to buy asparagus out of season from South America (so I simply don’t eat asparagus in winter), but now I find it even more ridiculous that most of the asparagus in stores right now is coming from Mexico, which has underpriced California growers by so much that even California grocery stores sell Mexican asparagus.

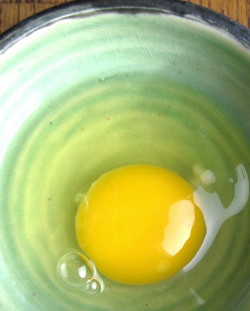
Okay, so despite my rant (sorry about that), I still wanted to give you a tasty asparagus recipe for Easter, so I went to the store and bought asparagus to cook with this morning—and I tried not to look at the label of origin. I’m comforting myself with the delicious bread pudding that just came out of the oven, and I am also using the excuse that this dish is really all about the eggs. I know, I know—I have a thing about farm-fresh eggs, too, with their rich marigold yolks and bouncy whites.
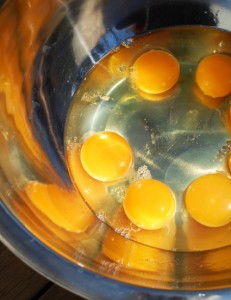
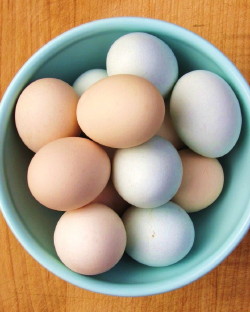
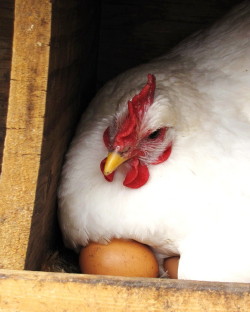
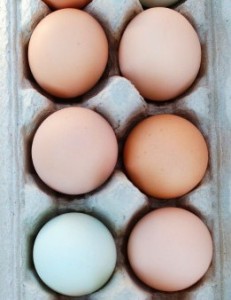
But here’s the thing—it may be impossible to get local or even U.S. asparagus this Easter, but you’ve got more and more choice in eggs at the grocery store now. Look for the USDA Organic label (even Costco has Organic eggs!), the Certified Humane label, or eggs that say “pastured.” Pastured eggs come from hens that truly do range over grass. (Unfortunately, the term “free-range” can be applied to hens that simply have a bit more room to stretch than the typical factory egg-layer which has 1 square foot of space allotted to her. Some free-range eggs truly do come from “free-range” hens, but the term is a loose one.) And then there’s always the “grow-your-own” option! Backyard chicken keeping is one of the biggest trends going, so why not join in?! But if you’re planning to get baby chicks for Easter (our 50 babies arrive April 25), you will have to wait five or six months before they lay eggs.

In the mean time, enjoy this eggy treat with friends and family this Easter morning and keep the spirit of new beginnings in your heart.


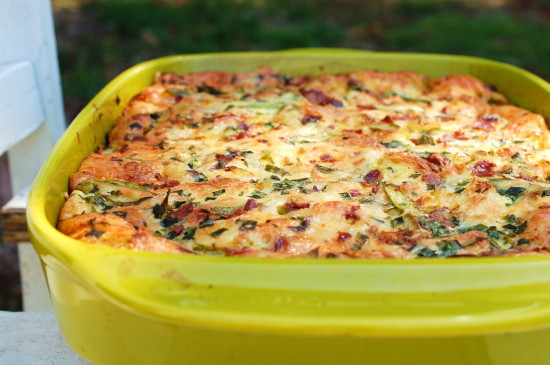
Asparagus, Leek, Bacon & Croissant Bread Pudding
 
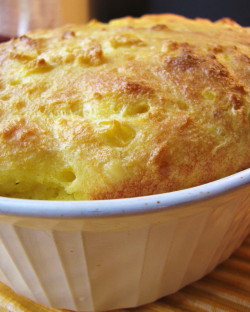
While I love challah bread in a savory bread pudding, croissants are a wonderful option, too, and they give the final dish a lovely ethereal texture. (No need for fancy croissants—just pick some up at the grocery store bakery.) There’s no trick to cooking a bread pudding (you can even call it a strata if you like), so don’t be intimidated. I like to bake mine soon after assembling (I let the bread soak up custard for 20 minutes or so), but I have held them in the fridge for a few hours before baking, so feel free to do that if you like. (Remove from fridge a half-hour or so before baking.)
Author:
: Breakfast & Brunch
Serves: 6
Ingredients
  • kosher salt
  • 1 tablespoon extra virgin olive oil
  • 1 bunch medium asparagus, trimmed and thinly sliced on a sharp diagonal (to yield about 2¼ cups)
  • 7 eggs
  • 1¾ cups whole milk
  • 1 cup heavy cream
  • 3 to 4 tablespoons sliced fresh chives
  • 2 teaspoons coarsely chopped fresh thyme leaves
  • ⅛ tsp. ground nutmeg
  • Worcestershire sauce
  • ½ pound day-old grocery store or bakery croissants, torn into 1-inch pieces
  • 1½ cups (packed) coarsely grated Gruyere cheese
Directions
  1. Preheat the oven to 375 degrees F. Rub a 9×13-inch (3-quart) baking dish all over with a little butter.
  2. In a large heavy nonstick skillet, cook the bacon over medium-low heat until crisp and browned, about 10 to 14 minutes. Transfer the bacon to a paper-towel lined plate and break up into smaller pieces when cool. Pour off half the bacon fat from the skillet and add 1 tablespoon butter and the leeks. Season the leeks with a pinch of salt, cover, and cook, stirring, until softened and beginning to brown, about 6 to 8 minutes. Remove the pan from heat and let the leeks cool.
  3. In a medium nonstick skillet, heat the olive oil and the remaining half-tablespoon of butter over medium-high heat. When the butter has melted, add the asparagus and ¼ teaspoon kosher salt. Cook, stirring, until the asparagus is crisp-tender (it will still be somewhat green), about 3 to 4 minutes. Transfer the asparagus to a plate.
  4. In a large mixing bowl, combine the eggs, the milk, the cream, the chives, the thyme, the nutmeg, a couple dashes of Worcestershire sauce, and 1 tsp. salt. Whisk well to combine.
  5. Arrange half of the croissant pieces over the bottom of the baking dish. Sprinkle half of the asparagus, half of the leeks, half of the Gruyere, and half of the bacon over the bread. Repeat with the remaining bread, veggies, cheese, and bacon.
  6. Pour the egg mixture evenly over all. (Start at one end and pour slowly back and forth). Using your hands, gently press down on the bread and veggies to force the custard to evenly surround everything. Let sit for 20 minutes. Bake until the bread pudding has risen and is set and dry in the middle (it will be golden all over), about 40 to 44 minutes.

 

Try Broccoflower in a Versatile Dutch-Oven Ragoût

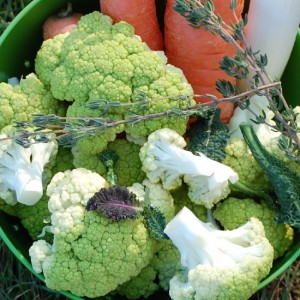
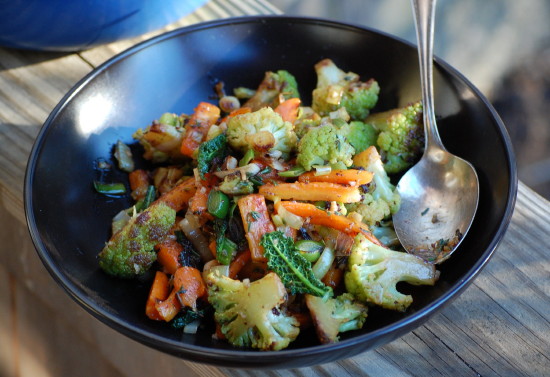
If it’s January, I must be cooking Broccoflower. I picked some up at the grocery the other day because, frankly, our vegetable larder of turnips, rutabagas, kale, and beets is starting to freak me out. Plus, I can never resist the lime-green color of Broccoflower, and I love its nutty flavor when browned, too. (Also, since we live in a small town and I shop at the same small grocery store every day after my post-office run, I’m beginning to worry that people might think we have a really unhealthy diet, since I rarely buy vegetables at the store any more. Checking out with Roy’s donuts, some Lucky Charms for Libby, and maybe some chocolate chips for me makes me a little self-conscious! Hence the need for the occasional head of Broccoflower.)

I’ve sautéed, roasted, stir-fried and quick-braised Broccoflower, but it’s very cold here today and I thought a ragoût would be satisfying. (When I say it’s cold today, I mean it’s calling-all-mice-inside cold. This morning a mouse was in the compost bowl in the pantry. He’d fallen in, obviously in search of yumminess, but since there was little more than coffee grinds and egg shells to feast on—anything green is going to the chickens or Cocoa Bunny right now—he’d tried to scamper back up the sides of the aluminum bowl. No luck. Roy switched on the light about 6:30 and left the little mouse to do a roller derby around the bowl until I got up. I put him back outside (tipping the bowl to let him escape), where he will most likely find his way straight back inside the house tonight. I feel a little bit like Fred Flintstone putting Dino outside the back door. Oh, well. At least Libby is not here to insist on a warm bed for Mousey.)

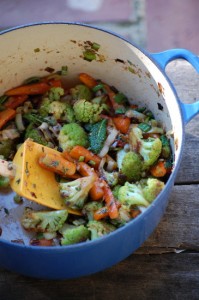
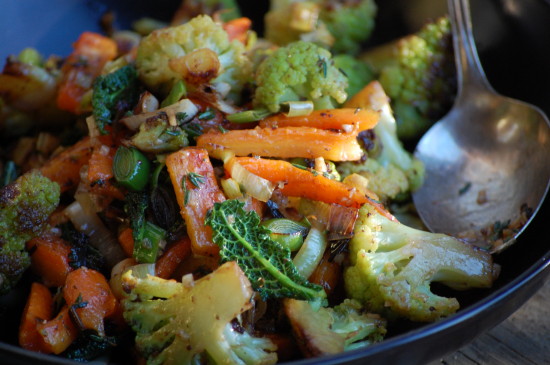
Anyway, since it was a ragoût day, I used the broccoflower in one of my Dutch-oven ragouts with some carrots, leeks, and baby kale (recipe follows). My “ragoûts” are not particularly saucy and they’re not heavy. They’re more like delightful “mélanges” of colorful veggies, finished with some bright flavors and a bit of butter to bring everything together. I use a Dutch oven to create some extra moisture, which, along with the browned bits on the bottom of the pan, contributes to the final flavor of the dish. Sautéing the hearty veggies in the Dutch oven means they steam and brown at the same time. I’ve used fingerling potatoes, Brussels Sprouts, baby artichokes, cauliflower and carrots successfully in these ragoûts, always adding an allium like onions, leeks, shallots or garlic, and something lighter and greener at the end for contrast, like peas or baby greens. So improvise as you please, using zest, vinegars, herbs and aromatics, and get ready for a satisfying veggie dish that can easily become a main course if served with a grain or over polenta. (The version below uses a small Dutch oven and yields just about enough for two small main dish portions or three sides. I was short on some ingredients or would have made a bigger batch, which you can easily do in a larger Dutch-oven.) And oh, by the way, this is top secret, but there are more of these ragout recipes coming in my new book, The Fresh & Green Table, later this year. But more on that topic soon!

Broccoflower, Carrot & Leek Ragout with Thyme, Orange & Tapenade

For a printable version of this recipe, click here.

If you want to double this recipe, use a larger Dutch oven (like a 6 or 7 quart). The little bit of tapenade here pairs deliciously with the Broccoflower but if you are not an olive person, feel free to mess around with the finishing sauce. (Use a dash of balsamic, soy or Worcestershire with the orange juice.) Whatever you do, be sure your cooking pot has a lid—you’ll need it to trap moisture to help cook the veggies. You can substitute cauliflower for the broccoflower, but it will take a bit longer to cook and may need a little more butter for moisture.

_____________________________________

2 teaspoons orange juice

1/2 teaspoon olive tapenade

1/4 to 1/2 teaspoon freshly grated lemon zest

2 tablespoons unsalted butter (1 tablespoon cut into 4 pieces and kept chilled in the refrigerator)

3 tablespoons extra-virgin olive oil, more if needed

1/2 pound carrots (or up to 10 ounces), peeled and cut into sticks 1 1/2 to 2 inches long and about 3/8 to 1/2-inch wide and thick

kosher salt

1/2 pound 1-inch Broccoflower florets, each cut in half to have one flat side

1 small leek, thinly sliced and washed (about 2/3 cup)

1 to 1 1/2 teaspoons minced garlic

handful baby kale leaves or other tender greens

2 teaspoons chopped fresh thyme

__________________________________________

In a small bowl, combine the orange juice, tapenade, lemon zest, and 1 tablespoon water.

In a small (4-quart) Dutch oven or other deep, wide pan, heat 1 tablespoon of the butter and 1 tablespoon of the olive oil over medium-low heat. Add the carrots and 1/2 tsp. salt. Cover and cook, stirring frequently but gently (a silicone spoonula works well), until the carrots are lightly browned and just tender (test with a paring knife), about 12 to 14 minutes. With a slotted spoon, transfer the carrots to a plate.
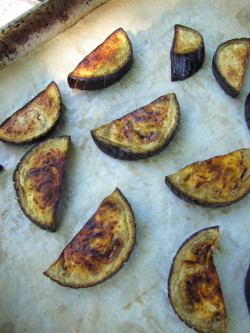
Add 1 tablespoon olive oil to the pan. When the oil is hot, add the Broccoflower and 1/2 teaspoon salt. Stir, cover, and cook, stirring frequently and gently, until all the florets are browned and mostly tender, about 6 to 8 minutes. (Don’t worry if the broccoflower absorbs all the fat at first—it will give off moisture as it continues to cook. Return the lid quickly after each stir.) With a slotted spoon, transfer the broccoflower to the plate with the carrots.
Turn the heat to low, add 1 more tablespoon of olive oil, and add the leeks and a pinch of salt. Cover and cook, stirring frequently, until the leeks are just softened and a bit browned, about 4 to 6 minutes. Add the garlic, stir, and cook until softened, about 30 seconds. Remove the pan from the heat or turn the heat off under the pan and immediately return the carrots and Broccoflower to the pan. Add the kale leaves and thyme and pour in the reserved orange juice mixture. Stir immediately, add the cold butter pieces, and continue stirring gently until the butter melts (just a few seconds). Transfer to a serving bowl and serve immediately.

Serves 2 to 3

Fun with Artichokes – Brown-Braising Babies is Best

Well, I am embarrassed to admit that I got overwhelmed in Whole Foods the other day. Here I am a Food Professional (whatever that is), and the sheer abundance of goodies in the store was just too much for me. Granted, it was a quick stop—I only had 10 minutes to troll the store, as I was on my way to a book signing at Andover Bookstore in Andover, MA. Since we don’t have a Whole Foods on the Island (nor a grocery store anywhere near the size and breadth of this kind), I try to stop in one of these stores when I’m off-Island, mostly to see what the produce selection is like, but sometimes to pick up a specialty ingredient.

So it’s a little frustrating to be in a store with zillions of different products and not much time to peruse them. But honestly, even if I had hours on my hands, or a store like this nearby for regular shopping, I’d still probably be a bit blinded and a tad frazzled by all the colors and sounds and choices and crowds. It’s just a personal preference for me these days—I like things simpler and quieter, and I don’t mind a few less choices.

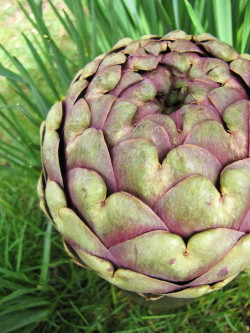
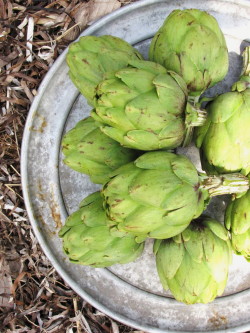
So as my little brain struggled to quiet down all the firing synapses while I whizzed around the produce section, I zeroed in on something visually arresting, something I could wrap my whole 5-minutes-are-left-for-you-to-shop self around – a gorgeous mound of purple-tinged globe artichokes, the biggest and prettiest I’d ever seen. One was literally aching to pop into my little basket and so it did. Next to the display was a stack of boxes filled with baby artichokes—my favorite for cooking. (And yes, we do get both kinds on the Island, just not as consistently or in such abundance.) I grabbed two boxes, thinking I hadn’t yet blogged about the babies, and about how delicious they are braised.

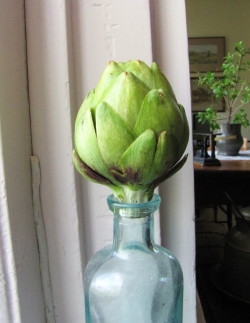
Back home, after a weekend of writing, planting onions, leeks, potatoes, and more greens in the garden, and transplanting tomato and basil seedlings to 4-inch pots inside, I finally got a chance yesterday to do this recipe (below) for you, a variation on one in Fast, Fresh & Green. But first I had all kinds of fun photographing the artichokes in various spots all over the house and yard. I simply couldn’t take my eyes off that purple one.

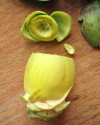
I am convinced that most folks shy away from cooking baby artichokes because they are daunted by prepping them. Really and truly, I promise you that the trimming couldn’t be easier, and that you can do one batch in less than 15 minutes, maybe 10. I did take some quick pictures (in recipe below) to try and illustrate the process for you, but for a better visual, you can also visit the Ocean Mist Farms website (the folks who package up the babies, which are most available in the month of May) to watch a video. Don’t let prepping stop you from cooking and eating baby artichokes—they’re fabulously delicious, and you get more bang for your buck out of them than with bigger artichokes.

By the way, baby artichokes are just immature artichokes picked lower down the stem before they get big. Because their chokes haven’t developed, the whole thing (except for a few tough outer leaves you strip off) is edible.

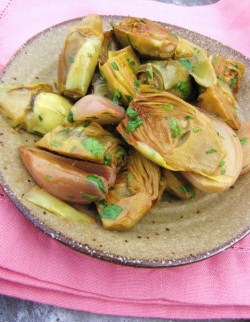
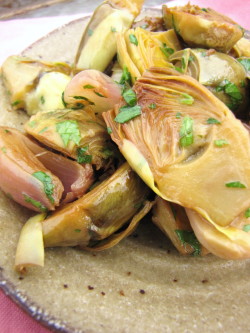
Brown-Braised Baby Artichokes with Lemon Herb Pan Sauce

Printable Version of Recipe

Serve these over creamy polenta or a small serving of fresh fettucine for a lovely veggie supper. For a variation, cook a little bacon, ham or pancetta in the pan before cooking the artichokes; remove and crumble on at the end. Toasted almonds or hazelnuts would be good with these too, and you could substitute a squeeze of orange instead of lemon at the end if you liked. Baby artichokes vary in size—I have seen the same size box packed with 9 artichokes sometimes, 12 another. This recipe will work for 9 medium-small baby artichokes (2 to 2 1/2 oz. each). If your artichokes are very small, you can use 10 or 11 of them, as long as they fit in one layer across the bottom of the pan with the shallots. Be generous with the fresh herbs here.

_____________________________

1 1/2 lemons

9 or 10 baby artichokes

1 1/2 tablespoons unsalted butter

1 tablespoon extra-virgin olive oil

4 small shallots, halved and peeled (or 2 medium or large, quartered)

Kosher salt

1 cup low-sodium chicken broth

1 to 2 tablespoons mixed fresh tender spring herbs such as chives, parsley, mint, tarragon and/or chervil

__________________________________

Cut the whole lemon in half. Squeeze and drop the two halves into a medium bowl filled half-way with water. Cut the stems off the artichokes at the base. Working with one artichoke at a time, peel away all of the outer leaves until you are left with a mostly lemon-limey colored artichoke (it will be somewhat cone-shaped) with the top third still being a light green. With a sharp knife, cut about 3/4 inch off of the top, and, with a paring knife, clean up the stem end just a bit (don’t remove too much; that’s the tasty heart). Cut the artichoke in half lengthwise. Rub the cut sides of each piece with the other lemon half and drop the artichoke halves into the lemon water.

In a 10-inch straight-sided sauté pan that has a lid, melt 1 tablespoon of the butter with the olive oil over medium heat. Arrange the artichoke halves (with whatever water still clings to them) and the shallot halves (both cut-side down) in one snug layer in the pan. Sprinkle with 1/2 teaspoon salt. Cook, without stirring, until the bottoms of the artichokes and the shallots are well browned, 7 to 8 minutes. (If the heat on your stovetop is uneven—or the burner isn’t level, like mine—rotate the pan so that the bottoms get evenly browned.) Pour in the chicken broth and cover the pan, leaving the lid slightly askew so that some steam escapes. Simmer gently, turning down the heat if necessary, until the broth is reduced to a few tablespoons, 12 to 14 minutes. Uncover, add the remaining 1/2 tablespoon butter, and squeeze the other lemon half over all. Sprinkle most of the herbs over and stir gently until the butter has melted. Remove the pan from the heat, and stir again, scraping up any browned bits if possible. Taste for salt and immediately transfer the artichokes and the pan sauce to a serving platter. Sprinkle on any remaining herbs.

Serves 2 as a veggie main dish with polenta or noodles, or 3 as a side dish

Veggies for Breakfast or Eggs for Dinner? Here’s A Frittata Plus A Dozen Other Eggy Ideas

Lest you think I’m completely crazy for devoting so much cyber-ink to birds in my last blog, I thought maybe I should come clean about a couple of things. First, I think the whole bird thing is part of my effort to be more in touch with nature (goofy as that sounds, I know). Mostly because observing nature requires slowing down. In my old life, I did everything on one speed: Fast. (Oh, dear, now I’m starting to sound like Charlie Sheen.) I barely made time to tend a pot of herbs on the windowsill or take a walk around the neighborhood—I certainly didn’t don the binoculars to wait for a bird to fly by.

Secondly (and much more practically), one of the reasons I’m truly excited about having our own hens is because we eat so many darn eggs around here (see below). Okay, I admit, there’s also a deeper meaning to the hen thing. To be completely honest, I still have a little fear that someone is going to snatch me away from the Island, return me to the office, to the suburbs, to I-95, and to a whole lot of other noise that I now happily live without. I figure raising hens gives me one more toehold on Vineyard terra firma. If the Old Life Aliens come to snatch me away, they will have to take my hens, too!

Okay. So about those eggs. Because I don’t eat a ton of meat anymore…and because I figured out a long time ago that I won’t get hungry mid-morning if I eat eggs for breakfast… and because Roy loves having breakfast for dinner… and because Libby loves anything that involves mixing a batter—we eat a lot of eggs. We are very fortunate to have a regular supply of eggs from local farms available to us (even in the grocery stores); their plump golden yolks and perky whites have spoiled me. (The yellow color comes from the  higher amounts of beta-carotene these birds ingest.) When I’m developing recipes, I’ll try to use non-local eggs to make sure the recipe will taste good regardless—but for our everyday eating, we love our local eggs. Here’s what we do with them:

1. We scramble them with fresh herbs (especially cilantro and mint), a dash of cream, a little cheese (cheddar, aged gouda, Monterey jack, goat cheese), and plenty of salt and pepper.

2. We make waffles and buttermilk pancakes, sometimes for dinner. (Favorite recipes at finecooking.com).

3. We make all kinds of different egg sandwiches; here’s a recipe for one of my favorite creations, which I nicknamed “The Local.” Yes it has a bit of (local!) meat on it.

4. We make my Dad’s famous popovers. (See King Arthur Flour site for pans.)

5. We make savory bread puddings, especially when we have the amazing challah bread from our local Orange Peel Bakery. (Popover and bread pudding recipes coming in Fresh & Green for Dinner.)

6. We make French toast with a dash of vanilla and maple in the custard, and we top it with a homemade concoction of fresh berries warmed in maple syrup and slightly mashed in the skillet. (Love to use the challah here, too.)

7. We make omelets with leftover roasted veggies or roasted tomatoes.

8. We make a rif on pasta carbonara with spring asparagus or garden peas.

9. We make thin, quiche-like tarts; my favorite is with fresh corn, basil, and tiny tomatoes.

10. Of  course, we make cookies and quickbreads and the occasional coffee cake, too. (Most often we use recipes from my favorite baker, Abby Dodge.)

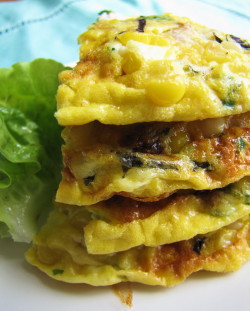
11. We make veggie fritters or pancakes—sometimes with grains, too, or leftover mashed potatoes. We also make spoonbread, a favorite from my Dixie days.

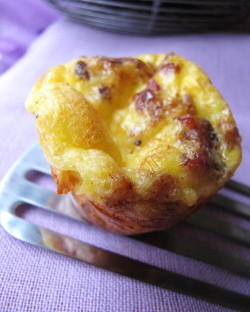
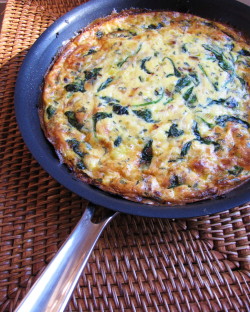
12. But probably our favorite thing to do with eggs is to make a veggie frittata. Usually I make one big one, but sometimes I’ll make little ones in a mini-muffin tin. Frittatas (like the leek and spinach one below) are incredibly versatile; you can eat them for breakfast, lunch, snacks or dinner. And they always taste better after sitting a bit (even overnight); I guess the flavors have more time to penetrate the custard. The method I learned years ago at Al Forno restaurant is easy to follow, and you can make up your own veggie combos, too. (I also love potatoes, mushrooms, corn, arugula, scallions, and broccoli in frittatas.) Just be sure to cook most veggies first to concentrate flavor and to reduce excess moisture. Be generous with fresh herbs and don’t forget the salt and pepper in the custard.

Leek, Spinach, Thyme & Gruyere Frittata

This easy frittata method starts out on the stovetop and finishes baking in the oven—but there’s no tricky flipping involved. After cooling, I like to cut the frittata into small squares, rather than wedges, so that bite-size snacks are easy to grab. It’s also a great way to go for a potluck, book group meeting, or other casual gathering.

_______________________________

3 tablespoons unsalted butter

3 medium leeks (white and light green parts), sliced about 1/4-inch thick (about 2 cups) and well washed

Kosher salt

2 teaspoons minced fresh garlic

3 ounces baby spinach leaves

6 large eggs at room temperature

2/3 cup half ’n half

1 tablespoon roughly chopped thyme leaves

big pinch nutmeg

freshly ground pepper

1 cup (3 oz.) coarsely grated Gruyère

_______________________________

Preheat the oven to 375°F.  Make sure one of your oven racks is positioned in the center of the oven.

In a 10-inch heavy nonstick (ovenproof) skillet, melt 2 Tbsp. of the butter over medium-low heat. Add the leeks, season with a big pinch of salt, and cover. Cook, stirring occasionally, until the leeks are softened, 5 or 6 minutes. Uncover, raise the heat to medium, and continue to cook, stirring frequently, until the leeks are browned in spots, another 8 to 11 minutes. (Don’t worry if they get a little overbrown in places—that’s just great flavor.) Add the minced garlic and stir well. Add the spinach and 1/4 tsp. salt and, using tongs, toss and stir the spinach with the leeks until it is all wilted, 2 to 3 minutes. Remove the skillet from the heat and let the veggies cool a minute.

In a large mixing bowl, whisk together the eggs, half ’n half, 1/2 teaspoon kosher salt, the thyme, the nutmeg, and several grinds of fresh pepper. Stir in the Gruyère.

Return the skillet to medium-high heat and add the remaining 1 tablespoon of butter to it. When the butter has melted, pour and scrape all the custard mixture into the skillet.  Using a silicone spatula, gently stir and move the contents of the pan around so that everything is evenly distributed. (You may have to nudge clumps of leeks and spinach apart.) Let the pan sit on the heat until the custard is just beginning to set all the way around the edge of the pan, 1 to 2 minutes. Transfer the pan to the oven and bake until the frittata is puffed, golden, and set, 22 to 24  minutes.

Before unmolding, let the frittata cool for 10 to 15 minutes. Shake the pan a bit, tip it, and use a spatula (silicone works great) to get under the frittata and slide it gently out onto a cutting board or serving plate.  Cut into wedges and serve warm, or wait for a bit longer and serve at room temp. Refrigerate leftovers; this is even better the next day.

Serves 4 to 6

“How do I cook eggplant?” she asked…

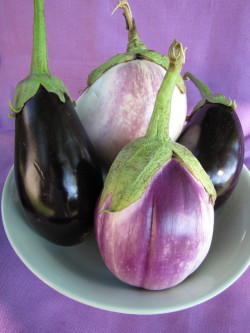
Lately, I seem to be getting the same question over and over, at book signings and on my blog: How do I cook eggplant? Friends are also telling me they’re awash in late-season eggplants, and I’ve got four pretty purple orbs (orphans from the farm stand) staring at me right from my own countertop. Or at least I did, until this morning. I figured the universe was trying to tell me something, and I’d better start blogging about eggplant. So I turned the oven on.

It won’t surprise you that my favorite way to cook eggplant is to roast it. (Grilling’s right up there, too, but I am without grill today.) At its very simplest, roasting eggplant is as easy as slicing it up, spreading the slices on a lined sheet pan, brushing them with oil, seasoning them with salt, and putting them into a 450° oven for 20 or 25 minutes, until the slices are golden brown and cooked through.  The browning brings out the nutty flavor in eggplant, and the combination of a high oven temperature and a coating of olive oil draws enough heat and moisture through the eggplant slices to cook them all the way through. (Undercooked eggplant is not good.)

The roasted slices are really versatile, too. You’ll want to nibble a few straight out of the oven, but you can also turn a couple slices into “sandwiches” with a bit of goat cheese and sundried tomatoes or fresh mozzarella and basil in between. Or you can make a roasted vegetable “stack” with roasted tomatoes and roasted zucchini and surround it with greens for an elegant salad. You can serve the roasted slices as a side dish with a topping of fresh salsa or with a warm tomato sauce and a little Parmigiano, too. Or you can use them in a casserole or gratin, like I did this morning. (See recipe below; if you just want to make the roasted slices, follow the directions in the first paragraph of the recipe, and cut round slices, rather than half-moons.)

Grilling eggplant slices will get you similar results, with one problem. Often the high, dry heat of the grill (drier than the oven) will sear the outsides of the eggplant slices before they are cooked all the way through. To solve this problem, I take the slices off the grill when they’re browned and stack and wrap them in foil for a few minutes, where they’ll finish cooking from the residual steam they give off. I don’t normally like to “steam” veggies to finish cooking them, but since the eggplant slices are never really going to be crisp—and undercooked eggplant flesh is unappealing—I find this is a good idea, and that the eggplant flesh benefits, turning out to be especially creamy.

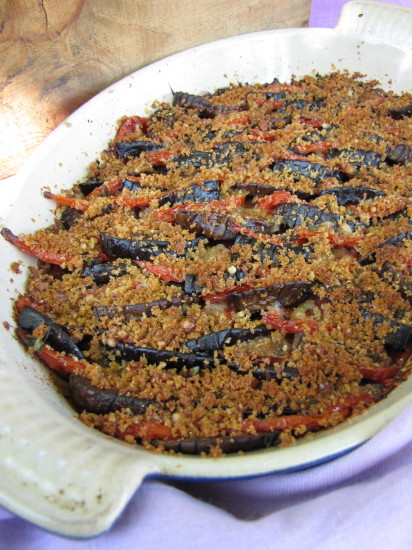
There are lots of other ways to cook eggplant. Roasting them whole is cool (the silky flesh makes great dips), and sautéing doesn’t have to mean a lot of fat (a nonstick skillet solves that). But since this blog is long (and the Late Summer Gratin recipe–shown at left–even longer!), I’ll have to hold those thoughts for another day. One last bit of eggplant advice: Many folks find the tough skin unpalatable. It doesn’t particularly bother me, and I actually like to have a little bit of that texture. So I usually do what was recommended to me long ago—score the skin with a fork or partially peel it (every other half-inch or so) with a vegetable peeler. Either method breaks up the tough skin without entirely getting rid of it. So everyone will enjoy the eggplant—now that you’ve figured out how to cook it!

Late Summer Eggplant, Tomato & Parmigiano Gratin

I love summer veggie gratins because they reduce and mingle the essence of summer flavors into one dish. When I make one with eggplant, I sometimes use feta cheese or goat cheese instead of some or all of the parmesan. I also occasionally add chopped olives, a  little black olive tapenade, or some pesto. I use fresh thyme in this one (a variation on one in Fast, Fresh & Green), but mint’s a natural with eggplant, too. This is also a great spot to use up excess garden tomatoes.  Just be sure to cook the gratin long enough to let the tomato juices mingle and reduce with the onions for the best flavor. You can use any kind of eggplant you like in this gratin, though I think Globe-type are a little more suitable for their heft. If you do use a skinny eggplant, like a Japanese or Italian style, you might not need to cut the veggies in half first before slicing (so you’ll have round slices instead of half-moons.)

___________________________________________________

1 ¼ pounds globe-type eggplant (about 3 small or 1 large)

scant ½ cup extra-virgin olive oil

kosher salt

1 large onion (about 9 oz), thinly sliced

1 ¼ pound small or medium tomatoes (4 or 5)

2 tablespoons fresh thyme leaves or chopped fresh mint

1/2 cup plus 2 tablespoons  finely grated Parmigiano-Reggiano

½ cup fresh bread crumbs

____________________________________________________

Heat the oven to 450˚F . Line two heavy-duty sheet pans with parchment paper.  Trim the ends of the eggplant. Score the eggplant skin by dragging a fork down it lengthwise, repeating all over until the whole eggplant is scored. Cut the eggplant in half lengthwise; then cut each half crosswise into 1/2-in-thick half-moon slices. Arrange the slices in one layer on the sheet pans, and, using a pastry brush, brush both sides of each slice with some olive oil. Season the top sides with a little kosher salt. Roast until the eggplant is tender and lightly browned, 20 to 22 minutes. (The undersides will be slightly browner, and the slices will be somewhat shrunken.)

Reduce the oven temperature to 375˚F. Set the eggplant aside while you prepare the rest of the ingredients.

Grease a shallow 2-quart gratin dish with a little of the olive oil.

In a medium nonstick skillet over medium heat, heat 2 teaspoons of the olive oil. Add the onions and 1/4 tsp salt and cook, stirring frequently, until the onions are a light golden brown but still have some body, 8 to 12 minutes. Transfer the onions to the gratin dish and spread them out in one layer. Sprinkle them with one teaspoon of the thyme leaves. Let the onions cool.

Core the tomatoes, and cut them in half lengthwise (through the stem). Put each tomato half, cut side down, on the cutting board, and cut each half crosswise into 1/4-in- thick slices. Put the tomato slices on a shallow plate.

In a small bowl, combine  the bread crumbs with 2 teaspoons olive oil, a pinch of salt, and 2 tablespoons of the Parmigiano.

Starting at one end of the gratin dish, arrange a row of overlapping eggplant and tomato slices against the back of the pan (prop the veggies up a bit against the edge of the dish).  Alternate between one tomato slice and one eggplant slice, and after finishing each row, sprinkle it with some of the Parmigiano and a few thyme leaves. Continue arranging rows until you have filled the pan. If you come up short, you can always spread the rows out a bit by pressing down on them (or you can push them back to make more room). If you have extra Parmigiano and thyme, you can sprinkle it over the top of the finished rows.

Season the gratin with 1/4 tsp salt and drizzle 2 tablespoons of olive oil over the veggies.  Cover the veggies with the bread crumb mixture, letting the veggies peek out a bit.

Bake until the gratin is well-browned all over (the crumbs will be dark brown and the edges of the gratin will be browned), and the tomatoes are well-cooked and shrunken (if they were very juicy, the juices will be very reduced, as well), about 50 to 55 minutes. Let cool for at least 15 minutes before serving.

Serves 6 as a sidedish