Tag Archives: Onions

It’s Pub Day! Celebrating Fresh from the Farm with a Winter Green Market Meatloaf Recipe

FFF square black sm collage b


This is it—Fresh from the Farm: A Year of Recipes and Stories is now officially published, as of this morning. Yippee!

I have no idea what this actually means. But I just learned that pub dates are apparently always on Tuesdays. Who knew?

My secret source revealed that the “pub” date is a date set in order to back up and create a “release” date, when the books begin to ship from the distribution warehouse. The scheduling masters try to work everything out (considering distance-to-travel, etc.) so that most of the books are in most of the outlets they’re supposed to be in by the “pub” date.

I like the idea of hundreds of boxes of Fresh from the Farms hopping on trucks and traveling far and wide to get to their destinations.

DSC_2568
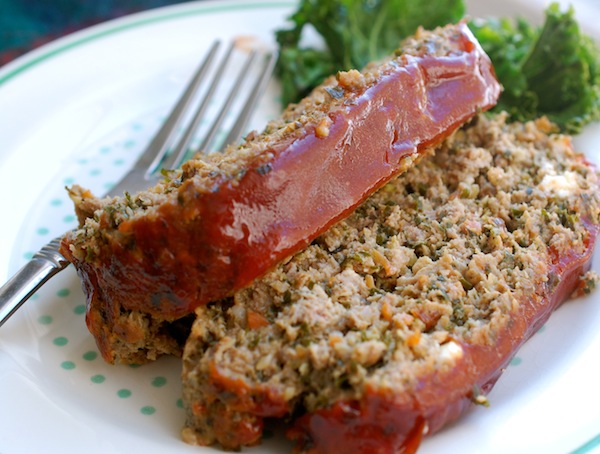
So to celebrate their safe arrival, I’m offering up what really and truly is one of my favorite recipes in the book—Winter Green Market Meatloaf. I named it that because I first made it with the goodies I got at our Winter Farmers’ Market—including onions, carrots, kale (yes, kale), local feta cheese, and local ground pork and beef. The meatloaf is terrifically moist and tasty, and the sauce on the outside has a great zing to it.

I also chose this recipe, because of course, it’s February, and meatloaf makes a little more sense than say, a corn sauté, or a strawberry crisp. But the cool thing about Fresh from the Farm, which is arranged seasonally in three sections, is that it spans almost the entire year, and the recipes in the fall section (like the meatloaf) are plenty appropriate for mid-winter, too.

I made the meatloaf yesterday so that I could take pictures of it (it’s not photographed in the book), and wound up sending half of it off with a couple of newspaper reporters who were here visiting the farm and talking with me about the book. (We have our big author event at Bunch of Grapes bookstore this Saturday at 3 pm, which I’m really excited about. Libby will be here and able to come with us, and I’ll be cooking up a storm this week to bring along plenty of recipe samples.)

For me, pub day is exciting, but considering the travel and the radio spots and all the other efforts coming up to promote the book, there’s no easing back. I am just looking ahead with an eye towards keeping my energy level up—while Roy and I also seriously begin to prepare for the growing season. Yikes. And while at first I thought it was a little strange to bring a book like this out in February, now I am really thankful that it gives me the window of opportunity to promote it this spring by doing some traveling before the farm gets really busy. Next stop: Washington, D.C., my hometown: A great event at La Cuisine on March 1, and the Dupont Circle Farmers’ Market on March 2. Maybe I’ll see some of you there!

Enjoy the meatloaf, and by the way, if you really want to make somebody happy on Valentine’s Day, this is a decidedly comforting way to do it. You could serve these mashed potatoes with it, or even the crispy smashed potatoes.

DSC_2576

Winter Green Market Meatloaf Recipe
 
Yes, there’s actually kale in this incredibly moist and flavorful meatloaf. (Feta cheese, too!) Tossing the veggies and plenty of garlic into the food processor makes a finely minced mixture perfect for lightening up meatloaf. I always eat at least a nibble of this warm out of the oven, but resting for a few minutes is a good idea; it will be easier to slice. It’s also delicious leftover, reheated or even cold, pâté style. Recipe copyright Susie Middleton, 2014, from Fresh from the Farm: A Year of Recipes and Stories (The Taunton Press, 2014.)
Author:
: main dish
Serves: 4 to 6
Ingredients
  • ¾ cup fresh breadcrumbs (about 1 English muffin)
  • 3 tablespoons milk
  • ½ cup ketchup
  • 2 tablespoons Worcestershire sauce
  • 2 tablespoons brown sugar
  • 1 tablespoon reduced sodium soy sauce
  • 1 tablespoon Dijon mustard
  • 1 large carrot (about 3 ounces), coarsely chopped
  • 1 small onion (about 4 ounces), coarsely chopped
  • 4 large cloves garlic, peeled
  • 1 small serrano pepper, cut into 3 or 4 pieces
  • 2 cups (packed) coarsely chopped kale (about 2 ounces)
  • 2 tablespoons unsalted butter
  • Kosher salt
  • 1 pound 80 to 85% ground beef
  • ½ pound ground pork
  • 3 ounces crumbled good-quality feta cheese
  • 1 large egg
  • Freshly ground black pepper
  • 2 tablespoons (lightly packed) chopped fresh oregano
Directions
  1. Heat the oven to 350°F. Line a large rimmed heavy-duty baking sheet with parchment paper.
  2. Put the breadcrumbs and milk in a small bowl and mix. Let sit. In a small bowl, whisk together the ketchup, Worcestershire, brown sugar, soy sauce, and Dijon.
  3. In the bowl of a food processor, combine the carrots, onions, garlic, serranos, and kale. Pulse until very finely chopped, scraping down the sides as necessary to incorporate the kale.
  4. In a medium (10-inch) nonstick skillet, melt the butter over medium-low heat. Add the chopped veggies and ½ teaspoon salt. (The pan will be crowded.) Cook, stirring, until gently softened and very fragrant, about 5 minutes. Transfer to a plate and let cool (about 10 minutes).
  5. In a large mixing bowl, combine the veggies, beef, pork, feta, egg, several grinds of pepper, the oregano, ½ teaspoon salt, the breadcrumb mixture, and 3 tablespoons of the ketchup mixture (reserve the rest for brushing on the loaf). Using your hands, mix all of the ingredients together thoroughly without mashing too much. Transfer the mixture to the baking sheet and shape into a long, narrow loaf about 9 inches long and 4 inches wide. Spoon the rest of the ketchup mixture down the length of the top of the loaf and gently spread or brush it over the sides.
  6. Bake the meatloaf until an instant-read thermometer registers 160° to 165°F, 55 to 60 minutes. Let rest for 5 minutes before slicing and serving.


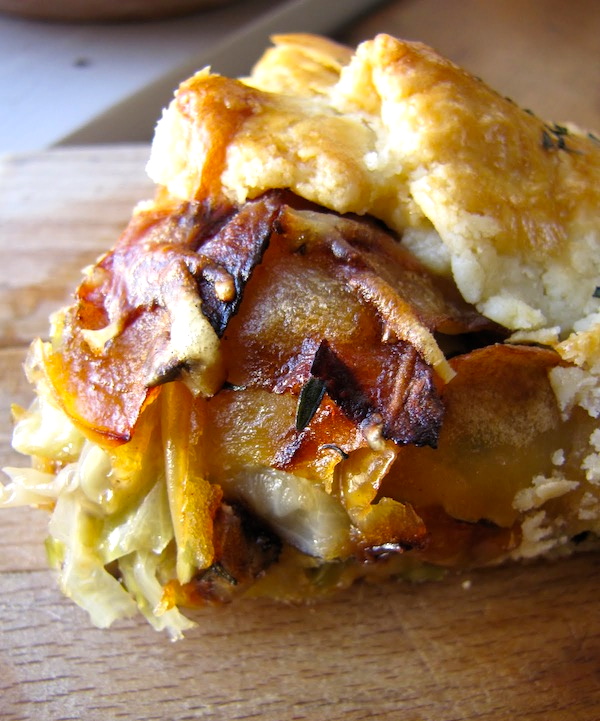
Please note: The terrific finished food photos in the collage at top were taken by Alexandra Grablewski for Fresh from the Farm: A Year of Recipes and Stories (The Taunton Press, 2014).


The Ultimate Destination for Winter Cabbage: A Savory Tart

xTARTS Cabbage 3 This week I am posting a primer on how to make one of my very favorite things in the whole world–a savory rustic tart (aka crostata or galette). Be sure to check out that post–not only for tips and photos on making the dough and assembling the tarts–but also for the easy food-processor dough recipe, too. Then come back over here for a complete recipe for filling and assembling the cabbage, apple and onion tart (recipe follows). If you’ve got a copy of my cookbook The Fresh & Green Table, you can also use the guidelines over on that post to help you make either the Roasted Ratatouille Tart with Goat Cheese & Mint; the Seven-Treasure Roasted Winter Veggie Tart; or the Roasted Butternut Squash, Cranberry, Shallot & Pecan Tart. There’s also a Rustic Roasted Tomato Tart recipe (my favorite yet) in my new book, Fresh from the Farm: A Year of Recipes and Stories.

I hope you’ll try one of these fun-to-make free-form tarts. The crust is flaky, buttery, and delicious, and the savory fillings are the perfect counterpart. Serve a slice with a salad or a bowl of soup–or have a piece for breakfast!

PicMonkey Collage


Savoy Cabbage, Apple, Onion & Gruyère Rustic Tart

IMG_5669_1

When I was developing my rustic tart recipes for The Fresh & Green Table, the filling for this tart was the surprise favorite with friends I never thought would be cabbage-eaters. So I highly recommend this as a great way to introduce people to the ethereal (and traditionally Alsatian) combination of sautéed cabbage and onions, nutty gruyere cheese, sweet-tart sautéed apples, perky fresh thyme, and buttery, flaky crust.

I also recommend closely following my sautéing directions for the filling—especially the cabbage. You’ll be cooking it in a relatively dry pan over relatively high heat, so that it will quickly brown (almost toast) rather than steam. This is the secret to bringing out the wonderfully complex nutty flavor in cabbage. Be sure to use the beautiful crinkly-leaved variety of cabbage known as Savoy for this. (You’ll find it in the grocery right next to green cabbage; it’s round, too, but with dark-green outer leaves.) The filling components cool quickly, so you can make them in about the time you’ll need to let your dough warm up after taking it out of the fridge.

Makes one 8- to 9-inch tart. Serves 4  

____________________________________________________

For the egg wash:

1 egg yolk

2 Tbsp. heavy cream


For the filling:

2 Tbsp. unsalted butter

1 Tbsp. extra virgin olive oil

1 medium onion (6 to 7 oz.), thinly sliced

6 oz. Savoy cabbage, thinly sliced (about 3 cups packed)

1/2 Golden Delicious apple, unpeeled, cored and thinly sliced (about 1/8-inch thick)

kosher salt


For the tart:

3/4 cup (about 3 oz.) grated Gruyère cheese

1 tsp. lightly chopped fresh thyme leaves

flour for dusting

1 disk Savory Rustic Tart Dough (recipe here), made ahead, chilled for at least one hour, and removed from refrigerator 45 to 55 minutes before assembling tart

________________________________________________________________________________

Preheat the oven to 400 degrees F. Set an oven rack in the center of the oven.

Make the egg wash

Whisk together the egg yolk and heavy cream in a small bowl, cover with plastic, and set aside.

Make the filling

In a heavy 10-inch nonstick skillet, heat 1 Tbsp. of the olive oil and 1 Tbs. of the butter over medium-low heat. Add the onion and a pinch of salt, cover, and cook, stirring occasionally, until the onion is limp and translucent, 5 minutes. Uncover, turn the heat to medium, and cook, stirring occasionally, until the onions are golden brown, about another 6 to 8 minutes. Transfer the onions to a plate to cool.

Add 1/2 Tbsp. butter to the pan, turn the heat to medium high, and add the cabbage and another big pinch of salt. Cook, tossing with tongs occasionally (only once or twice at first; let the cabbage have contact with the pan), until the cabbage is limp and nicely browned in spots all over (the thinnest pieces will be all brown but the green color will still be bright in the bigger pieces), about 5 minutes. Transfer the cabbage to a plate to cool.

Take the pan off the heat, and let it cool for a minute or two before returning to the heat. Reduce the heat to medium and add the remaining 1/2 Tbsp. butter. When the butter has melted, add the apple slices, season them with a pinch of salt, and spread them out in one layer (tongs help here). Let them cook undisturbed until very lightly brown on the bottom side, about 2 minutes. Flip and cook until the other side is very lightly browned, another 2 minutes. Transfer the apples to a plate to cool.

Make the tart

(For help with assembling the tart, check out the “How to Make A Savory Rustic Tart” photos here.)

Line a large heavy-duty rimmed sheet pan with a piece of parchment paper and position it next to a large cutting board or other surface you will use to roll out the dough. Arrange the cabbage, onions, apples, thyme and Gruyère around your work area.

Sprinkle your work surface lightly with flour and spread it around with your hand. Put the disk of dough in front of you and lightly tap it with the rolling pin to start softening and spreading it. Then gently roll it out, lifting and giving the disk a quarter-turn after each roll, until you have a roughly 12-inch circle. Try not to roll your pin over the edges of the dough, as that will tend to make the edges thinner than the center. (If your edges get very ragged or torn, it’s okay to patch them back together or trim them a bit.) If at any time the dough feels like it is sticking, lift it up and toss a bit of flour underneath it and/or over it.  Transfer the dough to the baking sheet by rolling it up or draping it over your rolling pin and unrolling or undraping it on the baking sheet.

Sprinkle a quarter of the Gruyère over the dough, leaving a two-inch border around the edge. Arrange half of the cabbage over the Gruyère. Arrange half of the onions over the cabbage. Sprinkle them with a little bit of fresh thyme, and top with another quarter of the Gruyère. Repeat with the remaining cabbage and onions, and sprinkle again with a little thyme and another quarter of the Gruyère. Arrange the apples, very slightly overlapping, in the center of the tart (they will not cover all the filling). Sprinkle with a tiny bit of thyme and the remaining Gruyère.

Pleat and fold the edges of the dough up and over the outer edge of the filling all the way around the tart.  (You will be folding in that 2-inch border.) You don’t have to go crazy making a lot of pleats—folding a piece of dough in about every 2 to 3 inches around the tart will get you the results you want (you’ll have about 8 or 9 folds).

Brush the edges of the dough with some of the egg wash (you won’t use it all), and sprinkle the edges of the tart with any remaining thyme.

Bake until nicely golden all over and crisp and brown on the bottom (check with spatula), about 38 to 40 minutes. Let cool for a few minutes and use the parchment paper to slide the tart on to a cutting board. Cool for another 5 to 10 minutes before slicing and serving.

The Last Onion and The Teeny Tiny Stir-Fry

Roy, Farmer, and I spent an exhausting day off-Island  yesterday, driving around in the truck to assorted malls, stores, and appointments, loading up with supplies for various building projects, for the garden, and for life in general. By last night, coming back on the 6:15 boat, the three of us felt like we’d moved into the cab of the Ford, with Farmer’s kibble and water bowls on the floor, our empty coffee cups strewn all around, and the usual collection of reading material I can’t go anywhere without (several magazines, a few books, and a newspaper) covering every surface. One day off-Island was enough for us. We were ever so glad to get home.

Quick dinner thoughts raced through my head as I stumbled into the barn to grab an  onion. In the dark my fingers fumbled around in the wooden crate, feeling for something hefty and round but only coming up with papery skins at first. Finally my hand settled on a little onion—the last one of our own, ordered from Dixondale Farms last February, planted last May, harvested last September, cured and stored all winter long. I am pleased we got all the way to February with our own onions, but I’m sad that it will be September before we see one again. Actually, maybe it will be sooner as I intend to overplant this year and harvest some bulbs as spring onions.

Onions (actually all of the lovely allium family, including leeks, scallions, chives and garlic) have been popping up on my radar a lot lately. Yesterday I leafed through a new issue of Martha Stewart Living magazine and my eyes fell on the most stunning photographs of alliums, courtesy of a feature called The Early Onion. Then I happened to watch a video on growing onions over at Vegetablegardener.com.  I  just placed my onion order for the garden, too. This year I’m going to grow a good storage onion called Copra, in addition to the gorgeous Ailsa Craig and Big Daddy onions I grew last year.

As much as I love to start vegetable dishes with some kind of allium (the promise of deep flavor), I knew I needed something more than my one little onion to get veggies on the table last night. So I did a fast fridge fly-through, retrieved a bit of broccoflower, some mushrooms, a carrot, and a bell pepper and focused on a technique I used for a a yummy veggie fried rice coming in The Fresh & Green Table. I diced all the veggies (including the onion) into very small pieces (no fussing here—exact dice are not necessary!) and heated a couple tablespoons of oil in my favorite (non-stick) stir-fry pan over medium-high heat. Once the oil was hot, I added the veggies, cranked up the heat to high, and started stirring. After about 3 minutes, I added a little chopped ginger and garlic, continued cooking for about 30 seconds, and brought the pan off the heat. The veggies were done!

This sounds like a no-brainer quick stir-fry, but there are two important things at work here. First, normally you wouldn’t throw onions and peppers into the pan at the same time as dense veggies like carrots and broccoflower. If all the veggies were cut into larger pieces, the softer veggies would be burned by the time the denser veggies softened up. But by cutting everything very small (and you can use most any vegetable except for the very densest) and turning the heat to high (after the veggies go in the pan—nonstick should not be heated beyond medium-high when empty), the cooking happens really fast. There’s an explosion of moisture as the veggies tumble around the pan, and that translates to steam to help tenderize the denser veggies a bit and to keep the softer ones from burning. You need to watch closely though, as somewhere between three and four minutes the steam transitions to smoke when excess moisture is used up. But by then the veggies are nicely browned and crisp-tender—perfectly delicious.

You can eat the veggies as is (plenty tasty) or you can add a little finishing sauce like the Thai-flavored one I’ve suggested below. Chopped fresh herbs are optional, too, depending on just how much of a rush you’re in. Without the sauce or herbs, you can be done, start to finish, in less than 15 minutes. Starting with three cups of veggies yields plenty for a side-dish for two, but you can up the amount a bit, stretch the cooking time a touch, and make a bit more for three or four.

Teeny Veggie Stir-Fry with Optional Sauce

For a printable version of this recipe, click here.

Serve these with rice and a flat-omelet egg for a vegetarian supper.

_____________________________

For the sauce:

1 tablespoon Thai fish sauce

1 1/2 teaspoons fresh lime juice

1 1/2 teaspoons brown sugar

1/4 teaspoons Asian chili-garlic sauce

For the stir-fry:

2 tablespoons vegetable or peanut oil

3 cups veggies, cut into small (3/8- to1/2-inch) pieces (Choose as many as you like, but at least four of the following for a total of 3 cups: bell peppers, onions, mushrooms, broccoli, cauliflower, cabbage, green beans, bok choy, snow peas, sugar snap peas, or carrots)

kosher salt

1 teaspoon minced fresh garlic

1 teaspoon minced fresh ginger

2 tablespoons thinly sliced scallions

1 to 2 teaspoons chopped fresh cilantro or mint (optional)

______________________________________

For the (optional) sauce:

In a small bowl, mix together the fish sauce, lime juice, 2 teaspoons water, brown sugar, and chili-garlic sauce.

For the stir-fry:

In a large (12-inch) nonstick stir-fry pan, heat the oil over medium-high heat. When the oil is hot (it will loosen up), add the 3 cups veggies and 3/4 teaspoon salt, turn the heat to high, and cook, stirring, until the veggies are crisp-tender, slightly shrunken, and lightly browned, about 3 minutes (4 at the most). Add the garlic, the ginger, and the scallions. Stir-fry briefly, just until fragrant, about 30 seconds. Remove the pan from the heat and carefully pour in the sauce mixture (if using). Stir until the sauce thickens and reduces slightly. Fold in herbs if using and serve right away.

Serves 2

The 50-Pound Onion Harvest and The Mystery Egg

Fortunately, we did not have to move the hens into the mudroom during the hurricane.

Aside from the obvious drawbacks to this plan, there simply wouldn’t have been room, what with the hundreds of tomatoes and the 50 pounds of onions hanging around. With the storm coming, we did harvest just a wee bit more than we normally would have. But even on an ordinary day, the house is overrun with vegetables for the farm stand at this point.

As it turns out, moving the hens anywhere away from their coop might have been particularly upsetting just about now. They’ve been clucking like crazy lately and we thought maybe it was the change in barometric pressure. Apparently, it’s pressure of a whole different sort that’s bothering them, because we found our first egg on Wednesday morning. We’re very proud of the mama (whoever she is), because she got pretty close to the nesting box. We found the little brown egg lying in the hay in a dark corner of the coop. Yesterday, our hen-whisperer friend Katherine gave us some fake eggs to put in the nesting boxes, so hopefully the next mama will actually lay in one of the boxes. We thought for sure the first layer must be Sugar (below), who’s been making the loudest fuss lately. But since she’s our only Aracauna, and they are supposed to lay blue or green eggs, it wasn’t her. She must still be working on her first. Probably it was Martha, who’s all-business and, after all, Chief Hen. I can see her dropping her first egg like it’s no big deal.

We feel really lucky that the animals and the vegetables got through Hurricane Irene unscathed. I am a little worried though that we are due to get nailed at some point. (A farm stand customer just stopped in to tell me that another tropical storm is headed our way next week.) Because for some reason, the Island just hasn’t been in the path of the worst of this year’s storms—from the bad snows this winter to the recent deluge that soaked the rest of New England.

There is something delicious about this post-hurricane weather, though. Crystal blue days and piercing late summer sunshine are giving me just the window I need to get the garden beds replanted (more arugula, turnips, lettuce, and bok choy) for the next two months of Indian summer we get out there, thanks to the warm ocean air. It’s also the perfect weather for drying out those 50 pounds of onions. At one point during the storm, they were in my office—on top of and underneath my desk. I didn’t mind so much as I am totally tickled by how great they came out. They were easy to grow and over the last several weeks, they bulbed up into bodacious plump beauties. This week I’ve had them outside during the sunlight hours to finish the drying process. (Top photos.) The stems need to wither from perky green to brittle brown, and a few nice layers of golden onion skin will assure they keep for many months. (Final destination: the barn. See photo at bottom.)

The whole idea behind the onions was to supply my kitchen for the winter (and not to sell them at the farm stand). But I’ve lost a dozen or so already to begging farm stand customers who’ve seen them in the yard spread out everywhere over tables and chairs. Who’d have thought people would want to buy onions at a farm stand? But then again, I had no idea how beautiful the harvest would be. These are some of the best things about tending the farmette—the little surprises, like a freshly laid egg or a beautiful heap of onions. (I’ve been snapping shots of my turnips and fennel, too. I can’t get over how gorgeous they are straight out of the ground, with all their greens and roots attached. So different from the grocery store.)

People ask me what I’m going to do with all those onions, and I just smile. I use onions in everything. We’ve already been grilling them (last night for fajitas), including them in roasted and slow-sautéed veggies (with those turnips and some of our carrots and potatoes, too), and this weekend I hope to make one my summer gratins or “tians” with our tomatoes and zucchini. If you’ve never made one of these summer gratins, you simply must. Everyone loves them. If you’ve got a copy of Fast, Fresh & Green (and if you don’t, ahem!, you should), turn to p. 201 and make the Summer Vegetable and Tomato Tian with Parmesan Bread Crumbs. Or, you can find one of my very first tian recipes over at finecooking.com. Next up for the onions and fennel and tomatoes and kale: Hurricane Soup!

Tip of the Week: Skewer Onions for the Grill with Turkey Lacers

Yep, you guessed it. I’ve been spending so much time doing this (harvesting greens, left) that I haven’t had time to do much of that (cooking, right). Or to write a blog post this weekend. But I have been thinking of you, I promise. So I offer a good old tip I’ve used for years and that I called into quick action the other night for our dinner–using a turkey lacer to skewer onion slices for the grill. It’s that easy.

You can pick up a package of turkey lacers (basically mini-skewers) at any grocery store. Peel and cut a big red onion (or yellow or sweet) into 1/2-inch slices and poke the lacer through the center of the onion from side to side (so that you poke through every ring). Coat the slices with olive oil and salt and put on a medium-hot grill. Cook until there are nice grill marks on each side of the slice (about 5 to 7 minutes per side on my grill). And here’s one last tip: At this point the onions will be flavorful but not completely tender. Take them off the grill and wrap them briefly in aluminum foil, where they will steam a bit, finish cooking, and get soft and tender. Delicious. On steak. On salad. On whatever. Good emergency vegetable when the crisper drawer is empty!

St. Patty’s Day & Sixburnersue: A Gratin Recipe to Celebrate

St. Patrick’s Day, 2011, is sixburnersue.com’s unofficial one-year anniversary. At least that’s what I’ve decided. Actually, let’s make it official. And next year, we’ll have a proper celebration with two green cupcakes and two green candles. This year, we will have to make do with a yummy cabbage and potato gratin recipe.

I’m not sure of the exact day sixburnersue.com went live last year, but I know by St. Patty’s Day I was blogging in real time. And strangely enough, the blog I wrote on sautéed cabbage for the green holiday turns out to be one of the most visited pages on this site. (Along with a post on ten things to do with celery root! Go figure. Posts on more glamorous veggies like fingerling potatoes and asparagus get a lot of hits, too, but I think there may be a shortage of good cooking info out there on less sexy veg.)

My favorite cabbage is the crinkly Savoy (beautiful dark green on the outside, pale on the inside), and yes, I love to sauté it to bring out its sweeter, nuttier side (see last year’s blog.) Then I use it as a rustic tart filling, a pizza topping, a bed for meat, a stir-in for mashed potatoes, or as a bed for a savory gratin, like the potato and Gruyére one here. Of course my main motive for posting this recipe today is to give you an alternative to boiled cabbage (not my favorite). Actually, I’d be happy if you skipped the corned beef, too, and went with roast leg of lamb. But, yeah, you didn’t ask for my opinion on that, did you?

Whatever you eat on Thursday, may the (good) luck of the Irish be with you. (We have more than a little of it here in our household. Just ask the man with the shamrock tattoo.) And if you’re the praying kind, ask St. Patrick for a little luck to rub off on our friends in Japan.

St. Patrick’s Day Potato, Cabbage, Onion, Apple & Gruyère Gratin

This delicious gratin is a pretty rich side dish, so a little goes a long way. Serve it with roast lamb, corned beef, or a big warm salad. It will take you about an hour to get it in the oven, and about an hour and a bit to cook, so plan your menu accordingly. When prepping, don’t be tempted to under-brown the cabbage or the onions. To slice the potatoes thinly, cut them in half first, lay them cut side down, and slice across with a thin-bladed knife such as a Santoku. (You don’t need to use a mandolin).  

__________________________________________

1 tablespoon unsalted butter, plus more for rubbing the baking dish

1 1/2 cups coarse fresh breadcrumbs

3 ounces Gruyère cheese, grated (1 1/4 cups packed)

3 tablespoons olive oil

1 tablespoon plus 1 teaspoon coarsely chopped fresh thyme leaves

kosher salt

2 small yellow onions (9 to 10 ounces total), thinly sliced (about 2 cups)

2 teaspoons minced fresh garlic

2 cups thinly sliced Savoy cabbage (about 7 ounces)

1 Jonagold, Pink Lady, or Golden Delicious apple, peeled, cored, quartered and thinly sliced crosswise

1 lb. Yukon Gold potatoes, peeled, halved and very thinly sliced

3/4 cup heavy cream

3/4 cup low-sodium chicken broth

_________________________________________

Heat the oven to 350 degrees F. Rub a 2-quart shallow gratin dish (or a 11 x 7 Pyrex baker) with a little butter.

In a small bowl, combine the breadcrumbs, 2 tablespoons of the grated Gruyère, 1 tablespoon of the olive oil, 1 teaspoon of the chopped thyme and a good pinch of salt. Set aside.

In a 10-inch heavy nonstick skillet, melt 1/2 Tbsp. of the butter with 1 Tbsp. of the olive oil over medium-low heat. Add the onions and 1/4 tsp. of salt, cover, and cook, stirring occasionally, until softened and translucent, 6 to 7 minutes. Uncover, raise the heat to medium, and continue to cook, stirring frequently, until the onions are lightly browned, 6 to 7 minutes more. Add 1 teaspoon of the minced garlic, stir for a few seconds, and remove the pan from the heat.  Transfer the onion-garlic mixture to the baking dish and spread it evenly in one layer. Sprinkle 1/2 teaspoon thyme leaves over the onions.

Return the skillet to medium-high heat and add the remaining 1/2 tablespoon of butter and 1 tablespoon olive oil. When the butter has melted, add the cabbage and a pinch of salt. Stir and let sit for a minute for browning to begin. Then cook, tossing frequently with tongs, until cabbage is limp and browned, 4 to 5 minutes. Add the remaining 1 tsp. garlic, stir well, and remove the pan from the heat. Transfer the cabbage mixture to the baking dish and spread in one layer. Sprinkle 1/2 teaspoon thyme leaves over the onions.

In a mixing bowl, combine the sliced potatoes, the sliced apples, the remaining Gruyère, the remaining thyme, the cream, the chicken broth, and 3/4 teaspoon salt. Gently mix with a silicone spatula and transfer to the baking dish, spreading the mixture evenly over the cabbage and onions. (Sometimes it’s easier to transfer the solids first. Lift the potatoes and apples out of the liquids with your hands and spread them in the dish; then gently pour the liquids over all.) Make sure everything is evenly distributed and use your hands to press down gently on the potatoes and apples to let the liquids come up around them.

Cover the top of the gratin with the breadcrumb mixture. Bake until the potatoes are tender (check both the middle and sides of the dish with a paring knife) and the top is brown (there will be a brown line around the edge where the liquids have reduced), about 65 minutes. Let cool for several minutes before serving.

Serves 6 as a side dish

A Sweet Tooth and Her Caramelized Onions

Since I have a sweet tooth, turning vegetables into candy is a favorite pastime (see roasted beets and roasted tomatoes). Last week, after the grand sopping we got (more on the way from Hurricane Earl), we pulled up most of our onions in the garden, as they don’t like wet feet and looked like they were sort of gurgling in the muck.  I know you are supposed to grow onions in order to keep them in long storage all winter. But that may not be happening around here. I couldn’t stand watching all those beautiful onions drying out in the kitchen. I wanted to slice them and dice them and sauté them and roast them and and and…well, you know, I couldn’t wait. Friday I stole three nice plump onions off the rack and sliced them up. And made caramelized onions. There, I had my way.

Caramelized onions are something unto themselves. With their amazing flavor and almost jammy, condiment-y texture, they go well in, on, and around just about anything. Eggs, crostini, pasta, steaks, salads. The other night I threw some in with chopped tomatoes for a quick-simmered pan sauce for chicken thighs. Last night we put some on pizza. They keep in the fridge for at least a week (if you don’t eat them all), so every morning I mix a little with some fresh corn kernels and fresh thyme and add that to my scrambled eggs.

And, ta da!, I just happen to have a good recipe for caramelized onions up my sleeve. It’s one I developed for Fast, Fresh & Green but ultimately cut when we had too much content. While I love this classic preparation, I don’t really think of caramelized onions as a side dish so much as a dinner-booster, so it made sense to take it out of a book of side dishes.

My recipe takes the classic, slow-cooked, slowly browned onions a small step further by adding a bit of balsamic, honey and thyme at the end. (You could leave them out but I think they give everything a lift.) There is some technique to caramelizing onions. First off, they won’t cook evenly unless you “sweat” them first in a covered pan until they are translucent (middle photo above). Then, and only then, can you procede to browning the onions. The next big tip I learned from my old chef boss Lenny Greene: When onions start sticking to a hot pan (and leaving behind all those delicious brown nubbins), pull the pan off the heat and the onions will immediately begin releasing moisture, which will allow you to “wash” all those delicious brown bits back into the onions. You can do this frequently while caramelizing the onions, and every time you wash the browned bits back into the onions, they will get more golden. Lastly, I like to caramelize my onions over moderately low heat so that they cook most evenly. But if you’re in a hurry, you can bump up the heat a bit (after “sweating”) and speed the cooking along. Happy caramelizing!

Caramelized Onions Agrodolce

__________________________________

2 pounds yellow onions

3 tablespoons extra virgin olive oil

1 teaspoon kosher salt, more for seasoning

1 teaspoon balsamic vinegar

1 teaspoon honey

2 teaspoons coarsely chopped fresh thyme leaves

________________________________

Slice the ends off of the onions, cut them in half lengthwise, and peel them.  Put each half, cut-side down, on a cutting board. Slice each onion half lengthwise in ¼-inch wide slices in a “radial” fashion by angling your knife in towards the core as you slice from one side to the other (as if you were slicing along longitudinal lines towards the axis of the earth). When you get half-way through, lay the rest of the onion over on its side for easier slicing and continue to slice towards the core. Discard any very thin or small pieces of onion. Slice the remaining halves in the same way. (See radial-cut onions in photo in text, above right.)

In a 10-inch straight-sided skillet, heat the olive oil over medium-low heat. Add all the onions and 1 teaspoon kosher salt.  Stir well, cover, and cook, stirring only every few minutes and putting the lid back on quickly, until all the onions are limp, translucent, and just beginning to stick to the pan, 12 to 14 minutes.

Uncover and cook, stirring more and more frequently, until most of the onions are the color of a caramel candy (some will be deeper amber), about 30 minutes. (Turn heat to medium if onions are browning too slowly for you.) The onions will stick to the pan frequently and will leave browned bits on the bottom of the pan. You will need to “wash” those browned bits back into the onions by doing two things. First, use a wooden spoon to scrape the brown bits up. Secondly, when there is a lot of browning in one place in the pan, pull the pan off the heat and let the onions sit for a few seconds. They will release moisture which will help unstick the browned bits; you can then sweep the onions back and forth across the browned bits to reincorporate them.

Mix the balsamic vinegar with two teaspoons water. Turn the heat to low, add the balsamic mixture, stir, and remove the pan from the heat. Continue stirring to incorporate all of the browning in the pan and to evaporate the liquids. Add the honey and thyme, and stir well again. Taste and season with a little more salt if needed. Let the onions sit a minute or two longer and stir again to incorporate any remaining browned bits in the pan. Let cool and transfer to a storage bowl if not using right away. They will keep in the fridge for a week.

Yields 1.5 cups

Bitter Gets Sweet (I Swear!): A Recipe for Caramelizing Turnips In a Cast Iron Skillet

I know you are thinking I have lost my mind. Last week it was celery root; this week it’s turnips. “Can’t she write about something delicious—or something my family will actually eat?” I hear you asking. I’m sorry, but I just couldn’t pass up the chance to tell you about this—the absolutely most delicious way to cook turnips.

In fact, I’ve already written about this technique—slow-sautéing in a cast-iron skillet—once this week. I moonlight as an occasional blogger over at the Huffington Post’s Green Page, and this week I’ve been participating in their latest challenge—The Week of Eating In. At first I felt a little silly saying, “Sure, I’ll eat in for a week,” since I already cook and eat most of my meals at home. (Plus I just recently posted my opinion on why I think everyone else should cook at home more, too!) But then I realized I could help other people in the challenge by posting tasty ideas for cooking veggies at home.  And since I had just made my slow-sautéed turnips, potatoes, carrots, and onions for like the 12th time this winter, I figured I’d share that yummy idea on Huff Post.

Over here, I wanted to post the whole recipe (and a few more photos), and to also let you know that there are many more “slow-sautés” coming in my cookbook, Fast, Fresh, & Green. The recipes in the book were developed for a straight-sided stainless steel sauté pan, since I think more people own them than cast-iron pans. But cast-iron is so perfect for this kind of dish, because it captures and distributes heat so evenly, that I wanted you to be able to try it if you can. (You can get a pre-seasoned Lodge cast iron skillet for about $15.)

I start this kind of sauté by dicing (pretty small but not too fussy) whatever roots I’ve got on hand and piling them into the skillet with lots of olive oil and herb sprigs. The pan will be really crowded at first—that’s okay. As the vegetables cook, they brown and steam at the same time (and they shrink quite a bit). I always add some aromatic allium—onion, leeks, or shallots—about halfway through cooking for added moisture and flavor.

But the most important thing I do is to keep my ears tuned to the sizzling in the pan. It should be a steady, perky sizzle—but nothing too explosive sounding. The sizzle’s your cue to how fast the veggies are cooking. You want them to brown and steam at about the same rate, because your ultimate goal is deeply browned (yes, caramelized) vegetables that are cooked through, too. This is much easier than I’m making it sound. All you need to do is stir every once in awhile and maybe adjust the heat once or twice. The veggies will be done in about 35 to 40 minutes—but you’ll have plenty of time to make whatever else you’re having for dinner while they’re cooking. (By the way, for vegetarians, these sautés are hearty enough to plunk in the middle of the plate.)

Caramelized Turnips, Potatoes, & Carrots with Onions & Thyme

If you don’t have a cast iron pan, you can make this recipe in a 10-inch straight-sided sauté pan (stainless interior). The browning won’t be quite as even, and you might need to add a bit more oil, but the results are still very tasty.

___________________________________________________________

3 tablespoons extra-virgin olive oil, more if needed

½ pound purple-topped turnips, trimmed but not peeled, cut into ½-inch dice

½ pound Yukon Gold potatoes, unpeeled, cut into ½-inch dice

½ pound carrots, trimmed and peeled, cut into ½-inch dice

½ teaspoon kosher salt, more if needed

5 to 6 thyme sprigs

1 medium onion (about 5 ounces), cut into medium dice

___________________________________________________________

In a 10 or 11-inch cast iron skillet, heat the 3 tablespoons olive oil over medium-high heat. Add the turnips, potatoes, carrots, salt, and herb sprigs and stir and toss well to combine and to coat with the oil. (The pan will look crowded.) Reduce the heat to medium and cook, stirring and flipping occasionally with a metal spatula, for about 20 minutes. (Listen to the pan—you should hear a gentle sizzle, not a loud one. If the vegetables are browning too quickly, reduce the heat a bit to maintain that gentle sizzle. If they seem dry, add a bit more olive oil.) Add the diced onion and continue to cook, stirring and flipping with the spatula, until the vegetables are deeply browned and tender all the way through, about another 15 minutes. Remove the herb sprigs before serving. Taste and season with more salt if you like.

Serves 3 to 4