All posts by Susie Middleton

Pick Your Own Mint & Make a Refreshing Apple-Lime Spritzer

You meet the most interesting people. If you have a farm stand in your back yard, that is. The farm stand didn’t start out as close to the house as it is now, but there were a couple of little problems that forced our decision to move it down the driveway. On a positive note, now when people get out of their cars, they get a great view of the garden, and some even wander over to take a look at the chickens and Cocoa bunny. Also, since I am often outside working, I get to meet more of them now.
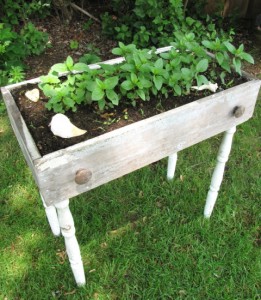
This past weekend I was chatting with a lady who’d just returned from a trip to Paris with her husband. She had her eye on our “pick your own mint” patch (which is actually mint planted in an old dresser drawer—very cute!), because she wanted to recreate a drink she had in Paris for her friends on the Vineyard. She told me it was a (non-alcoholic) combination of lime juice, apple juice, and mint, with lots of ice and a splash of soda. I didn’t get any more details, but the notion of making one of these stuck in my head because it sounded so refreshing, and I love any concoction that takes advantage of the lime-mint synchronicity.
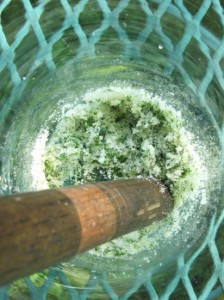
Back at my desk, I did a quick Google search of similar drinks and couldn’t find one just like that. But since the drink sounded a bit like a mojito to me, I decided to follow the method in a mojito recipe by Jen Armentrout over at Finecooking.com. I started out by using the handle of a wooden spoon to “muddle” the mint with a little bit of sugar (not too much since apple juice is sweet, also). I added a pretty generous amount of freshly squeezed lime juice, a little apple juice, lots of crushed ice and a bit of club soda. It was delicious and a dead-on thirst quencher. I drank the whole thing right up as I seem to be constantly thirsty from working outside. But I’ve no doubt you could sip on one, too (and add a splash of your favorite spirit), in the cool shade of a maple—or a palm—tree.

Apple-Lime-Mint Spritzer

For a printable recipe, click here.

I have a wonderful old wooden spoon that’s about 2 feet long (I think it must have been used for candy making) and has a thick handle perfect for “muddling” the sugar and mint. But look around your kitchen and you’ll likely find something (shorter!) that will work. To make crushed ice, put ice cubes in a zip-top bag and bang with a wooden meat mallet or other heavy object.

____________________________________

6 to 8 big peppermint or spearmint leaves, plus an extra sprig for garnish

1 tablespoon sugar

2 tablespoons fresh lime juice

1/4 cup apple juice

crushed ice

club soda

_____________________________________

Put the mint leaves and the sugar in a tall glass. Crush the mint leaves with the  handle of a wooden spoon until the mint is macerated and broken up. (The sugar will have a green tint.) Add the lime juice and stir well. Add the apple juice and a generous amount of crushed ice. Top off with club soda. (Start with a small amount of soda, taste and add more if you like.) Garnish with a mint sprig.

Serves one

Mustard Greens Are the New Baby Bok Choy – Really!

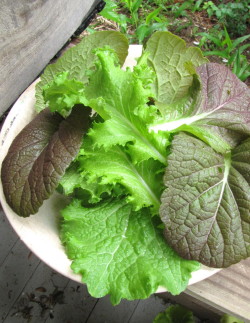
Who knew baby bok choy was such a star? It seems to be the most popular vegetable on the Island right now, and the little bit of it I planted in May is pretty much gone. I have another young patch coming along, but it prefers cool temps, so I’m afraid the weather might be too hot when it matures. In the meantime, while I wait for my next cooking green to get big enough to harvest (Swiss chard is close), I’m picking mustard greens to sell.

I’ve noticed that since I wrote “Mustard Greens” on the farm stand sign (instead of “Baby Bok Choy”), we’ve had fewer people pulling into the driveway. Well, harrumph! Doesn’t everybody know how tasty mustard greens are, too?! Okay, seriously, if I were to be honest I’d have to tell you that mustard greens are not as groovy as baby bok choy. For one thing, they don’t have that stand-up texture. But they are strangely delicious in a very arresting kind of way. If you like spicy mustard of any sort—and you’re looking for a powerhouse nutritional kick—give mustard greens a try. (They’re not only purported to lower cholesterol, but they contain unique cancer-fighting phytonutrients and lots of Vitamins A, C, and K.)

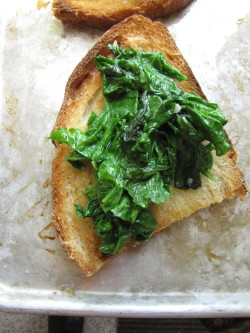
I especially like the young tender leaves I’m harvesting now because they don’t need par-boiling—just a quick turn in the sauté pan. Super quick and easy. Ginger and garlic both are natural partners for mustard greens, and not surprisingly, the spicy greens do really well with just a touch of something creamy to offset the zing. For me that creamy thing is often goat cheese. I’ve been making a really simple lunch/snack of toasted or grilled bread with sautéed mustard greens and a bit of warm goat cheese on the top (recipe below). I guess I have goat cheese on the brain these days, too.

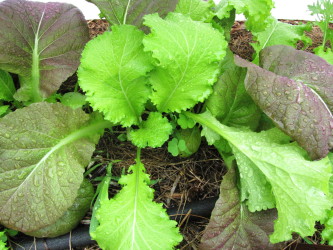
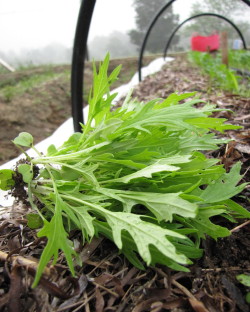
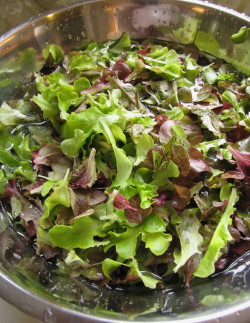
There’s one last reason why mustard greens are my heroes this spring. For some reason those wily flea beetles danced right past them on their way to the Tuscan Kale. (This was not good news for the kale, unfortunately.) Normally flea beetles feast on anything in the brassica family, including the milder mustard relatives, mizuna and tat soi (in the photo at right, top), that I put in my salad mixes. But they didn’t linger on the mustard greens, leaving them nice-looking enough to sell. Whew. The greens grow so quickly, too, that I’ve been able to harvest baby leaves for salad and come back the next day to find the rest of the leaves on the plant 6 inches tall–perfect for cooking. You could live on this stuff. Really.
Toast with Sautéed Mustard Greens and Warm Goat Cheese

This recipe is more like a thought-starter, so feel free to jiggle it around as you like. You probably have a favorite method for toasting or grilling good bread, too, so use it.  This makes a nice snack or light lunch for one person, but scale it up as much as you want to serve more, or turn it into a crostini for starters. Remove the tough stems from the mustard leaves before ripping them into smaller pieces. If you only have mature, large mustard greens, you would want to parboil them 3 to 4 minutes first and drain well before sautéing.
1 oval slice Artisan bread (about 6 or 7 inches long and cut 1/2-inch thick), cut into two pieces

extra-virgin olive oil

kosher salt

1/2 teaspoon minced garlic

2 to 3 ounces mustard greens, stems removed, leaves torn into small pieces (about 2 cups), washed and spun dry

2 tablespoons crumbled fresh goat cheese (or queso fresco or other cheese if you prefer)

Heat the oven broiler on high and arrange a rack 4 to 6 inches from the heating element. Put the bread on a baking tray or cookie sheet. Brush one side of the bread with a little olive oil, sprinkle with a little salt, and broil until lightly browned. Set the toast aside on the sheet tray. (You can lightly brown the other side, too, if you wish, though leaving the bread a little soft in the middle is nice.)
In a small skillet, heat 1 teaspoon olive oil over medium heat. Add the garlic and cook, stirring, just until softened and fragrant, about 30 seconds. Add the mustard leaves and a pinch of salt and cook, stirring, until wilted, about 1 minute. Remove from the heat.

Pile the mustard greens on each of the two bread pieces and crumble the goat cheese or other cheese on top. Place back under the broiler and cook just until the goat cheese is warmed and softened.

Serves 1

My Favorite Herb of all Time is Thyme

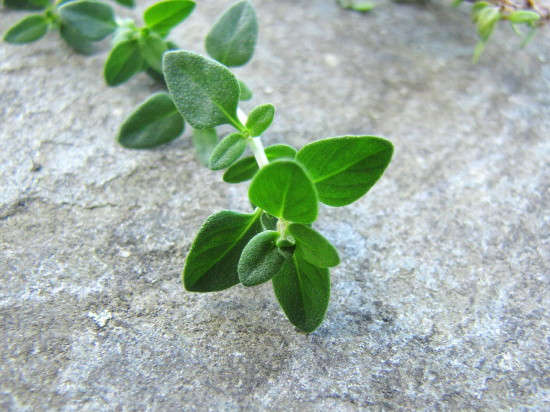
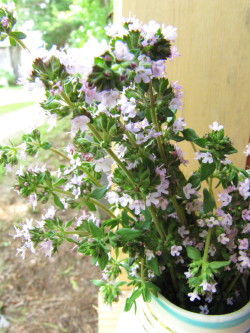
Sorry for the bad-pun headline, but I do love fresh thyme. Right about now I’m getting to use a lot of it, for two reasons. First, I’ve got several plants flourishing, both right outside the kitchen door and also along the edge of the vegetable garden. Secondly, I keep cutting bunches to sell at the farm stand, and no one buys it. So it goes. Herbs are not a huge seller, even in the high months, but I stubbornly put them out there, just in case. Secretly, I just like to look at the pretty little bunches arranged in cute cups. Thyme and all the rest of the herbs cut fresh from the garden last a remarkably long time compared to store-bought herbs. (And despite how pretty they look at room temperature in a little container, they will keep even longer in the fridge in a sealed zip-top bag. Dry them well before storing.)

My friends in the test kitchen at Fine Cooking magazine, where hundreds of my recipes have passed through, used to give me a hard time about the amount of fresh thyme I use in my recipes. Everyone groans when they see thyme on the ingredient list, because it means somebody has to pick all the little leaves off the stem. But it’s really not that big of a deal. (Libby actually likes to do it. I told her—in my version of Huck Finn getting Tom Sawyer to paint the picket fence—that it’s an important job for a sous chef.)

The easiest way to pick thyme is to slide two fingers down the stem (from flowering end backwards), stripping the leaves as you go. Usually this works pretty well, but it does depend on the variety of thyme. If you decide to grow your own, pick a variety at the nursery with relatively big leaves spaced far apart on the stem. I usually buy something labeled “common thyme” as opposed to the “English” thyme. There are lots of other varieties; lemon thyme always seems to grow quickly, and I love brushing my hand through it and smelling it in the garden, but it can be overpowering in the kitchen if not used judiciously (it’s good with fish and in chowders).

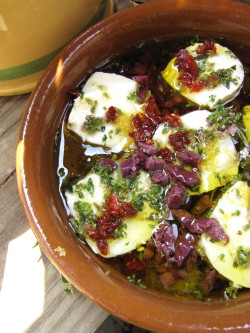
I use thyme (both the leaves and flowers) in vinaigrettes and herb butters, in fresh tomato sauces and pan sauces, with roasted potatoes and roast chicken, and in egg and pasta dishes, too. But a favorite simple destination for it is a marinated goat cheese appetizer I’ve been making for years. I sprinkle fresh thyme leaves, a little lemon zest, chopped sundried tomatoes and olives over medallions of fresh goat cheese, pour olive oil over them, and let marinate in the fridge for a few hours. I bring the whole thing back to room temperature before serving, and the creamy, herby, salty cheese makes a wonderful summer topping for crackers or crostini. It’s also a quick and easy dish to make for a party. Last night we were invited, along with a few other couples, to a wonderful bouillabaisse dinner at our friends Buck and Kay Goldstein’s open, airy house high on a hill in Chilmark. Buck and Kay have mastered the art of Zen entertaining (and Kay is an amazing cook), so while we arrived with goat cheese appetizer in hand, we left with contentment, full bellies, and the pleasure of having been in good company, too.

Marinated Goat Cheese with Fresh Thyme and Lemon

For a printable recipe, click here.

This is a great hors d’oeuvre to take to a party. Make it a few (or several) hours ahead, refrigerate it, and then let it warm up a bit before putting out with toasted baguette slices or crackers. After serving, there will probably be some olive oil left in the dish. Save it and drizzle it over grilled or toasted bread the next day.

_______________________________________

1 4-ounce log fresh goat cheese, sliced into 6 pieces

1 heaping tablespoon fresh thyme leaves and flowers, lightly chopped, plus a sprig or two for garnish

1 packed teaspoon fresh lemon zest

2 teaspoons finely chopped pitted black olives

2 teaspoons finely chopped sundried tomatoes

sea salt or kosher salt

½ cup extra virgin olive oil, more if necessary

Toasted crostini, baguette slices, or crackers for serving

_____________________________________________

Arrange the slices of goat cheese snugly in one layer in a small shallow dish. (I use a little straight-sided tapas dish for this, but a small gratin dish would work, too.)  Sprinkle the thyme, lemon zest, olives and sundried tomatoes over and around the cheese, and sprinkle the cheese with a little sea salt. Pour over the olive oil. It should just barely cover the cheese. Add more if necessary. Let the cheese marinate in the refrigerator for a few hours, and bring it to room temperature about 45 minutes before serving. Put the dish of cheese, the baguette slices or crackers, and a couple small knives out for serving.

Serves 6

The 6 a.m. Garden

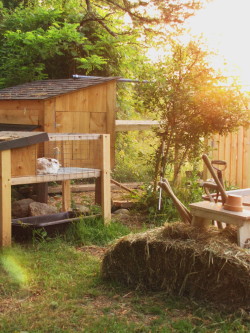
I am not a morning person—anybody who knows me well will tell you that. And yet I was up at 5:30 this morning and by 6 my coffee and I were outside. All the rest of the girls were up, too. Cocoa Bunny was enjoying the cool morning air, and I could hear the hens ruckus-ing inside the coop so I let them out into their yard. They came spilling down the ramp in a whirl of colorful feathers and a buzz of adolescent clucks and clicks. Martha hopped on to my leg while I crouched to position the food and water.

The real reason I beat Roy to the coffee (for once) is that yesterday I got dehydrated working for too long in the heat of the day. Stubborn me. Some things you have to learn over and over in life. Drink a lot of water. Take frequent breaks. Eat stuff. Despite quaffing a liter of water when I came inside at noon, I had a headache all afternoon.

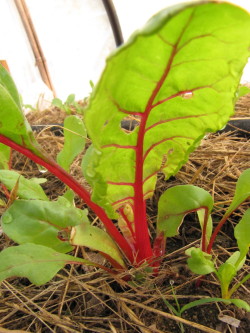
It wasn’t just the threat of the hot midday sun that woke me up early this morning. I have been fretting about most everything in the garden. I just spent two days transplanting 50 tomato plants, and they don’t look so pretty to me. The poor things have been moved around, dried out, and otherwise tortured for two months, and they should have been in the ground by now. There are any number of horrible deaths I have imagined for them, but I can’t bring myself to mention them. Plus, something is eating my basil and my Swiss chard (it looks like Swiss cheese), and despite the row cover, the flea beetles have reached the tat soi and mizuna, too. Sometimes I just wish my gardening IQ were more on par with my cooking IQ. I still have so much to learn about growing vegetables, and it takes years of experience to figure some of this stuff out.

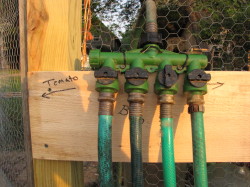
And I will admit that my Achilles heel is watering. I can’t for the life of me get on a consistent schedule of watering. This is mostly because I don’t (usually) get up early enough to do it when it should be done–in the morning. (And despite a cold and grey spring, we really haven’t  had much rain at all on our particular postage stamp.) Roy was kindly explaining to me yesterday that drenching the poor hot dry tomatoes with cold water in the middle of the day was probably not the best idea. Right. Got that. Thankfully, Roy helped solved one issue—the hideous tangle of hoses, drip hoses, and hose connectors at the garden gate—that has not been making the whole thing any easier. I moved the cute little wicker garden table (goodbye to the last hint of charming kitchen garden—we’re all about production, here) and Roy nailed up a board to hang all the hose connectors on (and labeled them with a sharpie!). We eliminated a couple of redundant hoses and streamlined the whole system. No excuses, now.

Getting out to work in the garden early this morning turned out to be both lovely and cheering. I looked around at everything in the morning dew and felt okay again. The potatoes are absolutely thriving—about to bloom. The onion bed is perky, the lettuces look lovely, all my bush beans have germinated, the peas are flowering, and my neat little rows of carrot seedlings are happy and green. (The tomatoes even looked relatively happy this morning.) My project this morning was planting Round Two of carrots and thinning Round One (I gave the thinnings to Cocoa Bunny, who was not happy about the approaching heat.) Then I spread hay on the last path that needed mulching and looked around in amazement – every single bed is planted! Now all we have to do is add on that extra bed for the squash seedlings….oh, and plant a new round of arugula…and…

Tip of the Week: Skewer Onions for the Grill with Turkey Lacers

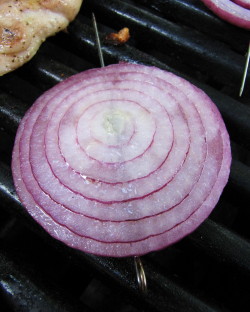
Yep, you guessed it. I’ve been spending so much time doing this (harvesting greens, left) that I haven’t had time to do much of that (cooking, right). Or to write a blog post this weekend. But I have been thinking of you, I promise. So I offer a good old tip I’ve used for years and that I called into quick action the other night for our dinner–using a turkey lacer to skewer onion slices for the grill. It’s that easy.

You can pick up a package of turkey lacers (basically mini-skewers) at any grocery store. Peel and cut a big red onion (or yellow or sweet) into 1/2-inch slices and poke the lacer through the center of the onion from side to side (so that you poke through every ring). Coat the slices with olive oil and salt and put on a medium-hot grill. Cook until there are nice grill marks on each side of the slice (about 5 to 7 minutes per side on my grill). And here’s one last tip: At this point the onions will be flavorful but not completely tender. Take them off the grill and wrap them briefly in aluminum foil, where they will steam a bit, finish cooking, and get soft and tender. Delicious. On steak. On salad. On whatever. Good emergency vegetable when the crisper drawer is empty!

For the Farm Stand, A Stir-Fried Baby Bok Choy Recipe

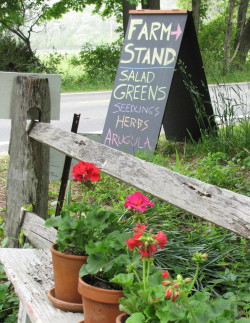
Guess I can safely say that our “soft” opening of the farm stand this weekend was more successful than the Spider Man Broadway previews. You might even cast it more in the vein of Field of Dreams, because, it seems, if you build a farm stand, they will come. At least if you put a big blackboard sign out by the side of the road, and that road happens to be one of the main routes Up-Island. And also, it doesn’t hurt if it’s a holiday weekend. And the sun is shining.

Yikes. Most people would be overjoyed at selling out on the first weekend. But I felt bad that we had run out of salad greens by Saturday afternoon. I just couldn’t harvest any more from my baby plants without endangering a steady  harvest in the weeks to come. So we took the sign off the road, and just left the tomato plants and seedlings out for anyone who happened to notice while driving by. Even without the sign, people spotted the farm stand and turned down the driveway.

So now I am of course ruminating on how we can expand the garden right away. This summer, not next summer. (Roy is rolling his eyes…but smiling, too.) It seems we have lucked into a great location. (Actually, it wasn’t luck. It was a gift from our dear friend Joannie Jenkinson, who actually spent part of her childhood in this house and introduced us to the owners. She got it in her head that we should live here, and I have to say she was on to something. Joannie, who is the animal control officer for West Tisbury and is out and about a lot, was, appropriately, our first customer Friday morning.)

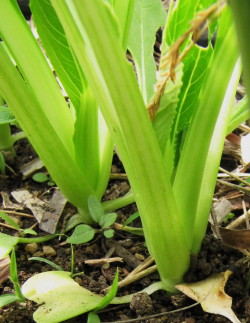
I think I may also have to learn vegetable-growing magic tricks to hurry some things along. Take my baby bok choy. I am crossing my fingers that it might be ready for the farm stand this coming weekend. (Judging by the photo at left you can see that this is probably wishful thinking.) So while I wait, I figured I’d work up a baby bok choy recipe to give away at the farm stand. (I’m hoping to have different appropriate recipes available every week. This week I put out the “pink and green” arugula and radish salad here.)

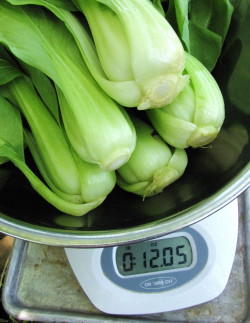
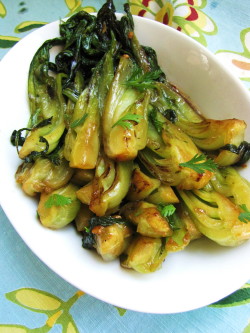
Fortunately, there is a wonderful farmer on the Island, Krishana Collins of Bluebird Farm, who specializes in baby bok choy. So if you live on the Vineyard, you will have much better luck finding hers (at Down Island Cronig’s before the farmers’ market opens in a few weeks) than mine (which is a tiny planting any way!). Her baby bok choy (top photo, in the scale) is gorgeous and delicious.  Yesterday, I picked up a half-dozen little heads (about 6 inches long and less than 2 inches wide) and stir-fried some for lunch. I did a variation on a recipe from Fast, Fresh & Green, and it couldn’t be simpler or more delicious. The complex nutty flavor of baby bok choy really deepens with browning (no surprise there) and pairs well with Asian seasonings. (I also like to brown-braise baby bok-choy, but I am still working on the perfect way to use it in a gratin. It’s also lovely raw in salads and slivered into noodle soups.) Unfortunately, when stir-fried, baby bok choy loses its beauty-queen looks and becomes more like the charming bad boy–appealing in a rustic kind of way, but definitely delicious.

Stir-Fried Baby Bok Choy

For a printable recipe, click here.

Try to choose baby bok choy that are all about the same size for this recipe. Depending on how little they are, you’ll need between four and six to get 3/4 pound.

_______________________________

4 to 6 baby bok choy (6 to 7 inches long, 1 1/2 to 2 inches wide), 12 ounces total

1 tablespoon soy sauce

1 tablespoon orange juice

1 teaspoon brown sugar

1/2 teaspoon sesame oil

1/8 teaspoon chili-garlic sauce

1/2 teaspoon cornstarch

2 tablespoons peanut oil

2 large garlic cloves, very thinly sliced crosswise

kosher salt

1 to 2 teaspoons chopped fresh cilantro (optional)

________________________________________

Cut the bok choy lengthwise into quarters if very small (2 ounces), and into six pieces if larger (3 ounces). (There’s no need to trim any of the stems.) Wash them well by swishing them in a bowl of tepid water, and spin them dry.

Set a serving dish on your counter. I like a white oval for this.

In a small bowl, combine the soy sauce, orange juice, brown sugar, sesame oil, chili-garlic sauce and whisk well. Add the cornstarch and whisk until dissolved.

In a large (12-inch) nonstick stir-fry pan, heat the peanut oil over medium heat. When the oil is hot (it will loosen up), add the garlic slices and the bok choy. Season with 1/4 teaspoon salt and turn the heat to high. Using tongs, toss the bok choy with the oil to coat and to distribute the garlic slices.

Cook, flipping the bok choy with tongs and spreading it out occasionally so that all the stems have some contact with the pan as they cook, and so that the garlic does not all gather on the bottom of the pan, until all of the bok choy stems are browned in parts (the leaves will be well-wilted and browned), 5 to 7 minutes. (If your stove runs very hot or the garlic is burning after the first few minutes, turn the heat down to medium-high.) Take the pan off the heat, pour the sauce into the pan, and stir immediately as it thickens up. Toss well and quickly transfer the vegetables, sauce and garlic to the serving platter. (The garlic will be very brown—some folks like it, some don’t, so push aside if you like!) Garnish with chopped fresh cilantro if desired.

Serves 2 to 3 as a side dish.

Cheap Thrills on the Farmette–Like Being a Kid All Over Again

We now have a pet turtle. Her name is Turtle. Yeah, well. Roy came home with Turtle the other day, claiming to have rescued her from the middle of the road. “I kept her because I thought Libby would like her.” Yeah, right. I said, “Libby?” And he laughed and admitted that he was just reliving his childhood. As it happens both he and Libby love turtles (and pretty much anything else creepy-crawly, including snakes and lizards). And one of the charming idiosyncracies of this property we live on is a series of old stone fish ponds in the woods. One is still holding water, so Roy is creating Turtle paradise over there. (Turtle is a large Painted Slider, by the way. She also happens to be female, so now with Ellie the Lovebird, Cocoa Bunny, and 8 hens–not to mention Libby and me–Roy is outnumbered here by females, 13 to 1! Tough luck.)

It’s funny though—this concept of reliving our childhoods. Because I seem to be doing exactly that here on the farmette. Or maybe it’s not so much reliving my childhood (I didn’t grow up on a farm), as it is trying to recapture that spirit of wonder and fun I had as a kid. I say trying, but it’s not really an effort—it comes easily around here.

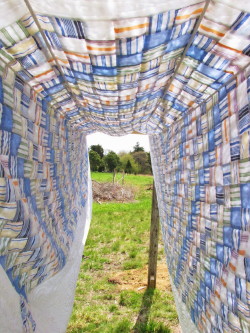
The other day I was hanging the laundry out on the line—an activity I adore for its Zen-like peacefulness—when I realized I had created a fort out of our quilt. I stood underneath it, looking out on the fields like a rabbit snugly in its hole, and remembered the forts my friends and I used to make by draping a blanket over the twin beds. I felt safe and happy and a little bit giddy.

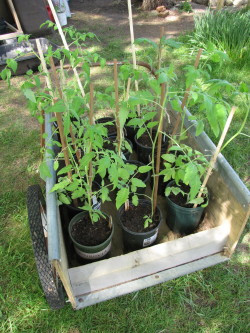
Then there’s the rope swing that Roy rigged up on a branch of the giant maple in the back yard. (This is the massive tree—more than 10 feet in diameter at its widest point—that gave us maple sap this winter and provides beautiful dappled shade for  all kinds of outdoor activity, like the tomato seedling repotting project I’ve been obsessed with.) Anyway, Libby loves the swing, of course. Especially when Dad pushes it higher than high. But Susie loves the swing too—loves arching back to look aloft at the world going by in a whirl of undulating maple branches against a smeary, smoky blue sky.

Little thrills are hiding everywhere. This weekend we found two blueberry bushes in bloom on the property—oh joy! There are wild raspberry canes all over the place. A little thatch of wild asparagus is poking up beneath the kitchen window. Barn swallows are building a nest in one of Roy’s work bags in the shop. And we think a turkey hen has built a nest in the maple grove.

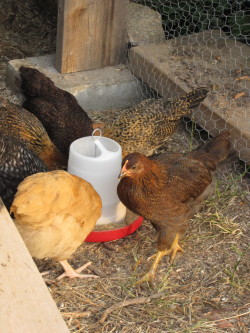
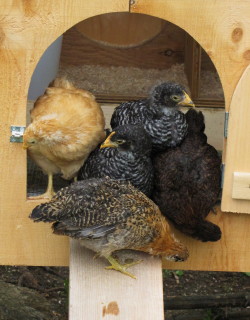
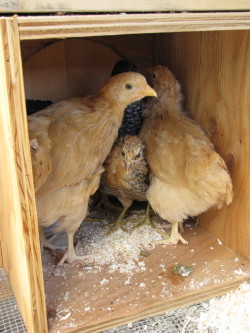
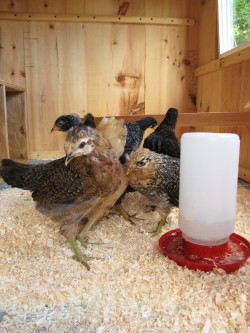
But I’d have to say that the chicks (now more like little hens) are still providing the biggest thrills around here. On Saturday—that rare warm and sparkly day we haven’t seem much of this spring—we moved them out to their permanent home, the chicken coop. Libby and I stood sentry at the coop door while Roy carried each hen from their brooder box in the mud room out to the coop. He started with Martha and Opti, the two Buff Orpingtons who are so big and so friendly that not only do they love to be picked up, but they will stand still to be petted. Perky, our nimble and self-confident Sicilian Buttercup, came next, followed by pudgy Miss Personality, Oreo. Sugar, Jelly Bean and Chippy are a bit skittish, so Roy brought them next to last. Bringing up the rear was our tiny Little Squawker (above), who still has some baby chick fuzz on her.

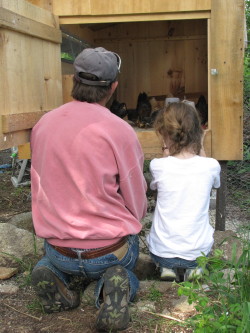
At first The Ladies (as Roy calls them) were overwhelmed by such a big space. They all huddled in one of the five nesting boxes, sticking close for comfort. But once they realized their food and water were out in the middle of the new space, they started to investigate and romp around. Pretty soon it was Party Central again, and everybody was hopping up on roosting bars and staring out the viewing window. (Staring in the viewing window is a fun way to keep an eye on them. I call it the peep show.)

The whole moving-day adventure was so much fun for all of us (not just the actual 8-year-old among us) that we felt the need to take silly pictures of ourselves at the coop door. And we celebrated by making grilled pizza Saturday night, with chef Libby at the controls.

Up until today we limited the chicks’ new world to the inside of the coop. But late this afternoon, Roy nailed up a ramp, opened the door, and welcomed them to come on down and explore their “yard” (an enclosed pen). This in itself was pretty hysterical as nobody wanted to go first. Predictably, Martha made the first tentative foray halfway down the ramp, and Roy carried her the rest of the way. Slowly the others crowded at the door, looking at Martha having fun in the grass. “What do we do?” they seemed to be saying to each other as they stared down the ramp. One by one, they finally all hopped down (except for Little Squawker, who kept her perch at the door). We didn’t stray too far, as we didn’t want to leave them alone just yet. But watching them is hardly a chore. It is totally fun and fascinating. More like a privilege, really.

This coming weekend holds another thrill—we’re planning to open our farm stand for the season. We’ll have a small selection of salad greens, arugula, radishes and seedlings if all goes as planned. I’m sure the weather won’t cooperate, we’ll be up all night washing greens, and there will be any number of bugaboos to work out. But I’m not worried. As I am prone to repeating—It’s all good.

For Stress-Free Veggie Grilling, Grab a Basket

Between rain drops this week, we’ve been firing up the grill a fair amount. My very favorite place to shop for veggies – the farm stand at Morning Glory Farm – finally opened up for the season. So I saddled up the Honda, headed down to Edgartown, and robbed the place. Not literally of course. But I did come away with a stash of valuable veggies, things that Morning Glory is already harvesting from their own fields and greenhouses. Among other items (like a tee shirt and a strawberry muffin), I nabbed baby bok choy, purple-tipped asparagus, scallions, and tiny mustard greens.

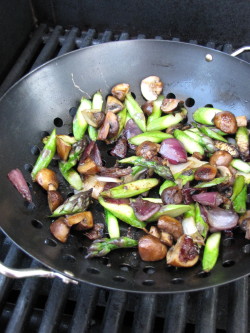
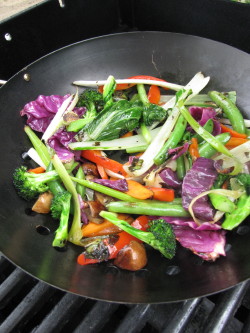
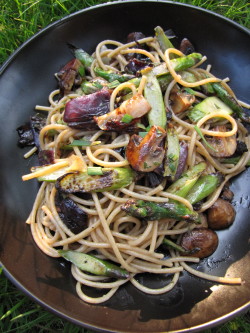
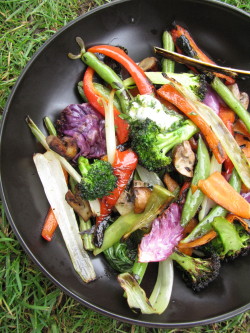
Since we’ve been working in the garden late every day, I’ve been dreaming up simple dinner ideas, too. (For a dozen weeknight ideas, read the blog I wrote for the Huffington Post this week.) I love grilled veggies, but sometimes prepping veggies for the grill, and then standing vigil over them patiently, is just a little more time than even I’m willing to give. So this week I grabbed my grill basket to make life easier. And I wound up improvising a number of different veggie dishes, using both my Morning Glory haul and the contents of my refrigerator veggie bin. (Just two samples–in the basket above, and finished, below.)

Grill baskets are inherently destructible. They won’t last forever, so don’t bother spending a lot of money on one. Just buy one—you won’t be sorry. (Mine is a particularly cheap, lightweight one that I picked up at a housewares store. But this new stainless steel one from Weber looks like a good bet.) Basically, using a grill basket is like stir-frying on the grill. But better. Because you don’t have to pay close attention. Stirring every three or four minutes, as opposed to every 30 seconds, is just fine. As long as you follow a few guidelines, you can cook practically any combination of your favorite veggies in about 10 minutes of mostly hands-off time.

Here are a few tips for cooking veggies in a grill basket:

1. Choose a combination of veggies that are loosely similar in density and moisture content. Broccoli, cauliflower, carrots, sugar snap peas, young beans, bok choy, broccoli raab are all fine. (Yeah, I’m defining density very loosely here). Don’t use potatoes or roots other than carrots here. It’s also fine to throw in a hearty leafy green like cabbage or radicchio—delicious if you don’t mind a few charred edges. But don’t use delicate greens like spinach here unless you toss the leaves in at the end of cooking.

2. Cut all those veggies into pieces about the same size. Then augment them with at least some peppers, onions or mushrooms—aromatic veggies that give off moisture as they cook. The aromatics not only spread flavor around but they help all the other veggies cook, too.

3. Estimate how many veggies you’ll need by putting the raw veg into the (cool) basket. Mine feels fullish with 3 to 4 cups veggies. You want your basket to be slightly overcrowded. With the grill lid-down (and only occasional stirring), the indirect (oven-like) heat of the grill, along with the moisture the crowded veggies will give off to each other, will help cook the veggies cook through while they brown.

4. Be sure the veggies are thoroughly (but not excessively) coated with oil. You need the oil to draw the heat in and cook the veggies. Season with kosher salt, too.

5. Preheat the grill with the grill basket in it for 5 to 10 minutes. Cook over medium heat (unless your grill is really old and slow—then medium-high.) The veggies are done when they are all limp, tender (some will be crisp-tender), and gently browned in places.

6. When the veggies come off the grill, you can do almost anything with them. We like to toss them with a compound butter (fresh herbs, citrus zest, salt), which is quick and easy to make. Then sometimes we take it a step further and toss the seasoned veg with whole wheat spaghetti or another pasta and call it dinner (or a big part of dinner). If you like the compound butter idea, I’ve included a formula below for making one. You might not use the whole batch on the veggies; use any extra with your eggs in the morning or on a steak tomorrow night.

Compound Herb Butter: In a small bowl, combine 2 tablespoons well-softened butter with 1/2 tsp. citrus zest, 1/8 teaspoon kosher salt, 1 1/2 teaspoons finely chopped fresh tender herbs (chives, mint, parsley, cilantro, basil), and 1 teaspoon honey or maple syrup (optional). Mash with a wooden spoon until well-combined. Store tightly covered in the fridge for up to 3 or 4 days.

Building a Garden, One Board at a Time

Basically, all I do these days is stand around and take pictures of Roy working. No, I’m kidding. But seriously, there’s been much to do around here lately that involves a table saw and a nail gun. I am not too handy with either of these things.

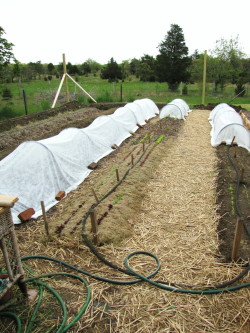
Fortunately I am fluent in untangling and reconnecting drip hoses, unfurling rolls of Remay (row cover) and draping them over seedlings, jamming PVC pipes in the ground (our “hoops” for the row cover) and securing the fabric with giant pins and heavy rocks. Also, I am the one who gets down on hand and knee to weed and thin the little lettuce and radish seedlings and painstakingly arrange grass clippings and seaweed mulch around these babies before the drip hoses and row cover go down.

I’m bringing all this up to make myself look good, of course, in the face of Builder Boy’s many smart-looking contributions to the farm-ette this month. Well, okay, I’m kidding again. The point I’m really trying to make is about infrastructure: If you want to get an ambitious garden going in a new location, you will probably have to (or want to) build all kinds of stuff that you’d never thought about—the garden enclosure (corner posts, deer fencing, gate, etc.) being only the start.

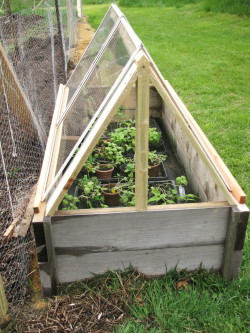
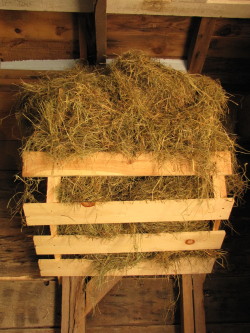
In the past few weeks, Roy’s built a raised bed for the carrots, begun building the actual farm stand for the veggies, rebuilt and expanded last year’s cold frame, expanded the brooder box for the chicks (now small hens), reconfigured the seedling shelves (again), built a small hay mow in the barn, and done more work on the chicken coop. And together we’ve been working out the watering system and continuing to dig beds, remove grass and rocks, improve soil, thin, mulch, and plant.

It’s ironic that even with all this work on the infrastructure, the garden doesn’t yet look terribly pretty or impressive right now. Mid-May, after all, is an awkward time in a New England production garden. All those hoses and row-cover and piles of rocks and dirt everywhere are not so sexy. I notice the expectant looks on people’s faces when they stop by to see the garden. Where is the romance, the lush greenery, the color? (Still weeks away, I’m afraid). It’s not like the neighborhood nursery, so verdant with all those hot-house jumpstarts. To save money, we start everything from seed around here. (Next year, a hoop house is top of the wish list. More room and more light for starting seedlings.)

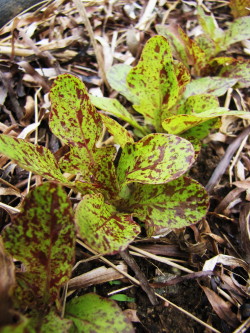
And this year, it’s been so cold and dreary that many seeds in the garden have been slow to germinate. Only in the last few days have my carrots surfaced and my lettuce begun to look like it means business. The good news is that the new lettuce varieties are spectacular. I’m already in love with the Speckled Amish (left) and the Flashy Green Buttercrunch. Also, despite the cold, I think we’re on track to harvest arugula, radishes, and a bit of lettuce for Memorial Day Weekend visitors.

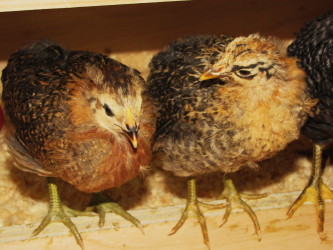
Right now, it’s an awkward time inside, too. The chicks are huge! They have most of their feathers now–and a new-found sense of adventure. When they’re not trying to fly the coop (literally, when I’m cleaning it), they’re chasing each other around, knocking their water dish over, or squeezing each other on and off the roost. If we can just get through the rain and the cold of this week, they can move outside to the coop this weekend. And the overgrown, leggy tomato seedlings under the grow lights are dying to get some fresh air and direct sunlight, too.

I know, soon enough I’ll be complaining about the heat and the weeding, about washing all that lettuce and picking all those green beans every morning. But right now I’m just impatient for nature to do its thing. We’re holding up our end of the bargain, after all.

Back Door Gifts and Cinnamon-Rhubarb Muffins

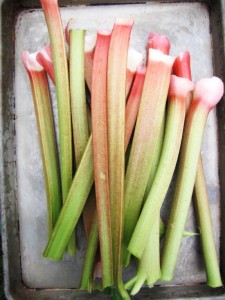
A pile of freshly cut rhubarb stalks appeared at our back door last week, courtesy of our neighbor Ralph. This is one of the strange and wonderful things about living on the Vineyard: People are in the habit of sharing…without much fuss or fanfare. Stuff just shows up, unbidden but much appreciated. In the short time we’ve been living in the farmhouse, we’ve been the grateful recipients of beach plum jelly, wild cherry jam, honey, eggs, lobsters, codfish, sweet potatoes, pickles, warm bread and kale soup, to name a few things.

I was particularly excited to see those beautiful rhubarb stalks, since I won’t be harvesting any this year from the new plant I plopped in the ground a few weeks ago at the southeast corner of the garden. As soon as I got the plant, it immediately sent up its monstrous flower stalk. The flower is fascinating (see photo), but after admiring it for a while, I lopped it off, hoping to return the plant’s energy to its stalks. Still, it’s a baby plant and I won’t be cooking from it this year.

I knew right away what I wanted to make with the rhubarb gift—a favorite Fine Cooking recipe from years ago. It’s a fabulously tender muffin from award-winning North Carolina baker Karen Barker. The tart little rhubarb bits melt into these light coffee-cake-like treats, which are topped with cinnamon sugar. The batter has sour cream, melted butter, cinnamon, and vanilla in it, and it comes together really easily. Twenty minutes in the oven and nirvana. Roy was home from work cutting and pounding out a piece of copper in his shop when the muffins came out of the oven. So I stopped snapping photos long enough to get a few warm muffins out to him. He likes anything with cinnamon sugar on it, but especially if it’s straight out of the oven.

I had enough rhubarb left over to mess around again with a strawberry-rhubarb compote I’ve been tinkering with. I’ve seen a lot of blog posts lately about roasted strawberries (something we also did at Fine Cooking years ago!) and was hoping I could make an oven–roasted compote with both rhubarb and strawberries that would be a bit roasty-flavored and perhaps would keep the rhubarb together better than a stovetop version. I won’t bore you with my experiments (which included some ghastly rhubarb “chips!”) but I will give you the parameters (below) for the compote as it stands now, because it’s an incredibly easy, versatile, seasonal condiment. I use it most often in my favorite treat—yogurt and granola parfaits—but I also put it in smoothies (with frozen bananas) and on pancakes. And of course it would be great on vanilla ice cream.

I’ve resigned myself to a syrupy, soft-fruit dessert-topping-ish kind of compote, and this texture is just a-okay with me. What I’m not quite happy with yet is the sweet-tart flavor balance. My first version wasn’t quite sweet enough and the second version was too sweet. But just futzing with the sweetness won’t necessarily fix this, because rhubarb has a unique tartness that doesn’t really get mitigated by more sweet. Sweet flavors can hang out with rhubarb, but not knock it back altogether. Too much sweet and you just get cloying. Right now I also have a bit of balsamic vinegar (great with strawberries) and orange juice in this, and I’m thinking to knock those back even more and switch out more of the plain sugar for more maple syrup. (I’m wondering about adding vanilla, too?) But since I probably won’t get to the next version any time soon, I’m leaving the tweaks up to you. (I don’t usually offer experiments on the blog—I like to give you finished recipes, but something like this really does involve a measure of personal taste!) In the directions following, I’m suggesting a middle road on the maple and sugar and a little less balsamic then my last batch.

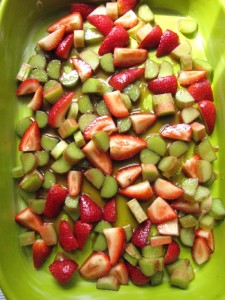
Strawberry-Rhubarb Compote: Heat the oven to 425 degrees and butter a 3-quart baking dish. Slice 8 ounces of rhubarb into 1/2-inch pieces (a scant 2 cups), and quarter or halve about 10 ounces of (organic or local) strawberries (2 cups). Put them in a mixing bowl with 2 to 3 tablespoons sugar, 3 tablespoons maple syrup, 2 tablespoons orange juice, and 1/2 teaspoon balsamic vinegar. Sprinkle with a little salt, toss well, and scrape and pour out into the baking dish. Spread in one layer. Bake for 20 minutes, stir gently with a silicone spoon, and continue baking until the liquids are syrupy (but not too reduced or they will burn), about another 6 to 10 minutes. Let cool in the pan, transfer to a glass or ceramic container and keep in the fridge for a week or so. This makes about 1 cup compote.

P.S. I seem to have a thing for saucy rhubarb recipes–see my chutney recipe I posted last spring. (This year I gave in to the classic strawberry pairing!)