All posts by Susie Middleton

What Fingerling Potatoes Want: Something Saucy

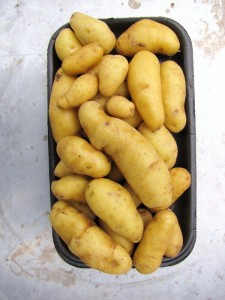
If you listen to conventional wisdom, you might think roasting is the only way to go when it comes to cooking fingerling potatoes. Now, I am usually the poster-girl for roasting (potatoes or anything else), and I’d like not to be burned at the stake for potato heresy, but I think fingerling potatoes are usually better braised or simmered, or, yes, boiled—any method that involves a little liquid.

I hate to generalize, because there are, in fact, many different varieties of fingerling potatoes. Fingerlings themselves aren’t a variety, but more of a type of potato, defined by their size and shape—small, knobby, and elongated. Their flavor is usually rich and concentrated, but the color of their skin and flesh, as well as their starch content, can vary quite a bit from variety to variety. (Popular varieties include Russian Banana, Purple Peruvian, Ruby Crescent, and French Fingerling.)

The varying starch level is why some fingerlings lean towards being fluffy and dry (like a Russet potato), while others have creamy or waxy flesh (like a Red Bliss potato).  Unless you cook with the same variety a lot, it’s hard to always know exactly what you’re getting at the store (or the farmers’ market) or how it will behave in the dry heat of the oven. While I’ve had bad experiences with Russian Bananas over-drying when roasted, I’ve never had a fingerling that wasn’t perfectly delicious when cooked with a wet-heat method.  

That’s why I love a stovetop braise for fingerlings. First you brown the halved potatoes cut-side down in a little butter and olive oil so that they get that nice caramel color and flavor. Then you pour a bit of chicken broth over them and cover the pan (a straight-sided saute pan works best here). As the potatoes finish cooking in the broth, the broth simmers down to a bit of a glazey consistency. The recipe I’ve included here uses sage and garlic to add more flavor, but fingerlings cooked this way are delicious even without the extras.

And if you love fingerlings so much that you need more ideas for using them, see my post on more delicious ideas for using fingerlings.

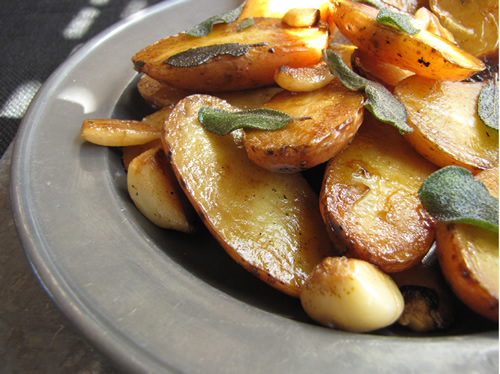
Braised Fingerlings with Crispy Sage & Tender Garlic

For this dish, choose fingerlings that are all about the same thickness (length doesn’t matter) so that they will all cook in about the same amount of time.

Serves 3

—————————————————————————————–

1 tablespoon unsalted butter
1 tablespoon extra-virgin olive oil
25 large sage leaves
8 garlic cloves, lightly smashed and peeled
12 ounces (about six to eight) fingerling potatoes, cut in half lengthwise
½ teaspoon kosher salt, more for seasoning
½ cup low-sodium chicken broth
½ to 1 teaspoon sherry or malt vinegar

—————————————————————————————–

In a large (10-inch) straight-sided skillet with a lid, heat the butter and olive oil over medium-high heat. When the butter has melted and is foaming, add the sage leaves and cook, stirring a bit, until the sage leaves have turned color and are crispy and the butter is golden brown, about 2 minutes. (Watch carefully so that they don’t burn; they will stiffen and curl and turn grey as they crisp up.) Remove the pan from the heat and transfer the sage leaves with a fork or tongs to a plate.

Put the pan back over medium to medium-high heat and immediately add the garlic and potatoes. Season them with the ½ teaspoon salt and toss them in the butter/oil mixture. Arrange the potatoes cut side down, cover the pan loosely with the lid (leaving the lid a bit askew for some steam to escape), and cook until the bottoms of the potatoes are nicely browned, 8 to 10 minutes. (Move the pan around occasionally for even browning.)

Add the chicken broth and cover with the lid partially askew again. Bring the broth to a gentle simmer and cook until the broth has reduced to just a tablespoon or two, about 10 to 15 minutes. Remove the lid, turn the heat off, and transfer the potatoes and garlic to a serving dish. Add the vinegar to the pan and stir and scrape with a wooden spoon to get up any browned bits. Immediately pour the pan drippings over the potatoes and garlic and garnish with the crispy sage leaves. Sprinkle a little more kosher salt over all.

More Delicious Ways to Cook Fingerling Potatoes

A while back I posted my favorite way to cook fingerling potatoes–the stovetop braise–and a yummy sample recipe, Braised Fingerlings with Crispy Sage and Tender Garlic. But the reality is, thanks to my CSA at Whippoorwill Farm here on Martha’s Vineyard, I was swamped with fingerling potatoes last summer and fall, so happily, I have a few other suggestions for using them. I figured I’d pass them on to you here, as many are good options for winter cooking, too.

  • Boiled fingerlings hold their shape really well, so use them (cut in half or other pieces) in warm salads (like with frisee, bacon, and a poached egg or a garlic crostini) or other composed salads like a grilled tuna or salmon Niçoise.
  • Cut into a few chunks and boiled, fingerlings are then perfect for “crushing” or smashing with roasted garlic and a bit of cream (or sour cream), butter, and chives.  These smashed potatoes make a perfect bed for beef stew.
  • Make a quick and delicious fish chowder by starting with sautéed leeks, simmering chopped fingerlings in the same pot, adding corn kernels and pieces of cod or haddock, and finishing with chopped fresh dill, a dash of cream, a squeeze of lemon, and lots of fresh pepper.
  • If you like the hands-off cooking of oven-roasting, don’t despair. You can oven-braise fingerlings by laying them flat, cut-side down, in an oiled Pyrex baking dish. Season with salt, dot with a few dabs of butter, and pour enough chicken broth in the pan to cover the potatoes. Cover with aluminum foil and cook (at about 375°F) until the potatoes are almost tender. Remove the foil and cook until the broth has reduced almost completely and the potatoes are browned. There’ll be some nice glazy stuff on the bottom of the pan.
  • Dice fingerlings and sauté slowly in lots of oil in a cast iron skillet until browned all around and tender through. Season with lots of salt. Voila, crispy “fried” fingerlings. Add sautéed onions and crush a bit for a more hash-like dish.
  • Most fingerlings have such outstanding “potato” flavor (nutty, earthy, and rich), that they’re perfect in cold potato salads, too. Try one with fresh peas, mint, and a light lemony-mayonnaise and yogurt mix in springtime.
  • The firm texture of cooked fingerlings makes them perfect for simple Indian curries, too. Add shrimp, peas, and chopped fresh cilantro to make dinner.

Walk-Away Beets: Recipe for Diversion

I work at home. Translation: I love a distraction. The kitchen? Definitely the number one destination for diversion.  Even on days when recipe developing is not on my to-do list, I like to wander in to my favorite room and concoct a little something every few hours. Something quick, something that might work for our dinner later.  Even better, something that might last for a few days.

Roasted baby beets (so ruby-red pretty) are the ultimate in quick-to-make,  slow-to-cook vegetable condiments.  By vegetable condiments (no, I haven’t lost my mind) I mean stuff like caramelized onions and roasted tomatoes—things that are so great to have in the fridge for tossing in salads, onto pizzas, into tacos—that sort of thing. Okay, so maybe roasted beet wedges are not quite as versatile as roasted tomatoes, but they do juicy-up a salad and give you a great excuse to warm up goat cheese or to toast pecans (just add arugula and lemon vinaigrette). Plus, maybe you’ve got excess CSA-beet syndrome like me. Remarkably, mine (wrapped in a damp cloth and stored in a zip-top bag) have kept for months in the veg drawer of my fridge.

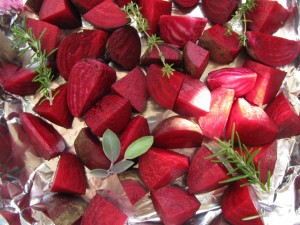
But today, icy-blue cold as it is outside, it just seemed like a good opportunity to turn on the oven. I knew I wouldn’t feel too guilty spending the 10 minutes it takes to quarter a pound of baby beets (no peeling necessary–that skin is perfectly edible when roasted), toss them with a little olive oil and salt, throw in a few herb sprigs, and wrap them up in a tidy little aluminum foil packet.  Inside the foil, they steam-roast (getting both tender and caramelized), and you don’t need to do much more than pop one in your mouth after they come out of the oven.

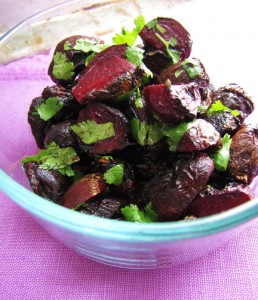
There is one extra flavor step you can take. This morning, I let mine cool and then dunked them in a marinade-ish dressing of orange and lemon juices, a little vinegar and maple syrup, and a bit of chopped fresh mint. They’ll loll around in that dressing for days, soaking up flavor in a bowl in the fridge, making themselves coyly available to the nearest taker.


Walk-Away Beets

 Serves 4

1 pound baby beets, washed but not peeled, ends trimmed, halved or quartered to all be about equal-sized wedges

2 tablespoons extra-virgin olive oil

½ teaspoon kosher salt

6 tiny sprigs of thyme, short branches of rosemary, or little clusters of sage

For the marinade:

2 teaspoons fresh lemon juice

2 teaspoons fresh orange juice

¼ teaspoon white balsamic vinegar

¼ teaspoon maple syrup or honey

kosher salt

2 teaspoons roughly chopped mint, cilantro, basil, parsley or a combination

Heat the oven to 375 degrees. Line a small roasting pan with aluminum foil, and measure out two other large pieces and arrange them in a “+” inside the pan. Toss the beet wedges, the olive oil, the salt, and the herb sprigs together in a mixing bowl. Arrange the contents of the mixing bowl in the center of the intersection of the two pieces of foil, and fold the foil up to form a tighly wrapped package.

Roast the beets for 1 ½ hours. Carefully avoiding the steam, lift the foil away to peek at the beets and to skewer one or two with the tip of a paring knife. If the knife slides in easily (and the bottoms of the beets are wrinkled and brown), they’re done. If not (and they often need more time), reseal the foil package and continue cooking for 20 to 30 minutes more until tender.

Let the beets cool a bit, toss all the marinade ingredients together, combine the marinade and beets, and stow in fridge for future snacks. Or add to your dinner salad of arugula, mache, or mixed greens with toasted nuts.

Playing Dress-Up: Roasted Brussels Sprouts Get Spiffy with Tangy Brown Butter


By now, you’ve probably drunk the koolaid and are indoctrinated into the magical powers of roasted brussels sprouts. This  ordinarily whiffy and less-than-taste-bud-pleasing vegetable gets a new life from the alchemy of the oven. The roasted result is nutty-delicious, the texture of the leaves fluttery-flaky-crispy, and the possibilities for seasoning endless. And shoot, cooking them is so damn easy. Maybe too easy–sometimes it’s tempting to forget that there are pitfalls to roasting brussels sprouts. Number one: They can dry out. To avoid this, cut your sprouts in half (not in quarters), and roast them cut-side down. This allows the bottoms (or cut-sides) to get caramelized, but also keeps moisture from escaping. Normally, I like to spread veggies out when roasting, but a little coziness is okay when roasting sprouts. All that togetherness means they steam a bit while roasting.  I even use a pyrex baking pan sometimes, instead of my usual roasting favorite–the heavy-duty sheet pan.

Lastly, don’t forget the flavor boosts. You can add onions or shallots or hearty herbs to the roasting pan, but lately I’m liking the option of adding flavor after the sprouts are cooked. I make a brown butter and spike it with lemon or lime and maple or honey….some fresh herbs, and definitely nuts. Nuts. Nuts. Nuts. No flavor pairs as well with roasted brussels sprouts as toasted nuts–especially hazelnuts and pecans. (If you don’t like nuts, no worries, though. Spiked brown butter is just fine.) Brown butter is easy to make; you simply melt butter until the milk solids begin to brown. Keep an eye on things though, as the brown butter will quickly darken and will eventually burn if ignored.

For this recipe, choose smaller sprouts, and beware those monstrous mini-cabbages masquerading as sprouts in the grocery store (not sure where they come from). The smaller ones will cook more evenly throughout.

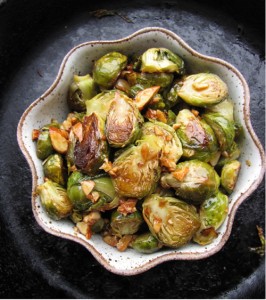
Roasted Brussels Sprouts with Nutty Lemon-Maple Brown Butter

Serves 2 to 3

——————————————————————————–

2 tablespoons unsalted butter
10 ounces small Brussels sprouts, cut in half
1 tablespoon extra-virgin olive oil
½ teaspoon kosher salt
2 tablespoons coarsely chopped pecans, walnuts, or hazelnuts
1 tablespoon maple syrup
1/2 teaspoon lemon juice

——————————————————————————–

Heat the oven to 400°F. Melt 1 tablespoon of the butter in the microwave or in a small pan on the stovetop. Toss the Brussels sprouts with the melted butter, the olive oil, and the kosher salt, and spread them in one layer, cut-side down, in a heavy-duty baking pan or casserole dish (Pyrex is fine).

Roast the sprouts until they are deeply browned on the bottom and tender when poked with a paring knife, about 25 minutes.

Meanwhile, heat the remaining tablespoon of butter with the chopped nuts in a small saucepan over medium heat. Stir and watch carefully until the nuts and the butter turn a light golden brown. Remove from the heat, pour in the maple syrup and lemon juice (the syrup will immediately boil and reduce), and scrape out into a heat-proof dish (to prevent further cooking). The mixture will be syrupy.

Pour and scrape the nut-butter-syrup over the roasted sprouts, toss well, and serve warm.

The True Cost—and Reward—of Fresh Food: Time Well Spent

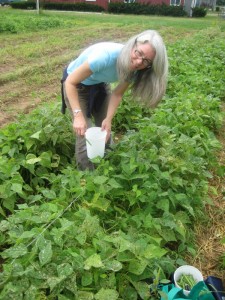
The hour I spend picking green beans, sunflowers, and cherry tomatoes at my CSA (Community Supported Agriculture) is the most blissful hour of the week. I usually arrive at the farm around noontime on Tuesdays. The sun is high and hot, and the little ache in the small of my back as I crouch low to hunt for beans reminds me that I’m not in the greatest shape. Some days, as I trek back to the farm stand to collect the rest of my share, my boots squish-squish through deep muddy trenches left behind after a recent deluge. Back home, I find my jeans caked with dirt, pollen, and grass stains. I have Humid Hair, stupidly unbehaving. I am happy.

I unpack my treasures and focus for another hour on washing greens, arranging flowers, rearranging the refrigerator, hauling stems and trimmings to the compost pile. Work like this is so engrossing that it is impossible to entertain the usual distracting conversations in my head. I relax without knowing it. Beans are piling up, so I decide to “put some up” – the expression my grandmother used for freezing vegetables for the winter. It has taken me 47 years and a mid-life course-change to do something she did every summer of her adult life.  I put the beans in boiling water for 2 minutes, transfer them to an ice bath, let them dry, spread them out on sheet pans to freeze, and pack them away in freezer bags.

I know I won’t be able to eat those ripe tomatoes fast enough, either, so I decide to roast them, long and slow and drenched in olive oil. After only a few minutes of prep, the tomatoes take care of themselves while I get back to work at my computer. In a few hours, what emerges from the oven is something so deeply caramelized, so unctuous in texture, and so beautiful (in a decidedly rustic way), that it is hard not to eat them all instead of popping them in the freezer. (Check out my recipe for roasted tomatoes on finecooking.com.)

My CSA experience has been so pleasurable, that—typical me—I’ve lately been wanting the whole world to get in on it, too.  (Find a CSA near you.) Why not? The usual argument against sustainable food is that it costs too much; but for once, I get to poke a little tiny hole in that argument. My CSA share (which I pay directly to the farmer before the season gets going so he has operating money upfront) is a bargain. I opted for a small share for the full season – $465 for 24 weeks – which averages out to a little more than $19. (If I had opted for just a 10-week share, it would have been about $25).

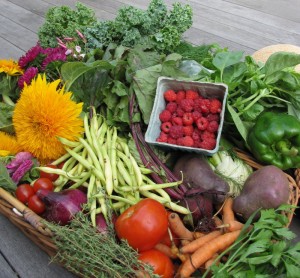
Last week, this is what I got in my small share:  ¾ pound potatoes, ¾ pound baby carrots, ¾ pound tomatoes, ½ pound red onions, ½ pound green beans, ½ pint raspberries, 4 beets, 1 green pepper, 20 cherry tomatoes, 1 fennel bulb, 10 kale leaves, 1 large bunch fresh basil (with roots), 1 small bunch thyme and parsley, 1 head lettuce, 1 cantaloupe, ½ bag mixed salad greens. Plus: 6 sunflowers, and 1 large bunch mixed flowers.

Just for kicks, I priced out this same list of ingredients at a national chain grocery store. Even though the produce looked so dismal that it could have been picked in the last millennium, the total still wound up being more than the CSA: $30, without the flowers. And you can bet very little of that $30 (unlike all your CSA dollars) is going directly to farmers.

I know this is just one needle-in-the-haystack example, that local and organic food is still generally more expensive than conventionally grown food. (Expensive, that is, dollar-wise, though much more economical in the long run when compared to the health, safety, waste, and fuel costs associated with “cheap” food. But for the sake of argument, what if it weren’t all about money? What’s the impediment? Scrolling back up to the top of this blog, you can see the answer in black and white: Time and convenience. Joining a CSA is a commitment, and a bit inconvenient.  I probably spend two to three hours every Tuesday gathering, washing, and storing vegetables. Sometimes I spend more time than that preserving food I know I won’t be able to eat in the week. And then, of course, I’m committed to cooking dinner at home most nights—dinner that always has fresh vegetables in it. But, ironically, those hours I spend and those meals I prepare are also the relaxing, delicious, and gratifying rewards that make my life better, simpler, sweeter. Without making the commitment, I might never have known.

This post originally appeared on The Huffington Post Green page, on September 3, 2009.