Tag Archives: Lemons

In the Winter Kitchen: Grains, Greens, Citrus & Sunlight

cit 4My pal Barney and I have been in the Laboratory all morning, mad-sciencing up creations to satisfy my winter cravings. For some reason, I am fixated on dark green vegetables, grains of all kinds, and citrus in every color. Plus, crunchy stuff. (My new love is roasted chickpeas). And then, I am putting them altogether for lunches and dinner. (My other new fixation is cooking grains ahead.)

DSC_0294

So first Barney and I had a nice cup of coffee.

DSC_0303

Then we snacked on the roasted chickpeas I made yesterday. Honestly, these are better fresh out of the oven, but they do keep okay for a day or two.

DSC_0063

Here’s how you make them: Rinse, drain, and thoroughly dry a can of chickpeas. Toss with enough of a neutral oil  (I like grapeseed) to coat well and season with about ½ teaspoon kosher salt. Spread on a parchment-lined baking sheet and roast at 400°F until browned and shrunken, 30 to 35 minutes.

DSC_0250

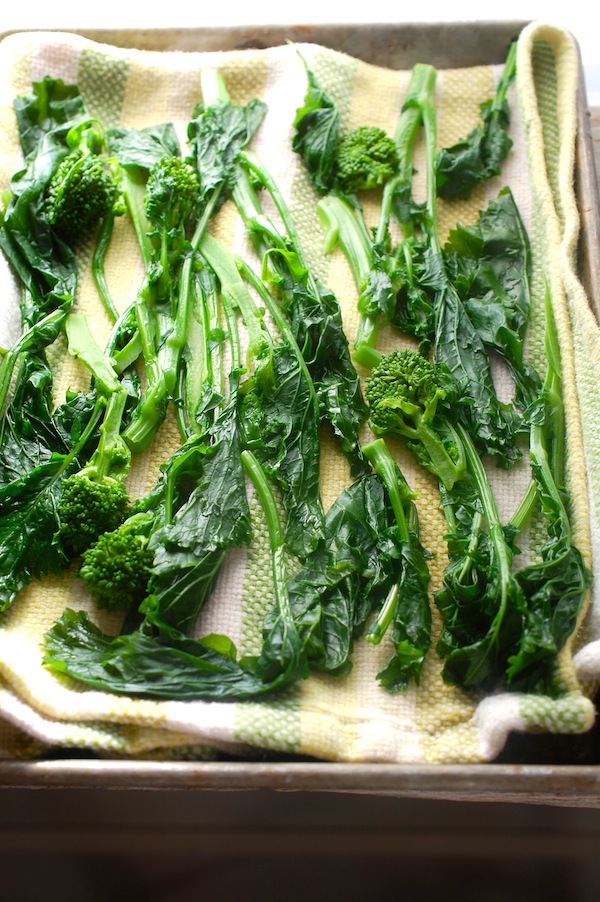
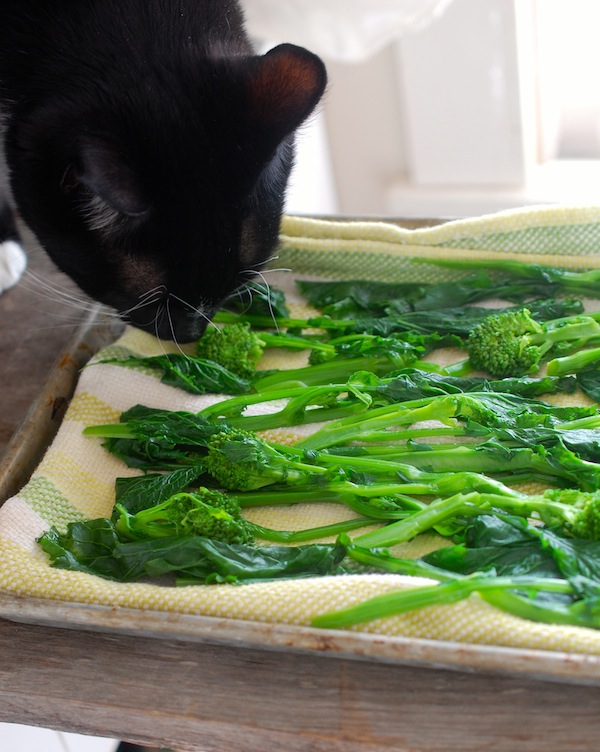
Then Barney and I par-boiled some broccoli raab. If you’re not familiar with raab (aka rapini) it’s actually a turnip relative and has a distinct bitterness which is highly satisfying, especially when paired with lemon or anything spicy. (Goat cheese is another good companion for raab, as are garlic and ginger.)

DSC_0270

You all know how much I love to roast most vegetables, and that I’m not much for boiling them, but broccoli raab is an exception. I almost always cook it in boiling salted water for about 4 minutes—even before finishing it in a sauté pan with garlic, as I did today. I also cut the thickest parts of the stems off and then split the stems down the middle so that the pieces are all about the same thickness.

DSC_0065

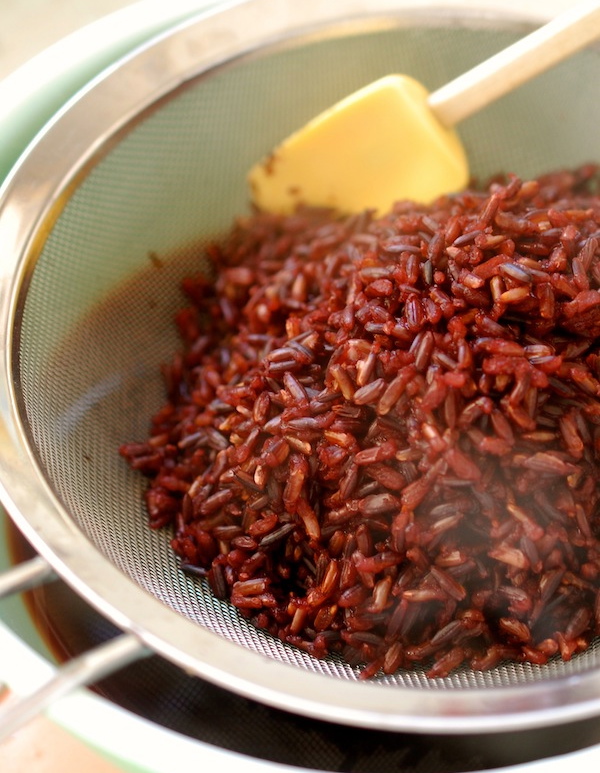
Meanwhile, on the back of the stove, a big pot of boiling water was going. I plunked a cup of black rice in it, stirred, lowered the heat just a tad (still boiling) and let the rice cook in the boiling water until tender. (About 28 minutes for me today.) Then I drained it and spread the rice on a sheet pan to cool.

br

I refilled the pot, brought it to a boil, and cooked a cup of farro the same way. I overcooked the farro today because I forgot to look back at one of my own recipes and thought I remembered the cooking time was about 40 minutes. In reality, it’s only 30. (There is also such a thing as par-cooked farro that cooks in 10 minutes.)

DSC_0094

That mistake aside, this boiling water method (as opposed to the pilaf method with a measured amount of water) is really a great way to cook grains in big amounts that you want to store and eat throughout the week. You don’t have the frustration of finding all your liquid simmered out and your grain undercooked; simply use a spoon to fish out a few grains every so often to see if they’re done. They should still be just a tiny bit toothy when you bite into them, and with some grains, just beginning to split open a bit.

DSC_0237

You can store them (after thoroughly cooling them) in plastic containers in the fridge. (You can also freeze cooked grains.) One note on salt: I don’t salt the water at first but tend to add some halfway through cooking. That said, the grains will still need to be generously seasoned when prepared for eating.

DSC_0175

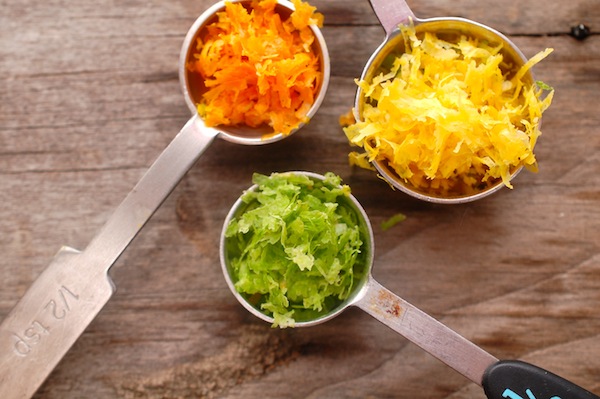
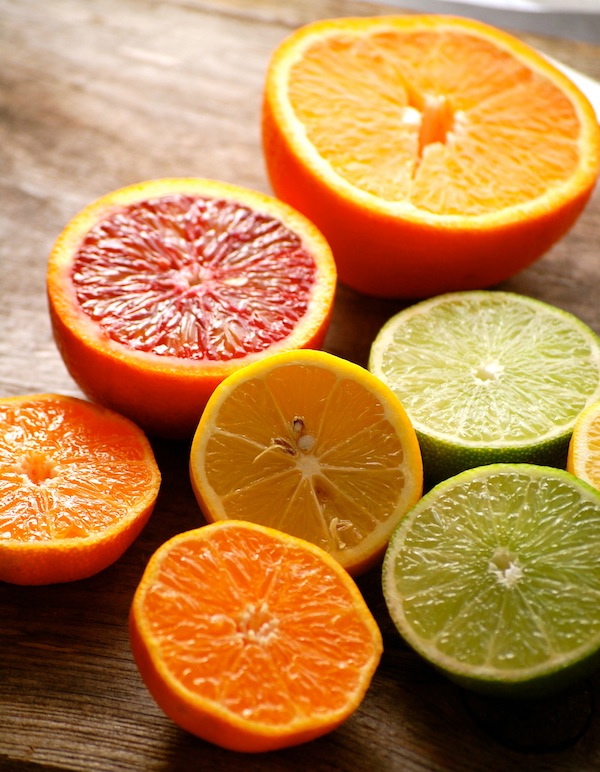
Next Barney and I pulled out all the various citrus fruits I’ve been stockpiling—a Meyer lemon, a blood orange, a Minneola orange, a clementine, a navel orange, a regular lemon, and a lime. Mostly I just wanted to cut them open, take pictures of them, and then eat some…but I also wanted to dress my grains with some juice and zest.

DSC_0228

I am a citrus zest freak and put it in everything.

Lastly, I put everything together to make lunch (which wound up being dinner, too, though I did make pork chops for Roy, since he does not appreciate the meatless meal the way I do!). I put a cup of cooked black rice and a cup of cooked farro into a microwavable bowl and reheated them for a minute and a half. (Remember this, as it is easy to do on a weeknight if you’ve got grains already made and stashed in the fridge.)

DSC_0314

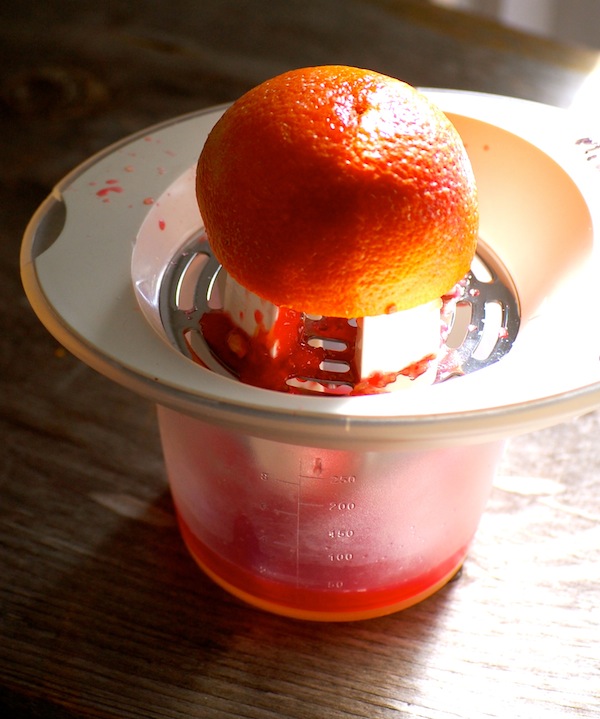
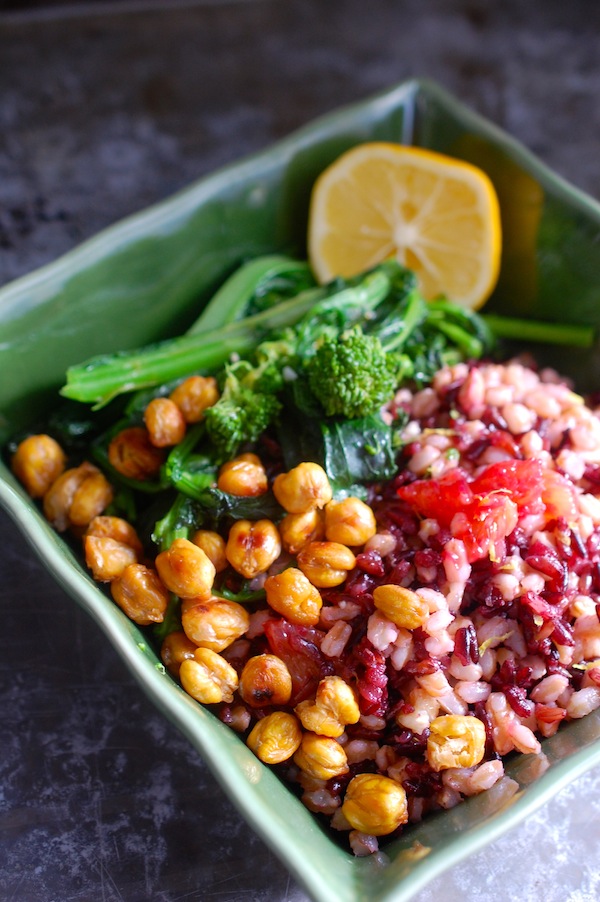
I juiced ½ of the blood orange and ½ of the Meyer lemon and added about a tablespoon of each to my grains. I seasoned with plenty of salt, too. In a little skillet, I heated up a bit of oil and a tiny bit of butter and softened ½ teaspoon or so of minced garlic in it. I tossed most of the softened garlic in with the grains and added 4 ounces of the broccoli raab to the skillet, tossing to warm it through in the garlic-scented oil. I stirred up the grains, tasted, and piled in a serving dish, arranging the raab and a smattering of roasted chickpeas alongside. I squeezed the other Meyer lemon half over the raab, and at the last minute, decided to cut the blood orange segments out of the unused half and toss them in, too. Often I used dried fruit and toasted nuts with grains, but it was a nice switch to have the crunchy chickpeas and the fresh citrus segments.

DSC_0362

There are lots of ways to turn grains into filling meals (think beans, roasted veggies, sautéed mushrooms), so I encourage you to do your own mad-scientist experimenting. Just be sure to season with plenty of bright ingredients (vinegars, fresh herbs, Asian condiments, as well as citrus).

But don’t be surprised when your trusty assistant loses interest in the experiment—especially if there are birds outside the window to keep an eye on.


DSC_0300


Imagining Spring with A Fennel & Meyer Lemon Recipe

This long winter is making me cranky. It snowed yesterday, for God’s sake! I want spring—the real spring—to arrive NOW. Fat chance. Here on the Island, it’s a long way’s off. The maritime climate (read: cold ocean air) keeps the trees from leafing out until it is practically summertime—spring slides by in a blur of lilacs and rhubarb.

It’s not just light and warmth I’m longing for; it’s something fresh and green and edible I want—something pulled from the ground with my own hands. Soon, soon, soon, I tell myself. It won’t be long before we head to our secret watercress stream and come home with a wild salad.

But for now, I’m still stuck imagining springtime at the grocery store. It’s not surprising, then, that I snapped up some frilly frondy bulbs of fennel yesterday. With all that greenery still attached, nice fennel bulbs look like they’re fresh from the garden—you can squint and imagine they’re still growing. A bag of Meyer lemons caught my eye, too. They weren’t cheap, but I had to have them, simply because their color reminded me of a sun-drenched villa in Italy. (A hypothetical villa, I’d have to say, since I’ve never been to Italy!) Meyer lemons have a bracing, almost champagne-ish quality to them that’s a lovely switch-up from the starker acidity of lemons. I wouldn’t necessarily call them sweet, but they do have a complex flavor that hints of tangerines.

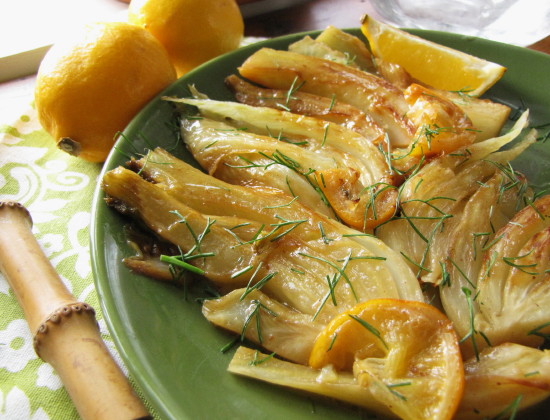
At home, I decided to brown-braise the fennel and finish with a little buttery pan sauce enhanced with the Meyer lemon juice. Since I’d already planned to grill-roast a pork loin for Roy, this was a perfect side dish—a riff on a recipe I did for Fast, Fresh & Green. While I love fennel raw—sliced paper thin for a salad—I find that braising it brings out a sweet flavor and tender texture that appeals to a lot of folks who think they don’t like this veggie. Ironically, though, cooked fennel is no longer very fresh and spring-y looking; this homey kind of braise is actually great on a cold night—which, of course, we still have plenty of around here. Hope it’s warmer wherever you are!

Brown-Braised Fennel with Meyer Lemon Pan Sauce

Printable Version of Recipe

You’ll have to forgive the long-winded description of trimming and cutting fennel here—I did my best to be clear, but a video would have helped! Just aim to get fennel wedges that are close to the same width so that they will cook evenly; don’t worry if the wedges don’t hold together—no big deal. Also, I’m sorry to say I call for 2 fennel bulbs here, but you will probably only use about 1 1/2. (One very large fennel would do it, but most of what you get in the grocery is medium-sized.) Save the remainder for salads. Feel free to use lemon juice here instead of Meyer lemon juice. I’d use a bit less or combine the lemon with a little orange juice to get a similar acidity.

______________________________________________

2 medium-large fennel bulbs (about 1 1/4 lb. each with stalks)

2 tablespoons unsalted butter (cut 1/2 tablespoon into two or three pieces and keep cold)

1 tablespoon extra-virgin olive oil

3/4 teaspoon kosher salt

1 cup low-sodium chicken broth

2 tablespoons fresh Meyer lemon juice (or 1 to 1 1/2 tablespoons regular lemon juice and or a combination of lemon and orange juice)

______________________________________________

Get out your pan. Make sure you have a 10-inch straight sided sauté pan and a lid for this. If you don’t have a straight-sided sauté pan, a Dutch oven would be a better bet than a slope-sided skillet.

Trim and cut the fennel bulbs: First cut the stalks and fronds off each bulb. Roughly chop a few fronds to yield about two teaspoons (more or less is fine) and set that aside for garnish. Cut each bulb in half. With a sharp knife, notch out most of the core from each bulb half, leaving a bit of the core in to hold the eventual wedges together. You will only need three of the four halves—save the other to slice thinly into green salads. Put the remaining halves, cut side down, on the cutting board and cut each into 5 or 6 wedges about 3/4 to 1-inch thick. (Point the knife towards the center of the bulb as you make each cut—that way you will be sure to include a bit of the core.) You will probably only be able to fit 14 or 15 wedges in the sauté pan. To see what fits, arrange them in the dry pan off the heat.

Cook the fennel. In the 10-inch straight-sided sauté pan, heat 1 1/2 tablespoons of the butter and the olive oil over medium heat. When the butter has melted, arrange the fennel wedges in one layer in the pan and season with the 3/4 teaspoon salt. Cook, uncovered, without stirring, until the bottom sides are browned, about 8 to 10 minutes. Use tongs to check to see if the wedges are browned enough. You also might want to move your pan around on the burner to make sure the wedges brown evenly.

Carefully flip the wedges over with the tongs and cook for about 4 minutes on the other side. Pour the chicken broth in the pan and cover loosely with the lid, leaving just a bit of room for steam to escape. Make sure the chicken broth is simmering; raise the heat if necessary. Cook until the chicken broth has reduced to just a couple tablespoons (the wedges will be tender), about 10 to 12 minutes. Take the pan off the heat and carefully transfer the wedges to a serving plate.

Return the pan to the heat, add the lemon juice and quickly scrape up all the browned bits on the bottom of the pan (don’t let the liquids over-reduce). Add the cold butter pieces and stir until melted and the sauce looks creamy. Remove the pan from the heat and stir and scrape the pan sauce over the fennel pieces. Sprinkle the chopped fennel fronds and a tiny bit more salt over and serve right away.

________________________________

Variation note: If you like, you can add a few very thin half-moon slices of Meyer lemon or lemon to the pan along with the fennel wedges while they’re cooking. They get browned and soft and are perfectly edible.