All posts by Susie Middleton

You’ve Got Mail! 50 Baby Chicks in a Cardboard Box

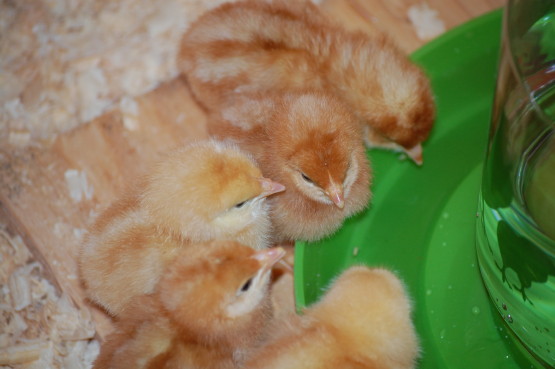
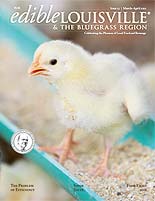
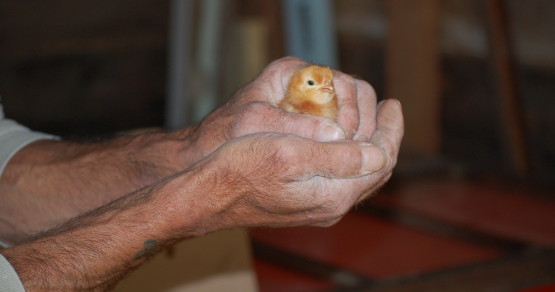
Overnight, we’ve gone from 11 live animals to 61 here at the farmette.  The baby chicks arrived at the West Tisbury post office about 9 am yesterday, and I am so very happy to report that they are all still alive this morning!

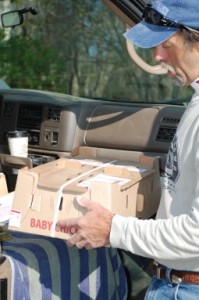
Roy took the call from the post office and drove over to collect the amazingly small (ventilated) cardboard box that they come in. (They need to be snuggled together to keep warm, and the newborn chicks live for a couple of days just on the remains of the yolk sac they’ve ingested.) I was waiting outside with the camera when he came, and it didn’t take long for me to hear the lovely Cheep! Cheep! chorus coming from the truck.

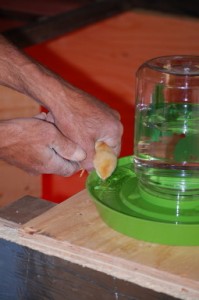
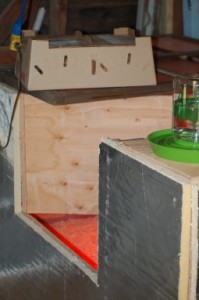
We took them out of the box one by one, and dipped their beaks in water so they’d get a little bit of hydration going and they’d know what the water source was. Then we put them into their toasty brooder box (more like a small room) that Roy built in the back of the barn/shop. It’s made of plywood, has a bit of insulation, and is topped with 3 old casement windows. A swinging door lets us move the food and water in and out, and a heat lamp with an infrared bulb keeps the brooder and the chicks warm.

Actually, there are supposed to be two heat lamps, but our second bulb burned out and a replacement is a couple days away. This was the cause of much discussion yesterday, and we did some rearranging to make sure the chicks wouldn’t smother each other last night trying to stay warm.

I, of course, am usually the worrywart in the family, but since these chicks are really Roy’s babies, I slept perfectly fine last night. I noticed, however, that Roy got up at 5:30 and came back to report that the babies were all doing fine. He is a sucker for little things. Me—I can’t wait until Libby gets here this weekend as I know she’s going to be enchanted. And Farmer, well, he’s not allowed in the barn/shop so he hasn’t met his 50 baby sisters. All in good time!

While the Cat’s Away

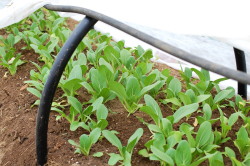
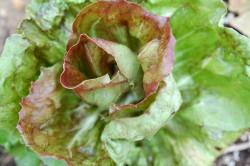
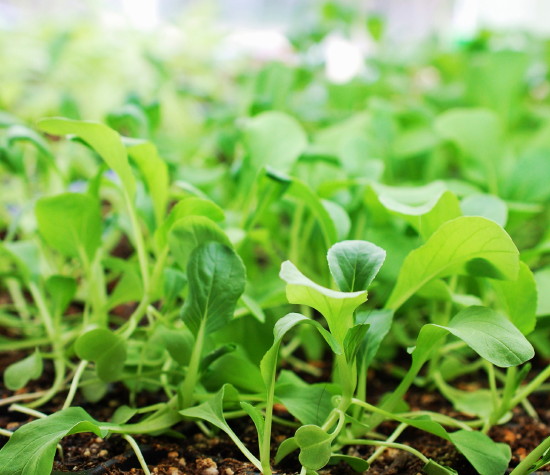
Under cover of darkness, we stole off the Island last Sunday and whisked Libby away to Florida for five days. It felt very sneaky, leaving the farmette and our jobs this busy time of year. And risky, too, what with hundreds of new seedlings in the garden and many still under lights inside. Not to mention live animals who, unlike plants, need fresh food and water every day, not just occasionally. But I shouldn’t have worried; many good friends stepped in to care for chickens, bunny, lovebird, seedlings, and dog. Despite the heat wave while we were gone, the garden is thriving (see the radicchio and bok choy pics below) and the hens are happy. So is our resident mouse (or mice), who chewed his way through insulation again to come have a party inside while we were gone. Fortunately, he (or them) mostly feasted on bird food.

Considering our Florida adventure, a mouse party was hardly much of a price to pay. Between an airboat ride in the Florida Everglades, holding a baby alligator, petting a sting ray, visiting dolphins, catching baby lizards outside Roy’s parents house, collecting sea shells, and spotting at least two dozen different kinds of birds, Libby got a National Geographic wildlife week—and a visit with her grandparents—to remember for a lifetime. We didn’t come home with a pet pelican, but I’m still not convinced there wasn’t a lizard in Libby’s suitcase.

Undercover: Health Insurance for Garden Seedlings

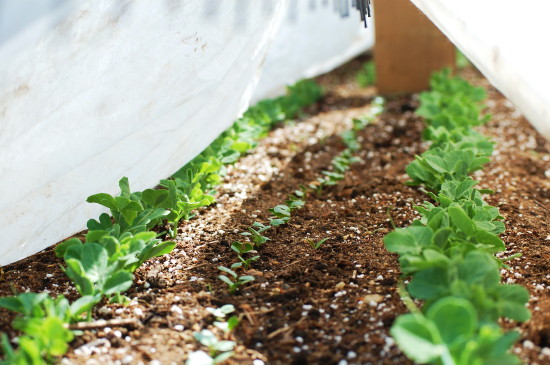
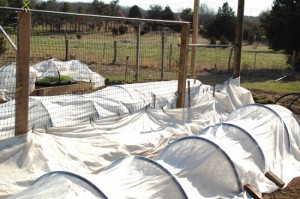
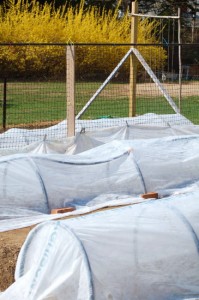
The garden looks like a morgue right now, I’m sorry to say. It’s not that anything’s dead—yet. (And I hope it stays that way, though we are really pushing things this year.) It’s just that most everything we’ve planted is under row cover, for one reason or another, and the billowy white fabric sort of looks like sheets over, well, you get the picture.

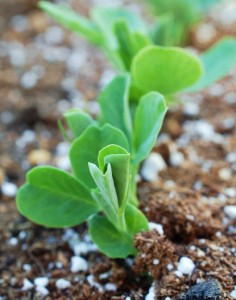
It doesn’t help that all the pretty stuff is hidden. At least a couple times a day I have to go peek—usually at the peas, which I find unbearably beautiful and promising as they unfurl their wings. (Plus, I am very proud of how well they germinated and the fact that I’ve managed to get radishes and lettuce into this raised bed, too. So I just have to stare at it all, you know.) I also have to remove the covers to water, but then I tuck everything back in, using clothespins, fabric pins, bricks, rocks—a motley assortment of things to keep the fabric down while the fierce Vineyard wind tries mightily to rip it off.

I had to laugh, because one of my favorite garden bloggers (and another former magazine editor), Margaret Roach, posted about row cover this past week, too. Read her informative interview with Paul Gallione of Johnny’s Seeds to learn some different uses for row cover. I also discovered, when I went looking for a “proper” definition of row cover (“sponbonded polyester” is it), an earnest blog site, Whiz Bang Row Cover Hoop System, which goes into great detail about hoop-supported row cover.

We are not quite so technical. We order our medium-weight row cover (Agribon 19) from Johnny’s Seeds or FedCo in big rolls. Then we go to the plumbing supply store and buy 50 or 100 feet of 3/4-inch PVC pipe and cut it into the right lengths using a ratchet cutter like this. Because we splurged on new fabric this spring (our old stuff has a lot of holes in it—fine for wind and some cold protection, but not for pest protection), I am using mostly bricks and stones to hold down the new fabric right now. The fabric pins are more secure, but you have to be careful about poking so many holes in the fabric, which then let tiny bugs in.

That brings me around to the main reasons we use row cover: wind, cold, and bugs. The bugs actually came first. I experimented with row cover our first season to keep flea beetles and cabbage worms from decimating all the brassica crops—especially my greens like mizuna, bok choy and kale. It worked well as long as I kept the row cover in good shape and securely on most of the time. Last year I wasn’t so diligent, and I paid the price. I never covered the kale at all, and I had some very beautiful Brussels Sprouts stalks until I took the row cover off of them in late August after the storm. A few weeks later, not having paid close attention, I realized the cabbage worms had settled in for a feast.

I’ve also used row cover over newly planted carrot seeds in the past, so I am trying that again this year, only earlier. Theoretically the cover keeps a downpour from washing the tiny carrot seeds away. But we’ve hardly had a shower, much less a downpour, all spring so this may be a mute point.

But the main reason we are using so much row cover this spring is to protect newly transplanted lettuce and greens from wind and cold. The medium-weight row cover only offers a few degrees of warmth, but it makes a difference while the roots are struggling to establish themselves. And protecting them from the dry wind we’ve been having is huge. The wind not only breaks the fragile seedling stems, but it also dries the soil out very quickly. And since the soil is so dry anyway, I’d like the little bit of water I’m adding not to evaporate more quickly than it has to.

Lastly, the reason the peas are under cover is crows (and other birds). Newly germinating peas are delicious bird snacks, so until the peas get tall enough to start clinging on to the mesh we’ve hung for them, they’ll be under cover. Peas love cool weather so they don’t need heat protection, but they appreciate the tiny microclimate under the row cover anyway. And the radishes and lettuce next to them are especially happy. The row cover on the pea bed is a real pain in the neck though. Because the trellis runs down the middle of the bed, hoops are not an option. Instead we wrap the row cover all the way around the raised bed like swaddling and then hold the middle up above the peas by clipping it to the trellis mesh with clothespins.

Is all this worth it? Well, considering we have hundreds (maybe thousands) of seedlings out there right now, I hope so. The goal is a nice harvest of greens to open the farm stand with on Memorial Day. So we’ll keep you posted—there are any number of hurdles (or hoops) to jump through (or over) before we get there!

Asparagus, Eggs & Croissants in a Recipe for Easter Brunch

Every year around Easter time (and believe it or not, this is sixburnersue.com’s third Easter), I start writing something about asparagus, even though we’re still weeks away from harvesting any local asparagus. I’ve always reassured myself that at least the vegetable is now in season in California; and after all, that’s where most of the country’s asparagus comes from—during the proper asparagus season. (Or at least it used to.) I’ve always found it ridiculous to buy asparagus out of season from South America (so I simply don’t eat asparagus in winter), but now I find it even more ridiculous that most of the asparagus in stores right now is coming from Mexico, which has underpriced California growers by so much that even California grocery stores sell Mexican asparagus.

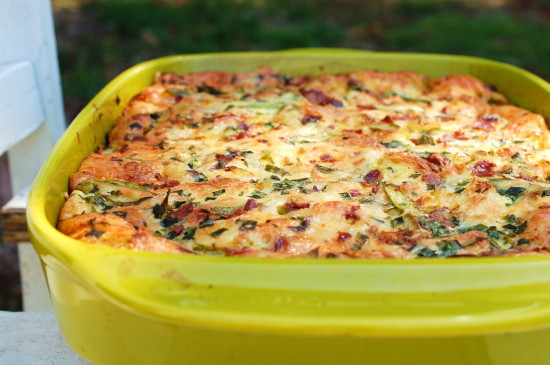
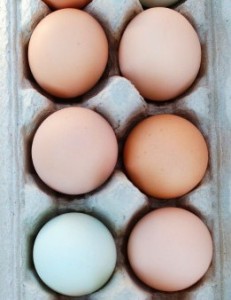
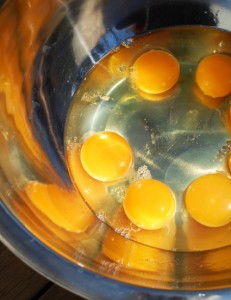
Okay, so despite my rant (sorry about that), I still wanted to give you a tasty asparagus recipe for Easter, so I went to the store and bought asparagus to cook with this morning—and I tried not to look at the label of origin. I’m comforting myself with the delicious bread pudding that just came out of the oven, and I am also using the excuse that this dish is really all about the eggs. I know, I know—I have a thing about farm-fresh eggs, too, with their rich marigold yolks and bouncy whites.

But here’s the thing—it may be impossible to get local or even U.S. asparagus this Easter, but you’ve got more and more choice in eggs at the grocery store now. Look for the USDA Organic label (even Costco has Organic eggs!), the Certified Humane label, or eggs that say “pastured.” Pastured eggs come from hens that truly do range over grass. (Unfortunately, the term “free-range” can be applied to hens that simply have a bit more room to stretch than the typical factory egg-layer which has 1 square foot of space allotted to her. Some free-range eggs truly do come from “free-range” hens, but the term is a loose one.) And then there’s always the “grow-your-own” option! Backyard chicken keeping is one of the biggest trends going, so why not join in?! But if you’re planning to get baby chicks for Easter (our 50 babies arrive April 25), you will have to wait five or six months before they lay eggs.

In the mean time, enjoy this eggy treat with friends and family this Easter morning and keep the spirit of new beginnings in your heart.


Asparagus, Leek, Bacon & Croissant Bread Pudding
 
While I love challah bread in a savory bread pudding, croissants are a wonderful option, too, and they give the final dish a lovely ethereal texture. (No need for fancy croissants—just pick some up at the grocery store bakery.) There’s no trick to cooking a bread pudding (you can even call it a strata if you like), so don’t be intimidated. I like to bake mine soon after assembling (I let the bread soak up custard for 20 minutes or so), but I have held them in the fridge for a few hours before baking, so feel free to do that if you like. (Remove from fridge a half-hour or so before baking.)
Author:
: Breakfast & Brunch
Serves: 6
Ingredients
  • kosher salt
  • 1 tablespoon extra virgin olive oil
  • 1 bunch medium asparagus, trimmed and thinly sliced on a sharp diagonal (to yield about 2¼ cups)
  • 7 eggs
  • 1¾ cups whole milk
  • 1 cup heavy cream
  • 3 to 4 tablespoons sliced fresh chives
  • 2 teaspoons coarsely chopped fresh thyme leaves
  • ⅛ tsp. ground nutmeg
  • Worcestershire sauce
  • ½ pound day-old grocery store or bakery croissants, torn into 1-inch pieces
  • 1½ cups (packed) coarsely grated Gruyere cheese
Directions
  1. Preheat the oven to 375 degrees F. Rub a 9×13-inch (3-quart) baking dish all over with a little butter.
  2. In a large heavy nonstick skillet, cook the bacon over medium-low heat until crisp and browned, about 10 to 14 minutes. Transfer the bacon to a paper-towel lined plate and break up into smaller pieces when cool. Pour off half the bacon fat from the skillet and add 1 tablespoon butter and the leeks. Season the leeks with a pinch of salt, cover, and cook, stirring, until softened and beginning to brown, about 6 to 8 minutes. Remove the pan from heat and let the leeks cool.
  3. In a medium nonstick skillet, heat the olive oil and the remaining half-tablespoon of butter over medium-high heat. When the butter has melted, add the asparagus and ¼ teaspoon kosher salt. Cook, stirring, until the asparagus is crisp-tender (it will still be somewhat green), about 3 to 4 minutes. Transfer the asparagus to a plate.
  4. In a large mixing bowl, combine the eggs, the milk, the cream, the chives, the thyme, the nutmeg, a couple dashes of Worcestershire sauce, and 1 tsp. salt. Whisk well to combine.
  5. Arrange half of the croissant pieces over the bottom of the baking dish. Sprinkle half of the asparagus, half of the leeks, half of the Gruyere, and half of the bacon over the bread. Repeat with the remaining bread, veggies, cheese, and bacon.
  6. Pour the egg mixture evenly over all. (Start at one end and pour slowly back and forth). Using your hands, gently press down on the bread and veggies to force the custard to evenly surround everything. Let sit for 20 minutes. Bake until the bread pudding has risen and is set and dry in the middle (it will be golden all over), about 40 to 44 minutes.


New Greens to Grow and One Fabulous Bok Choy Recipe from The Fresh & Green Table

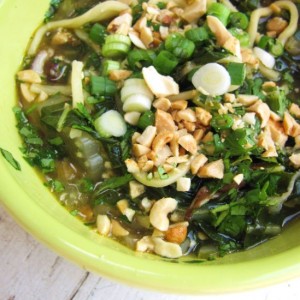
Spicy Noodle Hot Pot with Bok Choy 1Promises, promises. A few weeks ago, I said I would give you a peek at some of the recipes in The Fresh & Green Table (coming in June—preorder now!). Last week I said I’d let you know what new greens we’re growing this year. Time for me to keep my promises, don’t you think? Especially since the green factor is blowing me away right now. The seedlings we started three weeks ago are so fresh looking that it’s hard not to think about eating them right out of the flats! (The new light system has worked beautifully.) But some of those little guys—like the Rainbow Lacinato Kale and the Bright Lights Swiss chard—hold the uh, promise, of growing all summer and fall, with many many harvests along the way, so it wouldn’t be too smart to cut their little lives short just now.
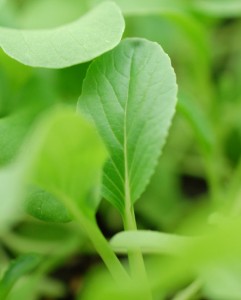
In honor of all these greens—especially the dozens of little baby bok choys we’ve started—I thought I’d include a delicious and easy recipe from the soup chapter of The Fresh & Green Table that features bok choy. (Recipe at end of blog.) I call it “Spicy Noodle Hot Pot with Bok Choy, Shiitakes, Ginger, Lime & Peanuts,” but it’s really just a quick and tasty noodle soup that you could make tonight (with regular or baby bok choy). (I’m sorry I don’t have access right now to the beautiful picture of this dish that appears in the book.) As it happens, this week three more recipes from The Fresh & Green Table were posted on the Internet, thanks to an article in the Spring issue of Martha’s Vineyard Magazine, Home and Garden (by yours truly). The three over there are for main-dish salads—most appropriate for grilling season. But one of them happens to feature asparagus and another Asian green, Napa cabbage, and would be perfect to make right now if you live in an area of the country that is already seeing local asparagus.

On the subject of Asian greens, here are three new ones we are trying in the market garden this year, in addition to tat soi, mizuna, and bok choy. (Most of our greens seeds come from High Mowing Seeds and Fedco.)
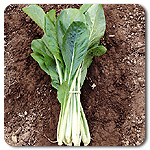
Komatsuna: This winter, I read about this intriguing Japanese green (also called spinach mustard) in The Seasons on Henry’s Farm. Then I began seeing references to it in all kinds of places so decided I’d love to give it a try. Supposedly the leaves are glossy and do not really wilt when cooked. A turnip relative, the greens are best picked young and tender to be at their sweetest.

Te Yu Flowering Broccoli: Years ago, Chinese broccoli was on my radar when I lived in New York. But I never grew it. I’m excited to give it a try this spring before the hot weather comes. It is fairly stemmy with little florets, but should be very tasty.
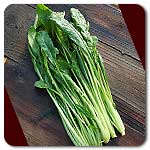
Mibuna: This delicate and very early green is quite similar to Mizuna except that the tips of the leaves are rounded rather than serrated. I’ll plan to use this in salads as soon as I can.

I also got all excited about the new frilly varieties of mustard I saw last year, so I wound up starting seeds for three of those—Ruby Streaks, Golden Frill, and Pink Lettucy. I know, I know, what was I thinking? One would have been enough.

In the lettuce department, here are three new ones I’m excited about:

Pirat Butterhead: A beautiful heading lettuce with pale green inner leaves, lime green outer leaves, and red tips. Sometimes called Pirate lettuce (I don’t know why, matey), this German heirloom is supposed to be very flavorful, so I can’t wait to try it.


Revolution: I’m hoping this red frilly Lollo-Rosso style lettuce will grow a bit more vigorously than others I’ve tried in the past. It should be a stunning addition to our farm stand mix.

Kinemontpas Butterhead: This French heirloom supposedly grows into giant deep-green buttery heads if you can resist picking it before then. Yes, I have a knack for choosing the hard-to-pronounce varieties.

Antares Oakleaf: The Fedco catalogue calls this, “A shimmery pink and bronze oakleaf growing vigorously to magnificent size. The extra-frilled finely cut bright leaves are colorful and tender, not bitter even in early July.”  Another one to look forward to!


I hate to tell you how many more greens we are growing other than those I’ve mentioned here. Despite doubling the size of the market garden, we are still going to be tight on space. Hmmm… maybe it would help if I promised not to take up too many beds with the greens. Promises, promises. We’ll see!

(Enjoy the soup recipe and don’t forget to pre-order The Fresh & Green Table. Your independent bookstore can order it from IndieBound so please patronize them if you can.)
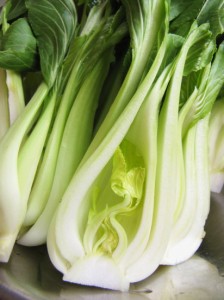
 

Spicy Noodle Hot Pot with Bok Choy, Shiitakes, Ginger, Lime & Peanuts

For such a quick soup, this one is darn satisfying. Thanks to the bold flavors of ginger, lime, soy sauce, and cilantro—and the intriguing flavor of one of my favorite greens (bok choy)—the soup packs a punch without much fuss. I do take one extra little step of sautéing the shiitakes separately in a nonstick pan; otherwise they can stick before browning or cooking through. I also take a clue from Asian cooks and boil the soup noodles separately. (They can soak up a lot of liquid if added raw to the soup. This works out nicely, as it means you can distribute the noodles evenly among four soup bowls and then add the tasty broth, the greens, and the fun condiments. Heads of bok choy vary tremendously. You can use any size; just cut off a bit of the bottom, quarter lengthwise, and slice crosswise. Use plenty of the leafy tops, where there is lots of flavor. If you can’t find fresh Chinese egg noodles (in the produce section of the grocery), substitute with another fresh egg pasta (such as Italian linguine or fettucine).

________________________________________________

kosher salt

6 oz. fresh Chinese egg noodles, torn into slightly shorter pieces

1/2 tsp. toasted sesame oil

1 Tbsp. soy sauce

1 Tbsp. freshly squeezed lime juice

1 tsp. packed brown sugar

2 Tbsp. plus 2 tsp. peanut or vegetable oil

3 1/2 oz. (1 package) shiitakes, stemmed and thinly sliced

2/3 cup thinly sliced shallots (about 3 oz. or 3 small shallots)

1 lb. bok choy (use both leaves and stalks), cored, quartered lengthwise, washed thoroughly, and sliced crosswise

1 Tbs. chopped fresh ginger

1 Tbs. chopped fresh garlic

1/2 tsp. Asian chili-garlic sauce (more to taste)

2 cups low-sodium chicken broth

3 to 4 Tbsp. chopped fresh cilantro

3 to 4 Tbsp. chopped roasted peanuts

2 Tbsp. finely sliced scallions

_______________________________________

Bring a large pot of salted water to a boil. Add the egg noodles and cook until tender, about 2 to 3 minutes. Drain in a colander, rinse briefly, and let dry a bit. Transfer to a bowl and toss with a big pinch of salt and the sesame oil.

In a small bowl, stir together the soy sauce, lime juice, and brown sugar. Set aside.

In a medium (10-inch) nonstick skillet, heat 2 tsp. of the oil over medium-low heat. Add the shiitakes and a pinch of salt and cook, stirring, until tender and just starting to brown, about 6 to 7 minutes. Remove from the heat and reserve.

In a 4- to 5-quart Dutch oven or other soup pot, heat the remaining 2 Tbsp. oil over medium-low heat. Add the shallots and a pinch of salt, and cook, stirring, just until the shallots are softened and many are browning, about 3 to 4 minutes. Add the bok choy and 1/2 tsp. salt, and stir until all the leaves are wilted, about 2 minutes. Add the garlic, ginger, and chili-garlic sauce and stir until fragrant, about 30 seconds. Add the cooked shiitakes, the chicken broth, and two cups of water to the pan. Bring to a boil, reduce to a simmer and cook for 5 minutes. Remove the pan from the heat and let sit for 5 minutes. Stir in the soy-lime mixture and 2 Tbsp. of the cilantro.

Distribute the noodles evenly among 4 deep soup bowls. Use tongs to arrange most of the greens over the noodles in each bowl, and then ladle the remaining broth and soup contents into each bowl, distributing evenly.Garnish each bowl of soup with more cilantro, the scallions, and the peanuts. Serve right away with both a fork and spoon.

Serves 4
Project Central: From Pea Trellis to Eggmobile

This is the time of year when I start making Roy really nice dinners. Actually, that’s a lie. There isn’t enough time in the day (despite, or maybe because of, Daylight Savings Time) to make really nice dinners. But still I try to be extra sweet. Because there is much building to do. And no little garden elf to do it. (Or cushy budget.) My carpentry skills are extremely limited (okay, you knew that), but I excel at creating situations that need immediate structural solutions.

So as if there weren’t enough on Roy’s list (the new eggmobile for the 50 chicks we just ordered, the hoop house, the new garden enclosure, and, oh, a bigger farm stand), I keep coming up with more stuff. Mostly small things that he can do quickly, but still it means cramming it in after work or stopping a bigger project on the weekend to help me solve a dilemma.

Sunday, after waffling for days on this decision, I chose a bed to plant the peas in. Originally, I had planned to put the peas along a fence on one side of the garden, but the bed there has a cover crop of rye grass in it that hasn’t decomposed enough. I’ve turned the rye over, but it takes three to four weeks to break down, and since rye inhibits germination, I’m wary of planting the peas there. I’ve been eyeballing a couple other beds, but the single enclosed raised bed we have (the one that Roy built for the carrots last year) was the easiest to get ready.

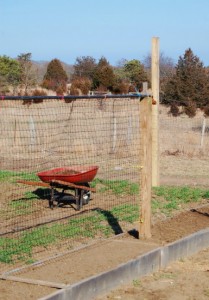
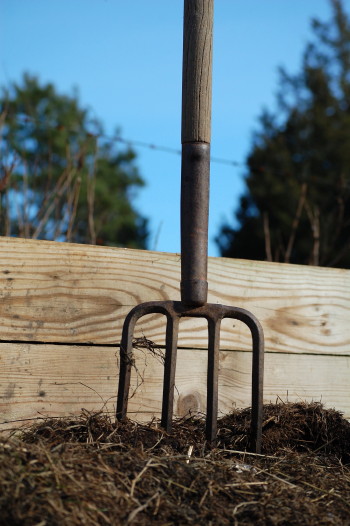
I trucked some of our lovely compost over in my jolly red wheelbarrow (oh how I wish we had acres more of this compost) and mixed and fluffed the bed until it was chocolate-cake perfect. Then I stared at it and began to envision some bamboo-and-twine contraption I was going to create for a trellis. I paced over to the lumber pile and back a few times, thought about whether I could attempt something that involved screws, and finally decided that the most expeditious thing to do was to go ask Roy to build me (us) a pea trellis.

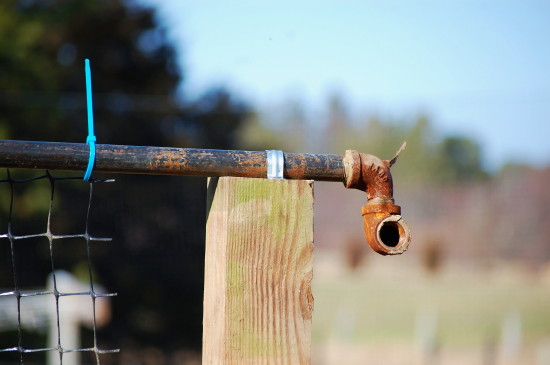
He was cutting wood for a work table he’s building to bend the hoops for the hoop house. But he stopped, came over, got the post-hole digger, dug three holes, sunk three 4 x 4s, found a super-long piece of pipe (above) for the top bar, cut two pieces of extra deer fencing we have, got some zip-ties to attach the mesh, and created a pea trellis in no time. Yeah. At least I had enough sense to ask. This year, with all we have going on, there is no time to waste. Stuff just has to get done.

To be fair, sometimes I get something really nice that I didn’t even ask for. Like the deluxe seed starting shelving this year. This baby holds 16 flats and 4 sets of double lights. (And of course I already have it almost completely filled.) The shelves are adjustable, and Roy built the whole thing to sit on the mudroom counter (the removable bookshelf has temporarily gone upstairs). It works. Mostly I’ve got greens going right now—lots and lots of lettuce, bok choy, chard, kale, tat soi, mizuna, plus a few new greens like Chinese broccoli and mibuna (more on that in another post). Soon it will be time to start the tomatoes and peppers and flowers…and, well, we might run out of room if I don’t get those greens transitioned outside. But don’t tell Roy. He just built this cute little work table for me, too.

Of Sky Miles and Staying Grounded: Edible Travels with Susie

Last Wednesday, I got on a plane to California kicking and screaming. Or I should say, I got in the car to drive to the ferry to get to the mainland to drive to Boston to get on the first of three airplanes to Santa Barbara. This is how it is with me these days: I hate to travel. I’ve always been a homebody, but I’ve never loved a “home” (and all that goes with it) quite as much as I do now. I just hate to leave the Island.

But flying back on Sunday, as I began to write this blog somewhere over Nebraska, I had to smile at myself: getting out every once in a while is good for me! (Except for the part about nearly missing my first plane on Sunday due to, uh, my ignorance of Daylight Savings Time. That nearly did me in.)

I have no right to complain, as I was invited to attend the annual Edible magazine publishers conference and the Edible Institute that followed after it. There are now 72 Edible magazines, including, of course, our own very fabulous Edible Vineyard, as well as our neighbors Edible Cape Cod, Edible Boston, and Edible Rhody.

The absolute coolest thing about these magazines is, in fact, that they’re local. No national magazine can connect you to the local food movement in your own backyard like these guys can. But there’s also a collective inspiration in the group as a whole. When you sit down to read a stack of these magazines (as I did in preparation for my trip), you see that everywhere across the country from Portland to Orlando, local heroes—fishermen, school lunch cooks, cheese makers, beer brewers, market organizers—are tackling the crazy problems in our food system one town, one day, one meal at a time.

In Santa Barbara, I got to meet and listen to some of these local heroes, as well as some national heroes, too. I had a quirky, peripheral duty at the conference: I was there to coach Edible publishers about magazine editing—that particularly funny skill I honed for many years and am now able to pass along from time to time. (It’s a change of pace from cooking and farmette-ing for sure!) But after teaching my classes on Thursday and Friday, I got to hang around on Saturday for the first day of the Edible Institute, a gathering of sustainable food folks put together by Tracey Ryder, co-founder of Edible Communities, and Bruce Cole, publisher of Edible San Francisco.

Listening to the speakers, I was alternately charmed and horrified. Charmed by the likes of Anna Larsen, an outgoing San Francisco entrepreneur (and part-time opera singer) who’s created a seafood CSA (Or CSF)—a way to link consumers directly with their fishermen. Larsen buys fish and shellfish that’s no more than 48 hours out of the water directly from the fishermen, then has it skinned and filleted, and gets it to her weekly subscribers the very next day. Larsen’s “Siren SeaSA” has a long waiting list, despite the fact that customers don’t always know what they’re getting until the last minute and they might get something—like whole squid or sardines—that they’ve never eaten before. It’s an exciting idea that I imagine we’ll see growing around the country.

The horrifying part came when book author Jonathan Bloom took the stage. I heard about Bloom’s book, American Wasteland: How America Throws Away Nearly Half of Its Food (and What We Can Do About It), when it first came out a couple years ago. But for some reason the stark reality of this problem did not sink in until I heard him say in person, “Every day in this country we waste enough food to fill the Rose Bowl.” Unbelievable. The food waste starts with growers who discard unmarketable food and it continues on down the line to supermarkets, restaurants, and home fridges. When asked what the most tangible, productive step in the right direction might be, Bloom indicated that European countries are successfully banning organic waste at landfill, and that this could be something we could embrace. (Short, of course, I was thinking, of changing our cultural mindset overnight). In other words, if a truck could not go straight to the landfill with the less-than-perfect tomatoes, the trucking company might start figuring out how to get the tomatoes to a food bank (at best) or a compost area (at least).

There were other moments that completely stopped me—listening to journalist Tracie McMillan talk about working in the garlic fields (in 100-plus-degree heat for $2 an hour) for her undercover work for her new book, The American Way of Eating: Undercover at Walmart, Applebee’s, Farm Fields and the Dinner Table was certainly one; watching a clip of Roberto Romano’s film The Harvest/La Cosecha, about child farm laborers in America, was another.

But there were plenty of hopeful moments, too, and I have to leave you with my most favorite. Watch this episode of The Perennial Plate, and you’ll see the work of a young chef and a young filmmaker who have driven around the country making a weekly documentary about real food, about cooking, about life. (This episode, “God’s Country,” stole my heart, but there are plenty more to watch online.) Both Daniel Klein and Mirra Fine are lovely and down-to-earth in person. They said they might be visiting the Vineyard some time soon—great news!

Now if I hadn’t gotten on that plane for Santa Barbara, I would have missed a lot. Sometimes my plate seems full enough, but then I realize I’m the kind of person who’s never been shy about second helpings. And I have to remind myself that if you’re someone who cares a lot about how the world eats, every once in a while you’ve got to sit down at the table with strangers.

Grill-Roasting Peppers in Mud Season or Any Season

Really, there’s no reason why you couldn’t grill-roast a bell pepper any old time of the year. But it’s just not something I think to do in early March. It’s yucky and mucky outside. My boots make an unfortunate sucking noise when I walk across the puddle-pocked yard, and the chickens are not happy with their squishy surroundings.

So why am I cooking outside? Recipe testing of course. This time I’m on deadline for a Vegetarian Times article which will run at the end of the summer when veggies and fruit are in all their glory. Right now? Not so much. I feel like an alien (and a hypocrite) buying out-of-season, flown-from-far-away peppers and tomatoes, but I signed on the dotted line, so I’m committed.

The good news is that the assignment forced us to get the grill repaired. It has been crippled since Farmer knocked it over the first week he called this place home. But now it’s back in top form, and I realized yesterday it would give me the opportunity to talk about my favorite way to roast a bell pepper.

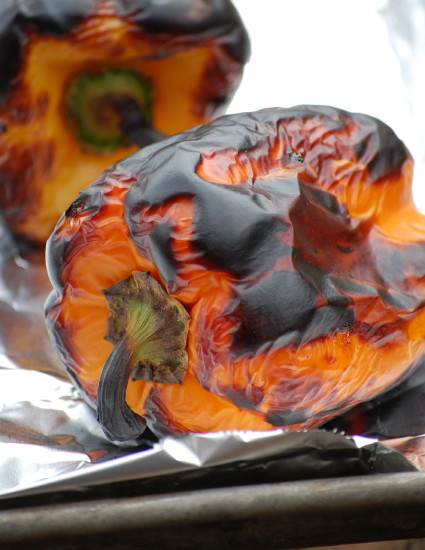
I’m not a big raw bell pepper fan (hence I don’t think I’ve ever blogged about one), but the smoky sweetness of a roasted pepper always appeals to me. Over the years I’ve roasted peppers many different ways—under the broiler, mostly, and sometimes over a gas flame or charcoal grill. But my favorite way is roasting in a covered gas grill. Not only is this method simple and hands-off (and yes, completely do-able in mud-season!), but it also yields a roasted pepper that’s easier to peel, because the skin really blisters and pops off, rather than getting too cooked and sticking to the pepper. The convected heat in a hot gas grill quickly surrounds the pepper on all sides and blackens it in less than 10 minutes. (A couple of flips with the tongs helps.) I take the peppers out when they’re mostly, but not completely, blackened so that they don’t overcook.

Below are quick directions you can follow. Once you’ve roasted and peeled your peppers, you can certainly keep them in the fridge for a couple days, although they are delicious warm. Cover them in olive oil or marinate them if you like. Use them as antipasto, rolled or stuffed with cheese or roasted veggies, or chopped up and added to other veggie or bean dishes for depth of flavor. If you’ve lucked in to a whole bunch of peppers, roast and puree them for soup.
To grill-roast and peel bell peppers:

Heat a gas grill on its highest setting. Go ahead and put the peppers on the grates and cover the grill as soon as you turn it on. (With this method, there’s no need to preheat the grill.) Check the peppers and turn them over every three minutes or so and remove them from the grill when they are blistered all over and blackened on most sides, about 8 to 10 minutes total.

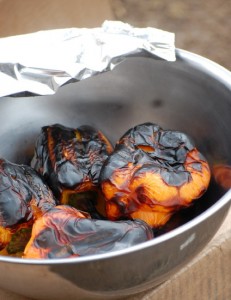
Put the peppers in a bowl and cover with foil. Let them sit for 10 minutes or up to 20 or so. (You could leave them longer, but they keep cooking in all that contained heat, so I think it is nicer to peel when the flesh still has a touch of firmness to it. You only really need 5 minutes or so to steam the peppers if you’re in a hurry.)

Over a bowl or plate, peel the blackened skin away. To remove the seeds, work over a strainer set in a bowl so that you can capture some of the delicious liquid. (If I’m going to be stuffing the peppers, I cut them in half carefully and leave the stems in. If not, I just remove the stems.) Use your fingers to niggle out all the seeds. If you like, cut or tear the peppers into lobes or strips. Whatever you do, don’t rinse the pepper under running water at any point. You will lose delicious flavor.

Welcome to the World, Little Lamb—R.I.P. Little Tiger

My Mom and Dad lost their little dog on Sunday. Tiger may have been a pint-sized poodle but he had the personality of a circus clown and the regal bearing of a prince. I’ve never seen a dog with eyes so black, or one with a step so lively. Tiger was a Type-A doggy, but underneath all that bravado was a heart of gold. And while he started out as Mom’s puppy, in the end it was Dad he snuggled up with every morning on the couch. Dad gave Tiger his daily shot and helped Tiger bear the more unseemly aspects of old age with patience and understanding. And together Mom and Dad gave Tiger the best 15 years of life a doggy could ever hope to have.

I didn’t get a chance to talk to my parents until yesterday, as my old-fashioned phone had swallowed up a text message my sister sent me with this news. Ironically, while Mom and Dad were mourning their loss, Libby and I were off welcoming newborns into the world. Newborn lambs. Our friend Liz Packer at Spring Moon Farm let us drop by and hang out with two ewes and their babies (each mom had given birth to twins—one black and one white lamb each), and Libby and I were in our element.

I was filling Roy in later about our visit with the lambs and describing Libby’s interaction with them. Roy and I have been talking a lot about our future farming plans, and the subject of sheep keeps coming up. Roy keeps saying “No” to sheep (despite his beloved summer on his uncle’s sheep farm), but I keep arguing their case. Finally I said to him in jest yesterday, “You know why we are eventually going to get sheep, don’t you? Because Libby wants lambs.” Roy conceded, “Yeah, I know.” He realizes he’s cooked on this one, because he watches his daughter with animals, and he knows what they mean to her. And Libby, to her credit, understands what happens to most farm lambs and agrees it would be okay as long as we get to name the mommy sheep and keep them around for a while.

It just reminded me what pure gifts animals are. When I called to talk to my parents, at first all I could think about is the giant hole they must be feeling in their lives. This kind of feeling is inevitable; there’s nothing to do but get through it. But looking at the picture of Tiger today, now all I can think about (and I know Mom and Dad are thinking this too) is what joy Tiger brought them all these years—what a great dog he was. Mom and Dad gave him a good life, and in return he gave what the best dogs give—unconditional love—and a bit of entertainment, too.

I will always be grateful to my parents for letting us have a dog (and a cat) growing up—for learning to love and care for an animal that depends on you in many ways. (To be fair, Mom did most of the “caring for” part with our dog!) This weekend, I smiled from ear to ear when Libby asked if she could take Farmer for a walk by herself. I kept an eye on her in the yard, and again later when she asked to hold the leash while we went around the field on our long walk. She did a great job handling Farmer and coaching him, and I was so tickled watching her take on this responsibility voluntarily.

We learn many things by caring for animals—not the least of which is to express our emotions. It’s a sad day when you lose an animal, but a happy one when you open your home to one and dedicate time and space in your life to care thoughtfully for it.

The Last Onion and The Teeny Tiny Stir-Fry

Roy, Farmer, and I spent an exhausting day off-Island  yesterday, driving around in the truck to assorted malls, stores, and appointments, loading up with supplies for various building projects, for the garden, and for life in general. By last night, coming back on the 6:15 boat, the three of us felt like we’d moved into the cab of the Ford, with Farmer’s kibble and water bowls on the floor, our empty coffee cups strewn all around, and the usual collection of reading material I can’t go anywhere without (several magazines, a few books, and a newspaper) covering every surface. One day off-Island was enough for us. We were ever so glad to get home.

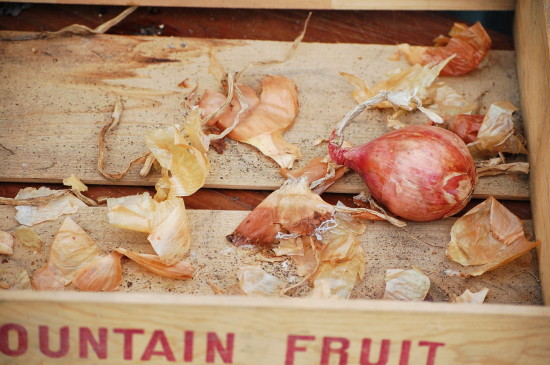
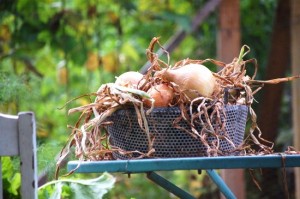
Quick dinner thoughts raced through my head as I stumbled into the barn to grab an  onion. In the dark my fingers fumbled around in the wooden crate, feeling for something hefty and round but only coming up with papery skins at first. Finally my hand settled on a little onion—the last one of our own, ordered from Dixondale Farms last February, planted last May, harvested last September, cured and stored all winter long. I am pleased we got all the way to February with our own onions, but I’m sad that it will be September before we see one again. Actually, maybe it will be sooner as I intend to overplant this year and harvest some bulbs as spring onions.

Onions (actually all of the lovely allium family, including leeks, scallions, chives and garlic) have been popping up on my radar a lot lately. Yesterday I leafed through a new issue of Martha Stewart Living magazine and my eyes fell on the most stunning photographs of alliums, courtesy of a feature called The Early Onion. Then I happened to watch a video on growing onions over at Vegetablegardener.com.  I  just placed my onion order for the garden, too. This year I’m going to grow a good storage onion called Copra, in addition to the gorgeous Ailsa Craig and Big Daddy onions I grew last year.

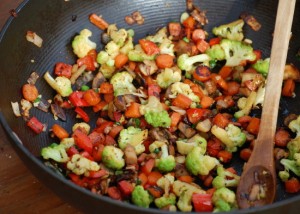
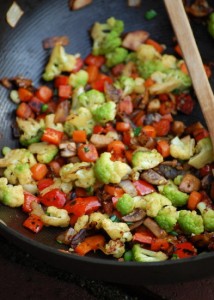
As much as I love to start vegetable dishes with some kind of allium (the promise of deep flavor), I knew I needed something more than my one little onion to get veggies on the table last night. So I did a fast fridge fly-through, retrieved a bit of broccoflower, some mushrooms, a carrot, and a bell pepper and focused on a technique I used for a a yummy veggie fried rice coming in The Fresh & Green Table. I diced all the veggies (including the onion) into very small pieces (no fussing here—exact dice are not necessary!) and heated a couple tablespoons of oil in my favorite (non-stick) stir-fry pan over medium-high heat. Once the oil was hot, I added the veggies, cranked up the heat to high, and started stirring. After about 3 minutes, I added a little chopped ginger and garlic, continued cooking for about 30 seconds, and brought the pan off the heat. The veggies were done!

This sounds like a no-brainer quick stir-fry, but there are two important things at work here. First, normally you wouldn’t throw onions and peppers into the pan at the same time as dense veggies like carrots and broccoflower. If all the veggies were cut into larger pieces, the softer veggies would be burned by the time the denser veggies softened up. But by cutting everything very small (and you can use most any vegetable except for the very densest) and turning the heat to high (after the veggies go in the pan—nonstick should not be heated beyond medium-high when empty), the cooking happens really fast. There’s an explosion of moisture as the veggies tumble around the pan, and that translates to steam to help tenderize the denser veggies a bit and to keep the softer ones from burning. You need to watch closely though, as somewhere between three and four minutes the steam transitions to smoke when excess moisture is used up. But by then the veggies are nicely browned and crisp-tender—perfectly delicious.

You can eat the veggies as is (plenty tasty) or you can add a little finishing sauce like the Thai-flavored one I’ve suggested below. Chopped fresh herbs are optional, too, depending on just how much of a rush you’re in. Without the sauce or herbs, you can be done, start to finish, in less than 15 minutes. Starting with three cups of veggies yields plenty for a side-dish for two, but you can up the amount a bit, stretch the cooking time a touch, and make a bit more for three or four.

Teeny Veggie Stir-Fry with Optional Sauce

For a printable version of this recipe, click here.

Serve these with rice and a flat-omelet egg for a vegetarian supper.

_____________________________

For the sauce:

1 tablespoon Thai fish sauce

1 1/2 teaspoons fresh lime juice

1 1/2 teaspoons brown sugar

1/4 teaspoons Asian chili-garlic sauce

For the stir-fry:

2 tablespoons vegetable or peanut oil

3 cups veggies, cut into small (3/8- to1/2-inch) pieces (Choose as many as you like, but at least four of the following for a total of 3 cups: bell peppers, onions, mushrooms, broccoli, cauliflower, cabbage, green beans, bok choy, snow peas, sugar snap peas, or carrots)

kosher salt

1 teaspoon minced fresh garlic

1 teaspoon minced fresh ginger

2 tablespoons thinly sliced scallions

1 to 2 teaspoons chopped fresh cilantro or mint (optional)

______________________________________

For the (optional) sauce:

In a small bowl, mix together the fish sauce, lime juice, 2 teaspoons water, brown sugar, and chili-garlic sauce.

For the stir-fry:

In a large (12-inch) nonstick stir-fry pan, heat the oil over medium-high heat. When the oil is hot (it will loosen up), add the 3 cups veggies and 3/4 teaspoon salt, turn the heat to high, and cook, stirring, until the veggies are crisp-tender, slightly shrunken, and lightly browned, about 3 minutes (4 at the most). Add the garlic, the ginger, and the scallions. Stir-fry briefly, just until fragrant, about 30 seconds. Remove the pan from the heat and carefully pour in the sauce mixture (if using). Stir until the sauce thickens and reduces slightly. Fold in herbs if using and serve right away.

Serves 2