All posts by Susie Middleton

Imagining Spring with A Fennel & Meyer Lemon Recipe

This long winter is making me cranky. It snowed yesterday, for God’s sake! I want spring—the real spring—to arrive NOW. Fat chance. Here on the Island, it’s a long way’s off. The maritime climate (read: cold ocean air) keeps the trees from leafing out until it is practically summertime—spring slides by in a blur of lilacs and rhubarb.

It’s not just light and warmth I’m longing for; it’s something fresh and green and edible I want—something pulled from the ground with my own hands. Soon, soon, soon, I tell myself. It won’t be long before we head to our secret watercress stream and come home with a wild salad.

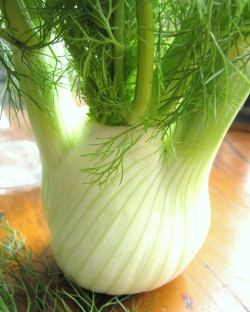
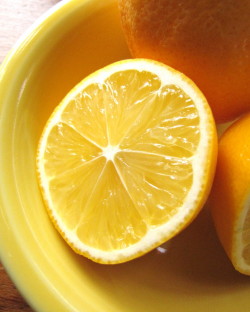
But for now, I’m still stuck imagining springtime at the grocery store. It’s not surprising, then, that I snapped up some frilly frondy bulbs of fennel yesterday. With all that greenery still attached, nice fennel bulbs look like they’re fresh from the garden—you can squint and imagine they’re still growing. A bag of Meyer lemons caught my eye, too. They weren’t cheap, but I had to have them, simply because their color reminded me of a sun-drenched villa in Italy. (A hypothetical villa, I’d have to say, since I’ve never been to Italy!) Meyer lemons have a bracing, almost champagne-ish quality to them that’s a lovely switch-up from the starker acidity of lemons. I wouldn’t necessarily call them sweet, but they do have a complex flavor that hints of tangerines.

At home, I decided to brown-braise the fennel and finish with a little buttery pan sauce enhanced with the Meyer lemon juice. Since I’d already planned to grill-roast a pork loin for Roy, this was a perfect side dish—a riff on a recipe I did for Fast, Fresh & Green. While I love fennel raw—sliced paper thin for a salad—I find that braising it brings out a sweet flavor and tender texture that appeals to a lot of folks who think they don’t like this veggie. Ironically, though, cooked fennel is no longer very fresh and spring-y looking; this homey kind of braise is actually great on a cold night—which, of course, we still have plenty of around here. Hope it’s warmer wherever you are!
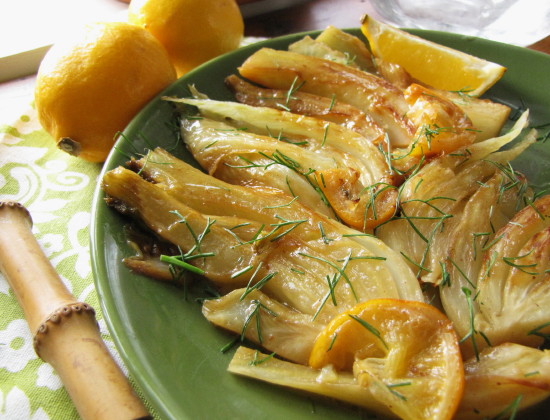
Brown-Braised Fennel with Meyer Lemon Pan Sauce

Printable Version of Recipe

You’ll have to forgive the long-winded description of trimming and cutting fennel here—I did my best to be clear, but a video would have helped! Just aim to get fennel wedges that are close to the same width so that they will cook evenly; don’t worry if the wedges don’t hold together—no big deal. Also, I’m sorry to say I call for 2 fennel bulbs here, but you will probably only use about 1 1/2. (One very large fennel would do it, but most of what you get in the grocery is medium-sized.) Save the remainder for salads. Feel free to use lemon juice here instead of Meyer lemon juice. I’d use a bit less or combine the lemon with a little orange juice to get a similar acidity.

______________________________________________

2 medium-large fennel bulbs (about 1 1/4 lb. each with stalks)

2 tablespoons unsalted butter (cut 1/2 tablespoon into two or three pieces and keep cold)

1 tablespoon extra-virgin olive oil

3/4 teaspoon kosher salt

1 cup low-sodium chicken broth

2 tablespoons fresh Meyer lemon juice (or 1 to 1 1/2 tablespoons regular lemon juice and or a combination of lemon and orange juice)

______________________________________________

Get out your pan. Make sure you have a 10-inch straight sided sauté pan and a lid for this. If you don’t have a straight-sided sauté pan, a Dutch oven would be a better bet than a slope-sided skillet.

Trim and cut the fennel bulbs: First cut the stalks and fronds off each bulb. Roughly chop a few fronds to yield about two teaspoons (more or less is fine) and set that aside for garnish. Cut each bulb in half. With a sharp knife, notch out most of the core from each bulb half, leaving a bit of the core in to hold the eventual wedges together. You will only need three of the four halves—save the other to slice thinly into green salads. Put the remaining halves, cut side down, on the cutting board and cut each into 5 or 6 wedges about 3/4 to 1-inch thick. (Point the knife towards the center of the bulb as you make each cut—that way you will be sure to include a bit of the core.) You will probably only be able to fit 14 or 15 wedges in the sauté pan. To see what fits, arrange them in the dry pan off the heat.

Cook the fennel. In the 10-inch straight-sided sauté pan, heat 1 1/2 tablespoons of the butter and the olive oil over medium heat. When the butter has melted, arrange the fennel wedges in one layer in the pan and season with the 3/4 teaspoon salt. Cook, uncovered, without stirring, until the bottom sides are browned, about 8 to 10 minutes. Use tongs to check to see if the wedges are browned enough. You also might want to move your pan around on the burner to make sure the wedges brown evenly.

Carefully flip the wedges over with the tongs and cook for about 4 minutes on the other side. Pour the chicken broth in the pan and cover loosely with the lid, leaving just a bit of room for steam to escape. Make sure the chicken broth is simmering; raise the heat if necessary. Cook until the chicken broth has reduced to just a couple tablespoons (the wedges will be tender), about 10 to 12 minutes. Take the pan off the heat and carefully transfer the wedges to a serving plate.

Return the pan to the heat, add the lemon juice and quickly scrape up all the browned bits on the bottom of the pan (don’t let the liquids over-reduce). Add the cold butter pieces and stir until melted and the sauce looks creamy. Remove the pan from the heat and stir and scrape the pan sauce over the fennel pieces. Sprinkle the chopped fennel fronds and a tiny bit more salt over and serve right away.

________________________________

Variation note: If you like, you can add a few very thin half-moon slices of Meyer lemon or lemon to the pan along with the fennel wedges while they’re cooking. They get browned and soft and are perfectly edible.

Road Trips are Great, But There’s No Place Like Home

We ran away from home this weekend. Just a short trip to America, and now we’re back on the Island. It seemed like the right time to go, what with the spring equinox and the super moon signaling the big change: Busy Season Up Ahead. The UPS guy deposited rolls of garden fencing on our back step last Wednesday; Roy lucked into a load of free lumber for the chicken coop on Thursday; our bulk order of potatoes arrives week after next, and the baby chicks won’t be long after. Better get away now, we thought.

Sometimes, on a Winnie-the-Pooh-worthy blustery March day such as Friday was, the ferries don’t make the six-mile run across Vineyard Sound (above) to the mainland. We lucked out, though, hopped the 9:30 boat, and headed right for the gas station once we landed in Falmouth. Had to fill up with $3.50 gas (rather than the $4.25 stuff out here) for our drive up to Portland, Maine. When the road lies before you, expectations run high. We were excited.

Oddly enough, though, by the time we were back at that same Falmouth gas station Sunday afternoon, we couldn’t wait to board the ferry for the ride home.

It’s not that we didn’t have a good weekend. Portland, in its haunting old-world way—all cobblestones and fishing wharves and classic architecture—is both stunning to look at and stimulating to walk around. It’s also an amazing food town: Saturday we sustained ourselves with treats from the Standard Baking Company—an assortment that included a vanilla bean-laced madeleine, a chewy dark brownie, a small asiago fougasse, a slice of ricotta pound cake, and one of their uber-flaky croissants—and with a visit to Rabelais Books, an incredible store for cooks that specializes in antiquarian and hard-to-find cookbooks (but that carries new cookbooks, too). Before Roy could drag me out of the store, I had gathered a small stack of purchases, all by British cooks, who I find so inspiring with their reverence for seasonal ingredients. Skye Gnygell’s A Year in My Kitchen and Nigel Slater’s The Kitchen Diaries were on the top of the stack.

Rabelais’ proprietors, Samantha Hoyt Lindgren and Don Lindgren, were kind enough to hand us a list of (affordable) dinner suggestions, and we wound up eating the perfect meal that night—a collection of small plates at Pai Men Miyake, a Japanese noodle bar. Everything—ramen with pork belly, crisp-fried flounder with shiitake, seared gyoza—was delicious, but the surprise hit was a warm salad of fried Brussels sprouts with a fish sauce, mirin, and cilantro vinaigrette. Nutty, crispy, salty, tart—Roy called the sprouts “unbelievable.” Who knew we’d find killer vegetables at a noodle place? I’m going to try to recreate them at home some time.

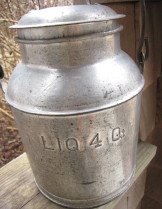
Probably the biggest kick we got was poking through the antique stores on a wiggly drive we took up Route 1A. Trolling for additions to our eclectic collections, we wound up with an old milk can, a couple new chicken-y egg cups, a small yellow ware bowl, and a 48-star American flag.

The car was full of goodies and we were full of good food as we straggled onto the 3:45 boat on Sunday. Car-weary, we shut off the Honda and walked up to the top deck for some air. Standing in the lee to avoid the wind, we watched Falmouth fade and the colors shift on the water as the ferry powered out into the Sound, leaving its roaring wake behind. Forty-five minutes later, rounding the corner into Vineyard Haven, we smiled and raced back to the car. Home.

Coming home, no matter how long you’ve been away and no matter where you live, usually elicits at least a small measure of emotion. But coming home to an Island—a place you cannot reach by car, a place no bridge connects to—feels somehow even more charged. More like a ruby-slipper-clicking kind of emotion. For me at least. As many times as I’ve ridden that boat in the last 3+years, I never fail to have a deep surge of gratitude as the ferry docks. Gratitude, I guess, for this peaceful place in an increasingly noisy world. For me there’s no place like my Island home.

St. Patty’s Day & Sixburnersue: A Gratin Recipe to Celebrate

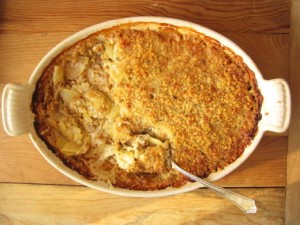
St. Patrick’s Day, 2011, is sixburnersue.com’s unofficial one-year anniversary. At least that’s what I’ve decided. Actually, let’s make it official. And next year, we’ll have a proper celebration with two green cupcakes and two green candles. This year, we will have to make do with a yummy cabbage and potato gratin recipe.

I’m not sure of the exact day sixburnersue.com went live last year, but I know by St. Patty’s Day I was blogging in real time. And strangely enough, the blog I wrote on sautéed cabbage for the green holiday turns out to be one of the most visited pages on this site. (Along with a post on ten things to do with celery root! Go figure. Posts on more glamorous veggies like fingerling potatoes and asparagus get a lot of hits, too, but I think there may be a shortage of good cooking info out there on less sexy veg.)

My favorite cabbage is the crinkly Savoy (beautiful dark green on the outside, pale on the inside), and yes, I love to sauté it to bring out its sweeter, nuttier side (see last year’s blog.) Then I use it as a rustic tart filling, a pizza topping, a bed for meat, a stir-in for mashed potatoes, or as a bed for a savory gratin, like the potato and Gruyére one here. Of course my main motive for posting this recipe today is to give you an alternative to boiled cabbage (not my favorite). Actually, I’d be happy if you skipped the corned beef, too, and went with roast leg of lamb. But, yeah, you didn’t ask for my opinion on that, did you?

Whatever you eat on Thursday, may the (good) luck of the Irish be with you. (We have more than a little of it here in our household. Just ask the man with the shamrock tattoo.) And if you’re the praying kind, ask St. Patrick for a little luck to rub off on our friends in Japan.

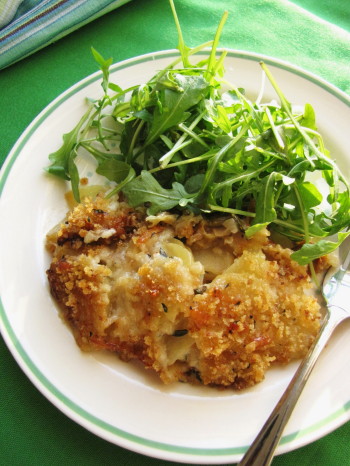
St. Patrick’s Day Potato, Cabbage, Onion, Apple & Gruyère Gratin

This delicious gratin is a pretty rich side dish, so a little goes a long way. Serve it with roast lamb, corned beef, or a big warm salad. It will take you about an hour to get it in the oven, and about an hour and a bit to cook, so plan your menu accordingly. When prepping, don’t be tempted to under-brown the cabbage or the onions. To slice the potatoes thinly, cut them in half first, lay them cut side down, and slice across with a thin-bladed knife such as a Santoku. (You don’t need to use a mandolin).  

__________________________________________

1 tablespoon unsalted butter, plus more for rubbing the baking dish

1 1/2 cups coarse fresh breadcrumbs

3 ounces Gruyère cheese, grated (1 1/4 cups packed)

3 tablespoons olive oil

1 tablespoon plus 1 teaspoon coarsely chopped fresh thyme leaves

kosher salt

2 small yellow onions (9 to 10 ounces total), thinly sliced (about 2 cups)

2 teaspoons minced fresh garlic

2 cups thinly sliced Savoy cabbage (about 7 ounces)

1 Jonagold, Pink Lady, or Golden Delicious apple, peeled, cored, quartered and thinly sliced crosswise

1 lb. Yukon Gold potatoes, peeled, halved and very thinly sliced

3/4 cup heavy cream

3/4 cup low-sodium chicken broth

_________________________________________

Heat the oven to 350 degrees F. Rub a 2-quart shallow gratin dish (or a 11 x 7 Pyrex baker) with a little butter.

In a small bowl, combine the breadcrumbs, 2 tablespoons of the grated Gruyère, 1 tablespoon of the olive oil, 1 teaspoon of the chopped thyme and a good pinch of salt. Set aside.

In a 10-inch heavy nonstick skillet, melt 1/2 Tbsp. of the butter with 1 Tbsp. of the olive oil over medium-low heat. Add the onions and 1/4 tsp. of salt, cover, and cook, stirring occasionally, until softened and translucent, 6 to 7 minutes. Uncover, raise the heat to medium, and continue to cook, stirring frequently, until the onions are lightly browned, 6 to 7 minutes more. Add 1 teaspoon of the minced garlic, stir for a few seconds, and remove the pan from the heat.  Transfer the onion-garlic mixture to the baking dish and spread it evenly in one layer. Sprinkle 1/2 teaspoon thyme leaves over the onions.

Return the skillet to medium-high heat and add the remaining 1/2 tablespoon of butter and 1 tablespoon olive oil. When the butter has melted, add the cabbage and a pinch of salt. Stir and let sit for a minute for browning to begin. Then cook, tossing frequently with tongs, until cabbage is limp and browned, 4 to 5 minutes. Add the remaining 1 tsp. garlic, stir well, and remove the pan from the heat. Transfer the cabbage mixture to the baking dish and spread in one layer. Sprinkle 1/2 teaspoon thyme leaves over the onions.

In a mixing bowl, combine the sliced potatoes, the sliced apples, the remaining Gruyère, the remaining thyme, the cream, the chicken broth, and 3/4 teaspoon salt. Gently mix with a silicone spatula and transfer to the baking dish, spreading the mixture evenly over the cabbage and onions. (Sometimes it’s easier to transfer the solids first. Lift the potatoes and apples out of the liquids with your hands and spread them in the dish; then gently pour the liquids over all.) Make sure everything is evenly distributed and use your hands to press down gently on the potatoes and apples to let the liquids come up around them.

Cover the top of the gratin with the breadcrumb mixture. Bake until the potatoes are tender (check both the middle and sides of the dish with a paring knife) and the top is brown (there will be a brown line around the edge where the liquids have reduced), about 65 minutes. Let cool for several minutes before serving.

Serves 6 as a side dish

Strange Bedfellows: Sunchokes & Our Own Maple Syrup

We may be taking this Green Acres thing a little far, but we’re having fun. Actually, more fun than people really deserve to have. Our latest project is making our own maple syrup from the sugar maples in our yard. Or I should say, this is Roy’s latest project. He got all geared up about this, apparently having learned something about maple sugaring in 4H and Boy Scouts. (The crafty 4H part I can wrap my head around. But Roy—a Boy Scout? Well, we all have our mysteries.)

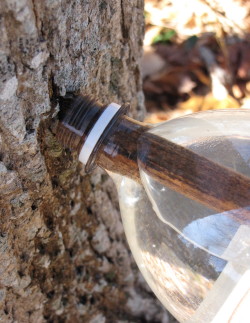
Anyhow, we have these two lovely mature sugar maples right out back, so Roy drilled one hole into each and inserted a tap fashioned from bamboo into each hole. (Mature sugar maples can take up to three taps.) With the cold nights and warmer days we’ve been having, the sap has been running like crazy. Roy’s solution to catching the sap (rather than the classic old-timey galvanized bucket we have that doesn’t look too sanitary) was to hang clean two-liter soda bottles over each tap. This works great—the narrow neck of the bottles keeps rain and other stuff out, while the weight of the running sap keeps the bottle clamped on to the tap. The bottles fill up in only a few hours though, so you’ve got to switch them often.
As far as cooking down the sap into maple syrup—before I (briefly!) describe our experiments, my food-safety-culinary-professional-self has to issue a disclaimer: You should turn elsewhere for expert information if you want to try this at home. We are just messing around with making a little syrup for our own drizzling, but if you seriously want to learn more about this, you can check out this primer, or visit or call a small producer like these folks we just read about in the latest issue of Edible Boston.
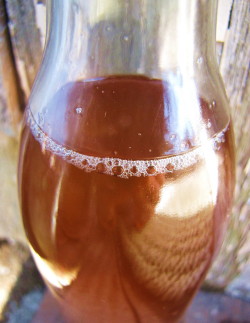
We started with one key piece of knowledge: Sap to syrup is a 40 to 1 ratio, so if you wanted 1 quart of maple syrup, you’d need to start with 40 quarts. We have managed, through trial and error, to get 1 pint of deliciously maple-y syrup (on the lighter side but still tasty) by boiling down the sap in parts—once the first batch gets down to about an inch and a half of depth in the pot, we add another big batch of sap. We keep on reducing the liquid down this way by adding more sap, and after each reduction the remaining liquid gets a bit darker, a bit sweeter, and a bit more viscous. If you know anything about water, sugar, and syrup, you’ll know that this all has to do with increasing the ratio of sugar to water in the liquid, and that to get the proper end result, you’d need a hydrometer. (Maple syrup that will both keep and not form sugar crystals has a final sugar percentage of between 66 and 67percent). But for a small amount of something tasty, we managed without a hydrometer.

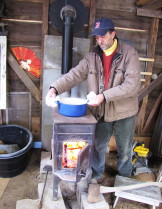
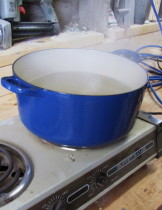
Any way you approach it, you will need to set up burners outside, and you will need a big heavy-duty pot. Our garage/barn/shop out back has both a wood stove and electricity. We tried using the wood stove and one of my cast iron Dutch ovens, but it couldn’t bring the liquid to a rolling boil. (Removing the stove cover would work—and would wreck my pot). So we switched to a portable electric twin burner we have and did most of the reducing on that in the shop. Roy brought the pot inside for the final reduction. But if you tried doing the whole thing inside, your ceiling paint would peel. (By the way, you will also need a fine-meshed filter to strain sugar sand out of the syrup.)

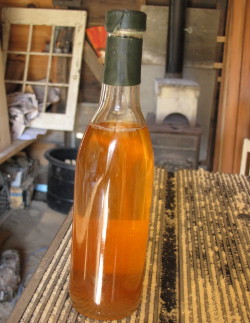
I, of course, let Roy do all the hard stuff. All I really did was clean a bottle so that we could take a pretty picture of the finished syrup—and then I could start drizzling it on everything, including vegetables (like the smoky sautéed cabbage and mushrooms we had last night). It’s no secret that I’m fond of maple syrup to the point of over-using it. (At least I can admit it. See these Swiss chard and Tuscan kale recipes on sixburnersue.com.)

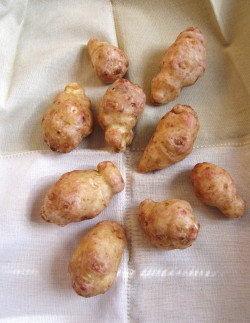
But in my follies, I found one vegetable it doesn’t get along with—Jerusalem artichokes (aka sunchokes). I bought the sunchokes at Whole Foods when we were off-Island last week. I bought some kohlrabi, too, thinking I need to push myself into experimenting with some vegetables I tend to overlook or haven’t worked with much.

The plump knobby sunchokes were pleasing to look at and hold, but don’t smell like anything.(I am an obsessive sniffer.) Easy to chop and slice, too (they don’t need peeling). But my jury’s still out on the flavor. I’d like to try Thomas Keller’s easy-looking sunchoke soup in the latest issue of Vegetarian Times for a different approach (unfortunately the recipe’s not online), but my roasting experiments left me perplexed. (I started with roasting on the advice of cookbooks I consulted.)

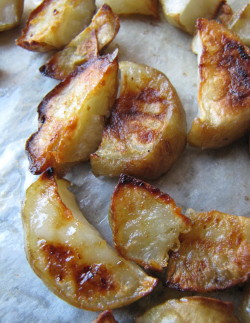
I cut the sunchokes into half-moons, tossed with oil and salt, and cooked at 425 on a sheet pan until tender and browned around the edges, about 20 minutes. While they were cooking, I made a quick rosemary-maple butter. When I tasted the roasted tubers, I had a feeling the maple butter was the wrong way to go—even with the rosemary and a touch of sherry vinegar in it. So I held off on tossing the two together.

I found the flavor of the roasted sunchokes to be intensely artichokey—but more in the artichoke leaf kind of way than the artichoke heart flavor. (I adore baby artichokes and artichoke hearts, and I know I may be splitting hairs here, but there really is a difference between the hearts and the leaves. This flavor was somehow overly vegetal and grassy, like the pulp on the leaves can be.) I loved the pieces with very crispy edges. (Probably no surprise, but I swear those crispy parts were more complex and less vegetal.). Realizing the maple butter was not going to cut the intensity, I made up a quick Asian dipping sauce similar to this one I use for crispy broccoli and I loved what the ginger and soy did with the roasted sunchoke flavor—that match worked for me.

So I need to mess around more with sunchokes—and the next time I roast them, I’d definitely push the browning. But right now I can’t yet rave about them. Maybe one of you has had a different experience with these tubers (which are actually the root of a particular sunflower). Let me know. Me, I’ll keep drizzling our maple syrup on Brussels sprouts and green beans—and on my yogurt and berry parfaits!

Veggies for Breakfast or Eggs for Dinner? Here’s A Frittata Plus A Dozen Other Eggy Ideas

Lest you think I’m completely crazy for devoting so much cyber-ink to birds in my last blog, I thought maybe I should come clean about a couple of things. First, I think the whole bird thing is part of my effort to be more in touch with nature (goofy as that sounds, I know). Mostly because observing nature requires slowing down. In my old life, I did everything on one speed: Fast. (Oh, dear, now I’m starting to sound like Charlie Sheen.) I barely made time to tend a pot of herbs on the windowsill or take a walk around the neighborhood—I certainly didn’t don the binoculars to wait for a bird to fly by.

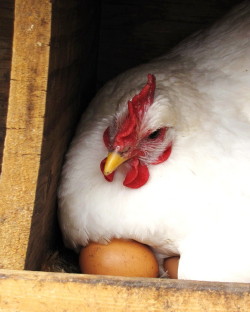
Secondly (and much more practically), one of the reasons I’m truly excited about having our own hens is because we eat so many darn eggs around here (see below). Okay, I admit, there’s also a deeper meaning to the hen thing. To be completely honest, I still have a little fear that someone is going to snatch me away from the Island, return me to the office, to the suburbs, to I-95, and to a whole lot of other noise that I now happily live without. I figure raising hens gives me one more toehold on Vineyard terra firma. If the Old Life Aliens come to snatch me away, they will have to take my hens, too!

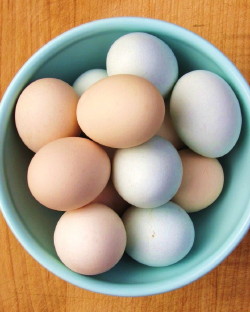
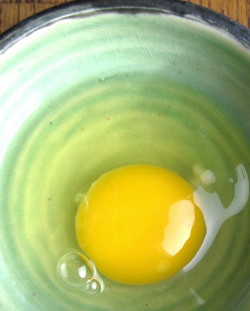
Okay. So about those eggs. Because I don’t eat a ton of meat anymore…and because I figured out a long time ago that I won’t get hungry mid-morning if I eat eggs for breakfast… and because Roy loves having breakfast for dinner… and because Libby loves anything that involves mixing a batter—we eat a lot of eggs. We are very fortunate to have a regular supply of eggs from local farms available to us (even in the grocery stores); their plump golden yolks and perky whites have spoiled me. (The yellow color comes from the  higher amounts of beta-carotene these birds ingest.) When I’m developing recipes, I’ll try to use non-local eggs to make sure the recipe will taste good regardless—but for our everyday eating, we love our local eggs. Here’s what we do with them:

1. We scramble them with fresh herbs (especially cilantro and mint), a dash of cream, a little cheese (cheddar, aged gouda, Monterey jack, goat cheese), and plenty of salt and pepper.

2. We make waffles and buttermilk pancakes, sometimes for dinner. (Favorite recipes at finecooking.com).

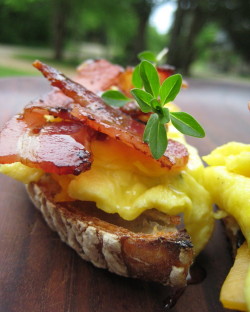
3. We make all kinds of different egg sandwiches; here’s a recipe for one of my favorite creations, which I nicknamed “The Local.” Yes it has a bit of (local!) meat on it.

4. We make my Dad’s famous popovers. (See King Arthur Flour site for pans.)

5. We make savory bread puddings, especially when we have the amazing challah bread from our local Orange Peel Bakery. (Popover and bread pudding recipes coming in Fresh & Green for Dinner.)

6. We make French toast with a dash of vanilla and maple in the custard, and we top it with a homemade concoction of fresh berries warmed in maple syrup and slightly mashed in the skillet. (Love to use the challah here, too.)

7. We make omelets with leftover roasted veggies or roasted tomatoes.

8. We make a rif on pasta carbonara with spring asparagus or garden peas.

9. We make thin, quiche-like tarts; my favorite is with fresh corn, basil, and tiny tomatoes.

10. Of  course, we make cookies and quickbreads and the occasional coffee cake, too. (Most often we use recipes from my favorite baker, Abby Dodge.)

11. We make veggie fritters or pancakes—sometimes with grains, too, or leftover mashed potatoes. We also make spoonbread, a favorite from my Dixie days.

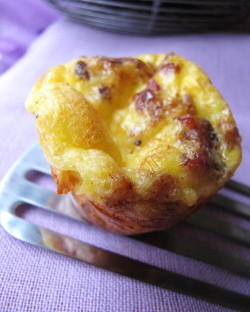
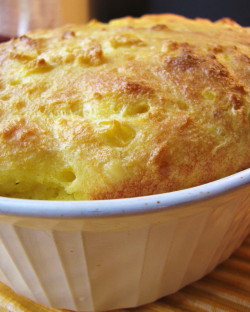
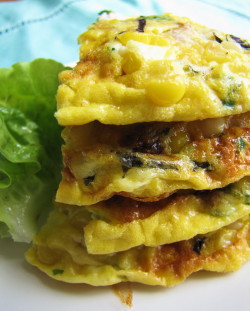
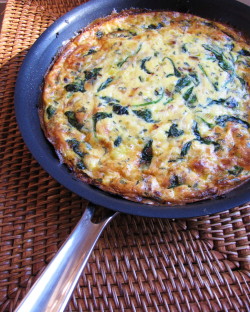
12. But probably our favorite thing to do with eggs is to make a veggie frittata. Usually I make one big one, but sometimes I’ll make little ones in a mini-muffin tin. Frittatas (like the leek and spinach one below) are incredibly versatile; you can eat them for breakfast, lunch, snacks or dinner. And they always taste better after sitting a bit (even overnight); I guess the flavors have more time to penetrate the custard. The method I learned years ago at Al Forno restaurant is easy to follow, and you can make up your own veggie combos, too. (I also love potatoes, mushrooms, corn, arugula, scallions, and broccoli in frittatas.) Just be sure to cook most veggies first to concentrate flavor and to reduce excess moisture. Be generous with fresh herbs and don’t forget the salt and pepper in the custard.

Leek, Spinach, Thyme & Gruyere Frittata

This easy frittata method starts out on the stovetop and finishes baking in the oven—but there’s no tricky flipping involved. After cooling, I like to cut the frittata into small squares, rather than wedges, so that bite-size snacks are easy to grab. It’s also a great way to go for a potluck, book group meeting, or other casual gathering.

_______________________________

3 tablespoons unsalted butter

3 medium leeks (white and light green parts), sliced about 1/4-inch thick (about 2 cups) and well washed

Kosher salt

2 teaspoons minced fresh garlic

3 ounces baby spinach leaves

6 large eggs at room temperature

2/3 cup half ’n half

1 tablespoon roughly chopped thyme leaves

big pinch nutmeg

freshly ground pepper

1 cup (3 oz.) coarsely grated Gruyère

_______________________________

Preheat the oven to 375°F.  Make sure one of your oven racks is positioned in the center of the oven.

In a 10-inch heavy nonstick (ovenproof) skillet, melt 2 Tbsp. of the butter over medium-low heat. Add the leeks, season with a big pinch of salt, and cover. Cook, stirring occasionally, until the leeks are softened, 5 or 6 minutes. Uncover, raise the heat to medium, and continue to cook, stirring frequently, until the leeks are browned in spots, another 8 to 11 minutes. (Don’t worry if they get a little overbrown in places—that’s just great flavor.) Add the minced garlic and stir well. Add the spinach and 1/4 tsp. salt and, using tongs, toss and stir the spinach with the leeks until it is all wilted, 2 to 3 minutes. Remove the skillet from the heat and let the veggies cool a minute.

In a large mixing bowl, whisk together the eggs, half ’n half, 1/2 teaspoon kosher salt, the thyme, the nutmeg, and several grinds of fresh pepper. Stir in the Gruyère.

Return the skillet to medium-high heat and add the remaining 1 tablespoon of butter to it. When the butter has melted, pour and scrape all the custard mixture into the skillet.  Using a silicone spatula, gently stir and move the contents of the pan around so that everything is evenly distributed. (You may have to nudge clumps of leeks and spinach apart.) Let the pan sit on the heat until the custard is just beginning to set all the way around the edge of the pan, 1 to 2 minutes. Transfer the pan to the oven and bake until the frittata is puffed, golden, and set, 22 to 24  minutes.

Before unmolding, let the frittata cool for 10 to 15 minutes. Shake the pan a bit, tip it, and use a spatula (silicone works great) to get under the frittata and slide it gently out onto a cutting board or serving plate.  Cut into wedges and serve warm, or wait for a bit longer and serve at room temp. Refrigerate leftovers; this is even better the next day.

Serves 4 to 6

Tuscan Kale with Blood Oranges: A Better Wintry Mix

The weather is seductively warm and balmy here today. We’ve hung the wash out on the line, started clearing brush in the yard, and snipped forsythia branches to force indoors. I know it’s going to turn freezing again this weekend, but I’m hoping we don’t get any more of that awful “wintry mix.” I think this is something the weathermen have dreamed up especially for the New England coastal islands this winter. Every time a big storm’s on the way, we watch the news expectantly, hoping to hear that we’ll awake to a beautiful blanket of snow the next morning. Instead, we always get the same news: “Stockbridge, you can expect 4 bazillion inches of snow. However, you folks down there on the Cape and Islands can expect a wintry mix: Sleet, freezing rain, ice.” Ugh. Instead of bright white, we get dull pewter.

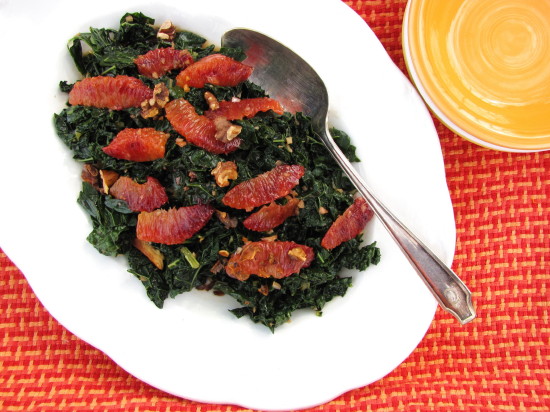
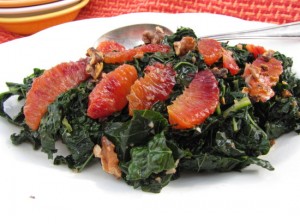
Since I require bright color to keep me happy, I make up for the weather with vegetables. One of my favorite color combos is deep green and bright orange. This week at the grocery I spotted big bunches of leafy Tuscan kale right across the aisle from a bin of blood oranges, and thought bingo! What a great combo—a truly colorful wintry mix.

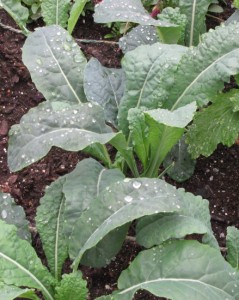
I’m surprised I haven’t written much on the blog yet about Tuscan kale, because it’s one of my favorite leafy greens, and we grew a lot of it last year, too. Unlike many leafy greens, Tuscan kale doesn’t bolt (go to flower), so you can keep harvesting from one plant for many weeks. It’s even better in the kitchen, because it has a much silkier texture and a less mineral-y flavor than regular curly kale. It’s lovely in soups, pastas, and gratins, but makes a versatile side dish, too.

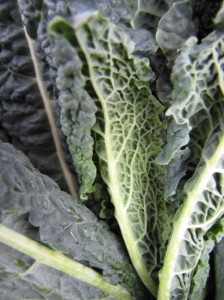
If you want to cook (or grow) Tuscan kale, there’s just one problem. You will have to memorize a roster of names this green goes by so that you don’t miss it. When I first encountered this kale a few years back, I understood it to be Cavolo Nero, or black kale. Now it seems to be marketed most often as Lacinato; though you will also see it labeled Dinosaur kale to appeal to kids. I just stick with Tuscan kale. The good news is, despite the name confusion, it’s relatively easy to identify this kale by its looks. The leaves are long, straight, and quite narrow—and they have a distinctive webby, bumpy pattern on them.

When you get your Tuscan kale home, rinse the leaves, wrap them in a damp dish towel, cover with a big zip-top bag, and they’ll keep very well in the fridge for several days. You’ll need to pull or cut the woody stem out and chop the leaves before cooking. I don’t like the texture of rubbery, undercooked kale (of any sort), so I always cook my kales (Tuscan included) in boiling salted water just until they lose their unpleasant chewiness. This takes between 4 and 6 minutes for Tuscan kale. Taste a leaf after a few minutes and keep tasting so that you’ll know when the texture has changed. Drain the kale well and press excess moisture out. Then toss it with sauces (in or out of the sauté pan) or use in a gratin or pasta. (No need to pre-cook it if using it in soup.)

For the recipe I’ve included here, the colorful blood oranges (easily replaced with regular oranges) inspired a sweet and tangy sauce that includes my two favorite flavors with dark greens—maple syrup and balsamic vinegar. (Greens need vinegar or some other acid to cut through the earthy tones.) A generous hit of garlic completes this dish, which would be tasty with roast chicken or pork, or even with creamy polenta for a light veggie dinner.

Tuscan Kale with Orange-Maple-Balsamic Sauce

This recipe calls for segmenting a blood orange or orange—and it also calls for a tablespoon of the citrus juice. So segment your fruit first (over a bowl to catch the juices) and you can use some of the juice in the sauce mix. The segments will also continue to give off juice as they sit; feel free to include those juices in your final dish, too.

___________________________________
1 tablespoon maple syrup
1 tablespoon balsamic vinegar
1 tablespoon fresh blood orange or orange juice
1 large bunch (about 10 to 11 ounces) Tuscan kale
kosher salt
1 tablespoon extra-virgin olive oil
1/2 tablespoon unsalted butter
1 1/2 to 2 teaspoons minced fresh garlic
big pinch crushed red pepper flakes
1 blood orange or small orange, peeled and segmented
2 tablespoons coarsely chopped toasted walnuts or pine nuts

_______________________________________

In a small bowl, whisk together the maple syrup, balsamic vinegar, and blood orange or orange juice. Set aside.

Fill a Dutch oven or other 4-quart pot two-thirds full of water. Add two teaspoons salt to the water and bring it to a boil.

Remove the ribs from the kale by grabbing the rib with one hand and ripping the two leafy sides away with the other hand. (Or use a paring knife to slice along the stem to cut it away from the leaves.) Discard the stems and chop the leaves into bite-size pieces.

Add the kale leaves to the boiling water and cook for 4 minutes. Taste a leaf—if it still feels tough or a bit rubbery, continue to cook the leaves for 1 to 2 minutes more.

Drain the kale very thoroughly in a strainer in the sink. Press down on the kale to remove some excess liquid. (You can use a folded over dishtowel if the kale is too hot to touch.) Let sit for a minute and then transfer to a mixing bowl. Put the blood orange or orange segments in a separate smaller bowl.

Meanwhile, in a small nonstick skillet, heat the olive oil and butter over medium low heat. When the butter has melted, add the garlic and the red pepper flakes. When the garlic begins to simmer, cook for just about 1 minute longer (do not let the garlic brown). Stir in the maple-balsamic-orange mixture and turn the heat up a bit to bring the mixture to a simmer. Simmer just briefly—about 30 seconds—and remove the skillet from the heat. Spoon about 2 teaspoons of the sauce mixture over the citrus segments. Pour and scrape the remaining sauce over the kale, season with a pinch of salt, and stir well.

Arrange the kale on a warm serving platter, garnish with the blood oranges, and drizzle over any juices or sauce left in both of the bowls. Sprinkle the toasted walnuts over all and serve right away.

Serves 3 as a side dish.

Hello Post Office, Goodbye Manuscript!

Yes, it’s Valentine’s Day, and it also happens to be my good friend Chris Hufstader’s 50th birthday. But disregarding these two events (almost) entirely, I woke up on Monday, February 14, 2011, completely focused on something else: Getting my cookbook manuscript into Express Mail.

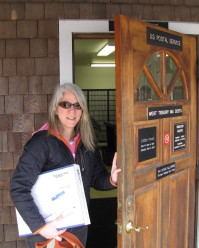
Mission accomplished. At noon, Roy drove me to the West Tisbury post office, I got out my credit card, and handed over a pretty heavy box containing the manuscript, the disc, some test photos and a cover letter. If all goes as it should, the box will travel from my Island home in New England to my editor’s desk in downtown San Francisco by noon (Pacific Time) tomorrow, satisfying the contract I signed, which required me to deliver these things on February 15, 2011.

It feels both disorienting (now what do I do?) and a bit anticlimactic (in reality, I have been wrapping this up for the last several weeks). But also exciting. Writing Fast, Fresh & Green and then seeing what a beautiful book Chronicle produced was totally a cool experience as far as I was concerned. And even though there is still a lot of work ahead (including some work from me on metric measurements) to make Fresh & Green for Dinner a reality, I am looking forward to it. I will keep you posted on the production process, but bear in mind that the book won’t be released until early spring of next year. (And again, that all depends on lots of things going the way they should.)

In the meantime, I’m going to do what all good cookbook authors do—dream up another book! And do some magazine writing, plan a vegetable garden and a chicken coop—and, oh, clean my kitchen, clean my office, organize the garden tools, cook a lot of vegetables…that sort of thing!

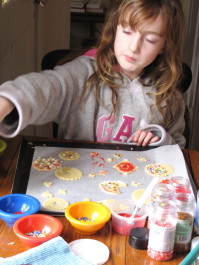
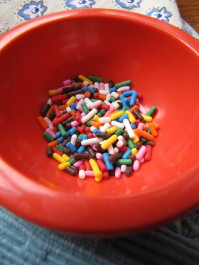
P.S. We didn’t entirely forget Valentine’s Day around here. Over the weekend, Libby and I improvised Valentine’s cookies from Christmas cookie dough (Roy’s favorite) and Christmas decorations. We didn’t even have a proper heart cookie cutter, but we managed. Here’s the recipe in case you ever need a decorate-able –and tasty—sugar cookie for a special occasion.)

Tip of the Week: Toast (or Oven-Roast) Nuts for More Flavor

As a kid, I never liked nuts in my brownies. And I was never really tempted to eat those big hulking Brazil nuts that lurked in my grandmother’s candy dish. Even today, you won’t catch me snacking on raw nuts very often. But I use a surprising amount of toasted nuts in my savory cooking, especially with vegetables. I add them to crumb toppings for gratins; I stir them into grain dishes (brown rice with toasted pecans, farro with toasted hazelnuts, wheat berries with toasted walnuts), and I use them to garnish roasted veggies, sautés and soups. I especially like to toss them in green salads (almost every night), so for convenience I keep a few little containers of different toasted nuts in my fridge at all times.

It’s not surprising, considering my obsession with everything caramelized, that I prefer the flavor of toasted nuts. Once browned, nuts get a deeper, earthier, sweeter, and, well, nuttier, flavor. And toasting improves their texture, too. While some raw nuts can be a bit pasty, toasted nuts are crisp and snappy.

While I say these nuts are “toasted,” it would be more accurate to call them oven-roasted. You can toast nuts on the stovetop in a sauté pan, but it requires close attention and careful stirring—and your nuts will still not be evenly toasted. So I prefer the oven method below:

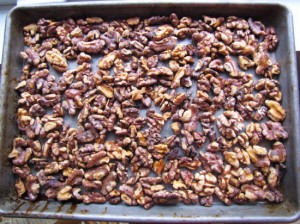
To toast nuts: Preheat your oven to 400 degrees. Leave nuts unchopped if you like, but I like to coarsely chop before toasting. (Don’t pulverize, though, or the nut “dust” will burn in the oven.) Spread the nuts in one loose layer on a heavy rimmed baking sheet and pop in the oven.

Alert your sniffer. That’s right, your nose. When the nuts begin to turn golden, they will start giving off that lovely nutty aroma. (So don’t stray too far from the kitchen.) Once you can smell them, they may still need a couple more minutes to get a really nice caramel color (most nuts will be toasted in 7 to 10 minutes). But keep an eye on them; golden brown is good—dark brown is heading towards bitter. Let the nuts cool on the baking sheet, then put them in a glass jar or other container to store in the fridge. Or freeze them. Either way, you’ll have a great little flavor/texture booster at the ready.

The Garden in Grey & White: Time to Think Green

I really don’t think I’m rushing things. I mean the seed catalogues arrived over a month ago. And so I’ve started to pester Roy about building our seed-starting shelves. I know we really don’t need to start the tomatoes for two months, but, you know, I like to be ready. Yes, it’s hard to think green when the garden looks like it does right now—all shades of grey and white. But I can’t help it if I’m kinda prone to over-excitement. (I got into a lot of trouble as a small child with this—I almost got kicked off a week-long stint on the Romper Room TV show in 1966 because I wouldn’t sit still. Apparently an ice cream bribe calmed me down. No surprise—that still works.)

Anyway, we are living in a new place this year, and we’ll be able to have our garden right out back. It was a lot of fun being at Native Earth Teaching Farm last year (and being near our neighbors, the baby goats), but it was a strain to shuttle back and forth every day. This year, it could be a blessing or a curse, but all we’ll have to do is tumble out of bed, pull on our boots, set the coffee off and head outside. There’s a lot of work ahead for us in preparing the garden here (see above!), but it’s an ample space that’s been gardened in the not-too-distant past. It sits up high and has plenty of sunlight. I can’t wait to work in it—of course after Roy builds the fence! I know, I’m bad—I will help him, I promise.

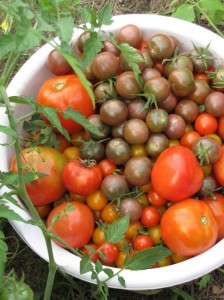
This year, we’re going to narrow our market crops to just a few things: greens, beans, potatoes, and tomatoes. And I’m going to use the rest of the garden in two specific ways for us. In part, it will be a kitchen garden, with plenty of greens and herbs for our everyday summer eating. (I can’t wait to get Ellen Ogden’s new book, The Complete Kitchen Garden.) And it will also function as a storage/winter-eating garden, with carrots, onions, potatoes, beets and turnips for the cold months. I’m not going to grow much in the way of squashes, eggplants, and peppers. They take up a lot of room and we don’t seem to eat as many of these as we do tomatoes and greens. When we need them, it’ll give us a good excuse to go to the farmers’ market and to barter with friends, too.

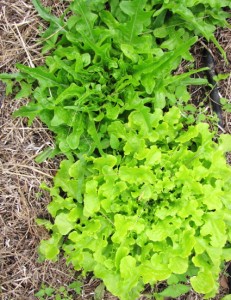
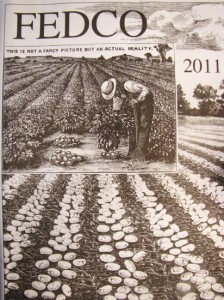
For the market garden, I’ve already ordered our tomato seeds and our potato and onion sets. (I told you I couldn’t wait.) I ordered mostly organic from the fabulous Fedco company in Waterville, Maine. They have incredible products at great prices. I’m trying out a couple new cherry tomatoes with great names and descriptions (love those seed catalogues!): Honeydrop Cherry Tomato and Be My Baby Gene Pool Cherry Tomato. We joined with our local Homegrown folks (a group of avid vegetable gardeners who meet once a month here on the Island to swap tips) for the potato (also from Fedco’s Moose Tubers division) and onion orders (from Dixondale Farms), so we’ll be saving a little money there. I’m trying to do the garden on a much smaller budget this year, so I didn’t splurge too much; I still have lots of viable seeds from last year, too. (At least I hope they’re viable). But since I’m such a nut about greens (both cooking greens and lettuces) and Fedco will hook you up with a small packet of lettuce seeds for less than $1.50, I went ahead and ordered some new lettuce varieties to try, including Flashy Green Butter Oak Lettuce and Speckled Amish Lettuce.

Oh, am I ever excited. I’ll let you know when we start the real work. And I’ll also let you know about the other big excitement coming around here—baby chicks! Future laying hens—at last, we’ll have our own eggs by fall if all goes well. (Of course, Roy is going to have to build a chicken coop, too—but he’s already designed it!)

P.S. Recipe blogs will return soon. I am strapped to the computer putting the final touches on my book manuscript, which will (please cross your fingers) be delivered to the post office next Monday…

Tip of the Week: Make Fresh Bread Crumbs in a Coffee Grinder

Between the book, the blog, and magazine articles, I’ve developed at least 100 new recipes in the last six months. (Ninety-nine, I think, for vegetables, but I did get to do one dessert!) All that time in the kitchen made me super-aware of the many cool tips I’ve gleaned over the years, both from the great cooks I’ve worked with and from my own experience. Tips for making things easier, tastier, faster, or just plain niftier. I don’t always get to include my favorite tips in published recipes, so I thought it would be fun to share one here every so often. This week I’m starting with a tip (or two!) about making fresh bread crumbs.

Surprisingly, I use fresh bread crumbs a fair amount in vegetable dishes. I use them to make a topping (usually combined with a little Parmigiano, chopped fresh herbs, and olive oil) for oven casseroles, including gratins and baked pastas. And I use them to make a crunchy topping for a stovetop pasta or sautéed vegetables. For baking, I want to start with fresh, moist breadcrumbs, as they will toast in the heat of the oven. For stovetop dishes, I actually want to start with those same fresh, moist breadcrumbs. Rather than drying them out to make them crunchy, I “toast” them by frying them in just a little bit of butter or oil in a small nonstick skillet—much tastier. (I never buy packaged dry breadcrumbs—the texture is too fine and often they have unwanted added flavors.)

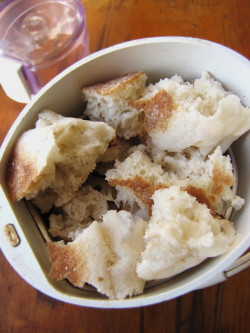
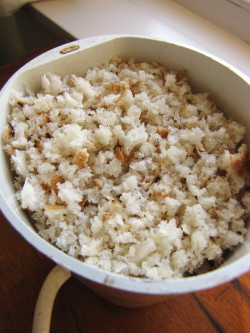
Either way, I always start with the same thing: bread I have whizzed in my coffee grinder. This little machine (mine is a Krups; $20 at Amazon) is incredibly efficient at ripping bread to shreds in seconds. I am partial to using English muffins for bread crumbs, because I love the generous texture they yield. I can rip up one fresh English muffin, whiz in the coffee grinder, and have fresh breadcrumbs in seconds. (I don’t over-whiz so that the crumbs stay somewhat coarse.) I also like to use up the ends of my sandwich loaves (which I collect in the freezer, where I keep most of my bread) by making them into bread crumbs. You can certainly turn artisan bread into bread crumbs, too, but it shouldn’t be more than a day or so old (unless it is coming from the freezer). Contrary to popular belief, rock-hard bread does not make good fresh breadcrumbs; it makes powder.

If I have lots of bits and ends on hand, I’ll use my food processor instead of my coffee grinder. A few quick pulses and I’ve got not just one cup but several cups of fresh bread crumbs. The food processor will work for small amounts, too. So if you don’t have a small coffee grinder that you can dedicate to cooking (it will chop spices and nuts too) rather than coffee, go ahead and use your food processor. Whatever you use, put any excess crumbs in a zip-top freezer bag and pop them in the freezer. There, they actually stay “fresh,” so that you can pull a half cup or so whenever you need it—they’ll defrost in seconds.