Category Archives: The Garden

It Ain’t Over ‘Til It’s Over

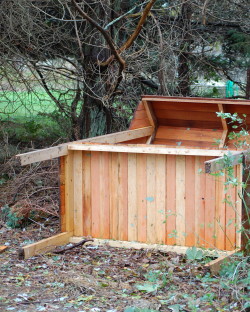
The farm stand fell over on Saturday. Tipped by a terrific gust from the nor’easter, it fell backwards, impaling itself on a small rock in the process. Just a little damage to the roof, no big deal. But it’s funny. Seems the farm stand somehow knew the season was over. Only an hour earlier, as the rain began to fall harder and colder, a customer in a small white station wagon pulled up, bought everything left on the stand (the last green beans, two bags of arugula, a dozen eggs, an onion and an eggplant) and neatly pushed the baskets to the back of the stand to keep them dry. (Thank you, whoever you were.) Seeing the car pull away, I dashed out and carried the cooler and baskets in. We were all in the living room playing Monopoly when we heard the bang.

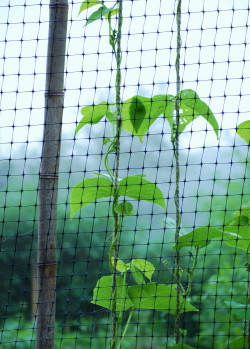
I’ve been reluctant to say goodbye to the growing season, so maybe I needed a little encouragement from the universe. A day after the nor’easter, I got some more: The first heavy frost fell, turning the 5-foot tall zinnia plants, the bushy eggplants, the spindles of leafy pole beans—just about everything still green in the garden—into a ghastly scene from Beetlejuice. Frightful skeletons of their former selves, the plants said goodbye in a single night.

I should be so courageous, I thought, rummaging around the dead foliage, harvesting random peppers and eggplants that clung hopefully to the blackened vines. I was thinking about the daunting project that awaited me inside—a different kind of rummaging, this time through old memories.

We’d just hauled a load of cardboard boxes over from my storage unit—my goal to empty the thing out and quit paying the ridiculous $200 a month to store my tchotchkes. But our little farm house, charming as it is, can only hold so much. Built in 1895, it has no closets. We’ve turned an upstairs bedroom into a storage closet, but between clothes, linens, coolers, and extra pots and pans, there ain’t much more it can take. Time to lighten my load.

In the end, it was much easier than I thought to part with many of the old photographs and school reports and scrapbooks and diaries. (Being a 13-year old girl was hard enough—no need to relive it. All these many years later, and I still winced. I had to laugh, though—judging from the reams of notebooks, apparently I was highly verbal from a very young age!) The best memories drifted out of an old trunk my mother had packed up long ago with a few of my most precious toys and dolls and little-girl clothes. Raggedy Ann and Peter Rabbit—such good friends. I couldn’t let them go.
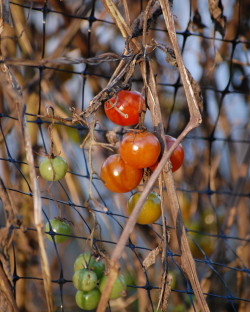
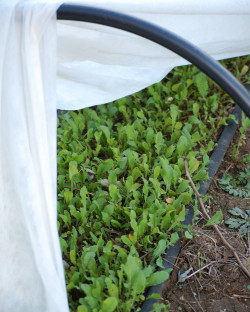
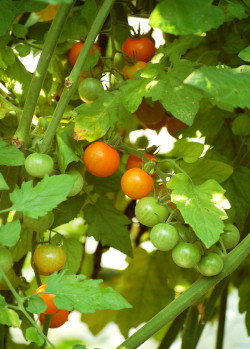
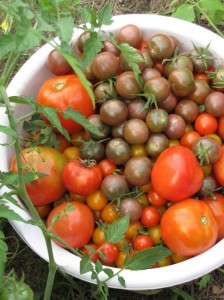
Why, I wondered, did letting go of the garden seem just as hard? (Or letting go of most of it—those darn rutabagas are alive and well, as are the kale plants—for now. And the lettuce and arugula we’ve protected under row cover and cold frame are thriving.) I think it’s only partly about how much I enjoy the gardening. The other part is that I seem to be extremely sensitive to two big issues these days: waste and expense. Why should we blithely ignore good food in our back yard, when we ourselves are on a tight budget, and the world at large—those who have enough to eat—is, too. Because despite the frost and the storm, every time I go out to the garden, I discover something else that’s still alive, still edible. Even the darn cherry tomatoes (hundreds of them) are still ripening. Inside, every surface in my office (while Roy puts new windows into the mudroom) is covered with trays of green tomatoes—rapidly turning red—that we picked during the last couple of weeks.

So I am hell-bent on still making our meals from the garden. (Not the whole meal, just some of it.) I made a delicious kale soup the other night, which I sold to Roy by including a good amount of andouille sausage and potatoes, along with some of those salvaged peppers, a late carrot, our stored onions, and plenty of garlic and spices. Sort of a Stone Soup with kale. I made a green tomato, gruyere, and leek gratin yesterday (good, but not the perfect match I was looking for with the tartness of green tomatoes).

This morning I messed around with fried green tomatoes. And, actually, fried red (and reddish-green) tomatoes. And realized again how powerful childhood memories are. Some of them will be forever with us, no matter how many trunks we lock up or boxes we throw away. Growing up, summers in Delaware, we ate fried red tomatoes (not green tomatoes) on a regular basis. (A regional thing, I guess.) Seasoned with lots of salt and pepper and dredged simply in flour, the big  cross-sections of beefsteaks cooked in butter or a little bacon fat took on a deep, umami-ish, almost stew-y flavor (with some sweetness, yes), and while I don’t remember absolutely loving them then, they were one of my Dad’s favorites. And tasting them this morning was a hugely familiar sensation, a reminder of my grandmother Honey and days at the beach. And I loved them. They’d be perfect with sausage and eggs for breakfast or sautéed flounder and garlicky spinach for dinner.

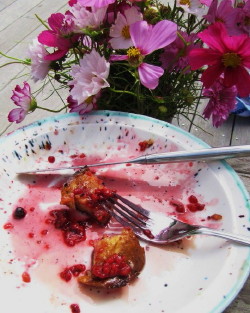
Turns out I don’t really love fried green tomatoes, though once I stopped being lazy (they require a commitment of several bowls—one for flour, one for egg, one for cornmeal and flour), I realized they are best with a crunchy coating, achieved by the three-part dredging. The cornmeal in the final coating is essential not only for texture and flavor, but also to help make an-extra firm coating that keeps steam inside while the green tomato fries. That steam, in turn, helps tenderize the green tomato and soften the tartness, too.

I tried the fried green tomatoes with a soy-lime-ginger dipping sauce like this one, thinking that would be a fun spin, sort of tempura-esque. But I wasn’t so crazy about that—even the little bit of lime was too much with the tartness of the green tomatoes. Because of the cornmeal, I also thought to try them simply drizzled with (you guessed it) maple syrup. Hmmm. Actually quite yummy. Well, I am predictable at least. I’ve had that sweet tooth all my life, too, and I don’t think it’s going away.

A Video of the Farmette, A Paella Dinner, and A Recipe for Unsellable Tomatoes

Darn it all, wouldn’t you just know it—this is the time of year when there’s so much going on at the farmette that I could write a blog every day. Except, ironically, there’s no time to write—too busy!

So today I’ll just have to give you a quick update on the goings on around here, because tomorrow I’m off to Boston to sign books at the Dewey Square Farmers’ Market, and I spent this morning cramming in the last bit of proofreading I needed to do on the galley of Fresh & Green for Dinner in order to get it off to Fed Ex in time to reach San Francisco by tomorrow. (It’s very exciting to see the design of the new book shaping up, even though publication is still many months away.)

First, great news: My friend Katie Hutchison, who kindly took care of the farmette with her husband Chris Hufstader while we were in Delaware, secretly made a video of their farm-keeping experience here at Green Island Farm and posted it on her website. Katie, who is an accomplished architect, photographer, and writer, is admittedly new to gardening and occasionally posts about her “Idjit” garden plot in a Salem, Mass., community garden. As you can tell, Katie’s not afraid to poke fun at herself, and her sense of humor is evident in the video—you’ve got to see it!

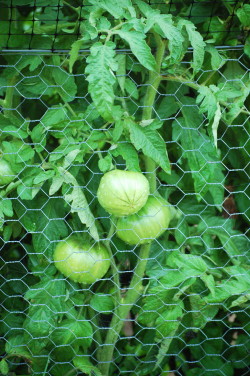
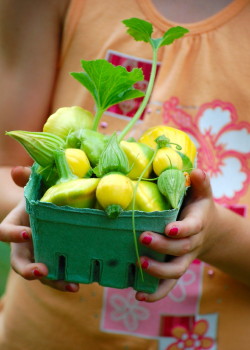
More good news: The garden is thriving (see photos) and so is the farm stand. In fact we’re pretty much selling out of everything we can harvest every day, now that the August visitors have arrived on the Island. (Obama will be here soon!) It’s killing me that we don’t have more to sell (can’t wait ‘til next year), but I’m also getting an invaluable sense of what the market wants. We’re dead on with our cherry tomatoes—all the varieties are producing well, we’re harvesting several pounds a day, and folks love the colorful pints. I just wish the beefsteak tomatoes would speed up. They’re big and fat—and very green. Our green beans are definitely getting folks to drive down the driveway, but again, it’s frustrating that we don’t have more of them (the beans, not the customers). It takes Roy and I (and sometimes a house guest!) at least a half-hour to pick them in the morning, and then we only wind up with a few pounds. But that’s how it goes.

It’s been fun to watch the farm stand traffic pick up, and I’m meeting all kinds of interesting people. One friendly couple from San Francisco (yes) has stopped by three times this week, and I had a nice conversation with two ladies from Southern Italy the other day. Sometimes an old friend who is visiting the Island will unexpectedly come down the driveway and surprise me (it happened this morning—hi Margo!).

And speaking of friends and visitors…August on the Vineyard means lots of both. And since the farmette is such a welcoming (and entertaining) place (most popular: the bunny and the rope swing), we seem to be a central gathering spot. Last week I almost cried when I stood in the backyard with two of my dear friends and former staff members from my Fine Cooking days, food writers Tony Rosenfeld and Sarah Jay. Tony was only on the Island for a day, but stopped to say hello and brought some Italian friends along with him. After touring the garden, the Italians convinced me that my arugula wasn’t too spicy!

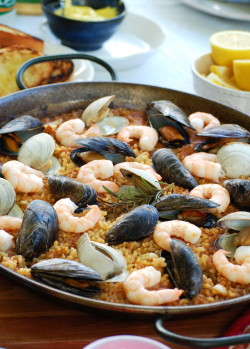
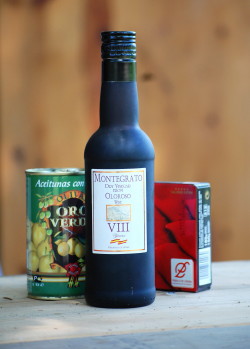
Fortunately Sarah and her two daughters were here for the better part of last week and we had lots of time to catch up—and to cook together. Sarah is an expert in Spanish cooking and runs a successful business importing paella pans and selling all kinds of Spanish goodies from her terrific website, paellapans.com. Not only did she bring me a wonderful bottle of sherry vinegar, as well as piquillo peppers, olives, and chorizo, but she made us a seafood paella while she was here. I’m a huge fan of Sarah’s paella (recipes here), which she learned to cook while living with a family in Spain, but it was Roy’s first really authentic paella. And he loved it.

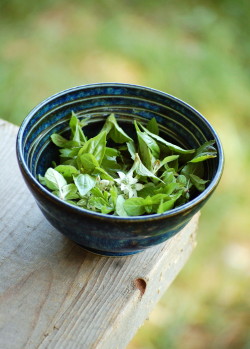
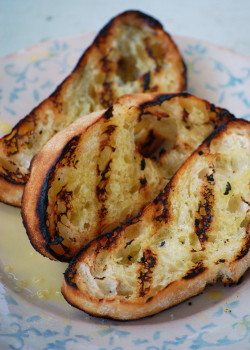
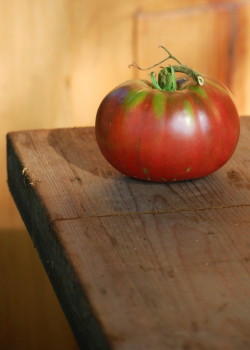
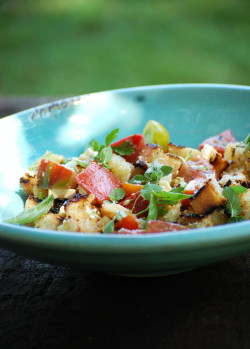
The day after Sarah left, I missed her. Right about lunch time, I started thinking about those Spanish ingredients she brought me. Hmmm. As it happens, I was also staring at a damaged Cherokee Purple (heirloom) tomato from the garden that needed to be carved up and eaten right away. (Ironically, this happens a lot – we have a garden full of lovely vegetables, but we wind up eating the overgrown beans, the holey greens, the deformed carrots, and the over-ripe tomatoes because the good stuff goes to the farm stand!) I’ve also been on a grilled bread kick, so I decided to make a grilled bread-tomato salad with olives, sherry vinegar, feta cheese (left over from a delicious salad Sarah made while she was here) and lots of fresh herbs. I guess it was an Italian-inspired salad with Spanish ingredients and a Greek twist! Whatever it was, it was delicious. So I’m passing the recipe on to you in honor of good friends and summer visitors and farm stand customers everywhere. It makes enough for two, but if you’re like me and a juicy heirloom tomato falls into  your lap, you might not want to share it.

Spanish Grilled Bread, Tomato & Fresh Herb Salad

You can use any variety of juicy tomatoes in this salad—as long as they’re juicy. (Did I mention juicy?) When you grill or toast the bread, don’t overdo it—leave it a little chewy so that it will soak up the dressing and all those tomato juices. This recipe makes a generous lunch for one or a supper side dish for two, but you can easily double or triple it to serve a crowd. I like lots of basil and mint in this (I pick the tiniest leaves from my plants and throw them in whole), but parsley, chives, or a judicious amount of fresh oregano can go in the mix, too.

___________________________________________

1 tablespoon extra virgin olive oil

2 teaspoons good-quality sherry vinegar

3/4 pound (or a little more) juicy tomatoes (a combo of beefsteak and cherry is nice), cut into small chunks or quartered if small

2 ounces feta cheese, cut into small cubes

2 1-inch thick slices ciabatta or other narrow loaf artisan bread, brushed generously with olive oil, sprinkled with salt, and grilled or broiled until toasty, cut into small cubes

8 to 12 Spanish green olives, smashed and pitted

1/4 teaspoon minced fresh garlic

1/4 cup small whole herb leaves (basil and mint)

kosher salt

_____________________________________________

In a small bowl, combine the olive oil and sherry vinegar. Set aside.

In a medium mixing bowl, combine the tomatoes, feta, bread, olives, garlic and half of the whole herbs. Sprinkle with salt and pour over the olive oil-vinegar mixture. Toss and mix well. If desired, toss and let sit for 15 minutes to let the bread absorb the tomato juices (but it isn’t necessary). Turn out into a pretty shallow serving bowl and garnish with the remaining herbs.

Serves 2

Of Mice and Girls (And Baby Carrots, Too)

I’m always in a bit of a funk after Libby leaves. There’s a palpable void that I can’t quite describe, except that suddenly everything is much too quiet without her giggles and shrieks and pattering all around. After a few days we adjust and look forward to her next visit. But this time, after a particularly fun four-day holiday weekend, I’m missing her even more.

We did all the usual stuff you’d dream up for a swath of hot July days on Martha’s Vineyard—swimming at State Beach, heading up to Menemsha at sunset time for an instantly dripping chocolate-dipped soft-serve ice cream cone, hitting the arcade in Oak Bluffs for a round of games and prize-winning tickets. (I could have done without the giant inflatable Red Sox hammer, I’ll admit.)

But mostly we puttered around the farmette, where there’s no shortage of distractions for a girl with Libby’s expansive curiosity: Crickets, fireflies, chickens, bunnies, turkeys. Wild berries and wild flowers. Rope swing, sand pile, garden, farm stand. And the nice part is that the three of us can be outside within view of each other (I don’t have to worry about Libby) and working on different things. While I’m weeding in the garden and Roy’s cutting wood outside the shop, Libby will skip from spot to spot, stopping with news of the chickens or the discovery of a particularly interesting bug.

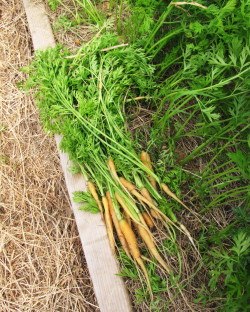
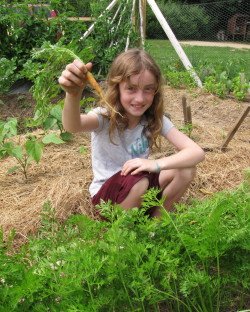
Occasionally, I’ll get lucky and Libby will help me in the garden. She’s particularly fascinated with the carrots, so thinning them was the perfect job for her this weekend. Together we held back the fronds and found the carrots that were too close together and held our breath to see what would come up when we tugged. Some were tiny, some were finger-sized, and some were just big enough for me to sauté up for dinner. The tops went to Cocoa and the chickens. (The not-quite-ready-for-prime-time carrots are just one of the many frustrations in my I-don’t-have-enough-stuff-to sell-at-the-farm stand-yet saga. I am tired of listening to myself complain about it, so I will leave that alone and just say that the baby squash and the baby carrots and the little bean plants had better be harvest-ready by next week!)

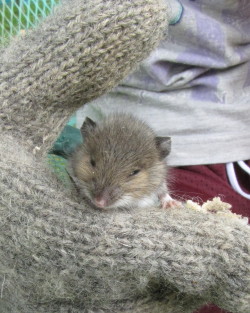
It’s a good thing I got Libby to help me with the carrots on Saturday, because on Sunday, along came Mousey. Roy and I have never seen Libby fall so hard for an animal. We thought she’d like the bunny, and we knew she’d love the chicks, but her heart now belongs to Mousey (for as long as Mousey remains breathing). Libby and I first saw Mousey scamper across the front step in the early morning. Later Mousey (not newborn, but probably only a few weeks old) stood frozen near the basement bulkhead doors. Dad found some old gloves and let Libby hold Mousey and feed her a bit of cheese. Several times we tried to return Mousey to wherever she came from, but she kept coming back to us. The discovery of Mousey’s expired brother, and the suspicion that a hawk or something else had gotten Mommy, confirmed that Mousey was an orphan. Soon Mousey had a comfy tissue-lined box to snuggle in and a saucer of local grass-fed cow’s milk to drink (only the best for Mousey). But mostly Mousey spent the day napping in Libby’s glove-lined hands, and I’m not sure who was happier—Libby or Mousey. Actually Mousey’s full name, according to Libby, is Lucky Mousey Joy. (Joy is Libby’s middle name.)

Libby’s mom Kelly is a really great sport about all this farm activity (and I so appreciate her sharing Libby with me), but I can only imagine what she was thinking when Roy and Libby got off the ferry with Mousey in a shopping bag. We could have kept Mousey here, of course, but she wanted to go with Libby, I’m quite sure.

Roy and I thought of Libby and Mousey as we ate our sautéed carrots last night (recipe follows). Hoping the days will fly by (and the carrots will grow big) until we see them both again. Well, Libby at least.

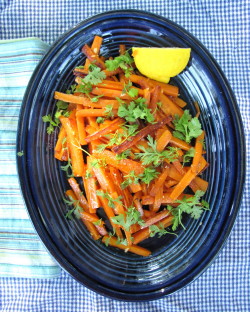
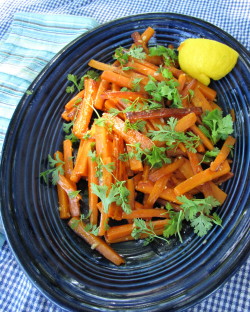
Every Night Sautéed Carrots

For a printable recipe, click here.

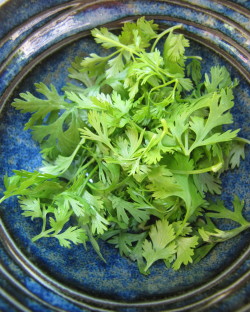
This is our house go-to method for weeknight carrots. Cooked over moderate heat in a covered skillet, the carrots get tender and lightly browned at the same time. I am picky about the way I cut carrots, as I think sticks hold together and brown up better than coins. Cutting sticks isn’t as hard as you’d think (see photo for progression) and they don’t need to be perfect. In this version, I use lemon, garlic, and cilantro (because I’ve tons of it in the garden) to season the carrots; but you could substitute lime, orange, ginger, mint or basil to customize these any night. Be sure to zest your lemon before juicing it.

_____________________________________________________

1 teaspoon fresh lemon juice, plus a couple lemon wedges for serving

1 teaspoon red wine vinegar

1/2 teaspoon honey

1 tablespoon unsalted butter, 1 teaspoon separated and chilled

2 teaspoons extra-virgin olive oil

1 pound carrots, peeled and cut into sticks 1/4 to 3/8 inch thick and 2 to 3 inches long

1/2 teaspoon kosher salt

1 teaspoon minced fresh garlic

1/4 teaspoon (packed) freshly grated lemon zest

2 tablespoons loosely packed fine cilantro leaves or 2 teaspoons chopped cilantro

________________________________________________________________

Put a serving dish near your stove. In a small bowl, combine the lemon juice, vinegar, and honey. Set aside.

In a large (12-inch) nonstick skillet, heat 2 teaspoons of the butter with the olive oil over medium heat. Add the carrots and salt and stir to coat. Cover the pan. (I use a sheet pan because my large skillet does not have a lid! It does not have to be a tight fit—letting a little air escape is good.) Cook, stirring occasionally at first and more frequently as the carrots begin to brown, until the carrots have shrunken, are just tender, and nicely browned on some sides, about 13 to 15 minutes. Uncover, reduce the heat to low, and add the garlic and lemon zest. Stir until fragrant, about 30 seconds. Drizzle the lemon juice mixture overall, toss, and remove the pan from the heat. Immediately transfer the carrots to the serving dish and garnish with the cilantro and the lemon wedges.

Cheap Thrills on the Farmette–Like Being a Kid All Over Again

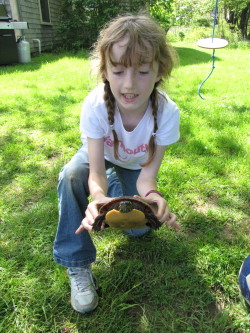
We now have a pet turtle. Her name is Turtle. Yeah, well. Roy came home with Turtle the other day, claiming to have rescued her from the middle of the road. “I kept her because I thought Libby would like her.” Yeah, right. I said, “Libby?” And he laughed and admitted that he was just reliving his childhood. As it happens both he and Libby love turtles (and pretty much anything else creepy-crawly, including snakes and lizards). And one of the charming idiosyncracies of this property we live on is a series of old stone fish ponds in the woods. One is still holding water, so Roy is creating Turtle paradise over there. (Turtle is a large Painted Slider, by the way. She also happens to be female, so now with Ellie the Lovebird, Cocoa Bunny, and 8 hens–not to mention Libby and me–Roy is outnumbered here by females, 13 to 1! Tough luck.)

It’s funny though—this concept of reliving our childhoods. Because I seem to be doing exactly that here on the farmette. Or maybe it’s not so much reliving my childhood (I didn’t grow up on a farm), as it is trying to recapture that spirit of wonder and fun I had as a kid. I say trying, but it’s not really an effort—it comes easily around here.

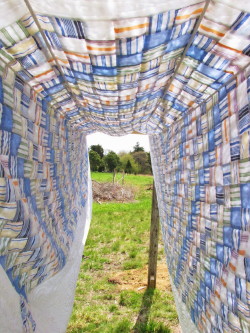
The other day I was hanging the laundry out on the line—an activity I adore for its Zen-like peacefulness—when I realized I had created a fort out of our quilt. I stood underneath it, looking out on the fields like a rabbit snugly in its hole, and remembered the forts my friends and I used to make by draping a blanket over the twin beds. I felt safe and happy and a little bit giddy.

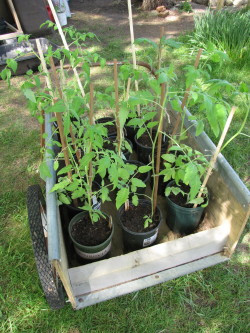
Then there’s the rope swing that Roy rigged up on a branch of the giant maple in the back yard. (This is the massive tree—more than 10 feet in diameter at its widest point—that gave us maple sap this winter and provides beautiful dappled shade for  all kinds of outdoor activity, like the tomato seedling repotting project I’ve been obsessed with.) Anyway, Libby loves the swing, of course. Especially when Dad pushes it higher than high. But Susie loves the swing too—loves arching back to look aloft at the world going by in a whirl of undulating maple branches against a smeary, smoky blue sky.

Little thrills are hiding everywhere. This weekend we found two blueberry bushes in bloom on the property—oh joy! There are wild raspberry canes all over the place. A little thatch of wild asparagus is poking up beneath the kitchen window. Barn swallows are building a nest in one of Roy’s work bags in the shop. And we think a turkey hen has built a nest in the maple grove.

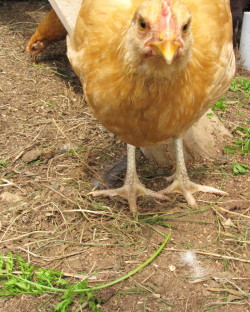
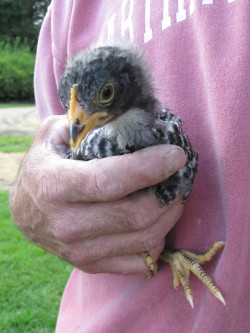
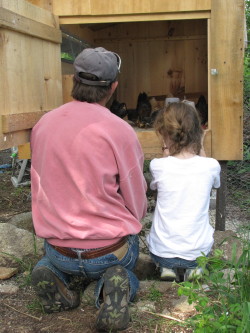
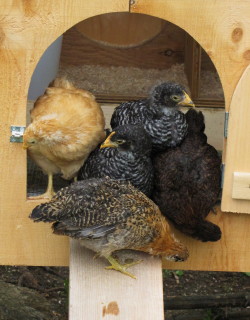
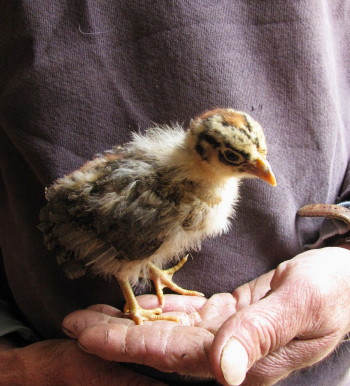
But I’d have to say that the chicks (now more like little hens) are still providing the biggest thrills around here. On Saturday—that rare warm and sparkly day we haven’t seem much of this spring—we moved them out to their permanent home, the chicken coop. Libby and I stood sentry at the coop door while Roy carried each hen from their brooder box in the mud room out to the coop. He started with Martha and Opti, the two Buff Orpingtons who are so big and so friendly that not only do they love to be picked up, but they will stand still to be petted. Perky, our nimble and self-confident Sicilian Buttercup, came next, followed by pudgy Miss Personality, Oreo. Sugar, Jelly Bean and Chippy are a bit skittish, so Roy brought them next to last. Bringing up the rear was our tiny Little Squawker (above), who still has some baby chick fuzz on her.

At first The Ladies (as Roy calls them) were overwhelmed by such a big space. They all huddled in one of the five nesting boxes, sticking close for comfort. But once they realized their food and water were out in the middle of the new space, they started to investigate and romp around. Pretty soon it was Party Central again, and everybody was hopping up on roosting bars and staring out the viewing window. (Staring in the viewing window is a fun way to keep an eye on them. I call it the peep show.)

The whole moving-day adventure was so much fun for all of us (not just the actual 8-year-old among us) that we felt the need to take silly pictures of ourselves at the coop door. And we celebrated by making grilled pizza Saturday night, with chef Libby at the controls.

Up until today we limited the chicks’ new world to the inside of the coop. But late this afternoon, Roy nailed up a ramp, opened the door, and welcomed them to come on down and explore their “yard” (an enclosed pen). This in itself was pretty hysterical as nobody wanted to go first. Predictably, Martha made the first tentative foray halfway down the ramp, and Roy carried her the rest of the way. Slowly the others crowded at the door, looking at Martha having fun in the grass. “What do we do?” they seemed to be saying to each other as they stared down the ramp. One by one, they finally all hopped down (except for Little Squawker, who kept her perch at the door). We didn’t stray too far, as we didn’t want to leave them alone just yet. But watching them is hardly a chore. It is totally fun and fascinating. More like a privilege, really.

This coming weekend holds another thrill—we’re planning to open our farm stand for the season. We’ll have a small selection of salad greens, arugula, radishes and seedlings if all goes as planned. I’m sure the weather won’t cooperate, we’ll be up all night washing greens, and there will be any number of bugaboos to work out. But I’m not worried. As I am prone to repeating—It’s all good.

Big Rocks & Toddler Chicks: Update from Green Island Farm

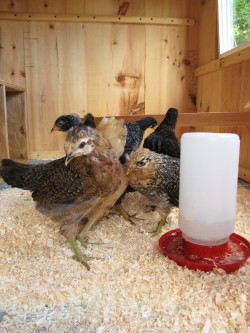
We have a jumper. We haven’t called 911 yet, but when we found Martha (one of the big gold Buff Orpingtons) on top of the water jar in the brooding box, we knew the chicks were getting frisky. It’s amazing how fast they’re getting their feathers and learning to stretch their wings. They can all fly/hop/jump from one end of the box to the other if startled, though fortunately they don’t all jump at once. It’s tempting to build a bigger box, but they’ll be ready to go outside in a few weeks. Meanwhile, I do my best to keep the box and their water and food dishes clean. They sure can trash a place—worse than teenagers.

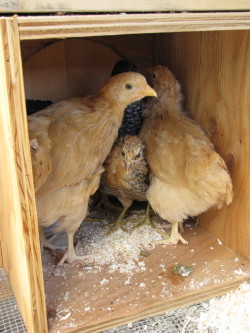
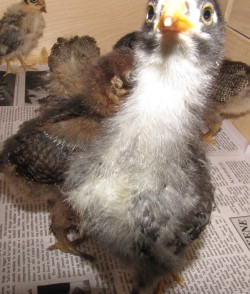
The girls all have names now, thanks to Libby and our friends Eliza Peter and her son James who came to visit weekend before last. Eliza and James brought along the family dog, a golden-colored Labradoodle named Opti, and Libby decided one of the Buff Orpingtons should be named for Opti (far left). The littlest and prettiest bird (and also the friendliest—she loves to sit in Roy’s hand–see top photo) is named Perky, for my mom. Yes, it’s sort of an odd Mother’s Day present, but I thought she’d get a kick out of it as she likes animals. My Mom’s real name is Pauletta, but friends have called her Perky for years. (She is perky—and pretty, too, so it’s only fitting that our beautiful little Sicilian Buttercup be named for her.) Oreo (above right), one of the Barred Rocks, definitely gets our vote for Miss Personality. Every time I try to take a picture inside the box (difficult), she comes right up to the camera. Also, along with Martha and Opti, she heads for high ground whenever possible; these three generally hog the little roost Roy built for the box. The other gals—Jelly Bean, Little Squawker, Sugar (Eliza’s pick, short for Cinnamon Sugar), and Chippy (looks like our resident chipmunk), are camera shy and less adventuresome.

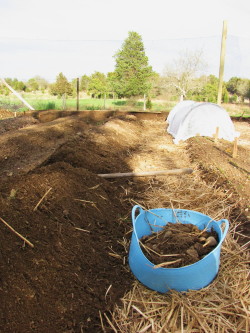
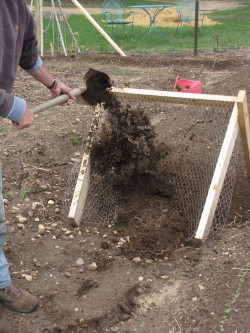
Keeping up with the toddler chicks has been easy compared to the garden work over the past few weeks. We’re still prepping beds, as our soil is full of rocks. If you want to see a humorous illustration of Mars vs. Venus, you can watch Roy and me in the garden using two very different methods to get rocks out of the soil. I basically kneel or bend over and hand-pick them out after turning a patch of soil over with a fork. Roy has built a portable screen that looks sort of like a soccer or hockey goal that he can shovel dirt through and watch the biggest rocks roll away. His method is (somewhat) quicker, but I think mine is more efficient!

One thing I’m crazy about, though, is the simple little screen (far left) Roy made me from hardware cloth and a few boards. I use this to cull out twigs and stones from soil to make a fine mixture to sprinkle over tiny seeds after planting, instead of spending money on a soilless mix. Actually, I’m always excited when I hear the table saw screeching or the compressor hissing in the shop—I never know what Roy is going to come out with, like this recent appearance (at right)—a new gate for the chicken pen.

We also spent the better part of an evening splayed out on the newspaper-covered mudroom floor transplanting all the tomato and basil seedlings out of six-packs and into 4-inch pots. The numbers are not as crazy as last year, but we still have 200 seedlings, all of which need light. So Roy had to reconfigure the seedling shelves (which he built last year with the idea that they’d be easy to break down and reassemble) to accommodate more lights and taller plants. (The extra lights came from Roy’s shop–now he has to do without until Memorial Day!)

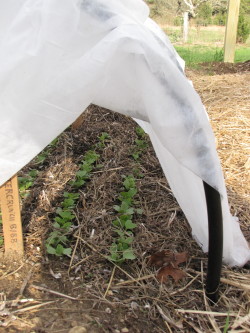
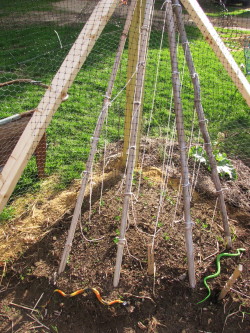
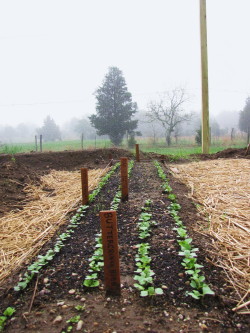
The really great news is that everything I planted outside a few weeks ago is coming up. The pea vines are a couple inches high. That’s my crazy teepee trellis at (near)right. I don’t plan to sell peas this year—I just wanted some for us—so I grabbed a corner for them and made this contraption out of our bamboo stock (also saved from last year) and string to keep the birds out and to provide support. My first batch of arugula and radishes are thriving, so I went ahead and popped the PVC pipes in the ground and draped the Remay over them for early flea-beetle protection (photo, far right). My baby bok choy and about 12 different kinds of lettuces have germinated, and we got the onions, the leeks, and the first batch of potatoes planted. I’ve also been working on an area outside the garden where perennial herbs will go.

It’s all very satisfying, and every morning I wake up excitedly, head out to feed Cocoa the bunny, and to check out the garden, too. I especially love a foggy morning like this past Friday. Something terribly romantic about the mist and the green colors fading to grey. (Romance was on my mind, I admit, as I was watching the royal wedding. No, I am not related to Kate Middleton, unfortunately!) I snapped a few pix of the garden and then trotted over to the north side of the property—an area called The Grove which had fish ponds in it years ago and now has hundreds of daffodils waning and lilies of the valley coming on under the maples.

The fish ponds were the purview of Farmer Greene, who built this place. And since we love all things green, we’ve started calling our little operation Green Island Farm. Might be more accurate to call our version a mini-farm at this point, but it’s wonderful to imagine all the different iterations this place has taken over the years—the food that’s been raised and grown and gathered on this piece of land over the last few hundred years, probably beginning with the Wampanoag Indians. We’re still hoping all this digging is going to turn up an arrowhead.

Best of Spring: Baby Lambs, Digging Dirt, The Chicken Coop

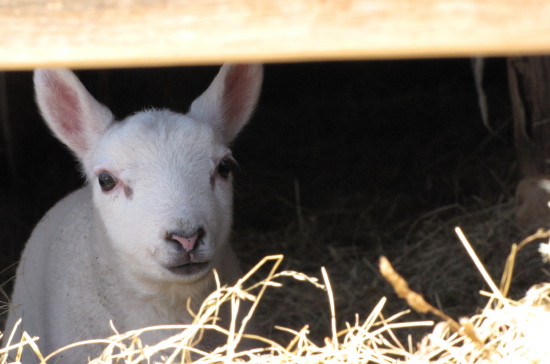
Remind me when I start complaining about the weather again (as I did in my last blog) how great this time of year really is. First of all, there are baby lambs. Honestly, there is absolutely nothing cuter than a baby lamb—even though the one above looks more like the Easter Bunny. You get a better idea from the photo at right. All of these cuties are Cheviot lambs, who have distinctively upright ears and clean faces. They are new residents at Whiting Farm right up the road from us. Libby and I visited the farm last year at lambing time and decided to go back this Saturday. For some reason, Libby thought that the lamb at right looked familiar. “Let’s call him Dad,” Libby said. So I took some pictures of “Dad” to show to the real Dad, who was back home rototilling the vegetable garden (a fun job I managed to avoid).

Poor Roy. He gets all the hard jobs. Once again he jokingly offered to write a blog post this week entitled, “She Wanted To Be A Farmer, And I Got All The Work.” Once again, I kept him away from the keyboard. The rototilling—with a less than ideal rented rototiller—turned out to be a bear, what with the sod and rocks and shrub roots. Fortunately, what it turned up is beautiful soil—the remains of a former flower-grower’s garden from years back. We are still pinching ourselves that we’ve got this killer sunny spot to do our vegetable growing (and selling) in our very own backyard (or I should say the backyard of our rented farmhouse). The farmhouse sits on two acres, but this cleared spot that we’ll cultivate is just about 1600 square feet. That’s a good deal smaller than the 2800 square feet we had last year, but with all we’ve learned and lots of streamlining, we should be able to be as productive as last year—hopefully more so. No space-hogging, long-to-mature crops like squashes, eggplants, and peppers this year. Just lots of greens, tomatoes, carrots, beans, herbs, and potatoes.

Which brings me to the second thing I love about this time of year—the opportunity to get outside and dig in the dirt—finally. Even if it is just to dig a trench. See, I felt bad about the whole rototilling thing, so I offered to dig the trench around the garden where we will bury the chicken wire and deer fencing. Truthfully, the couple of hours I spent working on this yesterday were blissful. Shoveling dirt (despite the tug on that weak spot in my lower back) is a Zen activity much like weeding. Now I know why my Dad spends so much time moving plants around in his garden. He’d be shocked to know how much I like digging. When my sister and I were little, we’d find any excuse to get out of garden chores.

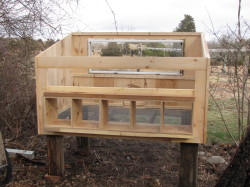
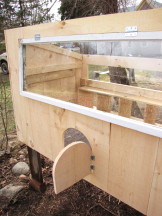
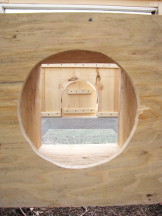
Lastly, the really best thing about March is anticipating April—and all that’s coming our way. It’s no secret that Libby and I can barely wait ‘til the baby chicks arrive (in less than two weeks!), but now we can even picture what it’ll be like when they get their feathers and go live outside. Because Roy started building the chicken coop this week. His design is so cool that I thought I’d show you a few photos in case you’re of a mind to do something like this. (I’ll show you more when it’s all finished.)

The best feature is the fun round holes (top right photo and middle photo above) he made to reach inside the nesting boxes in the back of the coop—which also has a flip-down access door. (The holes will offer a little weather protection when the door opens.) The bottom of the coop is hardware cloth (which will have bedding on it); there’s a side door for easy cleaning; and the front features a “viewing” window that also opens for ventilation. (When the hens are inside roosting or laying, they can look out at the vegetable garden!) The cute little arched front door will lead to a ramp which the hens will use to scuttle down to their “yard”—a chicken-wire covered pen that will protect them from hawks during the day. The coop is just a stone’s throw from the edge of the vegetable garden (the clothesline is relocating), and we positioned the coop in a bit of shade for some coverage on the hottest days.
I have to say, Libby and I are not the only ones excited about all these developments. Secretly this whole homesteading/farming/growing/whatever-you-call-it thing we’re doing makes Roy pretty darn happy, too. But just for good measure, I did make him meatloaf for dinner last night.

Veggies for Breakfast or Eggs for Dinner? Here’s A Frittata Plus A Dozen Other Eggy Ideas

Lest you think I’m completely crazy for devoting so much cyber-ink to birds in my last blog, I thought maybe I should come clean about a couple of things. First, I think the whole bird thing is part of my effort to be more in touch with nature (goofy as that sounds, I know). Mostly because observing nature requires slowing down. In my old life, I did everything on one speed: Fast. (Oh, dear, now I’m starting to sound like Charlie Sheen.) I barely made time to tend a pot of herbs on the windowsill or take a walk around the neighborhood—I certainly didn’t don the binoculars to wait for a bird to fly by.
Secondly (and much more practically), one of the reasons I’m truly excited about having our own hens is because we eat so many darn eggs around here (see below). Okay, I admit, there’s also a deeper meaning to the hen thing. To be completely honest, I still have a little fear that someone is going to snatch me away from the Island, return me to the office, to the suburbs, to I-95, and to a whole lot of other noise that I now happily live without. I figure raising hens gives me one more toehold on Vineyard terra firma. If the Old Life Aliens come to snatch me away, they will have to take my hens, too!
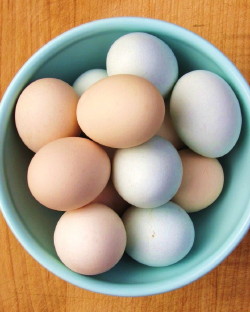
Okay. So about those eggs. Because I don’t eat a ton of meat anymore…and because I figured out a long time ago that I won’t get hungry mid-morning if I eat eggs for breakfast… and because Roy loves having breakfast for dinner… and because Libby loves anything that involves mixing a batter—we eat a lot of eggs. We are very fortunate to have a regular supply of eggs from local farms available to us (even in the grocery stores); their plump golden yolks and perky whites have spoiled me. (The yellow color comes from the  higher amounts of beta-carotene these birds ingest.) When I’m developing recipes, I’ll try to use non-local eggs to make sure the recipe will taste good regardless—but for our everyday eating, we love our local eggs. Here’s what we do with them:

1. We scramble them with fresh herbs (especially cilantro and mint), a dash of cream, a little cheese (cheddar, aged gouda, Monterey jack, goat cheese), and plenty of salt and pepper.

2. We make waffles and buttermilk pancakes, sometimes for dinner. (Favorite recipes at finecooking.com).

3. We make all kinds of different egg sandwiches; here’s a recipe for one of my favorite creations, which I nicknamed “The Local.” Yes it has a bit of (local!) meat on it.

4. We make my Dad’s famous popovers. (See King Arthur Flour site for pans.)

5. We make savory bread puddings, especially when we have the amazing challah bread from our local Orange Peel Bakery. (Popover and bread pudding recipes coming in Fresh & Green for Dinner.)

6. We make French toast with a dash of vanilla and maple in the custard, and we top it with a homemade concoction of fresh berries warmed in maple syrup and slightly mashed in the skillet. (Love to use the challah here, too.)

7. We make omelets with leftover roasted veggies or roasted tomatoes.

8. We make a rif on pasta carbonara with spring asparagus or garden peas.

9. We make thin, quiche-like tarts; my favorite is with fresh corn, basil, and tiny tomatoes.

10. Of  course, we make cookies and quickbreads and the occasional coffee cake, too. (Most often we use recipes from my favorite baker, Abby Dodge.)

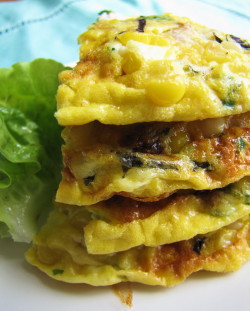
11. We make veggie fritters or pancakes—sometimes with grains, too, or leftover mashed potatoes. We also make spoonbread, a favorite from my Dixie days.

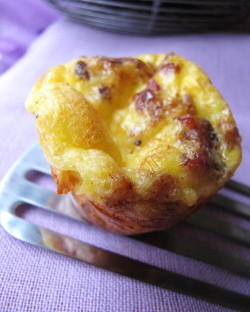
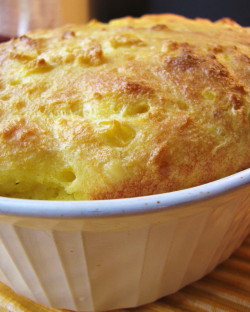
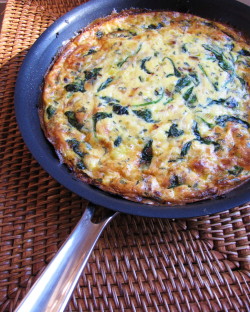
12. But probably our favorite thing to do with eggs is to make a veggie frittata. Usually I make one big one, but sometimes I’ll make little ones in a mini-muffin tin. Frittatas (like the leek and spinach one below) are incredibly versatile; you can eat them for breakfast, lunch, snacks or dinner. And they always taste better after sitting a bit (even overnight); I guess the flavors have more time to penetrate the custard. The method I learned years ago at Al Forno restaurant is easy to follow, and you can make up your own veggie combos, too. (I also love potatoes, mushrooms, corn, arugula, scallions, and broccoli in frittatas.) Just be sure to cook most veggies first to concentrate flavor and to reduce excess moisture. Be generous with fresh herbs and don’t forget the salt and pepper in the custard.

Leek, Spinach, Thyme & Gruyere Frittata

This easy frittata method starts out on the stovetop and finishes baking in the oven—but there’s no tricky flipping involved. After cooling, I like to cut the frittata into small squares, rather than wedges, so that bite-size snacks are easy to grab. It’s also a great way to go for a potluck, book group meeting, or other casual gathering.

_______________________________

3 tablespoons unsalted butter

3 medium leeks (white and light green parts), sliced about 1/4-inch thick (about 2 cups) and well washed

Kosher salt

2 teaspoons minced fresh garlic

3 ounces baby spinach leaves

6 large eggs at room temperature

2/3 cup half ’n half

1 tablespoon roughly chopped thyme leaves

big pinch nutmeg

freshly ground pepper

1 cup (3 oz.) coarsely grated Gruyère

_______________________________

Preheat the oven to 375°F.  Make sure one of your oven racks is positioned in the center of the oven.

In a 10-inch heavy nonstick (ovenproof) skillet, melt 2 Tbsp. of the butter over medium-low heat. Add the leeks, season with a big pinch of salt, and cover. Cook, stirring occasionally, until the leeks are softened, 5 or 6 minutes. Uncover, raise the heat to medium, and continue to cook, stirring frequently, until the leeks are browned in spots, another 8 to 11 minutes. (Don’t worry if they get a little overbrown in places—that’s just great flavor.) Add the minced garlic and stir well. Add the spinach and 1/4 tsp. salt and, using tongs, toss and stir the spinach with the leeks until it is all wilted, 2 to 3 minutes. Remove the skillet from the heat and let the veggies cool a minute.

In a large mixing bowl, whisk together the eggs, half ’n half, 1/2 teaspoon kosher salt, the thyme, the nutmeg, and several grinds of fresh pepper. Stir in the Gruyère.

Return the skillet to medium-high heat and add the remaining 1 tablespoon of butter to it. When the butter has melted, pour and scrape all the custard mixture into the skillet.  Using a silicone spatula, gently stir and move the contents of the pan around so that everything is evenly distributed. (You may have to nudge clumps of leeks and spinach apart.) Let the pan sit on the heat until the custard is just beginning to set all the way around the edge of the pan, 1 to 2 minutes. Transfer the pan to the oven and bake until the frittata is puffed, golden, and set, 22 to 24  minutes.

Before unmolding, let the frittata cool for 10 to 15 minutes. Shake the pan a bit, tip it, and use a spatula (silicone works great) to get under the frittata and slide it gently out onto a cutting board or serving plate.  Cut into wedges and serve warm, or wait for a bit longer and serve at room temp. Refrigerate leftovers; this is even better the next day.

Serves 4 to 6

The Garden in Grey & White: Time to Think Green

I really don’t think I’m rushing things. I mean the seed catalogues arrived over a month ago. And so I’ve started to pester Roy about building our seed-starting shelves. I know we really don’t need to start the tomatoes for two months, but, you know, I like to be ready. Yes, it’s hard to think green when the garden looks like it does right now—all shades of grey and white. But I can’t help it if I’m kinda prone to over-excitement. (I got into a lot of trouble as a small child with this—I almost got kicked off a week-long stint on the Romper Room TV show in 1966 because I wouldn’t sit still. Apparently an ice cream bribe calmed me down. No surprise—that still works.)

Anyway, we are living in a new place this year, and we’ll be able to have our garden right out back. It was a lot of fun being at Native Earth Teaching Farm last year (and being near our neighbors, the baby goats), but it was a strain to shuttle back and forth every day. This year, it could be a blessing or a curse, but all we’ll have to do is tumble out of bed, pull on our boots, set the coffee off and head outside. There’s a lot of work ahead for us in preparing the garden here (see above!), but it’s an ample space that’s been gardened in the not-too-distant past. It sits up high and has plenty of sunlight. I can’t wait to work in it—of course after Roy builds the fence! I know, I’m bad—I will help him, I promise.

This year, we’re going to narrow our market crops to just a few things: greens, beans, potatoes, and tomatoes. And I’m going to use the rest of the garden in two specific ways for us. In part, it will be a kitchen garden, with plenty of greens and herbs for our everyday summer eating. (I can’t wait to get Ellen Ogden’s new book, The Complete Kitchen Garden.) And it will also function as a storage/winter-eating garden, with carrots, onions, potatoes, beets and turnips for the cold months. I’m not going to grow much in the way of squashes, eggplants, and peppers. They take up a lot of room and we don’t seem to eat as many of these as we do tomatoes and greens. When we need them, it’ll give us a good excuse to go to the farmers’ market and to barter with friends, too.

For the market garden, I’ve already ordered our tomato seeds and our potato and onion sets. (I told you I couldn’t wait.) I ordered mostly organic from the fabulous Fedco company in Waterville, Maine. They have incredible products at great prices. I’m trying out a couple new cherry tomatoes with great names and descriptions (love those seed catalogues!): Honeydrop Cherry Tomato and Be My Baby Gene Pool Cherry Tomato. We joined with our local Homegrown folks (a group of avid vegetable gardeners who meet once a month here on the Island to swap tips) for the potato (also from Fedco’s Moose Tubers division) and onion orders (from Dixondale Farms), so we’ll be saving a little money there. I’m trying to do the garden on a much smaller budget this year, so I didn’t splurge too much; I still have lots of viable seeds from last year, too. (At least I hope they’re viable). But since I’m such a nut about greens (both cooking greens and lettuces) and Fedco will hook you up with a small packet of lettuce seeds for less than $1.50, I went ahead and ordered some new lettuce varieties to try, including Flashy Green Butter Oak Lettuce and Speckled Amish Lettuce.

Oh, am I ever excited. I’ll let you know when we start the real work. And I’ll also let you know about the other big excitement coming around here—baby chicks! Future laying hens—at last, we’ll have our own eggs by fall if all goes well. (Of course, Roy is going to have to build a chicken coop, too—but he’s already designed it!)

P.S. Recipe blogs will return soon. I am strapped to the computer putting the final touches on my book manuscript, which will (please cross your fingers) be delivered to the post office next Monday…

You Say Borlotti, I Say Cranberry—Beans, That Is

Halfway through the summer, I gave into temptation and bought a new packet of seeds for the vegetable garden. (Like I really needed more seeds—we had so many left over from our order last winter that I have enough to start the entire garden next year.) Right around the time our first carrot row emptied out, I happened to spot some Italian Borlotti beans at the garden center down the road. I had to have them.

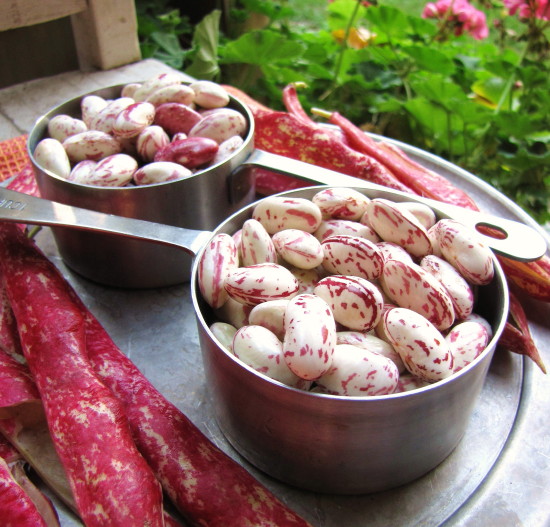
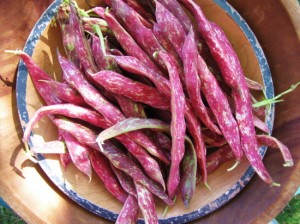
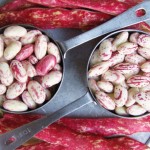
I’ve always wanted to grow shell beans. I think it’s the whole popping-them-out-of-the-pod thing. It seems so peaceful to me—an activity you definitely have to slow down to enjoy. But these particular shell beans are special. First off, they’re pink. I’m not kidding—my favorite color. The crimson pods and the magenta-dappled beans are way too charming to pass up. Secondly (and yeah, a bit more importantly), Borlotti beans (usually called Cranberry beans in the States) are delicious. Cooked fresh, their creamy, meaty texture is like no dried or canned bean you’ve ever eaten. The only bummer thing is that they lose that beautiful color when cooked.

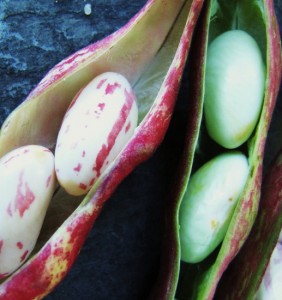
Because I planted my Borlotti beans late in the season, I didn’t expect much. In fact, after a little initial weeding to help the baby plants along, I kind of ignored them as summer waned and fall got busy. But every once in a while I’d catch a glimpse of pink among the weeds, and I discovered that the plants were producing lots of pods. As soon as the pods started plumping up, I’d zipper one open every time I visited the garden. I was trying to figure out when to harvest them. Were the beans ripe? They seemed big enough, but many of them also had a pale greenish hue—hardly white with pink spots. I couldn’t find any info on the internet, but I finally got my answer, almost by accident.

I took a few pods home one day to photograph, and as I was lining them up on the patio, I noticed that even though all the pods were predominantly pink, some of them were mottled with green, some with white. The pods that had the most white—almost the color of candy canes—had the nice white and magenta speckled ripe beans inside. The pods that had a mottled green background color still had the greenish beans inside. And there were gradations along the way; it seems the pods gradually change color as the beans ripen. At last, I’d finally figured out a way to tell if the beans were ripe without having to pick the pod and open it up first.

Saturday Roy and Libby and I pulled up most of the Borlotti bean plants. We were in a rush, trying to get some tidying done in the garden before heading to the Bronx Sunday morning for a book signing I’d been asked to do at The New York Botanical Garden’s Edible Garden event. So I snipped the pods off the plants, stuffed them in a bucket, and crammed them into the fridge at home.

This afternoon I got a chance to (slow down and) sort through the pods, and happily, a majority of them were more pink than green. I shelled enough pods just to get two cups of beans, as I want to make them last. I almost hated to cook with them they were so pretty. But I wanted to prepare them the way I’ve had them in Italian restaurants—with lots of garlic and rosemary. I wasn’t disappointed; they were as delicious as I remember—the perfect thing with a warm green salad and some crusty bread. And the bonus: Since they’re fresh, they cooked in less than 30 minutes (no soaking). (And actually, despite turning grey, they were still quite pretty when I photographed them, too, though you will just have to believe me. Unfortunately, I accidentally erased and recycled those photos tonight. Glad I don’t do that very often!)

Depending on where you live, you may still see the fresh beans at farmers’ markets or natural food stores this fall. But even if you don’t get a chance to cook them fresh this year, keep an eye out for dried Borlotti (or Cranberry) beans. They’re a classic addition to all kinds of Italian soups and stews like Pasta Fagioli and Minestrone.

Fresh Cranberry Beans with Bacon, Rosemary & Garlic

For a light supper, serve these beans with a warm escarole, spinach, or arugula salad and some crusty bread. If you have pancetta (Italian bacon), it would be a more authentic substitute for bacon, so feel free to use it. And if you want to go meatless altogether, no worries. The beans are still full of flavor cooked with just the rosemary and garlic and without the meat.

2 cups (10 oz.) shelled fresh cranberry beans (from about 1 ¼ lbs. pods)
kosher salt
extra virgin olive oil
1 large clove garlic, smashed, plus 2 tsp. minced fresh garlic
2 smal sprigs fresh rosemary plus 1½ tsp. chopped fresh rosemary
2 slices bacon
1/2 tsp. sherry vinegar or white balsamic vinegar

In a medium saucepan, combine the cranberry beans, ½ tsp. kosher salt, the rosemary sprigs, the smashed garlic clove, and 3 cups water. Bring to a boil, reduce to a simmer, and cook gently until the beans are tender, about 20 to 25 minutes. (You should be able to mash them lightly with the back of a spoon.)

Transfer the beans with a slotted spoon to a bowl, and reserve the saucepan of cooking liquid. Remove the garlic and rosemary leaves from the beans.

In a medium heavy nonstick skillet, cook the bacon or pancetta over medium-low heat until the bacon is crisp, about 12 minutes. Transfer the bacon to paper towels to drain. Turn the heat to medium and add 1 Tbs. of extra-virgin olive oil to the skillet.

When the oil is hot, add the minced garlic, and cook, stirring, until the garlic is fragrant and softened, about 1 minute. Add the beans, ½ tsp. kosher salt, ½ tsp. of the chopped rosemary, and a small amount (about ¼ cup) of the cooking liquid. Turn the heat to medium-high and cook, stirring frequently, until most of the cooking liquid has simmered down or been absorbed, about 2 minutes. Add the sherry vinegar and another ½ tsp. chopped rosemary to the beans. Stir and transfer all the contents of the pan to a serving bowl and garnish with the bacon, crumbled, and the remaining ½ tsp. chopped rosemary. (If you don’t plan to eat all the beans tonight, save a little more of the cooking liquid to reheat them in tomorrow.)

Serves 3 to 4 as a side dish.

Winter Squash Taste Test: Geeky, Yes, But Don’t You Want to Know the Results?

Sometimes, you just don’t know what you’re getting yourself into. Take my boyfriend, Roy, for example. I’m sure when he met me, he had no idea that one day he’d be standing around the kitchen island (which he built for me) with seven spoons and a heap of roasted squash in front of him. Fortunately, what I didn’t know (but suspected) when I met him, is that he’s a really good sport. Last Sunday, he agreed to do the winter squash taste test with me. Lucky him.

I dreamed up this little experiment after we found ourselves in possession of several different kinds of winter squash. I’ve loved taste comparisons ever since I was introduced to them at culinary school years ago. We did a lot of them at Fine Cooking, too, in order to recommend brands of chicken stock or canned tomatoes or olive oil to cooks. The worst taste test we ever did was butter. Tasting 8 different brands of butter in one morning will make anyone feel sick. The best? Bittersweet chocolate, of course. In fact, I’ve learned so much about flavor differences in both natural and manmade products over the years from taste tests, that I’m constantly urging other cooks to conduct their own at home. (A great place to start is with something you buy and use a lot, like extra-virgin olive oil. Buy a few different grocery-store brands and taste them side by side to find your favorite—you’ll be amazed at how different they are. Lately I’ve been liking Trader Joe’s Spanish olive oil.)

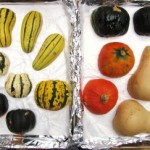
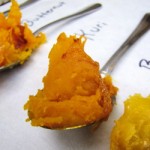
But not to belabor the point, here’s how we conducted the squash test: I cut each of the squash in half, scooped out the seeds, seasoned them ever so lightly with a little salt, and roasted them, cut side-down, on buttered parchment paper, until they were completely tender and lightly caramelized (about 1 hour 20 minutes on average). I turned the squash over, let them cool a bit, and scooped some of the flesh out of each for us to taste side by side. We each had one or two bites of each squash, and I took notes on the taste, texture, and color.

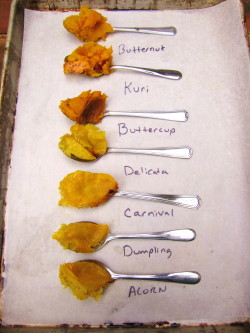
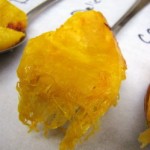
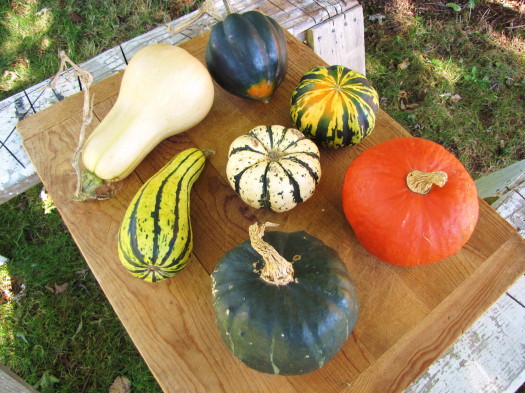
The first thing I noticed of course, before we even tasted, was the big range in color and texture among the squash. (To identify the squash, see the photo at the end of the blog with IDs underneath.)The Red Kuri, Buttercup, and Butternut squash have deep orangey-red flesh and a dense texture. The Delicata, Acorn, Sweet Dumpling, and Carnival all had a more yellowy golden flesh, although within them, the texture varies (Delicata and Dumpling being creamy, Acorn and Carnival more fibrous.) The cool part of the comparison, though, was how different they all tasted. Here’s what we thought.

Butternut—smooth, rich, dense flesh with a distinctively nutty flavor
Red Kuri—texture like a baked potato, very robust smoky-nutty flavor, intensely “squashy” in a good way; deeply colored (Susie’s favorite)
Buttercup—dense flesh with a very flavorful flesh reminiscent of caramel and peanuts
Delicata—very creamy flesh, light and bright tasting, flavor hints of summer squash
Carnival—moderately fibrous flesh, light sweet-sour flavor, our least favorite (sorry, Carnival)
Sweet Dumpling—flesh is a bit fibrous but creamy too, very sweet with a bit of tang, a light flavor
Acorn—fibrous texture but with a complex nutty-sweet-bright flavor (Roy’s favorite)

So there you have our unofficial and biased results. I’d recommend trying the Red Kuri if you haven’t, and I’d consider using it or Buttercup in place of Butternut in soups for a richer flavor. Though Carnival is a beguiling looking squash, I’d definitely stick with the similar but better tasting Acorn for stuffing, or go with the pleasantly sweet and creamy Delicata or Dumpling.

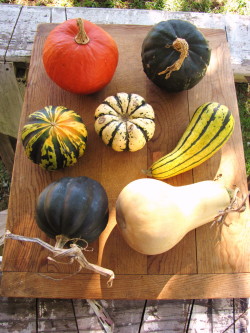
Squash IDs, clockwise, starting from top left: Butternut, Acorn, Carnival, Red Kuri, Buttercup, Delicata, Sweet Dumpling