Chef Mom — And a Salad Dressing to Celebrate

My mom is a great cook. No, really, I’m not kidding. I know everyone says that about their moms, but my mom is the real deal. I don’t think she’d mind me telling you, though, that this wasn’t always so. In fact, the family joke is that she didn’t know how to boil water when she got married. Worse, she married a guy from a big family. My Dad and his five brothers all pitched in to help their mother cook, so they knew their way around a stove—and had opinions about everything food-ish. My mom grew up in a more formal household; there was a cook, and I don’t think little Pauletta was allowed in the kitchen too much. So when my parents were newlyweds, the first time they went to the grocery store my Mom started to cry because Dad clearly knew what he was doing, and she didn’t.
Well, that all changed. Not only did Mom learn to cook, but she fell in love with cooking, sautéing her way through Julia Child, learning to bake great yeast bread and homemade rolls, picking up on the new craze for stir-frying in the ’70s, and mastering pie crust like nobody’s business. Her spaghetti sauce (which I cooked for Roy this week—it’s his favorite) and her pumpkin bread are now legendary. Plus, she was the Mom who had warm chocolate-chip cookies waiting every day after school. (Pretty sweet, huh?)

Fifty-seven years of marriage later, and, yep, my Dad is the most well-fed guy on the block. Not that Dad doesn’t pitch in, too—he’s still happy to do a little cooking when Mom needs a rest. And actually, I blame him for my obsession with food. He passed on the Evans family super-sniffer gene to me. Nobody on that side of the family sees or hears too well, but we all got a sensory bonus when the genes for smelling and tasting were handed out. That, combined with all the good food Mom cooked at home, and, well, you can see why both my sister and I love to cook. (That’s Eleanor on the right in the photo at the top of the blog. I, of course, am out of focus, because I could never sit still for longer than a second. Unfortunately, I don’t have a scanner so I had to photograph this framed photo for the post. But you get the idea!)

Everyone who knows my Mom marvels at how skinny she is. (A more recent photo of her, at left.) She’s always had a lot of energy, but I swear I think it may have something to do with all the salad she eats. She’s simply crazy about salad. (And chicken. She’ll order a grilled chicken Caesar salad 99 times out of 100 off a restaurant lunch menu!) In fact, along with home-made iced tea (this was Washington, D.C., after all), we had a fresh green salad with dinner every night when I was growing up. And this was before the salad craze or bagged lettuce. Usually the salad had sliced avocado in it, and later some of my Mom’s terrific home-made croutons. The lettuce was, and usually still is, green leaf and Bibb; these days she’ll put a little crumbled blue cheese and a few toasted walnuts on top. (These ingredients, along with a little bottle of her delicious home-made vinaigrette, are always prepped and at-the-ready in the fridge. My mom is the kind of person who makes dinner before breakfast.)

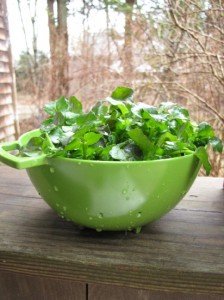
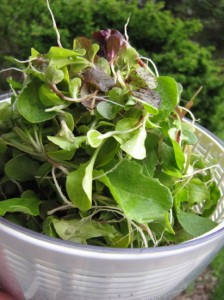
Today I love salad as much as Mom does (though unfortunately, I’m nowhere near as skinny as she is—it has something to do with chocolate!), and it is probably thanks to her that I grow so many salad greens. And wouldn’t you know it, yesterday I picked the first salad greens of the season from the garden. And I thought of Mom. Actually, I was just thinning the seedlings, but after I took all the roots off the little sprouts, they made a stunning “micro-greens” mix (in photo above).

So in honor of my Mom (and all Moms who cook every day for their families), I pass along a favorite salad dressing recipe to you. Maybe you’re making a meal for your Mom this weekend and will include a nice green salad. Me, I’ll have to wait. My Mom’s in Washington and I’m on Martha’s Vineyard (where, as everyone knows, I’m so firmly planted now that it is hard to drag me away!). But in a month or so, Mom and Dad are coming up to see the chicks (including Mom’s namesake, Perky), the garden, and the whole deal. We’ll have a nice salad—and maybe some grilled chicken. And we’ll think of Eleanor, who’ll be running in her third marathon that weekend. Later on in the summer we’ll all get together in Lewes, Delaware, my Dad’s home town. There will be the usual (loud) discussions between my sister, my father, and I about the best peaches, the best tomatoes, the best crab cakes, etc. And my mom will quietly go about turning out the best meals, three times a day.
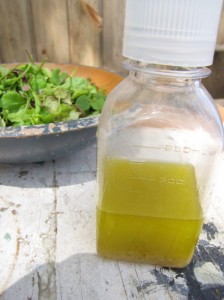
House Vinaigrette

7 Tbsp. extra-virgin olive oil

2 Tbsp. white balsamic vinegar

1 tsp. orange juice

1 tsp. maple syrup

1/2 tsp. finely grated lemon zest

1/2 tsp. Dijon mustard

big pinch kosher salt

6 to 7 grinds fresh pepper

Combine all the ingredients in a glass measure or in a jar with a lid. Whisk or shake well. Keep refrigerated for up to 3 weeks. Bring to room temperature before using.

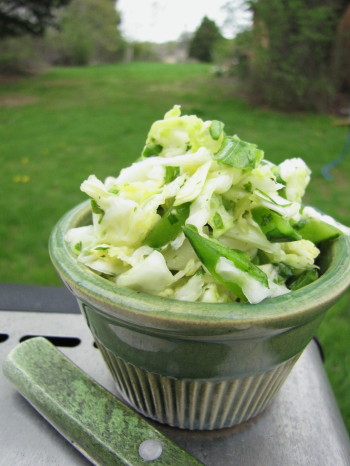
Sweet Pea Dreams and a Quick Slaw with Sugar Snaps

Peas, alas, are not a spring vegetable, despite what legions of food writers would have you believe. It is wonderful to think of things like spring pea risotto and minted pea soup for Mother’s Day, but unless you are lucky enough to live in a really temperate climate, you’ll be waiting for fresh peas until late June with the rest of us.

I feel bad being a Scrooge about this. Actually a super-Scrooge, as, these days, I can’t really even get behind those so-called fresh peas (usually already shelled) that arrive in the grocery stores before they do in my garden. I’d rather eat frozen peas. (And I do.) The reason is that shell peas–or English peas–lose that just-picked sweetness rather quickly and wind up tasting bland and starchy when they travel many miles to get to you.

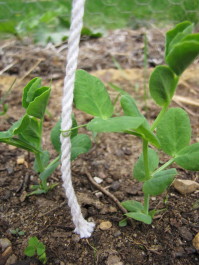
So right now I have to content myself with staring at the squat little pea seedlings in my garden, imagining what they’ll bring me. I’m very proud of them, actually. Yesterday I noticed that they’ve started unfurling their little tendrils and have obligingly begun to grab on to the curtain of strings I hung for them. Such good peas.

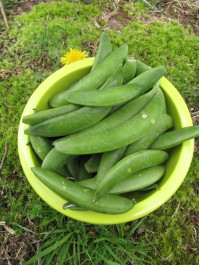
The other way I’m getting my pea fix right now is with sugar snap peas. I’m seeing a lot of nice ones at the grocery store. Yes, these come from far away, too, but at least they hold on to their flavor—and texture—better than shell peas. Sugar snaps are probably the number one quickest veggie on the planet to cook—or just eat. Because, of course, you can munch on them raw (like Cocoa Bunny, in photos below), toss them in a hot pan for a super-quick sauté, or slice them to use in salads and slaws (like the one below).

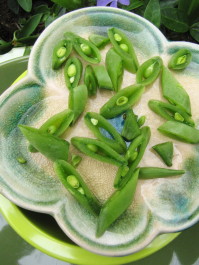
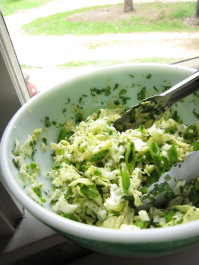
I get a kick out of slicing sugar snaps on the diagonal, exposing the cute little cross-section of peas inside. (I know, I’m easily amused). But these pretty little slivers are useful, too—they add sweetness and crunch, but not too much bulk, to a fresh slaw. Since I happened to have some Savoy cabbage, a few limes, and a bunch of cilantro in the fridge today, I knew I could make my favorite slaw and embellish it with sugar snaps. This recipe (I did a version of it in Fast, Fresh & Green) honestly takes no more than 10 minutes to make, and then reaches its perfect state of crunchy/wilty balance after another 10 minutes or so (though it can hold a bit longer than that). It’s versatile, too. Today I wanted a slightly creamy feel (something to do with the grey skies), so I stirred in a dollop of Mermaid Farm yogurt at the end.

I ate a whole bowlful of this slaw standing up at the kitchen counter, but if you were moved to make some this weekend, you might want to serve it with grilled butterflied leg of lamb, grilled chicken, or even grilled veggie or fish tacos.

Quick Savoy Slaw with Sugar Snaps, Lime & Cilantro

For a printable recipe, click here.

The amounts of lime juice, sugar, and cilantro are flexible here—taste after a few minutes and adjust seasonings if you like. I sometimes add sliced scallions or chives here, too. Savoy cabbage is the crinkly green one.

_______________________________________

8 ounces very thinly sliced cored Savoy Cabbage (about 3 1/2 cups)

4 to 5 ounces sugar snap peas, trimmed and sliced on the diagonal (about 1 1/3 cups)

3 tablespoons chopped fresh cilantro

3 tablespoons freshly squeezed lime juice

2 to 3 teaspoons sugar

1/2 teaspoon kosher salt

1 to 2 tablespoons full-fat plain yogurt (optional)

________________________________________

Combine the cabbage, snap peas, cilantro, lime juice, sugar, and salt in a medium bowl. Toss thoroughly with tongs or two spoons. Let sit for ten minutes, tossing occasionally. Taste and adjust seasonings if you like. Let sit another ten minutes for a softer slaw. Fold in the yogurt if desired.

Serves 4

________________________________________

Cocoa wasn’t so sure about the sugar snap pea…but curiosity prevailed

Big Rocks & Toddler Chicks: Update from Green Island Farm

We have a jumper. We haven’t called 911 yet, but when we found Martha (one of the big gold Buff Orpingtons) on top of the water jar in the brooding box, we knew the chicks were getting frisky. It’s amazing how fast they’re getting their feathers and learning to stretch their wings. They can all fly/hop/jump from one end of the box to the other if startled, though fortunately they don’t all jump at once. It’s tempting to build a bigger box, but they’ll be ready to go outside in a few weeks. Meanwhile, I do my best to keep the box and their water and food dishes clean. They sure can trash a place—worse than teenagers.

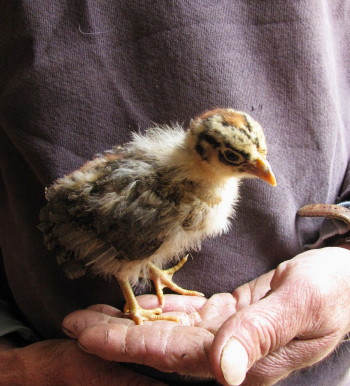
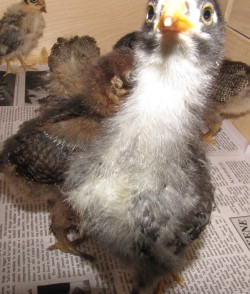
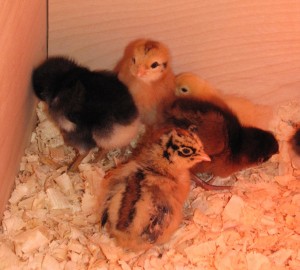
The girls all have names now, thanks to Libby and our friends Eliza Peter and her son James who came to visit weekend before last. Eliza and James brought along the family dog, a golden-colored Labradoodle named Opti, and Libby decided one of the Buff Orpingtons should be named for Opti (far left). The littlest and prettiest bird (and also the friendliest—she loves to sit in Roy’s hand–see top photo) is named Perky, for my mom. Yes, it’s sort of an odd Mother’s Day present, but I thought she’d get a kick out of it as she likes animals. My Mom’s real name is Pauletta, but friends have called her Perky for years. (She is perky—and pretty, too, so it’s only fitting that our beautiful little Sicilian Buttercup be named for her.) Oreo (above right), one of the Barred Rocks, definitely gets our vote for Miss Personality. Every time I try to take a picture inside the box (difficult), she comes right up to the camera. Also, along with Martha and Opti, she heads for high ground whenever possible; these three generally hog the little roost Roy built for the box. The other gals—Jelly Bean, Little Squawker, Sugar (Eliza’s pick, short for Cinnamon Sugar), and Chippy (looks like our resident chipmunk), are camera shy and less adventuresome.

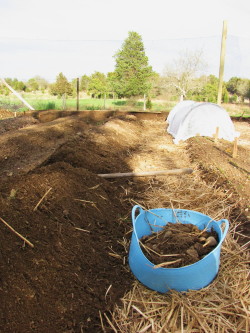
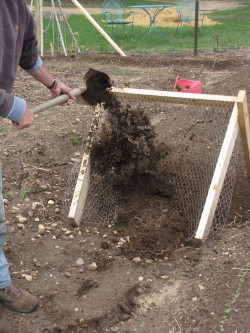
Keeping up with the toddler chicks has been easy compared to the garden work over the past few weeks. We’re still prepping beds, as our soil is full of rocks. If you want to see a humorous illustration of Mars vs. Venus, you can watch Roy and me in the garden using two very different methods to get rocks out of the soil. I basically kneel or bend over and hand-pick them out after turning a patch of soil over with a fork. Roy has built a portable screen that looks sort of like a soccer or hockey goal that he can shovel dirt through and watch the biggest rocks roll away. His method is (somewhat) quicker, but I think mine is more efficient!

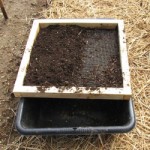
One thing I’m crazy about, though, is the simple little screen (far left) Roy made me from hardware cloth and a few boards. I use this to cull out twigs and stones from soil to make a fine mixture to sprinkle over tiny seeds after planting, instead of spending money on a soilless mix. Actually, I’m always excited when I hear the table saw screeching or the compressor hissing in the shop—I never know what Roy is going to come out with, like this recent appearance (at right)—a new gate for the chicken pen.

We also spent the better part of an evening splayed out on the newspaper-covered mudroom floor transplanting all the tomato and basil seedlings out of six-packs and into 4-inch pots. The numbers are not as crazy as last year, but we still have 200 seedlings, all of which need light. So Roy had to reconfigure the seedling shelves (which he built last year with the idea that they’d be easy to break down and reassemble) to accommodate more lights and taller plants. (The extra lights came from Roy’s shop–now he has to do without until Memorial Day!)

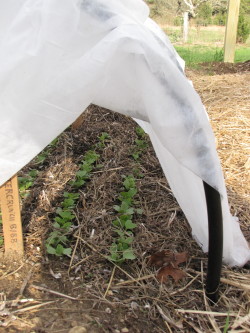
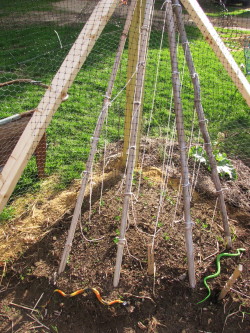
The really great news is that everything I planted outside a few weeks ago is coming up. The pea vines are a couple inches high. That’s my crazy teepee trellis at (near)right. I don’t plan to sell peas this year—I just wanted some for us—so I grabbed a corner for them and made this contraption out of our bamboo stock (also saved from last year) and string to keep the birds out and to provide support. My first batch of arugula and radishes are thriving, so I went ahead and popped the PVC pipes in the ground and draped the Remay over them for early flea-beetle protection (photo, far right). My baby bok choy and about 12 different kinds of lettuces have germinated, and we got the onions, the leeks, and the first batch of potatoes planted. I’ve also been working on an area outside the garden where perennial herbs will go.

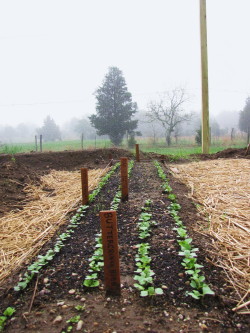
It’s all very satisfying, and every morning I wake up excitedly, head out to feed Cocoa the bunny, and to check out the garden, too. I especially love a foggy morning like this past Friday. Something terribly romantic about the mist and the green colors fading to grey. (Romance was on my mind, I admit, as I was watching the royal wedding. No, I am not related to Kate Middleton, unfortunately!) I snapped a few pix of the garden and then trotted over to the north side of the property—an area called The Grove which had fish ponds in it years ago and now has hundreds of daffodils waning and lilies of the valley coming on under the maples.

The fish ponds were the purview of Farmer Greene, who built this place. And since we love all things green, we’ve started calling our little operation Green Island Farm. Might be more accurate to call our version a mini-farm at this point, but it’s wonderful to imagine all the different iterations this place has taken over the years—the food that’s been raised and grown and gathered on this piece of land over the last few hundred years, probably beginning with the Wampanoag Indians. We’re still hoping all this digging is going to turn up an arrowhead.

Fun with Artichokes – Brown-Braising Babies is Best

Well, I am embarrassed to admit that I got overwhelmed in Whole Foods the other day. Here I am a Food Professional (whatever that is), and the sheer abundance of goodies in the store was just too much for me. Granted, it was a quick stop—I only had 10 minutes to troll the store, as I was on my way to a book signing at Andover Bookstore in Andover, MA. Since we don’t have a Whole Foods on the Island (nor a grocery store anywhere near the size and breadth of this kind), I try to stop in one of these stores when I’m off-Island, mostly to see what the produce selection is like, but sometimes to pick up a specialty ingredient.

So it’s a little frustrating to be in a store with zillions of different products and not much time to peruse them. But honestly, even if I had hours on my hands, or a store like this nearby for regular shopping, I’d still probably be a bit blinded and a tad frazzled by all the colors and sounds and choices and crowds. It’s just a personal preference for me these days—I like things simpler and quieter, and I don’t mind a few less choices.

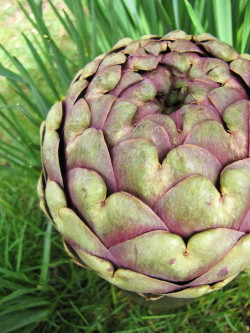
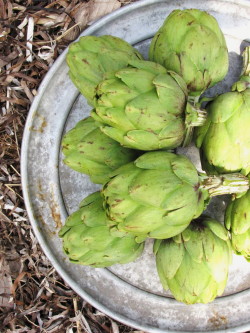
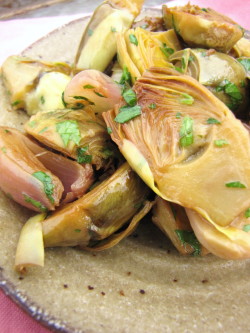
So as my little brain struggled to quiet down all the firing synapses while I whizzed around the produce section, I zeroed in on something visually arresting, something I could wrap my whole 5-minutes-are-left-for-you-to-shop self around – a gorgeous mound of purple-tinged globe artichokes, the biggest and prettiest I’d ever seen. One was literally aching to pop into my little basket and so it did. Next to the display was a stack of boxes filled with baby artichokes—my favorite for cooking. (And yes, we do get both kinds on the Island, just not as consistently or in such abundance.) I grabbed two boxes, thinking I hadn’t yet blogged about the babies, and about how delicious they are braised.

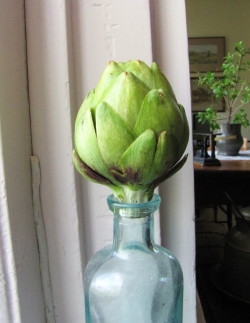
Back home, after a weekend of writing, planting onions, leeks, potatoes, and more greens in the garden, and transplanting tomato and basil seedlings to 4-inch pots inside, I finally got a chance yesterday to do this recipe (below) for you, a variation on one in Fast, Fresh & Green. But first I had all kinds of fun photographing the artichokes in various spots all over the house and yard. I simply couldn’t take my eyes off that purple one.

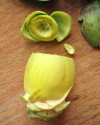
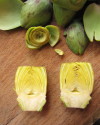
I am convinced that most folks shy away from cooking baby artichokes because they are daunted by prepping them. Really and truly, I promise you that the trimming couldn’t be easier, and that you can do one batch in less than 15 minutes, maybe 10. I did take some quick pictures (in recipe below) to try and illustrate the process for you, but for a better visual, you can also visit the Ocean Mist Farms website (the folks who package up the babies, which are most available in the month of May) to watch a video. Don’t let prepping stop you from cooking and eating baby artichokes—they’re fabulously delicious, and you get more bang for your buck out of them than with bigger artichokes.

By the way, baby artichokes are just immature artichokes picked lower down the stem before they get big. Because their chokes haven’t developed, the whole thing (except for a few tough outer leaves you strip off) is edible.

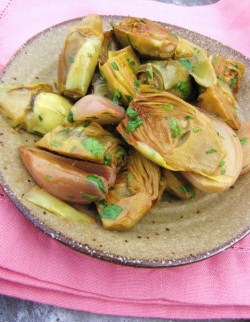
Brown-Braised Baby Artichokes with Lemon Herb Pan Sauce

Printable Version of Recipe

Serve these over creamy polenta or a small serving of fresh fettucine for a lovely veggie supper. For a variation, cook a little bacon, ham or pancetta in the pan before cooking the artichokes; remove and crumble on at the end. Toasted almonds or hazelnuts would be good with these too, and you could substitute a squeeze of orange instead of lemon at the end if you liked. Baby artichokes vary in size—I have seen the same size box packed with 9 artichokes sometimes, 12 another. This recipe will work for 9 medium-small baby artichokes (2 to 2 1/2 oz. each). If your artichokes are very small, you can use 10 or 11 of them, as long as they fit in one layer across the bottom of the pan with the shallots. Be generous with the fresh herbs here.

_____________________________

1 1/2 lemons

9 or 10 baby artichokes

1 1/2 tablespoons unsalted butter

1 tablespoon extra-virgin olive oil

4 small shallots, halved and peeled (or 2 medium or large, quartered)

Kosher salt

1 cup low-sodium chicken broth

1 to 2 tablespoons mixed fresh tender spring herbs such as chives, parsley, mint, tarragon and/or chervil

__________________________________

Cut the whole lemon in half. Squeeze and drop the two halves into a medium bowl filled half-way with water. Cut the stems off the artichokes at the base. Working with one artichoke at a time, peel away all of the outer leaves until you are left with a mostly lemon-limey colored artichoke (it will be somewhat cone-shaped) with the top third still being a light green. With a sharp knife, cut about 3/4 inch off of the top, and, with a paring knife, clean up the stem end just a bit (don’t remove too much; that’s the tasty heart). Cut the artichoke in half lengthwise. Rub the cut sides of each piece with the other lemon half and drop the artichoke halves into the lemon water.

In a 10-inch straight-sided sauté pan that has a lid, melt 1 tablespoon of the butter with the olive oil over medium heat. Arrange the artichoke halves (with whatever water still clings to them) and the shallot halves (both cut-side down) in one snug layer in the pan. Sprinkle with 1/2 teaspoon salt. Cook, without stirring, until the bottoms of the artichokes and the shallots are well browned, 7 to 8 minutes. (If the heat on your stovetop is uneven—or the burner isn’t level, like mine—rotate the pan so that the bottoms get evenly browned.) Pour in the chicken broth and cover the pan, leaving the lid slightly askew so that some steam escapes. Simmer gently, turning down the heat if necessary, until the broth is reduced to a few tablespoons, 12 to 14 minutes. Uncover, add the remaining 1/2 tablespoon butter, and squeeze the other lemon half over all. Sprinkle most of the herbs over and stir gently until the butter has melted. Remove the pan from the heat, and stir again, scraping up any browned bits if possible. Taste for salt and immediately transfer the artichokes and the pan sauce to a serving platter. Sprinkle on any remaining herbs.

Serves 2 as a veggie main dish with polenta or noodles, or 3 as a side dish

Easter Asparagus: Keep it Simple by Roasting or Grilling

I am, as they say, in the weeds this week. Not the garden weeds (yet), just life weeds. They happen to be good weeds (sorry to be prolonging this metaphor) – opportunities I’m grateful to have, just all a little too close together, timing-wise.

Tomorrow, for instance, I take a quick trip off-island to do a demo and book signing at Andover Books, in Andover, Massachusetts. When I get back on Friday, I have an essay to write for a magazine deadline—and a first look at the copyedited manuscript of Fresh & Green for Dinner, back to me from my publisher, Chronicle Books, for comments before moving on to the galley stage.

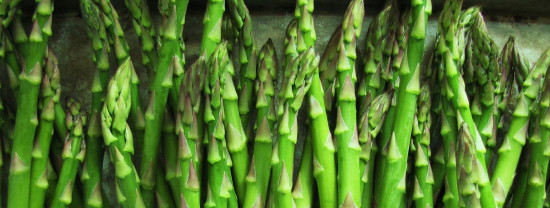
I realized today that I haven’t given a lick of thought to what we’ll have for Easter dinner—nor have I set aside time to develop a new Easter side dish to post for you all on the blog. My apologies. But just so I don’t leave you high and dry, I thought I’d offer you a piece of advice about everyone’s favorite Easter vegetable, asparagus: If you’re cooking for a crowd, keep it simple and pick a method like grilling or roasting.

While I’ve already posted about three methods I love for cooking asparagus (stir-frying, sautéing, and quick-braising), unfortunately these methods are best for serving three or four people. (And Easter dinner usually means at least a few more seats at the table.) Once you start overcrowding the sauté or stir-fry pan, you risk overcooking asparagus (steaming it before it browns). I also find poaching and boiling large amounts of asparagus to be risky, too (tips get overcooked or stem ends get undercooked).

What I love about grilling and roasting is that you can cook lots of asparagus at once. The big broad expanse of a gas grill’s grate or the generous surface area of a large sheet pan can accommodate twice as many asparagus as a sauté pan. Also, if you’re cooking a big ol’ leg of lamb and maybe some mashed potatoes, suddenly a quick and simple side dish becomes very appealing. The other great thing about roasted or grilled asparagus is that they are delicious without embellishment. Cooked with oil and salt and sweetened up by all that high heat, they can drop right on the plate. (Certainly a little lemon butter, a sprinkling of ginger-spiked soy sauce, or a few shavings of Parmigiano wouldn’t hurt, either.)

If you’re game, here are the basic methods:

Roasted Asparagus: Heat the oven to 475 degrees. Trim ends from asparagus. For every pound of trimmed asparagus, toss with 2 to 3 tablespoons olive oil and 1/2 to 3/4 tsp. kosher salt. Line a large heavy-duty sheet pan (or pans) with parchment paper. Arrange the asparagus in one loose layer (try not to crowd) across the sheet pan or pans. Cook for 10 to 14 minutes, or until the asparagus is tender and a little bit wrinkly. (Two sheet pans may take slightly longer to cook, but err on the side of undercooking, not overcooking.) Serve right away.

Grilled Asparagus: Preheat a gas grill on medium-high. Trim ends from asparagus. For every pound of trimmed asparagus, toss with 1 1/2 to 2 tablespoons olive oil and 1/2 tsp. kosher salt. Arrange the asparagus at an angle on the grill grates. Cover and cook until nicely marked on the bottom, about 1 to 2 minutes. Using tongs, carefully turn over the asparagus, a few at a time (keep them at an angle to the grate), cover, and cook until the other side is just marked, about 1 minute. (Do not overcook; they will still be bright green.) Transfer the asparagus to a tray or plate and serve warm or at room temperature.

Note: 1 pound of asparagus will serve about 4 people as a side dish. Cook 2 pounds for 8 people.

A Bunny and Baby Chicks, Just in Time For Easter

Overnight, life changed. We now have animals to care for—baby chicks and a bunny rabbit. I have nervous-new-mother syndrome, and I am relieved every morning that the chicks are still alive and that nothing has happened to Cocoa the bunny. (Cocoa arrived last Saturday, the chicks on Wednesday.) Actually, everybody seems remarkably content. Cocoa hunkered down in her cozy hutch and weathered the 5 inches of rain we got the other day. And the chicks are happily eating, drinking, and pooping in the brooder box Roy built them, under the light and heat of an infrared bulb in our mudroom.

So every morning, once I realize they’re all okay, reality kicks in. Oh, I’ve got to take care of these guys! Everyone is thirsty and hungry in the morning, and often there’s some clean-up to do, too. (More on the lovely subject of litter another time—I am busy reading up on how to incorporate animal manure into the compost pile.) So now my morning routine involves both animal chores and plant chores (after pushing the coffee button, of course.) I start with the veggie seedlings and the baby chicks inside, then move to the rabbit hutch and the new veg sprouts in the garden outside. Boots on; coffee cup in hand; 16 different layers of tee shirts, sweaters, jackets, hats, and socks on (still), I head outside. It’s simply not warm here yet. It was wicked cold today and blowing like stink, as my Dad says—so hard that the clothes on the line were horizontal all day. Not very farmlife-picturesque.

Despite the wretched weather, I still had this oddly warm glow all day. (Especially strange since I was signing books at an outdoor event, and it was chilly, to say the least.) This glow-y thing has been growing all week—it’s the animals, I’m sure. My friend Judy says I get the biggest smile on my face when I start talking about the animals. I admit I’m almost giddy about this little mini-farm, or homestead, or what-have-you we’re creating here. I just can’t believe it’s really happening, and I keep thanking Roy for helping me make my dream come true.

I know we are kind of nuts – in fact, Roy just pulled into the driveway with a truckload of compost, which will go right next to the big pile of sand near the garden. (You know you’re in trouble when you stop going to the nursery for bags of garden stuff and start buying by the truckload). And I bought myself a book called Mini Farming: Self-Sufficiency on 1/4 Acre, which sounds downright scary. Well, we’re definitely not heading towards self-sufficiency around here any time soon. But the book has some great tips and encouraging statistics about selling vegetables (something I still naively think might someday actually be a positive part of my income).

And we certainly don’t have plans to make money on the animals—yet. I’ve been told that selling fresh eggs is a break-even proposition at best, especially if not done on a decent scale. But…just in case, I am keeping track of the costs of acquiring, housing, and feeding the chickens. At the very least, I’d like to know how the cost of feeding your own laying hens every week compares to buying fresh eggs every week. So far, thanks to some free lumber (and in-house labor!), we’ve only spent about $125 getting ready for the baby chicks.

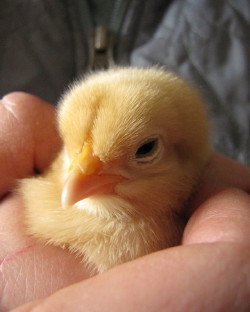
And about those chicks. In case you’re wondering, here’s what we wound up with: 8 chicks, 5 different varieties. Two Buff Orpingtons, two Aracaunas, two Barred Rock, one Partridge Rock, and one Sicilian Buttercup. They’re beautiful—each a different palate of golds, browns, blacks, taupes, creams, and silvers. Each one is already sprouting a few feathers and growing a little bit every day. They don’t stay babies for very long! They also don’t stand still long enough for me to get decent pictures of them–especially down in their infrared-warmed glowy-red brooder box. But it’s a good excuse to take a chick out and hold her, as I did for the photo up at the top (right). Cocoa, on the other hand, is a bit more cooperative–especially when Libby is holding her.

Instant Gratification: Roasted Fingerling & Watercress Salad

It’s funny how things come together in the kitchen. This week I’ve had lots of fingerling potatoes lying around, as I’ve been developing recipes with them for Vegetarian Times magazine. As it happens, I also treated myself yesterday to a watercress gathering excursion. Nice to be out in the quiet of the early morning under clearing skies, walking along a damp compost-y path beneath a gradually thickening canopy of budding branches. (Buds—finally.) I had my little scissors, a bag, and my camera. Sadly, I couldn’t linger long—lots of recipe testing scheduled for the day. But I crouched low in the black mud, hung over the stream, and snipped enough crisp clusters of Leprechaun-green watercress to fill my bag. And then reluctantly carried on my way. Retreating out of the cool forest, I heard the buzz of cars on the roadway calling me out of my reverie.

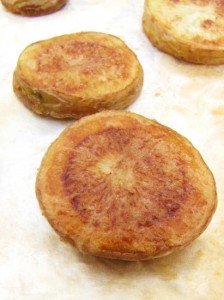
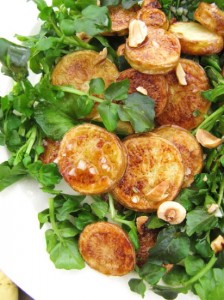
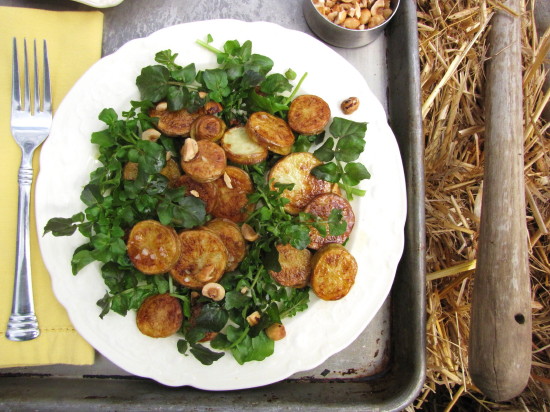
Back home at lunch time (after another recipe test—Asian slaw), I looked at the fingerlings and the watercress and thought: Warm salad. It’s no secret that my favorite way to cook fingerlings is brown-braising. But right then, I wanted instant gratification, and I looked at the little knobby potatoes and thought slicing them into coins and quick-roasting them would get me my hit. Sure enough, the little coins were golden on the outside, moist on the inside after 20 minutes at 450 degrees. I scrunched up some handfuls of washed watercress and scattered them on white plates. On went the roasted potatoes and a super-quick warm dressing I made in the skillet with sautéed garlic, olive oil, and red wine vinegar. I happened to have some toasted hazelnuts around, so I scattered a few of those on, too. Simple and lovely. Nothing I like better than a warm salad, especially with something so crazy delightful as freshly picked watercress. Now, I can’t wait ‘til I can harvest our own greens. (Just a few weeks away, maybe—the first arugula seeds I sowed in the garden last week sprouted today—yippee!)
One little suggestion: If you decide to whip yourself up a warm fingerling salad like this (which you could certainly do with arugula or any other assertive green), the dressing would be even better if you cooked a slice of bacon in the skillet first! Course you could skip the greens altogether, too, if you liked. Those little roasted fingerling coins tasted pretty yummy straight off the sheet pan.

Roasted Fingerling Potato & Watercress Salad

Printable Version of Recipe

All the amounts in this recipe are flexible, and you could vary the dressing or add garnishes as you like. This is really more like a serving suggestion, simply meant to inspire you to pair warm vegetables with cool greens. Just be sure your potato pieces are well-coated in oil for the best roasting. I find slicing the potatoes a little thicker than 1/4-inch, but not quite 1/2-inch (voila, 3/8-inch!) is just about right for cooking through and browning up at the same time in a hot oven.

___________________________________

12 oz. fingerling potatoes, unpeeled, sliced crosswise into “coins” about 3/8-inch thick

2 1/2 to 3 tablespoons extra-virgin olive oil

kosher salt

4 to 5 ounces stemmed watercress, washed (or other assertive greens in small pieces)

1/2 teaspoon minced fresh garlic

1 teaspoon red wine vinegar

1/4 teaspoon maple syrup

2 tablespoons finely chopped toasted hazelnuts or almonds (optional)

1 tablespoon crumbled good-quality blue cheese (optional)

__________________________________________

Heat the oven to 450 degrees F. Cover a large sheet pan with parchment paper. Toss the fingerling pieces with 1 1/2 to 2 tablespoons of the olive oil and 1/4 teaspoon kosher salt. Spread them out in one layer on the parchment paper. Roast under tender all the way through and golden brown on the bottom, about 20 minutes. (Don’t worry if the coins aren’t very brown on the tops—they will be quite golden on the bottom, so just flip them.)

Meanwhile, distribute the watercress on three salad plates (or two for bigger salads). In a small skillet, heat the remaining 1 tablespoon olive oil and the minced garlic over medium-low heat. Stir gently and cook until the garlic begins to sizzle, about 3 to 5 minutes (don’t let the garlic brown.) Add the red wine vinegar, the maple syrup, and a pinch of salt and stir. Remove the skillet from the heat.

Arrange the warm potatoes amongst the watercress and drizzle or spoon the warm dressing over the salads. Sprinkle a tiny bit more salt on each salad, and garnish with the nuts and/or cheese if desired. Serve right away.

Serves 2 or 3

Field of Dreams–And the Tools to Tend It

The landscape of the yard is surreal right now. We spent the week building the vegetable garden (and a few other things—including a rabbit hutch and bluebird nesting boxes), and tools and equipment lie everywhere. Despite the disarray—every day we tidy one area and mess up another—it doesn’t feel so much chaotic to me as comforting.
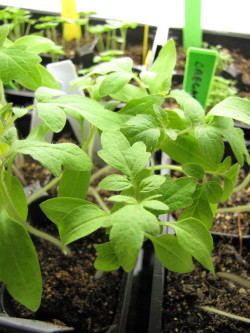
I am captivated by the well-worn handles and the crusted tines of old rakes and hoes and shovels. I’m fascinated with the patterns and textures that rocks and bricks and twisted chicken wire make against the crumbly earth and the cloud- and cedar-studded horizon. When I look around at all this, I associate the tactile pleasures of working with my hands with all the other sensory stimuli of being outside—the warm sun on my face, the blustery breeze tangling my hair, the pleasant tug of my straining muscles. I’m calmed by the rhythm and ritual of it all. And everything seems so much easier this year. Digging the paths, mounding the raised beds, marking the troughs for planting lettuce and radish seeds—the working sequence comes back to me effortlessly.

And there have been far fewer trips to the garden stores this year. Much less new, much more old. Recycled hinges and latches; an old door for the garden gate. Between what we cobbled together for last year’s garden and the leavings of this old farm, we have most of what we need. (And more. We inherited a lot of stuff you might imagine would be strewn about an old farm—things like rusty harrows and old window frames. It’s just too bad that all that remains of a once magnificent barn on the property is the stone foundation.)

Most arresting for me when I look around is the realization of time passing—my own personal time. I look at the odd collection of beat-up garden gloves I’ve amassed—and at the peeling sole of my favorite work boots. In one moment, I can’t believe those boots are already giving out on me; and in the next moment, I realize I bought them four springs ago, when I first stumbled on to the Vineyard—a time when I wasn’t even conscious of the healing power of dirt and lettuce seedlings and baby goats. Huh. Life is funny. I’m still hoping this isn’t all just a mirage.

Quickest Asparagus Recipe Yet—And a Pretty Egg Pancake Makes it Lunch for One

While I wait (and wait) for our local asparagus, it occurs to me that everyone else is not waiting. The grocery stores are full of asparagus (from elsewhere, wherever that is) and it is hard to walk down the produce aisles without snatching up a bunch. I understand, really I do, and that is probably why my two blogs on asparagus from last year are getting hit up a lot these days. So okay, I can’t be my stubborn self and wait another month to offer up more asparagus recipes. Especially because there are about a gazillion different ways to cook asparagus—almost all of them pretty darn quick—so I can come back to this provocative vegetable again. Soon.
While I love quick-braising and sautéing asparagus, I think the method that may be the absolute speediest may offer up some of the best flavor, too. It’s stir-frying. Two to three minutes, and you’ve got a beguiling roasty-toasty flavor and a nice crisp-tender texture. A few keys here: Slice the asparagus thinly on the bias for the best browning; don’t use a lot of fat; keep the heat cranked up. (I love the bowl shape of my non-stick stir-fry pan, but you can substitute with a nonstick skillet—just stir more frequently.) I like to include a bit of garlic, some sliced scallions or shallots (as in the recipe below), or a combo of ginger and garlic in an asparagus stir-fry—but not much more. I don’t make a finishing pan sauce for it, in order to let that pure flavor shine through. (I do, however, sometimes like a cool, creamy garnish for this dish—crème frâiche is lovely.)

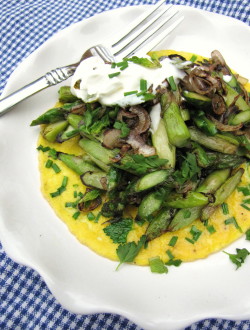
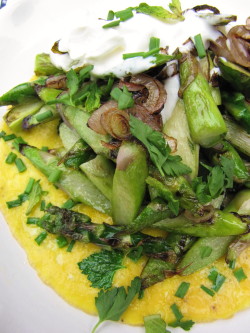
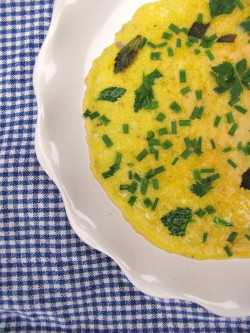
One of my favorite destinations for stir-fried asparagus is a little flat egg “pancake” (really just an unscrambled scrambled egg), which I dress up with fresh herbs to look pretty. (Yes, eggs—no surprise.) I tumble the asparagus and shallots out of the pan and onto the pancake, garnish the whole thing with a dollop of crème frâiche and a few more herbs, and I have a lovely spring lunch in less than 10 minutes (less than 5 minutes of cooking). But you can also double the asparagus recipe below and serve it as a quick side dish for dinner, too.

A Quick Note about Printable Recipes: I have finally figured out a way to provide you with printable recipes, through Google Documents. (Just click on the printable recipe link below the recipe title.) I set this up with last week’s fennel blog and will try to do this going forward until I can afford a website update and find a better way. (This should, I hope, at least make my Mom happy!) Of course you can still print the blog posts with the recipes imbedded in them, but it’s not a very usable format (and expends excess paper, too). The printable recipes are simply Word documents.

Stir-Fried Asparagus & Shallots on Fresh Herb Egg Pancake for One

Printable Version of Recipe

For this stir-fry, be sure to slice the asparagus sharply on the diagonal. It not only looks pretty, but the asparagus will also cook more evenly and the interior of the stalks will brown better. Crème frâiche is available in small tubs now in most groceries. Check both the cheese and dairy sections. If you can’t find it (or don’t want to bother with another trip to the grocery), you could try a little sour cream loosened with a bit of milk or a bit of thick yogurt or even fresh goat cheese. I absolutely love what fresh mint does here in both the pancake and as a garnish, but I usually combine it with chives and/or parsley, which hold their bright green color better. I call for cooking the veggies first and then the egg, but if you’re even a moderately good multi-tasker you can cook them both at the same time.

For the veggies:
2 teaspoons extra-virgin olive oil
1 cup thinly sliced asparagus (cut on the diagonal, 3/8- to 1/2-inch thick and 2 inches long), from about 1/2 medium bunch (or 1/2 pound) asparagus, trimmed
1/4 cup (scant) thinly sliced shallot (about 1/2 medium to large shallot)
1/8 teaspoon kosher salt

For the egg pancake:
1 large egg
1 teaspoon half-n-half or heavy cream
big pinch kosher salt
freshly ground pepper
1 teaspoon unsalted butter
1 scant tablespoon combo fresh baby mint leaves (or thinly sliced mint) and small parsley leaves and/or sliced chives (plus a sprinkling more for garnish)
2 teaspoons crème frâiche for garnishing

Make the veggies: In a large nonstick stir-fry pan, heat the oil over medium-high heat. When the oil is hot (it will loosen up and shimmer), add the asparagus, the shallots, and the 1/8 teaspoon salt, and turn the heat to high. Cook, stirring occasionally for the first minute, and then more frequently, until most of the asparagus are browned around the edges and the shallots are softened and browned, 2 to 3 minutes. (Pay attention here—this goes fast.) Remove the pan from the heat and transfer the veggies to a plate while you make the egg.

Make the egg: In a small bowl, whisk together the egg, half ‘n half or cream, a little salt, and a grind or two of fresh pepper. In a small nonstick skillet, heat the butter over medium-low heat. When the butter has melted, swirl it around in the pan to cover the bottom. Pour the egg mixture into the pan and do not stir. Sprinkle or arrange the herb leaves or cut herbs over the top of the egg. Let the egg cook until it has set, about 3 to 4 minutes. The egg will set from the outside edges in. When the center of the egg looks just barely set, remove the egg from the pan and slide it on a small pretty salad plate, keeping the herb side up. (The bottom will be golden, the top should be still slightly soft.)

Pile the asparagus and shallot mixture on top of the egg; garnish with the crème fraiche and extra herbs. Eat right away.

Serves 1

Best of Spring: Baby Lambs, Digging Dirt, The Chicken Coop

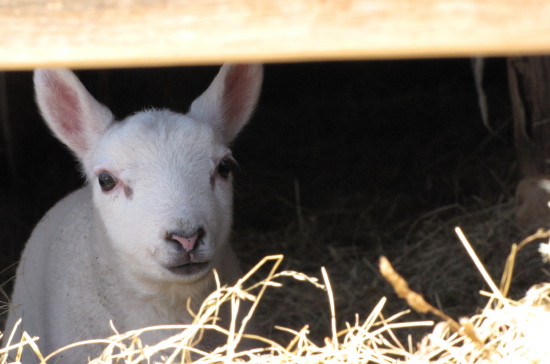
Remind me when I start complaining about the weather again (as I did in my last blog) how great this time of year really is. First of all, there are baby lambs. Honestly, there is absolutely nothing cuter than a baby lamb—even though the one above looks more like the Easter Bunny. You get a better idea from the photo at right. All of these cuties are Cheviot lambs, who have distinctively upright ears and clean faces. They are new residents at Whiting Farm right up the road from us. Libby and I visited the farm last year at lambing time and decided to go back this Saturday. For some reason, Libby thought that the lamb at right looked familiar. “Let’s call him Dad,” Libby said. So I took some pictures of “Dad” to show to the real Dad, who was back home rototilling the vegetable garden (a fun job I managed to avoid).

Poor Roy. He gets all the hard jobs. Once again he jokingly offered to write a blog post this week entitled, “She Wanted To Be A Farmer, And I Got All The Work.” Once again, I kept him away from the keyboard. The rototilling—with a less than ideal rented rototiller—turned out to be a bear, what with the sod and rocks and shrub roots. Fortunately, what it turned up is beautiful soil—the remains of a former flower-grower’s garden from years back. We are still pinching ourselves that we’ve got this killer sunny spot to do our vegetable growing (and selling) in our very own backyard (or I should say the backyard of our rented farmhouse). The farmhouse sits on two acres, but this cleared spot that we’ll cultivate is just about 1600 square feet. That’s a good deal smaller than the 2800 square feet we had last year, but with all we’ve learned and lots of streamlining, we should be able to be as productive as last year—hopefully more so. No space-hogging, long-to-mature crops like squashes, eggplants, and peppers this year. Just lots of greens, tomatoes, carrots, beans, herbs, and potatoes.

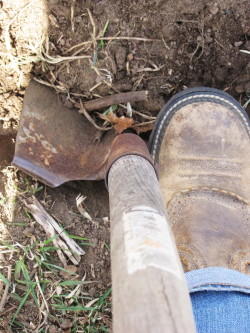
Which brings me to the second thing I love about this time of year—the opportunity to get outside and dig in the dirt—finally. Even if it is just to dig a trench. See, I felt bad about the whole rototilling thing, so I offered to dig the trench around the garden where we will bury the chicken wire and deer fencing. Truthfully, the couple of hours I spent working on this yesterday were blissful. Shoveling dirt (despite the tug on that weak spot in my lower back) is a Zen activity much like weeding. Now I know why my Dad spends so much time moving plants around in his garden. He’d be shocked to know how much I like digging. When my sister and I were little, we’d find any excuse to get out of garden chores.

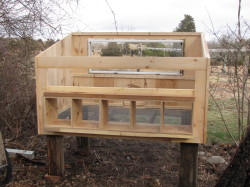
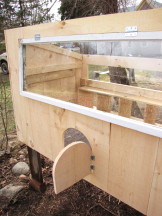
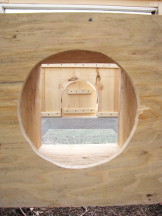
Lastly, the really best thing about March is anticipating April—and all that’s coming our way. It’s no secret that Libby and I can barely wait ‘til the baby chicks arrive (in less than two weeks!), but now we can even picture what it’ll be like when they get their feathers and go live outside. Because Roy started building the chicken coop this week. His design is so cool that I thought I’d show you a few photos in case you’re of a mind to do something like this. (I’ll show you more when it’s all finished.)

The best feature is the fun round holes (top right photo and middle photo above) he made to reach inside the nesting boxes in the back of the coop—which also has a flip-down access door. (The holes will offer a little weather protection when the door opens.) The bottom of the coop is hardware cloth (which will have bedding on it); there’s a side door for easy cleaning; and the front features a “viewing” window that also opens for ventilation. (When the hens are inside roosting or laying, they can look out at the vegetable garden!) The cute little arched front door will lead to a ramp which the hens will use to scuttle down to their “yard”—a chicken-wire covered pen that will protect them from hawks during the day. The coop is just a stone’s throw from the edge of the vegetable garden (the clothesline is relocating), and we positioned the coop in a bit of shade for some coverage on the hottest days.

I have to say, Libby and I are not the only ones excited about all these developments. Secretly this whole homesteading/farming/growing/whatever-you-call-it thing we’re doing makes Roy pretty darn happy, too. But just for good measure, I did make him meatloaf for dinner last night.

Vegetables, flowers, and serenity with Susie Middleton