Category Archives: How-To

Cook the Vineyard With Me — And Martha’s Vineyard Magazine’s New Website

        What’s in season. Where to find it. How to cook it.


Recipes follow me around. As do vegetables. And chocolate. And kitchen tools. I can’t get away from them. I admit, I’m not trying too hard.

Despite taking a break from cookbook writing after Simple Green Suppers came out in 2017, I’ve still been writing about food on Martha’s Vineyard for both the Vineyard Gazette and Martha’s Vineyard magazine (both owned by the Vineyard Gazette Media Group, where I am thankfully employed.) I’m also still contributing to Fine Cooking magazine. My guide to grilling vegetables is in the June/July issue.

So when Martha’s Vineyard magazine asked me to participate in the launch of a new cooking website and newsletter, I couldn’t say no. Didn’t want to say no. In fact, I said I thought it was a great idea! Yikes.

Well, it is a great idea — one that actually is going to come to life very soon. CooktheVineyard.com will be an online guide to cooking and eating deliciously at home, with an emphasis on finding and cooking fresh, seasonal ingredients. Of course that means recipes, and stories, and resources. And it will include a section on dining out, with regular features on chefs, restaurants and local food businesses and artisans.

But Cook the Vineyard will also be a free weekly newsletter, written by yours truly, with lots of recipes and ideas for what to cook every week, from weeknight suppers to entertaining menus.

You can read more about Cook the Vineyard, which will be sponsored by LeRoux at Home, The Net Result, and Cronig’s Market, in this article in this week’s Vineyard Gazette.

Then I hope you’ll sign up for the newsletter, which will be delivered to your inbox every Wednesday, starting July 3.

And follow us on Instagram, too @cookthevineyard. 

And perhaps you’ll forgive me for dropping the ball on sixburnersue and help me pick up the slack over at cookthevineyard.com.

Happy summer and happy cooking.


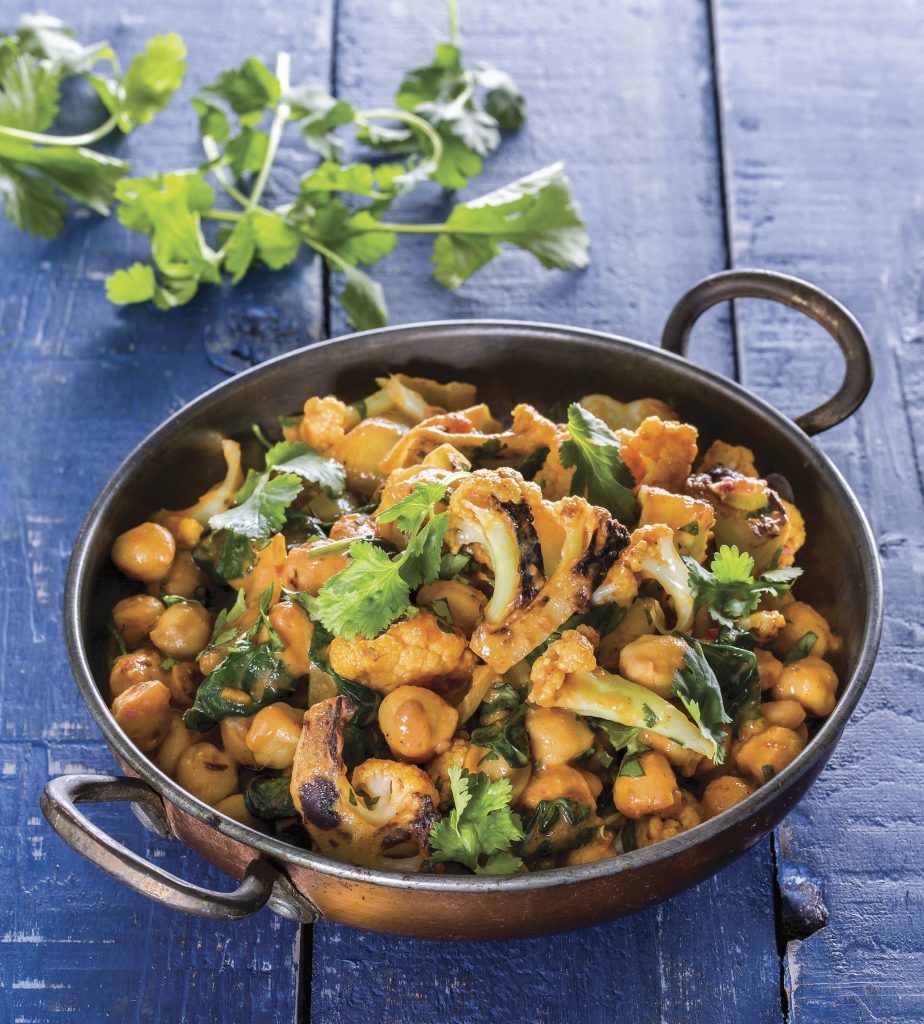
An Indian Curry with Cauliflower, Spinach, Tomatoes, and Coconut Milk – And the Miracle of Chickpeas

Weeknight. Cooking. Strategy. Three words we all wrestle with, but that I hope will soon bring a smile to your face when you get a hold of Simple Green Suppers: A Fresh Strategy for One-Dish Vegetarian Meals. Lately, with all the distractions, I barely noticed that the pub date for my fourth cookbook is sneaking up, and now we have just two months to go. (April 11—yay!)
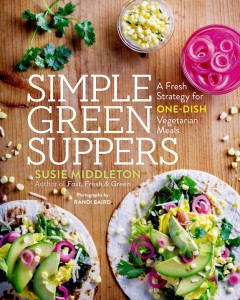
I’m pretty darn excited, because I think this is the most useful cookbook I’ve written since Fast, Fresh & Green, and honestly, these days, useful is good. Useful is something we can wrap our heads around.

Heck, lately I’ve even realized that smarter cooking might be able to help us alleviate one problem in this country—food waste. (In American households, 27 million pounds of food a year gets tossed.) But I’ll offer some tips on that in a later blog.

Right now, I want to assure you that flavor comes first. Recipes that taste good and work well are the ones you will make again. When I can create great flavor, show a new technique, and offer a way to streamline weeknight cooking, I’m extra happy. Because I want you to cook more, enjoy cooking, and eat well.

So let’s talk about chickpeas—those incredibly versatile, protein-rich legumes that do it all. Despite the Ottolenghi-inspired elevation of chickpeas to a sexy star ingredient (very welcome stateside after many years of unfortunate mistreatment), I still have many friends who tell me they’re not crazy about chickpeas. I think this is because the texture, the liquid, and the flavor of canned chickpeas can be off-putting. Canned chickpeas can be a bit mushy and slippery, and some brands have a slight metallic or funky taste—or too much sodium. Doing a taste comparison of brands can go a long way towards eliminating some of these problems. I’ve found I really like Westbrae Natural Organic Garbanzos, so I stock up on them when I find them. And rinsing helps a lot, too.
It’s great to keep canned chickpeas around for convenience; I’d never suggest that you don’t. But I will tell you that of all the beans and legumes I cook and eat, chickpeas are the one I most frequently cook myself.

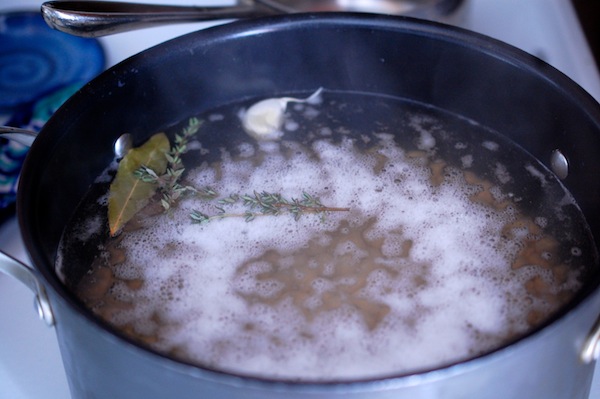
In fact, I toss a couple cups of dried chickpeas into a mixing bowl, cover with water, and stick in my fridge most Saturday nights. (That’s the overnight soak that people are fond of complaining about, when in reality it’s just a habit to form, and one that takes less than 2 minutes to accomplish.) At some point on Sunday, I drain them, put them in my pasta pot, cover with lots of water, add a bay leaf, a garlic clove, and maybe a sprig or two of thyme, bring to a simmer, and cook for about an hour. Then I add a little salt and continue cooking for 15 to 30 more minutes until the chickpeas are tender to the bite. (If I have to add more boiling water, I do.) I drain them, cool them, pop them in a storage container, refrigerate, and voila!–I  have chickpeas for the week. Very little hands-on cooking time for a big payoff.

Chickpeas that you cook yourself will not only have a better flavor and texture than canned ones, but they will keep longer as well—5 to 7 days in the fridge. For a vegetarian, having a protein like this already cooked and in the fridge cuts weeknight supper prep time down considerably.

And now those chickpeas are ready for their biggest trick—one that ordinary beans and lentils cannot perform: Browning. Yes, this is the real reason I love chickpeas so much: You can sauté or roast them until they take on a golden brown color and toasty, even nuttier, flavor. And you know, I love brown!! When I discovered that chickpeas could do this, I was ecstatic. Because the flavor is killer. The crunchy texture of roasted chickpeas is a fun bonus.
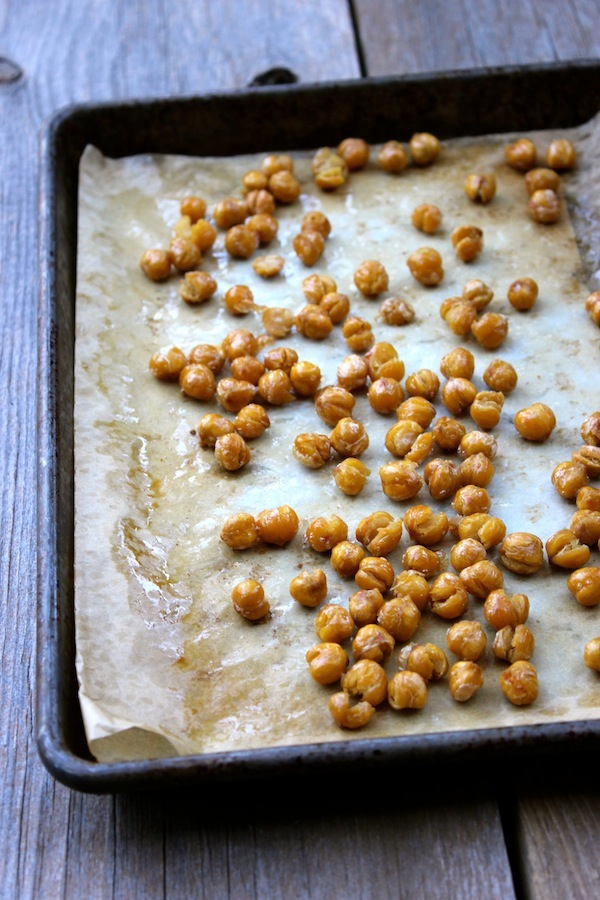
The good news is that you can sauté or roast either home-cooked or well-drained canned chickpeas. So if you’re new to vegetarian eating, look at it this way: If you’re making a quick weeknight stir-fry or sauté or braise, you can replace the shrimp, the chicken, or the beef with chickpeas. Chickpeas can also be part of a delicious hash, and they make a great base for quesadilla and burrito fillings. Sautéed and spiced chickpeas and veggies, along with some toasted nuts and fresh herbs, turn cooked whole grains (another great make-ahead) into a million different suppers. Marinated or dressed (don’t leave them rolling around naked and lonely), they turn a chopped or warm salad into a filling supper.

But enough already. I think at this point you’d just like a delicious recipe to try all this out, so here is a favorite Indian curry from the book. I think you’ll love it.

And I’ll be back in a couple weeks with another teaser recipe and more tips for weeknight vegetarian suppers to keep you excited about the book. And if you haven’t preordered your copy—or asked your independent bookstore to order some—please do. Click on this link.

Indian Curry with Chickpeas, Cauliflower, Spinach, Tomatoes, and Coconut Milk

One fall night I set out to cook a comforting Indian curry that would have all the things I love in it, starting with sautéed chickpeas and cauliflower and ending with a slightly creamy coconut-tomato sauce. In between, a mix of ginger, garlic, and curry spices (as well as fresh spinach) would provide backbone. I decided to use my handy stir-fry pan, because it’s great for sautéing and simmering. After a little chopping, I started cooking. Fifteen minutes later, I was so happy: I loved it! Leftovers were delicious, too. Be sure to use fresh curry powder. This dish is filling on its own, but you could serve it with rice or naan if you like.

Serves 2 to 3

3 tablespoons grapeseed or vegetable oil

One 15-ounce can chickpeas, drained, rinsed, and dried (or about 1 1/3 cups cooked chickpeas)

¾ teaspoon kosher salt, plus a pinch

3 cups cauliflower florets (1- to 1½-inch pieces, cut so that most have a flat side)

1 cup sliced yellow onion (about 1 medium-large onion, cut lengthwise)

1 tablespoon minced fresh garlic

1 tablespoon minced fresh ginger

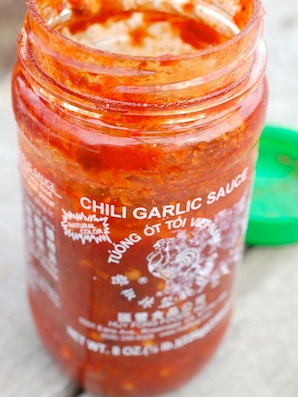
1½ teaspoons Asian chili-garlic paste

2 teaspoons curry powder

2 teaspoons packed dark brown sugar

½ teaspoon ground cumin

3 cups packed baby spinach

½ cup canned crushed tomatoes

1 cup canned full-fat coconut milk (preferably organic), well stirred

¼ cup finely chopped fresh cilantro


In a large (12-inch) nonstick stir-fry pan, heat 1 tablespoon of the oil over medium-high heat. When the oil is hot, add the chickpeas and ¼ teaspoon salt. Cook, stirring occasionally, until all the chickpeas are golden and have some brown spots on them, 5 to 6 minutes. Transfer the chickpeas to a large plate.

Return the pan to medium-high heat and add 1 tablespoon of the oil. When the oil is hot, add the cauliflower and ½ teaspoon salt. Stir, cover, and cook, uncovering to stir occasionally, until the cauliflower pieces are browned in spots and have lost their whiteness (they will be softened but still crisp), about 5 minutes. (If the cauliflower is browning too quickly, reduce the heat to medium. If your pan does not have a lid, use a baking sheet or the bottom of a large skillet.) Transfer the cauliflower to the plate with the chickpeas.

Return the pan to medium-high heat and add the remaining 1 tablespoon of oil, the onion, and a pinch of salt. Cook, stirring, until the onions are browned in spots but haven’t lost all their stiffness, about 3 minutes. Add the garlic, ginger, chili-garlic paste, curry powder, brown sugar, and cumin. Stir well to combine, and fry the spices for 30 seconds. Add the spinach, tomatoes, and coconut milk and stir well to incorporate the spices with the liquids and to soften the spinach. Add the cooked cauliflower and chickpeas and simmer, stirring, for 1 minute. Stir in the cilantro and remove the pan from the heat.

Serve hot or very warm in two or three bowls.

Recipe From Simple Green Suppers by Susie Middleton, © 2017 by Susie Middleton. Reprinted by arrangement with Roost Books, an imprint of Shambhala Publications, Inc. Boulder, CO.

Photo of Indian Curry by Randi Baird © Randi Baird

What One Vegetarian Really Eats (and Cooks)

DSC_0189A year ago this January, I hopped a very short fence. I went from eating not a lot of meat, to eating no meat at all. Technically, I became a vegetarian, though I have eaten the occasional fish or shellfish when it has been offered to me.

Now that I am in the thick of writing and editing the text and recipes for my vegetarian cookbook (which will come out in Spring 2017 from Roost Books), I am thinking hard about strategies and tips for readers. But I am also thinking about what fun I have had developing the recipes—how the creative challenge for this book has been the best yet, because it is has essentially given me a blueprint for eating.

I can’t wait (though I must—and, ahem, I must also finish the manuscript, complete the last photo shoot, and a list of other things…before it even gets to my editor!) for the book to come out so that I can cook from my own recipes every night. And sadly, I won’t be able to share any of those recipes with you until we get close to publication.

But I thought for those of you who are contemplating a shift, it might be interesting to share with you what one vegetarian really eats. (And I say really or actually, because this is not theoretical. Since I, like most year-round Islanders, cook the vast majority of my food at home, this is truly what I eat.) Remember, I’m not a nutritionist—my gig is cooking technique—and I’m only one person, so take it for what it is.

DSC_0217

I will say, though, that cooking vegetarian truly is a blast (if you like to cook), because the creative possibilities are endless. I never come at it from the “what can I replace the meat with” (in fact, I’m not big on meat-replacement type proteins); I always come at it from the “how I can turn these vegetables into a delicious, filling meal?”

Here are some of the things I eat and cook with on a regular basis (in addition to the obvious—vegetables!):

DSC_0197Nuts. Toasted. Toasted nuts have an almost cocoa-like umami thing going on, so they taste delicious and are very filling. Almonds are at the top of my list, with pecans and walnuts next. I stock pine nuts, hazelnuts, and, of course, peanuts and natural peanut butter. (Pepitas, too, which are seeds, not nuts.) I use nuts not just in salads, but in grain and bean dishes, too.

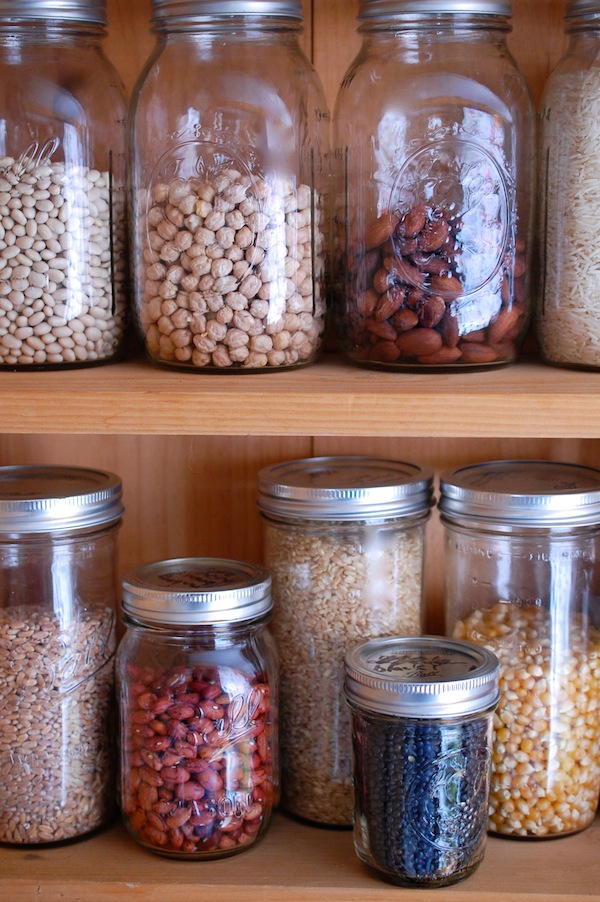
Chickpeas. Sheepishly, I have to admit that, like a lot of vegetarian converts, I have fallen totally in love with chickpeas. (I’m simmering a pot on the stove right now on this first snowy day in January, though I stock canned chickpeas, too.). In addition to the great flavor and rich texture, chickpeas have a distinct advantage over most other beans and legumes—they hold up well in all kinds of cooking. In fact, you can even brown them by sautéing or roasting; and as you know, I love browning because that means caramelization and extra flavor!

DSC_0199

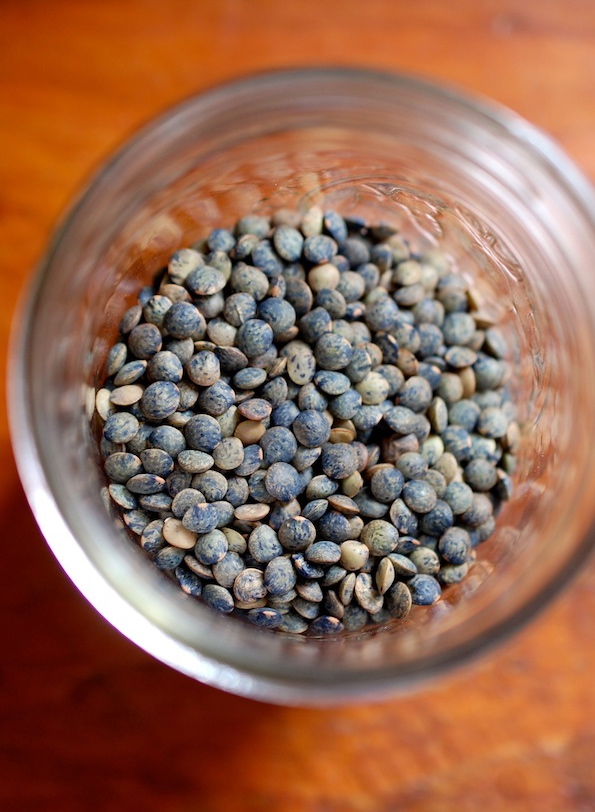
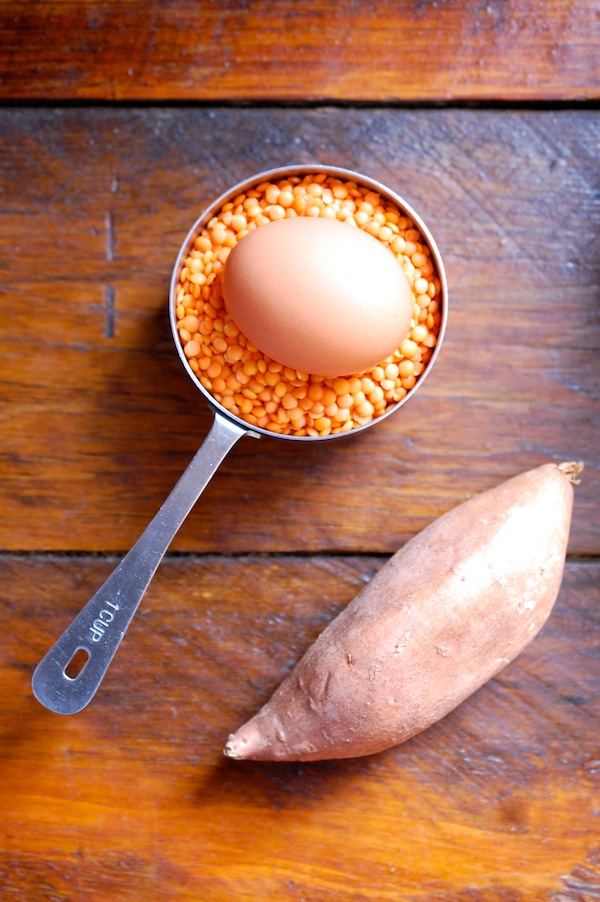
Lentils. While I eat all beans (always soaked first before cooking, or canned), I’ve become more of a fan of lentils in the last year. For one thing, they cook very quickly—in less than 20 minutes in many cases. Secondly, you can now find black Beluga lentils and small French green (DuPuy) lentils in many more grocery stores, and I find the firmer texture of these more pleasing than that of the larger common brown lentils. Red lentils are also quick and delicious in soups and porridge-like dishes. And all lentils have assertive flavors that go well in soups, salads and sautés.

lent


DSC_0186Avocados. Yes, I know we think of avocadoes as a vegetable, but they are really something unto themselves (and technically a fruit), and I have to mention them because they have that uniquely rich and filling thing going on (good fat, don’t you know?). And, I eat a lot of them. On toast, in salads, with tortillas, in egg sandwiches. Alone with lemon and olive oil and salt. With chickpeas! And nuts!

Grains. I’ve always been a fan of grains, but I like them and use them even more now that I’ve figured out I can cook them ahead and hold them in the fridge or freezer, and that I can use them sometimes almost like a condiment, or as one of many ingredients in a dish. Sitting down to a big bowl of grains can get monotonous. Putting some grains in a salad, a soup, a taco, whatever, is much more interesting. My favorites are wheat berries, farro, short grain brown rice, and oats (granola for breakfast!) but I stock lots of (gluten-free) quinoa, as well as millet and many different kinds of rice.

DSC_0200

Eggs. I’m not vegan or dairy-free, so I still turn to eggs for some of my protein. (That may change at some point, but for now, I’m an egg eater.) The best thing about an egg (like a lot of these ingredients that play well with others) is that you can add one to just about anything. Sure, you can make a meal just on eggs, but you can also add an egg to a grain or bean dish, a broth or a sauté.

DSC_0224

Those are the things that I most often pair with vegetables to make my meals. (Remember, vegetables have protein, too.) I do eat pasta and bread , too, though I choose whole-grain when I can. And again, I often use these carbs in smaller amounts rather than in starring roles. But there’s nothing like a great piece of artisan multi-grain toast for transporting any number of veggie toppings to a great destination.

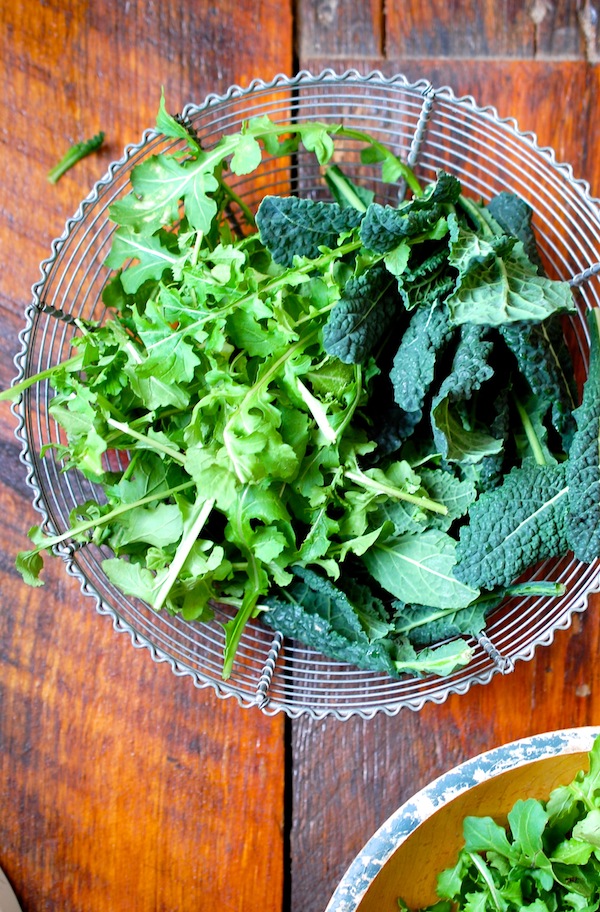
As for the vegetables themselves, I eat leafy greens every day. They are the easiest, quickest, and most flavorful vegetables to make a meal with. (The arugula in this picture was taken from plants still growing under hoops outside.) Alliums of all kinds (onions, shallots, garlic, scallions) make their way into almost everything I cook, and my fanaticism for tomatoes extends to this time of year with roasted tomatoes in the freezer and sundried tomatoes in the fridge. This time of year I also gravitate towards colorful root and winter vegetables like carrots, sweet potatoes, and butternut squash. Along with the aromatic ingredients I always keep around—citrus, fresh ginger, vinegars, hot sauces, spices, maple syrup and honey, miso, tahini, tamari, parmesan cheese—and any fresh herbs I can procure (my rosemary pot is indoors, still alive, for now!), I eat well.

DSC_0211

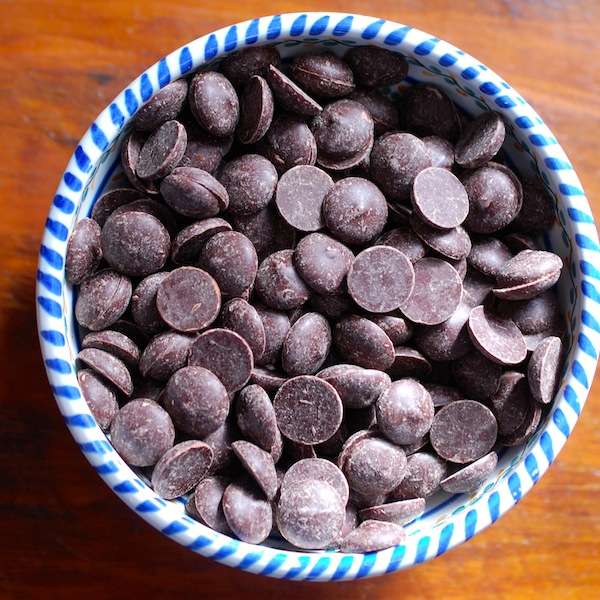
Happy eating and cooking to you, too, in this new year. And don’t forget the daily chocolate imperative. (My little bowl of chips, always by my side!)

DSC_0202


When Life Gives You Splitters, Make Tomato Confit

DSC_7815We’re growing a new variety of tomato (which shall remain nameless at this point, as it is not proving itself to be all that it was cracked up to be!), which tends to split. Especially after a lot of rain like we just had. (To be fair, there are some delicious tomatoes that have this trait. Inconsistent water wreaks havoc with tomatoes.)

I don’t like wasting all those splitters. Sadly, we used to feed them to Martha, Opti, Oreo, Sugar and the rest of our original hens. But they are no longer with us, and throwing one bowl of splitters into a yard of 200 hens is hardly fair, so I’ve had to think of other solutions.

DSC_7753

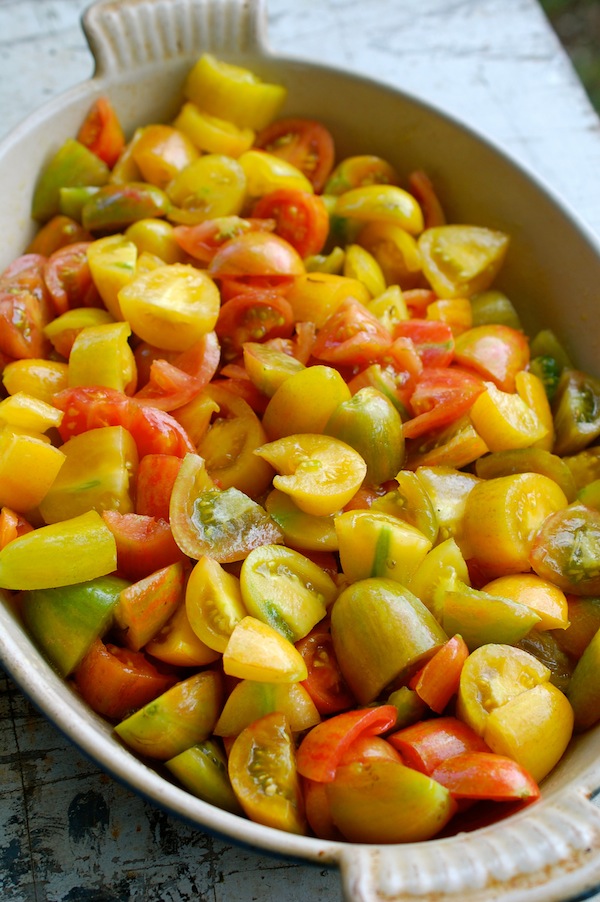
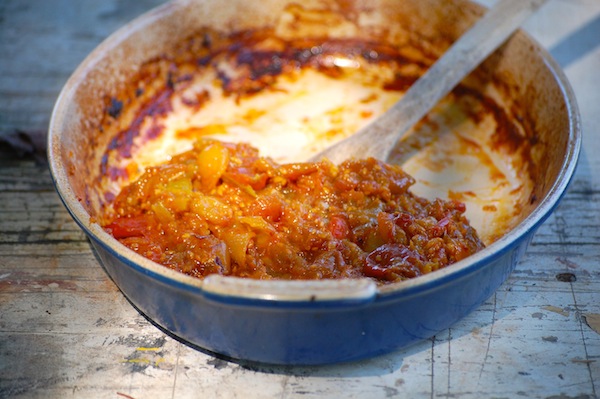
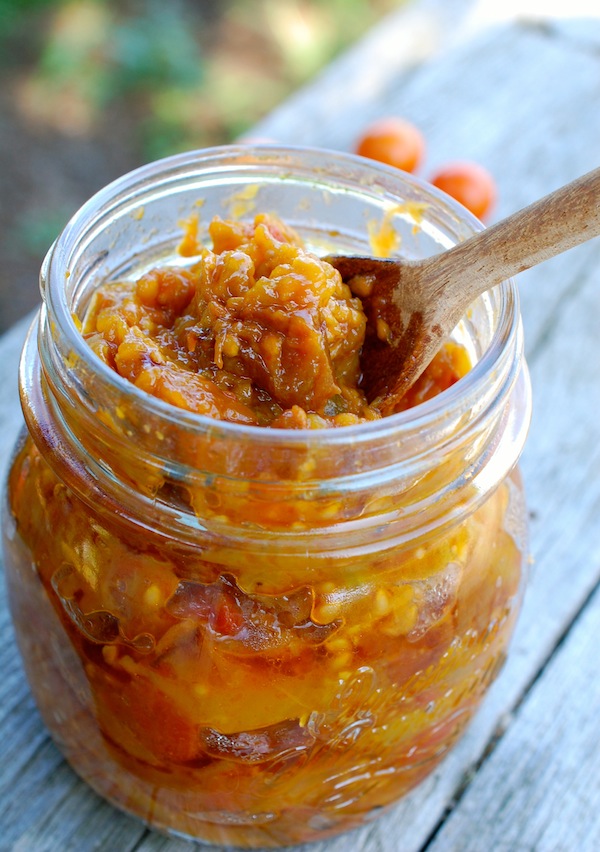
This week I simply cut them all up into chunks, tossed them with olive oil and salt, put them in a heavy roasting pan, and cooked them for about 2 hours at 300°. I checked on them from time to time, stirring and scraping. I cooked them until a lot of the moisture was gone and the texture was kind of jammy. At the very end, I folded in a little minced fresh garlic and a mixture of a small amount of balsamic vinegar and honey, and let the garlic soften and everything infuse for a couple minutes in the oven.

DSC_7772

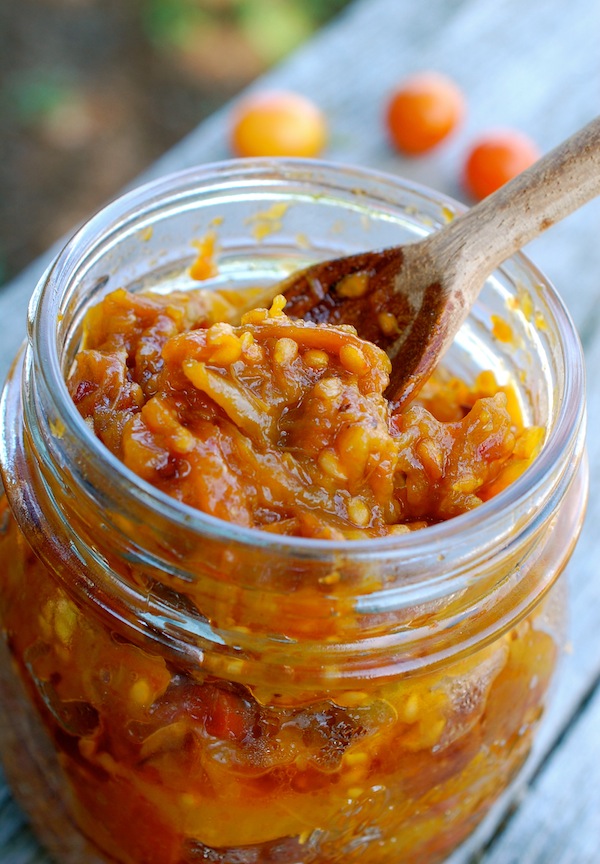
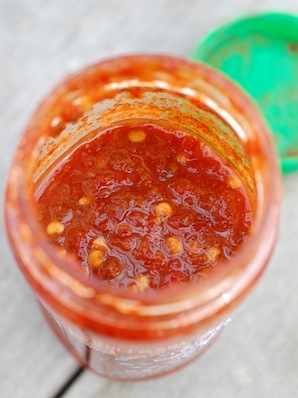
I left the cooked-down tomatoes to cool for a short spell in the pan, and then tasted. Delicious! Even though these tomatoes didn’t start out with a very robust flavor, roasting them down concentrated their flavor (as roasting always does!). The result was kind of a confit (really just a tomato jam or conserve), though with seeds and skins left in, it might not be everyone’s cup of tea. The seeds and skins don’t bother me, and considering how dead simple this is—and that it greatly extends the life of a bunch of tomatoes that otherwise would probably rot before you could eat them—it’s a no-brainer. You could literally do it with any tomatoes, any time.

DSC_7782

I put the confit in a cute jar just to photograph it—I was not intending to can it or keep it for very long. But I imagine it will keep at least a week in the fridge and would freeze just fine for longer. We’ve put it on top of grilled bread with warm goat cheese, and I’m planning to use the rest in a baked pasta. You could put some on top of scrambled eggs or in a quesadilla (yum), top a pizza or use it as a base for a flavorful rice dish. Why not?

DSC_7820


How to Cook a Pattypan, A Shisito, A Fairy Tale, A Fingerling

DSC_7564

We’re growing a few fun and different veggies this year—in addition to the old favorites—just to keep things interesting. (Fun and different=Cute names, too!)

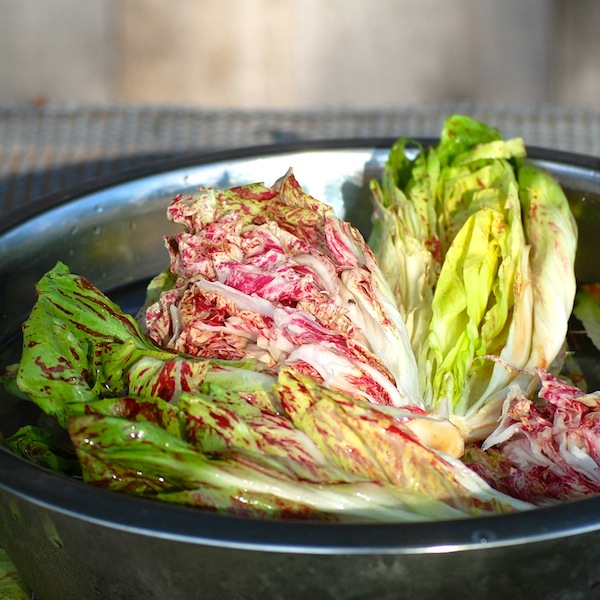
DSC_7426 The most beautiful? This Bel Fiore Radicchio.

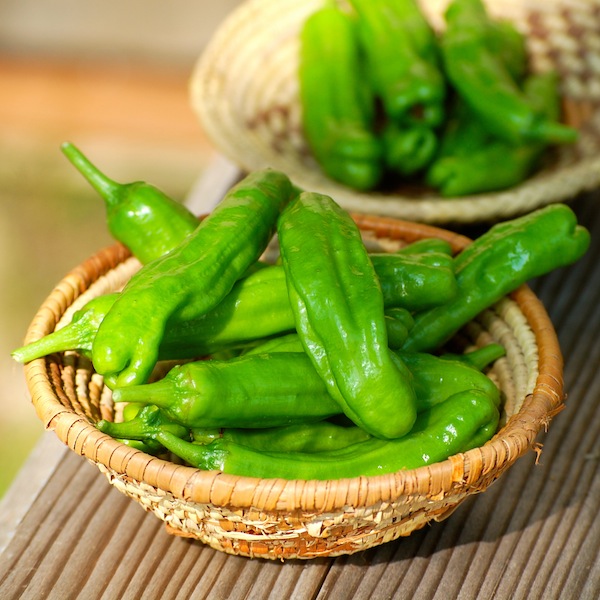
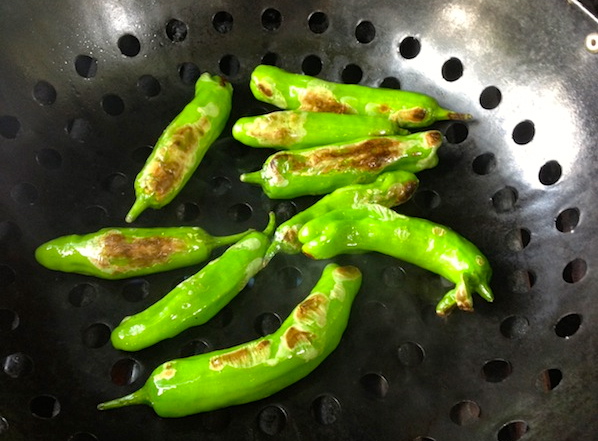
The most trendy? Shisito peppers. Well, oops, apparently (according to this hysterical mock restaurant menu on Eater.com) this trend is now passé in certain circles, or at least ubiquitous, which is never a good thing. But for a market gardener, a cook, or an eater, Shisito peppers are a total win-win-win. The plants are prolific, the cooking is super easy—just toss with oil, cook in a hot cast-iron pan or in a grill basket until blistered (a few minutes), and season with sea salt. Eat the whole thing—absolutely delicious. Summer-crowd appetizer friendly, too.

DSC_7204photo-72

The most colorful?

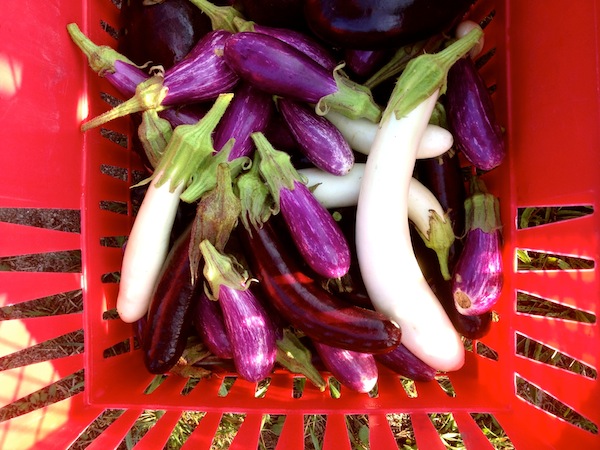
photo-77photo-76 Our crazy collection of eggplants, including new additions Orient Charm (the lavender beauty) and Hansel and Gretel (the mini purples and slim whites). The cute little Fairy Tales are still new to many shoppers, and I do get some questions about how to cook them. (Hopefully I can write a full blog on eggplants before the summer’s out—most of the slim eggplants are really interchangeable, though Fairy Tale most definitely has a creamier flesh than the others.)

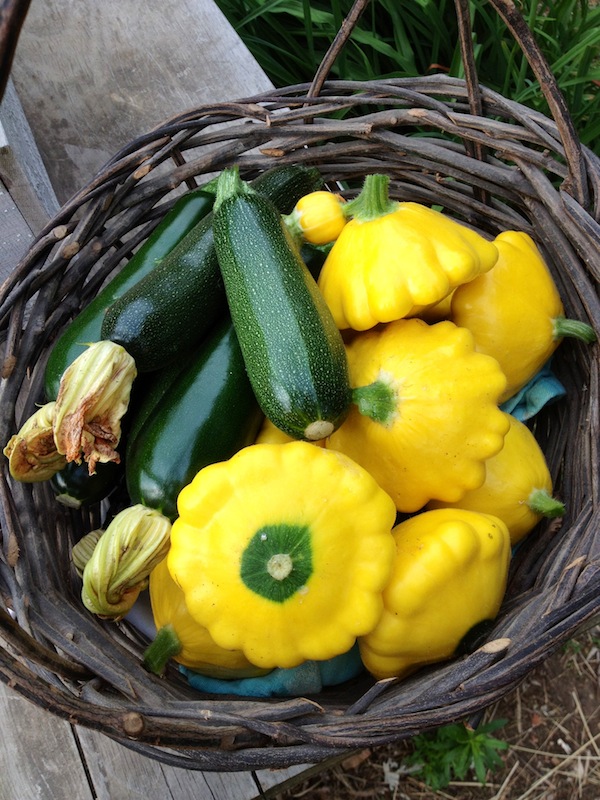
photo-74 And yet despite these less familiar vegetables, it’s something kind of classic (it’s a squash after all!) that seems to confound people the most. Every single day, I put all the green zucchini and the yellow pattypan squash in a big basket together. And every single day the zucchini quickly sell out before the pattypans. The pattypans do have their admirers—our Sunburst variety is so cheery—and there are some shoppers that exclaim, “Oh, my favorite!” and buy 5 or 6 at a time. But I finally realized it’s the shape that stumps many folks.

Because in reality, the texture of a pattypan is no different than a zucchini (as long as neither is overgrown) and you can dice or slice or grate or chop them both.  (The Sunburst pattypan, despite being yellow, does not have the seedy, watery texture of a crookneck or summer squash, but the firmer texture of a zucchini.) I think the flavor of a pattypan is actually a little sweeter than a zucchini.

DSC_7712

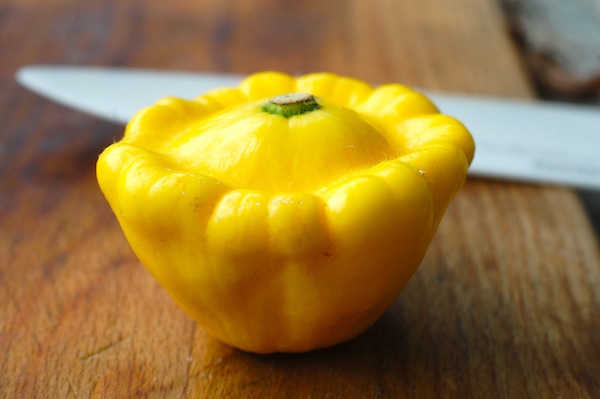
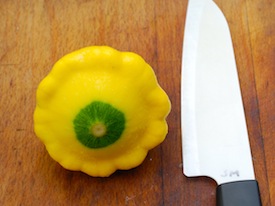
But when you look at a pattypan, especially a full-grown one, as opposed to the minis I’ve written about in the past (apparently my obsession with this subject has not waned), you do have to stop and think, now how am I going to cut this thing?

DSC_7690DSC_7700


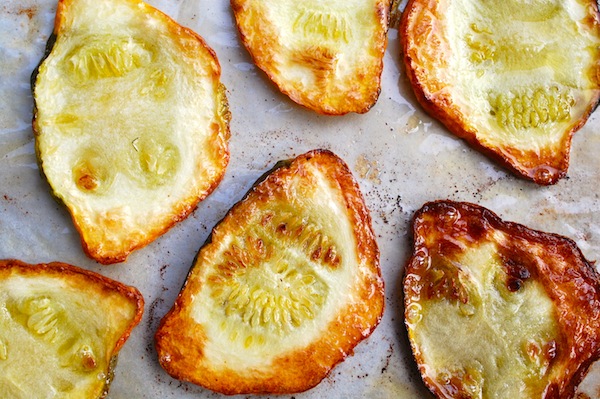
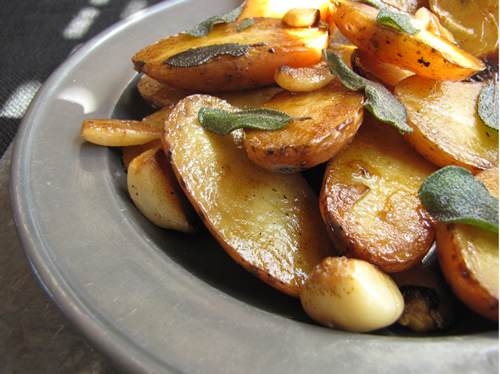
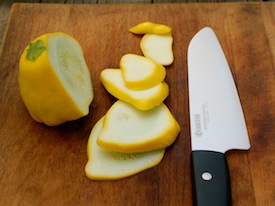
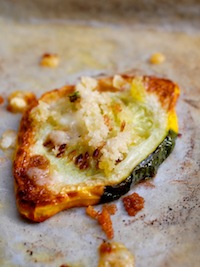
DSC_7572Hence, my first suggestion: Slice it and roast it. Specifically, slice it North Pole to South Pole (not through the equator), with one of the Poles being the stem end. Slice it thinly, but not too thinly, brush or toss the pieces with oil and salt, and roast in a 425° degree oven until golden brown and tender, 18 to 20 minutes, turning over with tongs once if you like (see finished photo at top of blog). In the last few minutes, you can sprinkle with a mixture of bread crumbs, Parmigianno and parsley if you like (right). Serve as a sidedish with a squeeze of lemon. Or sandwich a bit of goat cheese between warm slices when they come out of the oven and drizzle with a black olive vinaigrette. (There’s a recipe for Grilled Antipasto of Green and Yellow Zucchini with Black Olive-Lemon Vinaigrette in Fresh from the Farm. You can also grill, rather than roast, the slices (just cut them a little thicker).

The slice shape also works just dandy in a vegetable gratin like this one—just replace the zucchini slices with the pattypans.

DSC_7721 For smaller pattypans, cutting them in wedges (as if you were cutting a pie) gives you nice chunky pieces to stir-fry, sauté, or cook in a grill basket on the grill.  As with any summer squash that contains a fair amount of moisture, using relatively high heat will brown up the vegetable before it has a chance to get mushy. Caramelization brings out the sweetness, too. (Find a stir-fry recipe here.)

Now for those of you who’ve been asking about cooking those little Fingerling potatoes, I’ve got a treat for you. Click here!

braisedfingerlings


How DO You Cook Those Japanese Baby Turnips, Anyway?

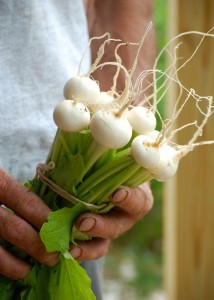
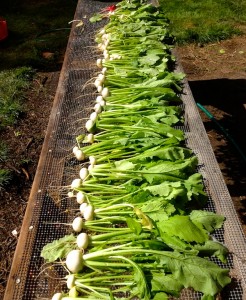
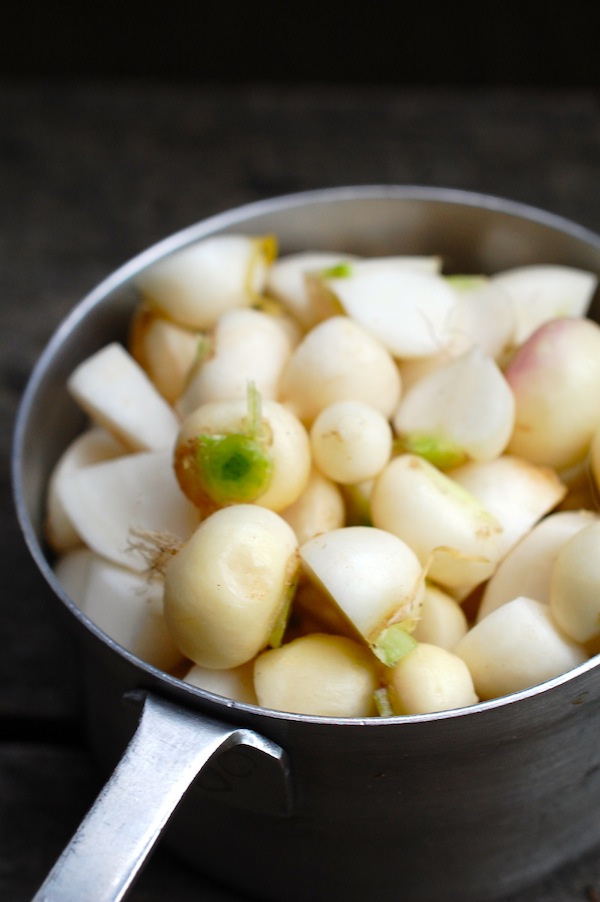
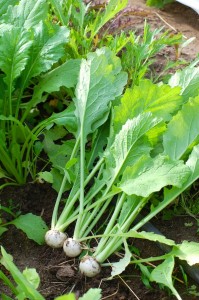
DSC_5455bunch 2We are just coming to the end of our first-ever harvest of Tokyo turnips, aka Japanese baby turnips. They aren’t really babies, but they are really delicious and beautiful and tender and juicy. (The greens are delicate and tasty, too.) We’ve never grown them (or a similar variety called Hakurei that’s popular at farmers’ markets) before, so I am pretty darn excited that they did well, and I can’t wait to grow more. I’m sure our cool weather helped, so I probably won’t seed again until fall.

It’s unusual for me to sell a vegetable at the farm stand that I haven’t cooked with much. And while I could certainly guess by the juicy raw texture and flavor that both minimal cooking (steaming, quick-braising, glazing) and browning (roasting, sautéing and stir-frying) would probably work with these, I couldn’t quickly reference one of my own recipes to help people cook them.

photo-64Fortunately, many of our farm stand customers are adventurous and competent cooks, so several of them forged ahead without me! One woman found a recipe for a nice sauté with potatoes in my fellow Island cookbook author friend Cathy Walther’s Greens, Glorious Greens, and on FaceBook, another cookbook author friend, Diane Morgan, suggested finishing a sauté with miso butter. I don’t have Cathy’s Greens book, though I know it’s a classic and well worth checking out, but I do have Diane’s award-winning Roots, and I can tell you there are more than a few really delicious recipes for turnip dishes in it, including one called Kashmiri-Style Turnips with Greens that led me to think I wasn’t crazy to want to pair cilantro (and ginger) with the baby turnips. The cilantro is flourishing in the cool spring garden, alongside the turnip bed.

Today (thank God for the rain!) I finally got a chance to mess around with the Japanese turnips in the kitchen. Since we had sold all the good-sized and blemish-free roots at the farm stand, I was left with only teeny-tiny roots and some bigger damaged roots, so I had no choice but to cut everything about ½-inch in size. (That meant no cutting for the teeniest mini-marbles.) But I think I would favor that size anyway—or wedges if all my roots were similar sized—for the quickest cooking. I did both a quick par-boil and a quick sauté, adding the greens only briefly to wilt at the end in the sauté , and with lemon and butter, found that the baby turnips really do make a super-quick spring side dish.

DSC_5438

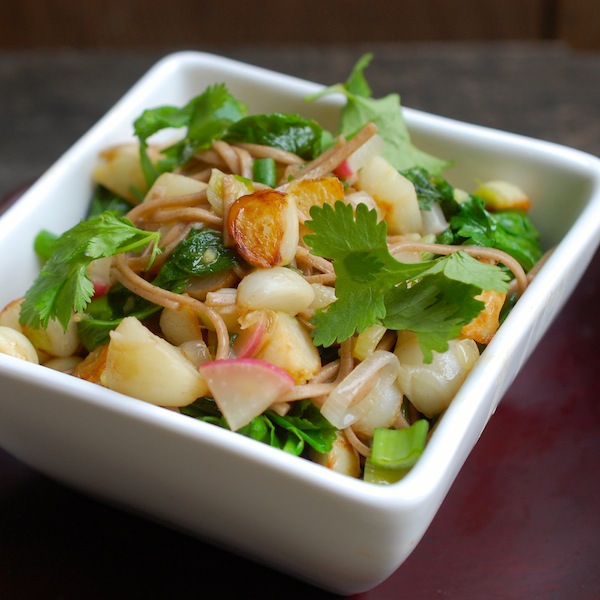
DSC_5233Then I indulged my desire to go Asian, and did a stir-fry with soba noodles—and ate the whole thing for lunch. (It would have served two easily with some grilled shrimp. Photos very top and below.) Originally I thought I might go all the way and turn it into an Asian noodle soup, as the greens would be so perfect for one of these. (And one small turnip—generally about 2 inches in diameter—has a lot of greens attached.) But I was afraid the turnip roots would get lost in the soup, so I kept it noodle-y. I’m including the recipe below in narrative form, as I wouldn’t want to give you a set-in-stone recipe without testing again with more uniform turnips and more exact proportions.


To make Soba Noodles with Stir-Fried Baby Turnips, Ginger & Cilantro: DSC_5470

Cook a handful of soba noodles separately in boiling water. (Follow the package directions, but shorten the cooking time a bit.) Drain and hold. Get out a non-stick stir-fry pan or a big non-stick sauté pan and heat just a couple teaspoons of vegetable oil (I used grapeseed oil) over medium heat. Add about a cup of diced baby turnip roots (trimmed) and a couple big pinches of kosher or sea salt. Cook, stirring, until lightly browned, about 5 minutes. Add a teaspoon of chopped fresh ginger, one-half teaspoon of chopped garlic, about ¼ cup thickly sliced spring onions or scallions, and a couple tablespoons of quartered, sliced radishes. (If I’d had a small Serrano pepper, I would have added a bit of it, chopped, too.)

Stir, cooking, until fragrant and a bit softened. Add a half cup of chicken broth or other broth and about 2 cups torn, stemmed turnip greens. Stir until the greens are wilted. Add the soba noodles and stir well to combine. Add a mix of fresh lemon (or lime) juice and soy sauce (one-half to one teaspoon of each or to taste) and a tablespoon or more of torn fresh cilantro leaves. Stir, remove from the heat, transfer to a serving bowl and garnish with a bit more cilantro and some sliced spring onion or scallion green tops.  (Serves 1 or 2)


photo-66P.S. I almost completely forgot. The first thing I actually did with the baby turnips a few days ago was to add them to one of my slow-sautes with carrots and potatoes. I’d forgotten I had a few in the fridge, and cut them just as a i was starting to cook the potatoes and carrots. They cook a little more quickly than purple-topped turnips, so you can certainly use them deliciously in one of these, but I might add them half-way through cooking.


Super-Quick “Confetti” Greens + (Surprise!) Broccoli Leaves

DSC_4266Even if I do not, the hoop house loves this weather. Or I should say the hoop house greens do. They like the cold nights and the many daylight hours of fuzzy sunlight. “Fuzzy” means grey and overcast to me, so I am not so happy about it, especially because it is freakin’ windy here, and the daytime temps haven’t exactly been soaring, so working outside isn’t really pleasant.

DSC_4132

But the greens inside the hoop house don’t have to deal with the wind, and they prefer these overcast days to the super sunny ones when the house gets pot-boiling hot.

DSC_4177It did get hot a few days while I was away; I could tell because some of the greens bolted and flowered. I lopped off most of the flowers (including a few spent mini-broccoli heads) so that the greens could get their energy back and keep growing. In the process, I discovered that the flowers are delicious (especially the kale flowers), which I kept nibbling.

I’m not really sure, since I’ve never overwintered this many different kinds of greens in a hoop house, but I think the kale and collards may be flowering because the plants are aging and/or because of the day length, in addition to the heat.

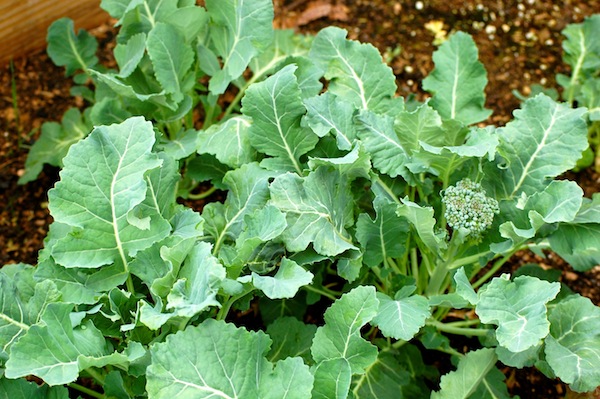
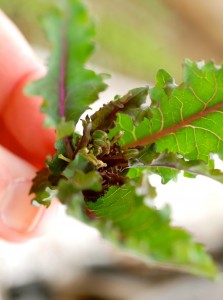
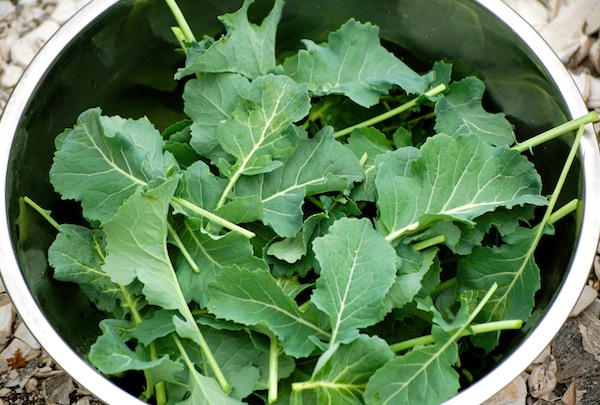
But mostly, it has been cool and perfect for the greens, so the leaves are unbelievably tasty—nutty and sweet, not at all bitter. The broccoli leaves are my favorite—I can’t imagine why they aren’t sold in grocery stores or at farmers’ markets (maybe they are somewhere!). Harvested young and tender, they need absolutely no prep before tossing in the stir-fry pan.

DSC_4126

None of this I would have known if I hadn’t finally taken advantage of the hoop house to plant broccoli and collards, which I normally avoid due to the cabbage pests out in the garden.

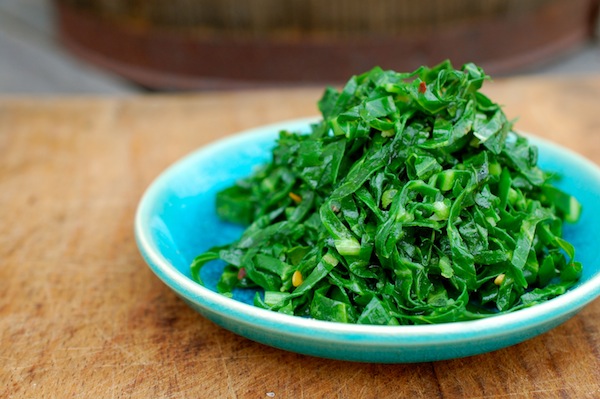
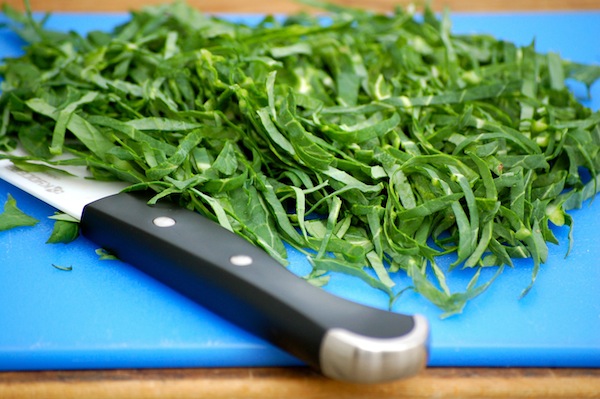
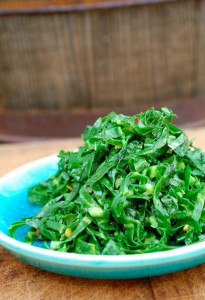
But here’s the good news—you don’t have to have a garden or a hoop house to do what I’ve been doing with the greens lately: Cooking the quickest side dish in the history of Vegetables-Meet-Fire. The secret is simply rolling your leaves up and slicing them across very thinly with a sharp knife. The slicing takes care of any tough fibers and the resulting “ribbons” cook in a heartbeat. I’ve often done this with mature collards in the past, but you can do it with any leafy veg.

DSC_4222

To get started, you can follow the basic recipe that I wrote for Fast, Fresh & Green (and updated slightly), below. I often just go with garlic and red pepper flakes, so the vinegar/honey/parm combo is optional here. But you could try finishing with sesame oil, soy sauce and sesame seeds or with lemon and minced capers or olives—whatever you like.

The greens also make a nice bed for fish (or lamb—it is Easter I realize!), a good addition to pasta dishes or frittatas, a nice pizza or tart topping, and an interesting fold-in to mashed potatoes or slow-sauteed root veggies like carrots and turnips.

Speaking of Easter, if you need asparagus side dish ideas, click here for a my favorite braised asparagus recipe, here for a nice saute, and here for roasting and grilling directions. Oh, and here for a nice asparagus bread pudding brunch recipe and here for asparagus bisque!

DSC_4277Super-Quick Sautéed Greens,“Confetti”- Style

I love using my large nonstick stir-fry pan for this and for so many things, but a large nonstick skillet works fine. Just crank up the heat so that the greens cook very quickly.

__________________________________________________________

½ teaspoon sherry vinegar (optional)

½ teaspoon honey (optional)

½ large bunch collard greens, broccoli leaves or kale

1 to 2 tablespoons vegetable, peanut, grapeseed, or olive oil

1 teaspoon minced garlic

Big pinch crushed red pepper

½ teaspoon kosher salt, more to taste

Shaved or coarsely grated Parmigiano-Regianno (optional)

____________________________________________________________

Combine the sherry vinegar and honey in a small bowl (if using).

Remove the leaves from their stems by holding the stem with one hand and pulling the leaves away from it with the other. Rip the leaves completely in half lengthwise. You should yield about 4 ounces greens. Rinse the leaves and dry them well. Stack them up on top of each other, roll them up tightly cigar-style, and, using a very sharp knife, slice them across into very thin ribbons (about 1/8-inch wide).

In a large (12-inch) nonstick skillet or nonstick stir-fry pan, heat the oil over medium-high heat. Add the garlic and red pepper flakes and cook until the garlic is softened and fragrant, 15 to 30 seconds. Add the sliced greens and the salt, and juke the heat up a bit so that the pan stays pretty hot. Cook, stirring to incorporate everything in the pan, until the greens turn bright green (at first) and then a darker green and are somewhat wilted, about 1 minute (do not cook much longer or they will begin to toughen). Remove the pan from the heat and taste. Stir in the vinegar/honey mixture if using, and serve right away, garnished with the Parmigiano if you like.

Serves 2


Throwback Thursday: How to Cook a Baby Artichoke . . . Plus Post-Blizzard Travels with Susie

artichoke blog 1Apparently, there is a “glut” of artichokes in California right now. I love that word, “glut.” It has a nice thwack to it; plus it must be derived from the best of the seven deadly sins, gluttony.

So we’re very happy for California. (Note, there is no cynical tone in my voice. I just couldn’t be more thrilled that here on the East Coast—actually, one of the very most Eastern parts of the East Coast—we had a blizzard yesterday. Whee! Certainly Farmer enjoyed it.) Honestly, we are happy because we know that California will be sending some of these artichokes our way very soon. They’d better, lest we have to travel out there and get them ourselves.

farm dog

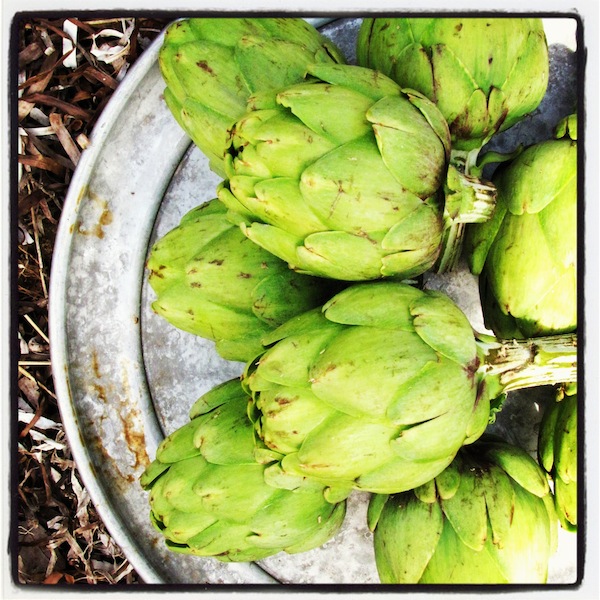
Meanwhile, I have been trolling through old photos and blogs to put together two presentations for my next travels (more on that in a minute). And I came across these baby artichokes (top) and my favorite method for cooking them (see recipe below). I’m hoping the “glut” includes baby artichokes, because I could eat a plate of these for lunch right now. Baby artichokes are really easy to prepare and so delicious. While we’re waiting (I just visited the Ocean Mists website—lots of good info there—and discovered that babies may be a few weeks away), you can get some excellent ideas for using standard-sized artichokes from Russ Parsons, Food editor of the LA Times. Here’s his recent piece that includes 12 artichoke recipes. (I want to make the fries!). And, as always, FineCooking.com comes to the rescue with more than two dozen artichoke recipes to browse through.

roy artichoke

I know a lot of you who read the blog actually live in California, so just to be clear—I love you! But now I’m going to focus on Montana. And North Carolina. Yup, in a week or so, I’ll be traveling to Montana to participate in Zone 4 Magazine’s spring Plant to Plate event at Chico Hot Springs Resort. I can’t wait! I’m going to do a cool tip demo and give a talk about how to cook all kinds of veggies—from baby bok choy to Swiss chard to beets. Plus a little Fresh from the Farm storytelling.

When I’m not on deck, I’m going to be sneaking around to observe all the cool growing seminars on things like grafting tomatoes, building a green house, and growing fruit trees. If you live in the area, I believe there are still a few tickets left (call 406-586-8540; dates are April 8 and 9.) I can assure you that it is going to be an awesome event, as Dan and Andra Spurr, the Editor and Publisher of Zone 4 Magazine, are old friends from our days together at Sailing World and Cruising World magazines, and they are super-organized and on the ball.

From Montana I fly directly to North Carolina for my 30th (yes 30th!) reunion at Duke University, where I am honored to be a featured speaker on Friday, April 11. I’m going to tell the story of my “career change” and how Fresh from the Farm came to be! It should be gorgeous in Durham by then—I’ll get to enjoy a real spring for once. I only wish Roy and Libby were going to be with me, but it’s just too much time away from farm and school this time. And I am certainly hoping I won’t be flying through any blizzards on this adventure.

But before I go, I have a few seedlings to tend to, some peas to plant, and some artichokes to track down.

brown braised artichokes pic monkey

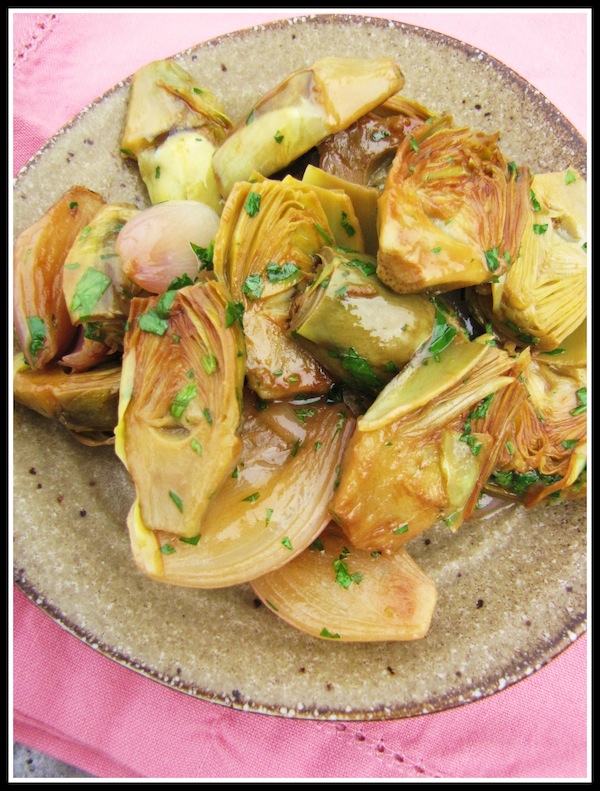
Brown-Braised Baby Artichokes with Lemon Herb Pan Sauce

Serve these over creamy polenta or a small serving of fresh fettucine for a lovely veggie supper. For a variation, cook a little bacon, ham or pancetta in the pan before cooking the artichokes; remove and crumble on at the end. Toasted almonds or hazelnuts would be good with these too. Baby artichokes vary in size—I have seen the same size box packed with 9 artichokes sometimes, 12 another. This recipe will work for 9 medium-small baby artichokes (2 to 2 1/2 oz. each). If your artichokes are very small, you can use 10 or 11 of them, as long as they fit in one layer across the bottom of the pan with the shallots. Be generous with the fresh herbs here.

_____________________________

1 1/2 lemons

9 or 10 baby artichokes

1 1/2 tablespoons unsalted butter

1 tablespoon extra-virgin olive oil

4 small shallots, halved and peeled (or 2 medium or large, quartered)

Kosher salt

1 cup low-sodium chicken broth

1 to 2 tablespoons mixed fresh tender spring herbs such as chives, parsley, mint, tarragon and/or chervil

__________________________________
baby artichoke prep

Cut the whole lemon in half. Squeeze and drop the two halves into a medium bowl filled half-way with water.

Cut the stems off the artichokes at the base. Working with one artichoke at a time, peel away all of the outer leaves until you are left with a mostly lemon-limey colored artichoke (it will be somewhat cone-shaped) with the top third still being a light green. With a sharp knife, cut about 3/4 inch off of the top, and, with a paring knife, clean up the stem end just a bit (don’t remove too much; that’s the tasty heart). Cut the artichoke in half lengthwise. Rub the cut sides of each piece with the other lemon half and drop the artichoke halves into the lemon water.
In a 10-inch straight-sided sauté pan that has a lid, melt 1 tablespoon of the butter with the olive oil over medium heat. Arrange the artichoke halves (with whatever water still clings to them) and the shallot halves (both cut-side down) in one snug layer in the pan. Sprinkle with 1/2 teaspoon salt.

Cook, without stirring, until the bottoms of the artichokes and the shallots are well browned, 7 to 8 minutes. (If the heat on your stovetop is uneven—or the burner isn’t level, like mine—rotate the pan so that the bottoms get evenly browned.)

Pour in the chicken broth and cover the pan, leaving the lid slightly askew so that some steam escapes. Simmer gently, turning down the heat if necessary, until the broth is reduced to a few tablespoons, 12 to 14 minutes. Uncover, add the remaining 1/2 tablespoon butter, and squeeze the other lemon half over all.

Sprinkle most of the herbs over and stir gently until the butter has melted. Remove the pan from the heat, and stir again, scraping up any browned bits if possible. Taste for salt and immediately transfer the artichokes and the pan sauce to a serving platter. Sprinkle on any remaining herbs.

Serves 2 as a veggie main dish with polenta or noodles, or 3 as a side dish


Show & Tell: Top 10 Favorite Pantry Ingredients

IMG_1370


When I’m on the road talking about my cookbooks, I love to bring along my kit of favorite pantry ingredients and a few favorite tools. (Unlike a toothbrush or an iPad, though, bottles of olive oil, bunches of fresh herbs, and sharp kitchen instruments can be difficult to carry on to an airplane. So this dog-and-pony-show only travels by car.)

I find that it doesn’t matter whether I’m at a bookstore, a farmers’ market, or a kitchenware store—people everywhere are interested in flavor pairing, quick cooking solutions, and brand choices. So I tell cooks that if they keep a pantry and fridge stocked with a few really versatile, good-quality ingredients, they can make literally hundreds of different delicious vegetable dishes with whatever they happen to bring home from the farmers’ market, the grocery store, or the backyard garden.
Here’s what’s in my “kit:”

IMG_7895 IMG_2186

1)Aromatic veggies: Garlic, shallots, onions; fresh ginger; scallions. I begin almost every cooked veggie dish by laying down a base layer of flavor with sautéed or softened aromatic veggies—minced, diced, chopped or sliced. Sometimes I will add them part-way through cooking or even turn them into starring ingredients, but one or more of them is almost always present because of the deep and permeating flavor they provide (especially if they are caramelized). They’re also vital ingredients in raw preparations like vinaigrettes and salsas, and can be the backbone of a tasty marinade. I keep little bowls of garlic bulbs and shallots on my countertop, onions in a cabinet away from potatoes, and fresh ginger and scallions in the refrigerator.
Favorite low-tech tool: an ordinary spoon for peeling fresh ginger skin

lime DSC_3072


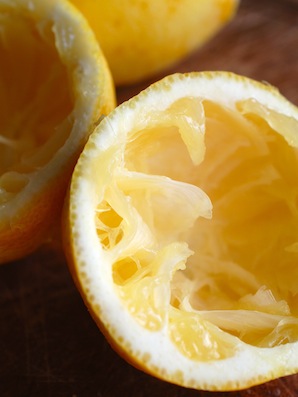
2)Lemons, limes, and other citrus—both juice and zest: Lemons are probably my all-time favorite supporting player in the kitchen. My go-to vinaigrette features lemon zest and juice, and I will very often finish a saucy vegetable dish like a braise or a soup with either zest or juice or both. The bright acidic flavor instantly revives dull or hidden flavors. Often I will substitute lime for lemon, and I’m particularly fond of using lime juice and zest to enhance (and cut the richness of) creamy dressings for potato salads, slaws, and cucumber salads. Fresh orange juice has great flavor but less acidity than lemons or limes so use it in combination with lemon or vinegar.

Quick finishing sauce: Combine 1 tablespoon citrus juice, ½ teaspoon fresh citrus zest, 2 teaspoons maple syrup or honey and 1 teaspoon soy sauce or balsamic vinegar. Double or triple amounts if you like. Drizzle over sautéed or stir-fried veggies just as you take the pan off the heat.

Favorite citrus tools: Microplane zester, OXO juicer.

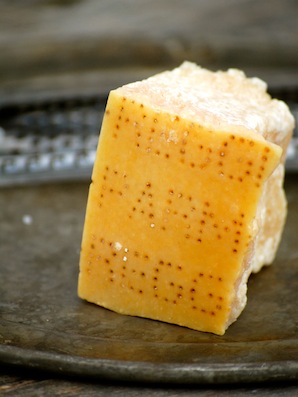
DSC_33323) Parmigiano Reggiano cheese: A little bit of the real deal, with its nutty, salty flavor and crystalline texture adds depth and earthiness to any vegetable dish, whether it’s a baked potato gratin or a simple dish of roasted Brussels sprouts and walnuts. It’s expensive (sometimes painfully so), but it will be the last best quality cooking ingredient I give up before I go to the poor house. Substitutes can be lackluster at best, downright awful at worst. To get your last buck out of a piece of Parmigiano, simmer the rind with your broth when making your next minestrone.

Favorite way to cut: Surprisingly, though I love the range of handheld graters available for hard cheeses these days, I often turn to my food processor to chop Parmigiano into tiny pebbles. I like the bigger pieces and coarse texture for vegetable tarts and gratin or crostini toppings.

Tip: Identify true Parmigiano Reggiano by the branded name on the rind.

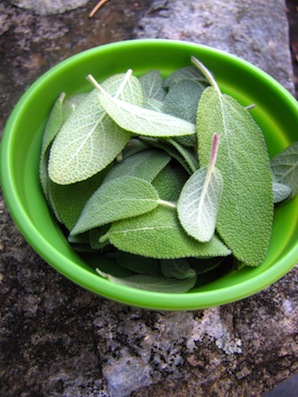
4) Fresh herbs. Nothing finishes a vegetable dish like a spoonful of chopped herbs or a handful of torn herb leaves. Like citrus zest, most tender fresh herbs add top notes and should be added at the end of cooking. Heat will take the oomph out of cilantro, basil, mint, parsley, chervil, and chives, so long cooking isn’t a great idea. Hardier herbs like thyme, rosemary, sage, and oregano are happy to go into a long-cooking dish. Their substantial oils will permeate the dish as it cooks.

If you can grow any herbs at all, please do. Even a pot or windowsill will offer you freshness, availability, and the ability to cut just the amount you want. And if you have even a small yard, just a few square feet will be enough room to plant one or two of the heartier herbs, many of which are perennial in milder parts of the country. But if you’re like most of us and have to get at least some of your herbs at the grocery store, take them out of their original packaging when you get them home. Wrap them in damp paper towels and store in zip-top bags. The exception is fresh basil. If it hasn’t been refrigerated yet, keep it in a jar of water at room temperature.

Tip: Use a very sharp knife when chopping herbs and don’t overchop or you will get bruised, blackened herbs that can get bitter.

IMG_0717 IMG_2180 - Copy


5)Extra-virgin olive oil and unsalted butter. I cook almost exclusively with extra-virgin olive oil and unsalted butter (usually a combination of both) since cooking fat adds flavor to a finished dish, and these are both flavorful. The exception is high heat, which destroys flavor compounds (and of course, burns butter, due to the milk solids, though adding some oil will drop the smoke point a bit). So I keep one other oil on hand for stir-frying—usually peanut oil or vegetable oil, sometimes grapeseed oil. Nut oils I save for vinaigrettes.

Tip: To settle on a moderately priced extra-virgin olive oil that can be a “house” brand for you, buy several and do your own side-by-side taste test. (Invite some friends and family.) You’ll be surprised at how different the flavors can be. I tend to like the richness of olive oils originating in Spain (which many do—check labels.)

6) Vinegars and other acids: Like citrus, vinegars and other acidic ingredients like hot sauce, tomato sauce, pickling juice, wine, and unsweetened fruit juices really add dimension and brightness to vegetable dishes. You don’t need to go crazy keeping a lot of these around. In fact, you can settle on a couple vinegars you like best and stick with those.

My favorite vinegars: sherry vinegar, white balsamic vinegar, malt vinegar.

7) Honey, maple syrup or other natural sweeteners. As I mentioned above, I love a quick little sweet-sour finishing sauce for veggies, so I am quick to reach for the maple syrup bottle. And sometimes just a drizzle of honey over something like roasted cauliflower is a lovely finishing note. So pick your favorite natural sweetener and store a bottle of it next to the vinegar.

8) Toasted nuts and dried fruit: I keep almonds, pecans, walnuts and pine nuts in the freezer and toast small batches of them to add to veggie dishes for interesting texture and deeper flavor. I find the flavor of toasted (or maybe I should call them roasted) nuts to be much more appealing than raw nuts. I also love adding chopped dried cranberries, cherries, apricots or figs to winter veggie dishes.

Tip: To toast nuts, spread them on a sheet pan and put in a 350°F oven until browned and fragrant, between 4 and 10 minutes, depending on the nuts. Keep an eye on them—deep golden brown is good; very dark brown is heading for bitter. And use your sniffer–you’ll be able to smell when the nuts are starting to get too brown.

DSC_3351 DSC_3345

9)Bonus “umami” condiments: To give veggies an added depth—almost a “meaty” flavor, I keep a few robust condiments (always in the fridge after opening) from each of my favorite cuisines. I could probably get by with just soy sauce and chili-garlic paste, but usually I have sesame oil, oyster sauce or fish sauce, capers, olives, sundried-tomatoes, and anchovies around, too. Plus coconut milk, canned tomatoes, and boxed broth in the pantry. All these condiments are bonus ingredients—you can certainly make delicious vegetable dishes without them.

10) Kosher salt and a good pepper grinder: I use Diamond Crystal kosher salt because I like feeling the large pieces in my hands as I season, but I also find that it dissolves well. I’m afraid that the perfect pepper grinder is still eluding me!

Of course there are other things in my pantry to stretch veggies further into main dishes—beans, grains, pastas. But for weeknight veggie sides, I can do just about anything with what I’ve listed here. And with the exception of the fresh herbs, pretty much everything can be shopped for infrequently and stored for several weeks at least.


Throwback Thursday: Ten Things to do with Celery Root

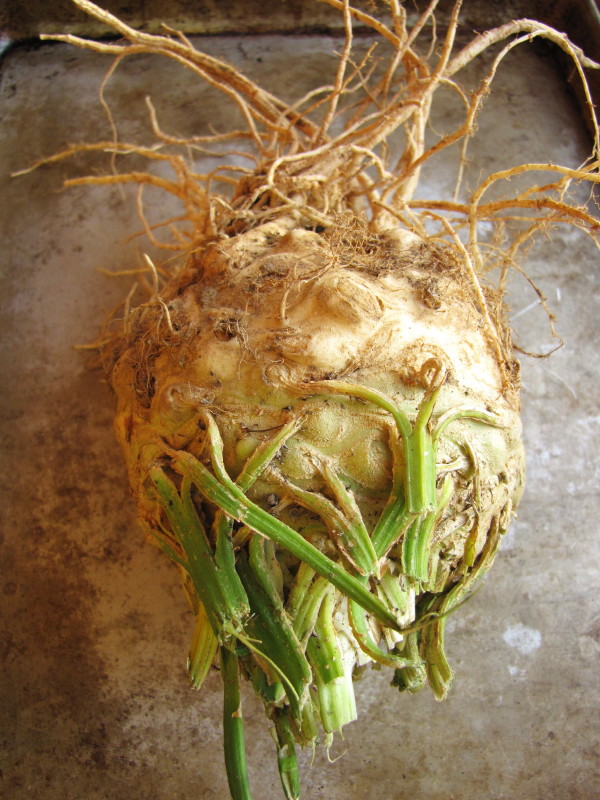
croot 2This week marks the 4-year anniversary of sixburnersue.com. Yay Sixburnersue! Whew. That’s a lot of blog posts. To celebrate, I’m going the “Throwback Thursday” route and reaching into the archives to repost one of the earliest—and believe it or not, most popular—posts I have done. And yes, I’m talking about celery root. The reason people frequently land on this post (actually two posts–you might want to read Cinderalla Celery Root first!) is pretty simple, I think: There isn’t a lot of great info out there about cooking celery root (celeriac). So when people search for it, they wind up here!

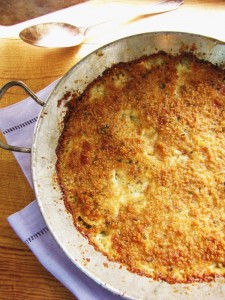
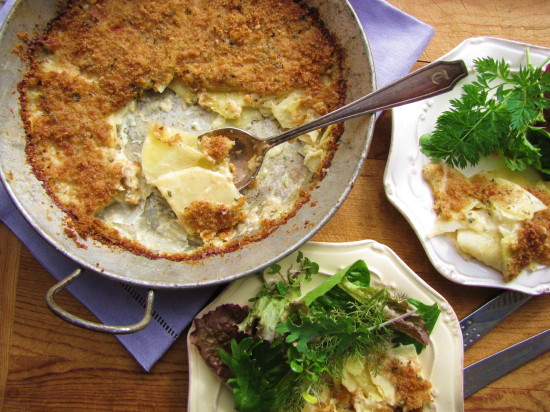
croot 3So, you’re in luck if you happen to be harboring a few of these hairy, gnarly looking roots. You can click straight through to the delicious Creamy Celery Root and Potato Gratin recipe. Or you can peruse this list of 10 ideas and get started down the road to celery root bliss!

1. Slice celery root into thin matchsticks (or grate it coarsely) and toss it (raw) into a winter salad of endive, sliced pears, toasted walnuts, and blue cheese.

2. Make roasted celery root “chips.” Slice the root in half and then into quarters; then slice each quarter as thinly as possible. (A santoku knife is great for this). Toss the pieces in enough olive oil to coat, sprinkle with salt, spread on a heavy-duty sheet pan; and roast at 350°F until they are mostly a deep golden brown, with some white left. (I think the darker ones are crispier, but too dark and they’ll taste bitter.) Let them cool on the sheet pan to finish crisping up. Sprinkle with more salt and snack on the couch with your favorite DVD.croot 4

3.  Since celery root and potatoes are such a great match, use them together in a hearty winter soup. Sauté lots of sliced leeks in butter, add cubed celery root, potatoes, and chicken or vegetable broth, simmer until tender, puree, and enhance with a touch of cream, a little lemon zest, lots of chopped fresh parsley and crispy croutons.

4. Apples and celery root are also happy partners. Use them raw together in a salad, or try roasting them first and adding them to a warm escarole salad with crispy strips of ham and a warm Dijon vinaigrette.

5.  Make a celery root “galette” by lining a tart pan with a couple layers of thinly sliced circles of celery root and gruyere cheese. Bake at 400°F until browned and tender. (Cover for the first half of cooking.) Let cool and slice into wedges.

6. Try a “quick braise” of celery root. Brown diced celery root in a combination of butter and olive oil in a sauté pan, then add just enough liquid (a little broth spiked with apple cider), cover and reduce the liquid to finish cooking the vegetables. Uncover, toss with a little spiced butter, and serve warm.

croot 57. Instead of chips, you can also dice celery root for roasting. Make a quick weeknight side dish of roasted celery root and Yukon Gold potatoes with honey and rosemary. Cut the vegetables into ½-inch dice, toss in olive oil and salt, and roast on a sheet pan at 425°F until browned and tender. Dress lightly with a combination of melted butter, honey, and chopped fresh rosemary.

8. Celery root  is also a good flavor match with seafood.  A bed of celery root puree for a sear-roasted fish filet is delicious. Cut the root (and a few small potatoes) into pieces and simmer them with a few small garlic cloves until tender. Puree the vegetables with a little of the cooking liquid, a bit of cream, and salt and pepper.

9. Instead of a puree, make a celery root “mash” by hand-mashing cooked celery root and potatoes together with butter and milk and a little sautéed garlic. Serve with pot roast.

10. For an elegant holiday side dish—or even a hearty weeknight main dish with a salad—make my recipe for a celery root and potato gratin I use a combination of heavy cream and chicken broth so it is rich but not too heavy; this is a good dish to introduce celery root to folks.

IMG_3066_1