Category Archives: side dishes

A Golden Galette is My All-Time Favorite Potato Recipe

It’s not very forward-thinking to pronounce something your all-time-favorite-such-and-such recipe. What happens if a more delicious recipe comes along down the road and you change your mind? It’s a little like the boy who cries wolf. You can go around saying, “No, really, this one is my favorite,” but after a while, no one will believe you.

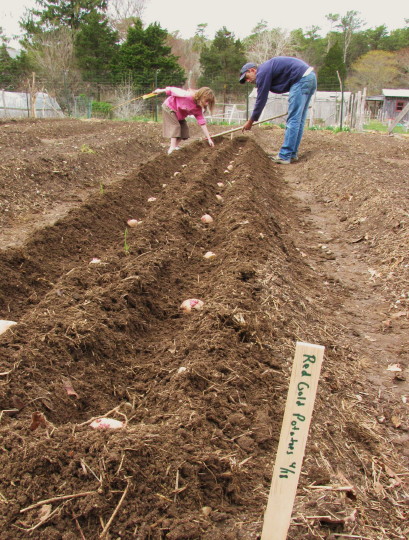
It’s very possible that I once bestowed this “favorite recipe” honor on another potato recipe of mine, one for a crispy roast smashed potato I developed for Fine Cooking magazine years ago, and that resides over at finecooking.com with many wonderful user reviews. And I have to say, the recipe for braised fingerlings I posted here a few months ago is pretty darn delicious. But yesterday, when I planted potatoes for the first time in my life, it was this recipe for a potato and cheese “galette” that I was dreaming of making later in the summer when we harvest our first Red Gold potatoes (photo below). So I’m going to risk my rep and call this galette my favorite potato recipe. (It  has something to do with the crispy factor.)  Just don’t blame me when I get all excited about a new potato salad or roasted garlic mashed potatoes or crispy slow-sautéed potatoes in some future blog. I can’t help myself.

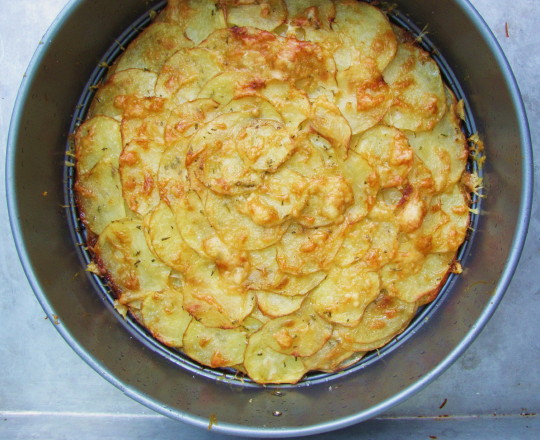
One of the things I love best about the galette is the easy method. A galette is a layered potato dish, very similar to what the French call Potatoes Anna, except that instead of having to flip it in a pan on the stovetop (something I’m notoriously bad at), you get to bake it in a tart pan or cheesecake pan (anything with a removable rim).  All you do is arrange thinly sliced potatoes in slightly overlapping circles, sprinkle on a bit of cheese, and repeat. Bake until tender inside, crispy outside. Cut into wedges to serve.  You get the idea.

Better still, the galette is incredibly versatile. I like to use it as a sort of a bed for sliced roast chicken or grilled steak. A small wedge also nestles nicely next to a salad or can be served with a bowl of soup. It’s even good at room temperature as a snack. After a galette cools, I cut the whole thing into wedges, even if I’m not serving it all right away, as the wedges can be kept in the fridge for a day or two and easily reheated, one at a time if you like.

Potato Galette with Fresh Rosemary & Two Cheeses

Be sure to use good Parmigiano and gruyere cheese in this recipe. With so few ingredients, the quality (and flavor) of the cheese makes a different. You can substitute fresh thyme for the rosemary if you like. Stick with yellow-fleshed potatoes for this recipe; red skinned-potatoes and Idahos do not work as well in this kind of dish. You don’t need to peel the potatoes.

_______________________________________________

3 tablespoons plus ½ teaspoon extra-virgin olive oil

1 ½ pounds Yukon Gold potatoes (about 4 medium)

1 ½ teaspoons chopped fresh rosemary

¾ cup grated Gruyere cheese

1/3 cup finely grated Parmigiano Reggiano

kosher salt

_______________________________________________

Heat the oven to 375°  and arrange one rack in the middle of the oven.  Rub a 9- inch tart pan or a 9 ½-inch cheesecake pan with ½ teaspoon of the olive oil. (Make sure the pan has a removable bottom.)

Put the potatoes on your cutting board and trim a small slice off the bottom of each to stabilize it. Trim off and discard the very ends of the potatoes. Then cut the potatoes crosswise into very thin slices. Use a sharp, thin-bladed (but strong) knife—a Santoku knife works great for cutting thin potato slices. Slice as thinly as you can, but don’t worry in the least if the slices are inconsistent; the galette will still cook evenly as long as you don’t include any really thick slices. If you have a mandolin, you can certainly use it, but you don’t need to.

Put the potato slices, the chopped rosemary, and the remaining 3 tablespoons of olive oil into a mixing bowl and toss thoroughly to coat.

Cover the bottom of the pan with a layer of potato slices, starting by making a ring of slightly overlapping slices all the way around the outside edge, and then working inward, laying down more rings of slightly overlapping slices until the bottom is covered. Sprinkle the potatoes with a tiny bit of kosher salt (about 1/8 teaspoon) and then sprinkle about 1/3 of the gruyere and 1/3 of the Parmigiano over all. Arrange another layer of potatoes over that, season again with salt, sprinkle with 1/3 of each cheese again, and finish with a top layer of potatoes and cheese.

Bake the galette until the top is golden brown and a fork easily pierces the layers of potato, about 45 to 50 minutes. Let the galette cool for 10 to 15 minutes in the pan. Run a thin knife around the edge to unstick any cheese and remove the cheesecake ring or the tart ring, leaving the galette on the bottom of the pan. Use a thin spatula to gently release the galette from the pan bottom, and transfer the galette to a cutting board. Cut into 6 or 8 pie-shaped pieces. Serve warm.

Serves 6 to 8


Stalking Wild Watercress for Salads & Sautés

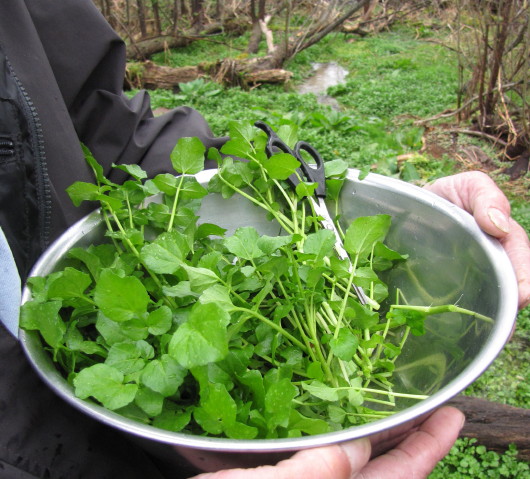
Sneaking around is so much fun. Like heisting those leeks a few weeks ago, we had the best time on Friday clandestinely gathering wild watercress from a fresh-water stream deep in the woods. Scissors in hand, we scurried down a path of pine needles, all the while looking over our shoulders, hoping no one would see us through the mist and fog and tangled brush. Soon we could hear the gentle burbling of the stream, and then the green mirage appeared–a carpet of a million leprechaun-green petals, so shiny and inviting you’d almost want to walk across it. But unless you’re wearing waders, it’s best to snip wild watercress by draping yourself over a fallen tree branch. Which is exactly what we did. Snacking as we snipped, we filled up a big bowlful of the freshest, zippiest taste of spring you could ever hope for.

Gathering wild watercress is a time-honored Spring tradition on the Vineyard. But don’t ask an old-timer where his favorite patch is, like I did when I was just a new “wash-ashore.” He looked at me, only half-smiling, and said, “If I tell you, I’ll have to kill you.”  Like stands of wild blueberry bushes and sandy beach-plum covered dunes, the location of a good watercress patch is a highly guarded secret. And I think I finally understand why. Unlike the summer berry  hunt, where you’ll definitely lose out if you don’t get there first, it’s not that there isn’t enough watercress to go around. As long as you snip sprigs (and don’t pull up roots), this wild green will flourish.

No, I think the appeal of watercress picking is the ritual–the walk through the peaceful woods that are just starting to green-up, the crouching by the edge of a cool stream. It’s so calming and rejuvenating after a long winter that you’d hate to disturb the experience by sharing it with hoards of people all at once. Funny thing is, on our way back to the car, we saw a lone watercress sprig dropped by the side of the road. Someone had been to “our” spot before us, but had kindly given us our space.

I can’t say that foraging for your own greens doesn’t somehow make them tastier and more exciting. So I won’t blame you if you are now saying, “Why should I bother with watercress if I’m just foraging for it at the grocery store? Because I think watercress is a highly underappreciated green, pushed out of the limelight by the likes of arugula and mizuna, when in fact it has all of their zip and less of their bite. And it is truly simple to prepare. I love it raw in salads–alone or with other greens–and wilted in a sauté pan, always with plenty of garlic. (Below are two favorite “recipe-lets” for you to try.) I also love to toss watercress in with steamed mussels, I love it with a juicy hamburger, and I love it in a very simple Asian soup of chicken broth, scallions, ginger, and garlic. And, oh yeah, it’s really good for you too. This relative of the nasturtium has traditionally been used as an herbal remedy for hot flashes, headaches, canker sores, and even gout. And it’s a good source of Vitamin C, Vitamin A, phosphorous, iron and calcium. Touché, arugula!

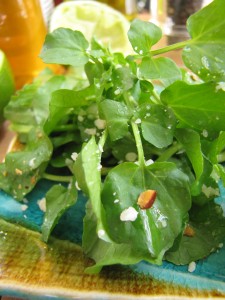
Simple Watercress Salad with Lime-Honey Dressing & Toasted Almonds: Combine 3 tablespoons extra-virgin olive oil, 1 tablespoon plus 1 teaspoon freshly squeezed lime juice, 1 teaspoon honey, a hefty pinch of salt, and a few grinds of fresh pepper in a small bowl. Whisk the dressing together until creamy. Toast whole almonds in a 375°  oven until deeply browned; cool and chop coarsely. Coarsely grate a few tablespoons of Parmigianno Regianno cheese.

For each portion of salad, wash and dry 2 good handfuls of watercress, trimming away any thick lower stems first. If you have mint around, pick out a few small leaves or finely slice a few bigger ones. Put the watercress (and the mint if you’re using) in a bowl, season it with a big pinch of sea salt, and toss it with just enough of the dressing to coat. Add a generous amount of the chopped almonds and the grated Parmigianno and toss again. Arrange each portion on a salad plate and garnish with more almonds and cheese if desired.

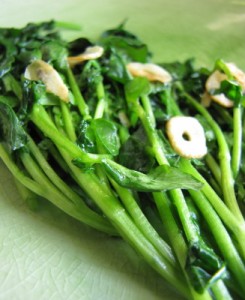
Wilted Watercress with Garlic Chips: In a small nonstick skillet, heat 2 teaspoons extra-virgin olive oil over medium-low heat. Add 1 large garlic clove, very thinly sliced crosswise, and saute until the garlic is just golden. Add 2 cups (packed) of trimmed watercress and a good pinch of kosher salt. Sauté until the watercress has just wilted, 1 to 2 minutes. Serves 2.

This post has also been published at Oneforthetable

I Like Mine Extra-Crispy—Roasted Broccoli, That Is

Wouldn’t you know it, I went skipping off to the grocery store yesterday, smugly thinking I’d pick up some fiddlehead ferns and/or baby artichokes and blog about cooking one or both of them this week.  The grocery store had other plans. In other words, it had neither. I swear I saw fiddleheads somewhere recently, even though I know the wild ones aren’t up yet around here. But I must have been imagining things (not surprising). I’m sure I didn’t imagine the baby artichokes; they’re at the other grocery store—the one I didn’t plan to go to yesterday.  Oh well, soon enough for both.

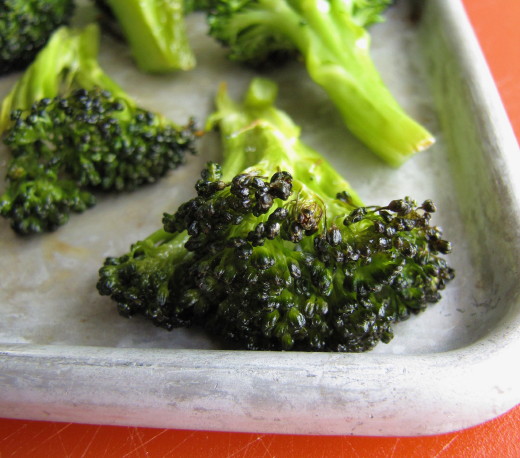
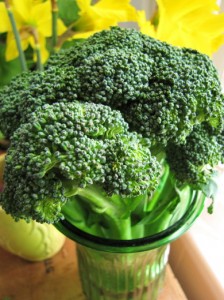
Instead I bought broccoli. I know, broccoli. But it was, truthfully, the best looking thing at the store. And I think maybe I had a tiny cruciferous craving, as suddenly I had to have several of the perky purple-green crowns to roast for our dinner. (And a couple to put in a vase near the daffodils–weird but true.) I realized, too, that I needed something I could throw together pretty quickly, with a minimum of hands-on time, as I was probably going to be unloading the rest of my groceries all night! (I’m working on three recipes for Fine Cooking magazine today.)

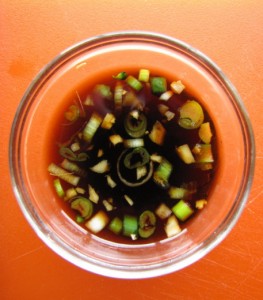
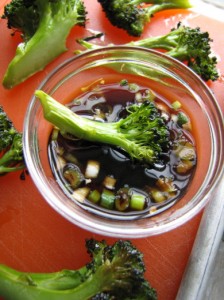
If you’re a roasted broccoli convert already, you know what I’m talking about in terms of bang for your buck. With very little effort, you get a vegetable so tasty and crispy-toasty that even the pickiest veggie-disdainers will eat it straight off the sheet pan. That’s why I usually make a dipping sauce for the florets—to encourage kids and adults alike to eat roasted broccoli just like any other finger food. Last night I made a quick soy-lime-honey-ginger sauce, but you’ll find plenty more quick sauce and herb butter recipes for roasted veg in Fast, Fresh & Green, too. (Sorry to be a tease about the book–it really will be released from the warehouse in only three weeks!)

Whether or not you’re a seasoned broccoli-roaster, you can follow some tips for the best results. First, I use a very hot oven (475°) and spread the florets out in one loose layer on a large sheet pan. The combination of high heat and good air circulation guarantees that the broccoli will roast, not steam. If you have a convection function on your oven, turn it on for roasting broccoli. When I cut up broccoli for roasting, I try to cut through whole florets to create flat sides. The flat sides have more surface area and will brown more against the pan. Lastly, I give the broccoli pieces a pretty generous coating of olive oil—again to draw the heat into the florets.

Roasted Broccoli with Soy-Lime-Honey-Ginger Dipping Sauce

You can easily double this recipe if you like, and the one-pound of florets will fit on a large (18×13) sheet pan. Any more than that should go on two sheet pans. I like to use parchment paper to line my sheet pans when roasting vegetables, but it’s not necessary here, as the broccoli will not stick to the pan.

_________________________________________

½ pound broccoli florets (from about 2 small crowns), each about 2 inches long, with one flat side

1 ½ to 2 tablespoons extra virgin olive oil

½ teaspoon kosher salt

2 tablespoons low sodium soy sauce

2 tablespoons freshly squeezed lime juice

2 tablespoons honey

2 tablespoons chopped scallions

1 (generous) tablespoon chopped fresh ginger

_________________________________________

Heat the oven to 475°. In a large mixing bowl, toss the broccoli florets with enough olive oil to generously coat them. Add the kosher salt, toss, and spread the florets in one layer, cut sides down, on a heavy, rimmed sheet pan. (A small-to-medium sized pan is fine for this amount of florets.) Roast until the florets are browned and crispy at their outer edges, and the cut sides are lightly browned on the bottom, about 15 to 17 minutes. Transfer the broccoli to serving dishes or a platter if you like.

Meanwhile, combine the soy sauce, lime juice, honey, scallions and ginger and mix well. Transfer to one or more dipping bowls and serve with the broccoli.

Serves 2 to 3

A Prettier Way to Cut Asparagus & A Tasty Easter Side Dish

Sometimes it’s all about the cut. Take asparagus. Everyone loves the long, lanky, sexy look of a whole asparagus spear. (Sorry—sounds like I’m describing a brand of Gap jeans). Why would you want to wreck that by cutting it up? Oh, yeah, there’s that awkward moment when you’re trying to cut those long spears with a fork on your holiday dinner plate. And the even more awkward moment when you push the woody bottom half of the spears over to the side of your plate because they’re undercooked. Now consider this—with a few extra seconds of work upfront, you can have a beautiful, evenly cooked, easy-to-eat asparagus side dish that can take on a variety of flavors, too.

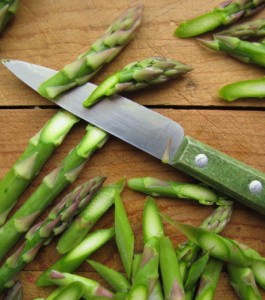
So I’m going to ignore my mother (who claims I tend to get a bit fussy about my vegetable cuts), and suggest that you try slicing your asparagus on the diagonal (sharply…at a sharp angle…on the bias…however you want to say it) for a change. Use a small knife and cut a few spears at a time. Position the knife at something like a 30-degree angle to your cutting board and slice the spears across at about 2-inch intervals. (See photo.) You’ll usually get about 5 or 6 pieces out of a (trimmed) spear.

It doesn’t matter whether your asparagus are thin, medium, or thick, because, by slicing, you’ll be averaging out their thickness. I especially like to cut our big, thick, purple, local asparagus (below) this way, but we’re still a month away from harvesting those beauties. (When the time comes, I’ll give you another great method for cooking thick asparagus.) Right now, many of you will be stuck with what I think are overly-thin asparagus sold at the grocery store. No matter, they will still be delicious.

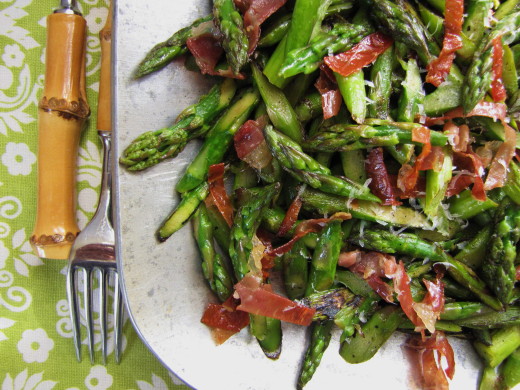
Once sliced, these evenly-sized asparagus pieces are perfect for stir-fries and sautés. The recipe I’m including here is a bit Italian-country-rustic but very flavorful. (It would be a nice side for roasted salmon.) If you wanted something different (and vegetarian), you could sauté a few cremini mushrooms and/or sliced shallots in place of the prosciutto. Or you could keep things simple by seasoning the asparagus with just a bit of sautéed garlic and a finish of lemon.

You can also easily scale this kind of recipe up or down; just be sure to change the size of your skillet so that your asparagus fit comfortably in it.  Cooking times may also vary on different stovetops, so keep an eye on your asparagus when sautéing them. They’ll first turn bright green and then begin to brown in spots. You’ll want them to be glistening and toasty looking all over, but still a little bit firm to the bite. It’s best to eat these right away, as they continue to cook off the heat and they cool down quickly. However, if you have leftovers, they make an excellent base for a frittata.

Sautéed Asparagus with Prosciutto Crisps & Parmigiano

Cutting thinly sliced prosciutto into strips can be tricky, as they tend to stick together. You can either cut each slice separately, or stack the slices and pull the strips apart after cutting. Either way, arrange the strips across your cutting board (rather than piling them), which will make them easier to transfer to the skillet in one layer.

_______________________________________________

1 ½ pounds (2 small bunches) medium asparagus spears, ends trimmed or snapped away (to yield about 1 pound)

1 tablespoon extra-virgin olive oil

1 ½ ounces thinly sliced prosciutto, sliced into strips about ¼-inch wide and 2-inches long

kosher salt

1 tablespoon unsalted butter

½ teaspoon white balsamic vinegar

2 to 3 tablespoons freshly grated Parmigiano-Regianno

_______________________________________________

Slice the asparagus on a very sharp angle (on the bias) into pieces that are about 2 inches long and about ¼-inch wide at their widest point. Include the ends, which will be shorter pieces.

In a large nonstick skillet, heat 2 teaspoons of the olive oil over medium-low heat. Add the prosciutto pieces and cook until crisp (they will turn a darker red color, too), about 5 minutes. Take the pan off the heat and transfer the prosciutto crisps to a plate. Add the remaining teaspoon olive oil and the asparagus to the pan. Season the asparagus with about a scant ½ teaspoon of salt. Return the pan to the heat, and turn the heat to medium-high. Cook, stirring, until all the asparagus pieces are glistening and browned in spots, about 5 to 7 minutes. They will still be firm, but not crunchy. Remove the pan from the heat and add the remaining tablespoon of butter and the balsamic vinegar (it will sizzle). Stir right away and keep stirring until the butter has melted. Stir in half of the prosciutto crisps and half of the Parmigiano, and transfer all to a serving dish. Garnish with the remaining prosciutto crisps and Parmigiano.

Serves 4

Slipping Leeks into the Skillet: “Sweat” first, then Sauté

Like Peter Rabbit sneaking into Mr. McGregor’s vegetable patch, I tiptoed into a friend’s garden yesterday and heisted some leeks. I didn’t get caught, and it was pretty thrilling, so, I don’t know, I may turn into a petty criminal.

Seriously, I sort of had permission for this particular heist. When my friend left the Island late last fall to spend the winter in California, he implored me to help myself to any garden stragglers. I stopped occasionally for some lettuce and other greens, then forgot all about the garden until yesterday, when I drove past it on my way to pick up some fresh eggs at a nearby farm. I looked out the window and couldn’t believe what I saw—a row of green leafy leek tops sticking out of the grey, crackly earth. What a courageous vegetable, I thought, to brave the winter we’ve had—the winter of a gazillion snowflakes and a billion rain drops, the winter of anemometer-breaking winds, beach-busting surf, and canceled ferries. I couldn’t just leave the leeks there—or not all of them, anyway. They deserved to be cooked. So I dug up a few, and oh, how good it felt to harvest a vegetable. Who says nothing’s in season in March?  (I hear that parsnips are even better after a long winter.)

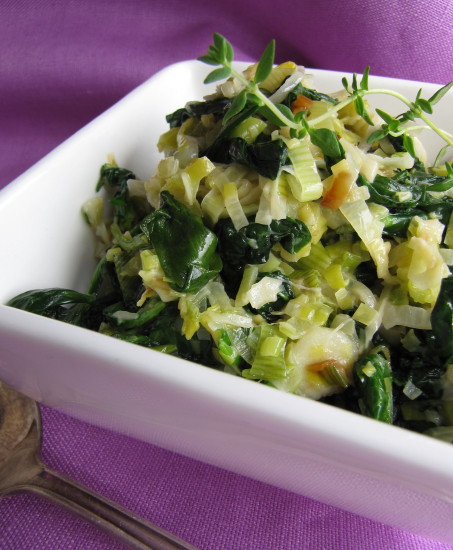
I took my leeks home, sliced them up, rinsed them well, and treated them to a luxurious buttery, steamy, simmer in a skillet until they were soft and most of the moisture had evaporated. Then I kept cooking them a bit until they were lightly browned. (Leeks like to be “sweated” in a little liquid before they’re sautéed. They give off a slightly sticky substance that can cause them to stick to the pan or cook unevenly if they’re not started off with enough fat or liquid.) Next, I folded in a few handfuls of fresh spinach, tossed in a teaspoon of fresh thyme leaves, and added just a tablespoon of heavy cream to give the dish some body. Off the heat, I grated in a tiny bit of Parmigiano. What I wound up with was the perfect “bed” for a juicy steak, a grilled lamb chop, or a piece of grilled fish. This is a pretty richly flavored side dish, so a little goes a long way.  You can use some at dinner time and do as I did this morning—add the rest to an omelet. Delicious. It would be a great pizza or crostini topping, too.

_________________________________________

A Bed of Buttery Leeks & Spinach

3 medium leeks, white and lightest green parts (about 8 ounces)

2 tablespoons unsalted butter

1/4 teaspoon kosher salt, more to taste

2 cups (packed) washed and stemmed fresh spinach leaves, torn into smaller pieces if large (about 2 ½ ounces)

1 teaspoon lightly chopped fresh thyme

1 tablespoon heavy cream

2 tablespoons grated Parmigiano Reggiano (optional)

__________________________________________

Trim the ends from the leeks. Slice the leeks across into thin rings (about 1/8-inch thick), discarding any woody stem in the center. Put the sliced leeks in a bowl and cover them with tepid water. Swish them around a bit and let them sit. Lift the leeks out of the bowl and transfer to a colander. Drain and rinse the sand from the bowl, return the leeks to the bowl, and cover again with tepid water. Lift, drain and repeat one more time, leaving the leeks in the water the last time.

Heat the 2 tablespoons butter in a medium non-stick skillet over medium-low heat.  Lift the leeks out of the water and add them to the pan with whatever water is clinging to them. Season with ¼ teaspoon salt. Cook, stirring occasionally, until the leeks are limp and all of the liquid has evaporated, 10 to 12 minutes. Continue to cook, stirring frequently, until the leeks are very lightly golden brown, another 3 to 5 minutes. Add the spinach leaves and a pinch of salt and fold or stir them in with the leeks until they are wilted, about 1 minute. Add the fresh thyme and the cream and remove the pan from the heat. Gently stir until the cream is mostly absorbed into the dish and the thyme is well-distributed. Stir in the Parmigiano, if using. Taste for salt and serve warm.

Serves 2 as a side dish, 2 to 3 as a “bed” for fish, chicken, or beef

Quick Sautéed Cabbage Recipe for St. Patrick’s Day

If you’re getting around to planning your St. Patrick’s menu a little late like me, here’s something to help—a quick and easy sautéed cabbage recipe. I’ve never been one for the traditional boiled cabbage that often goes along with the corned beef on this holiday. In fact, I didn’t learn to love cabbage until I cooked it hot-and-fast–in a sauté pan, in a stir-fry pan, on a griddle—anything where I could bring out its sweeter side with a little browning.

Sautéed cabbage is not only (much) tastier than boiled cabbage, but it’s less fussy to cook. The basic recipe really doesn’t need much embellishment either, since browning accentuates the nutty flavor of cabbage. But after you’ve tried this and made it part of your repertoire, you can perk it up by adding sautéed apples to it, by tossing in a bit of ginger or garlic, or by playing around with the deglazing broth by sub-ing in white wine, lemon, or apple cider for the rice vinegar and soy sauce.

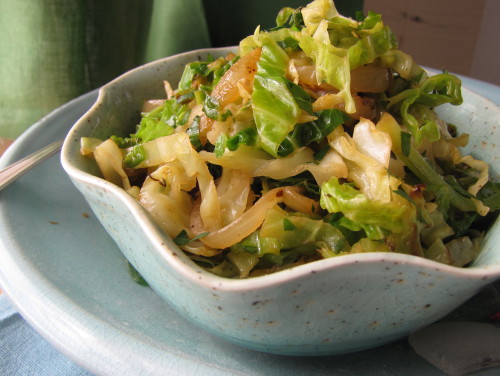
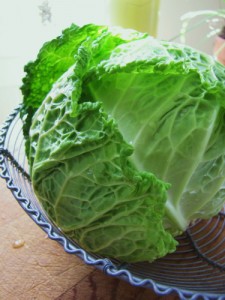
Regular old green cabbage would be just fine here, but I’m crazy about its crinkly-leaved cousin, Savoy cabbage (right). Savoy wilts in a hot pan a bit quicker than regular cabbage, and has a slightly richer flavor and lighter texture.

To make Colcannon: To make a delicious version of this Irish mashed potato and cabbage dish, make mashed potatoes using Yukon gold potatoes, cream, and butter (and plenty of salt). Hand mash for a coarse texture. Fold in some or all of the cooled Quick-Sautéed Savoy Cabbage (lightly chopped first if you like). You can also substitute leeks for the onions in the sautéed cabbage recipe, but you will need a bit more cooking fat and time to soften them before adding the cabbage.

Quick-Sautéed Savoy Cabbage

___________________________________

2 tablespoons chicken broth
½ teaspoon rice wine vinegar
¼ teaspoon low-sodium soy sauce
¼ teaspoon sugar
2 tablespoons unsalted butter
1 tablespoon extra-virgin olive oil
1 medium onion (4 to 5 ounces), thinly sliced
kosher salt for seasoning
½ head Savoy cabbage, cored and very thinly sliced (about 8 to 9 ounces)
2 teaspoons chopped fresh parsley (optional)

___________________________________

Combine the chicken broth, rice wine vinegar, soy sauce, and sugar in a small bowl. In a 10-inch straight-sided sauté pan over medium-high heat, melt 1 tablespoon of the butter with 1 tablespoon of the olive oil. When the butter is foamy, add the onion and a pinch of salt and sauté, stirring, until the onions are somewhat softened and just beginning to brown, 2 to 3 minutes. Add all of the cabbage and ½ teaspoon salt and stir well. Cook, stirring only occasionally, until the cabbage is limp and browned in spots (the bottom of the pan will be very brown and the onions will be brown), about 5 to 6 minutes.

Remove the pan from the heat and immediately stir in the chicken broth mixture and the remaining 1 tablespoon butter. Stir until the butter has melted, scraping up some of the browned bits on the bottom of the pan. Let the cabbage sit in the pan for two minutes and stir again. (The cabbage will release a little more moisture and you’ll be able to incorporate a bit more of the browned bits.) Add the parsley, stir again, and transfer to a serving dish. Serve right away.

Serves 3-4

Candidate for Cutest Veg: Baby Bok Choy

This week I’m in major recipe-development and photo-shoot mode, as I’ve got some last-minute assignments from magazines that need spring vegetable recipes. So I have been tiptoeing off to the grocery store, hoping none of my locavore friends see me pouring over the out-of-season vegetables in the produce section. I’m not sure why I feel guilty, as we’ve definitely done our best to make do with our winter CSA veg (and we STILL have some in the fridge and in the attic). We deserve a little fresh green stuff. But I hate the fact that it’s shipped from so far away. It’s one of the most ironic parts of my job—I encourage people to eat and cook seasonally, but often I’m developing recipes out of season.

Well, I guess it’s not so bad this time—spring is right around the corner; I actually saw a forsythia bush in bloom yesterday. (It was wedged between two barns, so I think it must have its own micro-climate, as the rest of Martha’s Vineyard is still chilled by the cold Atlantic waters swirling around us.) But next week I’ve got an assignment to work on some summer recipes, and talk about challenging—ripe, juicy tomatoes in March?

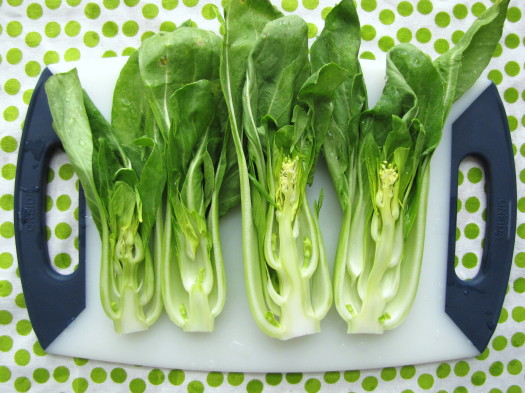
Anyway, when I got home the other day with all these pretty green things—peas and sugar snap peas and fresh mint and frilly lettuce—I got a little giddy. There’s something about the color green that knocks my socks off. And there’s one particular spring green that really tickles me. It’s baby bok choy. These mini-versions of the big honking Asian cabbage barely resemble their big sisters. They’re slender, curvy, and petite—about 6 to 7 inches long—and their color is a soothing mix of celadon and shamrock. Best of all, their fabulous flavor borrows from the nutty side of arugula and the tangy bite of a mellow mustard. (In the photo above, you can see that these baby bok choy were starting to bolt (sprout flowers). The good news is that they still taste good, unlike some bolted greens that become unbearably bitter.)

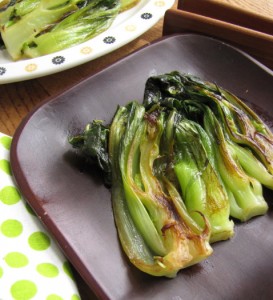
It won’t surprise you that I take this pretty green thing and brown the heck out of it. I’m like a broken record on that subject—browning green veggies almost always makes them sweeter. So I cut these babies in halves or quarters lengthwise (keeping the hint of that lovely shape—why slice these across and wreck that?), and sear them cut-side down, in a little combo of oil and butter. Then I finish cooking them (sort of part steaming, part braising), covered, in a little bit of liquid. You can easily add garlic, ginger, citrus, soy, or other flavorings to the liquid or at the end of cooking to fancy up the side dish. But this basic cooking method gives a perfectly delicious result.

Skillet Seared & Steamed Baby Bok Choy

Baby bok choy can vary in size a lot; choose heads that are all about the same size for this technique. If the heads are wider than 2 inches, cut them in quarters, rather than halves, for cooking.

___________________________

¼ cup chicken broth
1 teaspoon soy sauce
½ teaspoon honey
1 Tbs. vegetable oil
1 Tbs. unsalted butter
4 baby bok choy (6 to 7 inches long, 2 inches wide), about 10 to 12 ounces, trimmed, cut in half lengthwise, washed and spun dry
¼ tsp. kosher salt

__________________________

Combine the chicken broth, the soy sauce, and the honey in a glass measuring cup and whisk to combine well. In a 10-inch straight-sided sauté pan that has a lid, heat the vegetable oil and ½ tablespoon of the butter over medium heat. When the butter has melted and is bubbling, sprinkle the ¼ teaspoon salt over the pan. Arrange the bok choy, cut-side down (or one cut side down), in one layer in the pan. (They will be snug.) Cook, without stirring, until the undersides of the bok choy are deeply browned, 6 to 7 minutes.

Carefully pour the liquids into the pan and cover immediately. Simmer until the liquid is almost completely reduced (a teaspoon or two will be left), 5 to 6 minutes. (Check occasionally to make sure the liquids don’t reduce entirely and start to burn.) Uncover, remove the pan from the heat, and transfer the bok choy to a serving platter. Add the remaining ½ tablespoon butter and a tablespoon of water and stir well with a silicone spatula or wooden spoon as the butter melts, scraping any browned bits off the bottom of the pan. Scrape and pour the pan sauce over the bok choy.

Serves 2 to 3

Bitter Gets Sweet (I Swear!): A Recipe for Caramelizing Turnips In a Cast Iron Skillet

I know you are thinking I have lost my mind. Last week it was celery root; this week it’s turnips. “Can’t she write about something delicious—or something my family will actually eat?” I hear you asking. I’m sorry, but I just couldn’t pass up the chance to tell you about this—the absolutely most delicious way to cook turnips.

In fact, I’ve already written about this technique—slow-sautéing in a cast-iron skillet—once this week. I moonlight as an occasional blogger over at the Huffington Post’s Green Page, and this week I’ve been participating in their latest challenge—The Week of Eating In. At first I felt a little silly saying, “Sure, I’ll eat in for a week,” since I already cook and eat most of my meals at home. (Plus I just recently posted my opinion on why I think everyone else should cook at home more, too!) But then I realized I could help other people in the challenge by posting tasty ideas for cooking veggies at home.  And since I had just made my slow-sautéed turnips, potatoes, carrots, and onions for like the 12th time this winter, I figured I’d share that yummy idea on Huff Post.

Over here, I wanted to post the whole recipe (and a few more photos), and to also let you know that there are many more “slow-sautés” coming in my cookbook, Fast, Fresh, & Green. The recipes in the book were developed for a straight-sided stainless steel sauté pan, since I think more people own them than cast-iron pans. But cast-iron is so perfect for this kind of dish, because it captures and distributes heat so evenly, that I wanted you to be able to try it if you can. (You can get a pre-seasoned Lodge cast iron skillet for about $15.)

I start this kind of sauté by dicing (pretty small but not too fussy) whatever roots I’ve got on hand and piling them into the skillet with lots of olive oil and herb sprigs. The pan will be really crowded at first—that’s okay. As the vegetables cook, they brown and steam at the same time (and they shrink quite a bit). I always add some aromatic allium—onion, leeks, or shallots—about halfway through cooking for added moisture and flavor.

But the most important thing I do is to keep my ears tuned to the sizzling in the pan. It should be a steady, perky sizzle—but nothing too explosive sounding. The sizzle’s your cue to how fast the veggies are cooking. You want them to brown and steam at about the same rate, because your ultimate goal is deeply browned (yes, caramelized) vegetables that are cooked through, too. This is much easier than I’m making it sound. All you need to do is stir every once in awhile and maybe adjust the heat once or twice. The veggies will be done in about 35 to 40 minutes—but you’ll have plenty of time to make whatever else you’re having for dinner while they’re cooking. (By the way, for vegetarians, these sautés are hearty enough to plunk in the middle of the plate.)

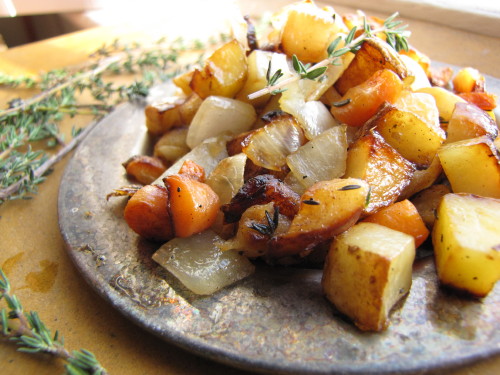
Caramelized Turnips, Potatoes, & Carrots with Onions & Thyme

If you don’t have a cast iron pan, you can make this recipe in a 10-inch straight-sided sauté pan (stainless interior). The browning won’t be quite as even, and you might need to add a bit more oil, but the results are still very tasty.

___________________________________________________________

3 tablespoons extra-virgin olive oil, more if needed

½ pound purple-topped turnips, trimmed but not peeled, cut into ½-inch dice

½ pound Yukon Gold potatoes, unpeeled, cut into ½-inch dice

½ pound carrots, trimmed and peeled, cut into ½-inch dice

½ teaspoon kosher salt, more if needed

5 to 6 thyme sprigs

1 medium onion (about 5 ounces), cut into medium dice

___________________________________________________________

In a 10 or 11-inch cast iron skillet, heat the 3 tablespoons olive oil over medium-high heat. Add the turnips, potatoes, carrots, salt, and herb sprigs and stir and toss well to combine and to coat with the oil. (The pan will look crowded.) Reduce the heat to medium and cook, stirring and flipping occasionally with a metal spatula, for about 20 minutes. (Listen to the pan—you should hear a gentle sizzle, not a loud one. If the vegetables are browning too quickly, reduce the heat a bit to maintain that gentle sizzle. If they seem dry, add a bit more olive oil.) Add the diced onion and continue to cook, stirring and flipping with the spatula, until the vegetables are deeply browned and tender all the way through, about another 15 minutes. Remove the herb sprigs before serving. Taste and season with more salt if you like.

Serves 3 to 4


Ten (Yes, 10) Things to Do with Celery Root

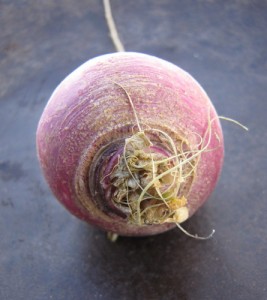
Count your blessings. So you’re stuck with six celery roots the size of footballs? At least they’re edible. Seriously, I know it’s hard to figure out what to do with these things; I’ve had quite a few on my hands recently thanks to my winter CSA share from Whippoorwill Farm. So last week I posted my favorite recipe for a creamy celery root and potato gratin, but I thought you might like a few more ideas, too. So here goes. (Be sure to try the oven roasted “chips.”)

1. Slice celery root into thin matchsticks (or grate it coarsely) and toss it (raw) into a winter salad of endive, sliced pears, toasted walnuts, and blue cheese.

2. Make roasted celery root “chips.” Slice the root in half and then into quarters; then slice each quarter as thinly as possible. (A santoku knife is great for this). Toss the pieces in enough olive oil to coat, sprinkle with salt, spread on a heavy-duty sheet pan; and roast at 350°F until they are mostly a deep golden brown, with some white left. (I think the darker ones are crispier, but too dark and they’ll taste bitter.) Let them cool on the sheet pan to finish crisping up. Sprinkle with more salt and snack on the couch with your favorite DVD.

3.  Since celery root and potatoes are such a great match, use them together in a hearty winter soup. Sauté lots of sliced leeks in butter, add cubed celery root, potatoes, and chicken or vegetable broth, simmer until tender, puree, and enhance with a touch of cream, a little lemon zest, lots of chopped fresh parsley and crispy croutons.

4. Apples and celery root are also happy partners. Use them raw together in a salad, or try roasting them first and adding them to a warm escarole salad with crispy strips of ham and a warm Dijon vinaigrette.

5.  Make a celery root “galette” by lining a tart pan with a couple layers of thinly sliced circles of celery root and gruyere cheese. Bake at 400°F until browned and tender. (Cover for the first half of cooking.) Let cool and slice into wedges.

6. Try a “quick braise” of celery root. Brown diced celery root in a combination of butter and olive oil in a sauté pan, then add just enough liquid (a little broth spiked with apple cider), cover and reduce the liquid to finish cooking the vegetables. Uncover, toss with a little spiced butter, and serve warm.

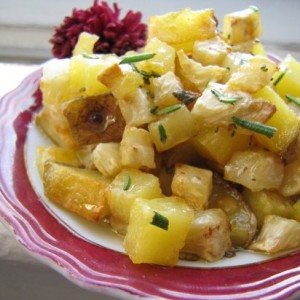
7. Instead of chips, you can also dice celery root for roasting. Make a quick weeknight side dish of roasted celery root and Yukon Gold potatoes with honey and rosemary. Cut the vegetables into ½-inch dice, toss in olive oil and salt, and roast on a sheet pan at 425°F until browned and tender. Dress lightly with a combination of melted butter, honey, and chopped fresh rosemary.

8. Celery root  is also a good flavor match with seafood.  A bed of celery root puree for a sear-roasted fish filet is delicious. Cut the root (and a few small potatoes) into pieces and simmer them with a few small garlic cloves until tender. Puree the vegetables with a little of the cooking liquid, a bit of cream, and salt and pepper.

9. Instead of a puree, make a celery root “mash” by hand-mashing cooked celery root and potatoes together with butter and milk and a little sautéed garlic. Serve with pot roast.

10. For an elegant holiday side dish—or even a hearty weeknight main dish with a salad—make my recipe for a celery root and potato gratin I use a combination of heavy cream and chicken broth so it is rich but not too heavy; this is a good dish to introduce celery root to folks.

Cinderella Celery Root

It’s a guy thing. Bigger is better. I had a chef-boss once, Lenny. He was about 6’ 6” and a former Hell’s Angel, a fairly imposing guy. When it was his turn to make the meatloaf, he’d fill an entire sheet pan (the restaurant kind, you know—the size of a football field) with two big fat long loaves, which we’d sell by the slice. (This was a glamorous establishment, you can tell.) When it was my turn, I’d shape the meatloaf into cute little “mini” loaves. At first Lenny just scowled at me, but then he figured out he could slap a higher price on mine and call it a day. “Girls,” he’d say, and shake his head.

So when my friend Roy offered to pick up my CSA share the other week and returned with two of the most ginormous celery roots I had ever seen, I didn’t say anything. I just chuckled. You know, it’s always risky to have someone else select your produce for you, but this is a guy I trust implicitly. After all, he can pick out a ripe cantaloupe from a mile away, and I certainly can’t do that. Anyway, in this particular case, bigger can be an advantage, so all was fine.

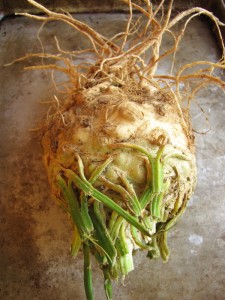
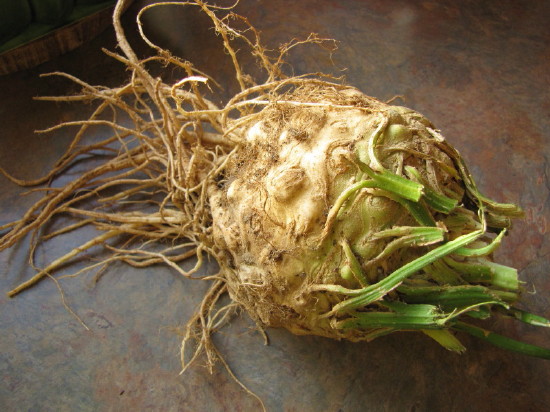
Celery root has an image problem, it’s true. It needs a marketing makeover, starting with its true name—celeriac. Eek. Who wants to eat something that sounds like a medical condition? I say, call it Cinderella, because beneath the drab wardrobe—that gnarly skin—beauty awaits.  (And versatility.) Ironically, it’s probably the skin that scares people away, yet it’s actually much easier and quicker to hack off the tops and sides of a celery root with a sharp knife than it is to, say, laboriously peel a butternut squash. So don’t be afraid to go at it; just choose the biggest roots. Since that tough skin also tends to burrow down into the flesh in places, you can wind up devastating a small root by the time you cut off all the skin. A bigger root will yield a higher flesh-to-skin ratio.

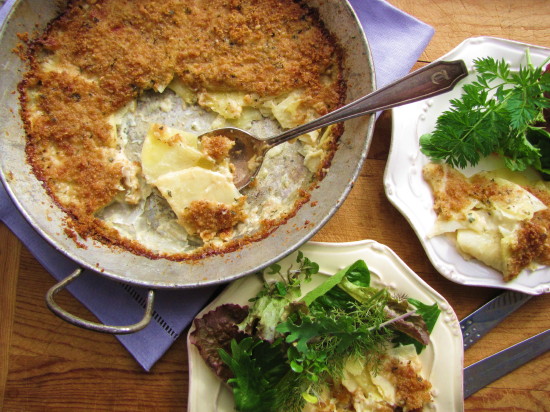
The cool thing is, once you get to that crisp, white, celery-scented flesh, your options are wide open. You can roast or sauté it, add it to stews and braises, and even eat it raw in salads. (See 10 Things To Do with Celery Root.) But my favorite thing to slip it into is a creamy gratin. This darn thing is so hardy it could be dinner with a salad. But it loves a slice of pot roast nearby, too.


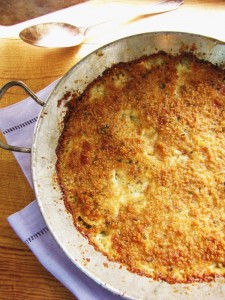
Yukon Gold and Celery Root Gratin
 
This hearty side dish could easily be the star of the meal with a nice green salad on the side.
Author:
: side dish
Serves: 4
Ingredients
  • ½ teaspoon unsalted butter
  • ¾ cup fresh breadcrumbs
  • 1 tablespoon extra-virgin olive oil
  • 1½ teaspoons chopped fresh thyme
  • ¼ cup finely grated Parmigiano Reggiano
  • Kosher salt
  • ¾ cup heavy cream
  • ½ cup plus 2 tablespoons low-sodium chicken broth
  • 1 teaspoon Dijon mustard
  • ½ pound Yukon Gold potatoes (about 2 large or 3 medium), peeled
  • ½ pound (8 ounces, about ¾ of a large peeled root) celery root, trimmed and thoroughly peeled
  • Freshly ground black pepper
  • ¾ cup grated Gruyère or Swiss cheese
Directions
  1. Preheat the oven to 350 ° F. Rub a 5- or 6-cup shallow gratin dish (or a 9.5 inch round pie plate) with the butter.
  2. In a small bowl, combine the breadcrumbs with the olive oil, a big pinch of salt, ½ teaspoon of the chopped thyme, and 2 tablespoons of the Parmigiano.
  3. In a liquid measure, combine the cream, broth, and mustard.
  4. Cut the potatoes in half lengthwise and turn the halves cut side down on a cutting board. With a sharp knife, slice the halves across as thinly as you can (between 1/16 and ⅛ inch is ideal) so that you have thin half-moon pieces. Cut the celery root into quarters, and slice it as thinly as the potato.
  5. Put the potatoes and celery root in the mixing bowl. Add ¾ teaspoon salt, several grinds of fresh pepper, the gruyere or Swiss cheese, the remaining Parmigiano, the remaining 1 teaspoon thyme, and the cream mixture. Mix well. Using your hands, lift the potatoes out of the bowl and transfer them to the gratin dish, arranging them as evenly as possible. Pour and scrape the liquids and anything remaining in the bowl into the gratin dish and distribute everything evenly, adjusting the potatoes as necessary to get an even top. Using your palms, press down on the potatoes to bring the liquids up and around them as much as possible. (It won’t necessarily completely cover them.) Cover the top evenly with the breadcrumb mixture.
  6. Bake until the potatoes are tender when pierced with a fork (check the middle of the dish as well as the sides), the breadcrumbs are brown, and the juices around the edges of the gratin have bubbled down and formed a dark brown rim around the edge, 55 to 65 minutes. Let cool for about 15 minutes before serving.