Category Archives: side dishes

Don’t Let Your Zukes Go To The Dogs

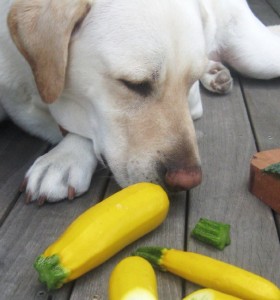
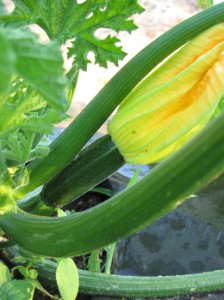
Our first little zucchinis appeared on the scene yesterday. We picked them, put them out at the farm stand, and someone bought them. Yeah, I know. That won’t last forever. There will come a time, say mid-August, when you won’t be able to give away a summer squash, they’ll be so ubiquitous. Just don’t do what I did a few years ago and try to feed them to your dog. (Poor Gus.) Honestly, there are plenty of delicious things to do with summer squash, and I’m determined to convert a few squash-bashers (that’s you Katie and Eliza) this summer with a couple of my recipes.
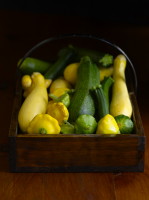
The first is a really, really quick (did I say quick?) sauté that requires very little effort to deliver a dish with restaurant-quality good looks and a lovely flavor and texture. The only caveat is that you have to hop yourself over to a housewares or kitchen store and pick up a groovy tool called a hand-held julienne peeler. It’s not expensive (about $6), and is just the coolest thing. Drag it along the outside of a summer squash, and it makes beautiful zucchini “ribbons.” (Use it to make strips of Parmigiano cheese for a salad, too, or to grate beautiful strands of carrots for a salad.)

The zucchini ribbons need only a quick toss in a hot sauté pan to be perfectly cooked—tender, but still al dente (sort of like linguine!). I like to make a little brown butter in the pan first, and to finish these sautés with a squeeze of lemon or lime, a few chopped toasted nuts, and a smattering of chopped bright fresh herbs like mint, cilantro, basil, or tarragon. There’s a version of this recipe in Fast, Fresh, & Green with lemon and hazelnuts, but the one I’ve included here (below) has a nice combination of lime, cilantro and mint.

I’ll post more squash recipes as the summer goes on, but I also suggest that you check out the new issue of Fine Cooking magazine (August/September, on newsstands next week) which has a beautiful zucchini story written by my cook-farmer friend Mary Ellen Driscoll. It includes a recipe for fried squash blossoms.
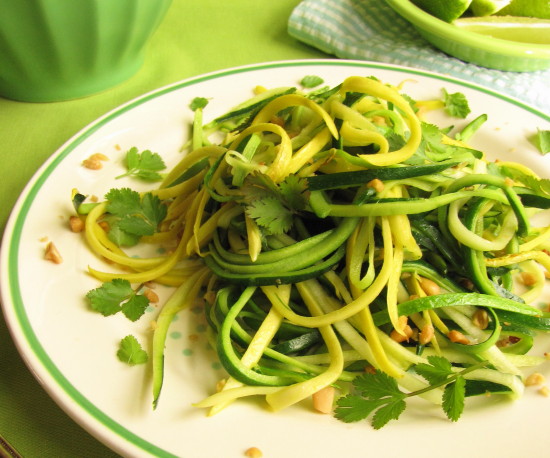
Zucchini Ribbons With Lime, Garlic, Cilantro & Mint

It takes a few peels to get the hang of the julienne peeler. I like to run the peeler all the way down the length of the squash for the longest pieces, but it’s easier on the fingers to hold the squash at one end and peel half way down and then flip it around and do the same thing. The shorter ribbons are just as pretty as the longer ones.  Whatever you do, discard the core—you want most of your ribbons to have a bit of skin on them for the best texture.

_________________________________________________

1 pound young zucchini or yellow squash, ends trimmed, washed and dried

1 ½ tablespoons unsalted butter

1 large clove garlic, smashed

1/2 teaspoon kosher salt, more to taste

2 teaspoons fresh lime juice

2 tablespoons finely chopped toasted pine nuts or toasted sliced almonds

1 tablespoon chopped fresh cilantro, mint, or a combination

________________________________________________

Set out a large mixing bowl. Working over the bowl, peel the squash lengthwise with the julienne peeler into thin strips. Work all the way around the squash until you get to the thick seed core. Discard the core. Break the strips up with your hands, as they can tend to clump together.

In a large nonstick skillet, heat the butter over medium-high heat. When the butter has melted, add the smashed garlic clove and cook, occasionally flattening the garlic clove with a spatula, just until the butter and the garlic clove start to turn a light brown. Remove the garlic. Add the squash strips and the ½ teaspoon kosher salt and cook, tossing with tongs, just until the squash have become pliable, about 1 minute.

Remove the pan from the heat and add the lime juice and most of the chopped nuts and herbs. Toss well. Taste and season with more salt if desired. Serve garnished with remaining nuts and herbs.

Serves 3 to 4 as a side dish

Beet Candy—Bet You Can’t Eat Just One

It is well documented that I will roast anything that will stand still long enough. So yesterday, when I accidentally harvested some baby beets while pulling weeds, the beets didn’t stand a chance. I’d barely been home for a minute when I turned the oven on to 450°F.

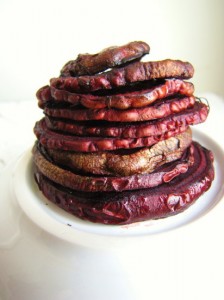
While I’m happy to slow-roast beets at a lower temperature, my very favorite thing to do with them is to slice them thinly and cook them hot and fast. The resulting “chips” are so sweet that I sometimes call them beet candy. I first discovered I could make beet candy when chef George Germon let me concoct a salad for the menu one night at Al Forno restaurant in Providence, RI, where I was a cook. He had some lovely mâche (a delicate leafy green), and I thought beets, goat cheese, and toasted walnuts would complement it. But I didn’t have a lot of time, and the wood-fired ovens at Al Forno are always running super-hot, so I decided to slice the beets really thinly and spread them out on a baking sheet to roast quickly. When they came out of the oven, they were shrivel-y and a bit black around the edges, but incredibly tender and sweet—in that deeply caramelized roasty-toasty kind of way.

I’ve loved these quick-roasted beets ever since. So much so that I keep writing about them. Fine Cooking.  Fast, Fresh & Green.  Now Sixburnersue. You’ll have to forgive me, but here I go again with the recipe—in case you missed it. It’s such a great way to convert beet haters into beet lovers that I don’t want anyone to be without it in beet season.

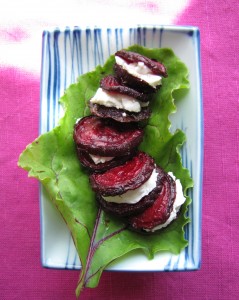
You can gobble quick-roasted beet slices right off the sheet pan. Or toss them into a citrus marinade (after roasting) and tuck them into salads. Sometimes I like to gussy them up by making little beet and goat cheese sandwiches, which I serve as appetizers. I mix some fresh goat cheese with a small amount of chopped fresh herbs or lemon zest, then dollop some on one beet slice, and top that with another. Yeah, a little fussy, but so darn cute.

Quick-Roasted Beets

This recipe is adapted from the version in Fast, Fresh & Green. The only slightly tricky part is slicing the beets. Start with a sharp, thin-bladed knife (I love my ceramic knife). Then, if your beets are too wobbly or unwieldy to hold straight, slice a very small sliver off the bottom and the beet will stay more stable when slicing. Then just cut round slices that are between 1/8 and ¼-inch thick (3/16 is ideal!). You don’t want paper-thin, or the beets will burn, so there’s no need to get out the mandolin.  Here’s another tip: to prevent your cutting board from getting stained with beet juice, cover it with a piece of parchment paper or part of a brown paper bag before slicing.

__________________________________________

About ½ pound beet roots (1 bunch, about 4 or 5 small or 3 medium, stalks and leaves trimmed), scrubbed but unpeeled, very thinly sliced crosswise

1/2 teaspoon kosher salt

1/2 teaspoon coarsely chopped fresh thyme leaves (optional)

1 tablespoon extra-virgin olive oil

_________________________________________

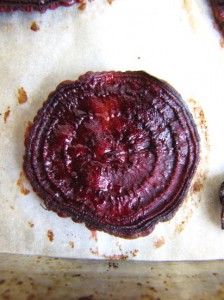
Preheat the oven to 450°F. Line a large (18- x 13- x 1-inch) heavy-duty rimmed sheet pan with a piece of parchment paper. Put the beet slices in a mixing bowl and toss thoroughly with the salt, thyme, and olive oil. Arrange the slices, evenly spaced, on the sheet pan (it’s okay if they touch). Roast until the beets are tender, shrunken, wrinkled, and glistening, 16 to 18 minutes. (If your beets are very small, they can roast in as little as 10 to 12 minutes.) The smallest slices will be black around the edges. Let cool for a few minutes and serve warm. Or refrigerate for up to a couple of days.

Serves 2 as a side dish or 4 as an appetizer

The Gold Rush (Or Why We Couldn’t Wait to Dig Up Potatoes)

We cheated. It’s not really time yet to harvest the potatoes, but we just had to check one plant. You know, to make sure there were tubers growing under all that foliage. Besides, it was Friday night and we were looking forward to an all-local dinner. We had just stopped to see Jeff Munroe, the Vineyard’s chicken man, and picked up a freshly slaughtered chicken for the grill. A big salad with our arugula, mizuna, lettuce, and peas was on the menu. All we needed were potatoes, right?

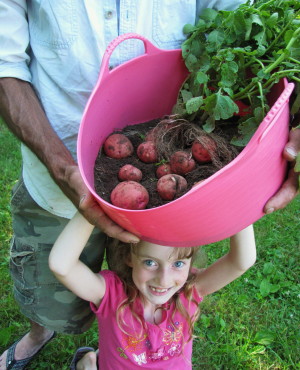
While I butterflied the chicken and cleaned the greens, Roy and Libby ran over to the garden, pitchfork in hand. They came back toting a potato plant—and about a pound and a half of Red Gold potatoes—in the big pink harvest bucket.  I jumped up and down for joy. Everyone giggled. Our own potatoes—how very cool is that? (We are easily amused, I guess.)

I wanted to cook them simply to see what the taste and texture was like. We bought our Red Gold seed potatoes from FedCo’s Moose Tubers catalogue, because they sounded like a fun and flavorful alternative to Yukon Golds, and because they were supposed to yield early and abundantly (we could already agree on that point). So I wound up boiling them until just tender and then frying them, cut-side down, until golden (directions below). I was surprised at how flaky the texture was for a red-skinned potato. It was almost as tender as a baking potato. And that rich yellow flesh was nutty and buttery tasting—perfectly delicious.

We’re trying to restrain ourselves from digging up any more Red Golds right now. The catalogue says about 65 days,  and it’s only been about 56.  The plant we did unearth clearly had a few more tubers forming, so we need to be patient. And then there’s that row of French Fingerlings waiting for us…

In the meantime, I guess we can line up with the rest of the folks who’ve discovered how rewarding potatoes are to grow. Our biggest problem has been keeping up with the ravenous Colorado Potato Beetle, who arrived early and with all of his kinfolk. The best way to dispatch them (in an organic garden) is to simply squish them (or their orange eggs that cluster on the back of leaves) with your fingers. Amazingly, this is an activity that Libby actually enjoys. (How many 7-year-old girls do you know who are fascinated by bugs?) So I’m grateful for that. Not so grateful that nature-loving father and daughter brought me a Garter snake as a present yesterday (to live in the garden!?). But I can hardly complain.

Golden Fried Potatoes

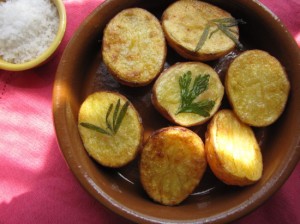
Choose small potatoes that are all about the same size and cut them in half lengthwise. Put them in a saucepan just big enough to hold them in one layer and cover them with cold water by at least an inch.  Add a good bit of kosher salt. (I use 1 ½ teaspoons for a pound of potatoes.)  Bring to a boil, lower to a gentle simmer, and cook until just tender, about 15 minutes for freshly dug potatoes, 20 to 25 for older potatoes.

Drain the potatoes well and let them cool for a bit on a dishcloth. Meanwhile, heat about a tablespoon of olive oil and about a tablespoon of butter in a large frying pan (nonstick works fine if it has a heavy bottom) over medium heat. When the butter is bubbling, sprinkle salt on the cut side of one potato (press an herb leaf on, too, if you like), and put the potato in the fat, cut side down. Repeat with the remaining potato halves. Cook, without turning the potatoes (but occasionally swirling the fat in the pan around them), until they are golden brown on the bottom (check carefully with a thin spatula), about 10 to 12 minutes. Transfer to a serving plate and serve warm, with or without a dollop of sour cream, a smattering of chives, and another sprinkle or two of salt.

Three Reasons to Celebrate: Baby Goats, Sugar Snap Peas, & A Second Printing

I watched a goat give birth this morning. It was maybe the coolest thing I’ve ever seen.

I was going to blog about something else today. Actually yesterday. And then yesterday went by and now today has, too. That is how my life goes these days, here in my new world. When I get up, I think there is something so important to do that I must focus entirely on it—be productive, get it done, do my work.  But the universe always has other plans for me. And if I just remember to pay attention to that, I get to experience the most amazing things.

So while Roy and I went over to the farm especially early this morning—ostensibly to water and harvest and be out of there by 8—Basil and Snowflake, two pygmy goats, had other plans (the goat pen is right next to our vegetable garden). By the time we got there, Basil had given birth during the night to two healthy kids, both females (does). One was a little grey and white patchy thing, already cleaned up and awkwardly skipping and hopping around like a tipsy gypsy. She even managed to climb on mama’s back.  The other little girl was black with white ears, and she was much bigger (and less squirmy) than her sister.

Snowflake was in labor. Never having given birth myself, I wasn’t exactly sure by her bleating and writhing what the whole timing scenario was! Fortunately, Randy and Rebecca (the farm owners) soon arrived to check on Snowflake. Randy had been up during the night helping Basil along with the second kid, who needed a small tug to get out. Basil, though, as it turns out, is a veteran Mom. For Snowflake, this was the first time.

Randy talked soothingly to her, but let her push. Two little white hooves followed by two little black legs appeared. And then, as we all stood watching (Snowflake had positioned herself in the breezeway of the shed so we could all see), swoosh!—the kid spilled out in a tidy (wet) bundle. Not a few seconds later it lifted its head and squiggled in the hay. Bravo Snowflake!

The second kid apparently followed not long after. I missed that but came back with my camera a short while later in time to watch Snowflake lick them (a little black doe and a little black buck) clean.  Even though I had emptied the chip in my camera, I still ran out of space after a half-hour or so. I was mesmerized.

Frankly, I was just as excited about the goats (and the appearance of the first sugar snap peas in the garden) as the other news I was going to blog about—that the second printing of Fast, Fresh & Green arrived in warehouses yesterday.

I have to admit, I have very mixed feelings about bragging about my book. I wasn’t brought up to flaunt success, and yet I know two things: One, I didn’t do this book all by myself, and the folks who helped me deserve to share in the good news. I owe it to them (and these are not the people who are logging on to Facebook and Twitter on a regular basis, so they are not going to see the reviews) to keep them updated. Secondly, I know what it feels like to be grateful. In my post midlife-crisis world, not only do I get to be present for a lot of cool stuff, but I also get to know that terrific feeling of gratitude—of knowing you’re the recipient of good karma that you’re not necessarily wholly responsible for.

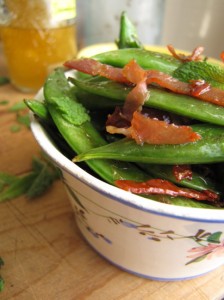
So to celebrate Fast, Fresh & Green (and those sugar snap peas I’m going to harvest for the farm stand tomorrow!), here’s a quick recipe, Sautéed Sugar Snaps with Salami Crisps. It’s one of my very favorites in the book for its inarguable simplicity.  And for anyone with lots of time on their hands (that’s you, Mom and Dad!!) who would like to see some of the recent coverage of FFG, there’s a list of links after the recipe. I’m particularly grateful to the articulate Tom Philpott of Grist.org for acknowledging my primary goal—to encourage people to cook at home more.  To me, there’s no better way to practice being present—and grateful—than spending time cooking (and eating) at home every day with friends and family.

Sautéed Sugar Snaps with Salami Crisps

___________________________________

1 ounce very thinly sliced Genoa salami

1 teaspoon extra-virgin olive oil

½ pound sugar snap peas, tails removed

1/8 teaspoon kosher salt

___________________________________

Stack the salami slices and cut them across into ¼-inch wide strips. Pull the strips apart and spread them in one layer on the cutting board; they are much easier to add to the pan when they are not clumped together.

In a large (12-inch) nonstick skillet, heat the 1 teaspoon olive oil over medium heat. When the oil is hot (it will loosen up and spread out), add the sugar snap peas and season them with the 1/8 teaspoon salt. Toss well. Cook, stirring occasionally, until the peas turn bright green, blister, and begin to turn a very light golden brown in spots, about 3 minutes. Add the salami strips and toss well.

Continue to cook, stirring occasionally, until the peas are browned in spots on both sides and the salami strips have shrunken, turned a darker brown color, and feel crisp, 3 to 4 minutes. (The salami will probably be crisp on the edges but still somewhat pliable after 3 minutes. You can stop at that point if you do not want to cook the peas further, but I like the texture of the fully crisp salami, and the peas stay crisp even when cooked more.) Transfer to a serving platter or dinner plates.

Serves 3

_____________________________________________________________

Here are links to some recent reviews of Fast, Fresh & Green.This is only a partial list and my thanks go to the many bloggers who have taken FFG for a test spin and enjoyed the ride!

How to Be Fast, Fresh & Green in the Kitchen (Grist)

To Market, To Market: 10 Top Summer Cookbooks (NPR)

Book Report: We Pick 11 New Cookbooks (Washington Post)

Ideas For What to Do With Summer’s Bounty (Associated Press)

Favorite Cookbooks: Fast, Fresh & Green (Eat Well, Eat Cheap blog)

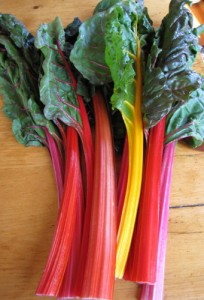
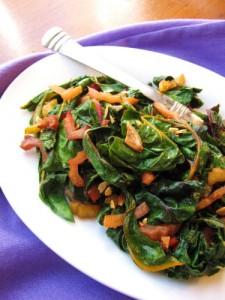
Chop Chop! Don’t Forget the Stems in a Swiss Chard Sauté

The second coolest thing about Swiss chard is that it cooks so darn fast. (The first coolest thing being its amazing neon color—especially the Bright Lights and Rainbow varieties.) So I hate to spoil the party, but I’m going to. My recipe takes a bit longer than the standard sauté.

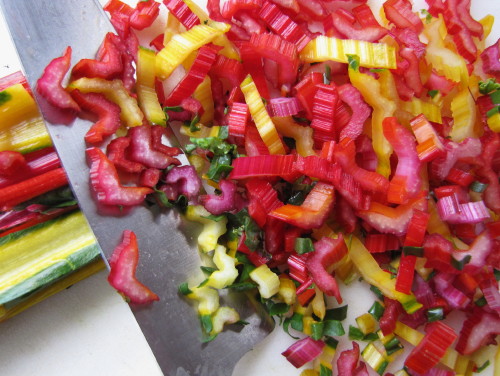
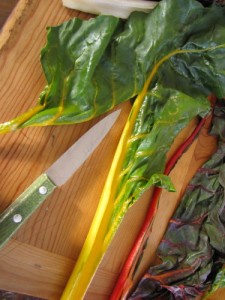
That’s because most recipes tell you to discard the chard stems and “use them for vegetable stock” or something else. (I know how many of you are busying yourselves making vegetable stock.) This is so you can then wilt the leaves like spinach and have a side dish in seconds. But if you have a few extra seconds (okay, minutes), you can simply slice up those stems and cook them until crisp-tender before adding the leaves to the pan. The stems add nice texture and make the side dish feel a little more substantial, too.
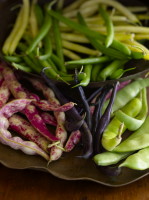
I’m a big fan of sweet and sour combinations with greens. Swiss chard has an especially mineral-y flavor, so I love to smooth out its rough spots with a flavor combo like maple and balsamic (in this recipe, along with ginger) or honey and sherry vinegar (or lemon). You can also use a caramelized aromatic (like sautéed shallots) to stand in for the sweetness and to add body. And garlic always plays well with greens. So fiddle around with flavors once you get your prep and technique down for this easy weeknight chard sauté.

(P.S. We just harvested our first Swiss chard, as well as Russian Kale, Lacinato, Tat Soi, Purple Pak Choi, Royal Oakleaf Lettuce, Tom Thumb Bibb Lettuce, and Lollo di Vino lettuce. We’re stocking a cooler out at Native Earth Farm stand with goodies, so stop by if you’re driving up-island. More details soon!)

Swiss Chard with Balsamic, Maple Syrup and Fresh Ginger

______________________________________

1 ½ teaspoons maple syrup

½ teaspoon balsamic vinegar

1 bunch (12 to 13 oz.) Swiss chard, unstemmed, rinsed and dried

1 tablespoon extra-virgin olive oil

kosher salt

1 ½ teaspoons minced, peeled fresh ginger

1 tablespoon unsalted butter

2 tablespoons chopped or sliced toasted almonds

______________________________________

In a small bowl, whisk together the maple syrup and the balsamic vinegar.

Pull or cut away the stems from the chard leaves. Cut or rip the leaves into large (2- to 3-inch pieces) and wash and dry them well. Rinse the stems and slice them crosswise into thin (1/4-inch) pieces.

Heat the olive oil in a large (11- to 12-inch) nonstick skillet over medium-high heat. Add the chard stems and a pinch of kosher salt, and cook, stirring occasionally, until shrunken and beginning to brown lightly, 7 to 8 minutes. (They will begin to crackle in the pan as moisture evaporates.) Add the fresh ginger, stir, and cook just until fragrant, a few seconds. Add all of the chard leaves and ¼ teaspoon kosher salt and toss until just wilted (45 seconds to 1 minute). Scrape the balsamic-maple mixture into the pan, stir, and remove from the heat. Add the butter and toss and stir until it is melted. Serve warm, garnished with toasted sliced or chopped almonds if desired.

Serves 2 to 3

A Potato Salad to Celebrate the Unofficial Start of Summer

I realize that this is Memorial Day weekend, not Fourth of July, so I may be jumping the gun a little by posting a potato salad recipe. But it’s been such a warm spring, and it’s looking like it will be a hot weekend all over the country, so I figured folks might be thinking about potato salad for picnics and barbeques.

Truthfully, this thought got me a little worried, as visions of store-bought, factory-made, gloppy potato salad came to mind.  There is nothing I hate worse than bad potato salad.

But then I breathed a sigh of relief, knowing that many of you all will be making your own delicious potato salads. In fact, you might even be scanning the web, looking for a lighter, brighter take on the classic American-style recipe. So I thought I’d post a favorite from Fast, Fresh & Green that’s got all the fresh flavors of spring, but that’s also assertive enough to pair with the grilled fare of summer—a  perfect season-bridger.

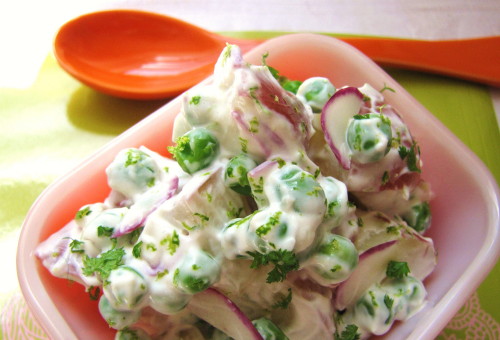
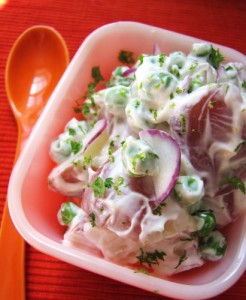
I made some of this New Potato Salad with Fresh Peas, Lime & Mint this morning and added a few slivers of baby radishes we pulled up from the garden yesterday. The lime zest and juice are the ingredients that really make this salad feel fresh, but lightening the mayonnaise with Greek yogurt helps a lot, too. In fact, these are two good tricks to remember when making any kind of mayonnaise dressing for a salad: Lighten the mayo with yogurt or whisked cream for a silkier texture, and always add extra lemon or lime for bright flavor. And don’t forget to salt the potatoes while you’re cooking them!

This salad is great with grilled lamb and grilled shrimp, but it’s also good as a main dish for lunch with some Bibb lettuce or as part of a vegetarian supper or picnic.

New Potato Salad with Fresh Peas, Lime & Mint

This recipe yields just enough to serve 4. You can easily double it, but you may find you want just slightly more dressing if you do. You can always whisk together just a bit more mayo, yogurt and lime and fold it in, or  you can start out by doubling all the ingredients, but only increasing the potatoes to 1 3/4 pounds instead of 2.

___________________________________________

1 pound baby Yukon gold or Red Bliss potatoes, quartered or cut into sixths for similar-sized pieces

2 ½ teaspoons kosher salt, more for seasoning

1 pound fresh peas in the pod, shelled to yield 1 cup peas (frozen peas are fine, too)

1/3 cup mayonnaise

¼ cup thick Greek yogurt (whole or 2%)

1 teaspoon (loosely packed) freshly grated lime zest (from about 1 lime)

½ teasoon fresh lime juice

¼ cup sliced scallions

2 to 3 tablespoons finely sliced fresh mint leaves

freshly ground black pepper

__________________________________________

Put the potatoes and 2 teaspoons of the salt in a large saucepan and cover with plenty of water. Bring to a boil, reduce to a simmer and cook until almost tender, about 10 minutes. Add the fresh peas (if using) and cook for 2 to 3 minutes more. (If using frozen peas, simply submerge them in a little tap water to defrost; then drain and dry.) Drain the potatoes and peas carefully in a colander and rinse them gently with cool water for a few minutes. Spread the potatoes and peas out on a small rimmed sheet pan and let cool. If you are in a hurry, you can refrigerate the potatoes like this and they will cool in about 20 minutes.

Meanwhile, whisk together the mayonnaise, the yogurt, the lime zest and the lime juice in a medium mixing bowl. Add the cooled potatoes and peas, the scallions, 2 tablespoons of the mint, ½ teaspoon kosher salt, and several grinds of fresh pepper. Mix gently but thoroughly with a silicone spatula. Taste and add a little more salt if desired. Garnish with the remaining mint .

Serves 4

Fruit or veg? Crisp or chutney? Rhubarb Does Double Duty

Technically, I said I was going to write about fruit as well as vegetables when I started this blog. So I could give myself permission to write about rhubarb—if it were a fruit. Which it’s not. (Technically it’s a vegetable).

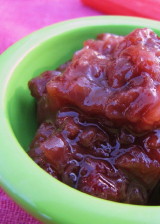
And technically I could have given you a crisp recipe, but I usually use Karen Barker’s great Rhubarb Brown Sugar Crumble recipe over on the Fine Cooking website. So instead I’m offering up my favorite savory concoction, Rhubarb-Dried Cherry Chutney.  (It’s quick and easy to make and would be really great if you’re grilling pork tenderloin or even chicken this weekend).

And technically (sorry, but I’m lacking in a diverse vocabulary today) I should have blogged about rhubarb when it first poked out of the ground here in late April. But I didn’t. Time slips, you know. Or skids. Or something.

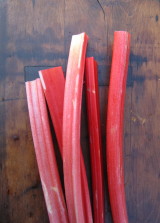
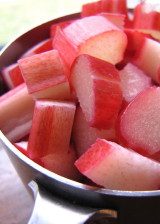
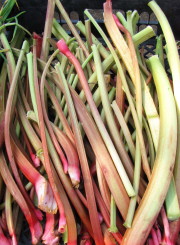
Fortunately, judging by the picture I took at our farmers’ market last year (stalks, above right), rhubarb is still thriving in June.

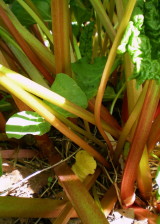
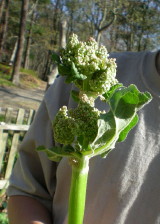
I took the other photos in April a couple years ago when I first got to the Island. (Not technically, but actually.) I was so fascinated by these bushy plants, which I sometimes found growing near old farmhouses, that I often stuck my camera down beneath their leafy canopies to capture the luminous underworld below, a forest of pink and pale green stalks writhing in dappled sunlight. The flowers (not edible) were a surprise to me, too.

If I had ever snatched any of this farmhouse rhubarb (which I didn’t), I would’ve been sure to trim all the leaves away before cooking. It annoys me to no end when I see rhubarb stalks for sale with the (toxic) leaves still attached. Do not eat the leaves. Period.  And know that the stalks themselves are quite tart. Delicious, but tart. They must be cooked with something sweet, and preferably lots of it.

Sure, sweet strawberries are the classic partner for rhubarb. But in reality, rhubarb appears on the scene so many weeks ahead of fresh (local) strawberries, that it’s nice to have a recipe or two on hand that showcases rhubarb alone. A crisp maybe, or a chutney.

Rhubarb & Dried-Cherry Chutney

_________________________________

1 cup medium-diced fresh rhubarb

½ cup small-diced onion

1⁄4 cup coarsely chopped dried cherries

1⁄4 cup granulated sugar

1⁄4 cup sherry vinegar

1 Tbs. honey

1⁄2 tsp. finely grated lemon zest

1⁄4 tsp. kosher salt

_________________________________

Combine all the ingredients in a small saucepan. Bring to a boil over medium-high heat, cover, and simmer over medium to medium-low heat until the onions are mostly translucent and the juices are beginning to thicken, about 5 minutes. Uncover and simmer, stirring frequently with a heatproof spatula, until very thick, another 6 to 8 minutes. Let cool completely in the pan before storing in an airtight container in the refrigerator for up to 2 weeks.

Yields about 1 cup.

A Great Tip+Fresh Spinach=Popeye’s Garlic Spinach Recipe

Cooks love tips—anything that makes life in the kitchen easier, tastier, more fun. I once did a TV tour where all I did was demonstrate cooking tips (of course with no stove or running water) on morning TV shows all over the country. This was somebody else’s great idea, not mine, as I was sent off to do this with almost no media training. Fortunately, I was usually on for about 30 seconds between the local political scandal and the weather, so I’m sure nobody watched.  However, in one place—Fort Worth, Texas—where I am happy to say they place a great value on cooking at home—I was on for 12 whole minutes. This required a little bit of effort to prepare for (and I’m not talking about the serious make-up they applied to me before I went on the air. I looked like Susiezilla). I had to expand my 30-second schpeel into a “top ten tips” kind of thing—and talk a whole lot more slowly!

The host (and the viewers) loved that tip demo, and I remembered this when I was getting ready for my book signing at Bunch of Grapes bookstore last Friday night. I was asked to speak for 30 minutes (normally this would be the time when a fiction or non-fiction author would read from his or her work), and I didn’t want to bore everyone to death. Plus, I am always better in front of a crowd if I have something to do with my hands. So I did a tip demo.

I peeled fresh ginger with a spoon. Made pretty squash ribbons with a hand-held julienne peeler. Zested a lemon with a Microplane zester. Cut the bottom of a potato off to stabilize it first before slicing it thinly. Stacked basil leaves, rolled them like a cigar, and sliced them across into a “chiffonade.” That sort of thing. Once again, I got positive feedback from folks, and one friend asked me if I could post more of these tips on my blog. “Just give us a short blog every once in a while with a quick tip.” Quick I am good at, short I am not. So while this blog could really begin with the next paragraph, I’ve made you all suffer through these words to get to the tip. Someday I will get it right.

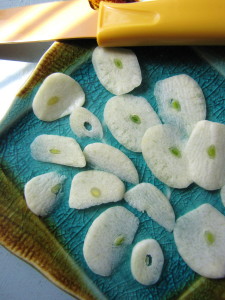
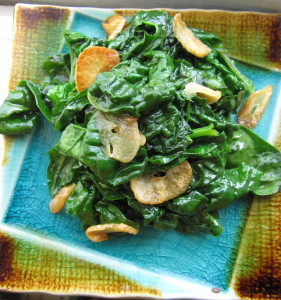
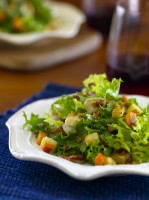
Here’s the tip. It’s about using fresh garlic. Instead of always chopping or mincing fresh garlic, try slicing whole cloves very thinly with a paring knife. These slivers, when gently sautéed in olive oil (keep the heat fairly low to prevent overbrowning), turn into delicious golden “chips.” Not only do the chips make for tasty nubbins in your final dish, but they gently infuse the olive oil with subtle garlic flavor. That olive oil, in turn, imparts a nice garlic flavor to whatever (ideally a green leafy vegetable) you next add to the pan.  (Minced garlic releases so much juice that it not only risks burning more quickly but can overpower a dish with intense garlic flavor).

I use this method (and these yummy garlic chips) to make my version of the classic side dish, garlicky sautéed spinach. (I named mine for Popeye.) The only other trick to my side dish is—your guessed it—really fresh spinach. By fresh I mean spinach still on its stems, in a bunch (not in a plastic bag). I realize how convenient bagged spinach is, and I’m all for using it when I’m making a big lasagna or that sort of thing. But to enjoy a simple spinach side dish, treat  yourself to a bunch of fresh flavor (that was a typo, I meant fresh spinach…or maybe I really did mean flavor). I especially like the variety with bodaciously crinkly leaves that give your side dish a little body, even when wilted. And I do mean wilted—that’s my last tip. Don’t overcook spinach. Just toss it in the infused oil until it collapses. Done.
Popeye’s Garlic Spinach For Two

____________________________________

1 tablespoon extra-virgin olive oil

1 bunch fresh spinach (10 to 12 ounces), stemmed, washed well, and spun dry

3 medium-large garlic cloves, peeled, ends trimmed, and cut into very thin slices (1 1/2 to 2 scant tablespoons garlic “chips”)

1/4 teaspoon kosher salt

1 teaspoon unsalted butter

____________________________________

Heat the olive oil in a medium (9- to 10-inch) nonstick skillet over medium-low heat. When the oil is hot (it will loosen up), add the garlic slices and stir with a silicone spatula to distribute them in the oil. Turn the heat to low and cook, stirring frequently to keep the garlic covered in the oil, until the garlic softens and loses its white color, and the smallest pieces become light brown, while the larger pieces are just starting to become a light golden color, 6 to 7 minutes (don’t overcook the garlic or it will become bitter). You should smell a pleasant garlicky aroma, nothing acrid. Add half of the spinach and the salt and stir and fold the spinach with tongs until most of it is wilted and dark green, 1 to 2 minutes. Add the other half of the spinach and stir well again until the spinach is mostly all wilted, another minute or two. Take the pan off the heat, add the butter, and stir again to melt the butter and incorporate it with the spinach. Transfer the spinach with all of the garlic pieces to a serving bowl or bowls.

Serves 2

A Whole Plate of Quick-Braised Asparagus, Just for Me

I am home today roasting a bazillion plum tomatoes for a nibble I’m going to pass at my book signing tonight. There are sheet trays of tomatoes in various stages covering almost every surface in the kitchen (which is now thankfully a little less cluttered, as many of the 465 seedlings have gone to the farm garden). Bottles of olive oil, cutting boards covered with garlic slivers and thyme sprigs, and bowls of tomato seeds for the compost cover every other bit of remaining surface area.

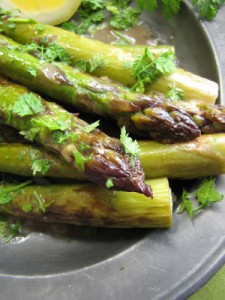
It would have been easiest to fix myself a peanut butter sandwich for lunch. But no, I had to get out the sauté pan, because I’ve been ogling the gorgeous asparagus I bought at Morning Glory Farm yesterday. Every year I look forward to these purple behemoths; they have amazing flavor and defy the spindly Chilean spears that haunt the fluorescent aisles of the grocery store. These asparagus—you can tell they grew in the dirt, broke ground one cold March morning, and burst onto the scene with the bravado of a groundhog.

Actually, I was really glad I got the sauté pan out, as this whole recipe—one of my very favorite preparations for asparagus—takes, start to finish, less than 15 minutes to make. And the depth of flavor the vegetable gets from the browning, the quick simmer in chicken broth, and the finish of a little Dijon, butter, and herbs, is just astounding. (Okay, I realize that sounds a little boasty, this being my recipe. But if you make it and disagree, please let me know.) And for once, I got to eat the whole dish myself. Lucky me.
Quick-Braised Asparagus with Dijon-Herb Pan Sauce

This recipe was adapted from my cookbook, Fast, Fresh & Green.

________________________________________

1/4 cup low-sodium chicken broth

2 tablespoons dry white wine or 2 teaspoons lemon juice

1 tablespoon extra-virgin olive oil

1 tablespoon unsalted butter

1 bunch medium-thick asparagus, each spear trimmed to six inches in length (to yield about 10 ounces)

1/4 teaspoon kosher salt

1 teaspoon roughly chopped fresh thyme or 1 to 2 teaspoons roughly chopped fresh chervil

1/2 teaspoon Dijon mustard

______________________________________

Combine the chicken broth and white wine or lemon juice in a liquid measuring cup.

In a 10-in straight-sided sauté pan with a lid, heat the olive oil and 1/2 tablespoon of the butter over medium-high heat. When the butter has melted and is bubbling, add the asparagus and salt and toss the asparagus well to coat. Arrange in one layer and cook, without stirring, until the undersides are nicely browned, 4 to 5 minutes.

Using tongs, turn each spear over and cook, without stirring, just until the other side is beginning to brown, about 2 minutes. (If the asparagus are very thick, go one minute more.) Carefully (it will sputter) pour the liquid into the pan and immediately cover it. Simmer until the liquid reduces almost completely (1 or 2 teaspoons will be left), about 2 minutes. Uncover, take the pan off the heat, and add the remaining 1/2 tablespoon of butter, most of the thyme or chervil, and the Dijon. Stir gently with a silicone spatula to mix the mustard with the melting butter and to incorporate any browned bits from the bottom of the pan. Transfer the asparagus to a serving platter or plates and pour the pan sauce over it, scraping all of the sauce out of the pan. Garnish with the remaining herbs.

Serves 3 (as a side dish) or 1 for lunch!

Fast, Fresh & Green is Here–and I Couldn’t Be More Thrilled
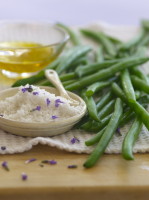

Theoretically, I am a jaded editor and writer. I’ve been in the publishing business a long time. (I got my first job at Seventeen magazine when I was 21 years old.) So you’d think that writing a book would be no big deal to me, right? Wrong.

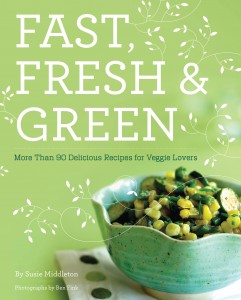
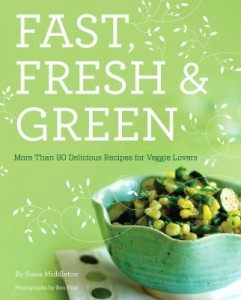
The day I held the first copy of Fast, Fresh & Green in my hands, I nearly cried I was so thrilled. It was beautiful and charming and there was that silly voice of mine all over the place, coaxing people into the kitchen to have fun. Somehow, my publisher, Chronicle Books, managed to let Susie be Susie, all the while infusing the book with their uniquely fresh design sensibility, making it feel so relevant, so very 2010, so luminous. A more grateful first-time author you couldn’t find.
That was back in January, when I got two copies of the book in the mail, straight from the printer. Because of the weird ways of publishing, I don’t actually have any more copies yet. My author copies will be shipped when the book “officially” leaves the warehouse to head for bookstores this Wednesday, April 28.

But (and like I said, this is weird stuff), the book started shipping from Amazon early last week, and Friday afternoon, the book reached #1 in the Vegetable category (and even hovered under 500 in the total books ranking for a few hours!). Now everyone knows that the Amazon rankings don’t really mean anything, but does that stop me from being proud? And does it mean I’m not excited about the new 5-star reviews that are up there from folks saying they’ve already found a place for Fast, Fresh & Green on their cookbook shelf of “favorites?” Of course not—I’m human. And heck, you only have a first book once, so why not totally give in to the thrill.

The book is also out early in Anthropologie stores all over the country and in Canada. This really tickles me, as I bought many of the props for the photos in the book from Anthropologie, just because I love their sensibility. It also tickles me because friends and family members have been spotting the book in their local Anthropologie and emailing photos of the displays to me. Which leads me to this: You don’t just write—or publish—a book in a vacuum. Your friends, your family, your professional colleagues—they offer so much support and encouragement as you go along that the book really becomes theirs, too.  They’re just as proud as you are, so they should share in the excitement. That’s why I feel like it’s important to spread the good news around when it comes along, whether I do that by Facebook, on Twitter, on sixburnersue.com, or with a simple email.

To be honest, this good news doesn’t just “come along.” Promoting a book is actually more work, and involves more people, than the actual writing of a book, and I have an incredible team at Chronicle Books, my friends at Fine Cooking magazine and finecooking.com, the good people at Edible Communities, and an enthusiastic group of independent booksellers on my home turf of Martha’s Vineyard to thank profusely. (Bunch of Grapes bookstore in Vineyard Haven is kindly staging an author event for me on Friday, May 7, to officially “launch” Fast, Fresh & Green on the Island. Wherever you live, be sure to patronize your local independent bookstore!).

In honor of official publication week, I thought I’d post a few of the incredible photos in the book and one of my favorite recipes. The photos (above) were taken over a four-day period in my home by fabulous photographer Ben Fink. Food stylist Michelli Knauer prepared and styled the food for the camera with the help of Safaya Tork. I planned and propped each shot, bought the ingredients, and worked with Ben and Michelli during the shoot to get the best results possible. And of course all of the food for the camera was shot exactly as the recipe was written (no fakery), and none of those recipes would be as good as they are without the efforts of my terrific cross-tester, Jessica Bard.

Publishing a book is a lot of work (and not the ticket to riches as many folks believe), but it is a thrill, plain and simple. Especially the first one—though I hope to find out what it feels like to be a second-time author, too!

___________________________________

Sweet Potato “Mini-Fries” with Limey Dipping Sauce

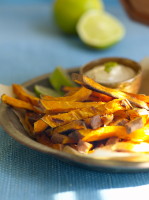
These oven fries are addictive, even though they don’t get as crisp as deep-fried sweet potatoes. I cut them into little sticks and sometimes serve them straight off the sheet pan (with more salt) to guests gathering in the kitchen. They always disappear quickly. The easy little limey dipping sauce is also great with grilled fish, crabcakes, and steamed asparagus.

___________________________________________

1 pound unpeeled sweet potatoes (about 2 small)

4 tablespoons extra-virgin olive oil

1 teaspoon kosher salt, more for seasoning

Spiced Salt (recipe follows)

Limey Dipping Sauce (recipe follows)

___________________________________________

Preheat the oven to 475 degrees F. Line a large (18- x 13- x 1-inch) heavy-duty rimmed sheet pan with a piece of parchment paper. Cut the sweet potatoes crosswise on a slight diagonal into 3/8-inch-thick slices. (If the sweet potato is very narrow at one end, you can cut slices at a very sharp angle at that end.) Cut each slice (along the longest side) into sticks between ¼- and 3/8-inch wide. (They will only be a couple inches long.) Put all the sticks in a mixing bowl and combine thoroughly with the olive oil and the 1 teaspoon salt. Spread the sweet potatoes out in one layer on the baking sheet, making sure to scrape all the oil and salt from the bowl onto them.

Roast for 20 minutes. Using a spatula, flip the sticks over and continue cooking, flipping once or twice more, until the fries are nicely browned (some in spots, some all over), about another 10 minutes. Sprinkle some of the Spiced Salt or more kosher salt (be generous and do not skip this step!) on the fries, toss well, and serve with the dipping sauce.

Serves 3 to 4

Limey Dipping Sauce

_____________________________________

1/3 cup mayonnaise

1/2 teaspoon freshly grated lime zest

1 tablespoon fresh lime juice

½ teaspoon finely minced garlic

a pinch of kosher salt

_____________________________________

In a small bowl, combine the mayonnaise, the lime zest, the lime juice, the garlic and a pinch of salt. Whisk well to combine. Let sit for 10 to 15 minutes to let the flavors blend.

Spiced Salt

This keeps in a tightly sealed container for several weeks.

________________________________

1 teaspoon kosher salt

1/2 teaspoon sugar

1/4 teaspoon ground cinnamon

1/4 teaspoon ground cumin

1/4 teaspoon ground coriander

1/4 teaspoon paprika

_________________________________

In a small bowl, stir together all of the spices.