Tag Archives: Cabbage

Tart Art: Recipes for Sweet or Savory Rustic Tarts

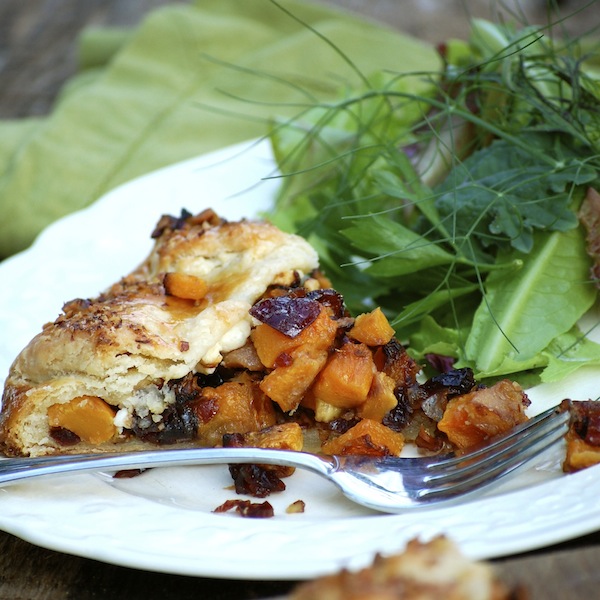
DSC_0626I’ve been looking for a great excuse to repost this blog on rustic tarts. Well, it being the eve of you-know-what, I don’t thing I even have to mention why you might want to totally distract yourself with an incredibly delicious cooking project. (Perhaps you don’t have a TV or the internet in your kitchen.) But even if you don’t feel like cooking today or tomorrow, chances are that either a sweet or savory tart might fit perfectly into one of your holiday menus. So, Ta da! A repost of where to find directions to all my yummy rustic tart recipes.

DSC_9313

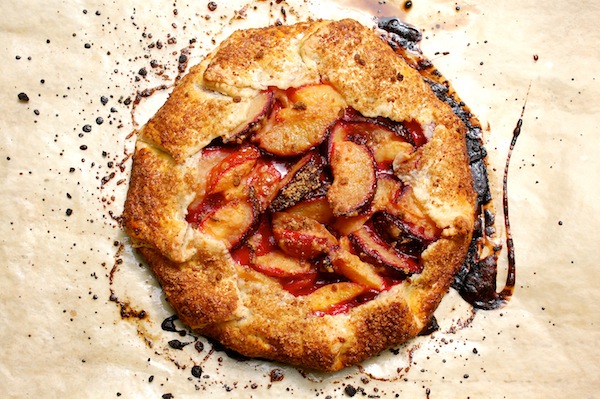
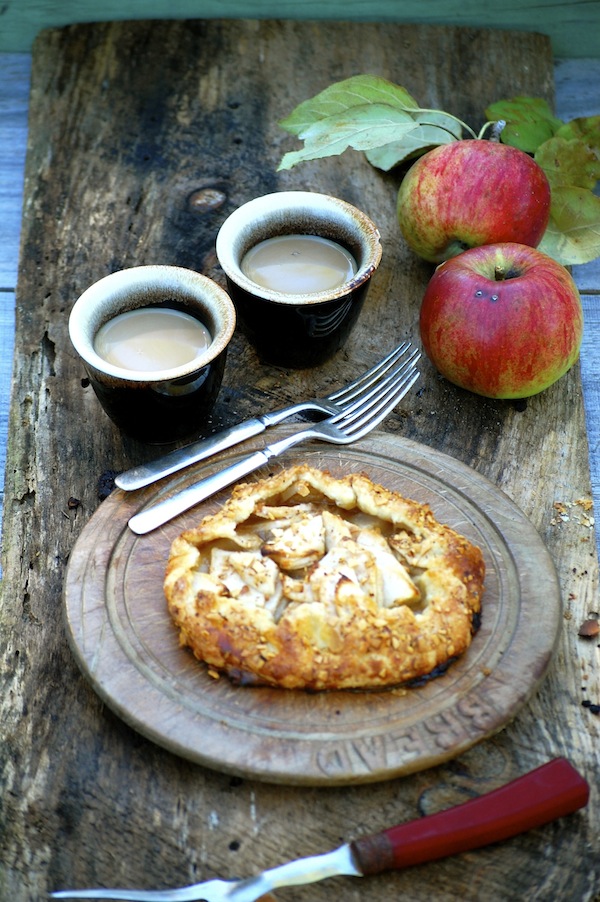
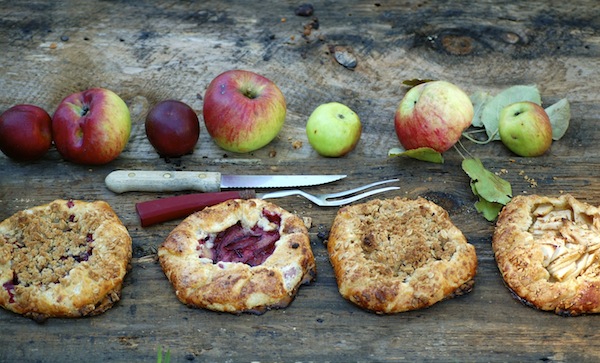
Sweet or savory, these open-faced pies can be everything from appetizer to dessert—and even breakfast. A couple years back, I wrote and photographed a story called “Tart Art” for Martha’s Vineyard Magazine, and now the recipes are all online. It’s a great place to go for my all-purpose, buttery, flaky dough recipe—and to find recipes for both my versatile fruit filling (apples, pears, or plums) and for two different savory fillings.

DSC_0706

The fruit fillings work for sweet rustic tarts that are as delicious for dessert as they are the next day for brunch or an easy leftover breakfast. And if you’ve got a copy of Fresh from the Farm on hand, you can find one of my favorite variations in the recipe for Little Pear Crostatas with Hazelnut Crisp Topping. (Rustic tarts go by the name crostata in Italy and galette in France.)

DSC_1548

The savory fillings I did for Martha’s Vineyard Magazine—Savory Cabbage, Apple & Cheddar and Savory Roasted Butternut, Pear, and Cranberry—are variations on the fillings I did for my tart chapter in The Fresh and Green Table. Not only are these savory tarts deeply flavored and satisfying (great with soup or salad), but they are a lot of fun to put together.

DSC_1915

For step by step assembling instructions, you’ll want to look back at the directions and the photos I included in a previous blog, which includes a link to one of the recipes from The Fresh & Green Table. (The Seven Treasure Roasted Winter Veggie Tart is also a favorite in The Fresh & Green Table.) And over on the Martha’s Vineyard Magazine website, you’ll see that I’ve given you options for dividing the dough into either two or four pieces to make two bigger or four smaller tarts.

So you’ve got options.

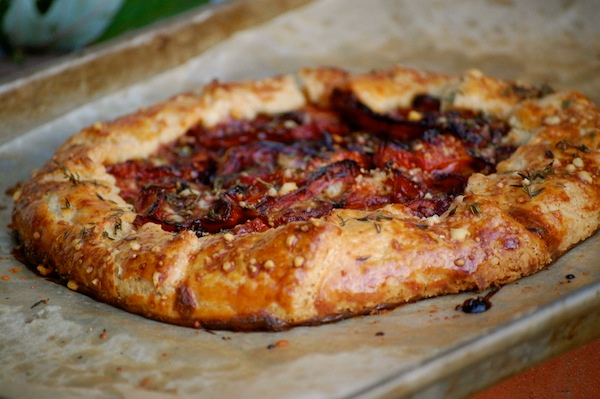
And when summer comes around (we can be hopeful, right?) don’t forget about my most favorite tart of all—the Roasted Tomato Rustic Tart in Fresh from the Farm!

xroastedtomatotart


Hope for the Seedlings + Sixburnersue’s Best Cabbage Recipes for St. Patrick’s Day

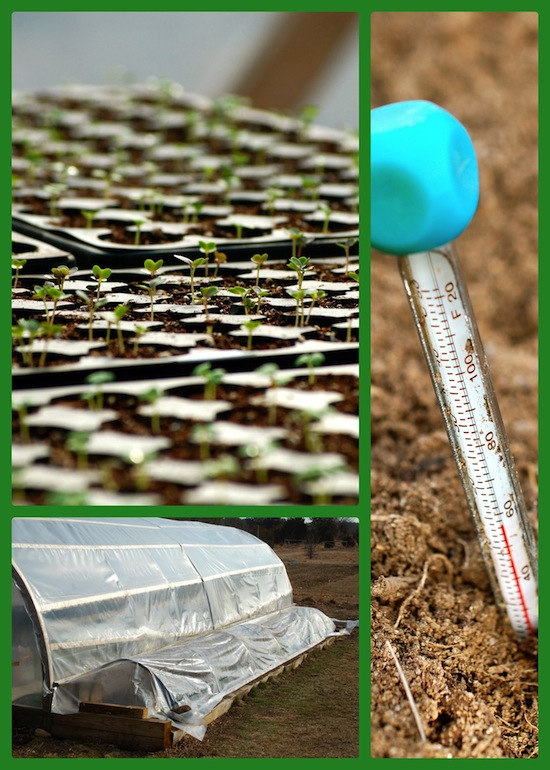
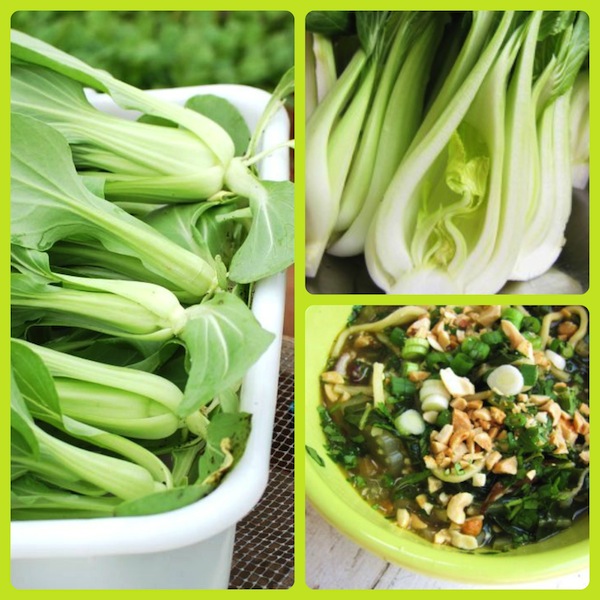
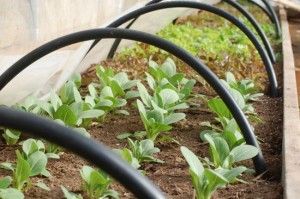
seedling pic 2Yesterday I was hiding out in the hoop house, pretending that I didn’t have a long list of things to do before getting on a plane tomorrow. It was warm and bright and still inside, the air spritzed with the fine smell of damp potting soil. I could have stayed there for hours, futzing over the hundreds of little baby bok choy seedlings that have popped up in the last week.

We planted the bok choy seeds with the grand scheme of getting an early crop into our south-facing bed along the outside of the hoop house. Roy has been prepping the bed and installing hoops and a plastic cover to warm the soil up for planting. Bok choy can go into 50° soil and by using transplants, you can have a harvest in about a month after transplanting.

seedling blog 3

Even though we have the hoop house now, it isn’t heated, so the nighttime temperatures are still pretty chilly in there. (The greens in the raised beds have covers over them.) So we had to germinate the bok choy seeds inside. First, I mixed up the seed starting soil (with water) and spread it in 72-hole flats in the hoop house. Then I carried the flats inside, planted the little tiny seeds, covered the flats with plastic tops, carried them upstairs, and arranged them over the floor of Libby’s bedroom. Then I shut the door to keep the room cool and to keep Barney out.

So you can see, we still do not have a very sophisticated system of seed starting. And, by the way, though Libby’s room was the perfect temperature, and the seeds germinated very evenly, Barney did get in there more than once and pounced on the plastic tops. I think he got in because Farmer nosed the bedroom door open, thinking Libby might be in there.

Still, we’ll call that part successful. However, we’ve then had to carry the flats down to the hoop house every morning—and then back every night. The seedlings grow straight and sturdy in the gauzy overhead sunlight of the hoop house, so you want them there during the day. (Without adequate direct light, seedlings grow leggy and sideways, as most of you probably know. ) And very soon we’ll be able to just pop the plastic tops back on at night and leave them in there. But right now, because of this ridiculous weather (50° yesterday, 25° and snowing today) the flats have to go back inside the house at night. Argh!!

bok choy Collage

Anyway, this is certainly not a big problem to be complaining about, and I’m only really recounting this as my way of saying I am oh-so-very-excited about spring coming. (And for making delicious things with bok choy, of course!). When I get back from Chicago, I will plant more flats—of lettuce, spinach, kale, and chard. (That is—IF I get back! I’m supposed to get out of downtown Chicago and to the airport on Monday, and isn’t that St. Patrick’s Day? And isn’t there, like, a fairly large parade in Chicago?! Oh well.)

cabbage recipe collage

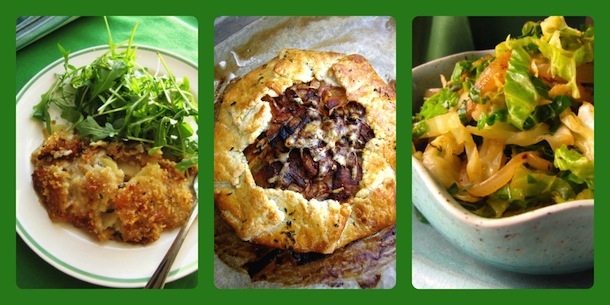
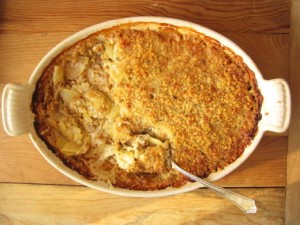
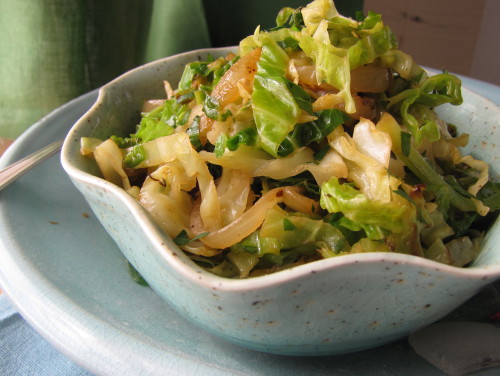
Since I won’t be actually here on the Irish holiday, I thought I’d better share my favorite cabbage recipes from Sixburnersue with you today. I’ve never been one for boiled cabbage, so for a simple preparation, I go with something like this Quick-Sautéed Cabbage recipe. For something fancy, there’s always the Savoy Cabbage, Apple, Onion & Gruyere Rustic Tart. But probably my favorite holiday cabbage side dish (with the same flavor profile as the tart, just with potatoes added) is this St. Patrick’s Day Cabbage, Onion Apple & Gruyere Gratin.

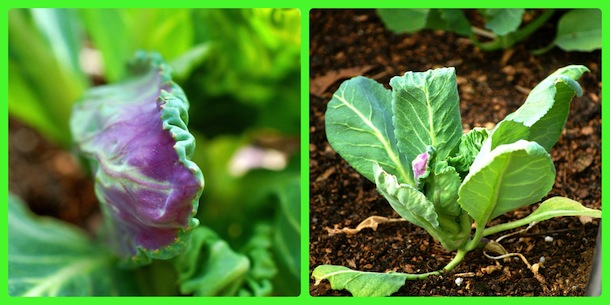
I may not get to eat one of these dishes on St. Patrick’s Day this year, but I do have some cabbage to look forward to—I planted some cabbage seeds directly into one of the hoop house beds last fall, and I now have a few tiny cabbage plants starting to form heads. With any luck, I’ll have cabbage on say, May Day! And baby bok choy even sooner. Can’t wait.

cabbage pic collage 1

How to Make a Savory Rustic Tart with an Easy, Flaky Dough

xroastedtomatotartxTART DOUGH 20

My affection for buttery, flaky crusts and sweet, caramelized vegetables came together one magical day many years ago. I realized that the wonderfully easy food-processor tart dough I had learned as a young cook at Al Forno restaurant wasn’t just for dessert. As much as I like a good rustic fruit tart (and there is one to die for—Little Pear Crostatas with Hazelnut Crisp Topping—in Fresh from the Farm), I am always looking for a good destination for roasted or sautéed vegetables, too. And these fun-to-make, free-form tarts (no special pan needed) are perfect for showcasing all kinds of veggies.

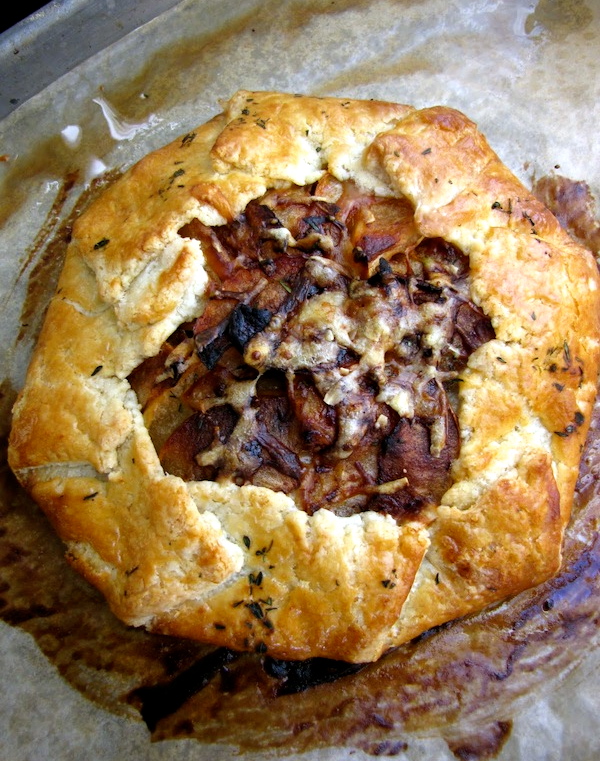
xTARTS Ratatouille 2I really played out this idea in The Fresh & Green Table with four delicious recipes—Roasted Ratatouille Tart with Goat Cheese & Mint; Seven-Treasure Roasted Winter Veggie Tart; Roasted Butternut Squash, Cranberry, Shallot & Pecan Tart; and Savoy Cabbage, Apple, Onion & Gruyere Tart (pictured here). And, not being able to help myself, I’ve done it again in Fresh from the Farm with one of my favorite ingredients, roasted tomatoes (see photo at top.)

I’ve never blogged about the tarts, though, because the recipes take up a lot of vertical space. With both the tart dough and the completed tart recipe needing to run together, your eyes would get tired!

But today I was organizing some old photos and came across a series of decent test photos that Roy and I took while developing the tarts for The Fresh & Green Table. I realized that publishing them would go a long way towards illuminating the technique of making the dough and assembling the tarts, so I’ve decided to go ahead and post these photos here today. (Therefore, if you’re looking at one of the tart recipes in my book, you can now get a little idea of what the process is like by looking here. Next I should probably do a video!)

You’ll also find the tart dough recipe after the photos. And I will put the recipe for the Savoy Cabbage, Apple, Onion & Gruyere Tart (the one in these process photos) in a separate post so that you can print it out on its own (and make it right now, while winter cabbage reigns supreme). One of these days I will also finally get my recipe formatting software working—and then the recipes will truly be print friendly. It’s on the list, I promise.

By the way, rustic tarts are also variously called crostatas and galettes.

Making and Assembling a Savory Rustic Tart
xTART DOUGH 2

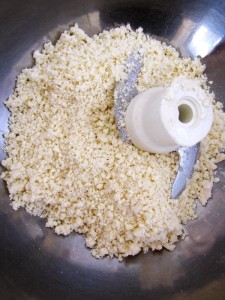
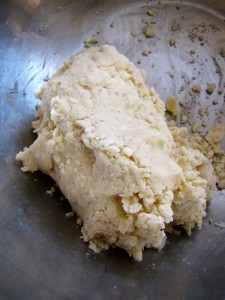
xTART DOUGH 1After pulsing the flour, salt, cold butter and a little ice water together in a food processor until the mixture looks like small pebbles, dump the mixture into a large mixing bowl. Use your fingers and the palm of your hand to knead the loose dough together into a mass.
xTART DOUGH 4xTART DOUGH 3

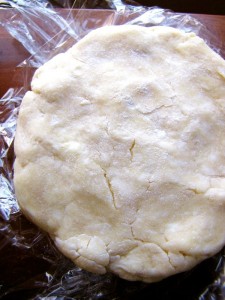
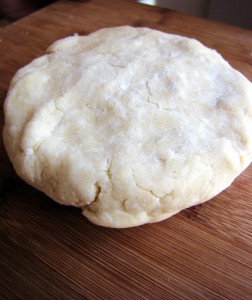
On a floured surface, pat and shape the dough into two flat disks, each about an inch thick. Wrap well in plastic and refrigerate for an hour or up to two days. Or freeze for a few weeks.
 

xTART DOUGH 5

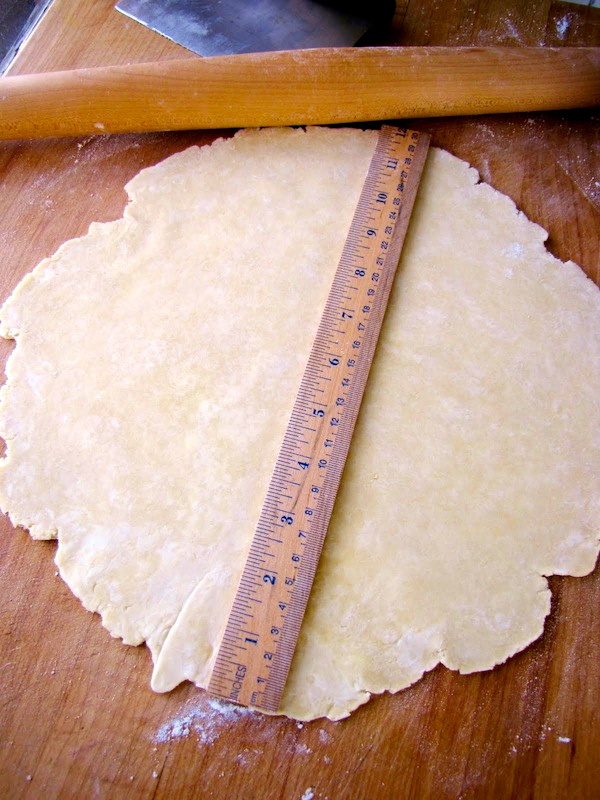
Remove dough from fridge 30 to 45 minutes before rolling. Flour a large surface, get out a ruler, and begin rolling the dough disk out, lifting the dough up, tossing a little more flour underneath, and giving it a quarter turn after every roll. The lifting and flour help prevent sticking; the turn helps with shaping a rough circle. (I like a French pin with tapered ends, which also helps to keep you from rolling over the edges of the dough, which will squish it.) Continue to roll the dough until you have a circle roughly 12-inches wide.
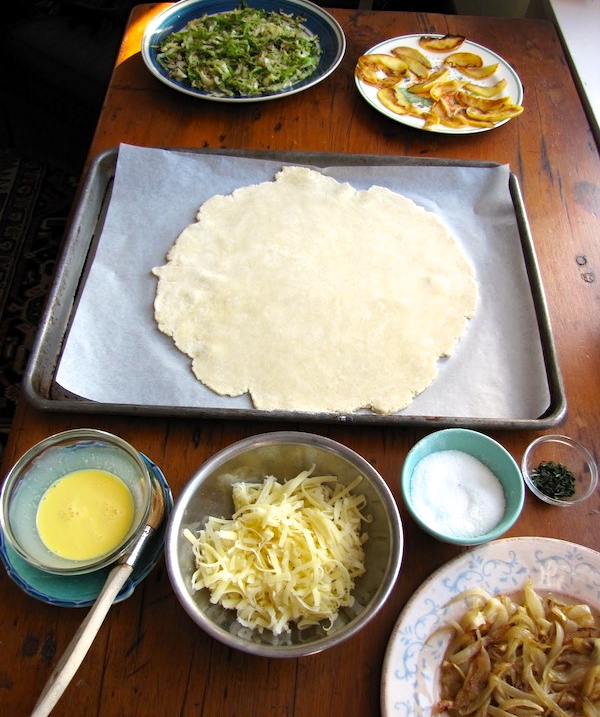
xTART DOUGH 6Transfer the dough to a parchment- lined heavy duty baking sheet.

Make an egg wash by combining an egg yolk and heavy cream.

Arrange all your filling ingredients around your baking sheet to make assembly easiest. (In most tart recipes, you can cook the filling ingredients during the time it takes for your dough to come back up to cool room temperature.)
xtart dough 8

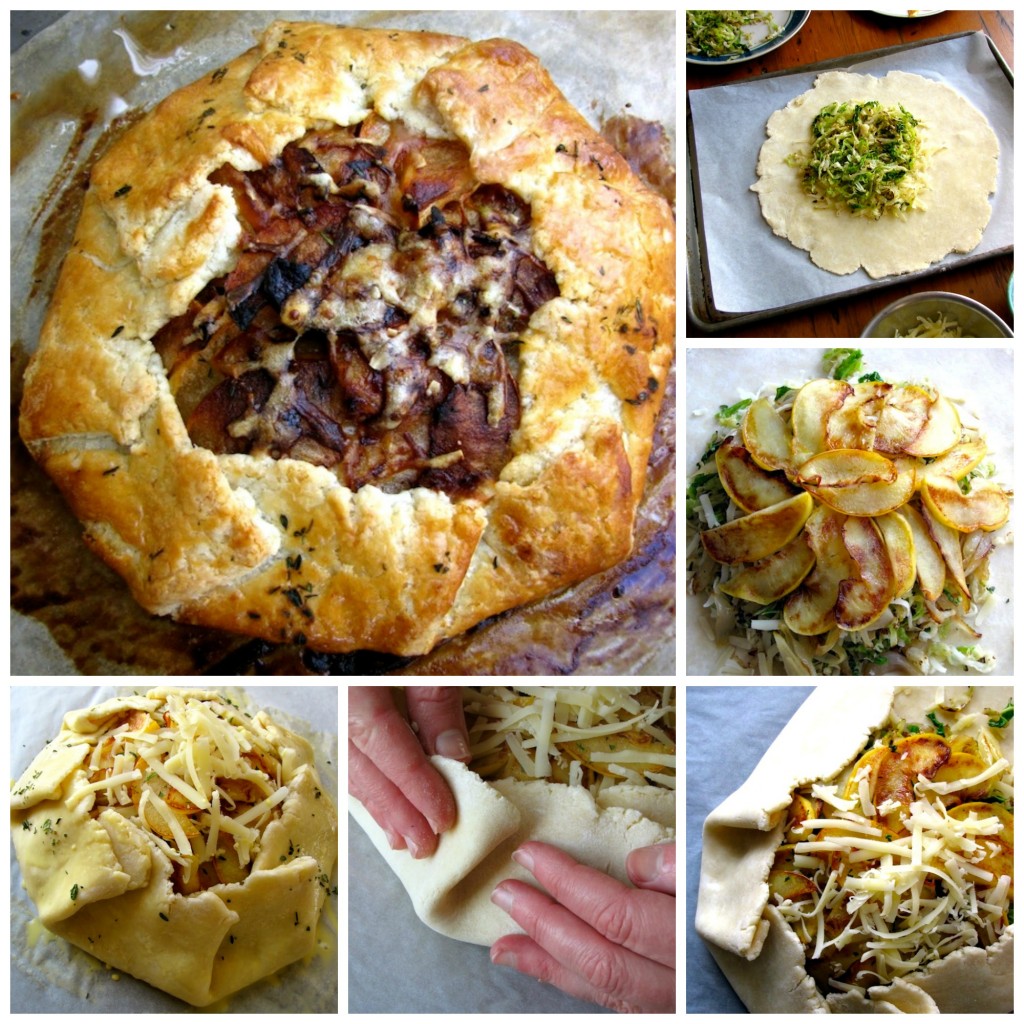
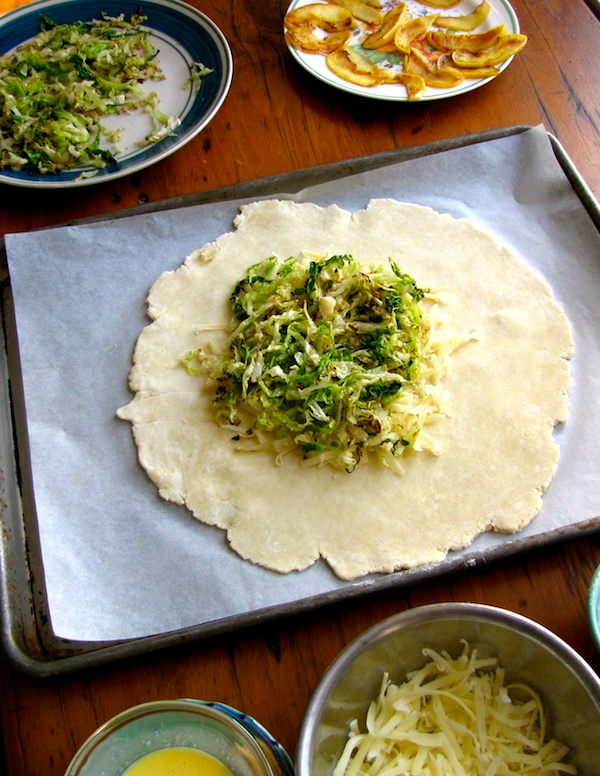
Arrange your first ingredient (usually cheese; in this case gruyere) in the center of the dough, leaving a 2-inch border all the way around. (Note, I could have done a much better job on this one–looks like 2 inches on one side and 4 on another! Maybe it was the camera angle.) Top with your next layer (in this case, sautéed cabbage).
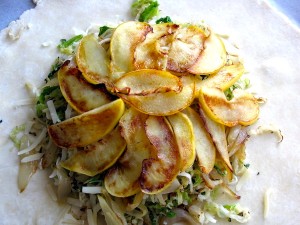
xTART DOUGH 11xTART DOUGH 10Continue layering your filling ingredients until you are done.
xTART DOUGH 14

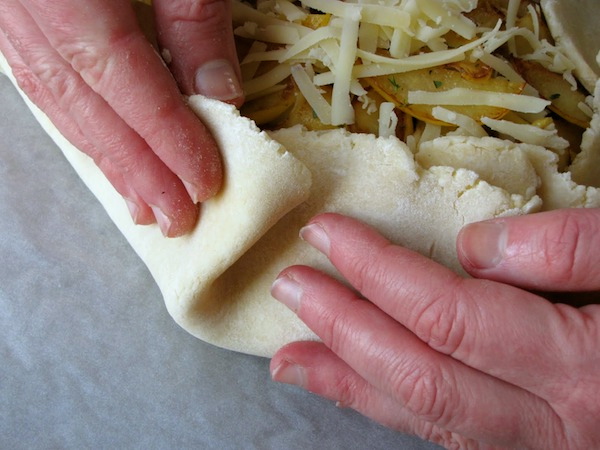
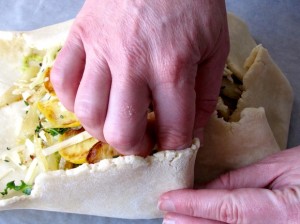
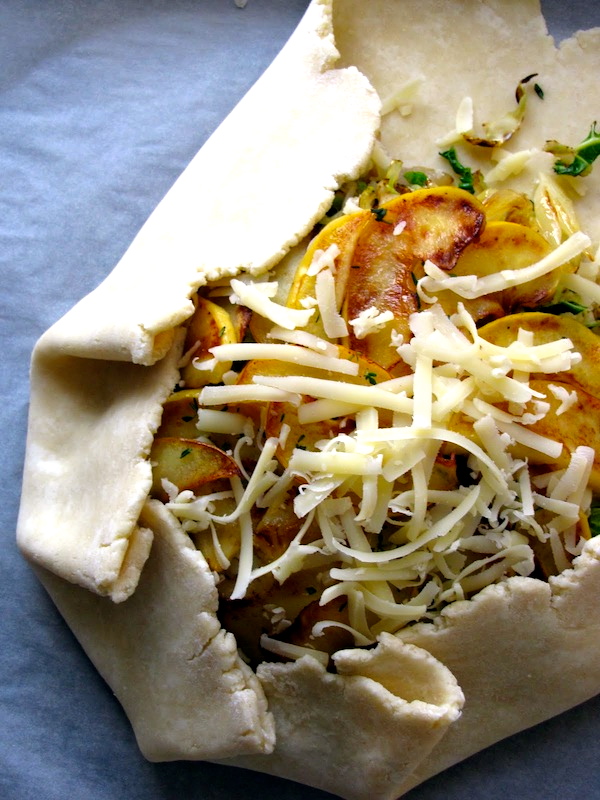
However you are most comfortable, pleat the edges of the dough up and over the filling.
xTART DOUGH 12

I often use the thumb and fingers of one hand to pinch while using the other hand to pull the dough up and begin the fold. (Okay, folks, by now you realize I don’t stand a chance at a career as a hand model. Yes, Roy took these pictures and those are my big hands!)
 

xTART DOUGH 16

xTART DOUGH 19


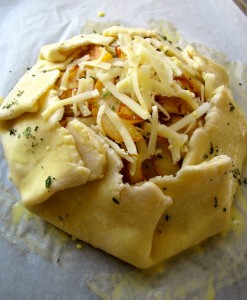
I find one pleat about every three  inches works well.  Continue pleating until the tart is contained. If cracks develop, don’t worry—you can pinch the dough together to seal it.

Brush the edges of the tart (and underneath the pleated folds) with egg wash. Sprinkle with herbs, a little cheese, or a bit of coarse salt.
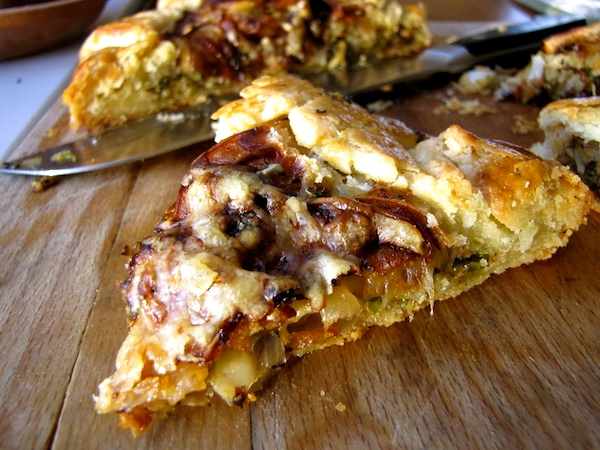
xTARTS Cabbage 5


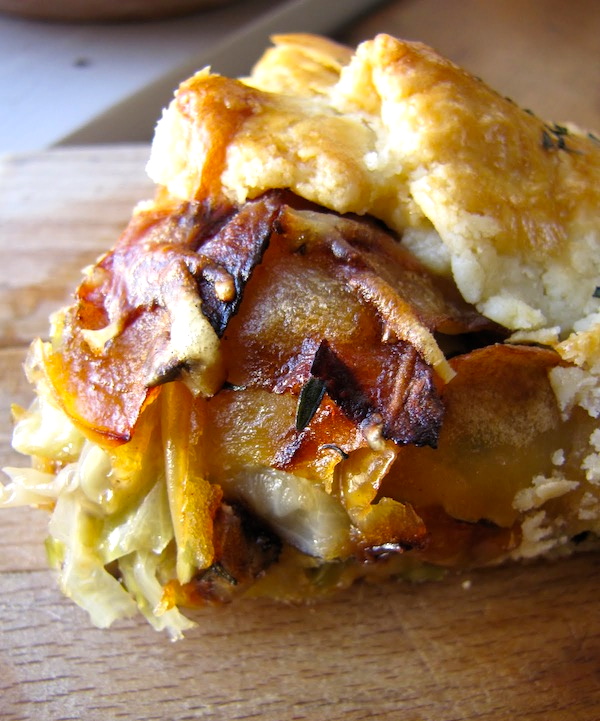
Bake until golden all over (see top photos) and brown and crisp on the bottom (check with a spatula). Depending on the size of the tart, this usually takes about 40 to 45 minutes at 400 degrees.
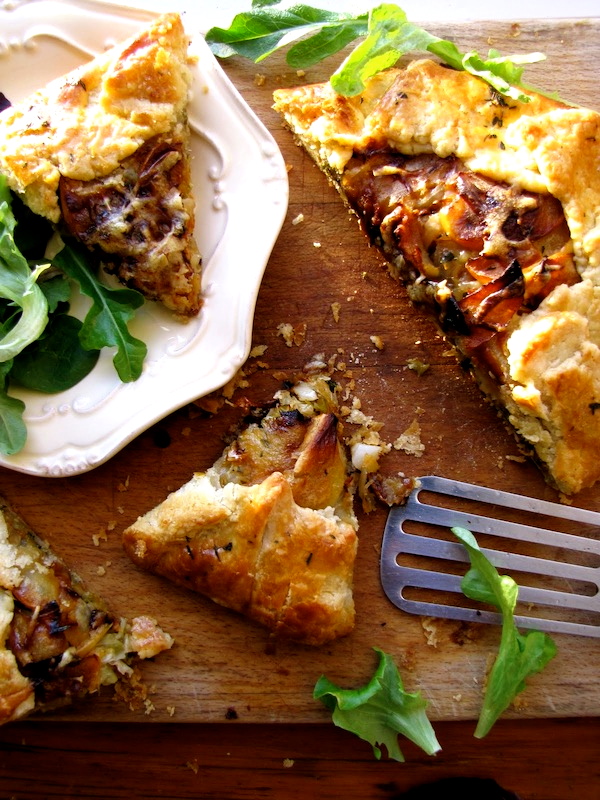
xTARTS Cabbage 2

Let cool for several minutes and cut into serving pieces. Salad or soup optional!
 

xTART DOUGH 4 xTARTS Ratatouille 2Savory Rustic Tart Dough Recipe

Easy, make-ahead, absolutely delicious. I swear, you no longer have to be afraid of pastry dough—of making it, rolling it out, shaping it—any of that. Yes, you’ll need a food processor (my favorite tool for making pizza dough, too), but oh, will you be happy with this ultra-buttery flaky crust.

The one thing you should keep in mind when making this dough is timing. It really works best to make the dough ahead. While it only takes 10 minutes to make, the dough needs to rest and chill in the fridge for at least an hour (and up to 2 days), and then, after taking it out of the fridge, it will need to warm back up to “cool” room temperature*, which will take about 45 to 55 minutes. So it’s a great idea to make the dough some morning or evening when you have just a few spare minutes. Pop it in the fridge and then when you’re ready to make a tart, you’ll only need to set aside the time it takes to warm it back up—and that’s the perfect amount of time to make your filling. It’s also really a joy to be able to reach in and grab that little wrapped present of dough already made up. (The dough will also keep in the freezer for 3 or 4 weeks.)

Makes enough dough for two 8- to 9-inch Rustic Tarts.

2 cups (9 ounces) unbleached all-purpose flour

1/2 teaspoon table salt

1/2 pound (16 Tbsp.) very cold unsalted butter, cut into ½-inch cubes

1/4 cup ice water

In the bowl of a food processor, combine the flour and salt. Pulse briefly to combine.

Add the cubes of butter. Pulse quickly about 20 times, or until the butter particles are quite small (like tiny pebbles). With the motor running, add the ice water in a steady stream. (This will take about 10 seconds). Stop the motor. Then pulse quickly six or eight times—just until the mixture begins to come off the sides of the bowl and clump together. The mixture will still be somewhat loose and crumbly—that’s okay. You will bring the dough together in the next step.

Turn the mixture out into a big mixing bowl and knead it briefly against the sides of the bowl to finish bringing it together into a dough. (Once you have incorporated all of the crumbs, knead once or twice to smooth out the dough just a bit. While you don’t want to over-handle the dough, you also don’t want to be afraid to handle it as much as you need to in order to bring all the bits of the dough together, as it will ultimately be easier to roll out.)

Divide the dough in half. (If you have a scale, you can weigh the dough pieces to make sure they’re of equal or close-to-equal weight. They should each weigh about 9 1/2 oz.)

Shape each piece into a disk about 1-inch thick (and about 4 inches across). (Again, don’t be afraid to handle the disk just enough to smooth out cracks and make a tidy disk.) Dust lightly with flour, wrap in plastic, and refrigerate for at least 1 hour or up to two days. (You will need to remove the dough from the fridge 45 minutes before rolling it.)

Alternatively, you can freeze the dough for up to a month. Defrost it in the fridge overnight before using.

*NOTE: Depending on how long your dough disk has been refrigerated, it will most likely be between 50 and 42 degrees when you take it out. Anything in this range is rock hard. You’re looking for the dough to warm up to about 60 degrees. Don’t worry, you don’t have to take its temperature—it will be ready when it is still slightly cool but somewhat pliable. Again, depending on the temperature the dough was chilled to, and the temperature of your kitchen, this will take anywhere from 40 to 60 minutes—leaving 45 or so minutes is a good bet, but also don’t worry if you get behind. There is a decent window of time, and on all but the hottest of days (or kitchens), it can usually sit for up to 30 minutes more before it gets too warm.


The Ultimate Destination for Winter Cabbage: A Savory Tart

xTARTS Cabbage 3 This week I am posting a primer on how to make one of my very favorite things in the whole world–a savory rustic tart (aka crostata or galette). Be sure to check out that post–not only for tips and photos on making the dough and assembling the tarts–but also for the easy food-processor dough recipe, too. Then come back over here for a complete recipe for filling and assembling the cabbage, apple and onion tart (recipe follows). If you’ve got a copy of my cookbook The Fresh & Green Table, you can also use the guidelines over on that post to help you make either the Roasted Ratatouille Tart with Goat Cheese & Mint; the Seven-Treasure Roasted Winter Veggie Tart; or the Roasted Butternut Squash, Cranberry, Shallot & Pecan Tart. There’s also a Rustic Roasted Tomato Tart recipe (my favorite yet) in my new book, Fresh from the Farm: A Year of Recipes and Stories.

I hope you’ll try one of these fun-to-make free-form tarts. The crust is flaky, buttery, and delicious, and the savory fillings are the perfect counterpart. Serve a slice with a salad or a bowl of soup–or have a piece for breakfast!
PicMonkey Collage


Savoy Cabbage, Apple, Onion & Gruyère Rustic Tart

IMG_5669_1

When I was developing my rustic tart recipes for The Fresh & Green Table, the filling for this tart was the surprise favorite with friends I never thought would be cabbage-eaters. So I highly recommend this as a great way to introduce people to the ethereal (and traditionally Alsatian) combination of sautéed cabbage and onions, nutty gruyere cheese, sweet-tart sautéed apples, perky fresh thyme, and buttery, flaky crust.

I also recommend closely following my sautéing directions for the filling—especially the cabbage. You’ll be cooking it in a relatively dry pan over relatively high heat, so that it will quickly brown (almost toast) rather than steam. This is the secret to bringing out the wonderfully complex nutty flavor in cabbage. Be sure to use the beautiful crinkly-leaved variety of cabbage known as Savoy for this. (You’ll find it in the grocery right next to green cabbage; it’s round, too, but with dark-green outer leaves.) The filling components cool quickly, so you can make them in about the time you’ll need to let your dough warm up after taking it out of the fridge.

Makes one 8- to 9-inch tart. Serves 4  

____________________________________________________

For the egg wash:

1 egg yolk

2 Tbsp. heavy cream


For the filling:

2 Tbsp. unsalted butter

1 Tbsp. extra virgin olive oil

1 medium onion (6 to 7 oz.), thinly sliced

6 oz. Savoy cabbage, thinly sliced (about 3 cups packed)

1/2 Golden Delicious apple, unpeeled, cored and thinly sliced (about 1/8-inch thick)

kosher salt


For the tart:

3/4 cup (about 3 oz.) grated Gruyère cheese

1 tsp. lightly chopped fresh thyme leaves

flour for dusting

1 disk Savory Rustic Tart Dough (recipe here), made ahead, chilled for at least one hour, and removed from refrigerator 45 to 55 minutes before assembling tart

________________________________________________________________________________

Preheat the oven to 400 degrees F. Set an oven rack in the center of the oven.

Make the egg wash

Whisk together the egg yolk and heavy cream in a small bowl, cover with plastic, and set aside.

Make the filling

In a heavy 10-inch nonstick skillet, heat 1 Tbsp. of the olive oil and 1 Tbs. of the butter over medium-low heat. Add the onion and a pinch of salt, cover, and cook, stirring occasionally, until the onion is limp and translucent, 5 minutes. Uncover, turn the heat to medium, and cook, stirring occasionally, until the onions are golden brown, about another 6 to 8 minutes. Transfer the onions to a plate to cool.

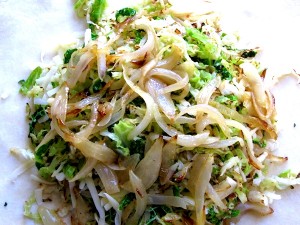
Add 1/2 Tbsp. butter to the pan, turn the heat to medium high, and add the cabbage and another big pinch of salt. Cook, tossing with tongs occasionally (only once or twice at first; let the cabbage have contact with the pan), until the cabbage is limp and nicely browned in spots all over (the thinnest pieces will be all brown but the green color will still be bright in the bigger pieces), about 5 minutes. Transfer the cabbage to a plate to cool.

Take the pan off the heat, and let it cool for a minute or two before returning to the heat. Reduce the heat to medium and add the remaining 1/2 Tbsp. butter. When the butter has melted, add the apple slices, season them with a pinch of salt, and spread them out in one layer (tongs help here). Let them cook undisturbed until very lightly brown on the bottom side, about 2 minutes. Flip and cook until the other side is very lightly browned, another 2 minutes. Transfer the apples to a plate to cool.

Make the tart

(For help with assembling the tart, check out the “How to Make A Savory Rustic Tart” photos here.)

Line a large heavy-duty rimmed sheet pan with a piece of parchment paper and position it next to a large cutting board or other surface you will use to roll out the dough. Arrange the cabbage, onions, apples, thyme and Gruyère around your work area.

Sprinkle your work surface lightly with flour and spread it around with your hand. Put the disk of dough in front of you and lightly tap it with the rolling pin to start softening and spreading it. Then gently roll it out, lifting and giving the disk a quarter-turn after each roll, until you have a roughly 12-inch circle. Try not to roll your pin over the edges of the dough, as that will tend to make the edges thinner than the center. (If your edges get very ragged or torn, it’s okay to patch them back together or trim them a bit.) If at any time the dough feels like it is sticking, lift it up and toss a bit of flour underneath it and/or over it.  Transfer the dough to the baking sheet by rolling it up or draping it over your rolling pin and unrolling or undraping it on the baking sheet.

Sprinkle a quarter of the Gruyère over the dough, leaving a two-inch border around the edge. Arrange half of the cabbage over the Gruyère. Arrange half of the onions over the cabbage. Sprinkle them with a little bit of fresh thyme, and top with another quarter of the Gruyère. Repeat with the remaining cabbage and onions, and sprinkle again with a little thyme and another quarter of the Gruyère. Arrange the apples, very slightly overlapping, in the center of the tart (they will not cover all the filling). Sprinkle with a tiny bit of thyme and the remaining Gruyère.

Pleat and fold the edges of the dough up and over the outer edge of the filling all the way around the tart.  (You will be folding in that 2-inch border.) You don’t have to go crazy making a lot of pleats—folding a piece of dough in about every 2 to 3 inches around the tart will get you the results you want (you’ll have about 8 or 9 folds).

Brush the edges of the dough with some of the egg wash (you won’t use it all), and sprinkle the edges of the tart with any remaining thyme.

Bake until nicely golden all over and crisp and brown on the bottom (check with spatula), about 38 to 40 minutes. Let cool for a few minutes and use the parchment paper to slide the tart on to a cutting board. Cool for another 5 to 10 minutes before slicing and serving.

White-Out Weary, Cruciferous Cravings, Limey Green Slaw

At this point I am willing to admit that living in a drafty, un-insulated old farmhouse loses a bit of its appeal in early February. While I have been busy telling my friends out in the rest of the world that winters on Martha’s Vineyard are relatively mild and that we don’t get much snow, it seems that the tables have turned. Most days now it’s more like Duluth, where Roy spent some time as a toddler—swaddled in a snowsuit, 24-7. Here, we are swaddled in a succession of all-weather boots, a smorgasbord of hats and eternally wet gloves, and two heavy, fleece-lined canvas farm jackets. With Roy wielding the axe to crack the ice on the chicken water every morning, we are pretty scary looking. And that’s just when we’re outside! Inside the cold (yes, cold) house, our triple-fleece, double-thermal lounging attire makes us look like rejects from a bad L.L. Bean catalogue photo shoot.

The snow is beautiful. And I longed for it in December. But now that I hear we are going to get a bazillion inches of it (not to mention scary wind) on Friday, I’m thinking, enough, already. This will require even more creative thinking on how to keep the chickens supplied with unfrozen water. And about how to keep our frequent farm stand customers supplied with eggs without making them shovel a path to the back door. Perhaps we could put the wild bunnies to work. Every morning after fresh snow, there’s a virtual Etch-a-Sketch of rabbit tracks all around the yard, from coop to garden to barn to woods to fields and back. Drives Farmer crazy.

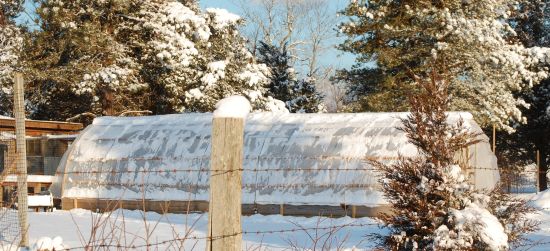
Also, we have to brush the snow off of the hoop house, lest it get too heavy, and, well, you can imagine what might happen. And that hoop house is my winter savior, so I’m very protective of it. I am so darned excited about what we’ve already got going in there, that I can barely stand it. My little baby bok choy and lettuce transplants are just cruising along. On sunny days, when the temperature inside the hoop house can get up to between 70 and 80, I can practically see the little green plants doing jumping jacks. On grey, drizzly, snowy, ice days, it takes most of the daylight hours just for the plants to unshrivel from the night’s cold. They’re under two layers of plastic, but still, cold is cold.

I’m longing to snatch some of those greens but I’ve held off to let them mature.  Fortunately there is still something green growing in the garden, under no cover at all. That would be miracle plant (and wonder food) kale, of course. A ridiculous plant, this kale. But a convenient one. Convenient because I’ve been messing around with kale salads lately. (I’ll let you know when I really and truly warm up to raw kale salads—I’m not quite there yet, but I’m working on it.) And also because this wicked February cold seems to be giving me strange cruciferous cravings. I only to want to eat Brussels sprouts or cabbage or kale every night. And even for lunch.

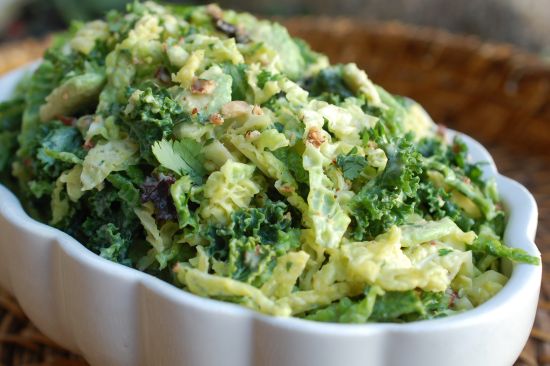
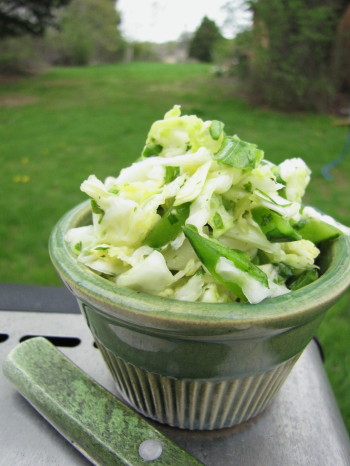
In fact, today I knew exactly what I wanted to do with a beautiful head of Savoy cabbage I saw at the grocery: Make one of my crunchy, limey slaws—and add a few of those sweet baby kale leaves from the garden to it. I happened to have a ripe avocado on deck, too, so a new variation on my original recipe was born. Green, green, green. Really green. Strangely refreshing on a cold day. I think it’s the antioxidants. Or maybe just the hopeful color. Or maybe it just tastes good. Whatever it was, I think I’d better go eat some more of it (and hope that it has magical powers) now that I’ve heard the latest forecast: Blizzard. Not just snow, but lots of it and lots of wind. Just what we love to hear on a farm. Stay tuned, and make some limey savoy and avocado slaw!

Savoy Slaw with Lime, Cilantro, Avocado & Toasted Pecans

Some groceries are now carrying baby kale leaves—snatch them up if you see them. If not, you can pluck tiny leaves from bigger bunches (even right off the stems of bigger curly kale) or very finely chop bigger leaves to add to this salady slaw. Or leave the kale out all together—or add more. Your choice!

_________________________________________

8 ounces very thinly sliced cored Savoy cabbage or regular green cabbage

1 ounce (about 1 cup) baby kale leaves or finely chopped or sliced large kale leaves (deribbed)

3 tablespoons plus 1 teaspoon fresh lime juice

1 tablespoon maple syrup, more to taste

1 teaspoon fresh lime zest

Kosher salt

1 firm-ripe avocado (2 if you like)

3 to 4 tablespoons roughly chopped fresh cilantro

3 to 4 tablespoons plain nonfat Greek yogurt

3 to 4 tablespoons finely chopped toasted pecans

_____________________________________

In a mixing bowl, toss together the cabbage, the kale leaves, the 3 tablespoons lime juice, the 1 tablespoon maple syrup, the lime zest and 3/4 teaspoon kosher salt. Let sit, tossing well with tongs every 5 to 10 minutes, for about 30 minutes.

Peel and slice the avocado. Then cut the slices into smaller pieces. In a small bowl, toss the avocado gently with the remaining teaspoon of lime juice and a pinch of salt.

To the cabbage mixture, add 3 tablespoons of the cilantro, 3 tablespoons of the yogurt, and 3 tablespoons of the pecans. Toss well and taste. Add a teaspoon or two more of maple syrup to balance the tang a bit, if you like. Add up to a tablespoon more yogurt for a slightly creamier slaw, and add a pinch more salt, if needed. Mix well and transfer to a serving bowl. Garnish with more cilantro and pecans.


Stormy Minestrone, A Recipe for Comfort

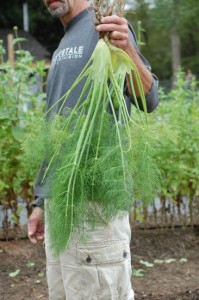
All I can think about today is soup. This may be because I have too many vegetables crowding up the fridge. After another round of recipe development and a pre-hurricane sweep of the garden, I am left with the clear makings of minestrone—everything from a five-pound bag of carrots to three awkwardly space-hogging baby fennel bulbs. I have a big basket of winter squash I keep stumbling over in the pantry, and I have a little handful of green beans I just plucked off the dying vines this morning. I even have a few cranberry beans that are finally ready to harvest, from plants that miraculously show very little storm damage.

Our storm damage, in fact, was minimal. Had circumstances been different—if Sandy hadn’t taken a left turn when she did—we would likely be facing a very different winter here on the farm. Instead the hoop house is still standing, the animals are all fine, and in fact, we have another flock of laying hens due to arrive here this week (more on that soon). So thankfully, Roy is building—rather than rebuilding. Now, of course, I hear that a big Nor ‘Easter is coming up the coast this week. So maybe we are not out of the woods yet. But still. I can’t stop thinking about Staten Island and the Rockaways and Seaside Heights. All those folks still without power and nights getting really chilly. And lots of friends on the coast of Connecticut with serious flood damage. We did have plenty of coastal erosion up here on the Island and flooding in the lowest harbor areas in the towns, but most homes were safe and dry (and warm).

Everyone knows it could have been different, though. One Island friend posted an idea on Facebook a couple days ago for a coats-and-warm-blankets drive, and seemingly overnight, boxes outside of Island businesses filled up with donations, and volunteers have come forward to drive the items down to a particularly hard-hit neighborhood in Queens.

I will be here, making hot and comforting soup, sort of a crazy response to feeling for other people who are cold. It’s like I have a sympathetic and not entirely imaginary chill that must be chased away. We human beings have strange responses to things—I know I can’t share my soup with those folks, but I’m hoping someone else will share their hot food with someone cold and hungry, and in the meantime I’m sending comfort-soup-karma out as best I can.

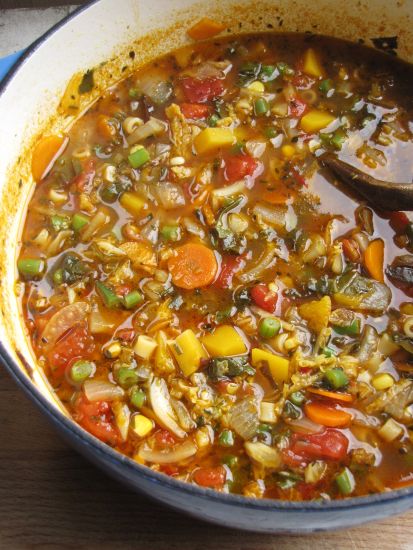
Here’s my Fall Farmers’ Market Minestrone recipe from The Fresh & Green Table. Deeply flavored without any meat at all, it’s a good starting point for comfort soup, but feel free to vary the veggies as you please.

Fall Farmers’ Market Minestrone  

Recipe copyright Susie Middleton, from The Fresh & Green Table (Chronicle Books, 2012).

The secrets to this meatless minestrone include lots of aromatic veggies and a Parmigiano rind. I usually finish the soup with grated Parmigiano and/or a bit of gremolata (a mix of freshly chopped parsley, lemon zest, and garlic). But if you don’t want to bother with the gremolata , it’s perfectly delicious without it.

______________________________

1/4 cup extra-virgin olive oil

2 cups medium-diced onions (about 1 large or 2 medium)

2 cups thinly sliced Savoy cabbage (about 1/4 small head)

1 cup thinly sliced fennel bulb (quartered and cored first, about 1/2 small bulb)

1 cup thinly sliced carrots (about 2 carrots)

Kosher salt

1 cup peeled, medium-diced butternut squash (about 4 to 5 oz.)

1 cup large-diced stemmed Swiss chard leaves (thinly slice stems separately and include them, too)

1 Tbsp. minced fresh garlic (plus 1/2 tsp. if making gremolata)

1 Tbsp. chopped fresh thyme

2 tsp. chopped fresh rosemary

1 tsp. ground coriander

1 Tbsp. tomato paste

1 14 1/2-oz. can diced tomatoes (I like Muir Glen), well drained

1 2-inch Parmigiano-Reggiano rind

½ cup ditalini pasta or other very small pasta

1 cup thinly sliced green beans (about 4 oz.)

½ to 1 cup fresh corn kernels (optional)

1 to 2 tsp. lemon juice

½ tsp. lemon zest (if making gremolata)

2 Tbs. chopped fresh parsley

1/3 cup coarsely grated Parmigiano Regianno

______________________________

a 5- to 6-quart Dutch oven or other large soup pot, heat the olive oil over medium heat. Add the onion, fennel, cabbage, carrots and 1 tsp. salt. Cover and cook, stirring occasionally, until the onions are softened and mostly translucent and the cabbage is limp, about 6 to 8 minutes. Uncover and continue cooking, stirring occasionally, until much of the cabbage is browning and the bottom of the pan is browning as well, about another 8 to 9 minutes.

Add the 1 Tbsp. garlic, the thyme, the rosemary, the coriander, and the tomato paste. Stir until fragrant, about 30 seconds. Add the butternut squash, the chard, the diced tomatoes, and 1 ½ tsp. salt and stir well until incorporated. Add the Parmigiano rind and 8 cups water.

Bring to a boil, reduce to a simmer, and cook, stirring occasionally, for 10 minutes. Add the ditalini and cook another 8 minutes. Add the green beans and the fresh corn (if using) and cook for 4 to 5 more minutes. Remove the pot from the heat, remove the Parmigiano rind, and stir in 1 tsp. of the lemon juice. Let cool for a few minutes; taste and adjust for salt, pepper, and lemon juice.

For the gremolata (optional), combine the 1 tsp. garlic, the lemon zest, and the fresh parsley in a small bowl.

Garnish each portion of hot soup with some of the gremolata or chopped parsely and some of the Parmigiano.

Yields 8 cups, Serves 6


Sweet Pea Dreams and a Quick Slaw with Sugar Snaps

Peas, alas, are not a spring vegetable, despite what legions of food writers would have you believe. It is wonderful to think of things like spring pea risotto and minted pea soup for Mother’s Day, but unless you are lucky enough to live in a really temperate climate, you’ll be waiting for fresh peas until late June with the rest of us.

I feel bad being a Scrooge about this. Actually a super-Scrooge, as, these days, I can’t really even get behind those so-called fresh peas (usually already shelled) that arrive in the grocery stores before they do in my garden. I’d rather eat frozen peas. (And I do.) The reason is that shell peas–or English peas–lose that just-picked sweetness rather quickly and wind up tasting bland and starchy when they travel many miles to get to you.

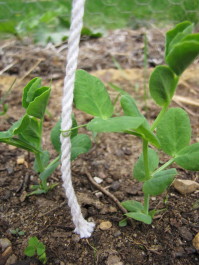
So right now I have to content myself with staring at the squat little pea seedlings in my garden, imagining what they’ll bring me. I’m very proud of them, actually. Yesterday I noticed that they’ve started unfurling their little tendrils and have obligingly begun to grab on to the curtain of strings I hung for them. Such good peas.

The other way I’m getting my pea fix right now is with sugar snap peas. I’m seeing a lot of nice ones at the grocery store. Yes, these come from far away, too, but at least they hold on to their flavor—and texture—better than shell peas. Sugar snaps are probably the number one quickest veggie on the planet to cook—or just eat. Because, of course, you can munch on them raw (like Cocoa Bunny, in photos below), toss them in a hot pan for a super-quick sauté, or slice them to use in salads and slaws (like the one below).

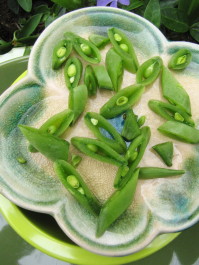
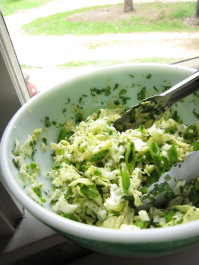
I get a kick out of slicing sugar snaps on the diagonal, exposing the cute little cross-section of peas inside. (I know, I’m easily amused). But these pretty little slivers are useful, too—they add sweetness and crunch, but not too much bulk, to a fresh slaw. Since I happened to have some Savoy cabbage, a few limes, and a bunch of cilantro in the fridge today, I knew I could make my favorite slaw and embellish it with sugar snaps. This recipe (I did a version of it in Fast, Fresh & Green) honestly takes no more than 10 minutes to make, and then reaches its perfect state of crunchy/wilty balance after another 10 minutes or so (though it can hold a bit longer than that). It’s versatile, too. Today I wanted a slightly creamy feel (something to do with the grey skies), so I stirred in a dollop of Mermaid Farm yogurt at the end.

I ate a whole bowlful of this slaw standing up at the kitchen counter, but if you were moved to make some this weekend, you might want to serve it with grilled butterflied leg of lamb, grilled chicken, or even grilled veggie or fish tacos.

Quick Savoy Slaw with Sugar Snaps, Lime & Cilantro

For a printable recipe, click here.

The amounts of lime juice, sugar, and cilantro are flexible here—taste after a few minutes and adjust seasonings if you like. I sometimes add sliced scallions or chives here, too. Savoy cabbage is the crinkly green one.

_______________________________________

8 ounces very thinly sliced cored Savoy Cabbage (about 3 1/2 cups)

4 to 5 ounces sugar snap peas, trimmed and sliced on the diagonal (about 1 1/3 cups)

3 tablespoons chopped fresh cilantro

3 tablespoons freshly squeezed lime juice

2 to 3 teaspoons sugar

1/2 teaspoon kosher salt

1 to 2 tablespoons full-fat plain yogurt (optional)

________________________________________

Combine the cabbage, snap peas, cilantro, lime juice, sugar, and salt in a medium bowl. Toss thoroughly with tongs or two spoons. Let sit for ten minutes, tossing occasionally. Taste and adjust seasonings if you like. Let sit another ten minutes for a softer slaw. Fold in the yogurt if desired.

Serves 4

________________________________________

Cocoa wasn’t so sure about the sugar snap pea…but curiosity prevailed

St. Patty’s Day & Sixburnersue: A Gratin Recipe to Celebrate

St. Patrick’s Day, 2011, is sixburnersue.com’s unofficial one-year anniversary. At least that’s what I’ve decided. Actually, let’s make it official. And next year, we’ll have a proper celebration with two green cupcakes and two green candles. This year, we will have to make do with a yummy cabbage and potato gratin recipe.

I’m not sure of the exact day sixburnersue.com went live last year, but I know by St. Patty’s Day I was blogging in real time. And strangely enough, the blog I wrote on sautéed cabbage for the green holiday turns out to be one of the most visited pages on this site. (Along with a post on ten things to do with celery root! Go figure. Posts on more glamorous veggies like fingerling potatoes and asparagus get a lot of hits, too, but I think there may be a shortage of good cooking info out there on less sexy veg.)

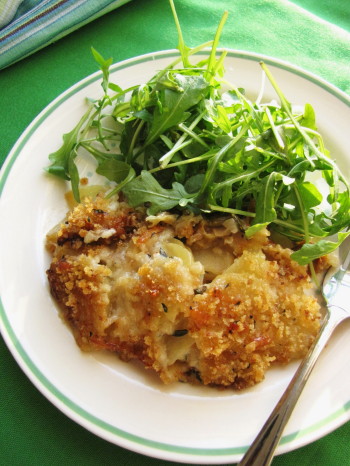
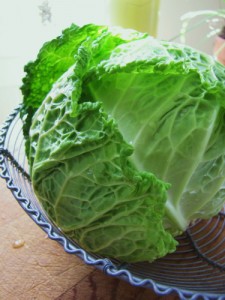
My favorite cabbage is the crinkly Savoy (beautiful dark green on the outside, pale on the inside), and yes, I love to sauté it to bring out its sweeter, nuttier side (see last year’s blog.) Then I use it as a rustic tart filling, a pizza topping, a bed for meat, a stir-in for mashed potatoes, or as a bed for a savory gratin, like the potato and Gruyére one here. Of course my main motive for posting this recipe today is to give you an alternative to boiled cabbage (not my favorite). Actually, I’d be happy if you skipped the corned beef, too, and went with roast leg of lamb. But, yeah, you didn’t ask for my opinion on that, did you?

Whatever you eat on Thursday, may the (good) luck of the Irish be with you. (We have more than a little of it here in our household. Just ask the man with the shamrock tattoo.) And if you’re the praying kind, ask St. Patrick for a little luck to rub off on our friends in Japan.

St. Patrick’s Day Potato, Cabbage, Onion, Apple & Gruyère Gratin

This delicious gratin is a pretty rich side dish, so a little goes a long way. Serve it with roast lamb, corned beef, or a big warm salad. It will take you about an hour to get it in the oven, and about an hour and a bit to cook, so plan your menu accordingly. When prepping, don’t be tempted to under-brown the cabbage or the onions. To slice the potatoes thinly, cut them in half first, lay them cut side down, and slice across with a thin-bladed knife such as a Santoku. (You don’t need to use a mandolin).  

__________________________________________

1 tablespoon unsalted butter, plus more for rubbing the baking dish

1 1/2 cups coarse fresh breadcrumbs

3 ounces Gruyère cheese, grated (1 1/4 cups packed)

3 tablespoons olive oil

1 tablespoon plus 1 teaspoon coarsely chopped fresh thyme leaves

kosher salt

2 small yellow onions (9 to 10 ounces total), thinly sliced (about 2 cups)

2 teaspoons minced fresh garlic

2 cups thinly sliced Savoy cabbage (about 7 ounces)

1 Jonagold, Pink Lady, or Golden Delicious apple, peeled, cored, quartered and thinly sliced crosswise

1 lb. Yukon Gold potatoes, peeled, halved and very thinly sliced

3/4 cup heavy cream

3/4 cup low-sodium chicken broth

_________________________________________

Heat the oven to 350 degrees F. Rub a 2-quart shallow gratin dish (or a 11 x 7 Pyrex baker) with a little butter.

In a small bowl, combine the breadcrumbs, 2 tablespoons of the grated Gruyère, 1 tablespoon of the olive oil, 1 teaspoon of the chopped thyme and a good pinch of salt. Set aside.

In a 10-inch heavy nonstick skillet, melt 1/2 Tbsp. of the butter with 1 Tbsp. of the olive oil over medium-low heat. Add the onions and 1/4 tsp. of salt, cover, and cook, stirring occasionally, until softened and translucent, 6 to 7 minutes. Uncover, raise the heat to medium, and continue to cook, stirring frequently, until the onions are lightly browned, 6 to 7 minutes more. Add 1 teaspoon of the minced garlic, stir for a few seconds, and remove the pan from the heat.  Transfer the onion-garlic mixture to the baking dish and spread it evenly in one layer. Sprinkle 1/2 teaspoon thyme leaves over the onions.

Return the skillet to medium-high heat and add the remaining 1/2 tablespoon of butter and 1 tablespoon olive oil. When the butter has melted, add the cabbage and a pinch of salt. Stir and let sit for a minute for browning to begin. Then cook, tossing frequently with tongs, until cabbage is limp and browned, 4 to 5 minutes. Add the remaining 1 tsp. garlic, stir well, and remove the pan from the heat. Transfer the cabbage mixture to the baking dish and spread in one layer. Sprinkle 1/2 teaspoon thyme leaves over the onions.

In a mixing bowl, combine the sliced potatoes, the sliced apples, the remaining Gruyère, the remaining thyme, the cream, the chicken broth, and 3/4 teaspoon salt. Gently mix with a silicone spatula and transfer to the baking dish, spreading the mixture evenly over the cabbage and onions. (Sometimes it’s easier to transfer the solids first. Lift the potatoes and apples out of the liquids with your hands and spread them in the dish; then gently pour the liquids over all.) Make sure everything is evenly distributed and use your hands to press down gently on the potatoes and apples to let the liquids come up around them.

Cover the top of the gratin with the breadcrumb mixture. Bake until the potatoes are tender (check both the middle and sides of the dish with a paring knife) and the top is brown (there will be a brown line around the edge where the liquids have reduced), about 65 minutes. Let cool for several minutes before serving.

Serves 6 as a side dish

Quick Sautéed Cabbage Recipe for St. Patrick’s Day

If you’re getting around to planning your St. Patrick’s menu a little late like me, here’s something to help—a quick and easy sautéed cabbage recipe. I’ve never been one for the traditional boiled cabbage that often goes along with the corned beef on this holiday. In fact, I didn’t learn to love cabbage until I cooked it hot-and-fast–in a sauté pan, in a stir-fry pan, on a griddle—anything where I could bring out its sweeter side with a little browning.

Sautéed cabbage is not only (much) tastier than boiled cabbage, but it’s less fussy to cook. The basic recipe really doesn’t need much embellishment either, since browning accentuates the nutty flavor of cabbage. But after you’ve tried this and made it part of your repertoire, you can perk it up by adding sautéed apples to it, by tossing in a bit of ginger or garlic, or by playing around with the deglazing broth by sub-ing in white wine, lemon, or apple cider for the rice vinegar and soy sauce.

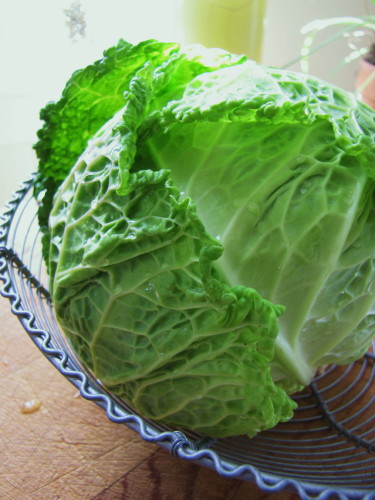
Regular old green cabbage would be just fine here, but I’m crazy about its crinkly-leaved cousin, Savoy cabbage (right). Savoy wilts in a hot pan a bit quicker than regular cabbage, and has a slightly richer flavor and lighter texture.

To make Colcannon: To make a delicious version of this Irish mashed potato and cabbage dish, make mashed potatoes using Yukon gold potatoes, cream, and butter (and plenty of salt). Hand mash for a coarse texture. Fold in some or all of the cooled Quick-Sautéed Savoy Cabbage (lightly chopped first if you like). You can also substitute leeks for the onions in the sautéed cabbage recipe, but you will need a bit more cooking fat and time to soften them before adding the cabbage.

Quick-Sautéed Savoy Cabbage

___________________________________

2 tablespoons chicken broth
½ teaspoon rice wine vinegar
¼ teaspoon low-sodium soy sauce
¼ teaspoon sugar
2 tablespoons unsalted butter
1 tablespoon extra-virgin olive oil
1 medium onion (4 to 5 ounces), thinly sliced
kosher salt for seasoning
½ head Savoy cabbage, cored and very thinly sliced (about 8 to 9 ounces)
2 teaspoons chopped fresh parsley (optional)

___________________________________

Combine the chicken broth, rice wine vinegar, soy sauce, and sugar in a small bowl. In a 10-inch straight-sided sauté pan over medium-high heat, melt 1 tablespoon of the butter with 1 tablespoon of the olive oil. When the butter is foamy, add the onion and a pinch of salt and sauté, stirring, until the onions are somewhat softened and just beginning to brown, 2 to 3 minutes. Add all of the cabbage and ½ teaspoon salt and stir well. Cook, stirring only occasionally, until the cabbage is limp and browned in spots (the bottom of the pan will be very brown and the onions will be brown), about 5 to 6 minutes.

Remove the pan from the heat and immediately stir in the chicken broth mixture and the remaining 1 tablespoon butter. Stir until the butter has melted, scraping up some of the browned bits on the bottom of the pan. Let the cabbage sit in the pan for two minutes and stir again. (The cabbage will release a little more moisture and you’ll be able to incorporate a bit more of the browned bits.) Add the parsley, stir again, and transfer to a serving dish. Serve right away.

Serves 3-4