Category Archives: The Recipes

Best Roasted Brussels Sprouts + 10 Fave Thanksgiving Sides

This time last year I was preparing to be on television the day before Thanksgiving. (The Martha Stewart Show—I cooked quick veggie sides from Fast, Fresh & Green.) A few years back I did a satellite media tour around this time to promote Fine Cooking’s book How To Cook A Turkey. The year before that, I did a radio blitz for most of November and December to promote all the holiday tips and recipes on Fine Cooking’s website (which, if you haven’t looked lately, is by far the best place to go to plan your Thanksgiving menu. Check out the cool interactive Create Your Own Menu Maker. But I’m not biased or anything.) Well, you can imagine how relieved I am not to be PR-ing this holiday season. I did in fact just record some radio spots for Fine Cooking that will soon air on WGBH (I’ll keep you posted); but they were a whole lot of fun to do—and they didn’t require a new wardrobe or an anxiety attack.

So we are free and clear to have a simple and quiet Thanksgiving at the farmette (yippee!). I still have squash, rutabagas, onions, kale, arugula, herbs, and salad greens from the garden, plus green beans, corn, and roasted tomatoes that I froze, so we will be able to make most of the meal über-local. I will wander across the street to the West Tisbury Winter Farmers’ Market on Saturday to see if I can get the rest of what I need.

Regardless of where you plan to get your goodies, most of you, I know, have this one thing on your mind: What kinds of dishes can I cook that are easy and delicious, that everyone likes, and that will serve a decent-sized crowd? To that end, I’ve gathered a list of ten of my own favorite side dish recipes that serve at least six people (below). Some of these recipes reside on sixburnersue.com, but several are ones I developed a few years back for an “updated classics” story on Thanksgiving sides for (you guessed it) Fine Cooking magazine. And I also threw in a “create your own” creamy veggie soup from another FC article I did years ago, in case yours is the kind of family that likes to start the meal with an elegant soup (or needs options for vegetarians).

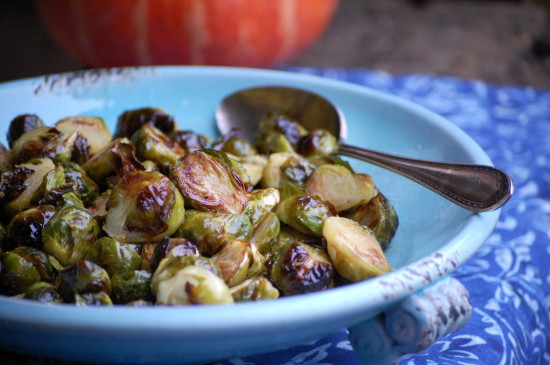
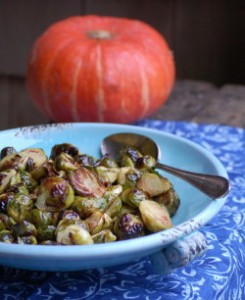
But for the tenth recipe on the list, I couldn’t resist posting my Roasted Brussels Sprouts with Orange Butter Sauce. This is a recipe I originally created for Fast, Fresh & Green but that I tweaked last year for the TV gig so that it would feed more people. I just remade it this morning and am happy to confirm that it is not only delicious, but possibly one of the fastest and easiest Thanksgiving side dishes ever to make.

Here’s my list:

1. Green Beans with Crispy Pancetta, Mushrooms, and Shallots

2. Roasted Turnips with Maple and Cardamom

3. Pomegranate-Balsamic-Glazed Carrots

4. Bourbon Sweet Potato and Apple Casserole with a Pecan Crust

5. Creamy Baked Leeks with Garlic, Thyme, and Parmigiano

6. Mashed Yukon Gold Potatoes with Roasted Garlic

7. Thanksgiving Gratin of Butternut Squash, Corn & Leeks

8. Potato Galette with Fresh Rosemary & Two Cheeses

9. Creamy Vegetable Soup (Pick Your Own Veggie!)

10. Roasted Brussels Sprouts with Orange Butter Sauce (see below)

Roasted Brussels Sprouts with Orange Butter Sauce

I’ve roasted Brussels sprouts a few different ways, but you can’t beat this method for volume (large rimmed sheet pans hold a lot), quickness (16 to 18 minutes in a 475° oven), and great results (by halving the sprouts and roasting them cut-side down, the tops and bottoms brown but the interiors steam). The flavorful butter sauce gives the nutty roasted sprouts just the right touch of tangy-sweet richness to make this completely holiday-worthy.

_________________________________________

2 lb. small Brussels sprouts, trimmed and halved lengthwise

1/4 cup extra-virgin olive oil

1 tsp. kosher salt

1 Tbsp. plus 1 tsp. balsamic vinegar

2 Tbsp. pure maple syrup

2 Tbsp. fresh orange juice

1 tsp. finely grated orange zest or lemon zest

4 Tbsp. cold unsalted butter, cut into 16 pieces and kept chilled

________________________________________________

Preheat the oven to 475˚F. Line two large heavy-duty rimmed sheet pans with parchment paper. In a mixing bowl, toss the Brussels sprouts with the 1/4 cup olive oil and 1 tsp. of the salt. Divide the sprouts between the two sheet pans and arrange them, cut-side down. Roast until brown and tender, 16 to 18 minutes. (The tops will be dark brown and crispy and the sprouts should feel tender when pierced with a paring knife.) Transfer the sprouts to a mixing bowl.

Combine the balsamic vinegar, maple syrup, orange juice, and orange zest in a small saucepan. Heat the mixture over medium heat just until it’s hot (you will see a bit of steam), but not simmering. Remove the pan from the heat and add the cold butter, several pieces at a time, whisking constantly until the mixture is smooth and creamy. (Don’t reheat the mixture or the butter will break and the sauce won’t be creamy.) Pour the sauce over the sprouts and stir thoroughly but gently until most of the sauce has been absorbed. Transfer the sprouts and any remaining sauce to a serving platter and serve right away.

Serves  8

Farm Critters, Chicken Butts, and A Thanksgiving Butternut Squash Gratin

When I first got to the Vineyard, I was totally charmed by farm animals. Back in my suburban  I-95 world, I hadn’t run into a lot of pigs and goats, much less a baby lamb or a pair of hulking oxen. I traipsed (okay, maybe trespassed) all over the Island, taking pictures of anything with four legs or feathers. I got lucky I guess, or maybe I was entranced, because I took a lot of nice photos of critters (some of my favorites are above). Sometimes the animals even looked at the camera.

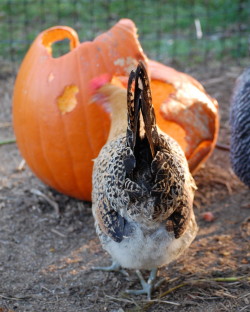
Lately it seems my luck (or probably my patience) has run out. Granted I don’t have a lot of time to wander around stalking farm animals. But when I do get close to a critter with the camera, I get mooned. Yeah, butts. Especially chicken butts. This week, I wanted to blog about our chickens…and their beautiful eggs…and about how wonderfully efficient they are at processing leftover food (and other farm compostables, like pumpkins). Yes, I know I’ve talked about this before, but after ranting about waste and expense last week, I had to share the satisfaction I got out of watching the hens efficiently turn our jack-o-lantern into fertilizer.

But the ladies would not cooperate for a good picture. When I got in the pen with them (to avoid shooting through the deer fencing), of course they all rushed away from the pumpkin and towards me. I crouched down to frame the shot and Perky jumped on my leg for a visit, while Martha and Opti started pecking at my boots. Very distracting. In the end, the best shots I got were of tail feathers. Granted those chicken butts are cute (and soft, too). But they’re still butts.

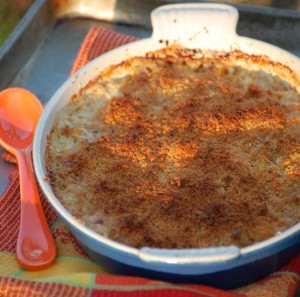
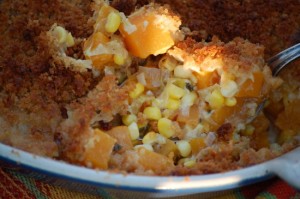
Oh, well. I finally realized that Thanksgiving is a breath away, and that it might be nicer if I paid attention to our country’s biggest cooking holiday for this blog instead of some chicken whim of mine. So I marched into the kitchen and made a new version of one of my favorite gratins from Fast, Fresh & Green—this one with a big enough yield to warrant a place on the Thanksgiving table. It turned out so well that Roy and I both snacked our way through the afternoon on it.  It features my favorite fall harvest combo—butternut squash, leeks, and corn—and, oh yes, a bit of cream and Parmigiano, plus thyme and just a hint of lemon.

Next week, I’ll offer up a green veg recipe for the Thanksgiving table—if I don’t get distracted by a baby goat or a stray dog or something.

Thanksgiving Gratin of Butternut Squash, Corn & Leeks

Since Thanksgiving is a crazy cooking day, here are some make-ahead tips for this recipe: Dice, chop, and otherwise prep all the ingredients ahead. (And buy already-peeled butternut.) Then go ahead and sauté your leeks, garlic, and corn, too. (If you’re working hours ahead, refrigerate.) You can grease the gratin dish ahead as well. Then all you’ll have to do is combine and assemble before cooking.

_________________________

2 tablespoons plus 1 teaspoon unsalted butter

1 1/2 cups fresh breadcrumbs

2 tablespoons extra-virgin olive oil

kosher salt

2 cups thinly sliced leeks (white and light green part only, about 2 large), rinsed well but not dried

2 teaspoons minced fresh garlic

1 1/4 cups corn kernels (from about 3 ears)

1/2 cup plus 2 tablespoons heavy cream

1/2 cup plus 2 tablespoons low-sodium chicken broth

½ teaspoon freshly grated lemon zest

freshly ground black pepper

2 teaspoon finely chopped fresh thyme leaves

1 1/4 pounds peeled, seeded butternut squash, cut into ½-inch dice (about 4 cups)

1/2 cup finely grated Parmigiano-Reggiano

__________________________________

Heat the oven to 400 degrees F. Rub a 2-quart shallow gratin dish with 1 teaspoon of the butter.

In a small bowl, combine the breadcrumbs, 1 tablespoon of the olive oil, 1/4 teaspoon salt and mix well.

In a medium (10-inch) heavy nonstick skillet, melt the remaining 2 tablespoons of the butter with the remaining tablespoon of olive oil over medium-low heat. Add the leeks (with any water still clinging to them) and 1/4 teaspoon salt; cover, and cook, stirring occasionally, until softened and translucent, about 5 minutes. Uncover and continue to cook, stirring frequently, until the leeks are shrunken and lightly browned in places, 10 to 12 minutes more. (The pan will dry out.) Add the minced garlic and stir until softened and fragrant, about 30 seconds.

Add the corn kernels, 1/4 teaspoon salt, and a few grinds of fresh pepper. Cook, stirring, until the corn has lost its raw look, is glistening, and is slightly shrunken, about two minutes. Take the pan off the heat and let the mixture cool for five to ten minutes.

Combine the heavy cream and the chicken broth in a liquid measure. Add the lemon zest, a scant 1/2 teaspoon salt, and a few grinds of pepper. Stir to mix well.

Add the corn-leek mixture and the herbs to the diced squash and toss well to combine. Transfer the mixture to the gratin dish and arrange as evenly as possible. Sprinkle the Parmigiano on the vegetables. Stir the cream mixture one more time and pour and drizzle it over everything. Be sure to scrape out any seasonings left in the liquid measure. Sprinkle the breadcrumbs evenly over all.

Bake until the crumb topping is deep golden and the squash is tender when pierced with a fork, 42 to 45 minutes. The juices should have bubbled below the surface of the vegetables, leaving browned bits in a line around the edge of the pan.

Serves 6 to 8 as a Thanksgiving side dish
It Ain’t Over ‘Til It’s Over

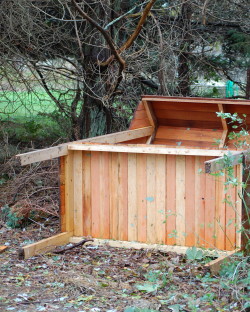
The farm stand fell over on Saturday. Tipped by a terrific gust from the nor’easter, it fell backwards, impaling itself on a small rock in the process. Just a little damage to the roof, no big deal. But it’s funny. Seems the farm stand somehow knew the season was over. Only an hour earlier, as the rain began to fall harder and colder, a customer in a small white station wagon pulled up, bought everything left on the stand (the last green beans, two bags of arugula, a dozen eggs, an onion and an eggplant) and neatly pushed the baskets to the back of the stand to keep them dry. (Thank you, whoever you were.) Seeing the car pull away, I dashed out and carried the cooler and baskets in. We were all in the living room playing Monopoly when we heard the bang.

I’ve been reluctant to say goodbye to the growing season, so maybe I needed a little encouragement from the universe. A day after the nor’easter, I got some more: The first heavy frost fell, turning the 5-foot tall zinnia plants, the bushy eggplants, the spindles of leafy pole beans—just about everything still green in the garden—into a ghastly scene from Beetlejuice. Frightful skeletons of their former selves, the plants said goodbye in a single night.

I should be so courageous, I thought, rummaging around the dead foliage, harvesting random peppers and eggplants that clung hopefully to the blackened vines. I was thinking about the daunting project that awaited me inside—a different kind of rummaging, this time through old memories.

We’d just hauled a load of cardboard boxes over from my storage unit—my goal to empty the thing out and quit paying the ridiculous $200 a month to store my tchotchkes. But our little farm house, charming as it is, can only hold so much. Built in 1895, it has no closets. We’ve turned an upstairs bedroom into a storage closet, but between clothes, linens, coolers, and extra pots and pans, there ain’t much more it can take. Time to lighten my load.

In the end, it was much easier than I thought to part with many of the old photographs and school reports and scrapbooks and diaries. (Being a 13-year old girl was hard enough—no need to relive it. All these many years later, and I still winced. I had to laugh, though—judging from the reams of notebooks, apparently I was highly verbal from a very young age!) The best memories drifted out of an old trunk my mother had packed up long ago with a few of my most precious toys and dolls and little-girl clothes. Raggedy Ann and Peter Rabbit—such good friends. I couldn’t let them go.

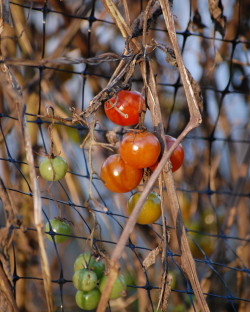
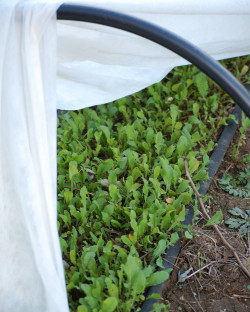
Why, I wondered, did letting go of the garden seem just as hard? (Or letting go of most of it—those darn rutabagas are alive and well, as are the kale plants—for now. And the lettuce and arugula we’ve protected under row cover and cold frame are thriving.) I think it’s only partly about how much I enjoy the gardening. The other part is that I seem to be extremely sensitive to two big issues these days: waste and expense. Why should we blithely ignore good food in our back yard, when we ourselves are on a tight budget, and the world at large—those who have enough to eat—is, too. Because despite the frost and the storm, every time I go out to the garden, I discover something else that’s still alive, still edible. Even the darn cherry tomatoes (hundreds of them) are still ripening. Inside, every surface in my office (while Roy puts new windows into the mudroom) is covered with trays of green tomatoes—rapidly turning red—that we picked during the last couple of weeks.

So I am hell-bent on still making our meals from the garden. (Not the whole meal, just some of it.) I made a delicious kale soup the other night, which I sold to Roy by including a good amount of andouille sausage and potatoes, along with some of those salvaged peppers, a late carrot, our stored onions, and plenty of garlic and spices. Sort of a Stone Soup with kale. I made a green tomato, gruyere, and leek gratin yesterday (good, but not the perfect match I was looking for with the tartness of green tomatoes).

This morning I messed around with fried green tomatoes. And, actually, fried red (and reddish-green) tomatoes. And realized again how powerful childhood memories are. Some of them will be forever with us, no matter how many trunks we lock up or boxes we throw away. Growing up, summers in Delaware, we ate fried red tomatoes (not green tomatoes) on a regular basis. (A regional thing, I guess.) Seasoned with lots of salt and pepper and dredged simply in flour, the big  cross-sections of beefsteaks cooked in butter or a little bacon fat took on a deep, umami-ish, almost stew-y flavor (with some sweetness, yes), and while I don’t remember absolutely loving them then, they were one of my Dad’s favorites. And tasting them this morning was a hugely familiar sensation, a reminder of my grandmother Honey and days at the beach. And I loved them. They’d be perfect with sausage and eggs for breakfast or sautéed flounder and garlicky spinach for dinner.

Turns out I don’t really love fried green tomatoes, though once I stopped being lazy (they require a commitment of several bowls—one for flour, one for egg, one for cornmeal and flour), I realized they are best with a crunchy coating, achieved by the three-part dredging. The cornmeal in the final coating is essential not only for texture and flavor, but also to help make an-extra firm coating that keeps steam inside while the green tomato fries. That steam, in turn, helps tenderize the green tomato and soften the tartness, too.

I tried the fried green tomatoes with a soy-lime-ginger dipping sauce like this one, thinking that would be a fun spin, sort of tempura-esque. But I wasn’t so crazy about that—even the little bit of lime was too much with the tartness of the green tomatoes. Because of the cornmeal, I also thought to try them simply drizzled with (you guessed it) maple syrup. Hmmm. Actually quite yummy. Well, I am predictable at least. I’ve had that sweet tooth all my life, too, and I don’t think it’s going away.

How To Get Rid of a Rutabaga

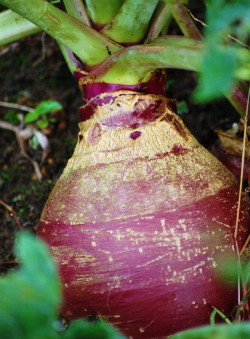
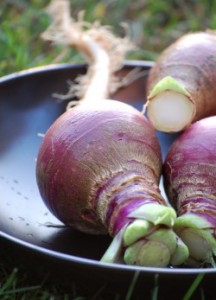
Me and my big ideas. Take rutabagas. I thought it would be just nifty to plant a row of these, late in the season, to use in our winter kitchen. (You can keep them right in the soil—how handy!) They’d be exclusively for us, not for the farm stand. Like the onions. Yes, but onions are a tad more versatile than rutabagas, you might point out. Duh. There are only so many rutabagas one can eat. It’s not even November and Roy is already looking a little rutabaga-weary. And this despite the fact that miraculously, Roy, who is not a huge veggie lover, is not turnip-averse. (Rutabagas are basically big, purple-skinned, yellow-fleshed turnips.)

I guess I got all rutabaga-smug because I figured I knew a bunch of tasty ways to cook them. This week, in fact, I slipped some into a potato gratin, and that was a definite hit. (Couldn’t have had anything to do with the cream and cheese.) And one of my favorite techniques—slowly caramelizing root vegetables in a crowded pan—works wonders on rutabagas, so I’ve been using this trick frequently. And Fall Veggie Minestrone is another great destination for rutabagas. (Soup recipe coming in new book—sorry! …for gratin, click here; for slow sauté, click here. In the gratin, use half rutabaga/half potato in place of the celery root.)

But no matter what I do with my rutabagas, I always treat these assertive roots to a few soothing flavor pairings. They like something a little sweet (anything from caramelized onions to apples to maple syrup), something a little fresh (arugula, fall lettuces, fresh herbs), and something a little earthy (like gruyere cheese or sauteed mushrooms.) But what they really like is—something else altogether. By that I mean they are better as part of a mix-and-match kind of dish, rather than as a stand-alone. Which is why I am eating a lot of warm salads.

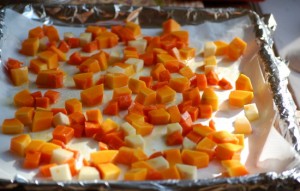
I don’t mind, really. Actually I love warm salads with roasted veggies, and this time of year, I could eat one every night for dinner if it weren’t for Protein Man. (We do actually wind up eating them for dinner “garnished” with a few roasted sausages or grilled chicken thighs. But I love them for lunch, too.) Happily, these warm salads give me a regular destination for the bits and pieces of rutabaga that seem to accumulate in my veggie bin. (They’re so huge that I never use a whole one.) I dice them up and roast them along with a mix of other diced fall veggies, like butternut squash, carrots, parsnips, all kinds of potatoes, and sweet potatoes, too. And, uh, honestly, sometimes I just go with the other veggies and leave the rutabagas out altogether.

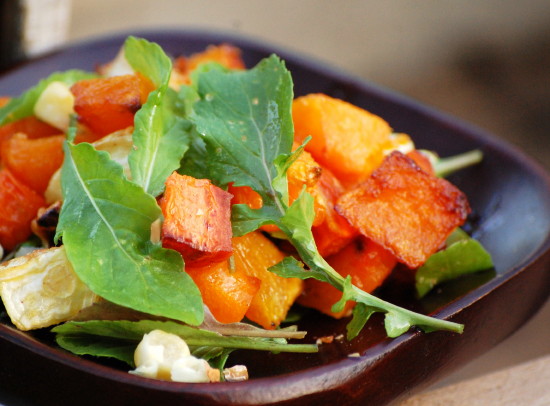
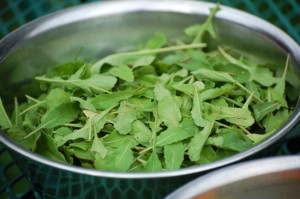
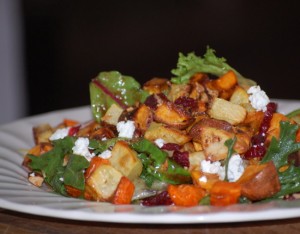
I serve the roasted veggies warm over a mix of hearty, sturdy lettuces (always with a bit of arugula for flavor) dressed with a simple vinaigrette which I warm in a sauté pan. Depending on my mood, I embellish the salad with toasted nuts, dried cranberries or cherries, and/or a little creamy goat cheese or blue cheese. It’s a versatile, variable kind of thing, so in case you’re interested, here’s a basic recipe to follow for four substantial salad servings. (The photo at the top of the blog, was, of course, not a “substantial” serving of warm salad, but me playing around with roasted veggies and some arugula I had just picked from the garden. The photo below is the unfortunate flash-photography view of the salad I made tonight with no natural light in sight.)

Roasted Fall Veggie Warm Salad Master Recipe

For a printable version of this recipe, click here.

Since there’s so much room to customize in this recipe, it’s a great place to try out new vinaigrettes. My friend Joannie Jenkinson, a great cook and our town’s Animal Control Officer, stopped by in her bright green Honda Element the other day with a goodie bag for me—a Spanish olive oil from Fiddlehead Farm’s end of season sale and a Black Cherry-Balsamic Vinegar from Le Roux kitchen store. I made a delicious warm vinaigrette with these two, but you can use your imagination and your favorite pantry staples.

________________________________

For the veggies:
2 pounds winter root veggies (carrots, parsnips, potatoes, rutabagas, turnips, sweet potatoes) and/or fall squash (such as butternut) weighed after peeling (no need to peel sweet potatoes or turnips), cut into 1/2-inch dice, about 7 cups
5 tablespoons extra-virgin olive oil
kosher salt

For the greens and vinaigrette:
8 cups mix of hearty lettuces (such as frisée or inner leaves of escarole, radicchio, endive, baby kale or Swiss chard, along with some romaine or other crisp lettuce), torn into bite-size pieces (5 to 6 oz.)
3 tablespoons extra-virgin olive oil
1/2 teaspoon minced fresh garlic
1 tablespoon flavorful vinegar
1 1/2 teaspoons maple syrup
1/2 teaspoon Dijon mustard
freshly ground pepper
2 tablespoons dried cranberries or cherries, coarsely chopped (optional)
2 tablespoons chopped toasted pecans, almonds or walnuts (optional)
2 to 3 tablespoons crumbled goat cheese or blue cheese (optional)

__________________________________________________

Preheat the oven to 450 degrees F. Line two large heavy-duty rimmed sheet pans with parchment paper. In a large mixing bowl, toss the diced vegetables with the 5 tablespoons olive oil and 1 1/4 teaspoons salt to thoroughly coat. Spread the vegetables in one layer on both sheet pans. Roast for 18 minutes; rotate the sheet pans onto opposite racks and use a flat spatula to flip some of the veggies over for more even browning if you like. Roast for about 15 to 17 minutes more, or until all the veggies are tender and nicely browned in places, a total of 33 to 35 minutes.

Meanwhile, set four dinner plates on your counter. Put the greens in a large heat-proof shallow bowl and sprinkle with a big pinch of kosher salt.

When the veggies are almost finished cooking, heat the 3 tablespoons olive oil in a small nonstick skillet over medium-low heat. Add the garlic and cook until fragrant and sizzling (but not brown), about 1 to 2 minutes. Remove from heat. Add the vinegar, maple syrup, mustard, 1/4 teaspoon kosher salt, and several grinds of fresh pepper to the pan. Whisk well to combine.

Drizzle half of the dressing over the greens and toss well with tongs to combine. Arrange the greens in equal portions over each plate. Arrange equal amounts of the roasted veggies over and around the greens and garnish with dried fruit and nuts if using. Drizzle a little of the remaining dressing over the vegetables and finish the salads with a sprinkle of cheese, if using. Serve warm.

Alternatively, you can add the warm vegetables, the fruit, and the nuts to the bowl of greens. Dress, toss gently, and serve. Garnish with the cheese.

Serves 4

Meet the Real Farmer–Woof!

Every farmette needs a farm dog. We’ve just been waiting for the right one to come along. Of course, while you’re waiting, there are certain things you must do to create good doggy-adoption karma. First, you must pine longingly, and like Dorothy, click your ruby-red farm boots together and say, “There’s nothing like a puppy. There’s nothing like a puppy.” Then, you must spend a few illicit hours scanning websites like petfinder.com. Lastly, you must “accidentally” drive past the MSPCA one day.

It happened to us two weeks ago. We were over on the Cape running errands. Riding from Hyannis to Falmouth in Roy’s truck, I had my eyes shut, daydreaming about dogs. Roy piped up, “Look, we just passed the MSPCA.” And I said, “Turn around,” and the famous words, “We’ll just look.”

Roy saw him first. I was wandering around the kennels, amazed at how many dogs there were, when I heard Roy say, “There’s a black Lab over here.” I came around the corner and saw this skinny black thing with soul-searching brown eyes. I crouched down low, and the pup reached out a paw through his kennel door to touch me. I gave my hand to him, which he licked and kissed with his funny pink-black tongue. Then he rolled over on to his belly. He had me. No way were we getting back on the ferry without this dog.

Riding home in the truck, the puppy (really about 8 months old and a mix of Lab and something short-eared!) sat on the big wide seat between us, butt pressed against Roy, shoulder rubbed up against mine, tongue reaching out for frequent kisses. He looked for all the world like he belonged right there, right then. We decided to name him Farmer. We told Farmer all about his new home on Martha’s Vineyard, and that he was a pretty lucky dog. We laughed, imagining him sending a postcard back to his friends at the shelter after a few days at the farmette: “DUDES! DUDES! I scored! I scored! You wouldn’t believe this place.”

Sure enough, Farmer loved his new home instantly. Loved the bunny and the chickens particularly…Seems Farmer needs a little training to understand the farm dog thing—that bit about protecting the animals, not chasing them or wanting to eat them! Fortunately, the animals are secure and Farmer already steers around them when we head out (always on a leash) for our long walks.

And truthfully, we didn’t really get Farmer to patrol the farm. We got him as a pet. Which is why I waited with great anticipation for Farmer and Libby to meet. I couldn’t imagine they wouldn’t get along, between Libby’s love of animals and Farmer’s sweet disposition. But I wanted to be sure. We took Farmer on the ferry with us to pick Libby up last weekend. On the way back in the car, he lay with his head in her lap, her tiny fingers stroking his muzzle. Saturday there were frequent games of squeaky-toy catch and ring-around-the-rosy. Sunday morning Farmer insisted on running upstairs, jumping on Libby’s bed and waking her up. He reached over to put his paws around her neck and she put her arms around him. I smiled. Lucky dog. Lucky Libby. Lucky us.

Finding My Place (and Peace) in the October Landscape

There’s a reason I don’t work in an office any more. It’s called October. Something to do with the sun on my face and the warm breeze at my back as I hike through the swaying grasses and the prickly scrub across the stone-splattered fields behind my house. Up to the spent cornfield I go, watching a thousand geese lift off in unison, honking like so many commuters in Time Square at 5 o’clock. Only it’s not Time Square or I-95 or even somewhere that has stoplights. It’s West Tisbury, where more of my neighbors are sheep than people.

By day, the strange silver light of fall sparkles through the still-green leafy maples and bounces off the crimson spokes of sumac leaves crisscrossing the meadow; by night, the man in the full moon winks, and the lights go on—an inky football field of black sky suddenly punch-holed with bright stars and planets that are mine to gaze at for as long as I like. Without city lights for miles, the Vineyard sky is unblemished by artificial luminescence. By dawn, I know the October kaleidoscope will shift again, this time turning a firey, blood-red sunrise into a gauzy grey-blue morning where the fog hovers just over the edge of the horizon, leaving you to guess what lies beyond.

In the garden, I am fascinated by the will to live. Plants are withered and brittle, their leaves brown and dropping, and still they flower and set fruit. Amazing. I gather up all kinds of imperfect vegetables and I love them even more for their struggles. I know the garden is slowly dying, and I accept that, because I know what spring will bring. And yet we drag the cold frame in and snuggle lettuce seedlings into it—hoping in a way to defy nature and have something fresh in the midst of frost.

There is palpable power in this October landscape, in the beauty, the errant stillness, the juxtaposition of life and death. It’s as if all of the elements of nature have conspired to bring us fully into the present, to be aware and observant and respectful.  Our job is not to do anything right at this moment but be a part of the place.

An Apple Taste-Test, A Giant Leek, and A Butternut Squash Soup for All

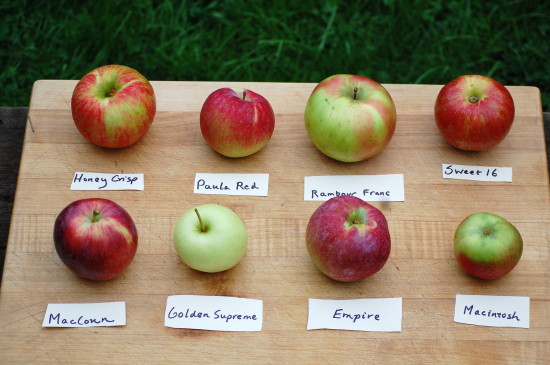
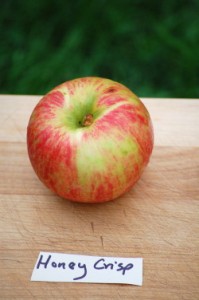
Libby loves apples. Roy does not. Nevertheless, I subjected them both to an apple taste-test last Saturday. They were good sports, even when I suggested they use words like “tangy” and “tart” to describe an apple’s flavor rather than “sour” and “yucky.” Actually, Libby was right there with me through the whole thing, but we noticed Roy was standing next to the compost bucket for most of the time, and I’m not entirely sure he really ate all of his apple portions. (Libby, on the other hand, called for a time-out half way through; I’d forgotten to tell her just to take a bite, not eat the whole wedge.) It didn’t matter that we all gradually lost steam, because the last apple was so crisp and juicy and flavorful and WOW! that it woke us all up and easily claimed it’s spot as number one. It was a Honey Crisp, which probably won’t surprise many of you. This one happened to be Island grown, too, and it was a doozy.

We picked up all the apples at Morning Glory Farm’s farm stand that afternoon, where we’d gone to get a big pumpkin for Libby and some vegetable treats for me. One thing I couldn’t resist tucking into my shopping bag was the biggest leek I’d ever seen—so big that I had to measure it when I got home! So much nicer than the average stubby leek you get at the grocery store…Anyway, while we were browsing, I noticed all the apples and remembered that I wanted to do a taste test again this year. There are so many different varieties of apples that you could never stop discovering delicious new ones.

The selection we brought home this year didn’t include some favorites like Fuji or Gala or Pink Lady. But we did find two new ones we liked a lot in addition to the Honey Crisp (double accent on the crisp). The first was Golden Supreme, a tastier relative of Golden Delicious. It was crisp, juicy and closer to the sweet end of the scale than the “sour” end. (Perhaps that’s why we three immediately liked it.) Supposedly a good cider apple, the Golden Supreme would be great in pies and tarts, too. Our third favorite, Paula Red, had a nice balance of acidity and sugar, but its texture and flavor make it a better destination for applesauce than pies.

In the end, we (at least Libby and I) enjoyed most of the apples. Except the Rambour Franc (also known as the Summer Rambo), which was quite mealy. I thought I remembered loving this apple, and it turns out I’m not crazy. (Well at least not on this issue.) I just read that it’s a summer apple—not a keeper—and best eaten shortly after picking. I must have had one earlier in the season last year. No matter—the texture didn’t bother the hens, who were only too happy to dispense with it.

But that still left me with pieces of apples, one giant leek, and one lovely Morning Glory Farm butternut squash to do something with this morning. So I made soup. But instead of loading the soup up with spices, I let the main ingredients star—and just gave them a hefty punch of fresh ginger. Often I make more complex squash soups, but I wasn’t in the mood today, and I liked what I wound up with—a very silky texture and pleasant flavor. If I had all the time in the world, I’d make a different soup every day. Well, actually, I did made soup every day in one job long ago. Come to think of it, maybe soup once a week is fine. After all, it’s hard to feed leftover soup to a chicken.

Butternut Squash, Apple, Leek & Ginger Soup

Choose apples with assertive flavor for this soup. I wound up using the Honey Crisp (better known as an eating apple) and the Golden Supreme and I think they worked nicely with the fresh ginger. As always, be very careful when pureeing hot soup. In fact, let the soup cool down a bit before blending (in batches) and keep a dish towel over the lid with just a small opening to vent steam. I used my garden Serrano peppers (which are very mild) in this soup. If yours are hot, pare out the veins and seeds before chopping and use less.

________________________________

2 tablespoons unsalted butter

1 tablespoon extra-virgin olive oil

2 cups sliced leeks (white and light green parts only, from about 3 medium leeks), well washed

kosher salt

1 tablespoon plus 1 teaspoon finely chopped fresh ginger

2 teaspoons minced fresh garlic

1 to 2 small Serrano peppers, finely sliced (less if peppers are very hot)

4 cups medium-diced peeled butternut squash (about 1 pound 3 ounces, or the neck of a medium squash, peeled)

2 cups medium-diced peeled apples (about 12 ounces or 2 apples)

5 cups low-sodium chicken broth

a few drops balsamic vinegar

garlic chives or chives for garnish

___________________________________________

In a 4- to 5-quart Dutch oven, heat the olive oil and butter over medium heat. When the butter has melted, add the leeks (with any water clinging to them) and 1/2 teaspoon kosher salt, and stir well. Cover and cook, stirring occasionally, until the leeks are well-softened, about 10 minutes. Uncover and continue to cook, stirring frequently, until the leeks are lightly browned, 6 to 8 minutes more. Add the ginger, garlic, and Serranos and cook, stirring, until fragrant, about 30 seconds. Add the butternut squash, the apples, 1 teaspoon kosher salt, and the chicken broth and stir well. (Scrape the bottom of the pan as well to bring up any flavorful browned bits.) Bring to a boil, reduce to a simmer and cook, covered, until the squash and apples are very tender, about 20 minutes. Take the pot off the heat, uncover, and let cool for 10 to 15 minutes.

Puree the soup in three batches (fill the jar only about half way or just a little more) and cover the blender lid partially with a folded dishtowel (leave a vent opening uncovered to let steam out) to prevent hot soup from splashing on you. Combine the batches in a mixing bowl. Taste. Add a few drops of balsamic vinegar to pick up all the flavors and stir well. Taste again. Add salt only if necessary. Return the soup to the (rinsed) soup pot and gently reheat. Serve hot, garnished with the chives.

Serves 4

Still Harvesting After All These Months

Slugs have snarfed most of my fall lettuce seedlings. Cabbage worms are devouring my Brussels sprouts, leaving behind their attractive green poop in the process. Lovely, huh? I should be having a fit; something’s gone wrong with the latest batch of turnips I planted, too, and an unsightly brown-spotting, leaf-withering plague is covering my baby bok choy. But I’m not upset.

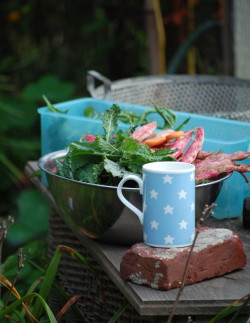
I’m just so happy to be back in my garden after too many hours, too many days away in recent weeks. Here I am in my comfort zone, coffee cup in one hand, scissors in the other, snipping cranberry beans in the early morning fog, the air so wet that moisture beads up on my stainless steel bowls. I can hear Sugar clucking—she’s about to lay her daily blue egg; and another swirl of honking geese swoops noisily overhead, the surest sign of fall I know.

True, the  fall garden may not be as productive as the summer garden, but it is amazing how tenacious some vegetables are. In addition to those pest-resisting cranberry beans (of the crazy-beautiful pink speckled color), our bush beans are still yielding several pounds of green beans every couple of days. And these are the same plants we started harvesting the second week of July! And no one has told the tomato plants to hibernate; not only are we still picking cherry tomatoes and beefsteaks, but the plants are still flowering. The pole beans are going nuts, a few butternuts are ripening, and I have a nice patch of arugula. But I think maybe the best part about the fall garden is all the overgrown bits—so romantic. The runaway marigolds and unstoppable nasturtiums have run ramshod over pots, tables, gates and (unfortunately) other plants, making the kind of accidental landscape no gardener can plan. I will never, ever, have a garden without nasturtiums as they are simply the most beguiling flowery vines I know.

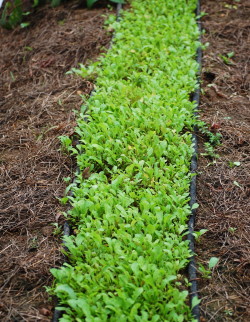
Today marks four months exactly since we opened the farm stand. Amazing that we are still harvesting—and folks are still coming down the driveway. Now, we get to think about next year. This patch of green behind the current garden (below) may be just the place to double our planting area. A little slopey, but we’ll make it work. Can’t wait.

Try This Tonight: Roasted Turnips & Pears With A Rosemary-Honey Drizzle

Sorry, but if I told you what I’d been doing for the past week or so, I’d have to kill you. Only kidding. It’s not top-secret. Just complicated in the way that only multiple Island-to-mainland round-trip ferry rides can be. Complicated in the wearing-lots-of-hats kind of way. You know, as much as I like being farmette girl, this week I had to wear some of my other hats (as we all do from time to time). I had to be cookbook author/cooking teacher girl and photo shoot girl, and more importantly, family girl and friend girl. Dr. Seuss would be proud, as I did manage to stack all my hats on my one head all at one time.

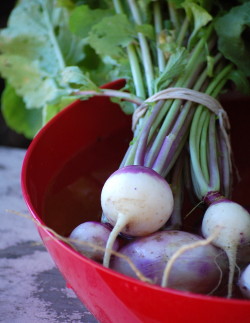
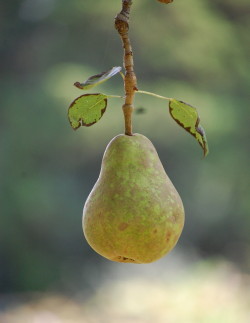
Anyway, the point is that you would die of boredom if I transcribed my diary, so instead, I’m offering you a timely recipe suggestion today. We have been gleaning pears from our neighbor’s pear trees, which were a bit rattled by Irene and are letting loose their fruit like a wet dog shaking off water. (I said gleaning, not stealing—the neighbors invited us to pick.) I’ve also been harvesting the purple-topped turnips I planted in July. I am in love with these darn things because they are so pretty and sturdy and useful and delicious all at once.

And, as it happens, for some reason (maybe I really was channeling the seasons), when I was writing Fast, Fresh & Green three years ago (that long now!), I developed a recipe that uses both turnips and pears. It also happens to be drop-dead easy and delicious. It was one of the recipes I demonstrated on Martha Stewart Television last Thanksgiving, and it was also featured in Martha’s Vineyard Magazine (see photo of finished dish). The recipe—for Roasted Turnips & Pears with a Rosemary-Honey Drizzle—came to mind last week not just because of the pear-picking, but because I wanted to give farm stand customers a turnip recipe that might encourage them to experiment. (And I admit, that might get them to buy turnips!) I know people often disdain turnips for their bitter edge, but I find they are delicious roasted, especially when combined with something a little sweet. (They are also really yummy in a slow-sauté, like the Caramelized Turnips, Potatoes & Carrots with Onion & Thyme I posted last year.) If you’re turnip-averse, please give this a try.

Roasted Turnips & Pears with a Rosemary-Honey Drizzle

For a printable version of this recipe, click here.

There’s a lovely balance in this autumn side dish between the sweet pears and the, well, not-so-sweet, turnips – and between the floral honey and the piney rosemary. All the flavors come together in a way that just might be palatable for people who normally wouldn’t eat turnips. These would be delicious nestled next to a braised lamb shank or some short ribs. Purple-topped turnips don’t need peeling; nor do I peel pears when I’m roasting them, so this is an easy dish to put together.

___________________________________________

3 medium purple-topped turnips (14 to 15 ounces total), unpeeled, cut into large (1/2- to 3/4-inch) dice

1 firm but ripe Bosc or Bartlett pear (about 7 ounces), unpeeled, cored, cut into 1/2-inch dice

2 tablespoons vegetable oil

1 teaspoon kosher salt

1 tablespoons unsalted butter

1 tablespoon honey

2 teaspoons chopped fresh rosemary

___________________________________

Preheat the oven to 475 degrees F. Line a large (18- x 13- x 1-inch) heavy-duty rimmed sheet pan with a piece of parchment paper. In a mixing bowl, toss the turnips and pears with the vegetable oil and the salt. Spread the turnips and pears in one layer on the sheet pan and roast, flipping with a spatula once or twice during cooking if you like, until the turnips are tender when pierced with a paring knife or spatula, 25 to 30 minutes (the turnips will be brown on some sides, the pears will be a bit darker).

Meanwhile, melt the butter in a small saucepan and add the honey and the rosemary. Simmer for a few seconds and remove from the heat.

Transfer the cooked turnips and pears to a mixing bowl and drizzle the butter mixture over all, scraping all of the mixture out of the saucepan. Toss well and transfer to a serving dish.

Serves 3

Droppers, Splitters, Honkers & Roasters

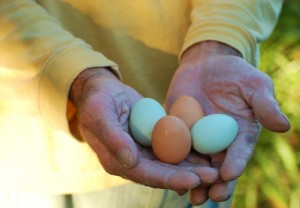
It has come to our attention that our hens are, ahem, robust. Not fat or anything. Just happy and healthy—and, okay, a tad bit bigger than the rest of the birds that arrived at the post office together last April. (We split a day-old-chick order with friends, as the hatchery ships a minimum of 25 chicks.) Our friend Mary told us the other day that Perky, our Sicilian Buttercup, is at least 50 percent bigger than the other Buttercups in the batch. This is probably why our ladies have started laying eggs a little earlier than expected. So far only Sugar (the Aracauna) and Chippy (one of the Partridge Rocks) are making regular appearances in the nesting boxes, but we have a nice clutch of little blue and brown eggs to show for it. (The hens will be laying full-size eggs in a few weeks.)

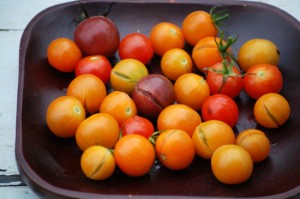
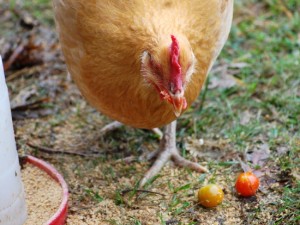
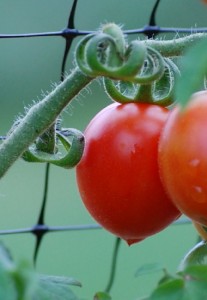
So the question is, what gives? Maybe since they’re only eight of them and they have lots of room to move around, the hens are just spreading their wings. But more likely it’s something they’re eating (or drinking—one theory is that maybe it’s our mineral-heavy well water). I think it’s the garden compost we give them—especially the Droppers and Splitters (left). These are the cherry tomatoes we can’t sell because they fall off the plants or split with too much moisture (like after a good rain—ugh.) I once had a black Lab who loved cherry tomatoes so much that he would stand on his puppy tippy-toes (or tippy-paws) to snarf the fruit off the plants through the garden fence. But I think these hens have Scout beat. They love those darn cherry tomatoes—especially the pulpy, seedy insides. Libby collects the Droppers from the garden and tosses them to the girls, who peck them open. And this week, alas, I’ve had more Splitters than I’d like to admit. We also feed the hens Honkers – the gangly green beans we find lurking in the shadows, beans that have grown so scary big that they look like witches’ fingers.

It makes me feel good that these tomatoes and beans don’t get wasted. In fact, since we collect the chicken manure for the compost pile, the hens are doing us a great favor by processing all this stuff. (Same goes for Cocoa Bunny, who is a greens-eating machine. Someone nicknamed her The Shredder for the way she eats leaves. The hens won’t touch mustard greens or kale, but Cocoa will devour them. And we collect her manure, too, so it’s all good. This whole circle of life thing makes me very happy. In fact, I just wrote an essay about it for Martha’s Vineyard Magazine.)

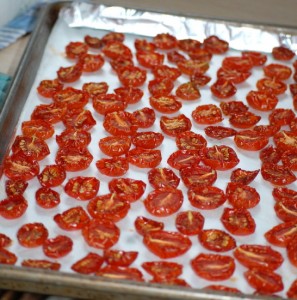
Don’t get me wrong, we also eat a lot of the funky vegetables. I slice the Honkers very thinly crosswise and stir-fry them. I pop the Splitters in my mouth while I’m harvesting. And then of course we also have to eat the veggies that have languished on the farm stand (thankfully, not so much). For instance, I’ve had trouble getting people to cozy up to the little baby plum tomatoes I’m growing (left). The variety is called Principe Borghese, and apparently it is used in Italy for sundried tomatoes. So I decided to try oven-drying them (or very slowly roasting them at low temps to approximate sun-drying), both to preserve some and to get a method down on paper to pass along at the farm stand.

They came out well—very intensely flavored and sort of semi-dried, still with a bit of moisture.  (Everyone knows I am stupidly crazy about oven-roasting tomatoes, so I will just say right out, it wouldn’t be summer if I didn’t roast some sort of tomato! Click here for quick-roasted (“caramelized”) plum tomatoes or here for slow-roasted beefsteak tomatoes.)

The problem was, in my attempt to sell these “Roasters”, I wrote up a little index card with directions for the oven-drying method and tucked it into a pint of the tomatoes on the farm stand. Only I suggested a six-hour cooking time instead of four hours. One of my friends took the bait, bought the tomatoes, cooked ‘em for six hours and found them to be very brittle! Oops. I screwed up. Should have been four hours. I did another batch to make sure and liked the four-hour result.

Of course, if you had a very low oven setting (or even better, a solar dehydrator), you could fully dry these tomatoes out and store them at room temp. With the  method I used (below), you’ll need to refrigerate or freeze them. One sheet tray (which holds a couple pounds) gets you a nice stash, though, and I’ve been using them in everything from soups and pastas to salads and even the pot roast I’ve got in the oven right now. I think this method would also work well with large cherry tomatoes, though the cooking time would need to be shortened somewhat. I haven’t yet tried the bigger plum tomatoes this way. (Though next year I will grow them instead of these boutique-y things!)

Here’s the method for Oven “Semi-Dried” Baby Plum Tomatoes: With a serrated knife, cut the tomatoes in half lengthwise. Place them, cut-side-up, on a parchment-lined heavy-duty baking sheet. Cook in a 250-degree oven for about 4 to 4 1/2 hours, or until they are shrunken and intensely colored. They will have lost most, but not all, of their moisture. They will collapse a bit more when you get them out of the oven.  Let cool and refrigerate or freeze.