Category Archives: The Recipes

When Life Gives You Splitters, Make Tomato Confit

DSC_7815We’re growing a new variety of tomato (which shall remain nameless at this point, as it is not proving itself to be all that it was cracked up to be!), which tends to split. Especially after a lot of rain like we just had. (To be fair, there are some delicious tomatoes that have this trait. Inconsistent water wreaks havoc with tomatoes.)

I don’t like wasting all those splitters. Sadly, we used to feed them to Martha, Opti, Oreo, Sugar and the rest of our original hens. But they are no longer with us, and throwing one bowl of splitters into a yard of 200 hens is hardly fair, so I’ve had to think of other solutions.

DSC_7753

This week I simply cut them all up into chunks, tossed them with olive oil and salt, put them in a heavy roasting pan, and cooked them for about 2 hours at 300°. I checked on them from time to time, stirring and scraping. I cooked them until a lot of the moisture was gone and the texture was kind of jammy. At the very end, I folded in a little minced fresh garlic and a mixture of a small amount of balsamic vinegar and honey, and let the garlic soften and everything infuse for a couple minutes in the oven.

DSC_7772

I left the cooked-down tomatoes to cool for a short spell in the pan, and then tasted. Delicious! Even though these tomatoes didn’t start out with a very robust flavor, roasting them down concentrated their flavor (as roasting always does!). The result was kind of a confit (really just a tomato jam or conserve), though with seeds and skins left in, it might not be everyone’s cup of tea. The seeds and skins don’t bother me, and considering how dead simple this is—and that it greatly extends the life of a bunch of tomatoes that otherwise would probably rot before you could eat them—it’s a no-brainer. You could literally do it with any tomatoes, any time.

DSC_7782

I put the confit in a cute jar just to photograph it—I was not intending to can it or keep it for very long. But I imagine it will keep at least a week in the fridge and would freeze just fine for longer. We’ve put it on top of grilled bread with warm goat cheese, and I’m planning to use the rest in a baked pasta. You could put some on top of scrambled eggs or in a quesadilla (yum), top a pizza or use it as a base for a flavorful rice dish. Why not?

DSC_7820


How to Cook a Pattypan, A Shisito, A Fairy Tale, A Fingerling

DSC_7564

We’re growing a few fun and different veggies this year—in addition to the old favorites—just to keep things interesting. (Fun and different=Cute names, too!)

DSC_7426 The most beautiful? This Bel Fiore Radicchio.

The most trendy? Shisito peppers. Well, oops, apparently (according to this hysterical mock restaurant menu on Eater.com) this trend is now passé in certain circles, or at least ubiquitous, which is never a good thing. But for a market gardener, a cook, or an eater, Shisito peppers are a total win-win-win. The plants are prolific, the cooking is super easy—just toss with oil, cook in a hot cast-iron pan or in a grill basket until blistered (a few minutes), and season with sea salt. Eat the whole thing—absolutely delicious. Summer-crowd appetizer friendly, too.

DSC_7204photo-72

The most colorful?

photo-77photo-76 Our crazy collection of eggplants, including new additions Orient Charm (the lavender beauty) and Hansel and Gretel (the mini purples and slim whites). The cute little Fairy Tales are still new to many shoppers, and I do get some questions about how to cook them. (Hopefully I can write a full blog on eggplants before the summer’s out—most of the slim eggplants are really interchangeable, though Fairy Tale most definitely has a creamier flesh than the others.)

photo-74 And yet despite these less familiar vegetables, it’s something kind of classic (it’s a squash after all!) that seems to confound people the most. Every single day, I put all the green zucchini and the yellow pattypan squash in a big basket together. And every single day the zucchini quickly sell out before the pattypans. The pattypans do have their admirers—our Sunburst variety is so cheery—and there are some shoppers that exclaim, “Oh, my favorite!” and buy 5 or 6 at a time. But I finally realized it’s the shape that stumps many folks.

Because in reality, the texture of a pattypan is no different than a zucchini (as long as neither is overgrown) and you can dice or slice or grate or chop them both.  (The Sunburst pattypan, despite being yellow, does not have the seedy, watery texture of a crookneck or summer squash, but the firmer texture of a zucchini.) I think the flavor of a pattypan is actually a little sweeter than a zucchini.

DSC_7712

But when you look at a pattypan, especially a full-grown one, as opposed to the minis I’ve written about in the past (apparently my obsession with this subject has not waned), you do have to stop and think, now how am I going to cut this thing?

DSC_7690DSC_7700


DSC_7572Hence, my first suggestion: Slice it and roast it. Specifically, slice it North Pole to South Pole (not through the equator), with one of the Poles being the stem end. Slice it thinly, but not too thinly, brush or toss the pieces with oil and salt, and roast in a 425° degree oven until golden brown and tender, 18 to 20 minutes, turning over with tongs once if you like (see finished photo at top of blog). In the last few minutes, you can sprinkle with a mixture of bread crumbs, Parmigianno and parsley if you like (right). Serve as a sidedish with a squeeze of lemon. Or sandwich a bit of goat cheese between warm slices when they come out of the oven and drizzle with a black olive vinaigrette. (There’s a recipe for Grilled Antipasto of Green and Yellow Zucchini with Black Olive-Lemon Vinaigrette in Fresh from the Farm. You can also grill, rather than roast, the slices (just cut them a little thicker).

The slice shape also works just dandy in a vegetable gratin like this one—just replace the zucchini slices with the pattypans.

DSC_7721 For smaller pattypans, cutting them in wedges (as if you were cutting a pie) gives you nice chunky pieces to stir-fry, sauté, or cook in a grill basket on the grill.  As with any summer squash that contains a fair amount of moisture, using relatively high heat will brown up the vegetable before it has a chance to get mushy. Caramelization brings out the sweetness, too. (Find a stir-fry recipe here.)

Now for those of you who’ve been asking about cooking those little Fingerling potatoes, I’ve got a treat for you. Click here!

braisedfingerlings


Two Favorite Potato Salad Recipes for Fourth of July

DSC_6147Our potatoes aren’t quite ready to harvest yet (usually some are by the Fourth of July), but that hasn’t stopped me from making potato salad. Yesterday I made one of our favorite recipes from Fresh From the Farm. Well, definitely one of Roy’s favorites and I think it is pretty darn swell, too. It’s called Roy’s Almost-Classic Potato Salad with Farm Eggs, Celery & Crème Frâiche (photo above, recipe below). I like it because I’ve never really been a fan of mayonnaise-based potato salads, though I am well aware of how popular they are. Creating one of my own gave me a chance to freshen up the classic.

I start with Yukon Gold potatoes, and for the dressing, I cut the mayo with crème fraiche (sour cream is a fine sub), add plenty of lemon juice and lemon zest (plus the cider vinegar), a touch of ground coriander, and fresh parsley and chives. The hard-boiled eggs, celery, and onions are non-negotiable. The salad has a nice, light feel and a bright flavor.


IMG_8127_1photo-68But in case you’re not in the mood for the classic, I offer up another potato salad that I created for Fast, Fresh & Green. It’s called New Potato Salad with Fresh Peas, Lime, and Yogurt (photo directly above). It also has some mayonnaise in the dressing, but cut with Greek-style yogurt. I’ve been thinking of that salad while harvesting peas in the near-dark (yes, there are so darn many of them this year that we can hardly keep up with them). Once we eat all of Roy’s Classic, I think we’ll make this one, too, as I just love it. We’ll still have peas, and maybe our Red Gold taters will be ready to pull.

Hope you all have a wonderful Fourth of July holiday!


Roy’s Almost-Classic Potato Salad with Farm Eggs, Celery & Crème Frâiche  

DSC_6149Recipe copyright Susie Middleton, 2014, Fresh From the Farm: A Year of Recipes and Stories

Roy gives this salad two thumbs up. He said he’d give it three if he had an extra hand. He also says he likes it even better the second day, so make this ahead if you like. Feel free to substitute sour cream for the crème fraiche. You can loosen the sour cream a bit with just a touch of half ‘n half.

Serves 4 to 6


2 pounds Yukon Gold potatoes, peeled and cut into 3/4-inch pieces

Kosher salt

1/2 cup mayonnaise

1/2 cup crème frâiche or sour cream

1 tablespoon plus 1 teaspoon cider vinegar

1 tablespoon lemon juice

1 teaspoon freshly grated lemon zest

3/4 teaspoon ground coriander

3 hard-cooked eggs, peeled and sliced

2 long or 3 short stalks celery, halved lengthwise and thinly sliced (3/4 cup)

1/2 small red onion, thinly sliced (a scant 1/2 cup)

2 to 3 tablespoons chopped fresh flat-leaf parsley

2 tablespoons sliced fresh chives

Put the potatoes and 2 teaspoons of salt in a large saucepan and cover with plenty of water. Bring to a boil, reduce to a simmer, and cook until just tender, or about 10 to 12 minutes. Drain carefully in a colander, rinse briefly with cool water, and spread on a clean dishtowel to cool to room temperature.

In a large mixing bowl, whisk together the mayonnaise, crème frâiche, cider vinegar, lemon juice, lemon zest, ground coriander, a pinch of salt, and several grinds of fresh pepper. Add the cooled potatoes, eggs, celery, onion, most of the parsley, and most of the chives. Sprinkle 1/2 teaspoon salt over all. With a silicone spatula, mix everything together until well combined, breaking the eggs apart as you mix. Transfer to a serving bowl and garnish with remaining parsley and chives. Serve at room temperature or refrigerate for up to 24 hours.

What to Do with Those Garden Strawberries + A Gingery Strawberry-Rhubarb Crisp Recipe

GingeryStrawberryRhubarbCrispPg.61Not since my parents gave me my weekly 50-cent allowance to bike down to Jack’s Market and buy a stash of penny candy have I been quite this excited. Every morning when I head out to the strawberry patch, I keep looking around for someone to give me permission, or at least to charge me an entry fee to the garden. I just can’t believe there’s a whole row of fresh, ripe strawberries simply lying around in my backyard waiting for me (and Libby, when she’s here) to eat. (Roy’s not much of a fruit guy.)  I’m truly and ridiculously giddy about this situation and I am not apologizing.

DSC_5605

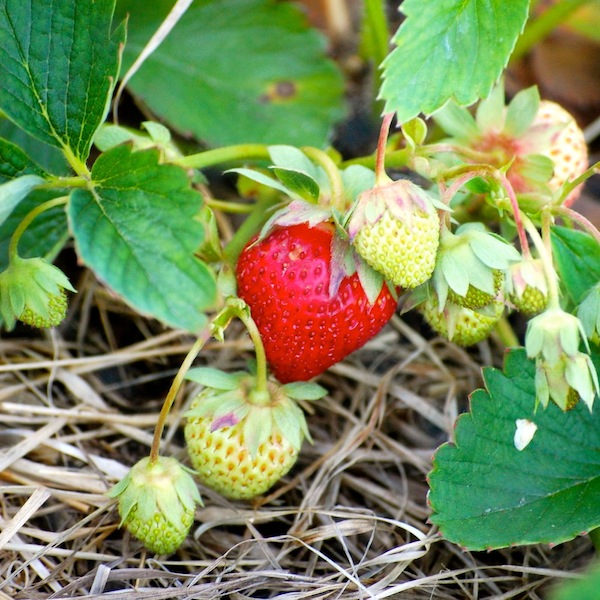
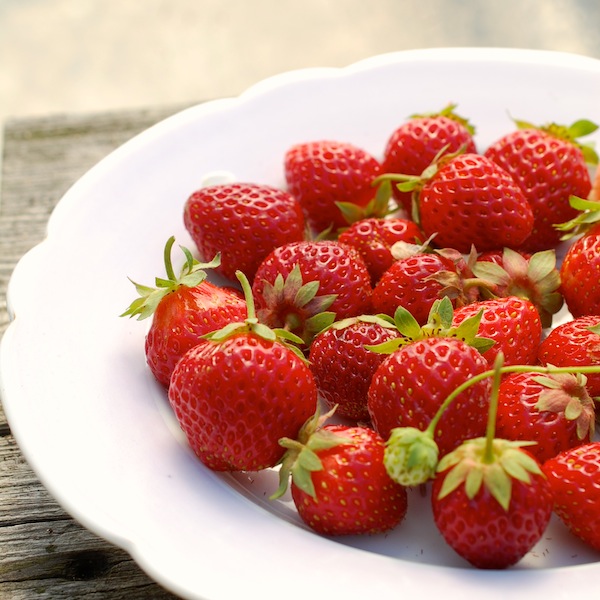
This is the first year we have enough for me to pick a bowlful every morning, but thankfully, not quite enough to sell at the farm stand. Too bad. This means most days, I get to decide how I want to eat them. I’m sure you can guess the next part—it is hard to get inside the house without eating most of them. But I have been practicing discipline.

DSC_5637

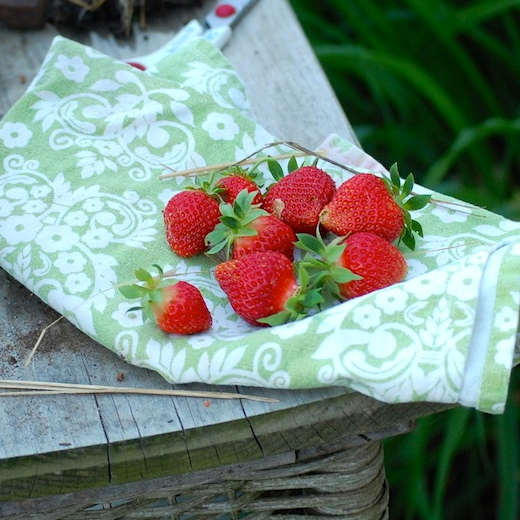
Last weekend, knowing Libby was coming, I saved enough for the two of us to have a nice dessert with whipped cream on Saturday night. We ran out of time to make shortcakes, because we decided to make grilled pizza instead. (If I’d had time, I would have made one of two shortcake recipes from my fabulous baker friend Abby Dodge (author of The Weekend Baker and many other cookbooks). This one is chocolate (oh my!), the other is a classic tender shortcake that Abby did for a story I worked on at Fine Cooking magazine years ago. But since Libby is a huge whipped cream fan, we were okay with just the strawberries tossed in sugar and topped with vanilla (freshly) whipped cream.

DSC_5900

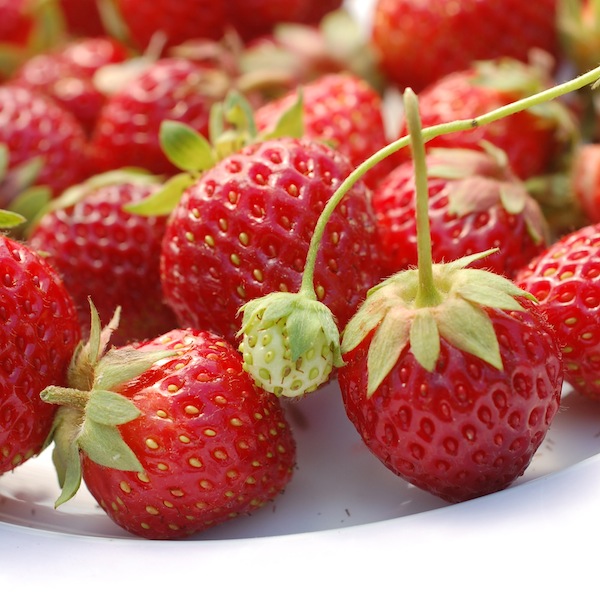
Libby remarked at how tasty the strawberries were—I had warned her that they weren’t terribly sweet, because it has been cool here. But I found her comments interesting (she has a sharp palette), because I am finding these Ozark Beauties that we are growing to have a really intriguing citrusy flavor. They’re tangy for sure, and at first I kept looking for that super-sweet flavor you get with say, the famous Earli-Glow strawberry. But now I think that for using in desserts, these are particularly nice, adding an intriguing acidity.

DSC_5912

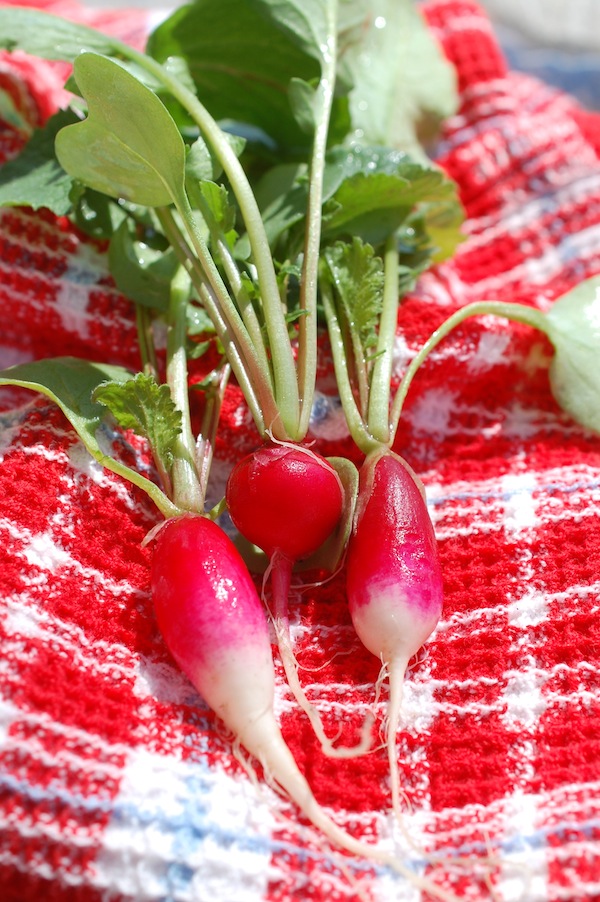
The other really cool thing about fresh, ripe, picked-nearby strawberries is how red they are—all the way through. It seems like kind of an obvious thing—that a ripe strawberry should have red flesh—but as you know, most grocery store strawberries are mostly white on the inside.

DSC_5921

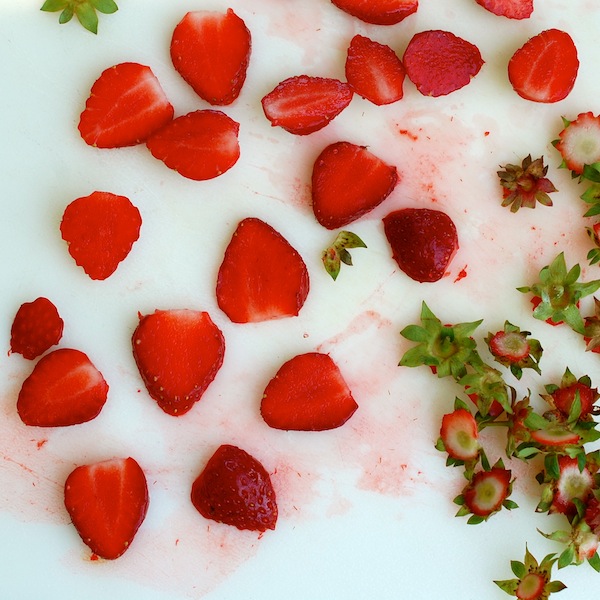
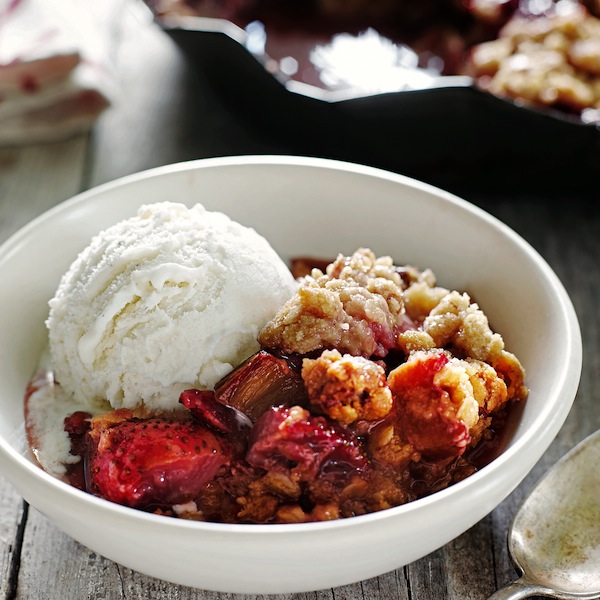
Now I am saving my daily harvest to make one of my very favorite recipes in Fresh From the Farm—the Gingery Strawberry Rhubarb Crisp with Brown Sugar-Pecan Topping. You have to make this one, I promise, even if you have to steal the strawberries from Mr. MacGregor’s garden! (Recipe below and photo above.)

After that, my next batch is definitely going to be my (and Libby’s) all-time favorite: homemade Strawberry-Vanilla Ice Cream. My other favorite frozen strawberry dessert is this Strawberry-Balsamic Granita from Fine Cooking, but Abby’s Strawberry Sorbet looks really good, too. I also see, among the many delicious strawberry dessert recipes Fine Cooking has on their site, an intriguing change-up to strawberries and yogurt—a Strawberry-Yogurt Brulee. Looks easy and delicious. And I remember loving all of Lori Longbotham’s strawberry concoctions, especially her roasted strawberries that she then used for her Triple Strawberry Ice Cream Sundaes–with chocolate-dipped strawberries!.

DSC_5897
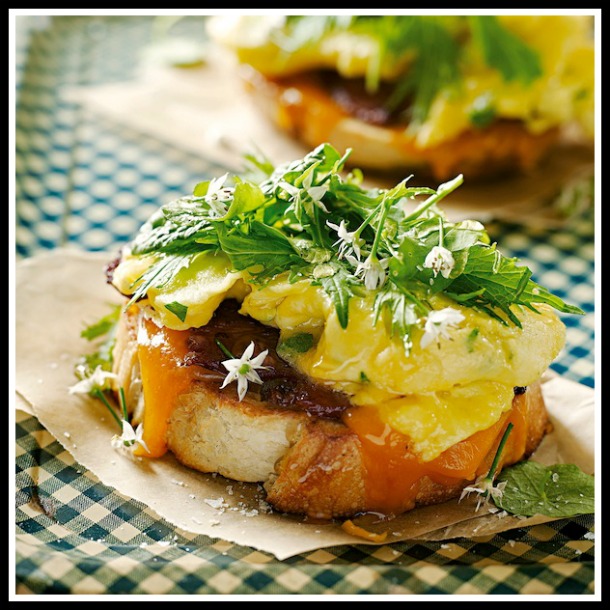
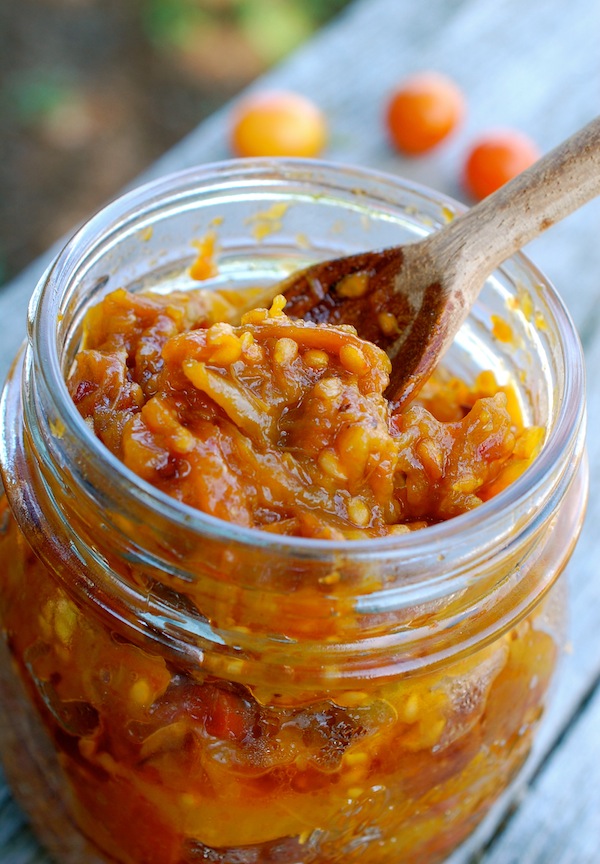
In the last strawberry days (which will trickle through the summer since the Ozark Beauties are everbearing), I will make Farmhouse French Toast with Backyard Berry Syrup as well as Yogurt and Strawberry Parfaits with Homemade Maple Granola (both from Fresh from the Farm). Maybe I’ll even have enough strawberries to finally make jam. I hope so, because my friend Cathy Barrow‘s recent article in the Washington Post (“Canning Class: Strawberry Jam that Works”) totally had me wishing I could stop right then and there and make jam.

Heck, maybe I’ll even be able to steer some of my berries to the freezer, so that I can recreate this glee in the middle of the winter. But don’t hold your breath. Think I’d better order more strawberry plants and get them in the ground this fall.

GingeryStrawberryRhubarbCrispPg.61Gingery Strawberry-Rhubarb Crisp with Brown Sugar-Pecan Topping  

Copyright Susie Middleton, 2014, from Fresh From the Farm: A Year of Recipes and Stories.

This crisp rocks. Sweet and tangy with a most excellent crunchy topping, it gets a flavor jingle from two secret ingredients—crystallized ginger and a touch of balsamic vinegar. Cook the crisp until the topping is plenty golden (about 45 minutes)—enough time to let the fruit juices reduce and thicken a bit, too. This looks pretty in a 10-inch quiche pan, but any 2-quart baking dish will work. Great warm with vanilla ice cream, this crisp is pretty tasty leftover for breakfast, too. I should know.

Serves 6


For the topping

8 tablespoons unsalted butter, softened, plus more for baking dish

1 cup all-purpose flour  

1/4 cup finely chopped toasted pecans

1/2 cup light brown sugar

1/2 cup regular oats

1/4 teaspoon kosher salt

1/8 teaspoon ground cinnamon

1/8 teaspoon ground ginger

For the filling

2 1/2 cups hulled, quartered strawberries  

2 1/2 cups thick-sliced rhubarb stalks (cut 1/2 inch thick; about 10 ounces)

1/2 cup plus 2 tablespoons sugar

3 tablespoons all-purpose flour

2 tablespoons finely chopped crystallized ginger

2 teaspoons pure vanilla extract

1 teaspoon balsamic vinegar

1/4 teaspoon kosher salt

For serving

Vanilla ice cream or frozen yogurt, or heavy cream (optional)


Heat the oven to 350°F. Rub a shallow 2-quart baking dish or large ceramic quiche dish all over with a little butter.

In a medium mixing bowl, combine all the ingredients for the crisp topping and mix together with your fingers until well-combined into large “crumbs.”

In a large mixing bowl, combine the filling ingredients and mix thoroughly. Arrange the filling mixture in the baking dish and top evenly with the topping mixture. (Depending on the size of your pan, you may have a little leftover topping. Freeze it for another use.)

Bake the crisp until the topping is firm and golden, about 45 minutes. (The juices will have been bubbling around the edges for a bit.) Let cool for 15 to 20 minutes and serve warm alone or with ice cream, frozen yogurt, or heavy cream.

top photo credit: Alexandra Grablewsky, from Fresh From the Farm: A Year of Recipes and Stories
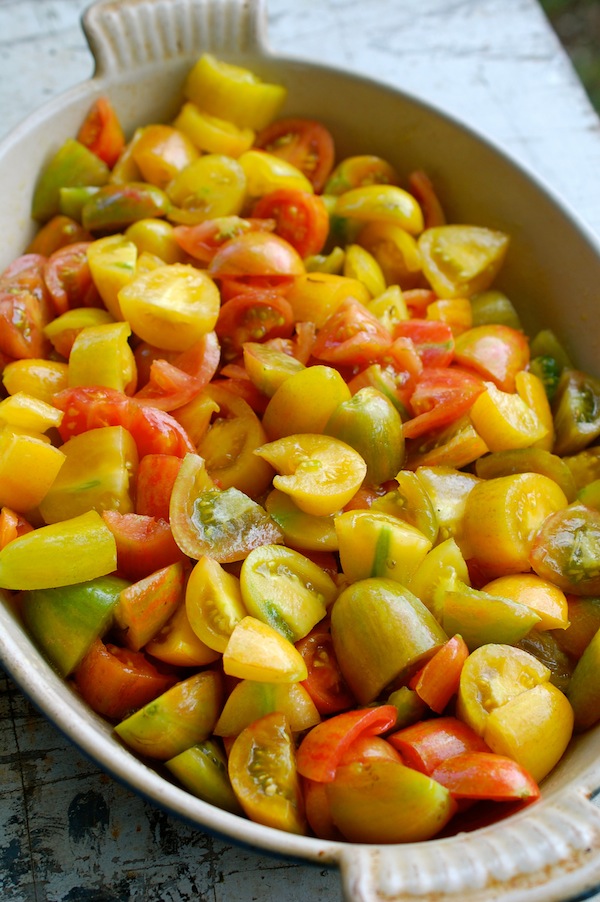
 

How DO You Cook Those Japanese Baby Turnips, Anyway?

DSC_5455bunch 2We are just coming to the end of our first-ever harvest of Tokyo turnips, aka Japanese baby turnips. They aren’t really babies, but they are really delicious and beautiful and tender and juicy. (The greens are delicate and tasty, too.) We’ve never grown them (or a similar variety called Hakurei that’s popular at farmers’ markets) before, so I am pretty darn excited that they did well, and I can’t wait to grow more. I’m sure our cool weather helped, so I probably won’t seed again until fall.

It’s unusual for me to sell a vegetable at the farm stand that I haven’t cooked with much. And while I could certainly guess by the juicy raw texture and flavor that both minimal cooking (steaming, quick-braising, glazing) and browning (roasting, sautéing and stir-frying) would probably work with these, I couldn’t quickly reference one of my own recipes to help people cook them.

photo-64Fortunately, many of our farm stand customers are adventurous and competent cooks, so several of them forged ahead without me! One woman found a recipe for a nice sauté with potatoes in my fellow Island cookbook author friend Cathy Walther’s Greens, Glorious Greens, and on FaceBook, another cookbook author friend, Diane Morgan, suggested finishing a sauté with miso butter. I don’t have Cathy’s Greens book, though I know it’s a classic and well worth checking out, but I do have Diane’s award-winning Roots, and I can tell you there are more than a few really delicious recipes for turnip dishes in it, including one called Kashmiri-Style Turnips with Greens that led me to think I wasn’t crazy to want to pair cilantro (and ginger) with the baby turnips. The cilantro is flourishing in the cool spring garden, alongside the turnip bed.

Today (thank God for the rain!) I finally got a chance to mess around with the Japanese turnips in the kitchen. Since we had sold all the good-sized and blemish-free roots at the farm stand, I was left with only teeny-tiny roots and some bigger damaged roots, so I had no choice but to cut everything about ½-inch in size. (That meant no cutting for the teeniest mini-marbles.) But I think I would favor that size anyway—or wedges if all my roots were similar sized—for the quickest cooking. I did both a quick par-boil and a quick sauté, adding the greens only briefly to wilt at the end in the sauté , and with lemon and butter, found that the baby turnips really do make a super-quick spring side dish.

DSC_5438

DSC_5233Then I indulged my desire to go Asian, and did a stir-fry with soba noodles—and ate the whole thing for lunch. (It would have served two easily with some grilled shrimp. Photos very top and below.) Originally I thought I might go all the way and turn it into an Asian noodle soup, as the greens would be so perfect for one of these. (And one small turnip—generally about 2 inches in diameter—has a lot of greens attached.) But I was afraid the turnip roots would get lost in the soup, so I kept it noodle-y. I’m including the recipe below in narrative form, as I wouldn’t want to give you a set-in-stone recipe without testing again with more uniform turnips and more exact proportions.


To make Soba Noodles with Stir-Fried Baby Turnips, Ginger & Cilantro: DSC_5470

Cook a handful of soba noodles separately in boiling water. (Follow the package directions, but shorten the cooking time a bit.) Drain and hold. Get out a non-stick stir-fry pan or a big non-stick sauté pan and heat just a couple teaspoons of vegetable oil (I used grapeseed oil) over medium heat. Add about a cup of diced baby turnip roots (trimmed) and a couple big pinches of kosher or sea salt. Cook, stirring, until lightly browned, about 5 minutes. Add a teaspoon of chopped fresh ginger, one-half teaspoon of chopped garlic, about ¼ cup thickly sliced spring onions or scallions, and a couple tablespoons of quartered, sliced radishes. (If I’d had a small Serrano pepper, I would have added a bit of it, chopped, too.)

Stir, cooking, until fragrant and a bit softened. Add a half cup of chicken broth or other broth and about 2 cups torn, stemmed turnip greens. Stir until the greens are wilted. Add the soba noodles and stir well to combine. Add a mix of fresh lemon (or lime) juice and soy sauce (one-half to one teaspoon of each or to taste) and a tablespoon or more of torn fresh cilantro leaves. Stir, remove from the heat, transfer to a serving bowl and garnish with a bit more cilantro and some sliced spring onion or scallion green tops.  (Serves 1 or 2)


photo-66P.S. I almost completely forgot. The first thing I actually did with the baby turnips a few days ago was to add them to one of my slow-sautes with carrots and potatoes. I’d forgotten I had a few in the fridge, and cut them just as a i was starting to cook the potatoes and carrots. They cook a little more quickly than purple-topped turnips, so you can certainly use them deliciously in one of these, but I might add them half-way through cooking.


Baby Kale, Avocado & Radish Salad—Susie’s Pink & Green #9

DSC_4756
photo-40Lately I have been obsessing about this Red Russian kale we are growing in the hoop house. I feel kind of silly, as it isn’t exactly a new thing—other farmers on the Island have been growing this variety and harvesting it young for a few years now. But I finally got around to planting a thick carpet of it (in order to harvest it as baby greens), and my, oh, my, is it tickling my fancy. It’s beautiful, yes. But tender, too. And almost sweet. (Even Roy likes it!) Which means now I have no business being cranky about kale salads. (I have come around on this, and even have a kale salad in Fresh from the Farm, but I am still not big on thick chewy mature kale leaves in salads—massaged, or not.)

I do think the hoop house kale is particularly tender, because it grows fast in those lovely conditions and doesn’t have to toughen up to the elements outside. But Red Russian kale is so delicious young, that I’d say, hoop house or not, rush out and buy yourself a packet of seeds and dump some in a pot of soil right now. In 28 days you’ll have a tender kale salad.

(If you live in Texas, maybe wait until fall’s cooler weather at this point.)

DSC_4602

DSC_4738Also, as most of you know, I am obsessed with the color pink. And this year we’re growing French Breakfast and Cherry Belle radishes in the hoop house, and they are nearly big enough to pull. Nearly big enough, yes. But since I am the boss, I get to pull them up whenever I want to.

In fact, since I realized I was heading towards yet another variation on a “pink and green” salad for my lunch today, I thought, “I’m going to put whatever I want in this salad!” So in went avocado, a few toasted pecans, a little blue cheese, and a drizzle of Perky’s Vinaigrette. Honestly, for your own variation, you could put just about anything you like in with that baby kale and it would be lovely.

DSC_4789If I sound like I am being obstinate, it’s because I have to go traveling again this week and am wishing I could just stay home and keep working outside until dark like Roy and I have been doing every night this week. (I’m not kidding, it really is satisfying.) But off I go so I’m having one last pink and green salad for the week.


DSC_4669And speaking of pink, we snuck off to get a quick peek at some trees in bloom at Polly Hill Arboretum Sunday afternoon (a stone’s throw from us).

I’d never seen this unusual magnolia, but fell in love with the pink blooms.

Of course.


DSC_4673


Super-Quick “Confetti” Greens + (Surprise!) Broccoli Leaves

DSC_4266Even if I do not, the hoop house loves this weather. Or I should say the hoop house greens do. They like the cold nights and the many daylight hours of fuzzy sunlight. “Fuzzy” means grey and overcast to me, so I am not so happy about it, especially because it is freakin’ windy here, and the daytime temps haven’t exactly been soaring, so working outside isn’t really pleasant.

DSC_4132

But the greens inside the hoop house don’t have to deal with the wind, and they prefer these overcast days to the super sunny ones when the house gets pot-boiling hot.

DSC_4177It did get hot a few days while I was away; I could tell because some of the greens bolted and flowered. I lopped off most of the flowers (including a few spent mini-broccoli heads) so that the greens could get their energy back and keep growing. In the process, I discovered that the flowers are delicious (especially the kale flowers), which I kept nibbling.

I’m not really sure, since I’ve never overwintered this many different kinds of greens in a hoop house, but I think the kale and collards may be flowering because the plants are aging and/or because of the day length, in addition to the heat.

But mostly, it has been cool and perfect for the greens, so the leaves are unbelievably tasty—nutty and sweet, not at all bitter. The broccoli leaves are my favorite—I can’t imagine why they aren’t sold in grocery stores or at farmers’ markets (maybe they are somewhere!). Harvested young and tender, they need absolutely no prep before tossing in the stir-fry pan.

DSC_4126

None of this I would have known if I hadn’t finally taken advantage of the hoop house to plant broccoli and collards, which I normally avoid due to the cabbage pests out in the garden.

But here’s the good news—you don’t have to have a garden or a hoop house to do what I’ve been doing with the greens lately: Cooking the quickest side dish in the history of Vegetables-Meet-Fire. The secret is simply rolling your leaves up and slicing them across very thinly with a sharp knife. The slicing takes care of any tough fibers and the resulting “ribbons” cook in a heartbeat. I’ve often done this with mature collards in the past, but you can do it with any leafy veg.

DSC_4222

To get started, you can follow the basic recipe that I wrote for Fast, Fresh & Green (and updated slightly), below. I often just go with garlic and red pepper flakes, so the vinegar/honey/parm combo is optional here. But you could try finishing with sesame oil, soy sauce and sesame seeds or with lemon and minced capers or olives—whatever you like.

The greens also make a nice bed for fish (or lamb—it is Easter I realize!), a good addition to pasta dishes or frittatas, a nice pizza or tart topping, and an interesting fold-in to mashed potatoes or slow-sauteed root veggies like carrots and turnips.

Speaking of Easter, if you need asparagus side dish ideas, click here for a my favorite braised asparagus recipe, here for a nice saute, and here for roasting and grilling directions. Oh, and here for a nice asparagus bread pudding brunch recipe and here for asparagus bisque!

DSC_4277Super-Quick Sautéed Greens,“Confetti”- Style

I love using my large nonstick stir-fry pan for this and for so many things, but a large nonstick skillet works fine. Just crank up the heat so that the greens cook very quickly.

__________________________________________________________

½ teaspoon sherry vinegar (optional)

½ teaspoon honey (optional)

½ large bunch collard greens, broccoli leaves or kale

1 to 2 tablespoons vegetable, peanut, grapeseed, or olive oil

1 teaspoon minced garlic

Big pinch crushed red pepper

½ teaspoon kosher salt, more to taste

Shaved or coarsely grated Parmigiano-Regianno (optional)

____________________________________________________________

Combine the sherry vinegar and honey in a small bowl (if using).

Remove the leaves from their stems by holding the stem with one hand and pulling the leaves away from it with the other. Rip the leaves completely in half lengthwise. You should yield about 4 ounces greens. Rinse the leaves and dry them well. Stack them up on top of each other, roll them up tightly cigar-style, and, using a very sharp knife, slice them across into very thin ribbons (about 1/8-inch wide).

In a large (12-inch) nonstick skillet or nonstick stir-fry pan, heat the oil over medium-high heat. Add the garlic and red pepper flakes and cook until the garlic is softened and fragrant, 15 to 30 seconds. Add the sliced greens and the salt, and juke the heat up a bit so that the pan stays pretty hot. Cook, stirring to incorporate everything in the pan, until the greens turn bright green (at first) and then a darker green and are somewhat wilted, about 1 minute (do not cook much longer or they will begin to toughen). Remove the pan from the heat and taste. Stir in the vinegar/honey mixture if using, and serve right away, garnished with the Parmigiano if you like.

Serves 2


Farm Eggs+Spring Greens= Green Island Farm Egg Sandwich

Egg Sandwich pic monkey

When I’m away from the farm, one of the things I miss most are our delicious eggs. (Well, I miss the egg farmer, too.) So as I leave today for a week, I’m indulging myself and posting one of my favorite egg recipes from Fresh from the Farm: A Year of Recipes and Stories. It’s a glorious open-faced egg sandwich, meant to challenge you to find as many local ingredients as you can when you put it (or something similar inspired by it!) together. (Recipe below.) In addition to the eggs, locally baked bread, local bacon, and Massachusetts-made cheddar, I also toss in a few of our own early Asian greens like mizuna and tat soi and drizzle with some honey gathered just up the road.

Since I’ve lately become seduced by Instagram, and one of my favorite subjects is our eggs, I thought I’d collect those eggy still-lifes and post them here as well. (You can see my daily Instagram photos here on sixburnersue.com as well, on the home page and at the bottom of the sidebar at right.)

Now, while I’m away, I only have to pop over to the blog to visit our eggs!

photo-12

The wash room. Roy does this twice a day. No joke.


photo-13 Hate to scramble this; it’s so lovely.


photo-16 This was our first duck egg.


photo-17

This morning Roy put out the chalkboard sign to market his duck eggs.


hard boiled pic monkey

Twelve minutes.


Note:  Lovely sandwich photo at top taken by Alexandra Grablewski and styled by Michael Pederson for Fresh from the Farm.

Green Island Farm Open-Faced Egg Sandwich                                        with Local Bacon, Cheddar & Asian Greens  

I love this sophisticated take on a breakfast sandwich, because it’s possible to include so many local ingredients in it. These open-faced sandwiches are a bit like giant crostini, so eat them out of hand and eat them right away!

Serves 4

4 slices bacon, preferably local

Four 3/4-inch slices peasant bread (from an oblong loaf) or challah bread (either way, pieces should be around 2 1/2 inches x 5 inches in diameter)

1 tablespoon plus 2 teaspoons unsalted butter, softened

2 to 2 1/2 ounces aged sharp Cheddar cheese  or any good local or regional semi-hard cheese, sliced thinly (about 10 to 12 small slices total)

4 fresh, local large eggs, preferably at room temperature

1 tablespoon heavy cream

Kosher salt

Freshly ground black pepper

1 to 2 teaspoons tender herb leaves (such as chives, chervil, cilantro, or parsley) or chive blossoms, plus 4 small tender sprigs or edible flowers for garnish (optional)

12 to 16 mizuna leaves (or other baby greens such as mustard, tat soi, arugula, or kale)

Honey, preferably local, for drizzling

Sea salt (optional)

Cook the bacon using your favorite method and drain on paper towels. Snap each piece in half so that you have 8 shorter strips of cooked bacon.

Arrange an oven rack 6 inches from the broiler and heat the broiler to high. Put the bread slices on a baking sheet and toast lightly. Turn the slices over, spread the untoasted sides with about 1 tablespoon of the butter, and put the baking sheet back under the broiler. Broil until the tops are golden brown. Arrange the cheese slices on top of the bread and broil until just beginning to melt.

Meanwhile, in a medium (10-inch) nonstick skillet, heat the remaining 2 teaspoons butter over medium heat. In a bowl, whisk together the eggs, cream, a generous pinch of salt, and a few grinds of pepper. Stir in the herb leaves or chive blossoms. When the butter has melted and is foaming, pour in the egg mixture. Let it sit until the edges start to set and then, using a silicone spatula, gently pull the edges of the egg toward the center, letting uncooked egg run underneath (tilting the pan if necessary). Continue to cook the egg this way, gradually gathering the soft folds of eggs together into a rough circle, about 6 to 7 inches around. (This is really just scrambled eggs with a little less scrambling.) When the eggs are mostly set, flip (use the spatula to divide the eggs in half first for easier flipping) and let the bottom side cook and brown up a bit. Transfer the egg to a cutting board and cut into four portions.

Arrange a few mizuna leaves on each of the bread pieces and top with a portion of egg. Top each with 2 pieces of bacon, another leaf or two of mizuna, and the herb sprig or flowers(if using). Drizzle all with honey, sprinkle with a little sea salt if desired, cut each piece in half, and serve right away.

mizuna tat soi plate picmonk

Mizuna is the spiky green; tat soi is also known as “spoon cabbage.”


Throwback Thursday: How to Cook a Baby Artichoke . . . Plus Post-Blizzard Travels with Susie

artichoke blog 1Apparently, there is a “glut” of artichokes in California right now. I love that word, “glut.” It has a nice thwack to it; plus it must be derived from the best of the seven deadly sins, gluttony.

So we’re very happy for California. (Note, there is no cynical tone in my voice. I just couldn’t be more thrilled that here on the East Coast—actually, one of the very most Eastern parts of the East Coast—we had a blizzard yesterday. Whee! Certainly Farmer enjoyed it.) Honestly, we are happy because we know that California will be sending some of these artichokes our way very soon. They’d better, lest we have to travel out there and get them ourselves.

farm dog

Meanwhile, I have been trolling through old photos and blogs to put together two presentations for my next travels (more on that in a minute). And I came across these baby artichokes (top) and my favorite method for cooking them (see recipe below). I’m hoping the “glut” includes baby artichokes, because I could eat a plate of these for lunch right now. Baby artichokes are really easy to prepare and so delicious. While we’re waiting (I just visited the Ocean Mists website—lots of good info there—and discovered that babies may be a few weeks away), you can get some excellent ideas for using standard-sized artichokes from Russ Parsons, Food editor of the LA Times. Here’s his recent piece that includes 12 artichoke recipes. (I want to make the fries!). And, as always, FineCooking.com comes to the rescue with more than two dozen artichoke recipes to browse through.

roy artichoke

I know a lot of you who read the blog actually live in California, so just to be clear—I love you! But now I’m going to focus on Montana. And North Carolina. Yup, in a week or so, I’ll be traveling to Montana to participate in Zone 4 Magazine’s spring Plant to Plate event at Chico Hot Springs Resort. I can’t wait! I’m going to do a cool tip demo and give a talk about how to cook all kinds of veggies—from baby bok choy to Swiss chard to beets. Plus a little Fresh from the Farm storytelling.

When I’m not on deck, I’m going to be sneaking around to observe all the cool growing seminars on things like grafting tomatoes, building a green house, and growing fruit trees. If you live in the area, I believe there are still a few tickets left (call 406-586-8540; dates are April 8 and 9.) I can assure you that it is going to be an awesome event, as Dan and Andra Spurr, the Editor and Publisher of Zone 4 Magazine, are old friends from our days together at Sailing World and Cruising World magazines, and they are super-organized and on the ball.

From Montana I fly directly to North Carolina for my 30th (yes 30th!) reunion at Duke University, where I am honored to be a featured speaker on Friday, April 11. I’m going to tell the story of my “career change” and how Fresh from the Farm came to be! It should be gorgeous in Durham by then—I’ll get to enjoy a real spring for once. I only wish Roy and Libby were going to be with me, but it’s just too much time away from farm and school this time. And I am certainly hoping I won’t be flying through any blizzards on this adventure.

But before I go, I have a few seedlings to tend to, some peas to plant, and some artichokes to track down.

brown braised artichokes pic monkey

Brown-Braised Baby Artichokes with Lemon Herb Pan Sauce

Serve these over creamy polenta or a small serving of fresh fettucine for a lovely veggie supper. For a variation, cook a little bacon, ham or pancetta in the pan before cooking the artichokes; remove and crumble on at the end. Toasted almonds or hazelnuts would be good with these too. Baby artichokes vary in size—I have seen the same size box packed with 9 artichokes sometimes, 12 another. This recipe will work for 9 medium-small baby artichokes (2 to 2 1/2 oz. each). If your artichokes are very small, you can use 10 or 11 of them, as long as they fit in one layer across the bottom of the pan with the shallots. Be generous with the fresh herbs here.

_____________________________

1 1/2 lemons

9 or 10 baby artichokes

1 1/2 tablespoons unsalted butter

1 tablespoon extra-virgin olive oil

4 small shallots, halved and peeled (or 2 medium or large, quartered)

Kosher salt

1 cup low-sodium chicken broth

1 to 2 tablespoons mixed fresh tender spring herbs such as chives, parsley, mint, tarragon and/or chervil

__________________________________
baby artichoke prep

Cut the whole lemon in half. Squeeze and drop the two halves into a medium bowl filled half-way with water.

Cut the stems off the artichokes at the base. Working with one artichoke at a time, peel away all of the outer leaves until you are left with a mostly lemon-limey colored artichoke (it will be somewhat cone-shaped) with the top third still being a light green. With a sharp knife, cut about 3/4 inch off of the top, and, with a paring knife, clean up the stem end just a bit (don’t remove too much; that’s the tasty heart). Cut the artichoke in half lengthwise. Rub the cut sides of each piece with the other lemon half and drop the artichoke halves into the lemon water.

In a 10-inch straight-sided sauté pan that has a lid, melt 1 tablespoon of the butter with the olive oil over medium heat. Arrange the artichoke halves (with whatever water still clings to them) and the shallot halves (both cut-side down) in one snug layer in the pan. Sprinkle with 1/2 teaspoon salt.

Cook, without stirring, until the bottoms of the artichokes and the shallots are well browned, 7 to 8 minutes. (If the heat on your stovetop is uneven—or the burner isn’t level, like mine—rotate the pan so that the bottoms get evenly browned.)

Pour in the chicken broth and cover the pan, leaving the lid slightly askew so that some steam escapes. Simmer gently, turning down the heat if necessary, until the broth is reduced to a few tablespoons, 12 to 14 minutes. Uncover, add the remaining 1/2 tablespoon butter, and squeeze the other lemon half over all.

Sprinkle most of the herbs over and stir gently until the butter has melted. Remove the pan from the heat, and stir again, scraping up any browned bits if possible. Taste for salt and immediately transfer the artichokes and the pan sauce to a serving platter. Sprinkle on any remaining herbs.

Serves 2 as a veggie main dish with polenta or noodles, or 3 as a side dish


Hope for the Seedlings + Sixburnersue’s Best Cabbage Recipes for St. Patrick’s Day

seedling pic 2Yesterday I was hiding out in the hoop house, pretending that I didn’t have a long list of things to do before getting on a plane tomorrow. It was warm and bright and still inside, the air spritzed with the fine smell of damp potting soil. I could have stayed there for hours, futzing over the hundreds of little baby bok choy seedlings that have popped up in the last week.

We planted the bok choy seeds with the grand scheme of getting an early crop into our south-facing bed along the outside of the hoop house. Roy has been prepping the bed and installing hoops and a plastic cover to warm the soil up for planting. Bok choy can go into 50° soil and by using transplants, you can have a harvest in about a month after transplanting.

seedling blog 3

Even though we have the hoop house now, it isn’t heated, so the nighttime temperatures are still pretty chilly in there. (The greens in the raised beds have covers over them.) So we had to germinate the bok choy seeds inside. First, I mixed up the seed starting soil (with water) and spread it in 72-hole flats in the hoop house. Then I carried the flats inside, planted the little tiny seeds, covered the flats with plastic tops, carried them upstairs, and arranged them over the floor of Libby’s bedroom. Then I shut the door to keep the room cool and to keep Barney out.

So you can see, we still do not have a very sophisticated system of seed starting. And, by the way, though Libby’s room was the perfect temperature, and the seeds germinated very evenly, Barney did get in there more than once and pounced on the plastic tops. I think he got in because Farmer nosed the bedroom door open, thinking Libby might be in there.

Still, we’ll call that part successful. However, we’ve then had to carry the flats down to the hoop house every morning—and then back every night. The seedlings grow straight and sturdy in the gauzy overhead sunlight of the hoop house, so you want them there during the day. (Without adequate direct light, seedlings grow leggy and sideways, as most of you probably know. ) And very soon we’ll be able to just pop the plastic tops back on at night and leave them in there. But right now, because of this ridiculous weather (50° yesterday, 25° and snowing today) the flats have to go back inside the house at night. Argh!!

bok choy Collage

Anyway, this is certainly not a big problem to be complaining about, and I’m only really recounting this as my way of saying I am oh-so-very-excited about spring coming. (And for making delicious things with bok choy, of course!). When I get back from Chicago, I will plant more flats—of lettuce, spinach, kale, and chard. (That is—IF I get back! I’m supposed to get out of downtown Chicago and to the airport on Monday, and isn’t that St. Patrick’s Day? And isn’t there, like, a fairly large parade in Chicago?! Oh well.)

cabbage recipe collage

Since I won’t be actually here on the Irish holiday, I thought I’d better share my favorite cabbage recipes from Sixburnersue with you today. I’ve never been one for boiled cabbage, so for a simple preparation, I go with something like this Quick-Sautéed Cabbage recipe. For something fancy, there’s always the Savoy Cabbage, Apple, Onion & Gruyere Rustic Tart. But probably my favorite holiday cabbage side dish (with the same flavor profile as the tart, just with potatoes added) is this St. Patrick’s Day Cabbage, Onion Apple & Gruyere Gratin.

I may not get to eat one of these dishes on St. Patrick’s Day this year, but I do have some cabbage to look forward to—I planted some cabbage seeds directly into one of the hoop house beds last fall, and I now have a few tiny cabbage plants starting to form heads. With any luck, I’ll have cabbage on say, May Day! And baby bok choy even sooner. Can’t wait.

cabbage pic collage 1