Category Archives: side dishes

We Brake for Farm Stands — and Fairy Tale Eggplants

The car was packed to the gills—no lie. We rearranged the sleeping bags, two coolers, bags of beach towels and bathing suits, two beach chairs, and one hermit crab in a small cage to fit three blueberry bushes into the way back. Gifts from my Dad, the blueberries–in our minds–already had a home in our garden. No way were we leaving them in Delaware. We tucked Libby and her stuffed animals Croc and Humphrey into a small spot in the back seat, next to three flowering annuals we’d bought on the way down. And off we went, leaving Lewes early Monday morning for the long drive (and ferry ride) home to Martha’s Vineyard. At least the outside temperature was a cool 88—16 degrees cooler, in fact, than on the drive down. (Yes, that’s 104 degrees F.)

With a full car and nine hours of highway ahead of us, we had no business braking for farm stands. But we did. Pretty soon we were cramming bags of Silver Queen corn into any fissure we could find. The nice farm stand guy at one place talked us into a new variety of melon – something called Candy Orange, a cross between a honeydew and a cantalope. A couple quarts of fresh peaches, a box of blueberries, and a few other fruits later, the car began to smell. Not a bad smell, just a very fragrant, perfumey smell. Roy thought it was rather mango-ish. All I could think about was whether the fruit would make it back without rotting or bruising something terrible. What I like best about farm stand fruit is that most of it is picked ripe or nearly ripe. But that means long car travel is about the worst way to treat these fragile babies.
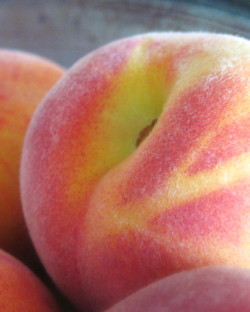
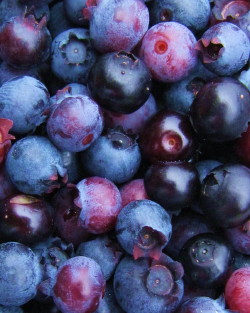
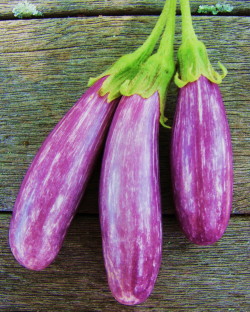
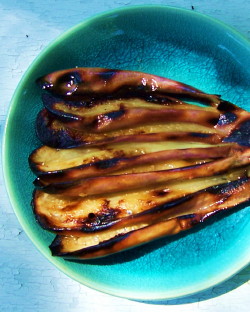
Most of the fruit survived (except one juicy peach that Libby and I shared in the car, random rest-stop napkins grabbed to catch the drips) as did the other goodies we nabbed at the farm stands. Silly me, I fell in love with something new – a box of little Fairy Tale eggplants – only to remember when I got home that I actually grew a few of these in my first garden on the island. (Photo at top left is evidence. Memory loss is worse than I thought, I guess!) I am a sucker for mini vegetables (like the little pattypan squash we grow and sell), so when I saw these I instantly thought we should grow them for our own farm stand next year. And maybe we will. In the meantime I had to figure out what to do with some of them today (a quart is a lot!). (Fortunately, many of the other goodies went straight away to the kind friends who looked after the chickens, the farm stand, and the garden while we were gone.)

From some other vague part of my brain came the memory of eggplant “fans.” I thought this would be a cool and pretty idea for the little mini eggplants, and so I sliced away. I trimmed the tops of the fruits just enough so that they still hung together, and cut about four parallel lengthwise slices just a bit shy of the tips to make the “fans.” I brushed each slice with olive oil, sprinkled with salt, and lit the grill. Ten minutes later I had lunch. Just three or four minutes on each side was enough to cook these eggplants through (I hate undercooked eggplant). The skin was tender, the flesh soft, and the flavor, well—clean and sweet. Not quite as deep and earthy as a big globe eggplant, but not the least bit bitter or seedy either. I wound up smearing some of my slices with a little extra Humboldt Fog goat cheese our farm-keeping houseguests left in the fridge for us. Wow—that was a killer pairing. But the grilled eggplant would be great lots of ways: dressed with salsa or a drizzle of chimichurri, in a salad with arugula, fresh mint and a lemony vinaigrette, or just on their own as a cute side, antipasto, or starter. Farm stand finds are fun, huh?

P.S. Culinary highlights from the weekend in Delaware included a Fast, Fresh & Green signing at the wonderful Historic Lewes Farmer’s Market, my sister Eleanor’s delicious baby back ribs, and a trip to Hopkins Farm Creamery for cow-fresh ice cream (complete with barnyard smells). We didn’t get a chance to eat crabs, pick beach plums, or pan-fry some scrapple on this trip—next year!

P.P.S. My camera has met a sad fate, so I beg your patience while I research a new camera (and rob a bank to pay for it!).

Of Mice and Girls (And Baby Carrots, Too)

I’m always in a bit of a funk after Libby leaves. There’s a palpable void that I can’t quite describe, except that suddenly everything is much too quiet without her giggles and shrieks and pattering all around. After a few days we adjust and look forward to her next visit. But this time, after a particularly fun four-day holiday weekend, I’m missing her even more.

We did all the usual stuff you’d dream up for a swath of hot July days on Martha’s Vineyard—swimming at State Beach, heading up to Menemsha at sunset time for an instantly dripping chocolate-dipped soft-serve ice cream cone, hitting the arcade in Oak Bluffs for a round of games and prize-winning tickets. (I could have done without the giant inflatable Red Sox hammer, I’ll admit.)

But mostly we puttered around the farmette, where there’s no shortage of distractions for a girl with Libby’s expansive curiosity: Crickets, fireflies, chickens, bunnies, turkeys. Wild berries and wild flowers. Rope swing, sand pile, garden, farm stand. And the nice part is that the three of us can be outside within view of each other (I don’t have to worry about Libby) and working on different things. While I’m weeding in the garden and Roy’s cutting wood outside the shop, Libby will skip from spot to spot, stopping with news of the chickens or the discovery of a particularly interesting bug.

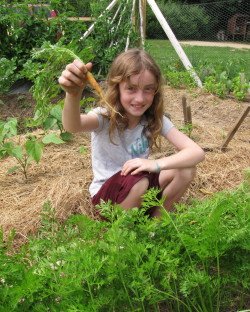
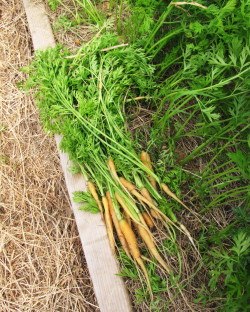
Occasionally, I’ll get lucky and Libby will help me in the garden. She’s particularly fascinated with the carrots, so thinning them was the perfect job for her this weekend. Together we held back the fronds and found the carrots that were too close together and held our breath to see what would come up when we tugged. Some were tiny, some were finger-sized, and some were just big enough for me to sauté up for dinner. The tops went to Cocoa and the chickens. (The not-quite-ready-for-prime-time carrots are just one of the many frustrations in my I-don’t-have-enough-stuff-to sell-at-the-farm stand-yet saga. I am tired of listening to myself complain about it, so I will leave that alone and just say that the baby squash and the baby carrots and the little bean plants had better be harvest-ready by next week!)

It’s a good thing I got Libby to help me with the carrots on Saturday, because on Sunday, along came Mousey. Roy and I have never seen Libby fall so hard for an animal. We thought she’d like the bunny, and we knew she’d love the chicks, but her heart now belongs to Mousey (for as long as Mousey remains breathing). Libby and I first saw Mousey scamper across the front step in the early morning. Later Mousey (not newborn, but probably only a few weeks old) stood frozen near the basement bulkhead doors. Dad found some old gloves and let Libby hold Mousey and feed her a bit of cheese. Several times we tried to return Mousey to wherever she came from, but she kept coming back to us. The discovery of Mousey’s expired brother, and the suspicion that a hawk or something else had gotten Mommy, confirmed that Mousey was an orphan. Soon Mousey had a comfy tissue-lined box to snuggle in and a saucer of local grass-fed cow’s milk to drink (only the best for Mousey). But mostly Mousey spent the day napping in Libby’s glove-lined hands, and I’m not sure who was happier—Libby or Mousey. Actually Mousey’s full name, according to Libby, is Lucky Mousey Joy. (Joy is Libby’s middle name.)

Libby’s mom Kelly is a really great sport about all this farm activity (and I so appreciate her sharing Libby with me), but I can only imagine what she was thinking when Roy and Libby got off the ferry with Mousey in a shopping bag. We could have kept Mousey here, of course, but she wanted to go with Libby, I’m quite sure.

Roy and I thought of Libby and Mousey as we ate our sautéed carrots last night (recipe follows). Hoping the days will fly by (and the carrots will grow big) until we see them both again. Well, Libby at least.

Every Night Sautéed Carrots

For a printable recipe, click here.

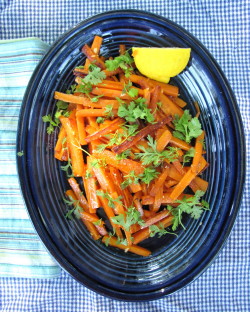
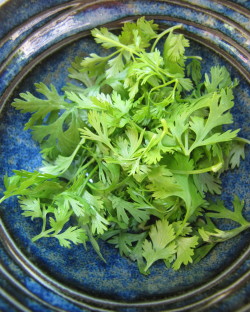
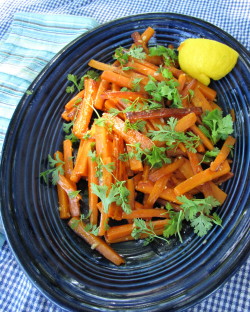
This is our house go-to method for weeknight carrots. Cooked over moderate heat in a covered skillet, the carrots get tender and lightly browned at the same time. I am picky about the way I cut carrots, as I think sticks hold together and brown up better than coins. Cutting sticks isn’t as hard as you’d think (see photo for progression) and they don’t need to be perfect. In this version, I use lemon, garlic, and cilantro (because I’ve tons of it in the garden) to season the carrots; but you could substitute lime, orange, ginger, mint or basil to customize these any night. Be sure to zest your lemon before juicing it.

_____________________________________________________

1 teaspoon fresh lemon juice, plus a couple lemon wedges for serving

1 teaspoon red wine vinegar

1/2 teaspoon honey

1 tablespoon unsalted butter, 1 teaspoon separated and chilled

2 teaspoons extra-virgin olive oil

1 pound carrots, peeled and cut into sticks 1/4 to 3/8 inch thick and 2 to 3 inches long

1/2 teaspoon kosher salt

1 teaspoon minced fresh garlic

1/4 teaspoon (packed) freshly grated lemon zest

2 tablespoons loosely packed fine cilantro leaves or 2 teaspoons chopped cilantro

________________________________________________________________

Put a serving dish near your stove. In a small bowl, combine the lemon juice, vinegar, and honey. Set aside.

In a large (12-inch) nonstick skillet, heat 2 teaspoons of the butter with the olive oil over medium heat. Add the carrots and salt and stir to coat. Cover the pan. (I use a sheet pan because my large skillet does not have a lid! It does not have to be a tight fit—letting a little air escape is good.) Cook, stirring occasionally at first and more frequently as the carrots begin to brown, until the carrots have shrunken, are just tender, and nicely browned on some sides, about 13 to 15 minutes. Uncover, reduce the heat to low, and add the garlic and lemon zest. Stir until fragrant, about 30 seconds. Drizzle the lemon juice mixture overall, toss, and remove the pan from the heat. Immediately transfer the carrots to the serving dish and garnish with the cilantro and the lemon wedges.

Mustard Greens Are the New Baby Bok Choy – Really!

Who knew baby bok choy was such a star? It seems to be the most popular vegetable on the Island right now, and the little bit of it I planted in May is pretty much gone. I have another young patch coming along, but it prefers cool temps, so I’m afraid the weather might be too hot when it matures. In the meantime, while I wait for my next cooking green to get big enough to harvest (Swiss chard is close), I’m picking mustard greens to sell.

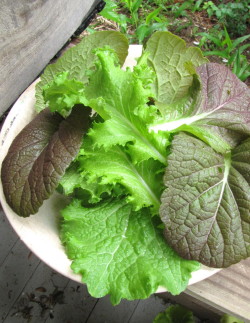
I’ve noticed that since I wrote “Mustard Greens” on the farm stand sign (instead of “Baby Bok Choy”), we’ve had fewer people pulling into the driveway. Well, harrumph! Doesn’t everybody know how tasty mustard greens are, too?! Okay, seriously, if I were to be honest I’d have to tell you that mustard greens are not as groovy as baby bok choy. For one thing, they don’t have that stand-up texture. But they are strangely delicious in a very arresting kind of way. If you like spicy mustard of any sort—and you’re looking for a powerhouse nutritional kick—give mustard greens a try. (They’re not only purported to lower cholesterol, but they contain unique cancer-fighting phytonutrients and lots of Vitamins A, C, and K.)

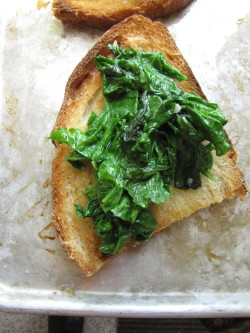
I especially like the young tender leaves I’m harvesting now because they don’t need par-boiling—just a quick turn in the sauté pan. Super quick and easy. Ginger and garlic both are natural partners for mustard greens, and not surprisingly, the spicy greens do really well with just a touch of something creamy to offset the zing. For me that creamy thing is often goat cheese. I’ve been making a really simple lunch/snack of toasted or grilled bread with sautéed mustard greens and a bit of warm goat cheese on the top (recipe below). I guess I have goat cheese on the brain these days, too.

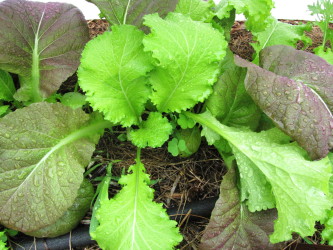
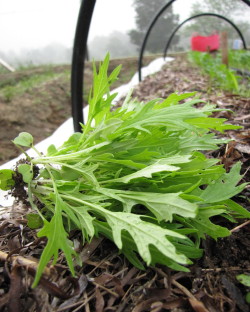
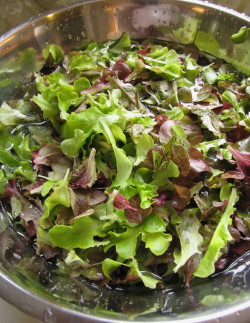
There’s one last reason why mustard greens are my heroes this spring. For some reason those wily flea beetles danced right past them on their way to the Tuscan Kale. (This was not good news for the kale, unfortunately.) Normally flea beetles feast on anything in the brassica family, including the milder mustard relatives, mizuna and tat soi (in the photo at right, top), that I put in my salad mixes. But they didn’t linger on the mustard greens, leaving them nice-looking enough to sell. Whew. The greens grow so quickly, too, that I’ve been able to harvest baby leaves for salad and come back the next day to find the rest of the leaves on the plant 6 inches tall–perfect for cooking. You could live on this stuff. Really.

Toast with Sautéed Mustard Greens and Warm Goat Cheese

This recipe is more like a thought-starter, so feel free to jiggle it around as you like. You probably have a favorite method for toasting or grilling good bread, too, so use it.  This makes a nice snack or light lunch for one person, but scale it up as much as you want to serve more, or turn it into a crostini for starters. Remove the tough stems from the mustard leaves before ripping them into smaller pieces. If you only have mature, large mustard greens, you would want to parboil them 3 to 4 minutes first and drain well before sautéing.

1 oval slice Artisan bread (about 6 or 7 inches long and cut 1/2-inch thick), cut into two pieces

extra-virgin olive oil

kosher salt

1/2 teaspoon minced garlic

2 to 3 ounces mustard greens, stems removed, leaves torn into small pieces (about 2 cups), washed and spun dry

2 tablespoons crumbled fresh goat cheese (or queso fresco or other cheese if you prefer)

Heat the oven broiler on high and arrange a rack 4 to 6 inches from the heating element. Put the bread on a baking tray or cookie sheet. Brush one side of the bread with a little olive oil, sprinkle with a little salt, and broil until lightly browned. Set the toast aside on the sheet tray. (You can lightly brown the other side, too, if you wish, though leaving the bread a little soft in the middle is nice.)

In a small skillet, heat 1 teaspoon olive oil over medium heat. Add the garlic and cook, stirring, just until softened and fragrant, about 30 seconds. Add the mustard leaves and a pinch of salt and cook, stirring, until wilted, about 1 minute. Remove from the heat.

Pile the mustard greens on each of the two bread pieces and crumble the goat cheese or other cheese on top. Place back under the broiler and cook just until the goat cheese is warmed and softened.

Serves 1

Tip of the Week: Skewer Onions for the Grill with Turkey Lacers

Yep, you guessed it. I’ve been spending so much time doing this (harvesting greens, left) that I haven’t had time to do much of that (cooking, right). Or to write a blog post this weekend. But I have been thinking of you, I promise. So I offer a good old tip I’ve used for years and that I called into quick action the other night for our dinner–using a turkey lacer to skewer onion slices for the grill. It’s that easy.

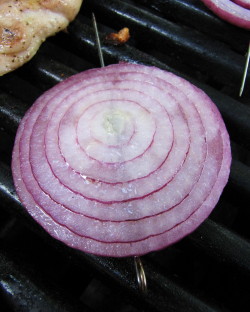
You can pick up a package of turkey lacers (basically mini-skewers) at any grocery store. Peel and cut a big red onion (or yellow or sweet) into 1/2-inch slices and poke the lacer through the center of the onion from side to side (so that you poke through every ring). Coat the slices with olive oil and salt and put on a medium-hot grill. Cook until there are nice grill marks on each side of the slice (about 5 to 7 minutes per side on my grill). And here’s one last tip: At this point the onions will be flavorful but not completely tender. Take them off the grill and wrap them briefly in aluminum foil, where they will steam a bit, finish cooking, and get soft and tender. Delicious. On steak. On salad. On whatever. Good emergency vegetable when the crisper drawer is empty!

For the Farm Stand, A Stir-Fried Baby Bok Choy Recipe

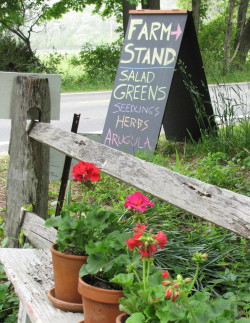
Guess I can safely say that our “soft” opening of the farm stand this weekend was more successful than the Spider Man Broadway previews. You might even cast it more in the vein of Field of Dreams, because, it seems, if you build a farm stand, they will come. At least if you put a big blackboard sign out by the side of the road, and that road happens to be one of the main routes Up-Island. And also, it doesn’t hurt if it’s a holiday weekend. And the sun is shining.

Yikes. Most people would be overjoyed at selling out on the first weekend. But I felt bad that we had run out of salad greens by Saturday afternoon. I just couldn’t harvest any more from my baby plants without endangering a steady  harvest in the weeks to come. So we took the sign off the road, and just left the tomato plants and seedlings out for anyone who happened to notice while driving by. Even without the sign, people spotted the farm stand and turned down the driveway.

So now I am of course ruminating on how we can expand the garden right away. This summer, not next summer. (Roy is rolling his eyes…but smiling, too.) It seems we have lucked into a great location. (Actually, it wasn’t luck. It was a gift from our dear friend Joannie Jenkinson, who actually spent part of her childhood in this house and introduced us to the owners. She got it in her head that we should live here, and I have to say she was on to something. Joannie, who is the animal control officer for West Tisbury and is out and about a lot, was, appropriately, our first customer Friday morning.)

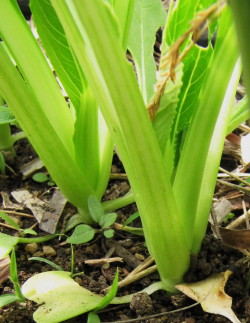
I think I may also have to learn vegetable-growing magic tricks to hurry some things along. Take my baby bok choy. I am crossing my fingers that it might be ready for the farm stand this coming weekend. (Judging by the photo at left you can see that this is probably wishful thinking.) So while I wait, I figured I’d work up a baby bok choy recipe to give away at the farm stand. (I’m hoping to have different appropriate recipes available every week. This week I put out the “pink and green” arugula and radish salad here.)

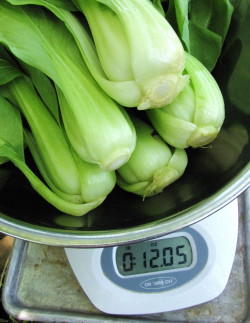
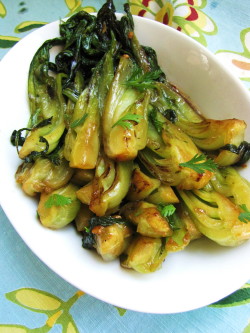
Fortunately, there is a wonderful farmer on the Island, Krishana Collins of Bluebird Farm, who specializes in baby bok choy. So if you live on the Vineyard, you will have much better luck finding hers (at Down Island Cronig’s before the farmers’ market opens in a few weeks) than mine (which is a tiny planting any way!). Her baby bok choy (top photo, in the scale) is gorgeous and delicious.  Yesterday, I picked up a half-dozen little heads (about 6 inches long and less than 2 inches wide) and stir-fried some for lunch. I did a variation on a recipe from Fast, Fresh & Green, and it couldn’t be simpler or more delicious. The complex nutty flavor of baby bok choy really deepens with browning (no surprise there) and pairs well with Asian seasonings. (I also like to brown-braise baby bok-choy, but I am still working on the perfect way to use it in a gratin. It’s also lovely raw in salads and slivered into noodle soups.) Unfortunately, when stir-fried, baby bok choy loses its beauty-queen looks and becomes more like the charming bad boy–appealing in a rustic kind of way, but definitely delicious.

Stir-Fried Baby Bok Choy

For a printable recipe, click here.

Try to choose baby bok choy that are all about the same size for this recipe. Depending on how little they are, you’ll need between four and six to get 3/4 pound.

_______________________________

4 to 6 baby bok choy (6 to 7 inches long, 1 1/2 to 2 inches wide), 12 ounces total

1 tablespoon soy sauce

1 tablespoon orange juice

1 teaspoon brown sugar

1/2 teaspoon sesame oil

1/8 teaspoon chili-garlic sauce

1/2 teaspoon cornstarch

2 tablespoons peanut oil

2 large garlic cloves, very thinly sliced crosswise

kosher salt

1 to 2 teaspoons chopped fresh cilantro (optional)

________________________________________

Cut the bok choy lengthwise into quarters if very small (2 ounces), and into six pieces if larger (3 ounces). (There’s no need to trim any of the stems.) Wash them well by swishing them in a bowl of tepid water, and spin them dry.
Set a serving dish on your counter. I like a white oval for this.

In a small bowl, combine the soy sauce, orange juice, brown sugar, sesame oil, chili-garlic sauce and whisk well. Add the cornstarch and whisk until dissolved.

In a large (12-inch) nonstick stir-fry pan, heat the peanut oil over medium heat. When the oil is hot (it will loosen up), add the garlic slices and the bok choy. Season with 1/4 teaspoon salt and turn the heat to high. Using tongs, toss the bok choy with the oil to coat and to distribute the garlic slices.

Cook, flipping the bok choy with tongs and spreading it out occasionally so that all the stems have some contact with the pan as they cook, and so that the garlic does not all gather on the bottom of the pan, until all of the bok choy stems are browned in parts (the leaves will be well-wilted and browned), 5 to 7 minutes. (If your stove runs very hot or the garlic is burning after the first few minutes, turn the heat down to medium-high.) Take the pan off the heat, pour the sauce into the pan, and stir immediately as it thickens up. Toss well and quickly transfer the vegetables, sauce and garlic to the serving platter. (The garlic will be very brown—some folks like it, some don’t, so push aside if you like!) Garnish with chopped fresh cilantro if desired.

Serves 2 to 3 as a side dish.

For Stress-Free Veggie Grilling, Grab a Basket

Between rain drops this week, we’ve been firing up the grill a fair amount. My very favorite place to shop for veggies – the farm stand at Morning Glory Farm – finally opened up for the season. So I saddled up the Honda, headed down to Edgartown, and robbed the place. Not literally of course. But I did come away with a stash of valuable veggies, things that Morning Glory is already harvesting from their own fields and greenhouses. Among other items (like a tee shirt and a strawberry muffin), I nabbed baby bok choy, purple-tipped asparagus, scallions, and tiny mustard greens.

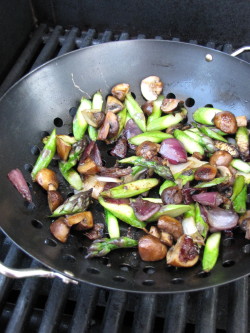
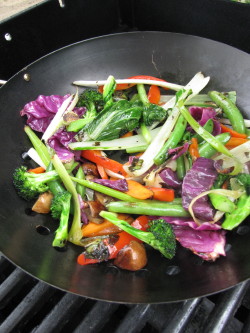
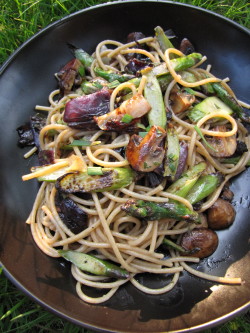
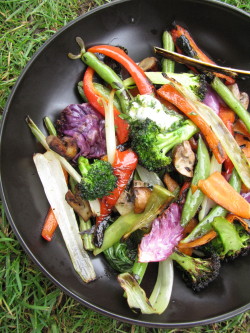
Since we’ve been working in the garden late every day, I’ve been dreaming up simple dinner ideas, too. (For a dozen weeknight ideas, read the blog I wrote for the Huffington Post this week.) I love grilled veggies, but sometimes prepping veggies for the grill, and then standing vigil over them patiently, is just a little more time than even I’m willing to give. So this week I grabbed my grill basket to make life easier. And I wound up improvising a number of different veggie dishes, using both my Morning Glory haul and the contents of my refrigerator veggie bin. (Just two samples–in the basket above, and finished, below.)

Grill baskets are inherently destructible. They won’t last forever, so don’t bother spending a lot of money on one. Just buy one—you won’t be sorry. (Mine is a particularly cheap, lightweight one that I picked up at a housewares store. But this new stainless steel one from Weber looks like a good bet.) Basically, using a grill basket is like stir-frying on the grill. But better. Because you don’t have to pay close attention. Stirring every three or four minutes, as opposed to every 30 seconds, is just fine. As long as you follow a few guidelines, you can cook practically any combination of your favorite veggies in about 10 minutes of mostly hands-off time.

Here are a few tips for cooking veggies in a grill basket:

1. Choose a combination of veggies that are loosely similar in density and moisture content. Broccoli, cauliflower, carrots, sugar snap peas, young beans, bok choy, broccoli raab are all fine. (Yeah, I’m defining density very loosely here). Don’t use potatoes or roots other than carrots here. It’s also fine to throw in a hearty leafy green like cabbage or radicchio—delicious if you don’t mind a few charred edges. But don’t use delicate greens like spinach here unless you toss the leaves in at the end of cooking.

2. Cut all those veggies into pieces about the same size. Then augment them with at least some peppers, onions or mushrooms—aromatic veggies that give off moisture as they cook. The aromatics not only spread flavor around but they help all the other veggies cook, too.

3. Estimate how many veggies you’ll need by putting the raw veg into the (cool) basket. Mine feels fullish with 3 to 4 cups veggies. You want your basket to be slightly overcrowded. With the grill lid-down (and only occasional stirring), the indirect (oven-like) heat of the grill, along with the moisture the crowded veggies will give off to each other, will help cook the veggies cook through while they brown.

4. Be sure the veggies are thoroughly (but not excessively) coated with oil. You need the oil to draw the heat in and cook the veggies. Season with kosher salt, too.

5. Preheat the grill with the grill basket in it for 5 to 10 minutes. Cook over medium heat (unless your grill is really old and slow—then medium-high.) The veggies are done when they are all limp, tender (some will be crisp-tender), and gently browned in places.

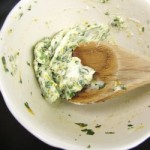
6. When the veggies come off the grill, you can do almost anything with them. We like to toss them with a compound butter (fresh herbs, citrus zest, salt), which is quick and easy to make. Then sometimes we take it a step further and toss the seasoned veg with whole wheat spaghetti or another pasta and call it dinner (or a big part of dinner). If you like the compound butter idea, I’ve included a formula below for making one. You might not use the whole batch on the veggies; use any extra with your eggs in the morning or on a steak tomorrow night.

Compound Herb Butter: In a small bowl, combine 2 tablespoons well-softened butter with 1/2 tsp. citrus zest, 1/8 teaspoon kosher salt, 1 1/2 teaspoons finely chopped fresh tender herbs (chives, mint, parsley, cilantro, basil), and 1 teaspoon honey or maple syrup (optional). Mash with a wooden spoon until well-combined. Store tightly covered in the fridge for up to 3 or 4 days.

Sweet Pea Dreams and a Quick Slaw with Sugar Snaps

Peas, alas, are not a spring vegetable, despite what legions of food writers would have you believe. It is wonderful to think of things like spring pea risotto and minted pea soup for Mother’s Day, but unless you are lucky enough to live in a really temperate climate, you’ll be waiting for fresh peas until late June with the rest of us.

I feel bad being a Scrooge about this. Actually a super-Scrooge, as, these days, I can’t really even get behind those so-called fresh peas (usually already shelled) that arrive in the grocery stores before they do in my garden. I’d rather eat frozen peas. (And I do.) The reason is that shell peas–or English peas–lose that just-picked sweetness rather quickly and wind up tasting bland and starchy when they travel many miles to get to you.

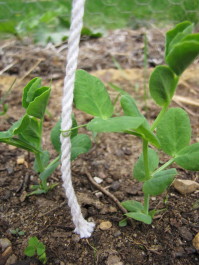
So right now I have to content myself with staring at the squat little pea seedlings in my garden, imagining what they’ll bring me. I’m very proud of them, actually. Yesterday I noticed that they’ve started unfurling their little tendrils and have obligingly begun to grab on to the curtain of strings I hung for them. Such good peas.

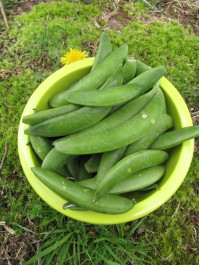
The other way I’m getting my pea fix right now is with sugar snap peas. I’m seeing a lot of nice ones at the grocery store. Yes, these come from far away, too, but at least they hold on to their flavor—and texture—better than shell peas. Sugar snaps are probably the number one quickest veggie on the planet to cook—or just eat. Because, of course, you can munch on them raw (like Cocoa Bunny, in photos below), toss them in a hot pan for a super-quick sauté, or slice them to use in salads and slaws (like the one below).

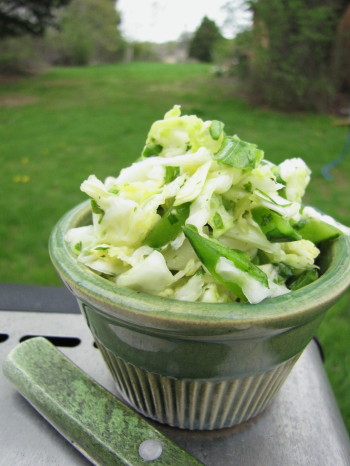
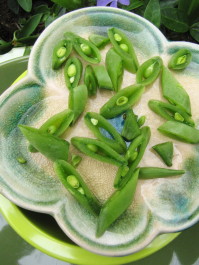
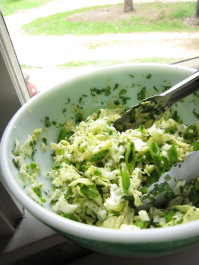
I get a kick out of slicing sugar snaps on the diagonal, exposing the cute little cross-section of peas inside. (I know, I’m easily amused). But these pretty little slivers are useful, too—they add sweetness and crunch, but not too much bulk, to a fresh slaw. Since I happened to have some Savoy cabbage, a few limes, and a bunch of cilantro in the fridge today, I knew I could make my favorite slaw and embellish it with sugar snaps. This recipe (I did a version of it in Fast, Fresh & Green) honestly takes no more than 10 minutes to make, and then reaches its perfect state of crunchy/wilty balance after another 10 minutes or so (though it can hold a bit longer than that). It’s versatile, too. Today I wanted a slightly creamy feel (something to do with the grey skies), so I stirred in a dollop of Mermaid Farm yogurt at the end.

I ate a whole bowlful of this slaw standing up at the kitchen counter, but if you were moved to make some this weekend, you might want to serve it with grilled butterflied leg of lamb, grilled chicken, or even grilled veggie or fish tacos.

Quick Savoy Slaw with Sugar Snaps, Lime & Cilantro

For a printable recipe, click here.

The amounts of lime juice, sugar, and cilantro are flexible here—taste after a few minutes and adjust seasonings if you like. I sometimes add sliced scallions or chives here, too. Savoy cabbage is the crinkly green one.

_______________________________________

8 ounces very thinly sliced cored Savoy Cabbage (about 3 1/2 cups)

4 to 5 ounces sugar snap peas, trimmed and sliced on the diagonal (about 1 1/3 cups)

3 tablespoons chopped fresh cilantro

3 tablespoons freshly squeezed lime juice

2 to 3 teaspoons sugar

1/2 teaspoon kosher salt

1 to 2 tablespoons full-fat plain yogurt (optional)

________________________________________

Combine the cabbage, snap peas, cilantro, lime juice, sugar, and salt in a medium bowl. Toss thoroughly with tongs or two spoons. Let sit for ten minutes, tossing occasionally. Taste and adjust seasonings if you like. Let sit another ten minutes for a softer slaw. Fold in the yogurt if desired.

Serves 4

________________________________________

Cocoa wasn’t so sure about the sugar snap pea…but curiosity prevailed

Fun with Artichokes – Brown-Braising Babies is Best

Well, I am embarrassed to admit that I got overwhelmed in Whole Foods the other day. Here I am a Food Professional (whatever that is), and the sheer abundance of goodies in the store was just too much for me. Granted, it was a quick stop—I only had 10 minutes to troll the store, as I was on my way to a book signing at Andover Bookstore in Andover, MA. Since we don’t have a Whole Foods on the Island (nor a grocery store anywhere near the size and breadth of this kind), I try to stop in one of these stores when I’m off-Island, mostly to see what the produce selection is like, but sometimes to pick up a specialty ingredient.

So it’s a little frustrating to be in a store with zillions of different products and not much time to peruse them. But honestly, even if I had hours on my hands, or a store like this nearby for regular shopping, I’d still probably be a bit blinded and a tad frazzled by all the colors and sounds and choices and crowds. It’s just a personal preference for me these days—I like things simpler and quieter, and I don’t mind a few less choices.

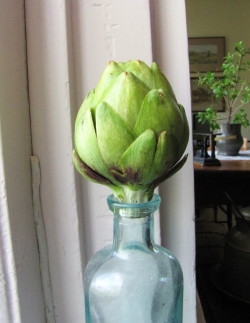
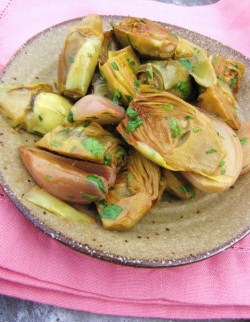
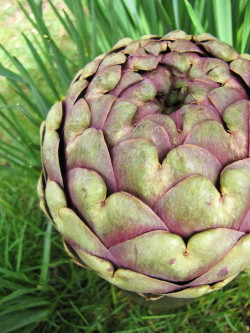
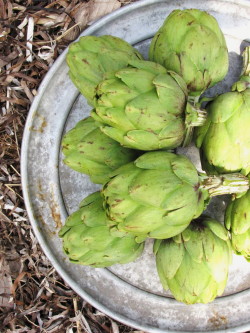
So as my little brain struggled to quiet down all the firing synapses while I whizzed around the produce section, I zeroed in on something visually arresting, something I could wrap my whole 5-minutes-are-left-for-you-to-shop self around – a gorgeous mound of purple-tinged globe artichokes, the biggest and prettiest I’d ever seen. One was literally aching to pop into my little basket and so it did. Next to the display was a stack of boxes filled with baby artichokes—my favorite for cooking. (And yes, we do get both kinds on the Island, just not as consistently or in such abundance.) I grabbed two boxes, thinking I hadn’t yet blogged about the babies, and about how delicious they are braised.

Back home, after a weekend of writing, planting onions, leeks, potatoes, and more greens in the garden, and transplanting tomato and basil seedlings to 4-inch pots inside, I finally got a chance yesterday to do this recipe (below) for you, a variation on one in Fast, Fresh & Green. But first I had all kinds of fun photographing the artichokes in various spots all over the house and yard. I simply couldn’t take my eyes off that purple one.

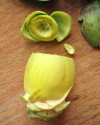
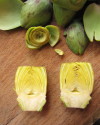
I am convinced that most folks shy away from cooking baby artichokes because they are daunted by prepping them. Really and truly, I promise you that the trimming couldn’t be easier, and that you can do one batch in less than 15 minutes, maybe 10. I did take some quick pictures (in recipe below) to try and illustrate the process for you, but for a better visual, you can also visit the Ocean Mist Farms website (the folks who package up the babies, which are most available in the month of May) to watch a video. Don’t let prepping stop you from cooking and eating baby artichokes—they’re fabulously delicious, and you get more bang for your buck out of them than with bigger artichokes.

By the way, baby artichokes are just immature artichokes picked lower down the stem before they get big. Because their chokes haven’t developed, the whole thing (except for a few tough outer leaves you strip off) is edible.

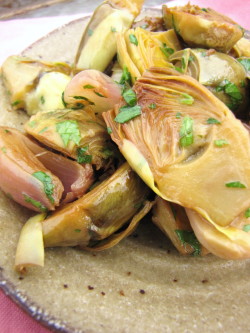
Brown-Braised Baby Artichokes with Lemon Herb Pan Sauce

Printable Version of Recipe

Serve these over creamy polenta or a small serving of fresh fettucine for a lovely veggie supper. For a variation, cook a little bacon, ham or pancetta in the pan before cooking the artichokes; remove and crumble on at the end. Toasted almonds or hazelnuts would be good with these too, and you could substitute a squeeze of orange instead of lemon at the end if you liked. Baby artichokes vary in size—I have seen the same size box packed with 9 artichokes sometimes, 12 another. This recipe will work for 9 medium-small baby artichokes (2 to 2 1/2 oz. each). If your artichokes are very small, you can use 10 or 11 of them, as long as they fit in one layer across the bottom of the pan with the shallots. Be generous with the fresh herbs here.

_____________________________

1 1/2 lemons

9 or 10 baby artichokes

1 1/2 tablespoons unsalted butter

1 tablespoon extra-virgin olive oil

4 small shallots, halved and peeled (or 2 medium or large, quartered)

Kosher salt

1 cup low-sodium chicken broth

1 to 2 tablespoons mixed fresh tender spring herbs such as chives, parsley, mint, tarragon and/or chervil

__________________________________

Cut the whole lemon in half. Squeeze and drop the two halves into a medium bowl filled half-way with water. Cut the stems off the artichokes at the base. Working with one artichoke at a time, peel away all of the outer leaves until you are left with a mostly lemon-limey colored artichoke (it will be somewhat cone-shaped) with the top third still being a light green. With a sharp knife, cut about 3/4 inch off of the top, and, with a paring knife, clean up the stem end just a bit (don’t remove too much; that’s the tasty heart). Cut the artichoke in half lengthwise. Rub the cut sides of each piece with the other lemon half and drop the artichoke halves into the lemon water.

In a 10-inch straight-sided sauté pan that has a lid, melt 1 tablespoon of the butter with the olive oil over medium heat. Arrange the artichoke halves (with whatever water still clings to them) and the shallot halves (both cut-side down) in one snug layer in the pan. Sprinkle with 1/2 teaspoon salt. Cook, without stirring, until the bottoms of the artichokes and the shallots are well browned, 7 to 8 minutes. (If the heat on your stovetop is uneven—or the burner isn’t level, like mine—rotate the pan so that the bottoms get evenly browned.) Pour in the chicken broth and cover the pan, leaving the lid slightly askew so that some steam escapes. Simmer gently, turning down the heat if necessary, until the broth is reduced to a few tablespoons, 12 to 14 minutes. Uncover, add the remaining 1/2 tablespoon butter, and squeeze the other lemon half over all. Sprinkle most of the herbs over and stir gently until the butter has melted. Remove the pan from the heat, and stir again, scraping up any browned bits if possible. Taste for salt and immediately transfer the artichokes and the pan sauce to a serving platter. Sprinkle on any remaining herbs.

Serves 2 as a veggie main dish with polenta or noodles, or 3 as a side dish

Easter Asparagus: Keep it Simple by Roasting or Grilling

I am, as they say, in the weeds this week. Not the garden weeds (yet), just life weeds. They happen to be good weeds (sorry to be prolonging this metaphor) – opportunities I’m grateful to have, just all a little too close together, timing-wise.

Tomorrow, for instance, I take a quick trip off-island to do a demo and book signing at Andover Books, in Andover, Massachusetts. When I get back on Friday, I have an essay to write for a magazine deadline—and a first look at the copyedited manuscript of Fresh & Green for Dinner, back to me from my publisher, Chronicle Books, for comments before moving on to the galley stage.

I realized today that I haven’t given a lick of thought to what we’ll have for Easter dinner—nor have I set aside time to develop a new Easter side dish to post for you all on the blog. My apologies. But just so I don’t leave you high and dry, I thought I’d offer you a piece of advice about everyone’s favorite Easter vegetable, asparagus: If you’re cooking for a crowd, keep it simple and pick a method like grilling or roasting.

While I’ve already posted about three methods I love for cooking asparagus (stir-frying, sautéing, and quick-braising), unfortunately these methods are best for serving three or four people. (And Easter dinner usually means at least a few more seats at the table.) Once you start overcrowding the sauté or stir-fry pan, you risk overcooking asparagus (steaming it before it browns). I also find poaching and boiling large amounts of asparagus to be risky, too (tips get overcooked or stem ends get undercooked).

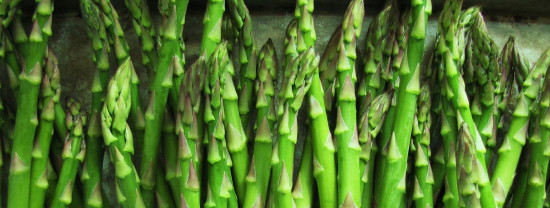
What I love about grilling and roasting is that you can cook lots of asparagus at once. The big broad expanse of a gas grill’s grate or the generous surface area of a large sheet pan can accommodate twice as many asparagus as a sauté pan. Also, if you’re cooking a big ol’ leg of lamb and maybe some mashed potatoes, suddenly a quick and simple side dish becomes very appealing. The other great thing about roasted or grilled asparagus is that they are delicious without embellishment. Cooked with oil and salt and sweetened up by all that high heat, they can drop right on the plate. (Certainly a little lemon butter, a sprinkling of ginger-spiked soy sauce, or a few shavings of Parmigiano wouldn’t hurt, either.)

If you’re game, here are the basic methods:

Roasted Asparagus: Heat the oven to 475 degrees. Trim ends from asparagus. For every pound of trimmed asparagus, toss with 2 to 3 tablespoons olive oil and 1/2 to 3/4 tsp. kosher salt. Line a large heavy-duty sheet pan (or pans) with parchment paper. Arrange the asparagus in one loose layer (try not to crowd) across the sheet pan or pans. Cook for 10 to 14 minutes, or until the asparagus is tender and a little bit wrinkly. (Two sheet pans may take slightly longer to cook, but err on the side of undercooking, not overcooking.) Serve right away.

Grilled Asparagus: Preheat a gas grill on medium-high. Trim ends from asparagus. For every pound of trimmed asparagus, toss with 1 1/2 to 2 tablespoons olive oil and 1/2 tsp. kosher salt. Arrange the asparagus at an angle on the grill grates. Cover and cook until nicely marked on the bottom, about 1 to 2 minutes. Using tongs, carefully turn over the asparagus, a few at a time (keep them at an angle to the grate), cover, and cook until the other side is just marked, about 1 minute. (Do not overcook; they will still be bright green.) Transfer the asparagus to a tray or plate and serve warm or at room temperature.

Note: 1 pound of asparagus will serve about 4 people as a side dish. Cook 2 pounds for 8 people.

Instant Gratification: Roasted Fingerling & Watercress Salad

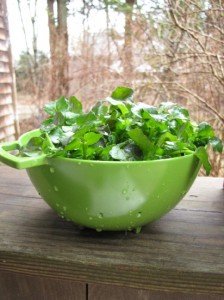
It’s funny how things come together in the kitchen. This week I’ve had lots of fingerling potatoes lying around, as I’ve been developing recipes with them for Vegetarian Times magazine. As it happens, I also treated myself yesterday to a watercress gathering excursion. Nice to be out in the quiet of the early morning under clearing skies, walking along a damp compost-y path beneath a gradually thickening canopy of budding branches. (Buds—finally.) I had my little scissors, a bag, and my camera. Sadly, I couldn’t linger long—lots of recipe testing scheduled for the day. But I crouched low in the black mud, hung over the stream, and snipped enough crisp clusters of Leprechaun-green watercress to fill my bag. And then reluctantly carried on my way. Retreating out of the cool forest, I heard the buzz of cars on the roadway calling me out of my reverie.

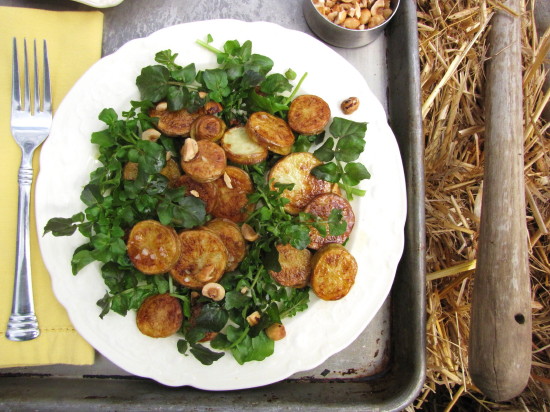
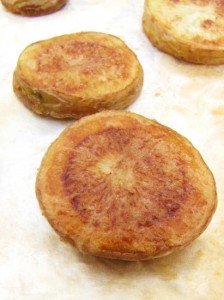
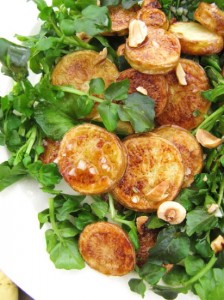
Back home at lunch time (after another recipe test—Asian slaw), I looked at the fingerlings and the watercress and thought: Warm salad. It’s no secret that my favorite way to cook fingerlings is brown-braising. But right then, I wanted instant gratification, and I looked at the little knobby potatoes and thought slicing them into coins and quick-roasting them would get me my hit. Sure enough, the little coins were golden on the outside, moist on the inside after 20 minutes at 450 degrees. I scrunched up some handfuls of washed watercress and scattered them on white plates. On went the roasted potatoes and a super-quick warm dressing I made in the skillet with sautéed garlic, olive oil, and red wine vinegar. I happened to have some toasted hazelnuts around, so I scattered a few of those on, too. Simple and lovely. Nothing I like better than a warm salad, especially with something so crazy delightful as freshly picked watercress. Now, I can’t wait ‘til I can harvest our own greens. (Just a few weeks away, maybe—the first arugula seeds I sowed in the garden last week sprouted today—yippee!)

One little suggestion: If you decide to whip yourself up a warm fingerling salad like this (which you could certainly do with arugula or any other assertive green), the dressing would be even better if you cooked a slice of bacon in the skillet first! Course you could skip the greens altogether, too, if you liked. Those little roasted fingerling coins tasted pretty yummy straight off the sheet pan.

Roasted Fingerling Potato & Watercress Salad

Printable Version of Recipe

All the amounts in this recipe are flexible, and you could vary the dressing or add garnishes as you like. This is really more like a serving suggestion, simply meant to inspire you to pair warm vegetables with cool greens. Just be sure your potato pieces are well-coated in oil for the best roasting. I find slicing the potatoes a little thicker than 1/4-inch, but not quite 1/2-inch (voila, 3/8-inch!) is just about right for cooking through and browning up at the same time in a hot oven.

___________________________________

12 oz. fingerling potatoes, unpeeled, sliced crosswise into “coins” about 3/8-inch thick

2 1/2 to 3 tablespoons extra-virgin olive oil

kosher salt

4 to 5 ounces stemmed watercress, washed (or other assertive greens in small pieces)

1/2 teaspoon minced fresh garlic

1 teaspoon red wine vinegar

1/4 teaspoon maple syrup

2 tablespoons finely chopped toasted hazelnuts or almonds (optional)

1 tablespoon crumbled good-quality blue cheese (optional)

__________________________________________

Heat the oven to 450 degrees F. Cover a large sheet pan with parchment paper. Toss the fingerling pieces with 1 1/2 to 2 tablespoons of the olive oil and 1/4 teaspoon kosher salt. Spread them out in one layer on the parchment paper. Roast under tender all the way through and golden brown on the bottom, about 20 minutes. (Don’t worry if the coins aren’t very brown on the tops—they will be quite golden on the bottom, so just flip them.)

Meanwhile, distribute the watercress on three salad plates (or two for bigger salads). In a small skillet, heat the remaining 1 tablespoon olive oil and the minced garlic over medium-low heat. Stir gently and cook until the garlic begins to sizzle, about 3 to 5 minutes (don’t let the garlic brown.) Add the red wine vinegar, the maple syrup, and a pinch of salt and stir. Remove the skillet from the heat.

Arrange the warm potatoes amongst the watercress and drizzle or spoon the warm dressing over the salads. Sprinkle a tiny bit more salt on each salad, and garnish with the nuts and/or cheese if desired. Serve right away.

Serves 2 or 3