Category Archives: side dishes

You Say Borlotti, I Say Cranberry—Beans, That Is

Halfway through the summer, I gave into temptation and bought a new packet of seeds for the vegetable garden. (Like I really needed more seeds—we had so many left over from our order last winter that I have enough to start the entire garden next year.) Right around the time our first carrot row emptied out, I happened to spot some Italian Borlotti beans at the garden center down the road. I had to have them.

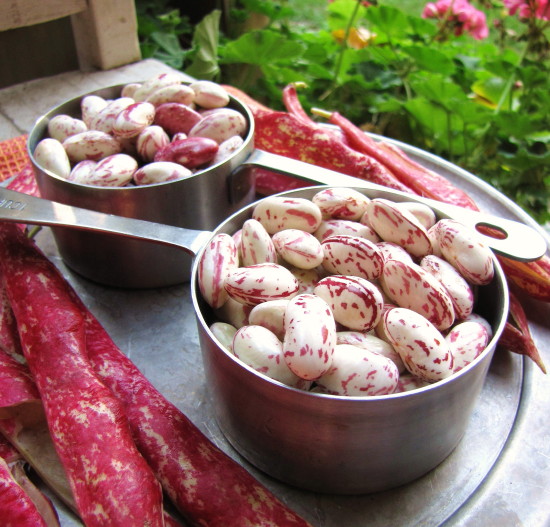
I’ve always wanted to grow shell beans. I think it’s the whole popping-them-out-of-the-pod thing. It seems so peaceful to me—an activity you definitely have to slow down to enjoy. But these particular shell beans are special. First off, they’re pink. I’m not kidding—my favorite color. The crimson pods and the magenta-dappled beans are way too charming to pass up. Secondly (and yeah, a bit more importantly), Borlotti beans (usually called Cranberry beans in the States) are delicious. Cooked fresh, their creamy, meaty texture is like no dried or canned bean you’ve ever eaten. The only bummer thing is that they lose that beautiful color when cooked.

Because I planted my Borlotti beans late in the season, I didn’t expect much. In fact, after a little initial weeding to help the baby plants along, I kind of ignored them as summer waned and fall got busy. But every once in a while I’d catch a glimpse of pink among the weeds, and I discovered that the plants were producing lots of pods. As soon as the pods started plumping up, I’d zipper one open every time I visited the garden. I was trying to figure out when to harvest them. Were the beans ripe? They seemed big enough, but many of them also had a pale greenish hue—hardly white with pink spots. I couldn’t find any info on the internet, but I finally got my answer, almost by accident.
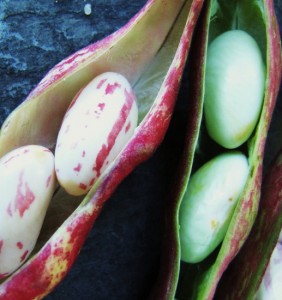
I took a few pods home one day to photograph, and as I was lining them up on the patio, I noticed that even though all the pods were predominantly pink, some of them were mottled with green, some with white. The pods that had the most white—almost the color of candy canes—had the nice white and magenta speckled ripe beans inside. The pods that had a mottled green background color still had the greenish beans inside. And there were gradations along the way; it seems the pods gradually change color as the beans ripen. At last, I’d finally figured out a way to tell if the beans were ripe without having to pick the pod and open it up first.

Saturday Roy and Libby and I pulled up most of the Borlotti bean plants. We were in a rush, trying to get some tidying done in the garden before heading to the Bronx Sunday morning for a book signing I’d been asked to do at The New York Botanical Garden’s Edible Garden event. So I snipped the pods off the plants, stuffed them in a bucket, and crammed them into the fridge at home.

This afternoon I got a chance to (slow down and) sort through the pods, and happily, a majority of them were more pink than green. I shelled enough pods just to get two cups of beans, as I want to make them last. I almost hated to cook with them they were so pretty. But I wanted to prepare them the way I’ve had them in Italian restaurants—with lots of garlic and rosemary. I wasn’t disappointed; they were as delicious as I remember—the perfect thing with a warm green salad and some crusty bread. And the bonus: Since they’re fresh, they cooked in less than 30 minutes (no soaking). (And actually, despite turning grey, they were still quite pretty when I photographed them, too, though you will just have to believe me. Unfortunately, I accidentally erased and recycled those photos tonight. Glad I don’t do that very often!)

Depending on where you live, you may still see the fresh beans at farmers’ markets or natural food stores this fall. But even if you don’t get a chance to cook them fresh this year, keep an eye out for dried Borlotti (or Cranberry) beans. They’re a classic addition to all kinds of Italian soups and stews like Pasta Fagioli and Minestrone.

Fresh Cranberry Beans with Bacon, Rosemary & Garlic

For a light supper, serve these beans with a warm escarole, spinach, or arugula salad and some crusty bread. If you have pancetta (Italian bacon), it would be a more authentic substitute for bacon, so feel free to use it. And if you want to go meatless altogether, no worries. The beans are still full of flavor cooked with just the rosemary and garlic and without the meat.

2 cups (10 oz.) shelled fresh cranberry beans (from about 1 ¼ lbs. pods)
kosher salt
extra virgin olive oil
1 large clove garlic, smashed, plus 2 tsp. minced fresh garlic
2 smal sprigs fresh rosemary plus 1½ tsp. chopped fresh rosemary
2 slices bacon
1/2 tsp. sherry vinegar or white balsamic vinegar

In a medium saucepan, combine the cranberry beans, ½ tsp. kosher salt, the rosemary sprigs, the smashed garlic clove, and 3 cups water. Bring to a boil, reduce to a simmer, and cook gently until the beans are tender, about 20 to 25 minutes. (You should be able to mash them lightly with the back of a spoon.)

Transfer the beans with a slotted spoon to a bowl, and reserve the saucepan of cooking liquid. Remove the garlic and rosemary leaves from the beans.

In a medium heavy nonstick skillet, cook the bacon or pancetta over medium-low heat until the bacon is crisp, about 12 minutes. Transfer the bacon to paper towels to drain. Turn the heat to medium and add 1 Tbs. of extra-virgin olive oil to the skillet.

When the oil is hot, add the minced garlic, and cook, stirring, until the garlic is fragrant and softened, about 1 minute. Add the beans, ½ tsp. kosher salt, ½ tsp. of the chopped rosemary, and a small amount (about ¼ cup) of the cooking liquid. Turn the heat to medium-high and cook, stirring frequently, until most of the cooking liquid has simmered down or been absorbed, about 2 minutes. Add the sherry vinegar and another ½ tsp. chopped rosemary to the beans. Stir and transfer all the contents of the pan to a serving bowl and garnish with the bacon, crumbled, and the remaining ½ tsp. chopped rosemary. (If you don’t plan to eat all the beans tonight, save a little more of the cooking liquid to reheat them in tomorrow.)

Serves 3 to 4 as a side dish.

“How do I cook eggplant?” she asked…

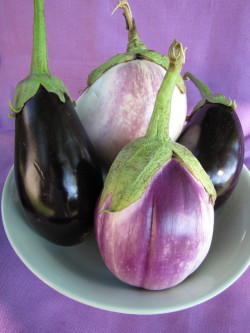
Lately, I seem to be getting the same question over and over, at book signings and on my blog: How do I cook eggplant? Friends are also telling me they’re awash in late-season eggplants, and I’ve got four pretty purple orbs (orphans from the farm stand) staring at me right from my own countertop. Or at least I did, until this morning. I figured the universe was trying to tell me something, and I’d better start blogging about eggplant. So I turned the oven on.

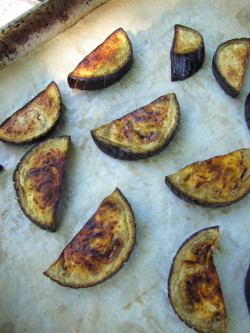
It won’t surprise you that my favorite way to cook eggplant is to roast it. (Grilling’s right up there, too, but I am without grill today.) At its very simplest, roasting eggplant is as easy as slicing it up, spreading the slices on a lined sheet pan, brushing them with oil, seasoning them with salt, and putting them into a 450° oven for 20 or 25 minutes, until the slices are golden brown and cooked through.  The browning brings out the nutty flavor in eggplant, and the combination of a high oven temperature and a coating of olive oil draws enough heat and moisture through the eggplant slices to cook them all the way through. (Undercooked eggplant is not good.)

The roasted slices are really versatile, too. You’ll want to nibble a few straight out of the oven, but you can also turn a couple slices into “sandwiches” with a bit of goat cheese and sundried tomatoes or fresh mozzarella and basil in between. Or you can make a roasted vegetable “stack” with roasted tomatoes and roasted zucchini and surround it with greens for an elegant salad. You can serve the roasted slices as a side dish with a topping of fresh salsa or with a warm tomato sauce and a little Parmigiano, too. Or you can use them in a casserole or gratin, like I did this morning. (See recipe below; if you just want to make the roasted slices, follow the directions in the first paragraph of the recipe, and cut round slices, rather than half-moons.)

Grilling eggplant slices will get you similar results, with one problem. Often the high, dry heat of the grill (drier than the oven) will sear the outsides of the eggplant slices before they are cooked all the way through. To solve this problem, I take the slices off the grill when they’re browned and stack and wrap them in foil for a few minutes, where they’ll finish cooking from the residual steam they give off. I don’t normally like to “steam” veggies to finish cooking them, but since the eggplant slices are never really going to be crisp—and undercooked eggplant flesh is unappealing—I find this is a good idea, and that the eggplant flesh benefits, turning out to be especially creamy.

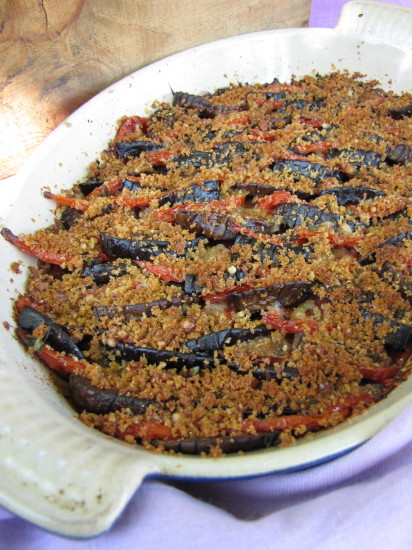
There are lots of other ways to cook eggplant. Roasting them whole is cool (the silky flesh makes great dips), and sautéing doesn’t have to mean a lot of fat (a nonstick skillet solves that). But since this blog is long (and the Late Summer Gratin recipe–shown at left–even longer!), I’ll have to hold those thoughts for another day. One last bit of eggplant advice: Many folks find the tough skin unpalatable. It doesn’t particularly bother me, and I actually like to have a little bit of that texture. So I usually do what was recommended to me long ago—score the skin with a fork or partially peel it (every other half-inch or so) with a vegetable peeler. Either method breaks up the tough skin without entirely getting rid of it. So everyone will enjoy the eggplant—now that you’ve figured out how to cook it!

Late Summer Eggplant, Tomato & Parmigiano Gratin

I love summer veggie gratins because they reduce and mingle the essence of summer flavors into one dish. When I make one with eggplant, I sometimes use feta cheese or goat cheese instead of some or all of the parmesan. I also occasionally add chopped olives, a  little black olive tapenade, or some pesto. I use fresh thyme in this one (a variation on one in Fast, Fresh & Green), but mint’s a natural with eggplant, too. This is also a great spot to use up excess garden tomatoes.  Just be sure to cook the gratin long enough to let the tomato juices mingle and reduce with the onions for the best flavor. You can use any kind of eggplant you like in this gratin, though I think Globe-type are a little more suitable for their heft. If you do use a skinny eggplant, like a Japanese or Italian style, you might not need to cut the veggies in half first before slicing (so you’ll have round slices instead of half-moons.)
___________________________________________________

1 ¼ pounds globe-type eggplant (about 3 small or 1 large)

scant ½ cup extra-virgin olive oil

kosher salt

1 large onion (about 9 oz), thinly sliced

1 ¼ pound small or medium tomatoes (4 or 5)

2 tablespoons fresh thyme leaves or chopped fresh mint

1/2 cup plus 2 tablespoons  finely grated Parmigiano-Reggiano

½ cup fresh bread crumbs

____________________________________________________

Heat the oven to 450˚F . Line two heavy-duty sheet pans with parchment paper.  Trim the ends of the eggplant. Score the eggplant skin by dragging a fork down it lengthwise, repeating all over until the whole eggplant is scored. Cut the eggplant in half lengthwise; then cut each half crosswise into 1/2-in-thick half-moon slices. Arrange the slices in one layer on the sheet pans, and, using a pastry brush, brush both sides of each slice with some olive oil. Season the top sides with a little kosher salt. Roast until the eggplant is tender and lightly browned, 20 to 22 minutes. (The undersides will be slightly browner, and the slices will be somewhat shrunken.)

Reduce the oven temperature to 375˚F. Set the eggplant aside while you prepare the rest of the ingredients.

Grease a shallow 2-quart gratin dish with a little of the olive oil.

In a medium nonstick skillet over medium heat, heat 2 teaspoons of the olive oil. Add the onions and 1/4 tsp salt and cook, stirring frequently, until the onions are a light golden brown but still have some body, 8 to 12 minutes. Transfer the onions to the gratin dish and spread them out in one layer. Sprinkle them with one teaspoon of the thyme leaves. Let the onions cool.

Core the tomatoes, and cut them in half lengthwise (through the stem). Put each tomato half, cut side down, on the cutting board, and cut each half crosswise into 1/4-in- thick slices. Put the tomato slices on a shallow plate.

In a small bowl, combine  the bread crumbs with 2 teaspoons olive oil, a pinch of salt, and 2 tablespoons of the Parmigiano.

Starting at one end of the gratin dish, arrange a row of overlapping eggplant and tomato slices against the back of the pan (prop the veggies up a bit against the edge of the dish).  Alternate between one tomato slice and one eggplant slice, and after finishing each row, sprinkle it with some of the Parmigiano and a few thyme leaves. Continue arranging rows until you have filled the pan. If you come up short, you can always spread the rows out a bit by pressing down on them (or you can push them back to make more room). If you have extra Parmigiano and thyme, you can sprinkle it over the top of the finished rows.

Season the gratin with 1/4 tsp salt and drizzle 2 tablespoons of olive oil over the veggies.  Cover the veggies with the bread crumb mixture, letting the veggies peek out a bit.

Bake until the gratin is well-browned all over (the crumbs will be dark brown and the edges of the gratin will be browned), and the tomatoes are well-cooked and shrunken (if they were very juicy, the juices will be very reduced, as well), about 50 to 55 minutes. Let cool for at least 15 minutes before serving.

Serves 6 as a sidedish

Slow-Sautéed Pole Beans with Shallots and Bacon — Not so Pretty, but Pretty Delicious

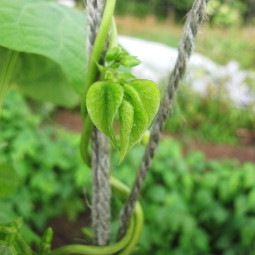
When the pole bean trellis blew down for the second time, we left it. Granted, we were a bit annoyed at the pole beans. They took a lifetime to germinate and what seemed like eternity to start yielding. Meanwhile the bush beans were churning out lovely filet beans by the pound every day.  We would have ignored the pole beans altogether except for this nagging voice I had in my head, “Pole beans are better than bush beans.” I grew up with this voice. My father’s.

My father and his mother (my grandmother Honey, who “put up” pole beans at the end of every summer) were always carrying on about the superiority of “pole beans” over bush beans. (Pole beans are green bean varieties like Kentucky Wonder that grow on vines as long as 12 feet, therefore needing support in the form of poles or some other trellising.)  I needed to find out the truth for myself, as it seemed to me that our bush beans (a variety from FedCo called Beananza) were pretty darn tasty—and oh-so-lovely to look at, too. The pole beans looked kind of gnarled up and blotchy the minute they appeared on the scene.

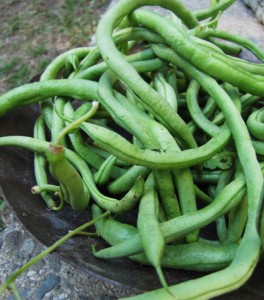
They didn’t get any prettier—but they did keep growing, even under the weight of a collapsed trellis. After neglecting them for a while (figuring we’d eventually till them back into the soil, as nitrate-fixing beans make great soil enhancements), we came along one day, lifted up the vines, and discovered dozens of big funky beans growing under them.  We surely weren’t going to sell these fallen beans, so I collected them that day—and every few days thereafter—and took them home for us. From the first time I picked them, I knew something was up. They just smelled “bean-y.” I realize that doesn’t sound too appealing, but I mean it in the best way—a really fresh, green, arresting aroma that followed through when I cooked them. It was green bean flavor times two! Really delicious. So now I have to tell my Dad he was right. Bummer.

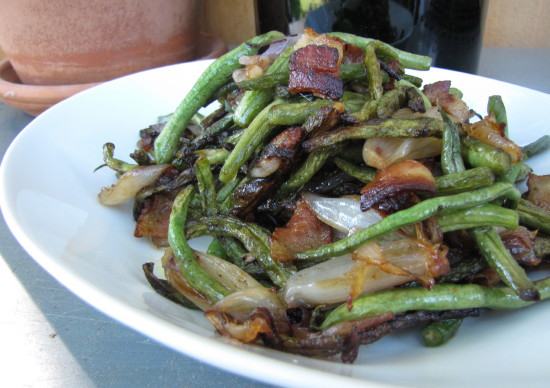
The pole beans (at least the varieties we grew—Kentucky Wonder and Fortex) do present one cooking challenge:  their texture is a bit, well… I wouldn’t say tougher exactly, just more substantial, I guess. Toothsome, in a good way. To me that texture is a clue to cook the beans a bit longer and with some heartier flavors. But by longer cooking, I don’t mean boiling them to death. I mean something like slow-sautéing, where the beans get brown and tender and pick up the flavors of other ingredients in the pan, like the shallots and bacon in the recipe below. I made this recipe yesterday because it felt comforting and warm, and we’ve had a bit of a nip in the air up here. Plus, I had some particularly gnarly beans to deal with. So it may not look so pretty (though, yes, everything is supposed to be that brown—brown is where all the flavor is), but it did taste pretty delicious.

Slow-Sautéed Pole Beans with Shallots & Bacon

If you don’t have pole green beans, don’t worry. This recipe will work great with any mature green beans—just choose the largest beans you can find when you’re shopping. This method of “slow-sautéing” involves a crowded pan (the opposite of what you would think of for a quick sauté), but I promise you it works great. Keep the pan at a gentle sizzle—you can always slow browning down by lowering the heat. The end goal is veggies that are cooked through and nicely browned, too.

__________________________________

2 teaspoons orange juice

1 teaspoon red wine vinegar

3 tablespoons extra-virgin olive oil

12 ounces pole green beans, trimmed and cut into 2- or 3-inch pieces

4 large shallots, peeled and cut lengthwise into ½-inch wedges (keep a little of the stem end intact if you can)

2 ounces bacon (about 2 pieces), cut into 1-inch pieces

kosher salt

½ tablespoon unsalted butter

__________________________________

In a small bowl, combine the orange juice and vinegar and set aside. In a 10-inch straight sided skillet, heat the olive oil over medium heat. Add the beans, shallots, bacon, and a scant teaspoon of salt. Using tongs, toss to break up the bacon and to coat everything with the oil and salt. Reduce the heat to medium-low. Cook, stirring occasionally at first and a little more frequently after browning begins, until the vegetables are all very-well browned and limp (the bacon will be cooked through and some pieces will be crisp), about 22 to 25 minutes. Remove the pan from the heat, add the butter and the orange juice mixture, and immediately stir to incorporate the liquids and melting butter into the beans. Transfer the vegetables to a serving dish or individual plates and serve hot or warm.

Serves 3 to 4 as a side dish

Squish-Squash: A So-So Day in the Test Kitchen

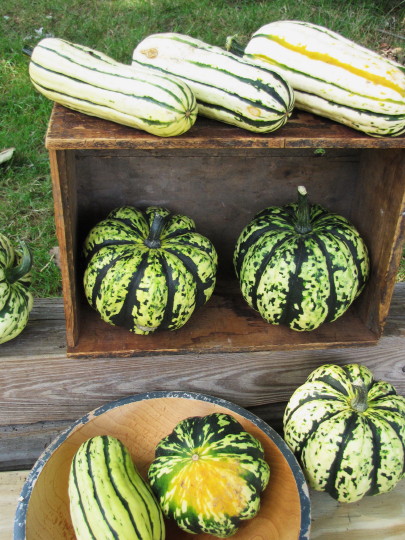
Not every day is a winner in a food writer’s test kitchen. In fact, yesterday was kind of a stinker, if I’m really to be honest. I made some stuffed winter squash which was just—not good. I’ll spare you the details about the stuffing, but I have to tell you, the most frustrating thing was this: The squash were under-ripe. And so, as beautiful as they were raw (see the lovelies at left), the squash were fibrous and bland when cooked. I know—I’m really making you salivate, now, huh?

I more or less suspected this was the case when I picked the squash in the days leading up to Hurricane Earl. Uh, I mean Tropical Storm Earl. Or maybe Lite & Breezy Earl is more like it. It just didn’t amount to much, but everyone was scurrying around plucking fruit—ripe or not—from vine and tree alike before the storm. I succumbed—before  I had solved this dilemma of “how do you tell when winter squash is ripe?”

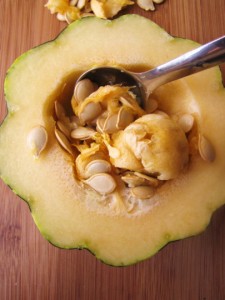
I know, I am supposed to be a vegetable expert. So I should definitely be hanged (or maybe something less dramatic) for continuing to cook the squash once I cut it open and started digging the seeds out of the hard, pale flesh. I knew for sure then that the squash (especially the Delicatas) were under-ripe. (You’ve probably had this experience with a slightly green butternut squash you’ve bought at the market.) The thing is, in the gardening department, I’m still a neophyte, and try as I might, I haven’t been able to get a straight answer from other gardeners on how to tell when my stripey Carnival and Delicata squash are ripe.

I’ve been told to wait for the stems to wither and dry up on the vine (uh-oh, I am not that patient),  and I’ve been told to look for a good spot of orange color on the underside  (this didn’t hold true when I cut into the one with color–the one in the bowl in the top photo). But I am beginning to suspect that it is, in fact, a color issue. I looked at pictures of Carnival squash online this morning, and they all had an orange hue on at least half of their surface. And I remember someone telling me a while back that Delicatas are ripe when the green stripes have an orange hue beneath them. So, if you’re color blind (or impatient, like you-know-who), I don’t suggest growing winter squash.
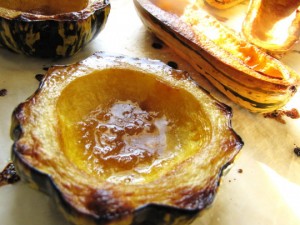
All is not lost, despite my stubborn “I’m going to get this darn thing in the oven anyway” approach yesterday. First, I have more squash in the garden (still ripening, theoretically). Second, I can, in fact, give you quick and easy directions for simple, delicious (unstuffed) roasted acorn squash halves, if you are smarter than me and actually buy your (ripe) squash at the grocery store. (Directions below.) And lastly, if you’ve got a copy of Fast, Fresh & Green on hand, you can turn to page 51 for my absolute favorite acorn squash recipe—Vanilla and Cardamom Glazed Acorn Squash Rings.
And if you don’t have a copy of Fast, Fresh & Green, you’d better get one! The third printing hit last week, and if it’s anything like the first two, copies will be scarce again soon.

———————————————————————————–

Simple Roasted Acorn Squash Halves

Heat the oven to 400° F. With a very sharp knife, cut a thin sliver off of both ends of the acorn squash, and then cut it in half crosswise. (Cutting the slivers off the ends will help each half sit flat in the baking vessel, rather than rolling around.) Line a shallow baking dish or small heavy sheet pan with foil or parchment paper and arrange the halves in it. Sprinkle them with salt. For each acorn squash you are baking, combine 1 ½ tablespoons of unsalted butter with 1 ½ tablespoons of maple syrup and a small squeeze of lemon (or dash of balsamic vinegar or soy sauce) in a small saucepan. Heat until the butter melts, stir, and brush all over the squash halves. Most of the liquid will pool in the center of the squash; that’s okay—just be sure that you’ve brushed the tops. Bake until very tender and nicely browned, about 1 hour and 10 minutes for a small acorn squash, 10 to 15 minutes more for a larger squash. Baste occasionally if you like. Serve warm as a side dish, one half per person.

A Sweet Tooth and Her Caramelized Onions

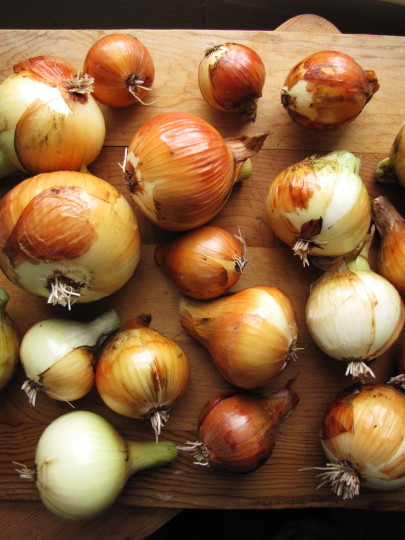
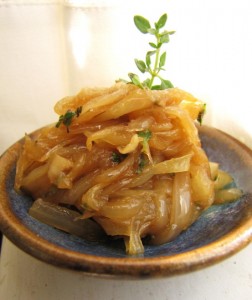
Since I have a sweet tooth, turning vegetables into candy is a favorite pastime (see roasted beets and roasted tomatoes). Last week, after the grand sopping we got (more on the way from Hurricane Earl), we pulled up most of our onions in the garden, as they don’t like wet feet and looked like they were sort of gurgling in the muck.  I know you are supposed to grow onions in order to keep them in long storage all winter. But that may not be happening around here. I couldn’t stand watching all those beautiful onions drying out in the kitchen. I wanted to slice them and dice them and sauté them and roast them and and and…well, you know, I couldn’t wait. Friday I stole three nice plump onions off the rack and sliced them up. And made caramelized onions. There, I had my way.

Caramelized onions are something unto themselves. With their amazing flavor and almost jammy, condiment-y texture, they go well in, on, and around just about anything. Eggs, crostini, pasta, steaks, salads. The other night I threw some in with chopped tomatoes for a quick-simmered pan sauce for chicken thighs. Last night we put some on pizza. They keep in the fridge for at least a week (if you don’t eat them all), so every morning I mix a little with some fresh corn kernels and fresh thyme and add that to my scrambled eggs.

And, ta da!, I just happen to have a good recipe for caramelized onions up my sleeve. It’s one I developed for Fast, Fresh & Green but ultimately cut when we had too much content. While I love this classic preparation, I don’t really think of caramelized onions as a side dish so much as a dinner-booster, so it made sense to take it out of a book of side dishes.

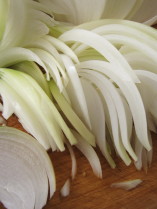
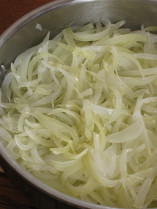
My recipe takes the classic, slow-cooked, slowly browned onions a small step further by adding a bit of balsamic, honey and thyme at the end. (You could leave them out but I think they give everything a lift.) There is some technique to caramelizing onions. First off, they won’t cook evenly unless you “sweat” them first in a covered pan until they are translucent (middle photo above). Then, and only then, can you procede to browning the onions. The next big tip I learned from my old chef boss Lenny Greene: When onions start sticking to a hot pan (and leaving behind all those delicious brown nubbins), pull the pan off the heat and the onions will immediately begin releasing moisture, which will allow you to “wash” all those delicious brown bits back into the onions. You can do this frequently while caramelizing the onions, and every time you wash the browned bits back into the onions, they will get more golden. Lastly, I like to caramelize my onions over moderately low heat so that they cook most evenly. But if you’re in a hurry, you can bump up the heat a bit (after “sweating”) and speed the cooking along. Happy caramelizing!

Caramelized Onions Agrodolce

__________________________________

2 pounds yellow onions

3 tablespoons extra virgin olive oil

1 teaspoon kosher salt, more for seasoning

1 teaspoon balsamic vinegar

1 teaspoon honey

2 teaspoons coarsely chopped fresh thyme leaves

________________________________

Slice the ends off of the onions, cut them in half lengthwise, and peel them.  Put each half, cut-side down, on a cutting board. Slice each onion half lengthwise in ¼-inch wide slices in a “radial” fashion by angling your knife in towards the core as you slice from one side to the other (as if you were slicing along longitudinal lines towards the axis of the earth). When you get half-way through, lay the rest of the onion over on its side for easier slicing and continue to slice towards the core. Discard any very thin or small pieces of onion. Slice the remaining halves in the same way. (See radial-cut onions in photo in text, above right.)

In a 10-inch straight-sided skillet, heat the olive oil over medium-low heat. Add all the onions and 1 teaspoon kosher salt.  Stir well, cover, and cook, stirring only every few minutes and putting the lid back on quickly, until all the onions are limp, translucent, and just beginning to stick to the pan, 12 to 14 minutes.

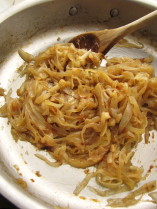
Uncover and cook, stirring more and more frequently, until most of the onions are the color of a caramel candy (some will be deeper amber), about 30 minutes. (Turn heat to medium if onions are browning too slowly for you.) The onions will stick to the pan frequently and will leave browned bits on the bottom of the pan. You will need to “wash” those browned bits back into the onions by doing two things. First, use a wooden spoon to scrape the brown bits up. Secondly, when there is a lot of browning in one place in the pan, pull the pan off the heat and let the onions sit for a few seconds. They will release moisture which will help unstick the browned bits; you can then sweep the onions back and forth across the browned bits to reincorporate them.

Mix the balsamic vinegar with two teaspoons water. Turn the heat to low, add the balsamic mixture, stir, and remove the pan from the heat. Continue stirring to incorporate all of the browning in the pan and to evaporate the liquids. Add the honey and thyme, and stir well again. Taste and season with a little more salt if needed. Let the onions sit a minute or two longer and stir again to incorporate any remaining browned bits in the pan. Let cool and transfer to a storage bowl if not using right away. They will keep in the fridge for a week.

Yields 1.5 cups

Today’s Tomato Destination: Easy Bruschetta

It blew like crazy last night. The garden is pretty disheveled—flattened in fact. The pole bean trellis (with all of its Jack-and-the-Beanstalk vines) is face down in the zinnias. The cosmos are hugging the ground like a dog that’s been chastised. And the little zucchinis on the new plants are bare and naked, exposed to the world after their protective leaves and stems snapped off like flimsy toothpicks.

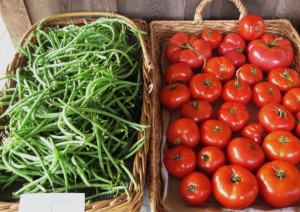
No matter; we will clean it all up this weekend. In the mean time, with the rain still coming down (and traffic at the farm stand sluggish), harvesting seemed like a silly idea today. We’ll have to go back later in the afternoon and get the beans; they grow too big if left for more than a day, and we have about 4 pounds coming in every day. (Bean picking is hard on the back and time-consuming, too, but if you just go with it, it can be Zen-like.)

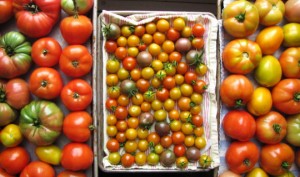
Fortunately we brought a ton more tomatoes in yesterday, as Mr. Rat is still on the loose. I was relieved to read on Facebook (yeah, what a source!) that real farmers are also bringing their tomatoes inside at first blush. Bad summer for pests, they say. Whew, this makes a start-up grower like me feel not so silly about the number (now in the hundreds) of under-ripe and semi-ripe tomatoes in our apartment.

However, the under-ripe tomatoes don’t scare me nearly as much as the ripe ones, as I don’t think there’s any way we will sell them all at the farm stand. (A good rainstorm like this comes along—and yesterday being Monday, too—and we only sell 2 pounds of tomatoes in a day, out of the 12 we put out on the stand!) I’ve given some to friends, and roasted a bunch this weekend, but deadlines (and life!) prevent me from spending time marketing them elsewhere. I’ve already told Roy that we’ll be eating green beans and tomatoes every night now for the next millennium, but I’m trying to make lunch out of this stuff, too.

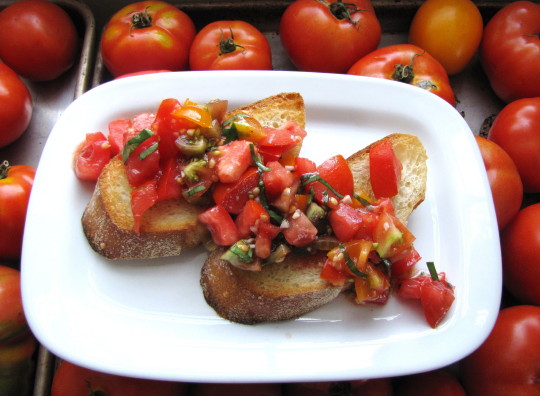
So yesterday I had my V-8 moment—Oh, Bruschetta! I remembered how good and easy bruschetta is to make with ripe summer tomatoes, and I had a nice rustic loaf of bread on hand. So voila—here’s what came of it. Easy, easy. Tasty, tasty.

Summer Tomato Bruschetta

______________________________________

2 to 2 ½ cups diced, cored ripe summer tomatoes (3 to 4 medium tomatoes; no need to skin or seed, just chop)

1 clove garlic, peeled and minced

10 to 12 medium-large leaves sweet basil, finely sliced or chopped

2 tablespoons extra-virgin olive oil, plus more for bread

few drops balsamic vinegar

few drops honey

kosher salt

4 to 6 slices rustic bread (each slice about 1-inch thick; I like a baguette cut on a sharp diagonal)

______________________________________

In a small mixing bowl, combine the tomatoes, the garlic, the basil, the 2 tablespoons olive oil, the balsamic vinegar, the honey, and about ¼ teaspoon kosher salt. Stir well to combine and let sit for 5 to 10 minutes, stirring occasionally.

Rub or drizzle the bread slices with a little more olive oil and toast them in a toaster oven or brown them under the broiler. Arrange the slices on two plates, sprinkle them with a tiny bit of salt, and spoon the tomato mixture over them. Let sit for a few minutes so that the bread soaks up a bit of the juices.

Serve for lunch or as a first course to dinner. You could also add some chopped grilled or sautéed shrimp to the tomato mix, and call this dinner.

Serves 2

A Tale of a Thousand Roasted Tomatoes

My friends will most definitely give me a hard time about this. Here I am, writing about roasted tomatoes—again. I love roasted tomatoes so much that I’ve written about them every chance I’ve gotten. If you want to slow-roast big, juicy beefsteaks or heirlooms, read how I do it over at Fine Cooking magazine’s website. (I even include lots of suggestions for ways to use roasted tomatoes.) But if you want almost-instant gratification, read on.

The recipe I’m posting here is a quicker version of roasted tomatoes, one I developed for Fast, Fresh & Green. It uses seeded plum tomatoes (which contain less moisture) and a high oven temp to get quicker caramelization. The reason I’m posting this recipe today is to thank all of the folks (like my best friend Eliza’s Mom, Bran Johnston, with me at Stonewall Kitchens, right) who’ve showed up at all my book signings this summer and gobbled up hundreds and hundreds of these things.

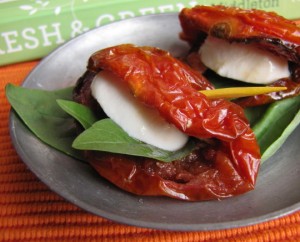
Early on in the whole book-publicity strategy plan, I decided that making the same recipe for every signing would keep my life a little simpler. Plus, I don’t have a lot of options for finger food in Fast, Fresh & Green, which is mostly side dishes. These roasted plum tomatoes conveniently fold up around a little piece of fresh mozzarella and a leaf of fresh basil to make “sandwiches” that I skewer with a toothpick (photo and recipe below). I can’t say that they’re the ideal finger food (caterer to the stars I am not), as they’re a little unwieldy and a bit messy. But they taste so intense that I absolutely don’t know anyone who hasn’t liked them on first bite.

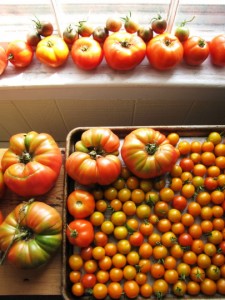
Fortunately, Roy likes them, too. (Actually he likes roasted tomatoes better than fresh tomatoes—that’s a good thing, because judging by the burgeoning pile of tomatoes at our windowsill (left), I’m going to have to roast a lot of tomatoes pretty soon.) Roy has not only been a huge help with assembling the sandwiches at the last minute, but he has been lugging the cooler and several other heavy bags of tools and ingredients up and down the East Coast in an effort to make my life easier. For that he gets a lot of roasted tomatoes!

If you’re not sure what all the fuss is about, take the 15 minutes to cut a few plum tomatoes in half, pull out the seeds, season them with salt, a little sugar, a few thyme leaves, a bit of garlic, and lots of olive oil and throw them in the hot oven, and enjoy the aroma while you wait to taste.

By the way, the Ag Fair (officially called the 149th Martha’s Vineyard Agricultural Society Livestock Show & Fair) starts on Thursday here on the Island. (The Obama family arrives on Thursday, too, so yes, it’s pretty much a circus around here.) We’re entering our black cherry tomatoes and a few other veg and flowers, so we’ll let you know if we win a ribbon!

Roasted Tomato, Basil, and Mozzarella “Sandwiches

These make great hors d’oeuvres or antipasto, but they’re also delicious on a dinner plate or tucked into a green salad, too.

_________________________________

1 recipe Caramelized Plum Tomatoes in an Olive Oil Bath (recipe follows), any excess oil drained

20 fresh basil leaves

8 mini-mozzarella balls (1 inch in diameter), each sliced into 3 to 4 pieces

kosher salt

__________________________________

Have ready a serving platter or shallow dish and twenty toothpicks or cocktail skewers.

Lay the plum tomatoes, cut side up , on a cutting board. Place a basil leaf, shiny side down, on each tomato half. Put a piece of mozzarella on one end of the tomato and sprinkle a little salt over it. Fold the other half of the tomato over the cheese and put a skewer through the “sandwich” at an angle, so that about 3/4 in of the skewer comes out the other side . It’s best to skewer through the folded-over ends of the tomato (and the cheese ), but not the middle , to prevent the “sandwich” from flopping open. Arrange the tomatoes on a serving pla tter in diagonal rows, tucking them close to one another.

Yields 20 sandwiches; serves 6 to 8

Caramelized Plum Tomatoes in An Olive Oil Bath

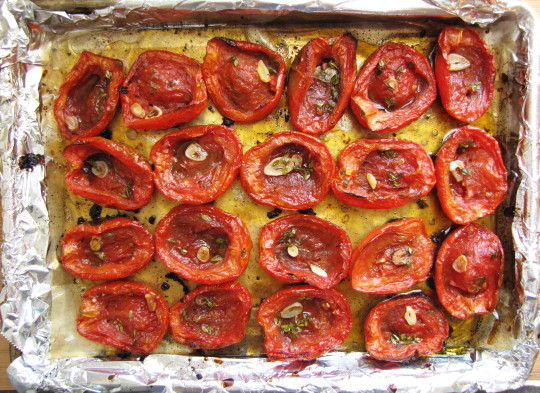
I’m always amazed at how a hot oven turns even the most pathetic, pale plum tomatoes into deeply flavored beauties. The generous amount of olive oil in this recipe has a purpose—as the water in the tomatoes evaporates, the oil replaces it and gently simmers and preserves the tomato flesh. When the tomatoes are finished cooking, you can lift one end and a good bit of the oil will spill out. Don’t be alarmed if the edges of some of your tomatoes (or some of the juices in the pan) look a little black ened. They will still taste delicious.  These tomatoes aren’t just a great side dish; they also make perfect crostini toppers, salad ingredients, or hors d’oeuvres (see page 42).

__________________________

10 plum tomatoes

½ cup extra-virgin olive oil

kosher salt

sugar

2 teaspoons fresh thyme leaves (4 to 6 sprigs)

balsamic vinegar

2 large garlic cloves, peeled and sliced crosswise into 10 to 12 slices each

_________________________

Preheat the oven to 425˚F. Line a large heavy-duty rimmed sheet pan with a piece of parchment paper. (I like to cover the sheet pan with aluminum foil, first, for easier clean up, but it’s not necessary.) Cut each tomato in half length wise, and, leaving in the core, scrape out the seeds and ribs with a tomato shark or a serrated spoon. Brush 1 tablespoon of the olive oil over the parchment.

Arrange the tomato halves, cut side up, on the parchment.

Season the cavity of each tomato half with a pinch of salt, a good pinch of sugar, and some of the thyme leaves. Drizzle a few drops of balsamic vinegar inside each tomato half. (An easy way to do this is to pour some vinegar into a small bowl and use a 1/8 tsp. measure to distribute it. Or just hold your thumb over the vinegar bottle opening to dispense drops!) Drop a slice or two of garlic in each half , and pour 1 teaspoon of the olive oil into each half. It will look like a lot of olive oil; that’s okay.

Roast the tomatoes until they collapse and are brown around the edges, the garlic is browned, and the juices are somewhat caramelized on the sheet pan, 30 to 40 minutes. (At this temperature, you can roast them up to about 55 minutes before the bottoms get too dark. Some of the really hefty—and underripe—plum tomatoes may want to go this long to be tastiest.)

Let the tomatoes cool for a few minutes on the sheet pan. Carefully transfer them to a serving plate. (If the juices are very caramelized, the tomatoes may stick a bit; take care not to rip the skin.) Serve warm or at room temperature. They will also keep in the fridge for about a week.

Yields 20 tomato halves; serves 6

Who’s Eating the Tomatoes? Call in CSI, please!

There is a scene in the Nutcracker ballet where the evil Mouse king dances with his mouse-followers beneath the giant Christmas tree at midnight. When I look at our tomatoes every morning, I envision something like this having gone on the night before. There are tomatoes strewn everywhere, little bites taken out of just-ripening cherry tomatoes, and big bites taken out of bigger tomatoes. Mr. Mouse or Mr. Rat is, apparently, also joined by his close personal friends, Mr. and Mrs. Hornworm (and all their prodigy), and a flock (or several flocks) of sparrows, all of whom enjoy illicit tomato-tastings under the light of the moon. It’s not hard to imagine how fun this is—we planted our tomatoes way too close together, so the two big rows form sort of a hedge. It’s really more like a forrest, and even I can appreciate the magical wonder of that leafy canopy when I am crawling around on my hands and knees in there looking for signs of invaders. It’s like a cool fort, stocked with candy.

Today Roy bought an inflatable owl. A big one. And stuck it right on top of one of the tomato stakes.

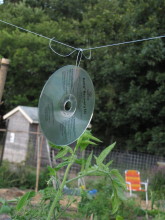
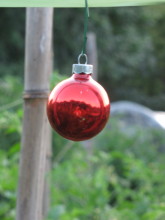
Last night, we strung monofilament line between the bamboo stakes, and hung shiny CDs and yellow streamers from it.  I also hung a few red Christmas ball ornaments around, which are supposed to lure birds into pecking at them instead of tomatoes (and thereby discourage further pecking).

Discouraging the rats and birds might work (will keep you posted). But we’ve yet to capture a hornworm. Normally, if you look hard enough, you can spot these big, ugly (and I mean UGLY) caterpillars, but we’ve looked and looked and haven’t seen one yet.

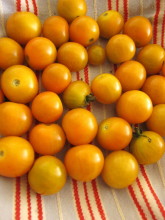
All this is incredibly frustrating, as we have 40 tomato plants, hundreds (maybe thousands because of the prolific little Sun Golds) of tomatoes ripening, and so many visitors (including POTUS, of course) coming to the Island in August, that we are looking at missing our best opportunity to make a little bit of real money at the farm stand.

In the short term, I’ve taken the advice of several farmers and started harvesting tomatoes that are just starting to blush. Apparently once they’ve started coloring, the quality will not be affected by ripening on a windowsill. (This doesn’t work with rock hard, dark green tomatoes that haven’t begun the ripening process.) This is hardly ideal, but right now, leaving anything with any color on the vine seems to be an automatic death sentence for the tomato.

Roy remembered that putting tomatoes in a bag with an apple will help ripen them, too, so we tried that with a batch of Sun Golds.  We put them in a shallow bowl with a ripe apple cut into pieces and covered the whole thing with an upside down stainless steel bowl. In two days, most of the tomatoes had turned yellow and were heading for the even deeper orange color of a perfectly ripe Sun Gold. They tasted good, but some were still a tiny bit green on the inside. They’re best when they’re orange all the way through.

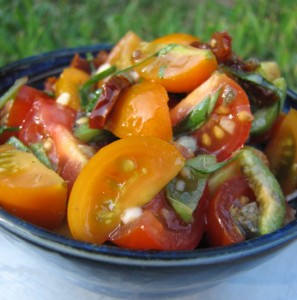
Nevertheless, we celebrated this small ripening feat by making one of my favorite easy summer cherry tomato concoctions last night. It’s a versatile dressing, kind of a loose salsa, that’s delicious over grilled vegetables, grilled meats, and even grilled bread. We had it atop a grilled sirloin and some grilled zucchini from our garden.

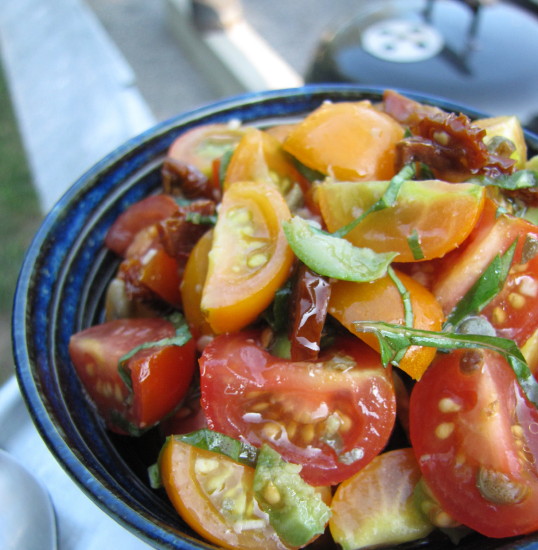
The version I made last night (below) is a variation on a recipe in Fast, Fresh & Green which I drape over a roasted pepper that is lightly stuffed with warm goat cheese. It’s a showcase for your tiniest, tastiest tomatoes, but it gets a depth of flavor from a bit of sundried tomato mixed in, too. The dressing has a Spanish-y feel, with a few minced capers, sherry vinegar, garlic, and sometimes a few sliced olives mixed in. I used mint and basil both last night, but any fresh herb would work. Fresh ginger is also a natural with tomatoes, so you could vary the dressing to include some ginger, too. Any way you make it, this no-cook versatile recipe is a fast flavor boost for a weeknight supper (or a weekend party). Of course, it’s a whole lot more satisfying with your own vine-ripened tomatoes, but take what you can get!

Summer Cherry Tomato Dressing, V2

Please don’t make this with those honking cherry tomatoes from the grocery store. They won’t taste great and will be too cumbersome for a salsa-like dressing, even if they’re quartered. Stick with small cherries, Sun Golds, Red Pears, and other fun little tomatoes. Be sure to get a brand of sundried tomatoes that isn’t marinated too heavily with overbearing dried herbs (I’ve had this experience—sundried tomatoes vary in flavor and quality a lot) as they might adversely affect the flavor of your dressing.

____________________________________________________

8 ounces small cherry or other tiny tomatoes, halved or quartered depending on size

3 tablespoons extra-virgin olive oil

2 tablespoons very finely sliced, drained, oil-packed sundried tomatoes

1 tablespoon finely sliced basil and/or mint leaves

2 teaspoons drained capers, very lightly chopped

4 green olives, pitted and sliced (optional)

1 tablespoon sherry vinegar

1 teaspoon orange juice

½ teaspoon minced garlic

¼ teaspoon teaspoon kosher salt

____________________________________________________

Combine all of the ingredients in a small bowl and stir gently to combine. Let sit for 10 to 15 minutes (or up to 30 minutes) to let the flavors mingle and to let the tomatoes marinate a bit. Stir gently again before serving.

Yields about 1 ¼ cups, enough to dress up four dinners

It’s About the Green Beans, Stupid!

For all the complaining I did about green beans as a child, I can’t believe I’m growing (and eating) more of them these days than practically any other vegetable. My green bean complaints started early. First, my mom seemed stuck on serving those frozen, stringy “frenched” beans about five times a week, no matter what else was on the plate. (‘Very mushy texture’ is the best thing I can say about them.) After her Julia Child-cooking enlightenment period, my mom moved on to fresh beans—but we still ate them, boiled with butter, a lot. Then my Dad got into vegetable gardening, and his pride and joy were pole string beans. I remember one summer (I think I was 10) when it seemed like we ate nothing but green beans. Ack. I’m pretty sure there was then a period of about 20 years when I didn’t eat any green beans at all.

But eventually I became editor of Fine Cooking magazine, and as such, privy to all kinds of reader feedback and issue surveys. I noticed that every time we did a feature with green bean recipes in it, the article topped the popularity scales. Finally, I had to say to myself, “It’s about the green beans, stupid.” Yes, I admitted, green beans are the most popular, most well-liked vegetable on the planet (or at least in America).

Fortunately somewhere along the way I also learned to love green beans—mostly because I began to cook them in lots of different ways. (I roast, grill, braise, and sauté them in Fast, Fresh & Green.) But there’s no getting around the fact that boiling is the quickest, simplest, and most efficient method for cooking green beans perfectly. And also the easiest way to ruin them.

There’s only one way to tell if a bean is perfectly cooked—by tasting it. Tasting as you cook is one of those concepts that chefs hammer into your head in culinary school, so I just thought I’d pass it along to you without screaming or throwing pots. There really is a practical (and rewarding) reason to taste as you cook. Actually, two reasons: flavor and texture. Unless you taste as you go, you won’t catch the subtle changes in flavor and texture that heat (both dry and wet heat) imparts to food, and you won’t be able to make the necessary adjustments in seasoning and cooking times that recipe instructions simply can’t tell you to do.

Green beans are a great example. Undercooked green beans are rubbery; overcooked are mushy. If you are boiling beans, simply begin tasting them after a few minutes. At first you will have a hard time biting through them. As the texture softens, the green beans are closer to being perfectly cooked. When you can just bite through with no resistance, they’re done. (If you walk away to check your email at this point and come back 5 minutes later, you will be sorry.) Yes, you will have to sacrifice a few green beans to tasting.

The thing is, different sized (and different aged) beans cook at different rates, so you pretty much need to taste every batch every time you cook them. In our garden, we are now harvesting “filet” beans—lovely slender green beans that are similar to French haricots verts—and they cook in just a couple minutes. But yesterday, I bought regular green beans at the grocery store to test a recipe for this blog (below), and they took about 6 minutes to be perfectly done. So tasting’s the thing.

By the way, in case there was any doubt, green beans are just as popular on Martha’s Vineyard as everywhere else. Even on recent days when hardly anything else at the farm stand has sold, the filet beans have disappeared. So of course, what have we gone and done? Planted more. (Bush beans are quick to germinate, flower, and fruit.) And the pole beans are coming, too. Yikes, I am going to be surrounded by green beans… having Jack-and-The-Beanstalk nightmares, don’t ya know. What goes around comes around.

The technique for perfectly cooked green beans is embedded in the recipe below. If you don’t feel like green beans with a Greek flavor profile, simply cook the beans and dress them as you please while they’re still a bit warm. Brown better, lemon oil, pesto, your favorite vinaigrette—whatever you like.

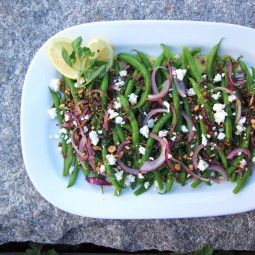
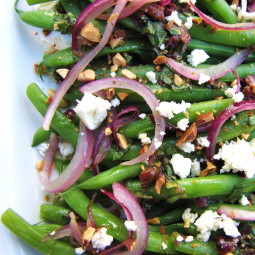
Warm Green Bean Salad with Feta, Olives, & Almonds and Lemon-Oregano Vinaigrette

3 tablespoons plus ½ teaspoon extra-virgin olive oil
¼ medium red onion, peeled and very thinly sliced
Kosher salt
12 ounces (3/4 lb.) green beans, trimmed
1 tablespoon balsamic vinegar
1 scant teaspoon freshly grated lemon zest
½ teaspoon honey
fresh pepper
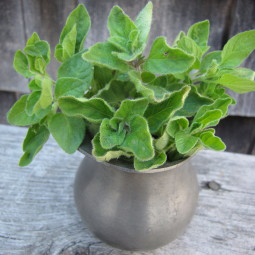
1 tablespoon chopped fresh oregano
1 tablespoon chopped, pitted Kalamata olives
1 to 2 tablespoons finely crumbled feta cheese
1 tablespoon finely chopped toasted almonds

In a small nonstick skillet, heat ½ teaspoon of the olive oil over medium-high heat. Add the sliced red onion and cook, stirring, until the onion has just softened (the smallest pieces will be wilted), about 2 minutes. Set the onions aside.

Fill a large saucepan half full with water and 2 teaspoons kosher salt. Arrange a few layers of dishtowels on a work surface to drain the beans. Add the beans to the boiling water and begin timing immediately. Boil until the beans are tender to the bite but still green, 5 to 8 minutes. (Begin tasting after 3 or 4 minutes; depending on the age of the beans and how quickly your stovetop brings water back to a boil, there can be a wide range in doneness times.) Drain the beans, or use tongs to lift them out of the water, and spread them out on the towels to let excess moisture drain and evaporate, about 5 minutes.

Make the dressing: Whisk together the 3 tablespoons olive oil, the balsamic vinegar, the lemon zest, the honey, 1/8 teaspoon kosher salt, and several grinds of fresh pepper in a glass measure or small mixing bowl. Add the chopped oregano and the chopped olives and stir or whisk again well to combine.

Arrange the cooled beans on a platter or in a shallow bowl and drizzle with all of the dressing. Arrange the red onions loosely over the beans and sprinkle with as much of the feta cheese and toasted almonds that you like. Serve slightly warm or at room temperature.

Serves 4

Birthday Worthy: Silver Queen Corn & Fastest Fudge Cake

This week I had to write my own book review for the Huffington Post. A little awkward, yes indeedy. But a good opportunity, so I took it. The fun part was choosing a sample recipe from Fast, Fresh & Green that I thought a wide range of people might like—and that was spot-on seasonal. My first thought: Corn. Second thought: Corn Sauté. Third thought: Corn Sauté with Chile & Lime.

Choosing a corn recipe wasn’t a hard decision. I have a not-very-well-kept-secret sweet tooth, and I’ve loved good fresh corn since I was a kid. (The grown-up in me adds stuff like lime and chiles to temper the sweetness.) And up here in New England, the first corn is just starting to come in from the fields; so that means folks south of us are already indulging. The timing for a corn recipe was perfect.

Plus, I couldn’t stop thinking about corn for another reason: It’s birthday week.  My Dad is turning 80 tomorrow, I am turning um…well, something that ends in 8…on Sunday, and Libby turned 8 today! To celebrate with Dad, we are hopping in the car and driving down to Lewes, Delaware, where I spent my childhood summers—and first fell in love with corn.

In those days (the dark ages, I know), the highway into town was lined with hundreds of acres of corn fields. (Now many of those fields are golf courses and retirement communities.) And all that corn was the pearly white, super sweet variety known as Silver Queen. The kernels were always tiny and juicy—not only delicious, but much easier on the teeth than this tough stuff you get in the grocery store these days. I’ve been told there’s an even sweeter variety of white corn around now, but I don’t seem to find either that or Silver Queen up here much. New Englanders seem partial to Butter and Sugar (yellow and white) varieties.

When we celebrate everyone’s birthday on Saturday, two things I know for sure. We’ll have corn and we’ll have chocolate cake. It might not be corn on the cob, slathered with butter, as it used to be. It might be one of my corn-off-the-cob sautés (a little easier on the teeth and oh, so tasty!), hopefully made with Silver Queen. And it won’t be my grandmother Honey’s famous chocolate cake. (She’s the one to whom I dedicated Fast, Fresh & Green. She was such a seat-of-the-pants great cook that no one can actually recreate that cake.) But I’m planning to make one of my favorite easy Fine Cooking recipes, Alice Medrich’s Fastest Fudge Cake. Libby and I made it last weekend in anticipation of her birthday, and after I poured the fancy-looking ganache on top, she decorated it with M& Ms, gummy bears, and pieces of (homemade) chocolate chip cookies! We carried the cake to the beach, and 20 people must have stopped us along the way to coo over the cake (and Libby). I think my 80-year-old Dad will enjoy it as much as she did.

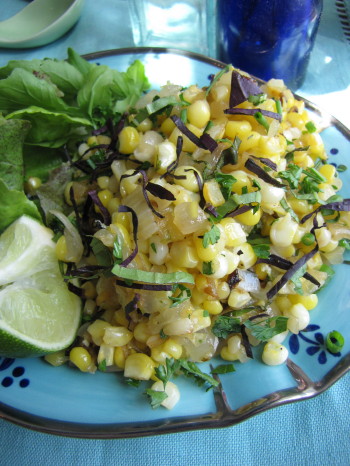
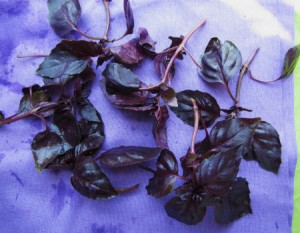
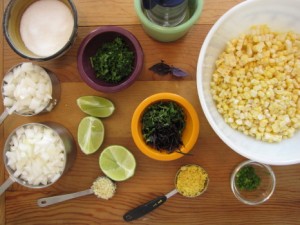
All this thinking and writing about corn was too much for me, though. I couldn’t wait until Saturday for Silver Queen, so I bought some New England corn yesterday and made one of my sautés. (Recipe follows.) I substituted a few things in the Fast, Fresh & Green recipe, adding fresh ginger and garlic and taking out the chile powder, and using purple basil (rescued from the farm stand—it doesn’t sell), chives, and parsley in place of the cilantro. Kept the lime though. (You could sub lemon if you wanted.) Wow, this one was so good—the lime/ginger/sweet onion/sharp basil thing with that sweet corn really works—that I combined the leftovers with a little goat cheese and put them in a frittata for lunch. Just for me, of course.  Sweet.

Summer Corn-off-the-Cob Sauté with Garlic, Ginger & Fresh Herbs

Don’t worry when you see a lot of brown stuff building up on the bottom of the pan. When you sauté corn, it always releases a bit of starch, which causes the browning. That brown stuff tastes really good though, so I incorporate a couple ways to get it back into the sauté. First, I suggest that you let the sauté sit for a few minutes in the pan after cooking. As the vegetables rest, they (especially the onions) will release some moisture that will loosen some of the browned bits, and you can then stir them in. Secondly, after you squeeze the lime in, you can use that bit of added moisture to get a bit more of the browned bits up. A wooden spoon works best for this.

________________________________________

1 tablespoon plus 1 teaspoon unsalted butter

1 tablespoon extra-virgin olive oil

1 1/2 cups small-diced yellow onion (6 to 7 ounces, or 1 medium-large onion), preferably sweet

Kosher salt

2 cups fresh corn kernels (cut from 4 medium ears)

1 tablespoon finely chopped fresh ginger

1 heaping teaspoon minced fresh garlic

1 teaspoon freshly grated lime zest

Freshly ground pepper

1/4 lime

3 tablespoons chopped fresh tender herbs (basil, parsley and chives are a nice combo)

______________________________________

Melt 1 tablespoon of the butter with the olive oil in a 10-inch straight-sided skillet over medium-low heat. Add the onions and 1/2 teaspoon salt, cover, and cook, stirring occasionally, until translucent, about 5 minutes. Uncover, turn up the heat to medium, and sauté, stirring frequently, until lightly browned, another 4 to 5 minutes.

Add the remaining 1 teaspoon butter, the corn kernels, and another 1/2 teaspoon salt. Cook, stirring frequently and scraping the bottom of the pan with a wooden spoon, until the corn is tender but still slightly toothy to the bite, 4 to 5 minutes. (It will begin to intensify in color, glisten, and be somewhat shrunken in size). Add the ginger and garlic and cook, stirring, until very fragrant, 30 seconds to 1 minute. Stir in the lime zest and remove the pan from the heat. Let the corn sauté sit undisturbed for 2 to 3 minutes (moisture released from the vegetables as they sit will loosen browned bits) and stir again, scraping up the browned bits from the bottom of the pan.

Season the sauté with a few generous grinds of pepper and a good squeeze of the lime. Stir in half of the herbs. Let sit for another couple of minutes if you have time. Stir and season to taste with more salt, pepper, or lime juice. Stir in the remaining herbs just before serving.

Serves 3 to 4 as a side dish

Tip: I find the safest way to cut corn off the cob is to snap the shucked ears in half first. This takes a little elbow grease, but works fine. Then put one half, cut side facing down, on a large cutting board and slice down the cob with a sharp knife using a sawing motion. Keep turning the cob until you’ve cut off all the kernels. Repeat with the other half. For convenience, I also put a large (old) dishtowel over my cutting board before I start. When I’m done cutting, I can fold the corners of the towel up and easily transfer the kernels to a bowl. Any way you do it, be aware that corn kernels do have a tendency to go flying when you cut them.