Category Archives: salads

Tiny Roasted Beets, A Winter Garden Salad, And A Dog that Likes Both

You would think that at some point I’d reach my limit with this whole veggie thing. But it seems I can never get enough. On Saturday I threw Libby and Farmer in the car (this was not hard, as where one goes, so goes the other) and headed off to Whippoorwill Farm. I’d heard a rumor that they were offering their last winter harvest for the CSA to the general public–$20 a share. Oh boy! I remember from belonging to the CSA a few years back that the cabbages and root veggies they provided at the end of the season lasted a good long time in the fridge. And since the only real winter-keepers we’ve got from our garden are onions and rutabagas, the idea of eating those carrots and beets and leeks (my favorite!) in January and February was too enticing for me to ignore.

When we got to the farm, Libby took over at the scales, weighing out each pound of carrots, turnips, and beets (we bought a double share, so it was a lot). Then she picked out our bags of lettuce and kale tops while I grabbed the cabbages and leeks. We hadn’t even made it back to the car before we were snacking on the incredibly sweet and crisp carrots. Of course Libby wanted to offer Farmer a carrot, so we broke one into pieces. He had a sniff from his back-seat perch, then proceded to crunch and swallow and lick his lips. Delicious. We ate three more on the way home.
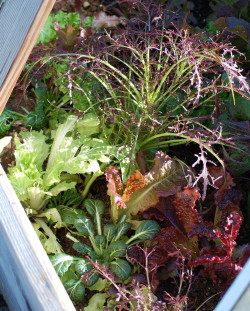
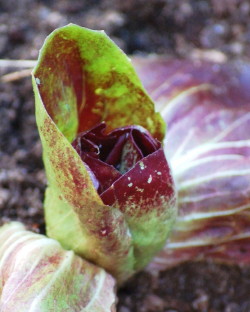
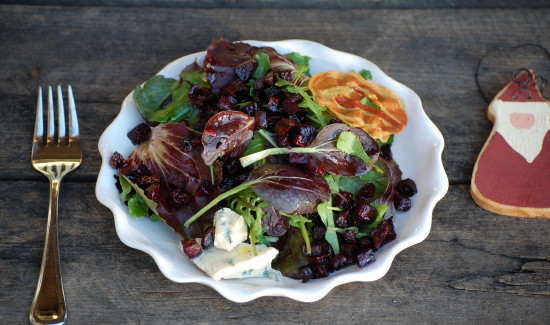
After I sorted and rinsed the veggies and stored them in the new (old) mudroom fridge, I began to think about new ideas for using them. I also have exploding lettuces in the cold frame; the mix of seedlings we planted includes an unusual frilly purple mustard and a deeply handsome red Tat Soi, both of which are thriving. I also am nursing along a couple young heads of radicchio in the cold frame, so all the pretty reds and purples inspired me to make a Christmas-y deep red and green winter salad. (The arugula is also still thriving—outside of the cold frame, no less.)

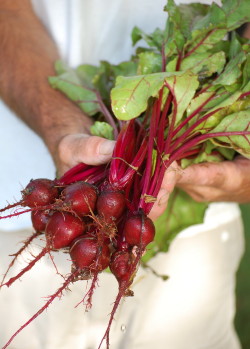
I wanted to try a slightly different take on my favorite quick-roasting method for beets, too. While I love roasting them as thin slices, I decided to try tiny dice this time. (The recipe for quick-roasted beet slices is both here and in Fast, Fresh & Green. And while I also included a recipe for tiny roasted roots in Fast, Fresh & Green, I had left beets off the list in that recipe for two reasons—they bleed, and I figured they would take longer than most roots to cook.)
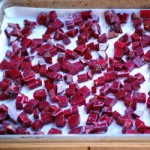
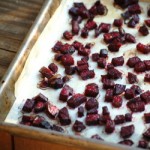
But I was so pleased to discover yesterday that the little diced beets did indeed get tender in 20 minutes at 475 degrees. (So the great news is the same here as it is with the quick-roasted slices: You do not need to invest hours of time to enjoy roasted beets.) With caramelized edges, these sweet little gems made a great addition to the salad—which I rounded out with a creamy blue cheese and a bit of salty pancetta. I forgot the nuts this time around, but would have been happy with chopped toasted pecans or hazelnuts. I used a simple white balsamic vinaigrette with a little maple, but you could improvise your own winter salad with your own dressing and any combination of arugula, endive, radicchio, escarole, mustard, tat soi, or other hearty salad green. Figure about two cups loosely packed greens for each serving, and plate the salads for the nicest presentation, especially if you’re including a creamy cheese (which tends to get messy when tossed). Certainly opt out of the pancetta if you like. Follow the simple recipe below to roast the beets. I think using them on the day they’re roasted is nicest (you can leave them at room temp for a couple hours), but they certainly hold in the fridge, too, and can even be marinated in a citrusy vinaigrette to become more of a condiment or relish.
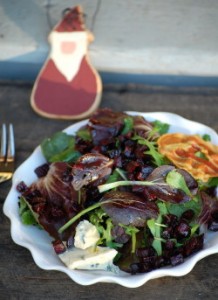
I discovered one other thing yesterday—Farmer likes roasted beets and arugula (in addition to Snickerdoodles). I won’t go into the details on how I learned this, but it has something to do with distracting him from the Christmas tree ornaments.

Tiny Diced Roasted Beets

Toss these in salads, marinate them to make a condiment or relish, or just plain eat them as a side dish or a snack.

1/2 pound trimmed small red beets (unpeeled)

1 generous tablespoon olive oil

1/4 teaspoon kosher salt

Heat the oven to 475°F. Line a small heavy-duty rimmed baking sheet (also called a quarter sheet pan) with parchment. Cut the beets into dice that are between 1/4-inch and 3/8-inch big. (It’s easiest to slice the beets across first—after discarding the ends—and then lay the slices down to cut into dice.)

Toss the diced beets thoroughly with the olive oil and salt in a small mixing bowl and spread in one layer on the sheet pan. Roast for 20 to 22 minutes, until caramelized and tender when pierced with a knife (they do not have to be soft, just cooked through. Don’t overcook or they will begin to burn.) Let cool a bit on the sheet pan and eat right away—or later!

Makes enough to garnish three or four small salads or two large ones.

A Video of the Farmette, A Paella Dinner, and A Recipe for Unsellable Tomatoes

Darn it all, wouldn’t you just know it—this is the time of year when there’s so much going on at the farmette that I could write a blog every day. Except, ironically, there’s no time to write—too busy!

So today I’ll just have to give you a quick update on the goings on around here, because tomorrow I’m off to Boston to sign books at the Dewey Square Farmers’ Market, and I spent this morning cramming in the last bit of proofreading I needed to do on the galley of Fresh & Green for Dinner in order to get it off to Fed Ex in time to reach San Francisco by tomorrow. (It’s very exciting to see the design of the new book shaping up, even though publication is still many months away.)

First, great news: My friend Katie Hutchison, who kindly took care of the farmette with her husband Chris Hufstader while we were in Delaware, secretly made a video of their farm-keeping experience here at Green Island Farm and posted it on her website. Katie, who is an accomplished architect, photographer, and writer, is admittedly new to gardening and occasionally posts about her “Idjit” garden plot in a Salem, Mass., community garden. As you can tell, Katie’s not afraid to poke fun at herself, and her sense of humor is evident in the video—you’ve got to see it!

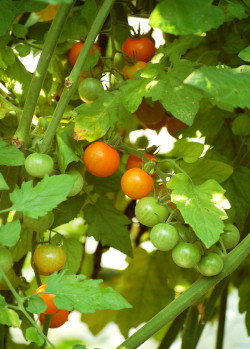
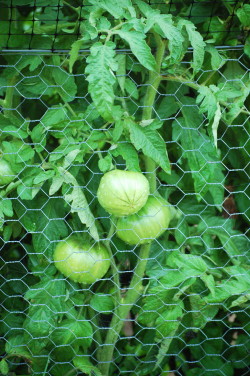
More good news: The garden is thriving (see photos) and so is the farm stand. In fact we’re pretty much selling out of everything we can harvest every day, now that the August visitors have arrived on the Island. (Obama will be here soon!) It’s killing me that we don’t have more to sell (can’t wait ‘til next year), but I’m also getting an invaluable sense of what the market wants. We’re dead on with our cherry tomatoes—all the varieties are producing well, we’re harvesting several pounds a day, and folks love the colorful pints. I just wish the beefsteak tomatoes would speed up. They’re big and fat—and very green. Our green beans are definitely getting folks to drive down the driveway, but again, it’s frustrating that we don’t have more of them (the beans, not the customers). It takes Roy and I (and sometimes a house guest!) at least a half-hour to pick them in the morning, and then we only wind up with a few pounds. But that’s how it goes.

It’s been fun to watch the farm stand traffic pick up, and I’m meeting all kinds of interesting people. One friendly couple from San Francisco (yes) has stopped by three times this week, and I had a nice conversation with two ladies from Southern Italy the other day. Sometimes an old friend who is visiting the Island will unexpectedly come down the driveway and surprise me (it happened this morning—hi Margo!).

And speaking of friends and visitors…August on the Vineyard means lots of both. And since the farmette is such a welcoming (and entertaining) place (most popular: the bunny and the rope swing), we seem to be a central gathering spot. Last week I almost cried when I stood in the backyard with two of my dear friends and former staff members from my Fine Cooking days, food writers Tony Rosenfeld and Sarah Jay. Tony was only on the Island for a day, but stopped to say hello and brought some Italian friends along with him. After touring the garden, the Italians convinced me that my arugula wasn’t too spicy!

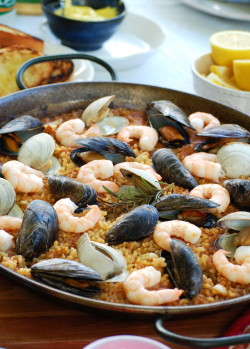
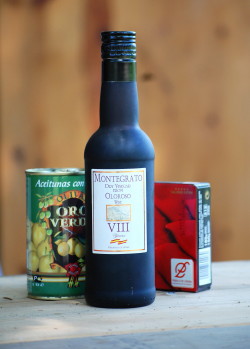
Fortunately Sarah and her two daughters were here for the better part of last week and we had lots of time to catch up—and to cook together. Sarah is an expert in Spanish cooking and runs a successful business importing paella pans and selling all kinds of Spanish goodies from her terrific website, paellapans.com. Not only did she bring me a wonderful bottle of sherry vinegar, as well as piquillo peppers, olives, and chorizo, but she made us a seafood paella while she was here. I’m a huge fan of Sarah’s paella (recipes here), which she learned to cook while living with a family in Spain, but it was Roy’s first really authentic paella. And he loved it.

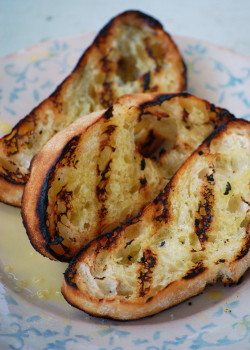
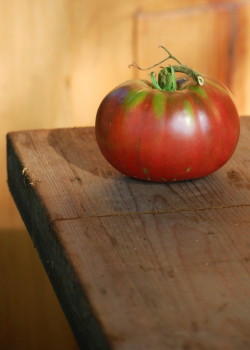
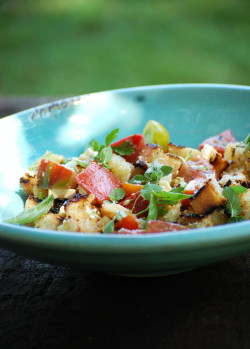
The day after Sarah left, I missed her. Right about lunch time, I started thinking about those Spanish ingredients she brought me. Hmmm. As it happens, I was also staring at a damaged Cherokee Purple (heirloom) tomato from the garden that needed to be carved up and eaten right away. (Ironically, this happens a lot – we have a garden full of lovely vegetables, but we wind up eating the overgrown beans, the holey greens, the deformed carrots, and the over-ripe tomatoes because the good stuff goes to the farm stand!) I’ve also been on a grilled bread kick, so I decided to make a grilled bread-tomato salad with olives, sherry vinegar, feta cheese (left over from a delicious salad Sarah made while she was here) and lots of fresh herbs. I guess it was an Italian-inspired salad with Spanish ingredients and a Greek twist! Whatever it was, it was delicious. So I’m passing the recipe on to you in honor of good friends and summer visitors and farm stand customers everywhere. It makes enough for two, but if you’re like me and a juicy heirloom tomato falls into  your lap, you might not want to share it.

Spanish Grilled Bread, Tomato & Fresh Herb Salad

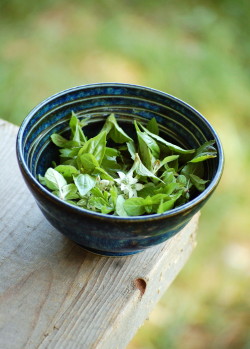
You can use any variety of juicy tomatoes in this salad—as long as they’re juicy. (Did I mention juicy?) When you grill or toast the bread, don’t overdo it—leave it a little chewy so that it will soak up the dressing and all those tomato juices. This recipe makes a generous lunch for one or a supper side dish for two, but you can easily double or triple it to serve a crowd. I like lots of basil and mint in this (I pick the tiniest leaves from my plants and throw them in whole), but parsley, chives, or a judicious amount of fresh oregano can go in the mix, too.

___________________________________________

1 tablespoon extra virgin olive oil

2 teaspoons good-quality sherry vinegar

3/4 pound (or a little more) juicy tomatoes (a combo of beefsteak and cherry is nice), cut into small chunks or quartered if small

2 ounces feta cheese, cut into small cubes

2 1-inch thick slices ciabatta or other narrow loaf artisan bread, brushed generously with olive oil, sprinkled with salt, and grilled or broiled until toasty, cut into small cubes

8 to 12 Spanish green olives, smashed and pitted

1/4 teaspoon minced fresh garlic

1/4 cup small whole herb leaves (basil and mint)

kosher salt

_____________________________________________

In a small bowl, combine the olive oil and sherry vinegar. Set aside.

In a medium mixing bowl, combine the tomatoes, feta, bread, olives, garlic and half of the whole herbs. Sprinkle with salt and pour over the olive oil-vinegar mixture. Toss and mix well. If desired, toss and let sit for 15 minutes to let the bread absorb the tomato juices (but it isn’t necessary). Turn out into a pretty shallow serving bowl and garnish with the remaining herbs.

Serves 2

Tip of the Week: Skewer Onions for the Grill with Turkey Lacers

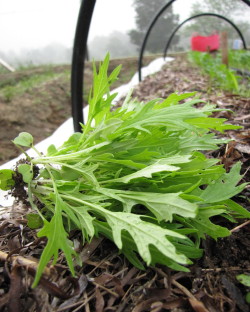
Yep, you guessed it. I’ve been spending so much time doing this (harvesting greens, left) that I haven’t had time to do much of that (cooking, right). Or to write a blog post this weekend. But I have been thinking of you, I promise. So I offer a good old tip I’ve used for years and that I called into quick action the other night for our dinner–using a turkey lacer to skewer onion slices for the grill. It’s that easy.

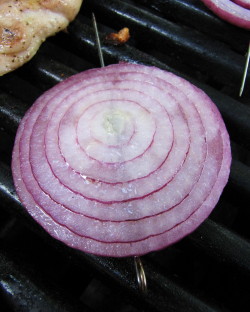
You can pick up a package of turkey lacers (basically mini-skewers) at any grocery store. Peel and cut a big red onion (or yellow or sweet) into 1/2-inch slices and poke the lacer through the center of the onion from side to side (so that you poke through every ring). Coat the slices with olive oil and salt and put on a medium-hot grill. Cook until there are nice grill marks on each side of the slice (about 5 to 7 minutes per side on my grill). And here’s one last tip: At this point the onions will be flavorful but not completely tender. Take them off the grill and wrap them briefly in aluminum foil, where they will steam a bit, finish cooking, and get soft and tender. Delicious. On steak. On salad. On whatever. Good emergency vegetable when the crisper drawer is empty!

Sweet Pea Dreams and a Quick Slaw with Sugar Snaps

Peas, alas, are not a spring vegetable, despite what legions of food writers would have you believe. It is wonderful to think of things like spring pea risotto and minted pea soup for Mother’s Day, but unless you are lucky enough to live in a really temperate climate, you’ll be waiting for fresh peas until late June with the rest of us.

I feel bad being a Scrooge about this. Actually a super-Scrooge, as, these days, I can’t really even get behind those so-called fresh peas (usually already shelled) that arrive in the grocery stores before they do in my garden. I’d rather eat frozen peas. (And I do.) The reason is that shell peas–or English peas–lose that just-picked sweetness rather quickly and wind up tasting bland and starchy when they travel many miles to get to you.

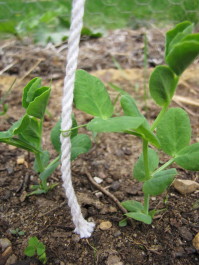
So right now I have to content myself with staring at the squat little pea seedlings in my garden, imagining what they’ll bring me. I’m very proud of them, actually. Yesterday I noticed that they’ve started unfurling their little tendrils and have obligingly begun to grab on to the curtain of strings I hung for them. Such good peas.

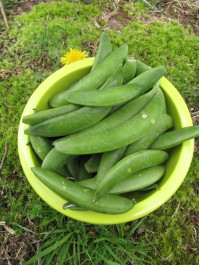
The other way I’m getting my pea fix right now is with sugar snap peas. I’m seeing a lot of nice ones at the grocery store. Yes, these come from far away, too, but at least they hold on to their flavor—and texture—better than shell peas. Sugar snaps are probably the number one quickest veggie on the planet to cook—or just eat. Because, of course, you can munch on them raw (like Cocoa Bunny, in photos below), toss them in a hot pan for a super-quick sauté, or slice them to use in salads and slaws (like the one below).

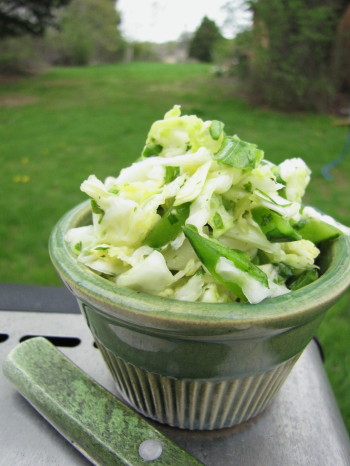
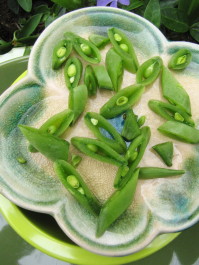
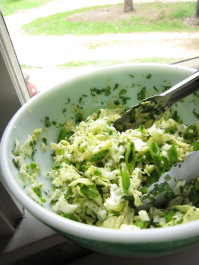
I get a kick out of slicing sugar snaps on the diagonal, exposing the cute little cross-section of peas inside. (I know, I’m easily amused). But these pretty little slivers are useful, too—they add sweetness and crunch, but not too much bulk, to a fresh slaw. Since I happened to have some Savoy cabbage, a few limes, and a bunch of cilantro in the fridge today, I knew I could make my favorite slaw and embellish it with sugar snaps. This recipe (I did a version of it in Fast, Fresh & Green) honestly takes no more than 10 minutes to make, and then reaches its perfect state of crunchy/wilty balance after another 10 minutes or so (though it can hold a bit longer than that). It’s versatile, too. Today I wanted a slightly creamy feel (something to do with the grey skies), so I stirred in a dollop of Mermaid Farm yogurt at the end.

I ate a whole bowlful of this slaw standing up at the kitchen counter, but if you were moved to make some this weekend, you might want to serve it with grilled butterflied leg of lamb, grilled chicken, or even grilled veggie or fish tacos.

Quick Savoy Slaw with Sugar Snaps, Lime & Cilantro

For a printable recipe, click here.

The amounts of lime juice, sugar, and cilantro are flexible here—taste after a few minutes and adjust seasonings if you like. I sometimes add sliced scallions or chives here, too. Savoy cabbage is the crinkly green one.

_______________________________________

8 ounces very thinly sliced cored Savoy Cabbage (about 3 1/2 cups)

4 to 5 ounces sugar snap peas, trimmed and sliced on the diagonal (about 1 1/3 cups)

3 tablespoons chopped fresh cilantro

3 tablespoons freshly squeezed lime juice

2 to 3 teaspoons sugar

1/2 teaspoon kosher salt

1 to 2 tablespoons full-fat plain yogurt (optional)

________________________________________

Combine the cabbage, snap peas, cilantro, lime juice, sugar, and salt in a medium bowl. Toss thoroughly with tongs or two spoons. Let sit for ten minutes, tossing occasionally. Taste and adjust seasonings if you like. Let sit another ten minutes for a softer slaw. Fold in the yogurt if desired.

Serves 4

________________________________________

Cocoa wasn’t so sure about the sugar snap pea…but curiosity prevailed

Instant Gratification: Roasted Fingerling & Watercress Salad

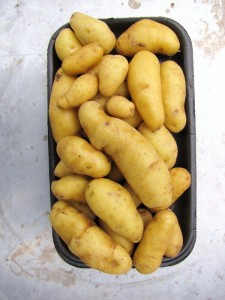
It’s funny how things come together in the kitchen. This week I’ve had lots of fingerling potatoes lying around, as I’ve been developing recipes with them for Vegetarian Times magazine. As it happens, I also treated myself yesterday to a watercress gathering excursion. Nice to be out in the quiet of the early morning under clearing skies, walking along a damp compost-y path beneath a gradually thickening canopy of budding branches. (Buds—finally.) I had my little scissors, a bag, and my camera. Sadly, I couldn’t linger long—lots of recipe testing scheduled for the day. But I crouched low in the black mud, hung over the stream, and snipped enough crisp clusters of Leprechaun-green watercress to fill my bag. And then reluctantly carried on my way. Retreating out of the cool forest, I heard the buzz of cars on the roadway calling me out of my reverie.

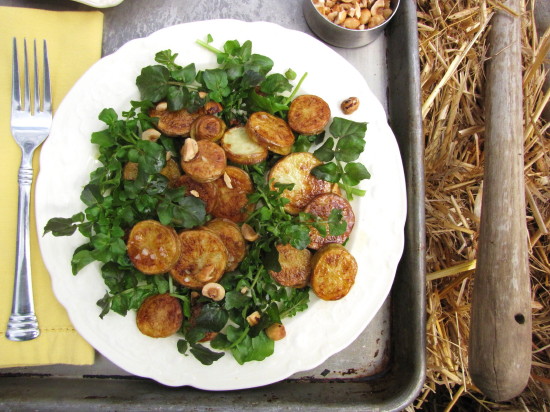
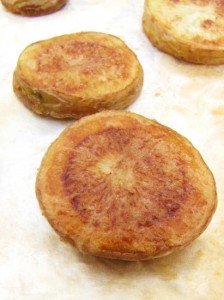
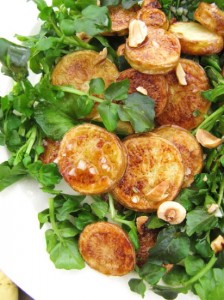
Back home at lunch time (after another recipe test—Asian slaw), I looked at the fingerlings and the watercress and thought: Warm salad. It’s no secret that my favorite way to cook fingerlings is brown-braising. But right then, I wanted instant gratification, and I looked at the little knobby potatoes and thought slicing them into coins and quick-roasting them would get me my hit. Sure enough, the little coins were golden on the outside, moist on the inside after 20 minutes at 450 degrees. I scrunched up some handfuls of washed watercress and scattered them on white plates. On went the roasted potatoes and a super-quick warm dressing I made in the skillet with sautéed garlic, olive oil, and red wine vinegar. I happened to have some toasted hazelnuts around, so I scattered a few of those on, too. Simple and lovely. Nothing I like better than a warm salad, especially with something so crazy delightful as freshly picked watercress. Now, I can’t wait ‘til I can harvest our own greens. (Just a few weeks away, maybe—the first arugula seeds I sowed in the garden last week sprouted today—yippee!)

One little suggestion: If you decide to whip yourself up a warm fingerling salad like this (which you could certainly do with arugula or any other assertive green), the dressing would be even better if you cooked a slice of bacon in the skillet first! Course you could skip the greens altogether, too, if you liked. Those little roasted fingerling coins tasted pretty yummy straight off the sheet pan.

Roasted Fingerling Potato & Watercress Salad

Printable Version of Recipe

All the amounts in this recipe are flexible, and you could vary the dressing or add garnishes as you like. This is really more like a serving suggestion, simply meant to inspire you to pair warm vegetables with cool greens. Just be sure your potato pieces are well-coated in oil for the best roasting. I find slicing the potatoes a little thicker than 1/4-inch, but not quite 1/2-inch (voila, 3/8-inch!) is just about right for cooking through and browning up at the same time in a hot oven.

___________________________________

12 oz. fingerling potatoes, unpeeled, sliced crosswise into “coins” about 3/8-inch thick

2 1/2 to 3 tablespoons extra-virgin olive oil

kosher salt

4 to 5 ounces stemmed watercress, washed (or other assertive greens in small pieces)

1/2 teaspoon minced fresh garlic

1 teaspoon red wine vinegar

1/4 teaspoon maple syrup

2 tablespoons finely chopped toasted hazelnuts or almonds (optional)

1 tablespoon crumbled good-quality blue cheese (optional)

__________________________________________

Heat the oven to 450 degrees F. Cover a large sheet pan with parchment paper. Toss the fingerling pieces with 1 1/2 to 2 tablespoons of the olive oil and 1/4 teaspoon kosher salt. Spread them out in one layer on the parchment paper. Roast under tender all the way through and golden brown on the bottom, about 20 minutes. (Don’t worry if the coins aren’t very brown on the tops—they will be quite golden on the bottom, so just flip them.)

Meanwhile, distribute the watercress on three salad plates (or two for bigger salads). In a small skillet, heat the remaining 1 tablespoon olive oil and the minced garlic over medium-low heat. Stir gently and cook until the garlic begins to sizzle, about 3 to 5 minutes (don’t let the garlic brown.) Add the red wine vinegar, the maple syrup, and a pinch of salt and stir. Remove the skillet from the heat.

Arrange the warm potatoes amongst the watercress and drizzle or spoon the warm dressing over the salads. Sprinkle a tiny bit more salt on each salad, and garnish with the nuts and/or cheese if desired. Serve right away.

Serves 2 or 3

It’s About the Green Beans, Stupid!

For all the complaining I did about green beans as a child, I can’t believe I’m growing (and eating) more of them these days than practically any other vegetable. My green bean complaints started early. First, my mom seemed stuck on serving those frozen, stringy “frenched” beans about five times a week, no matter what else was on the plate. (‘Very mushy texture’ is the best thing I can say about them.) After her Julia Child-cooking enlightenment period, my mom moved on to fresh beans—but we still ate them, boiled with butter, a lot. Then my Dad got into vegetable gardening, and his pride and joy were pole string beans. I remember one summer (I think I was 10) when it seemed like we ate nothing but green beans. Ack. I’m pretty sure there was then a period of about 20 years when I didn’t eat any green beans at all.

But eventually I became editor of Fine Cooking magazine, and as such, privy to all kinds of reader feedback and issue surveys. I noticed that every time we did a feature with green bean recipes in it, the article topped the popularity scales. Finally, I had to say to myself, “It’s about the green beans, stupid.” Yes, I admitted, green beans are the most popular, most well-liked vegetable on the planet (or at least in America).

Fortunately somewhere along the way I also learned to love green beans—mostly because I began to cook them in lots of different ways. (I roast, grill, braise, and sauté them in Fast, Fresh & Green.) But there’s no getting around the fact that boiling is the quickest, simplest, and most efficient method for cooking green beans perfectly. And also the easiest way to ruin them.

There’s only one way to tell if a bean is perfectly cooked—by tasting it. Tasting as you cook is one of those concepts that chefs hammer into your head in culinary school, so I just thought I’d pass it along to you without screaming or throwing pots. There really is a practical (and rewarding) reason to taste as you cook. Actually, two reasons: flavor and texture. Unless you taste as you go, you won’t catch the subtle changes in flavor and texture that heat (both dry and wet heat) imparts to food, and you won’t be able to make the necessary adjustments in seasoning and cooking times that recipe instructions simply can’t tell you to do.

Green beans are a great example. Undercooked green beans are rubbery; overcooked are mushy. If you are boiling beans, simply begin tasting them after a few minutes. At first you will have a hard time biting through them. As the texture softens, the green beans are closer to being perfectly cooked. When you can just bite through with no resistance, they’re done. (If you walk away to check your email at this point and come back 5 minutes later, you will be sorry.) Yes, you will have to sacrifice a few green beans to tasting.

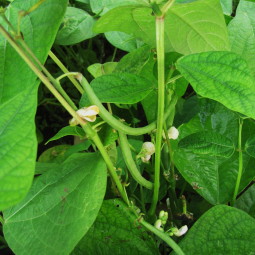
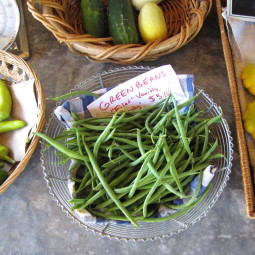
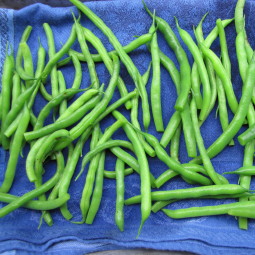
The thing is, different sized (and different aged) beans cook at different rates, so you pretty much need to taste every batch every time you cook them. In our garden, we are now harvesting “filet” beans—lovely slender green beans that are similar to French haricots verts—and they cook in just a couple minutes. But yesterday, I bought regular green beans at the grocery store to test a recipe for this blog (below), and they took about 6 minutes to be perfectly done. So tasting’s the thing.

By the way, in case there was any doubt, green beans are just as popular on Martha’s Vineyard as everywhere else. Even on recent days when hardly anything else at the farm stand has sold, the filet beans have disappeared. So of course, what have we gone and done? Planted more. (Bush beans are quick to germinate, flower, and fruit.) And the pole beans are coming, too. Yikes, I am going to be surrounded by green beans… having Jack-and-The-Beanstalk nightmares, don’t ya know. What goes around comes around.

The technique for perfectly cooked green beans is embedded in the recipe below. If you don’t feel like green beans with a Greek flavor profile, simply cook the beans and dress them as you please while they’re still a bit warm. Brown better, lemon oil, pesto, your favorite vinaigrette—whatever you like.

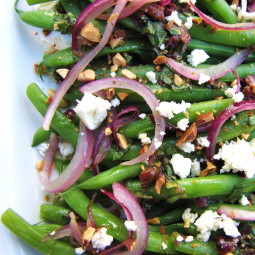
Warm Green Bean Salad with Feta, Olives, & Almonds and Lemon-Oregano Vinaigrette

3 tablespoons plus ½ teaspoon extra-virgin olive oil
¼ medium red onion, peeled and very thinly sliced
Kosher salt
12 ounces (3/4 lb.) green beans, trimmed
1 tablespoon balsamic vinegar
1 scant teaspoon freshly grated lemon zest
½ teaspoon honey
fresh pepper
1 tablespoon chopped fresh oregano
1 tablespoon chopped, pitted Kalamata olives
1 to 2 tablespoons finely crumbled feta cheese
1 tablespoon finely chopped toasted almonds

In a small nonstick skillet, heat ½ teaspoon of the olive oil over medium-high heat. Add the sliced red onion and cook, stirring, until the onion has just softened (the smallest pieces will be wilted), about 2 minutes. Set the onions aside.

Fill a large saucepan half full with water and 2 teaspoons kosher salt. Arrange a few layers of dishtowels on a work surface to drain the beans. Add the beans to the boiling water and begin timing immediately. Boil until the beans are tender to the bite but still green, 5 to 8 minutes. (Begin tasting after 3 or 4 minutes; depending on the age of the beans and how quickly your stovetop brings water back to a boil, there can be a wide range in doneness times.) Drain the beans, or use tongs to lift them out of the water, and spread them out on the towels to let excess moisture drain and evaporate, about 5 minutes.

Make the dressing: Whisk together the 3 tablespoons olive oil, the balsamic vinegar, the lemon zest, the honey, 1/8 teaspoon kosher salt, and several grinds of fresh pepper in a glass measure or small mixing bowl. Add the chopped oregano and the chopped olives and stir or whisk again well to combine.

Arrange the cooled beans on a platter or in a shallow bowl and drizzle with all of the dressing. Arrange the red onions loosely over the beans and sprinkle with as much of the feta cheese and toasted almonds that you like. Serve slightly warm or at room temperature.

Serves 4

Here at Lettuce Central, We Love Our Vinaigrette

As if it weren’t bad enough to live with 400 seedlings in our tiny apartment all winter, now we have a LPU (lettuce processing unit) in the kitchen. This is not an official piece of equipment, but rather a collection of big stainless steel bowls, salad spinners, dish towels, and assorted plastic bags, trays, and coolers that I use to wash, dry and pack the lettuce and greens we’re harvesting from the garden in order to sell them at the farm stand.

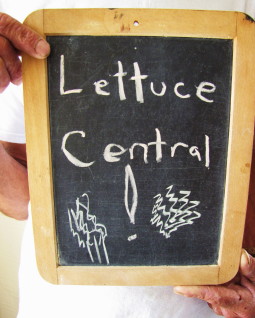
There comes a point every evening and every morning when pretty much every surface is covered with lettuce or greens of some sort. I don’t yet have my system worked out perfectly, so my partner, Roy, is finding this chaos all very amusing. Only yesterday did I realize he’d written “Lettuce Central” on our blackboard next to the kitchen door a few days ago. I’d been so distracted, I hadn’t even seen it.

It’s all pretty swell though, as I am totally enchanted with the lettuces and greens, and with our success in growing them, despite their wobbly start as spindly seedlings in the apartment. And the best perk is the killer salads we are having every night for dinner.

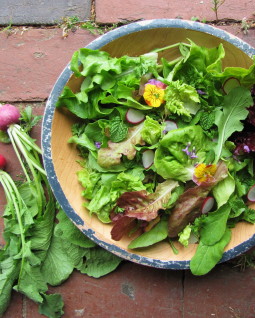
But you don’t have to grow your own lettuce to make a really good green salad—just keep things simple. Stick with mostly greens (forget the big hulking cherry tomatoes and chunks of raw bell pepper—they’re distracting), and try a combination of tender lettuces and a little bit less of something assertive (I love Bibb lettuce with a bit of arugula or mizuna). You can even toss in a few baby herb leaves or finely sliced fresh herbs like mint, parsley or basil for a tiny surprise hit of flavor.

Take the extra time to buy individual heads of lettuce and bunches of greens—they’re much fresher and tastier than bagged lettuce. Wash them well, and be sure to spin them dry as dressing won’t cling to wet leaves. Lastly, make your own tasty house vinaigrette. Bottled salad dressings are full of things you don’t want to be consuming. Plus they taste, well, bottled.

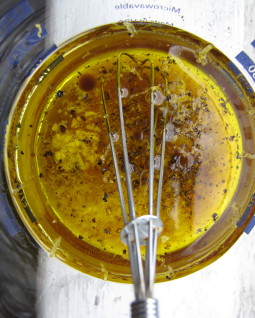
A vinaigrette in its simplest form is 3 parts oil to 1 part acid (vinegar, or a combination of vinegar and citrus juice). With a pinch of salt or a dab of mustard to emulsify the two, you can make a vinaigrette in seconds. Or add an extra flavor or two—fresh pepper, minced garlic, lemon zest, chopped herbs—and you’ve got a custom dressing with only a few more minutes of work. Make a decent-sized batch, and you’ll have homemade vinaigrette in the fridge for a couple weeks of dinner salads.

Here’s a recipe for our favorite house vinaigrette.

Lemon-Sherry Vinaigrette for Summer Salads

_______________________________

7 tablespoons extra-virgin olive oil

2 tablespoons sherry vinegar

½ teaspoon freshly grated lemon zest

½ teaspoon fresh lemon juice

½ teaspoon honey

½ teaspoon Dijon mustard

¼ teaspoon minced fresh garlic

several grinds of fresh pepper

½ to 1 teaspoon thinly sliced fresh mint (optional)

________________________________

Combine all the ingredients in a bowl or glass measure and whisk until emulsified. Or combine in a glass jar with a lid and shake the jar until the ingredients are emulsified. Store covered in the fridge for two weeks.

Yields about 2/3 cup

A Potato Salad to Celebrate the Unofficial Start of Summer

I realize that this is Memorial Day weekend, not Fourth of July, so I may be jumping the gun a little by posting a potato salad recipe. But it’s been such a warm spring, and it’s looking like it will be a hot weekend all over the country, so I figured folks might be thinking about potato salad for picnics and barbeques.

Truthfully, this thought got me a little worried, as visions of store-bought, factory-made, gloppy potato salad came to mind.  There is nothing I hate worse than bad potato salad.

But then I breathed a sigh of relief, knowing that many of you all will be making your own delicious potato salads. In fact, you might even be scanning the web, looking for a lighter, brighter take on the classic American-style recipe. So I thought I’d post a favorite from Fast, Fresh & Green that’s got all the fresh flavors of spring, but that’s also assertive enough to pair with the grilled fare of summer—a  perfect season-bridger.

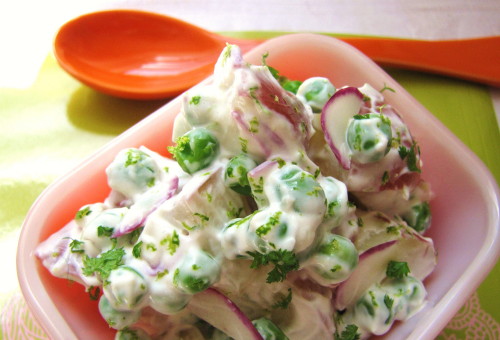
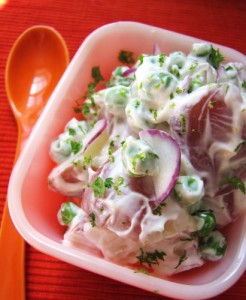
I made some of this New Potato Salad with Fresh Peas, Lime & Mint this morning and added a few slivers of baby radishes we pulled up from the garden yesterday. The lime zest and juice are the ingredients that really make this salad feel fresh, but lightening the mayonnaise with Greek yogurt helps a lot, too. In fact, these are two good tricks to remember when making any kind of mayonnaise dressing for a salad: Lighten the mayo with yogurt or whisked cream for a silkier texture, and always add extra lemon or lime for bright flavor. And don’t forget to salt the potatoes while you’re cooking them!

This salad is great with grilled lamb and grilled shrimp, but it’s also good as a main dish for lunch with some Bibb lettuce or as part of a vegetarian supper or picnic.

New Potato Salad with Fresh Peas, Lime & Mint

This recipe yields just enough to serve 4. You can easily double it, but you may find you want just slightly more dressing if you do. You can always whisk together just a bit more mayo, yogurt and lime and fold it in, or  you can start out by doubling all the ingredients, but only increasing the potatoes to 1 3/4 pounds instead of 2.

___________________________________________

1 pound baby Yukon gold or Red Bliss potatoes, quartered or cut into sixths for similar-sized pieces

2 ½ teaspoons kosher salt, more for seasoning

1 pound fresh peas in the pod, shelled to yield 1 cup peas (frozen peas are fine, too)

1/3 cup mayonnaise

¼ cup thick Greek yogurt (whole or 2%)

1 teaspoon (loosely packed) freshly grated lime zest (from about 1 lime)

½ teasoon fresh lime juice

¼ cup sliced scallions

2 to 3 tablespoons finely sliced fresh mint leaves

freshly ground black pepper

__________________________________________

Put the potatoes and 2 teaspoons of the salt in a large saucepan and cover with plenty of water. Bring to a boil, reduce to a simmer and cook until almost tender, about 10 minutes. Add the fresh peas (if using) and cook for 2 to 3 minutes more. (If using frozen peas, simply submerge them in a little tap water to defrost; then drain and dry.) Drain the potatoes and peas carefully in a colander and rinse them gently with cool water for a few minutes. Spread the potatoes and peas out on a small rimmed sheet pan and let cool. If you are in a hurry, you can refrigerate the potatoes like this and they will cool in about 20 minutes.

Meanwhile, whisk together the mayonnaise, the yogurt, the lime zest and the lime juice in a medium mixing bowl. Add the cooled potatoes and peas, the scallions, 2 tablespoons of the mint, ½ teaspoon kosher salt, and several grinds of fresh pepper. Mix gently but thoroughly with a silicone spatula. Taste and add a little more salt if desired. Garnish with the remaining mint .

Serves 4

Stalking Wild Watercress for Salads & Sautés

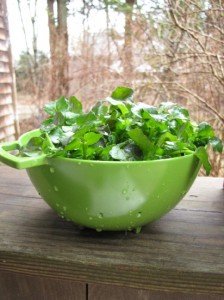
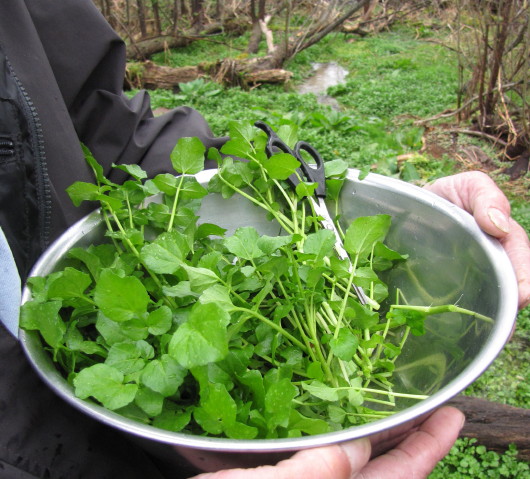
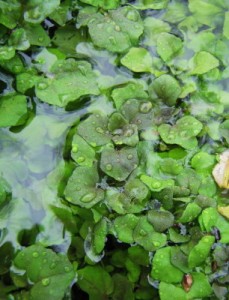
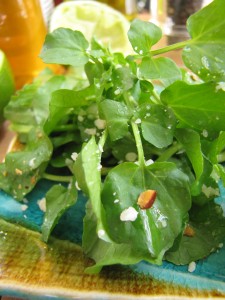
Sneaking around is so much fun. Like heisting those leeks a few weeks ago, we had the best time on Friday clandestinely gathering wild watercress from a fresh-water stream deep in the woods. Scissors in hand, we scurried down a path of pine needles, all the while looking over our shoulders, hoping no one would see us through the mist and fog and tangled brush. Soon we could hear the gentle burbling of the stream, and then the green mirage appeared–a carpet of a million leprechaun-green petals, so shiny and inviting you’d almost want to walk across it. But unless you’re wearing waders, it’s best to snip wild watercress by draping yourself over a fallen tree branch. Which is exactly what we did. Snacking as we snipped, we filled up a big bowlful of the freshest, zippiest taste of spring you could ever hope for.

Gathering wild watercress is a time-honored Spring tradition on the Vineyard. But don’t ask an old-timer where his favorite patch is, like I did when I was just a new “wash-ashore.” He looked at me, only half-smiling, and said, “If I tell you, I’ll have to kill you.”  Like stands of wild blueberry bushes and sandy beach-plum covered dunes, the location of a good watercress patch is a highly guarded secret. And I think I finally understand why. Unlike the summer berry  hunt, where you’ll definitely lose out if you don’t get there first, it’s not that there isn’t enough watercress to go around. As long as you snip sprigs (and don’t pull up roots), this wild green will flourish.

No, I think the appeal of watercress picking is the ritual–the walk through the peaceful woods that are just starting to green-up, the crouching by the edge of a cool stream. It’s so calming and rejuvenating after a long winter that you’d hate to disturb the experience by sharing it with hoards of people all at once. Funny thing is, on our way back to the car, we saw a lone watercress sprig dropped by the side of the road. Someone had been to “our” spot before us, but had kindly given us our space.

I can’t say that foraging for your own greens doesn’t somehow make them tastier and more exciting. So I won’t blame you if you are now saying, “Why should I bother with watercress if I’m just foraging for it at the grocery store? Because I think watercress is a highly underappreciated green, pushed out of the limelight by the likes of arugula and mizuna, when in fact it has all of their zip and less of their bite. And it is truly simple to prepare. I love it raw in salads–alone or with other greens–and wilted in a sauté pan, always with plenty of garlic. (Below are two favorite “recipe-lets” for you to try.) I also love to toss watercress in with steamed mussels, I love it with a juicy hamburger, and I love it in a very simple Asian soup of chicken broth, scallions, ginger, and garlic. And, oh yeah, it’s really good for you too. This relative of the nasturtium has traditionally been used as an herbal remedy for hot flashes, headaches, canker sores, and even gout. And it’s a good source of Vitamin C, Vitamin A, phosphorous, iron and calcium. Touché, arugula!

Simple Watercress Salad with Lime-Honey Dressing & Toasted Almonds: Combine 3 tablespoons extra-virgin olive oil, 1 tablespoon plus 1 teaspoon freshly squeezed lime juice, 1 teaspoon honey, a hefty pinch of salt, and a few grinds of fresh pepper in a small bowl. Whisk the dressing together until creamy. Toast whole almonds in a 375°  oven until deeply browned; cool and chop coarsely. Coarsely grate a few tablespoons of Parmigianno Regianno cheese.

For each portion of salad, wash and dry 2 good handfuls of watercress, trimming away any thick lower stems first. If you have mint around, pick out a few small leaves or finely slice a few bigger ones. Put the watercress (and the mint if you’re using) in a bowl, season it with a big pinch of sea salt, and toss it with just enough of the dressing to coat. Add a generous amount of the chopped almonds and the grated Parmigianno and toss again. Arrange each portion on a salad plate and garnish with more almonds and cheese if desired.
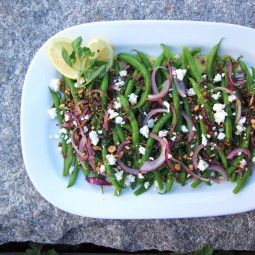
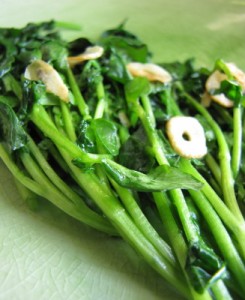
Wilted Watercress with Garlic Chips: In a small nonstick skillet, heat 2 teaspoons extra-virgin olive oil over medium-low heat. Add 1 large garlic clove, very thinly sliced crosswise, and saute until the garlic is just golden. Add 2 cups (packed) of trimmed watercress and a good pinch of kosher salt. Sauté until the watercress has just wilted, 1 to 2 minutes. Serves 2.
This post has also been published at Oneforthetable

More Delicious Ways to Cook Fingerling Potatoes

A while back I posted my favorite way to cook fingerling potatoes–the stovetop braise–and a yummy sample recipe, Braised Fingerlings with Crispy Sage and Tender Garlic. But the reality is, thanks to my CSA at Whippoorwill Farm here on Martha’s Vineyard, I was swamped with fingerling potatoes last summer and fall, so happily, I have a few other suggestions for using them. I figured I’d pass them on to you here, as many are good options for winter cooking, too.

  • Boiled fingerlings hold their shape really well, so use them (cut in half or other pieces) in warm salads (like with frisee, bacon, and a poached egg or a garlic crostini) or other composed salads like a grilled tuna or salmon Niçoise.
  • Cut into a few chunks and boiled, fingerlings are then perfect for “crushing” or smashing with roasted garlic and a bit of cream (or sour cream), butter, and chives.  These smashed potatoes make a perfect bed for beef stew.
  • Make a quick and delicious fish chowder by starting with sautéed leeks, simmering chopped fingerlings in the same pot, adding corn kernels and pieces of cod or haddock, and finishing with chopped fresh dill, a dash of cream, a squeeze of lemon, and lots of fresh pepper.
  • If you like the hands-off cooking of oven-roasting, don’t despair. You can oven-braise fingerlings by laying them flat, cut-side down, in an oiled Pyrex baking dish. Season with salt, dot with a few dabs of butter, and pour enough chicken broth in the pan to cover the potatoes. Cover with aluminum foil and cook (at about 375°F) until the potatoes are almost tender. Remove the foil and cook until the broth has reduced almost completely and the potatoes are browned. There’ll be some nice glazy stuff on the bottom of the pan.
  • Dice fingerlings and sauté slowly in lots of oil in a cast iron skillet until browned all around and tender through. Season with lots of salt. Voila, crispy “fried” fingerlings. Add sautéed onions and crush a bit for a more hash-like dish.
  • Most fingerlings have such outstanding “potato” flavor (nutty, earthy, and rich), that they’re perfect in cold potato salads, too. Try one with fresh peas, mint, and a light lemony-mayonnaise and yogurt mix in springtime.
  • The firm texture of cooked fingerlings makes them perfect for simple Indian curries, too. Add shrimp, peas, and chopped fresh cilantro to make dinner.