Category Archives: side dishes

A New Tradition—Crispy Smashed Potatoes—and More Thanksgiving Recipe Picks

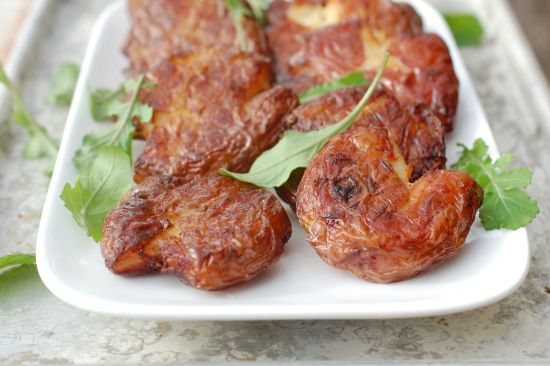
We left the pot-luck early with an empty platter. It wasn’t the first time this had happened, but still I was surprised at the sheer snarfing speed of the crowd. The party was really just getting going when we had to dash off to take Libby to the boat, but somehow, between the freshly shucked oysters, the beer bottles twisting open, and the first bites of juicy roast pig, the crispy potatoes had evaporated. I’d never even taken the tinfoil off. But someone had, and a flashmob of snackers had downed 45 crispy potatoes in no time.

When we got in the car, Libby was grinning and wide-eyed, clearly ready to give me credit for this disappearing act. But I told her, “It’s a dirty trick, you know, putting a platter of fried salty potato thingies in front of hungry people, people who’ve probably been raking leaves or rounding up sheep or wading in freezing waters for scallops all morning. They don’t stand a chance against a crispy potato. Once you eat one, they’re like potato chips or popcorn—you have to have more.”

So, yeah, I did not invent potatoes+salt+oil, but I did noodle a fun variation on this theme some years ago for Fine Cooking magazine, and I noodled the idea a little further for The Fresh & Green Table, where I turned the crispy smashed potatoes into a warm salad with a bit of Asian slaw. And somewhere, some potluck along the way, I also discovered a bonus: These crispy smashed potatoes don’t have to be served hot. They’re just fine at room temperature, which makes them ideal for a buffet, or, say, something like Thanksgiving dinner, when keeping everything hot seems to be one of the biggest challenges. So after the potluck, I began to think I should hand over the recipe here at sixburnersue.com in time for turkey day.

Now I am really not suggesting that you replace the mashed potatoes with these smashed potatoes. (They are literally smashed—you boil little red potatoes until tender and then gently smush them down with the palm of your hand. Then you toss with lots of oil and salt and roast at very high heat. Because they’ve already been boiled, they wind up with a fluffy texture inside and a very crispy texture outside.) But if you have a big crowd and serve lots of different kinds of food, there’s no reason not to make these, too, since they can be partially done ahead and popped in the oven when the turkey comes out to rest.

Or, heck, forget about Thanksgiving day and make them over the weekend or some other time during the holidays. They’re pretty good with roast beef. Or just about anything else.

And if you need some other great side dish ideas for the holiday, see my top ten suggestions from last year or browse Fine Cooking‘s terrific collection of Thanksgiving menus and recipes.


Crispy Smashed Potato Patties

Recipe copyright Susie Middleton, adapted from The Fresh & Green Table, Chronicle Books, 2012

Baby red potatoes—about 1 1/2 to 1 3/4 ounces each—are my favorites here. You can use slightly bigger potatoes, but keep them all about the same size for the best results. I used to toss these with olive oil, but I found that some olive oil got an offer flavor from the very high heat. Now I use vegetable oil. Canola is fine, but lately I’ve been using Spectrum’s high-heat safflower oil and that has a really clean taste.

___________________________________

16 baby red potatoes (consistently sized)

kosher salt

1/2 cup canola or safflower oil

__________________________________

Preheat the oven to 475°F. Line a heavy-duty rimmed baking sheet with aluminum foil and a piece of parchment paper on top. Arrange a double-layer of dish towels on a large cutting board or your kitchen counter. Put the potatoes (preferably in one layer) in a large Dutch oven and cover with at least 1 1/2 inches of water. Add 2 teaspoons kosher salt, cover loosely, bring the water to a boil, and reduce to a simmer. Uncover and cook until the potatoes are tender all the way through, but not falling apart, about 18 to 20 minutes. (Check with a paring knife.)

Using tongs or a slotted spoon, transfer each potato to the dish towels, arrange them a few inches apart, and let them cool for a few minutes. Using another folded dish towel, gently press down on each potato to flatten it into a patty about 1/2 inch thick (or up to 3/4-inch). The patties don’t have to be perfectly even, and a few pieces of potato may break off (no matter—you can still roast them). Let the patties cool for a few minutes more, transfer them to the baking sheet, and let them cool for 10 to 15 minutes longer. (Or, at this point, you can hold the potatoes in the fridge for up to 24 hours, covered with plastic. Bring to room temp before roasting.)

Sprinkle 1/4 teaspoon kosher salt on the potatoes and pour the 1/2 cup oil over them. Carefully flip the potatoes over, and season this side with a scant 1/2 teaspoon kosher salt. Rub with some of the oil, making sure that the potatoes are well-coated with oil on all sides. Roast (turning once with a spatula—carefully—halfway through cooking) until they turn a deep orange brown (a little darker and crisper around the edges), about 28 to 30 minutes.



The Last Onion and The Teeny Tiny Stir-Fry

Roy, Farmer, and I spent an exhausting day off-Island  yesterday, driving around in the truck to assorted malls, stores, and appointments, loading up with supplies for various building projects, for the garden, and for life in general. By last night, coming back on the 6:15 boat, the three of us felt like we’d moved into the cab of the Ford, with Farmer’s kibble and water bowls on the floor, our empty coffee cups strewn all around, and the usual collection of reading material I can’t go anywhere without (several magazines, a few books, and a newspaper) covering every surface. One day off-Island was enough for us. We were ever so glad to get home.

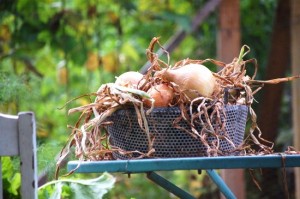
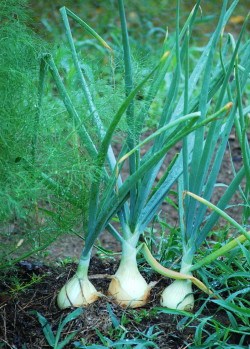
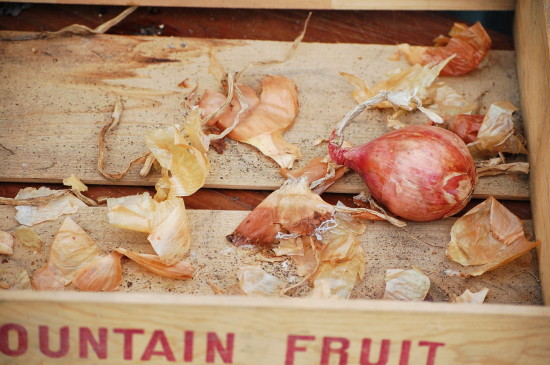
Quick dinner thoughts raced through my head as I stumbled into the barn to grab an  onion. In the dark my fingers fumbled around in the wooden crate, feeling for something hefty and round but only coming up with papery skins at first. Finally my hand settled on a little onion—the last one of our own, ordered from Dixondale Farms last February, planted last May, harvested last September, cured and stored all winter long. I am pleased we got all the way to February with our own onions, but I’m sad that it will be September before we see one again. Actually, maybe it will be sooner as I intend to overplant this year and harvest some bulbs as spring onions.

Onions (actually all of the lovely allium family, including leeks, scallions, chives and garlic) have been popping up on my radar a lot lately. Yesterday I leafed through a new issue of Martha Stewart Living magazine and my eyes fell on the most stunning photographs of alliums, courtesy of a feature called The Early Onion. Then I happened to watch a video on growing onions over at Vegetablegardener.com.  I  just placed my onion order for the garden, too. This year I’m going to grow a good storage onion called Copra, in addition to the gorgeous Ailsa Craig and Big Daddy onions I grew last year.

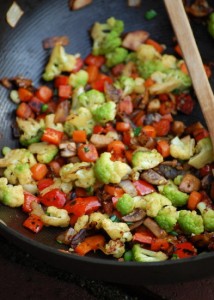
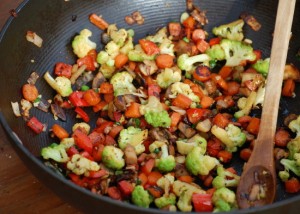
As much as I love to start vegetable dishes with some kind of allium (the promise of deep flavor), I knew I needed something more than my one little onion to get veggies on the table last night. So I did a fast fridge fly-through, retrieved a bit of broccoflower, some mushrooms, a carrot, and a bell pepper and focused on a technique I used for a a yummy veggie fried rice coming in The Fresh & Green Table. I diced all the veggies (including the onion) into very small pieces (no fussing here—exact dice are not necessary!) and heated a couple tablespoons of oil in my favorite (non-stick) stir-fry pan over medium-high heat. Once the oil was hot, I added the veggies, cranked up the heat to high, and started stirring. After about 3 minutes, I added a little chopped ginger and garlic, continued cooking for about 30 seconds, and brought the pan off the heat. The veggies were done!

This sounds like a no-brainer quick stir-fry, but there are two important things at work here. First, normally you wouldn’t throw onions and peppers into the pan at the same time as dense veggies like carrots and broccoflower. If all the veggies were cut into larger pieces, the softer veggies would be burned by the time the denser veggies softened up. But by cutting everything very small (and you can use most any vegetable except for the very densest) and turning the heat to high (after the veggies go in the pan—nonstick should not be heated beyond medium-high when empty), the cooking happens really fast. There’s an explosion of moisture as the veggies tumble around the pan, and that translates to steam to help tenderize the denser veggies a bit and to keep the softer ones from burning. You need to watch closely though, as somewhere between three and four minutes the steam transitions to smoke when excess moisture is used up. But by then the veggies are nicely browned and crisp-tender—perfectly delicious.

You can eat the veggies as is (plenty tasty) or you can add a little finishing sauce like the Thai-flavored one I’ve suggested below. Chopped fresh herbs are optional, too, depending on just how much of a rush you’re in. Without the sauce or herbs, you can be done, start to finish, in less than 15 minutes. Starting with three cups of veggies yields plenty for a side-dish for two, but you can up the amount a bit, stretch the cooking time a touch, and make a bit more for three or four.

Teeny Veggie Stir-Fry with Optional Sauce

For a printable version of this recipe, click here.

Serve these with rice and a flat-omelet egg for a vegetarian supper.

_____________________________

For the sauce:

1 tablespoon Thai fish sauce

1 1/2 teaspoons fresh lime juice

1 1/2 teaspoons brown sugar

1/4 teaspoons Asian chili-garlic sauce

For the stir-fry:

2 tablespoons vegetable or peanut oil

3 cups veggies, cut into small (3/8- to1/2-inch) pieces (Choose as many as you like, but at least four of the following for a total of 3 cups: bell peppers, onions, mushrooms, broccoli, cauliflower, cabbage, green beans, bok choy, snow peas, sugar snap peas, or carrots)

kosher salt

1 teaspoon minced fresh garlic

1 teaspoon minced fresh ginger

2 tablespoons thinly sliced scallions

1 to 2 teaspoons chopped fresh cilantro or mint (optional)

______________________________________

For the (optional) sauce:

In a small bowl, mix together the fish sauce, lime juice, 2 teaspoons water, brown sugar, and chili-garlic sauce.

For the stir-fry:

In a large (12-inch) nonstick stir-fry pan, heat the oil over medium-high heat. When the oil is hot (it will loosen up), add the 3 cups veggies and 3/4 teaspoon salt, turn the heat to high, and cook, stirring, until the veggies are crisp-tender, slightly shrunken, and lightly browned, about 3 minutes (4 at the most). Add the garlic, the ginger, and the scallions. Stir-fry briefly, just until fragrant, about 30 seconds. Remove the pan from the heat and carefully pour in the sauce mixture (if using). Stir until the sauce thickens and reduces slightly. Fold in herbs if using and serve right away.

Serves 2

Winter Whites and Something Bright—Roasted Cauliflower with Double-Lemon Ginger Dressing

Guess I am a little late to the party. Here I have been thinking I have some extra-special arugula-growing talent, because mine is still alive in the garden in late January. (Yes, and I’ve reminded everyone of this in nearly every recent blog.) And never mind that it’s been incredibly mild this year—we  had 8 inches of snow on Saturday, so now we can officially call it winter. (Though it’s already back up to 45 degrees!) I got a huge kick out of digging under the snow (and the row cover) on Sunday to find the arugula still percolating  away underneath.

But it turns out that I don’t have a special talent—apparently arugula is about the heartiest green you can grow. And with just a little protection, you can keep it going through the coldest months around here if you give it a good head start in the fall. It will do most of its growing before December, but if you’ve planted enough, you can just keep harvesting it all winter. This is a very exciting concept for me—having salad greens all year ‘round. The arugula was more or less an accident this winter, but come this fall, I’ll deliberately plant mâche (also called lamb’s lettuce—mild, nutty, and delicious) and spinach, too, for winter harvesting.

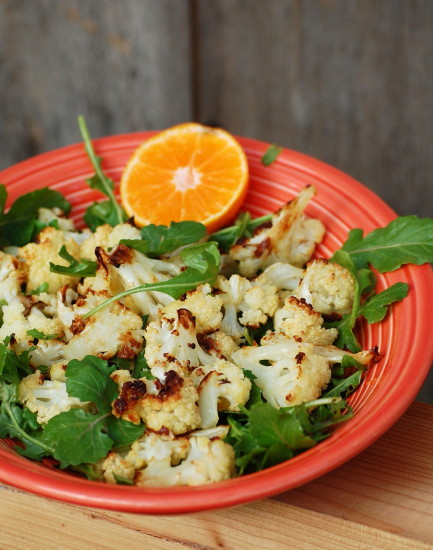
Right now, though, I am eating arugula with everything that will stand still long enough. Today that meant roasted cauliflower, which I’ve been craving something bad. I’m not sure why, though I do have a thing about winter whites. I love the color white (I collect Ironstone dishes) and when the snow started falling, cauliflower and endive and baby turnips and pearl onions began floating through my mind. I finally bought a head of cauliflower today, and decided to pair it with something bright and zingy. I love citrus with veggies this time of year, and I remembered a great dressing I put together for a carrot salad (of all things!) in Fast, Fresh & Green. It stars one of my favorite ingredients—crystallized ginger—along with lemon zest, lemon juice, and orange juice. Just the combo to counter the intensely sweet, nutty flavors of roasted cauliflower. So I gave it a go. Turns out the dressing is terrific with cauliflower—but even better with arugula. (I used the greens as a bed for the roasted veggies). So I will use the dressing again with hearty winter green salads. But the cauliflower combo was just right today—a bright spot on a cool (not exactly cold) winter day.

Roasted Cauliflower with Double-Lemon Ginger Dressing and a Spritz of Arugula

For a printable version of this recipe, click here.

For another way to dress up roasted cauliflower, see the compound butter idea in this post. You will probably not use all of the ginger dressing—save any extra for a green salad. In summertime, the dressing would also be a great marinade for shrimp before they hit the grill.  A few toasted chopped almonds would make a nice addition to this dish. You could also pair the whole thing with some cooked whole grains, such as wheatberries, farro, or brown rice, to make a delicious vegetarian main dish salad.

1 pound cauliflower florets (from about 1 small head), each cut into pieces about 1 ½  inches long with one flat side (see photos)

3 tablespoons extra-virgin olive oil

3/4 teaspoon kosher salt

Double-Lemon Ginger Dresssing

2 cups (more or less) arugula leaves, washed and dried

Heat the oven to 475 degrees F. Line a large baking sheet with parchment paper. In a mixing bowl, toss the florets gently but thoroughly with the olive oil and salt. Spread the florets out on the sheet pan in one layer, flat side down. (Scrape any remaining salt and oil out of the bowl onto the florets). Roast until the bottom of the florets are well-browned and the tops are starting to brown, 20 to 24 minutes. (You can turn them once with tongs about ¾ way through cooking, but do leave the flat side in contact with the sheet pan for about the first 12 to15 minutes so that it will get nicely caramelized.)

Gently transfer the warm florets to a mixing bowl and drizzle with as much dressing as you like (start with about half; you will not use it all). Toss the arugula leaves with a teaspoon or two of the dressing and arrange the leaves on a platter or plates. Top with the dressed, roasted cauliflower and serve right away (the cauliflower cools quickly.)

Serves 3 to 4 as a side dish.

Double-Lemon Ginger Dressing

1 tablespoon olive oil

1 tablespoon finely minced crystallized ginger

2 teaspoons fresh lemon juice

2 teaspoons orange juice

1/2 teaspoon freshly grated lemon zest

pinch of kosher salt

Combine the olive oil, the ginger, the lemon juice, the orange juice, the lemon zest and the salt in a small bowl and whisk well. Re-whisk before dressing. Store any leftover dressing covered in the fridge.

Try Broccoflower in a Versatile Dutch-Oven Ragoût

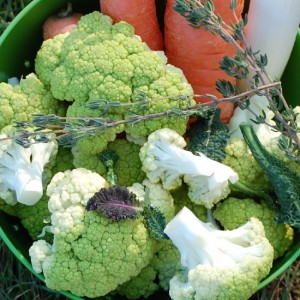
If it’s January, I must be cooking Broccoflower. I picked some up at the grocery the other day because, frankly, our vegetable larder of turnips, rutabagas, kale, and beets is starting to freak me out. Plus, I can never resist the lime-green color of Broccoflower, and I love its nutty flavor when browned, too. (Also, since we live in a small town and I shop at the same small grocery store every day after my post-office run, I’m beginning to worry that people might think we have a really unhealthy diet, since I rarely buy vegetables at the store any more. Checking out with Roy’s donuts, some Lucky Charms for Libby, and maybe some chocolate chips for me makes me a little self-conscious! Hence the need for the occasional head of Broccoflower.)

I’ve sautéed, roasted, stir-fried and quick-braised Broccoflower, but it’s very cold here today and I thought a ragoût would be satisfying. (When I say it’s cold today, I mean it’s calling-all-mice-inside cold. This morning a mouse was in the compost bowl in the pantry. He’d fallen in, obviously in search of yumminess, but since there was little more than coffee grinds and egg shells to feast on—anything green is going to the chickens or Cocoa Bunny right now—he’d tried to scamper back up the sides of the aluminum bowl. No luck. Roy switched on the light about 6:30 and left the little mouse to do a roller derby around the bowl until I got up. I put him back outside (tipping the bowl to let him escape), where he will most likely find his way straight back inside the house tonight. I feel a little bit like Fred Flintstone putting Dino outside the back door. Oh, well. At least Libby is not here to insist on a warm bed for Mousey.)

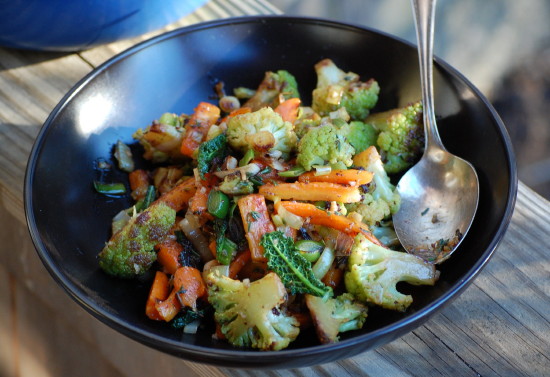
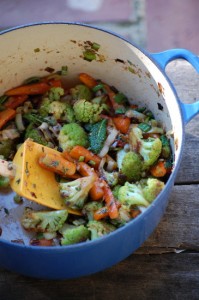
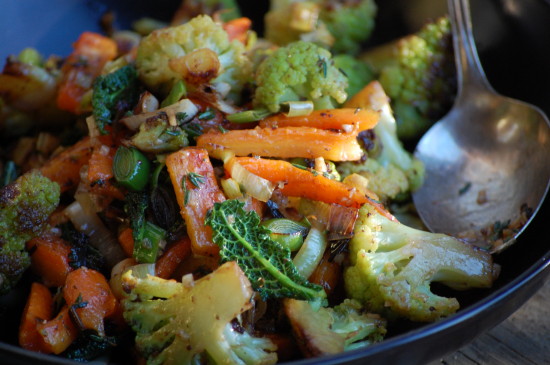
Anyway, since it was a ragoût day, I used the broccoflower in one of my Dutch-oven ragouts with some carrots, leeks, and baby kale (recipe follows). My “ragoûts” are not particularly saucy and they’re not heavy. They’re more like delightful “mélanges” of colorful veggies, finished with some bright flavors and a bit of butter to bring everything together. I use a Dutch oven to create some extra moisture, which, along with the browned bits on the bottom of the pan, contributes to the final flavor of the dish. Sautéing the hearty veggies in the Dutch oven means they steam and brown at the same time. I’ve used fingerling potatoes, Brussels Sprouts, baby artichokes, cauliflower and carrots successfully in these ragoûts, always adding an allium like onions, leeks, shallots or garlic, and something lighter and greener at the end for contrast, like peas or baby greens. So improvise as you please, using zest, vinegars, herbs and aromatics, and get ready for a satisfying veggie dish that can easily become a main course if served with a grain or over polenta. (The version below uses a small Dutch oven and yields just about enough for two small main dish portions or three sides. I was short on some ingredients or would have made a bigger batch, which you can easily do in a larger Dutch-oven.) And oh, by the way, this is top secret, but there are more of these ragout recipes coming in my new book, The Fresh & Green Table, later this year. But more on that topic soon!

Broccoflower, Carrot & Leek Ragout with Thyme, Orange & Tapenade

For a printable version of this recipe, click here.

If you want to double this recipe, use a larger Dutch oven (like a 6 or 7 quart). The little bit of tapenade here pairs deliciously with the Broccoflower but if you are not an olive person, feel free to mess around with the finishing sauce. (Use a dash of balsamic, soy or Worcestershire with the orange juice.) Whatever you do, be sure your cooking pot has a lid—you’ll need it to trap moisture to help cook the veggies. You can substitute cauliflower for the broccoflower, but it will take a bit longer to cook and may need a little more butter for moisture.

_____________________________________

2 teaspoons orange juice

1/2 teaspoon olive tapenade

1/4 to 1/2 teaspoon freshly grated lemon zest

2 tablespoons unsalted butter (1 tablespoon cut into 4 pieces and kept chilled in the refrigerator)

3 tablespoons extra-virgin olive oil, more if needed

1/2 pound carrots (or up to 10 ounces), peeled and cut into sticks 1 1/2 to 2 inches long and about 3/8 to 1/2-inch wide and thick

kosher salt

1/2 pound 1-inch Broccoflower florets, each cut in half to have one flat side

1 small leek, thinly sliced and washed (about 2/3 cup)

1 to 1 1/2 teaspoons minced garlic

handful baby kale leaves or other tender greens

2 teaspoons chopped fresh thyme

__________________________________________

In a small bowl, combine the orange juice, tapenade, lemon zest, and 1 tablespoon water.

In a small (4-quart) Dutch oven or other deep, wide pan, heat 1 tablespoon of the butter and 1 tablespoon of the olive oil over medium-low heat. Add the carrots and 1/2 tsp. salt. Cover and cook, stirring frequently but gently (a silicone spoonula works well), until the carrots are lightly browned and just tender (test with a paring knife), about 12 to 14 minutes. With a slotted spoon, transfer the carrots to a plate.

Add 1 tablespoon olive oil to the pan. When the oil is hot, add the Broccoflower and 1/2 teaspoon salt. Stir, cover, and cook, stirring frequently and gently, until all the florets are browned and mostly tender, about 6 to 8 minutes. (Don’t worry if the broccoflower absorbs all the fat at first—it will give off moisture as it continues to cook. Return the lid quickly after each stir.) With a slotted spoon, transfer the broccoflower to the plate with the carrots.

Turn the heat to low, add 1 more tablespoon of olive oil, and add the leeks and a pinch of salt. Cover and cook, stirring frequently, until the leeks are just softened and a bit browned, about 4 to 6 minutes. Add the garlic, stir, and cook until softened, about 30 seconds. Remove the pan from the heat or turn the heat off under the pan and immediately return the carrots and Broccoflower to the pan. Add the kale leaves and thyme and pour in the reserved orange juice mixture. Stir immediately, add the cold butter pieces, and continue stirring gently until the butter melts (just a few seconds). Transfer to a serving bowl and serve immediately.

Serves 2 to 3

Tiny Roasted Beets, A Winter Garden Salad, And A Dog that Likes Both

You would think that at some point I’d reach my limit with this whole veggie thing. But it seems I can never get enough. On Saturday I threw Libby and Farmer in the car (this was not hard, as where one goes, so goes the other) and headed off to Whippoorwill Farm. I’d heard a rumor that they were offering their last winter harvest for the CSA to the general public–$20 a share. Oh boy! I remember from belonging to the CSA a few years back that the cabbages and root veggies they provided at the end of the season lasted a good long time in the fridge. And since the only real winter-keepers we’ve got from our garden are onions and rutabagas, the idea of eating those carrots and beets and leeks (my favorite!) in January and February was too enticing for me to ignore.

When we got to the farm, Libby took over at the scales, weighing out each pound of carrots, turnips, and beets (we bought a double share, so it was a lot). Then she picked out our bags of lettuce and kale tops while I grabbed the cabbages and leeks. We hadn’t even made it back to the car before we were snacking on the incredibly sweet and crisp carrots. Of course Libby wanted to offer Farmer a carrot, so we broke one into pieces. He had a sniff from his back-seat perch, then proceded to crunch and swallow and lick his lips. Delicious. We ate three more on the way home.

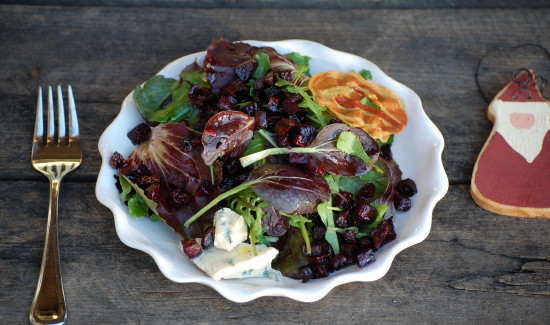
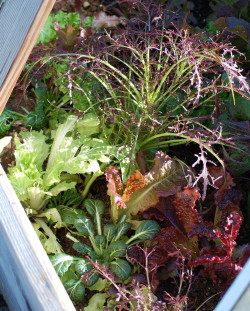
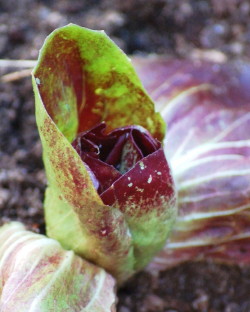
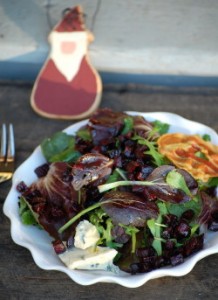
After I sorted and rinsed the veggies and stored them in the new (old) mudroom fridge, I began to think about new ideas for using them. I also have exploding lettuces in the cold frame; the mix of seedlings we planted includes an unusual frilly purple mustard and a deeply handsome red Tat Soi, both of which are thriving. I also am nursing along a couple young heads of radicchio in the cold frame, so all the pretty reds and purples inspired me to make a Christmas-y deep red and green winter salad. (The arugula is also still thriving—outside of the cold frame, no less.)

I wanted to try a slightly different take on my favorite quick-roasting method for beets, too. While I love roasting them as thin slices, I decided to try tiny dice this time. (The recipe for quick-roasted beet slices is both here and in Fast, Fresh & Green. And while I also included a recipe for tiny roasted roots in Fast, Fresh & Green, I had left beets off the list in that recipe for two reasons—they bleed, and I figured they would take longer than most roots to cook.)

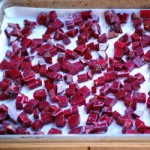
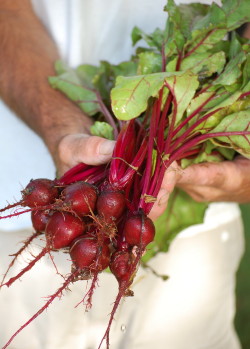
But I was so pleased to discover yesterday that the little diced beets did indeed get tender in 20 minutes at 475 degrees. (So the great news is the same here as it is with the quick-roasted slices: You do not need to invest hours of time to enjoy roasted beets.) With caramelized edges, these sweet little gems made a great addition to the salad—which I rounded out with a creamy blue cheese and a bit of salty pancetta. I forgot the nuts this time around, but would have been happy with chopped toasted pecans or hazelnuts. I used a simple white balsamic vinaigrette with a little maple, but you could improvise your own winter salad with your own dressing and any combination of arugula, endive, radicchio, escarole, mustard, tat soi, or other hearty salad green. Figure about two cups loosely packed greens for each serving, and plate the salads for the nicest presentation, especially if you’re including a creamy cheese (which tends to get messy when tossed). Certainly opt out of the pancetta if you like. Follow the simple recipe below to roast the beets. I think using them on the day they’re roasted is nicest (you can leave them at room temp for a couple hours), but they certainly hold in the fridge, too, and can even be marinated in a citrusy vinaigrette to become more of a condiment or relish.

I discovered one other thing yesterday—Farmer likes roasted beets and arugula (in addition to Snickerdoodles). I won’t go into the details on how I learned this, but it has something to do with distracting him from the Christmas tree ornaments.

Tiny Diced Roasted Beets

Toss these in salads, marinate them to make a condiment or relish, or just plain eat them as a side dish or a snack.

1/2 pound trimmed small red beets (unpeeled)

1 generous tablespoon olive oil

1/4 teaspoon kosher salt

Heat the oven to 475°F. Line a small heavy-duty rimmed baking sheet (also called a quarter sheet pan) with parchment. Cut the beets into dice that are between 1/4-inch and 3/8-inch big. (It’s easiest to slice the beets across first—after discarding the ends—and then lay the slices down to cut into dice.)

Toss the diced beets thoroughly with the olive oil and salt in a small mixing bowl and spread in one layer on the sheet pan. Roast for 20 to 22 minutes, until caramelized and tender when pierced with a knife (they do not have to be soft, just cooked through. Don’t overcook or they will begin to burn.) Let cool a bit on the sheet pan and eat right away—or later!

Makes enough to garnish three or four small salads or two large ones.

An Early Christmas Present From the UK—Roasted Veggie “Bundles” (Bacon-Wrapped, Of Course!)

While I am not (as many people ask) related to Catherine, Duchess of Cambridge (formerly known as Kate Middleton), I am fond of many things British, especially in the “cookery” world. Two of my favorite cookbooks from this year are Plenty—Vibrant Vegetable Recipes from London’s Ottolenghi, and Tender—A Cook and His Vegetable Patch, by Nigel Slater. And all of Hugh Fearnley-Whittingstall’s books (most recently River Cottage Every Day) inspire me. These modern British chefs and food writers have a knack for appreciating good quality fresh ingredients and treating them simply but creatively.

Back when I lived closer to a big Barnes&Noble, where I could buy British magazines, my favorite purchase was Olive, the little sister magazine to BBC’s Good Food. Last week, as I culled through hundreds of my old cookbooks to put out for our yard sale, I came across a page I had ripped out of Olive probably five years ago. The picture still seduced me, so I taped it up over my kitchen counter, hoping to make the dish soon. In the meantime, I went online to see if the recipe resided on their website, and while I couldn’t find it, I did find 80 recipes for using parsnips—lovely! And so British.  (See my favorite things to do with parsnips here.)

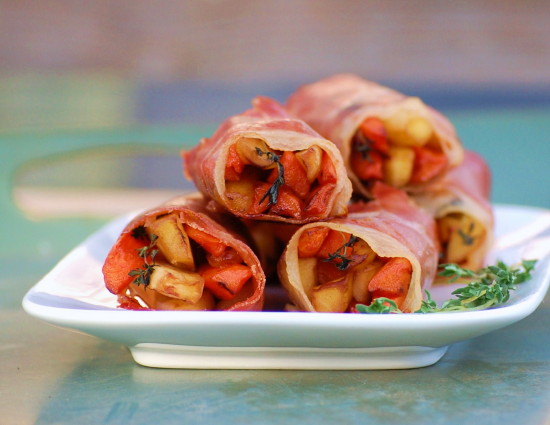
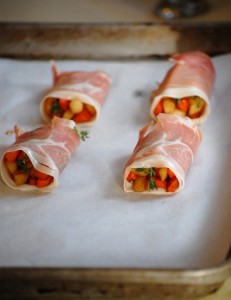
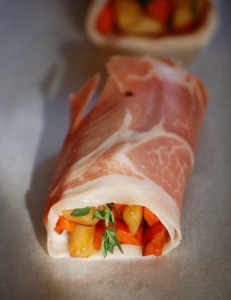
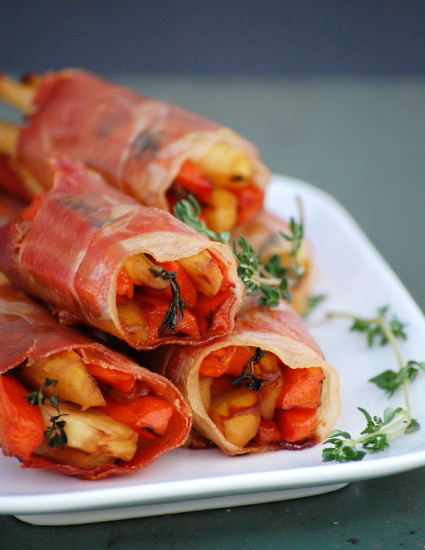
Yesterday I had a chance to make the dish, which was called “Roast” Vegetable Bundles in the magazine. I used that glorious photo and the simple instructions to develop a more detailed recipe, and I still think there is room for more improvisation here. The basic idea is a little package of carrots and parsnips, blanched and lightly glazed, wrapped in thinly sliced ham or bacon, and roasted to finish. The funny thing is, all along I was thinking what a great side dish this would be for a no-fuss Christmas Eve dinner with beef tenderloin. (I don’t see any reason why the bundles couldn’t be made up to the point of assembly and roasted just before serving.) But only this morning I noticed that the original recipe was part of a “Christmas Entertaining” section in the magazine. Of course!

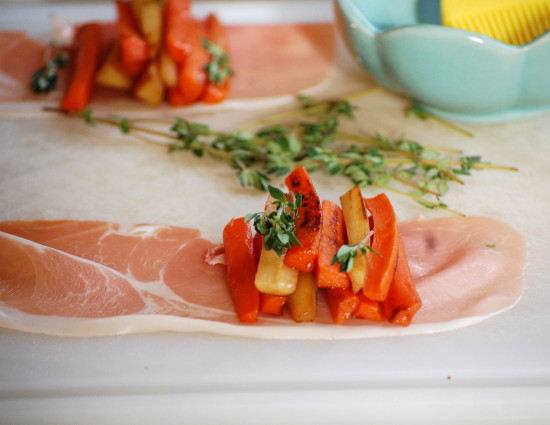
Straight out I will tell you that the main reason I love these little bundles is the whole wrapping and rolling thing. Fun in the kitchen, you know. Plus, they look so darn cute (who wouldn’t love a little veggie present?), and I admit, I had a lot of fun photographing them. As far as the delicious factor goes, they are more than satisfying. The only tiny drawback I see is that I liked the flavor and texture of the little bundles I wrapped in pancetta better than those I wrapped in prosciutto. Since prosciutto isn’t as fatty, it naturally hardens up a bit when roasted. The pancetta renders beautifully when roasted, but since it comes in round slices, you need to overlap them carefully to form one longer piece to wrap the bundles. (The long prosciutto pieces are easier to roll up than the pancetta, and they stay tighter when cooked). I think next time I will ask the deli to slice my pancetta extra thin and maybe experiment with using 3 pieces together rather than 2. (You could vary the size of the bundles, too.) Also, I didn’t try bacon, though theoretically overlapping thin slices would work, just a little more messily.

Also, this recipe includes a step that’s unusual for me—par-boiling root vegetables. Normally I would slowly saute sticks of carrots and parsnips until tender, but I went along with the suggestion to par-boil here and then lightly glaze in a sauté pan, because I thought the veggies would hold up better when roasted. That turned out to be true, and I’m glad I did it.

For a special dish, this really doesn’t take that much time to prepare, and you could very easily double it for a crowd if your Christmas dinner plans are ambitious. I know, we just got through Thanksgiving, but I am one of those goofballs who loves everything Christmas. (Libby and I made Christmas cookies the day after Thanksgiving.) In fact, there’s nothing I like better than a British Christmas. That’s why I’m so excited by the cool advent calendar my sister sent me. If you feel like treating yourself to Christmas in London—on your computer—click here.

Roasted Carrot and Parsnip “Bundles” with Fresh Thyme, Maple & Pancetta

These veggies would be just as lovely with roast chicken or turkey as they would with Christmas beef. If you are working ahead, assemble the bundles and refrigerate covered. Bring to room temperature before roasting. This recipe, adapted from Olive magazine,  doubles or triples easily.

_____________________________

Kosher salt

4 medium carrots, about 9 ounces

4 medium parsnips, about 9 ounces

1 1/2 tablespoons unsalted butter

1 tablespoon maple syrup, more for brushing

1 teaspoon balsamic vinegar

8 very thin slices of prosciutto, or 16 or 24 very thin slices of pancetta

16 small thyme sprigs

________________________

Heat the oven to 400°F. Put a piece of parchment paper on a heavy-duty rimmed baking sheet.

Bring a large pot of salted water to a boil. Meanwhile, peel and trim the carrots and parsnips, and cut into sticks or batons that are each about 3 inches long and 1/2 inch wide. Add the veggies to the boiling water and cook for 4 minutes. Transfer to a couple layers of dish towels to drain and dry.

Heat the butter in a medium nonstick skillet over medium heat. When the butter has melted, add the 1 tablespoon maple syrup and the balsamic vinegar and stir. Transfer the veggies to the skillet and season with about 1/4 teaspoon kosher salt. Stir gently and turn the heat to medium high. Cook, stirring and tossing occasionally, until the veggies are browned in spots and a bit more pliable, about 7 to 9 minutes. Transfer to a large plate and spread out to cool.

On a large cutting board or other surface, arrange the 8 slices of prosciutto in front of you. If using pancetta, arrange 8 groups of pancetta by slightly overlapping the slices.

Divide the veggies into eight portions and arrange each portion on top of the prosciutto or pancetta. (Rather than centering the veggies, place them about one third of the way over from the right side. This will make rolling easier.) Brush the bundle of veggies with a little maple syrup and arrange the thyme sprigs on them. Working right to left, roll up the veggies in the prosciutto or pancetta and transfer to the baking sheet.

Roast until the packages are browned around the edges (will be lots of browning underneath) and slightly shrunken, about 18 to 20 minutes. (This is enough to warm the veggies through, too.) Serve right away.

Makes 8 bundles; serves 4 as a side dish.


Best Roasted Brussels Sprouts + 10 Fave Thanksgiving Sides

This time last year I was preparing to be on television the day before Thanksgiving. (The Martha Stewart Show—I cooked quick veggie sides from Fast, Fresh & Green.) A few years back I did a satellite media tour around this time to promote Fine Cooking’s book How To Cook A Turkey. The year before that, I did a radio blitz for most of November and December to promote all the holiday tips and recipes on Fine Cooking’s website (which, if you haven’t looked lately, is by far the best place to go to plan your Thanksgiving menu. Check out the cool interactive Create Your Own Menu Maker. But I’m not biased or anything.) Well, you can imagine how relieved I am not to be PR-ing this holiday season. I did in fact just record some radio spots for Fine Cooking that will soon air on WGBH (I’ll keep you posted); but they were a whole lot of fun to do—and they didn’t require a new wardrobe or an anxiety attack.

So we are free and clear to have a simple and quiet Thanksgiving at the farmette (yippee!). I still have squash, rutabagas, onions, kale, arugula, herbs, and salad greens from the garden, plus green beans, corn, and roasted tomatoes that I froze, so we will be able to make most of the meal über-local. I will wander across the street to the West Tisbury Winter Farmers’ Market on Saturday to see if I can get the rest of what I need.

Regardless of where you plan to get your goodies, most of you, I know, have this one thing on your mind: What kinds of dishes can I cook that are easy and delicious, that everyone likes, and that will serve a decent-sized crowd? To that end, I’ve gathered a list of ten of my own favorite side dish recipes that serve at least six people (below). Some of these recipes reside on sixburnersue.com, but several are ones I developed a few years back for an “updated classics” story on Thanksgiving sides for (you guessed it) Fine Cooking magazine. And I also threw in a “create your own” creamy veggie soup from another FC article I did years ago, in case yours is the kind of family that likes to start the meal with an elegant soup (or needs options for vegetarians).

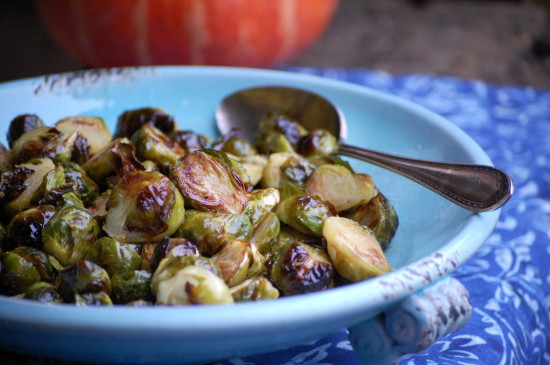
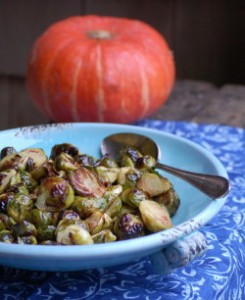
But for the tenth recipe on the list, I couldn’t resist posting my Roasted Brussels Sprouts with Orange Butter Sauce. This is a recipe I originally created for Fast, Fresh & Green but that I tweaked last year for the TV gig so that it would feed more people. I just remade it this morning and am happy to confirm that it is not only delicious, but possibly one of the fastest and easiest Thanksgiving side dishes ever to make.

Here’s my list:

1. Green Beans with Crispy Pancetta, Mushrooms, and Shallots

2. Roasted Turnips with Maple and Cardamom

3. Pomegranate-Balsamic-Glazed Carrots

4. Bourbon Sweet Potato and Apple Casserole with a Pecan Crust

5. Creamy Baked Leeks with Garlic, Thyme, and Parmigiano

6. Mashed Yukon Gold Potatoes with Roasted Garlic

7. Thanksgiving Gratin of Butternut Squash, Corn & Leeks

8. Potato Galette with Fresh Rosemary & Two Cheeses

9. Creamy Vegetable Soup (Pick Your Own Veggie!)

10. Roasted Brussels Sprouts with Orange Butter Sauce (see below)


Roasted Brussels Sprouts with Orange Butter Sauce

I’ve roasted Brussels sprouts a few different ways, but you can’t beat this method for volume (large rimmed sheet pans hold a lot), quickness (16 to 18 minutes in a 475° oven), and great results (by halving the sprouts and roasting them cut-side down, the tops and bottoms brown but the interiors steam). The flavorful butter sauce gives the nutty roasted sprouts just the right touch of tangy-sweet richness to make this completely holiday-worthy.

_________________________________________

2 lb. small Brussels sprouts, trimmed and halved lengthwise

1/4 cup extra-virgin olive oil

1 tsp. kosher salt

1 Tbsp. plus 1 tsp. balsamic vinegar

2 Tbsp. pure maple syrup

2 Tbsp. fresh orange juice

1 tsp. finely grated orange zest or lemon zest

4 Tbsp. cold unsalted butter, cut into 16 pieces and kept chilled

________________________________________________

Preheat the oven to 475˚F. Line two large heavy-duty rimmed sheet pans with parchment paper. In a mixing bowl, toss the Brussels sprouts with the 1/4 cup olive oil and 1 tsp. of the salt. Divide the sprouts between the two sheet pans and arrange them, cut-side down. Roast until brown and tender, 16 to 18 minutes. (The tops will be dark brown and crispy and the sprouts should feel tender when pierced with a paring knife.) Transfer the sprouts to a mixing bowl.

Combine the balsamic vinegar, maple syrup, orange juice, and orange zest in a small saucepan. Heat the mixture over medium heat just until it’s hot (you will see a bit of steam), but not simmering. Remove the pan from the heat and add the cold butter, several pieces at a time, whisking constantly until the mixture is smooth and creamy. (Don’t reheat the mixture or the butter will break and the sauce won’t be creamy.) Pour the sauce over the sprouts and stir thoroughly but gently until most of the sauce has been absorbed. Transfer the sprouts and any remaining sauce to a serving platter and serve right away.

Serves  8

Farm Critters, Chicken Butts, and A Thanksgiving Butternut Squash Gratin

When I first got to the Vineyard, I was totally charmed by farm animals. Back in my suburban  I-95 world, I hadn’t run into a lot of pigs and goats, much less a baby lamb or a pair of hulking oxen. I traipsed (okay, maybe trespassed) all over the Island, taking pictures of anything with four legs or feathers. I got lucky I guess, or maybe I was entranced, because I took a lot of nice photos of critters (some of my favorites are above). Sometimes the animals even looked at the camera.

Lately it seems my luck (or probably my patience) has run out. Granted I don’t have a lot of time to wander around stalking farm animals. But when I do get close to a critter with the camera, I get mooned. Yeah, butts. Especially chicken butts. This week, I wanted to blog about our chickens…and their beautiful eggs…and about how wonderfully efficient they are at processing leftover food (and other farm compostables, like pumpkins). Yes, I know I’ve talked about this before, but after ranting about waste and expense last week, I had to share the satisfaction I got out of watching the hens efficiently turn our jack-o-lantern into fertilizer.

But the ladies would not cooperate for a good picture. When I got in the pen with them (to avoid shooting through the deer fencing), of course they all rushed away from the pumpkin and towards me. I crouched down to frame the shot and Perky jumped on my leg for a visit, while Martha and Opti started pecking at my boots. Very distracting. In the end, the best shots I got were of tail feathers. Granted those chicken butts are cute (and soft, too). But they’re still butts.

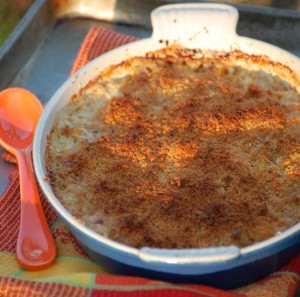
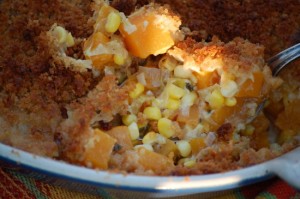
Oh, well. I finally realized that Thanksgiving is a breath away, and that it might be nicer if I paid attention to our country’s biggest cooking holiday for this blog instead of some chicken whim of mine. So I marched into the kitchen and made a new version of one of my favorite gratins from Fast, Fresh & Green—this one with a big enough yield to warrant a place on the Thanksgiving table. It turned out so well that Roy and I both snacked our way through the afternoon on it.  It features my favorite fall harvest combo—butternut squash, leeks, and corn—and, oh yes, a bit of cream and Parmigiano, plus thyme and just a hint of lemon.

Next week, I’ll offer up a green veg recipe for the Thanksgiving table—if I don’t get distracted by a baby goat or a stray dog or something.

Thanksgiving Gratin of Butternut Squash, Corn & Leeks

Since Thanksgiving is a crazy cooking day, here are some make-ahead tips for this recipe: Dice, chop, and otherwise prep all the ingredients ahead. (And buy already-peeled butternut.) Then go ahead and sauté your leeks, garlic, and corn, too. (If you’re working hours ahead, refrigerate.) You can grease the gratin dish ahead as well. Then all you’ll have to do is combine and assemble before cooking.

_________________________

2 tablespoons plus 1 teaspoon unsalted butter

1 1/2 cups fresh breadcrumbs

2 tablespoons extra-virgin olive oil

kosher salt

2 cups thinly sliced leeks (white and light green part only, about 2 large), rinsed well but not dried

2 teaspoons minced fresh garlic

1 1/4 cups corn kernels (from about 3 ears)

1/2 cup plus 2 tablespoons heavy cream

1/2 cup plus 2 tablespoons low-sodium chicken broth

½ teaspoon freshly grated lemon zest

freshly ground black pepper

2 teaspoon finely chopped fresh thyme leaves

1 1/4 pounds peeled, seeded butternut squash, cut into ½-inch dice (about 4 cups)

1/2 cup finely grated Parmigiano-Reggiano

__________________________________

Heat the oven to 400 degrees F. Rub a 2-quart shallow gratin dish with 1 teaspoon of the butter.

In a small bowl, combine the breadcrumbs, 1 tablespoon of the olive oil, 1/4 teaspoon salt and mix well.

In a medium (10-inch) heavy nonstick skillet, melt the remaining 2 tablespoons of the butter with the remaining tablespoon of olive oil over medium-low heat. Add the leeks (with any water still clinging to them) and 1/4 teaspoon salt; cover, and cook, stirring occasionally, until softened and translucent, about 5 minutes. Uncover and continue to cook, stirring frequently, until the leeks are shrunken and lightly browned in places, 10 to 12 minutes more. (The pan will dry out.) Add the minced garlic and stir until softened and fragrant, about 30 seconds.

Add the corn kernels, 1/4 teaspoon salt, and a few grinds of fresh pepper. Cook, stirring, until the corn has lost its raw look, is glistening, and is slightly shrunken, about two minutes. Take the pan off the heat and let the mixture cool for five to ten minutes.
Combine the heavy cream and the chicken broth in a liquid measure. Add the lemon zest, a scant 1/2 teaspoon salt, and a few grinds of pepper. Stir to mix well.

Add the corn-leek mixture and the herbs to the diced squash and toss well to combine. Transfer the mixture to the gratin dish and arrange as evenly as possible. Sprinkle the Parmigiano on the vegetables. Stir the cream mixture one more time and pour and drizzle it over everything. Be sure to scrape out any seasonings left in the liquid measure. Sprinkle the breadcrumbs evenly over all.

Bake until the crumb topping is deep golden and the squash is tender when pierced with a fork, 42 to 45 minutes. The juices should have bubbled below the surface of the vegetables, leaving browned bits in a line around the edge of the pan.
Serves 6 to 8 as a Thanksgiving side dish

It Ain’t Over ‘Til It’s Over

The farm stand fell over on Saturday. Tipped by a terrific gust from the nor’easter, it fell backwards, impaling itself on a small rock in the process. Just a little damage to the roof, no big deal. But it’s funny. Seems the farm stand somehow knew the season was over. Only an hour earlier, as the rain began to fall harder and colder, a customer in a small white station wagon pulled up, bought everything left on the stand (the last green beans, two bags of arugula, a dozen eggs, an onion and an eggplant) and neatly pushed the baskets to the back of the stand to keep them dry. (Thank you, whoever you were.) Seeing the car pull away, I dashed out and carried the cooler and baskets in. We were all in the living room playing Monopoly when we heard the bang.

I’ve been reluctant to say goodbye to the growing season, so maybe I needed a little encouragement from the universe. A day after the nor’easter, I got some more: The first heavy frost fell, turning the 5-foot tall zinnia plants, the bushy eggplants, the spindles of leafy pole beans—just about everything still green in the garden—into a ghastly scene from Beetlejuice. Frightful skeletons of their former selves, the plants said goodbye in a single night.

I should be so courageous, I thought, rummaging around the dead foliage, harvesting random peppers and eggplants that clung hopefully to the blackened vines. I was thinking about the daunting project that awaited me inside—a different kind of rummaging, this time through old memories.

We’d just hauled a load of cardboard boxes over from my storage unit—my goal to empty the thing out and quit paying the ridiculous $200 a month to store my tchotchkes. But our little farm house, charming as it is, can only hold so much. Built in 1895, it has no closets. We’ve turned an upstairs bedroom into a storage closet, but between clothes, linens, coolers, and extra pots and pans, there ain’t much more it can take. Time to lighten my load.

In the end, it was much easier than I thought to part with many of the old photographs and school reports and scrapbooks and diaries. (Being a 13-year old girl was hard enough—no need to relive it. All these many years later, and I still winced. I had to laugh, though—judging from the reams of notebooks, apparently I was highly verbal from a very young age!) The best memories drifted out of an old trunk my mother had packed up long ago with a few of my most precious toys and dolls and little-girl clothes. Raggedy Ann and Peter Rabbit—such good friends. I couldn’t let them go.

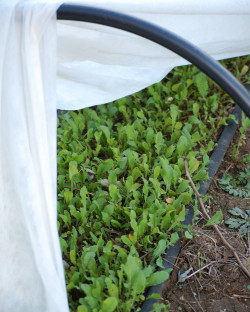
Why, I wondered, did letting go of the garden seem just as hard? (Or letting go of most of it—those darn rutabagas are alive and well, as are the kale plants—for now. And the lettuce and arugula we’ve protected under row cover and cold frame are thriving.) I think it’s only partly about how much I enjoy the gardening. The other part is that I seem to be extremely sensitive to two big issues these days: waste and expense. Why should we blithely ignore good food in our back yard, when we ourselves are on a tight budget, and the world at large—those who have enough to eat—is, too. Because despite the frost and the storm, every time I go out to the garden, I discover something else that’s still alive, still edible. Even the darn cherry tomatoes (hundreds of them) are still ripening. Inside, every surface in my office (while Roy puts new windows into the mudroom) is covered with trays of green tomatoes—rapidly turning red—that we picked during the last couple of weeks.

So I am hell-bent on still making our meals from the garden. (Not the whole meal, just some of it.) I made a delicious kale soup the other night, which I sold to Roy by including a good amount of andouille sausage and potatoes, along with some of those salvaged peppers, a late carrot, our stored onions, and plenty of garlic and spices. Sort of a Stone Soup with kale. I made a green tomato, gruyere, and leek gratin yesterday (good, but not the perfect match I was looking for with the tartness of green tomatoes).

This morning I messed around with fried green tomatoes. And, actually, fried red (and reddish-green) tomatoes. And realized again how powerful childhood memories are. Some of them will be forever with us, no matter how many trunks we lock up or boxes we throw away. Growing up, summers in Delaware, we ate fried red tomatoes (not green tomatoes) on a regular basis. (A regional thing, I guess.) Seasoned with lots of salt and pepper and dredged simply in flour, the big  cross-sections of beefsteaks cooked in butter or a little bacon fat took on a deep, umami-ish, almost stew-y flavor (with some sweetness, yes), and while I don’t remember absolutely loving them then, they were one of my Dad’s favorites. And tasting them this morning was a hugely familiar sensation, a reminder of my grandmother Honey and days at the beach. And I loved them. They’d be perfect with sausage and eggs for breakfast or sautéed flounder and garlicky spinach for dinner.

Turns out I don’t really love fried green tomatoes, though once I stopped being lazy (they require a commitment of several bowls—one for flour, one for egg, one for cornmeal and flour), I realized they are best with a crunchy coating, achieved by the three-part dredging. The cornmeal in the final coating is essential not only for texture and flavor, but also to help make an-extra firm coating that keeps steam inside while the green tomato fries. That steam, in turn, helps tenderize the green tomato and soften the tartness, too.
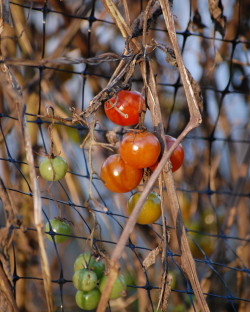
I tried the fried green tomatoes with a soy-lime-ginger dipping sauce like this one, thinking that would be a fun spin, sort of tempura-esque. But I wasn’t so crazy about that—even the little bit of lime was too much with the tartness of the green tomatoes. Because of the cornmeal, I also thought to try them simply drizzled with (you guessed it) maple syrup. Hmmm. Actually quite yummy. Well, I am predictable at least. I’ve had that sweet tooth all my life, too, and I don’t think it’s going away.
A Video of the Farmette, A Paella Dinner, and A Recipe for Unsellable Tomatoes

Darn it all, wouldn’t you just know it—this is the time of year when there’s so much going on at the farmette that I could write a blog every day. Except, ironically, there’s no time to write—too busy!

So today I’ll just have to give you a quick update on the goings on around here, because tomorrow I’m off to Boston to sign books at the Dewey Square Farmers’ Market, and I spent this morning cramming in the last bit of proofreading I needed to do on the galley of Fresh & Green for Dinner in order to get it off to Fed Ex in time to reach San Francisco by tomorrow. (It’s very exciting to see the design of the new book shaping up, even though publication is still many months away.)

First, great news: My friend Katie Hutchison, who kindly took care of the farmette with her husband Chris Hufstader while we were in Delaware, secretly made a video of their farm-keeping experience here at Green Island Farm and posted it on her website. Katie, who is an accomplished architect, photographer, and writer, is admittedly new to gardening and occasionally posts about her “Idjit” garden plot in a Salem, Mass., community garden. As you can tell, Katie’s not afraid to poke fun at herself, and her sense of humor is evident in the video—you’ve got to see it!

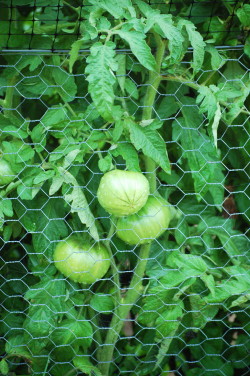
More good news: The garden is thriving (see photos) and so is the farm stand. In fact we’re pretty much selling out of everything we can harvest every day, now that the August visitors have arrived on the Island. (Obama will be here soon!) It’s killing me that we don’t have more to sell (can’t wait ‘til next year), but I’m also getting an invaluable sense of what the market wants. We’re dead on with our cherry tomatoes—all the varieties are producing well, we’re harvesting several pounds a day, and folks love the colorful pints. I just wish the beefsteak tomatoes would speed up. They’re big and fat—and very green. Our green beans are definitely getting folks to drive down the driveway, but again, it’s frustrating that we don’t have more of them (the beans, not the customers). It takes Roy and I (and sometimes a house guest!) at least a half-hour to pick them in the morning, and then we only wind up with a few pounds. But that’s how it goes.

It’s been fun to watch the farm stand traffic pick up, and I’m meeting all kinds of interesting people. One friendly couple from San Francisco (yes) has stopped by three times this week, and I had a nice conversation with two ladies from Southern Italy the other day. Sometimes an old friend who is visiting the Island will unexpectedly come down the driveway and surprise me (it happened this morning—hi Margo!).

And speaking of friends and visitors…August on the Vineyard means lots of both. And since the farmette is such a welcoming (and entertaining) place (most popular: the bunny and the rope swing), we seem to be a central gathering spot. Last week I almost cried when I stood in the backyard with two of my dear friends and former staff members from my Fine Cooking days, food writers Tony Rosenfeld and Sarah Jay. Tony was only on the Island for a day, but stopped to say hello and brought some Italian friends along with him. After touring the garden, the Italians convinced me that my arugula wasn’t too spicy!

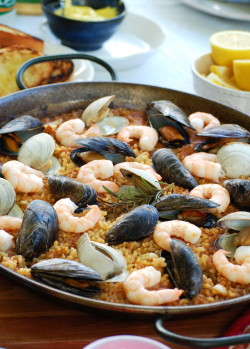
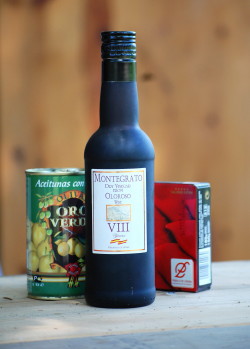
Fortunately Sarah and her two daughters were here for the better part of last week and we had lots of time to catch up—and to cook together. Sarah is an expert in Spanish cooking and runs a successful business importing paella pans and selling all kinds of Spanish goodies from her terrific website, paellapans.com. Not only did she bring me a wonderful bottle of sherry vinegar, as well as piquillo peppers, olives, and chorizo, but she made us a seafood paella while she was here. I’m a huge fan of Sarah’s paella (recipes here), which she learned to cook while living with a family in Spain, but it was Roy’s first really authentic paella. And he loved it.

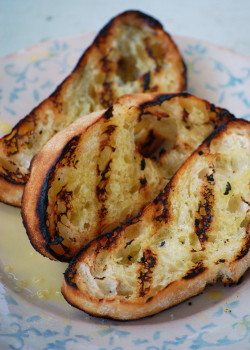
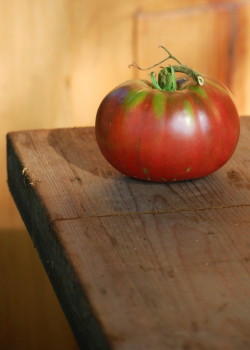
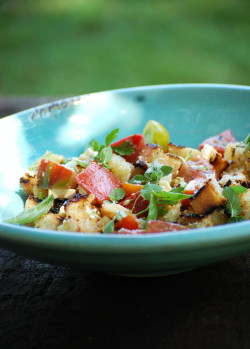
The day after Sarah left, I missed her. Right about lunch time, I started thinking about those Spanish ingredients she brought me. Hmmm. As it happens, I was also staring at a damaged Cherokee Purple (heirloom) tomato from the garden that needed to be carved up and eaten right away. (Ironically, this happens a lot – we have a garden full of lovely vegetables, but we wind up eating the overgrown beans, the holey greens, the deformed carrots, and the over-ripe tomatoes because the good stuff goes to the farm stand!) I’ve also been on a grilled bread kick, so I decided to make a grilled bread-tomato salad with olives, sherry vinegar, feta cheese (left over from a delicious salad Sarah made while she was here) and lots of fresh herbs. I guess it was an Italian-inspired salad with Spanish ingredients and a Greek twist! Whatever it was, it was delicious. So I’m passing the recipe on to you in honor of good friends and summer visitors and farm stand customers everywhere. It makes enough for two, but if you’re like me and a juicy heirloom tomato falls into  your lap, you might not want to share it.

Spanish Grilled Bread, Tomato & Fresh Herb Salad

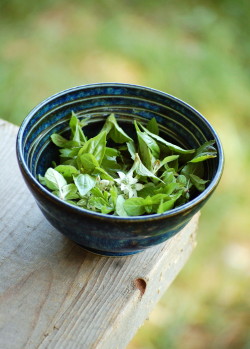
You can use any variety of juicy tomatoes in this salad—as long as they’re juicy. (Did I mention juicy?) When you grill or toast the bread, don’t overdo it—leave it a little chewy so that it will soak up the dressing and all those tomato juices. This recipe makes a generous lunch for one or a supper side dish for two, but you can easily double or triple it to serve a crowd. I like lots of basil and mint in this (I pick the tiniest leaves from my plants and throw them in whole), but parsley, chives, or a judicious amount of fresh oregano can go in the mix, too.

___________________________________________

1 tablespoon extra virgin olive oil

2 teaspoons good-quality sherry vinegar

3/4 pound (or a little more) juicy tomatoes (a combo of beefsteak and cherry is nice), cut into small chunks or quartered if small

2 ounces feta cheese, cut into small cubes

2 1-inch thick slices ciabatta or other narrow loaf artisan bread, brushed generously with olive oil, sprinkled with salt, and grilled or broiled until toasty, cut into small cubes

8 to 12 Spanish green olives, smashed and pitted

1/4 teaspoon minced fresh garlic

1/4 cup small whole herb leaves (basil and mint)

kosher salt

_____________________________________________

In a small bowl, combine the olive oil and sherry vinegar. Set aside.

In a medium mixing bowl, combine the tomatoes, feta, bread, olives, garlic and half of the whole herbs. Sprinkle with salt and pour over the olive oil-vinegar mixture. Toss and mix well. If desired, toss and let sit for 15 minutes to let the bread absorb the tomato juices (but it isn’t necessary). Turn out into a pretty shallow serving bowl and garnish with the remaining herbs.

Serves 2