Category Archives: side dishes

Super-Fresh, Super-Fast, Super Bowl Salsa & Guacamole: Recipe Preview, Fresh From the Farm

salsa guac 1

It’s hard not to dream about summer when your teeth are chattering.

Goodness, this cold weather is certainly getting to be a drag, isn’t it? Wouldn’t it be nice if you could walk outside right now, tip toe across the hot grass, swing open the garden gate, and tug a ripe juicy tomato off the vine? Uh, sorry. Not going to happen. I realize it’s not very nice of me to be teasing, and on top of that, I’m going to cheat, too. Because today I am offering you two recipes that are from the Summer section of Fresh From the Farm. So sue me.

guac 3
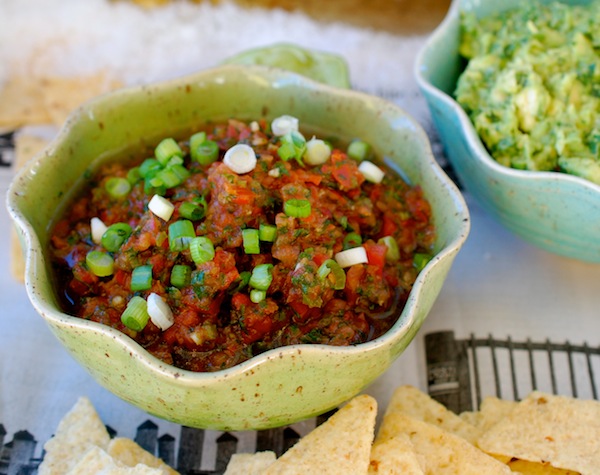
It just so happens that my Lazy Day Summer Salsa with Serranos, Cilantro & Lime (a spoonable, dippable, versatile Mexican-restaurant style sauce) is pretty darn good made with store-bought plum tomatoes—especially if you let them sit on the counter for a few days. Paired with my Double-Cilantro Guacamole (the real deal here, no pureeing or added fillers), these are two of the freshest, healthiest, liveliest additions you can make to your Super Bowl spread. Really clean and fresh-tasting. (And yes, this may be one of the only times you see two Vegan and Gluten-Free recipes together on Sixburnersue at the same time!) Even if you’re not into the whole football thing (and here in New England, with the Patriots now out of it, we suddenly have a lot of people who’d rather shovel their sidewalks than watch the Super Bowl), I bet you’ve got a taco night planned, or you need a good way to liven up a fish or shrimp dish.

Honestly, these two recipes are repertoire essentials.

So I made them both yesterday in order to take pictures (alas, neither of these recipes is among the 200 photos in the book!), and I ate an entire half-batch of the guacamole myself. And the way this salsa comes together in the food processor so fast and easily makes me feel efficient every time I make it. We’re eating leftovers tonight on pork tacos.

cilantro flowers cilantro leavesA Sidenote About Cilantro

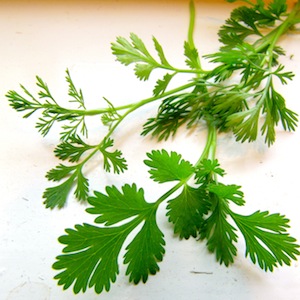
Both of these recipes use a good amount of cilantro (and a bit of ground coriander, the seed of the cilantro plant), and now is the time to plan for growing your own this year.

It’s very easy to grow, so order some seeds and plant early. It loves cool spring weather and tends to bolt around the summer solstice. One way to end-around this is to sow seed continuously (once a week or so). This way you can continuously harvest young plants before they bolt.

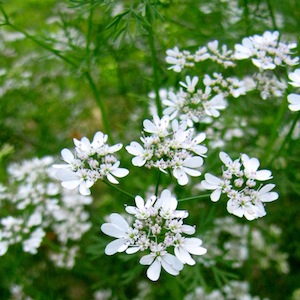
Once the plants bolt, though, all is not lost. The lovely flowers and fine foliage are just as tasty as the regular-sized leaves, if a bit more delicate.

The plants will also eventually form seed-heads, and at least some of them will drop and self-sow. I always have volunteer cilantro plants in my garden. If you leave the seed-heads on, they will dry and you can harvest coriander.

salsa 2
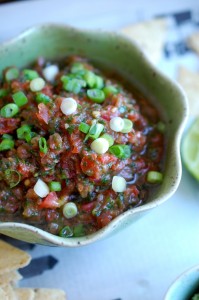
Lazy Summer Day Salsa with Serranos, Cilantro & Lime

Recipe copyright 2014 from Fresh From the Farm: A Year of Recipes and Stories

This fast, easy restaurant-style food-processor salsa is just as great with chips as it is with grilled steak or on top of a quesadilla. It will have a loose, not chunky, consistency.

Yields 1 2/3 cup


1/2 cup lightly packed cilantro (leaves and any upper stems—just lop the top off a bunch)

1/2 teaspoon kosher salt, plus more to taste

1/2 teaspoon granulated sugar, plus more to taste

1 large clove garlic, peeled

1 small serrano pepper, roughly chopped

2 cups cored, seeded and roughly chopped very ripe plum tomatoes (about 14 to 15 ounces or 4 to 6 large plum tomatoes)

2 teaspoons olive oil

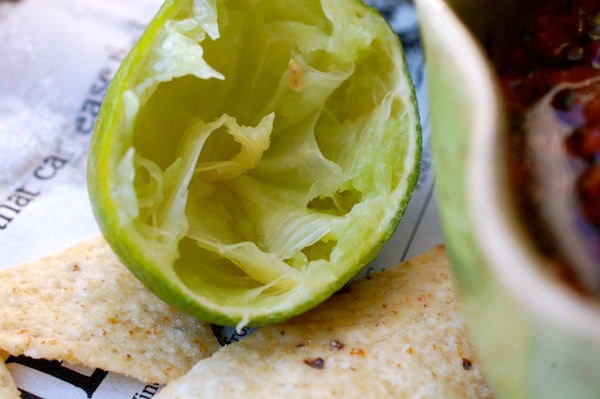
2 teaspoons fresh lime juice, more to taste

2 to 4 tablespoons thinly sliced scallions (white and as much of green part as you like)(optional)

Put the cilantro, salt, sugar, garlic and serrano in the bowl of a food processor. Process until finely chopped. Add the tomatoes and pulse six to eight times again until very finely chopped. (Don’t overprocess. The salsa will have a very loose consistency but should still have visible small chunks of veggies.) Scrape down the sides of the bowl and add the olive oil and lime juice. Pulse once or twice until combined. Taste for seasonings, adding more salt, sugar, or lime juice if desired, and process briefly again if necessary. Transfer the salsa to a bowl and stir in as many scallions as you like (or none at all). Serve right away or store in the fridge, well-covered, for several days.

guac again
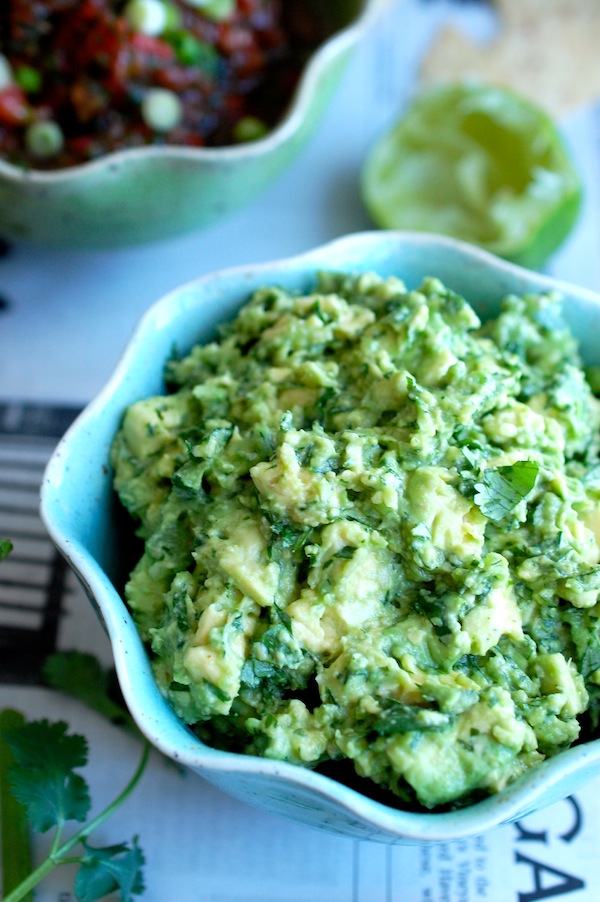
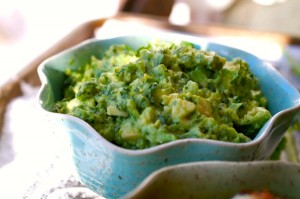
Double Cilantro Guacamole

Recipe copyright 2014 from Fresh From the Farm: A Year of Recipes and Stories

I like my guacamole bright, fresh, and a little bit chunky. I don’t add tomatoes or onions or sour cream, and I don’t pulverize the avocado, but I do think of guacamole as the perfect destination for our garden cilantro. I call this “double cilantro” guacamole because I add a little ground coriander to the mix, too. When you buy cilantro at the grocery, give it a sniff to make sure it is fragrant. Some grocery-store cilantro can be devoid of flavor during certain times of the year. You can easily double this recipe.

Yields 1 1/2 cups

1 large clove garlic

1 serrano pepper

kosher salt

2 medium ripe Haas Avocados

1/8 teaspoon ground coriander

big pinch ground cumin

2 teaspoons lime juice, more if needed

1/4 cup chopped fresh cilantro, more if needed

On a cutting board, roughly chop the garlic and the serrano. Sprinkle them with a big pinch of salt and continue to chop until the garlic and serrano are very finely minced. Transfer to a mixing bowl. Peel and pit the avocados. Cut them into rough 3/4-inch dice or pieces and add them to the mixing bowl. Sprinkle a generous 1/4 teaspoon salt, the coriander, the cumin, and the lime juice over the avocado. Using the back of a fork, gently mash and stir the avocado just until everything is well-combined but the mixture is still a bit chunky. Add the cilantro, stir again, and taste. Add more salt or lime juice if needed.

lime


Roasted Beet Jewels with Cranberries, Pecans & Balsamic Butter—A Festive Recipe Preview from Fresh From the Farm

RoastedBeetJewelsPg.205Tomorrow is Christmas. Oh boy. And, in one month, I will hold the first copy of my first-ever hardcover book in my hands. I am doubly excited. This could be a problem, as I’m not known for containing excitement well.

When I was three years old, I woke up in the middle of the night on Christmas Eve, put on my green velvet party dress (backwards, buttons down the front), and threw up all over myself. I thought I heard Santa on the roof. (Why I put my party dress on, I’m not sure. But apparently I was quite feverish—sick enough that the doctor had paid us a house-call earlier that day—so perhaps I got the dress-up part confused with Easter morning.) At any rate, I’m sorry to say that’s not the extent of the damage I did as a child during peak moments of excitement. (Graduation from elementary school involved pinning myself accidentally under a folded up ping-pong table. I’m not kidding.)

DSC_9957So my wise and wonderful publishers at The Taunton Press, who know how excited I am about Fresh from the Farm, have given me permission to publish a recipe from the book, just in time for Christmas. Whew.

So I will spare you any more childhood stories and get right to it. I’ll just tell you that I picked something easy and festive (with a pretty picture!), even though it is kind of an iconic Susie-type vegetable side dish recipe, the kind of thing you readers of Fast, Fresh & Green and The Fresh and Green Table will find familiar. But Fresh From the Farm has so much more—everything from tostados and burritos to pot roast and meat loaf to French toast, coffee cake, and cookies (all still inspired by the veggies and fruit that we grow). But since Christmas (and deep winter market/CSA season) is upon us, I thought I’d share something that could just as easily go on the holiday table as be part of a weeknight winter supper. (And use up some of those beets in the veg drawer. Although, in case you don’t know, beets are one of the better keeping winter veggies—wrap them in dish towels and put in open plastic bags and they’ll retain some moisture longer.)

FFF small image for webHere you go. I hope you have a peaceful and relaxing and delicious holiday. I wish I could give you the real book for Christmas, but alas, you and I will have to wait patiently. (You patiently, me not so much.) At least you can order Fresh From the Farm now if you like. (If you need it, all the ordering info is on the homepage of sixburnersue.)


If you like beets, check out these other recipes on sixburnersue as well.


Roasted Beet “Jewels” with Cranberries, Toasted Pecans & Balsamic Butter

DSC_3632_1This easy and delicious side dish is a great way to introduce people to roasted beets—or beets in general. You’ll love it too, because the small-diced beets cook in only 25 minutes—no boiling or long slow roasting here! This is just as great to make with summer beets as fall beets, and would be delicious with roast beef, roast chicken or crispy duck. I like to use a mix of red and orange or yellow beets if I’ve got them, but for a variation, you can also make this by substituting carrots for half of the beets.

Serves 4

1 1⁄2 pounds beets (preferably half red and half golden), topped and tailed but
not peeled

1 tablespoon plus 1 teaspoon extra-virgin olive oil

Kosher salt

1 tablespoon fresh orange juice

1 tablespoon seedless red raspberry jam

1 teaspoon balsamic vinegar

1 1⁄2 tablespoons unsalted butter, cut into 6 pieces and chilled

1⁄4 cup very finely chopped dried cranberries

1 teaspoon chopped fresh thyme

1⁄2 cup chopped toasted pecans

Small fresh parsley or mint leaves, for garnish (optional)


Heat the oven to 450°F. Cover two heavy-duty sheet pans with parchment paper. Keeping the red and golden beets separate (if using both colors), cut them into medium-small dice (no more than about 1⁄2 inch). Put each color in a bowl and toss with 2 teaspoons olive oil and 1⁄2 teaspoon kosher salt. Transfer each bowl of beets to separate sheet pans and spread in one layer. Roast until the beets are tender and shrunken, about 25 minutes. (Rotate the baking sheets to opposite racks halfway through cooking for more even cooking.) Transfer to a mixing bowl.

Put the orange juice, raspberry jam, and balsamic vinegar in a small saucepan over medium-low heat. Stir or whisk continuously (don’t walk away!) until the jam is completely melted and the sauce is slightly more viscous (it may be steaming but it should not boil), 2 to 3 minutes. Remove the pan from the heat and immediately add the cold butter. Swirl the pan until the butter is melted and the sauce is slightly creamy. Add the cranberries and thyme and stir. Pour and scrape the balsamic butter with the cranberries over the roasted beets and mix and toss gently. Add most of the pecans and stir gently again. Transfer to a serving bowl and garnish with the remaining nuts and herb leaves (if using).

PHOTO CREDIT, TOP PHOTO: Alexandra Grablewski; styling by Michael Pederson


Winter Garden Salad: A Template Recipe for Greens + Roots

If we didn’t have 150 pounds of pork in the freezer, I could eat a warm salad of winter greens and roasted veggies every night. (Roy, not so much.) This is one of those recipe/techniques that I unapologetically come back to again and again—Warm Winter Salad of Roasted Root Fries (The Fresh and Green Table), Warm Bistro Salad with Tiny Roasted Root Vegetables and Bacon Dressing (Fast, Fresh & Green), and Quick-Roasted Butternut Squash and Pear Salad with Ginger Lime Vinaigrette (coming in Fresh from the Farm), to name a few. (Hmmm, it appears I’m not averse to sneaking pork into these things, so you could certainly have your salad, and your bacon, too.)

The appeal of a warm salad with crispy, yummy roasted veggies served atop deep, dark greens with a bracing vinaigrette is the interplay between fresh and comforting. I also like the textural contrast, and to be honest, the visual appeal. These days, I don’t compose the salads so much as scatter-and-platter them. It’s a looser, more rustic look, and served family-style, more casual. But you can always arrange the salads on individual serving plates if you like.

It occurred to me this week that I should back up, look at the architecture of these salads, and come up with a template you could use, depending on whatever greens and winter veggies you’ve got hanging around.

Plus, I needed an excuse to show off my greens that are still alive in the market garden. (Ahem, again, unapologetic…) So this morning after my chicken chores (no frozen water—yay!), I took a bowl and scissors and collected a nice combo of mizuna, Ruby Streaks mustard, Russian kale, arugula, tat soi, parsley, a few baby bok choy leaves, and even a few carrot tops. It’s amazing what lives through freezing temperatures and unfortunate ice formations; the arugula is particularly hearty, and one of my lettuces, Winter Marvel, acts like it doesn’t even know its December. (Alas, soon enough, nothing will be growing, even if it stays alive, since we’re now down below the critical mark of 10 hours of daylight. I’ve got lots of lettuce and greens down in the hoop house which I am just hoping to keep alive and harvest sparingly until early February, when 10+hours returns and they’ll start growing again.)

Realistically, most of us will be harvesting greens for our winter salads from the grocery store, so here’s your chance to buy baby kale, escarole and frisee, sturdy spinach, and anything that’s got some backbone or body. Make your own custom mix, and try to steer away from bagged mixes of salad greens, which tend to be less fresh than heads or bunches and also contain filler lettuces which don’t hold up to warm vinaigrettes too well.

For your veggie mix, choose from sweet potatoes, potatoes, carrots, parsnips, turnips, rutabagas, beets, or butternut squash. Dice them quite small so that they’ll roast quickly; most won’t need peeling—but for the butternut. (For a pretty all squash-salad, you could use thinly sliced acorn and/or Delicata rings, which don’t need peeling and will also cook quickly.) Add diced pears or apples to the veggie mix if you want, and customize your salad with whatever toasted nuts and good quality cheeses you like. Use your favorite vinegar in the warm vinaigrette, and don’t be shy with a squeeze of lemon or lime to juice it up.

Here’s my template—I hope it will make a nice starting point for you. If you come up with a really delicious combo, I’d love to hear about it!

Warm Salad of Roasted Root Veggies and Winter Greens

Be sure to cut your veggies into evenly small pieces so they’ll all cook at the same rate. Don’t be tempted to crowd them on one pan, either—a little room around them will brown them up better. (Unless, of course, you want to cut this recipe in half, which is perfectly doable.) If you decide to include beets in your veggie mix, toss them with a little oil and salt separately from the rest or they’ll tend to color everything else.

___________________________

For the salad:

1½ to 1¾ pounds combination sweet potatoes (unpeeled), potatoes (unpeeled), carrots (peeled), parsnips (peeled), turnips (unpeeled), beets (unpeeled), butternut squash (peeled), firm-ripe pears (peeled), or Golden Delicious apples (unpeeled), cut into small dice (about 3/8-inch in diameter) (about 5 to 6 cups)

4 tablespoons extra-virgin olive oil

Kosher salt

6 to 7 cups combination sturdy mixed winter greens (such as baby kale, escarole, frisee, arugula, mustard, or tat soi)

¼ cup chopped toasted pecans, walnuts, almonds or hazelnuts

½ to 2/3 cup crumbled good quality blue cheese, feta cheese, goat cheese or 1/3 cup coarsely grated aged gouda or Parmigianno

3 tablespoons coarsely chopped dried cherries, cranberries, raisins, figs, pitted dates, or other dried fruit (optional)

For the vinaigrette:

1/3 cup extra-virgin olive oil

1 large shallot, sliced thinly

2 tablespoons sherry vinegar, balsamic vinegar, white balsamic vinegar, or cider vinegar

1 tablespoon maple syrup

1 teaspoon Dijon mustard

1 teaspoon fresh lemon or lime juice (more to taste)

½ teaspoons lemon or lime zest

1 teaspoon coarsely chopped fresh thyme leaves (or other herb of choice)

Kosher salt and freshly ground pepper

___________________________________

Preheat the oven to 450°F. Line two large rimmed heavy-duty baking sheets with parchment paper. In a large, wide mixing bowl, combine the veggies, the 4 tablespoons olive oil, and a scant teaspoon kosher salt. Toss well and spread in one layer on the two baking sheets. Roast, rotating the sheet pans once (and flipping the veg with a spatula if you like), until the veggies are nicely browned and tender, about 28 to 30 minutes. Let cool for a couple minutes on the sheet pans and then combine in a mixing bowl.

While the vegetables are roasting, put the greens in a wide heat-proof mixing bowl. Set out a serving platter or four serving plates.

Make the warm vinaigrette: Heat the 1/3 cup olive oil in a small nonstick skillet over medium heat. Add the sliced shallots and a pinch of salt and cook, stirring occasionally, until the shallots are browned and crisp, about 6 to 8 minutes. Take the skillet off the heat and remove the shallot rings with a fork, transferring them to a paper-towel lined plate. Let the oil cool for 3 to 5 minutes. Add the vinegar, the maple syrup, the Dijon, the juice, the zest, the herbs, ¼ teaspoon salt, and several grinds of fresh pepper. Whisk vigorously until the dressing is mostly emulsified. (Alternatively, first transfer the shallot-infused oil to a heat-proof Pyrex liquid measure, add the other ingredients and whisk well. This is a slightly less awkward way of making the dressing). Taste and adjust seasoning, adding more lemon or lime juice, salt or pepper as needed.

Season the greens with a sprinkling of kosher salt and drizzle over them a few tablespoons of the warm vinaigrette. (Be sparing at this point). Toss well, taste, and add a little more dressing if necessary. Arrange most of the greens on your platter or serving plates. Sprinkle with half of the nuts, cheese, and fruit.

Season the roasted veggies with a pinch more salt, and dress them lightly with 1 to 2 tablespoons of the vinaigrette. Toss well and scatter over the greens. Garnish with remaining nuts, cheese, fruit, greens, and reserved shallots. Serve right away, passing the remaining dressing if desired.

Serves 4

P.S. Farmer enjoyed harvesting greens this morning, too!


A Potato Gratin with Gruyère, Thyme & Horseradish

My obsession with gratins knows no limits. I once wrote a cookbook proposal called “Golden Brown and Bubbly: The Book of Gratins.” Honestly I don’t know why anyone didn’t pick that up. (Couldn’t have been the title.)

Now that golden-brown-and-bubbly season is back upon us, I figured I’d make it Gratin Week over on my Facebook page, Susie Middleton Cooks. Why not? If there can be a National Cupcake Day, then why not Gratin Week, I say. (A gratin is really just a vegetable and cheese casserole, after all.)

So I have been (and will be) posting a link to a different gratin recipe over there every day. Many of these recipes exist here at Sixburnersue.com or over on FineCooking.com, where my 11-year tenure (plus five years and counting as editor-at-large…okay I realize that makes me seem really old) has earned me multiple recipe listings. So linking to them is easy. (Try this favorite next summer.)

But today I thought I’d actually like to eat a gratin, rather than just talk about one. We’re having roast pork loin (yay, more pork—only 175 pounds left in the freezer!) for dinner, so I thought a classic creamy potato gratin would be nice. Of course I didn’t get around to making it until this afternoon so taking photos for the blog in the dying sunlight was a little tricky.

To do this recipe, I turned to the handy dandy “foundation recipe for baking gratins” in that fabulous cookbook, Fast, Fresh & Green. The recipe gives you a bunch of options, so I chose gruyère cheese, thyme, and horseradish as my flavor components. But then I also decided that I wanted to make a bigger gratin—just in case any of you need a pinch hitter for the Thanksgiving table. So I scaled the quantities up, and voilà, here you go. Yum. Happy Gratin Week.   

EasyRecipe

Potato Gratin with Gruyère, Thyme & Horseradish

Thinly sliced potatoes are key here, but there’s no need for a mandolin. Just cut your potato in half lengthwise first, lay it cut side-down on the cutting board (to stabilize) and then slice it crosswise with a sharp knife. A Santoku or ceramic knife works great.

Serves 6

1 teaspoon unsalted butter

1 cup fresh breadcrumbs

1 tablespoon extra-virgin olive oil

2 teaspoons roughly chopped thyme leaves

3 tablespoons coarsely grated Parmigiano

Kosher salt

1 cup heavy cream

3/4 cup low sodium chicken broth

2 teaspoons prepared horseradish

1½ pounds Yukon Gold potatoes (about 6 medium-small)

Freshly ground pepper

1 cup coarsely grated gruyère


Heat the oven to 350°F. Rub a 2-quart shallow gratin dish with the butter.

In a small bowl, combine the breadcrumbs with the olive oil, a big pinch of salt, ½ teaspoon of the thyme, and the Parmigiano.

In a liquid measure, combine the cream, the broth, and the horseradish. Mix well.

Cut the potatoes in half lengthwise and turn the halves cut-side down on a cutting board. With a sharp knife, slice the halves across as thinly as you can so that you have thin half-moon-shaped pieces.

Put the potatoes in a mixing bowl. Add 1 teaspoon salt, several grinds of fresh pepper, the cheese, the remaining thyme, and the cream mixture. Mix well. Transfer all to the prepared gratin dish.

Scooch the potatoes around until they are as evenly dispersed as possible. Using your palms, press down on the potatoes to bring the liquids up and around them as much as possible. (It won’t necessarily completely cover them.) Cover the top with the breadcrumb mixture. Bake until the potatoes are tender when pierced with a fork (check the middle of the dish as well as the sides), the breadcrumbs are brown, and the juices around the edges of the gratin have bubbled down and formed a dark brown rim around the edge, 65 to 70 minutes. Let cool for about 15 minutes before serving.


Cranking it Out of the Kitchen On a Snow Day

Nothing like pushing your culinary limits. It’s easy for me to get lazy with cooking—doing the same things I’ve always done, especially if I can do them blindfolded when I’m in a tired or harried state. But God and circumstances and magazine editors are constantly presenting me with nifty challenges that keep me from getting too complacent. That’s a good thing. Lately I’ve been pushing on a couple fronts.

Yesterday it snowed here. A flurry or two wouldn’t be such a crazy thing in November, but the fact that two inches stuck to the ground, and was still hanging around here this morning, is a little strange. I took some photos of snowy nasturtiums to post on my Facebook page; they seemed so pretty in an incongruous kind of way.

I like snow days, because they force me to stay inside and do my house-y, kitchen-y (and okay, computer-y) stuff. In the case of yesterday, it was a very good thing, as I was right on top of my deadline to develop six recipes for Vegetarian Times. I mentioned this assignment a few weeks ago, but I bring it up again, because the topic definitely fell squarely into the culinary challenge (culinarily challenging?) department. My charge was to develop recipes featuring (or at least including) the often discarded parts of veggies, including carrot tops, broccoli leaves, radish greens, celery leaves, chard stems, and beet greens. As it happens, I’ve developed recipes with chard stems and beet greens in the past, but around here, most of the rest of these goodies go straight to the chickens. When a farmstand customer offers to remove her carrot tops and leave them for the hens, I am only too happy. The more green stuff the chickens eat, the better their eggs.

But now that I’ve made carrot top pesto (really delicious), stir-fried broccoli leaves (the new kale?), and lemon-ginger-ized radish greens, I’m all excited. Those broccoli leaves, I’m telling you, are delicious. I did have a brief setback, though, which got me thinking about food waste: Many of these veggies are not available in the grocery store in their “natural” state. In other words, the greens are removed. (On the Island, the extras are likely composted or donated to pig farmers, but I hate to think about how much of this stuff goes into landfill in some circumstances, just because the leaves are wilted.) Broccoli is especially denuded these days. You can hardly get it with the stalk still attached (and the stalk is delicious, too), much less with anything more than a few leaves on it. (Farm stands, farmers’ markets, and any natural grocery offering local produce will be a different story.) And if you’ve ever seen broccoli growing in a field, you know that it’s kind of all about the leaves.

Yesterday I went down to Morning Glory Farm and they ever so kindly sent someone out from the farm store to the (snowy) field across the street to cut two large broccoli heads—with stalk and lots ‘o leaves—for me to play with. They were so beautiful that I didn’t want to cut them up. In the end I only used a small amount of the leaves in my recipe (which I then tried to photograph in the snow—here’s an outtake!!), but I saved a whole bag of leaves from just one head to put in soups and stir-fries over the next week.

However, I’m not sure we’ll be having a soup or a stir-fry any time soon. In Part Two of my current culinary challenge, I am trying to make my way through at least one piece of pork from the freezer every week. (For those who don’t know, we raised two pigs this summer, which we unfortunately named. So now when we have pork chops for dinner, the question always comes up: Is this a Dozer chop or a Wilbur chop? Yikes.)

This week I’ve gone overboard. I made meatloaf with ground pork first, then finally got a huge pork butt (that’s actually shoulder meat) defrosted enough to cut it into pieces and concoct a chili-ish stew in the slow-cooker. Wouldn’t you know it, though, I’m not too crazy about how it came out—my spice mix wasn’t quite right. But we are eating it anyway—last night in burritos, and tonight in, who knows?

But the really good news is that I had enough sense to reserve some of the pork butt meat and pork fat to make breakfast sausage—and it turned out absolutely delicious. This is probably our best effort so far with the pork. Not that making our first-ever homemade bacon from the belly wasn’t very cool and fun (did that a few weeks ago), but it came out a bit salty, so there’s room for improvement there. But today I used Bruce Aidell’s Brown Sugar and Sage Breakfast Pattie recipe from his Complete Book of Pork, and it was perfect. I made the mistake earlier in the fall of trying to make sausage from already ground pork, but the grind and the ratio of fat to meat is all wrong for sausage. You have to start with some pork meat (preferably butt) and some (actually a little more than some) pork fat. You don’t need a grinder though; I chilled the meat and fat and chopped in the food processor as instructed.

Roy was pretty excited about the sausage, too. In fact, we’re both kind of surprised and delighted by how much of our own food we’re eating. Roy said to me last night that next year is canning and preserving year. Okey dokey, Roy. Now, all we need is the cow for milk, and we’ll never have to go to the grocery store again. (The cow and a whole lot more time.)

In the meantime, I’m reading more and more about the benefits of fermented food, so I may have to try making kimchi. But I think next up is something I can wrap my head around a little more easily—roasted pumpkin pie. The only problem is that the only ripe Sugar Pie pumpkins we have left are the ones from Libby’s garden. I’ll have to ask her if she’ll loan me one. Should be okay—Libby likes a good experiment in the kitchen!


Pretty in Purple—Pak Choi for the Plate and Palate

It’s only May 1 and already we may have grown the prettiest vegetable we’ll see all season. (You can remind me I’ve said this when I start waxing on about peas and cherry tomatoes and Fairy Tale eggplants.) But honestly, this little purple pac choi (aka bok choy) is simply stunning. We can’t keep it at the farm stand for a minute, and I’m hoping I’ll get another round transplanted before it gets too hot. If you’re interested in growing this ethereal veggie (sweet, crunchy, tangy and light), you can still order seeds from Fedco and plant it in the fall.

Me, I think I’d better start eating more of the stuff. The purple color is the result of anthocyanins, which supposedly improve memory. I could use that, since I  completely forgot to make time for the blog post this week (a lot of farm work going on around here!) and now I am off to Maine to teach two classes at the fabulous Stonewall Kitchen this weekend. Wish you could all be there to join me!

A Recipe for Roasted Cauliflower—In a Gratin

The savage weather has reached Biblical proportions. Yes, I am exaggerating, but today it is blowing so hard that I am fully expecting Auntie Em to ride by my window on her bicycle at any time. Frankly, I’d rather look out and see her than some random farm item that was once tethered to the ground.*

Well, there is no antidote to all this other than good warming winter food. (And chocolate—I have my new favorite, a 77% percent cocoa bar from Chocolove, by my side.) In the kitchen today I am making a cauliflower gratin, because I am still having cruciferous cravings. Don’t worry, I am not eating the chocolate and the cauliflower at the same time.

Because of my sweet tooth, I prefer cauliflower roasted, rather than prepared any other way. So today I was thinking about taking the extra step of putting roasted cauliflower into a gratin with Gruyère and rosemary—and then I realized I’d already developed a recipe like this for The Fresh & Green Table. (Yikes, sometimes I forget these things, which is a little scary.) That recipe spans the seasons a bit, since it includes green beans and potatoes as well as cauliflower and mushrooms. I decided to simplify a bit and stick to the colors of winter, partly because I had a monochromatic photo in my head. (I love shades of white. In the end the photos turned out yummy, but not so monochromatic.)

Anyway, the version I made today is just cauliflower and mushrooms. I call it a gratin but really it is more like gratinéed veggies. No major deep-dish casserole-y kind of thing here—just roasted veggies sprinkled with cheese, a little cream, and plenty of breadcrumbs and baked until bubbly. Rustic and delicious. The rosemary winds up being pretty fragrant, so sub in thyme if you’re not in a piney mood.

Tip: And here’s something to keep in mind when roasting cauliflower or broccoli. Cut through the florets (at least in half, or in thick slabs if they’re large) so that they have a flat side that can have full contact with the sheet pan. Glorious caramelization will occur where floret meets heat. (Witness photo above; floret has been flipped up after roasting.)


*P.S. I wrote this yesterday but was unable to get it posted until today. I am happy to report that Auntie Em and Toto did not fly by the window. However, one of the doors off the gas grill, some tree limbs, and a plastic tarp are all tangled up outside my window.

Roasted Cauliflower, Cremini , Gruyère and Rosemary “Gratin”

Take this idea and run with it—use whatever roasted veggies you like, sprinkle with a bit of cheese, cream, and breadcrumbs, and bake until bubbly.

________________________

3 tablespoons plus 2 teaspoons extra-virgin olive oil (plus more for rubbing pan)
3/4 cup coarse fresh breadcrumbs (I use an English muffin for this)
1 1/4 teaspoons chopped fresh rosemary
kosher salt
Florets from 1 small head cauliflower (about 14 ounces), each about 1 1/2 inches long and cut to have one flat side
8 ounces cremini mushrooms, quartered if large, halved if small
1/2 cup grated Gruyère cheese
1/2 cup heavy cream

________________________

Heat the oven to 450°F. Line a large heavy-duty rimmed sheet pan with parchment paper. Rub a little olive oil all over the inside of a small shallow gratin or baking dish. (I used a 9-inch round, but something about 1 1/2 quarts in volume works well.)

In a small bowl, combine the breadcrumbs, 2 teaspoons olive oil, 1/2 teaspoon chopped rosemary and a pinch of salt. Mix well and set aside.

In a mixing bowl, toss the cauliflower and mushrooms with the 3 tablespoons olive oil and 1/2 teaspoon kosher salt. Spread the vegetables out in one layer on the sheet pan (flip the florets so that they are cut-side down). Roast until the veggies are nicely browned and tender, about 28 to 30 minutes. Let the veggies cool for a few minutes and transfer them to the baking dish, arranging them in one snug layer.

Reduce the oven temperature to 425°F.

Sprinkle the remaining rosemary and the cheese over the vegetables in the pan. Drizzle the cream over the vegetables. Scatter the breadcrumb mixture over the top, leaving some vegetables peeking out.

Bake until the crumbs are well-browned and the cream has bubbled and reduced, leaving a thin brown ring around the edge, about 18 to 20 minutes. Serve hot or warm.

Serves 3

White-Out Weary, Cruciferous Cravings, Limey Green Slaw

At this point I am willing to admit that living in a drafty, un-insulated old farmhouse loses a bit of its appeal in early February. While I have been busy telling my friends out in the rest of the world that winters on Martha’s Vineyard are relatively mild and that we don’t get much snow, it seems that the tables have turned. Most days now it’s more like Duluth, where Roy spent some time as a toddler—swaddled in a snowsuit, 24-7. Here, we are swaddled in a succession of all-weather boots, a smorgasbord of hats and eternally wet gloves, and two heavy, fleece-lined canvas farm jackets. With Roy wielding the axe to crack the ice on the chicken water every morning, we are pretty scary looking. And that’s just when we’re outside! Inside the cold (yes, cold) house, our triple-fleece, double-thermal lounging attire makes us look like rejects from a bad L.L. Bean catalogue photo shoot.

The snow is beautiful. And I longed for it in December. But now that I hear we are going to get a bazillion inches of it (not to mention scary wind) on Friday, I’m thinking, enough, already. This will require even more creative thinking on how to keep the chickens supplied with unfrozen water. And about how to keep our frequent farm stand customers supplied with eggs without making them shovel a path to the back door. Perhaps we could put the wild bunnies to work. Every morning after fresh snow, there’s a virtual Etch-a-Sketch of rabbit tracks all around the yard, from coop to garden to barn to woods to fields and back. Drives Farmer crazy.

Also, we have to brush the snow off of the hoop house, lest it get too heavy, and, well, you can imagine what might happen. And that hoop house is my winter savior, so I’m very protective of it. I am so darned excited about what we’ve already got going in there, that I can barely stand it. My little baby bok choy and lettuce transplants are just cruising along. On sunny days, when the temperature inside the hoop house can get up to between 70 and 80, I can practically see the little green plants doing jumping jacks. On grey, drizzly, snowy, ice days, it takes most of the daylight hours just for the plants to unshrivel from the night’s cold. They’re under two layers of plastic, but still, cold is cold.

I’m longing to snatch some of those greens but I’ve held off to let them mature.  Fortunately there is still something green growing in the garden, under no cover at all. That would be miracle plant (and wonder food) kale, of course. A ridiculous plant, this kale. But a convenient one. Convenient because I’ve been messing around with kale salads lately. (I’ll let you know when I really and truly warm up to raw kale salads—I’m not quite there yet, but I’m working on it.) And also because this wicked February cold seems to be giving me strange cruciferous cravings. I only to want to eat Brussels sprouts or cabbage or kale every night. And even for lunch.

In fact, today I knew exactly what I wanted to do with a beautiful head of Savoy cabbage I saw at the grocery: Make one of my crunchy, limey slaws—and add a few of those sweet baby kale leaves from the garden to it. I happened to have a ripe avocado on deck, too, so a new variation on my original recipe was born. Green, green, green. Really green. Strangely refreshing on a cold day. I think it’s the antioxidants. Or maybe just the hopeful color. Or maybe it just tastes good. Whatever it was, I think I’d better go eat some more of it (and hope that it has magical powers) now that I’ve heard the latest forecast: Blizzard. Not just snow, but lots of it and lots of wind. Just what we love to hear on a farm. Stay tuned, and make some limey savoy and avocado slaw!

Savoy Slaw with Lime, Cilantro, Avocado & Toasted Pecans

Some groceries are now carrying baby kale leaves—snatch them up if you see them. If not, you can pluck tiny leaves from bigger bunches (even right off the stems of bigger curly kale) or very finely chop bigger leaves to add to this salady slaw. Or leave the kale out all together—or add more. Your choice!

_________________________________________

8 ounces very thinly sliced cored Savoy cabbage or regular green cabbage

1 ounce (about 1 cup) baby kale leaves or finely chopped or sliced large kale leaves (deribbed)

3 tablespoons plus 1 teaspoon fresh lime juice

1 tablespoon maple syrup, more to taste

1 teaspoon fresh lime zest

Kosher salt

1 firm-ripe avocado (2 if you like)

3 to 4 tablespoons roughly chopped fresh cilantro

3 to 4 tablespoons plain nonfat Greek yogurt

3 to 4 tablespoons finely chopped toasted pecans

_____________________________________

In a mixing bowl, toss together the cabbage, the kale leaves, the 3 tablespoons lime juice, the 1 tablespoon maple syrup, the lime zest and 3/4 teaspoon kosher salt. Let sit, tossing well with tongs every 5 to 10 minutes, for about 30 minutes.

Peel and slice the avocado. Then cut the slices into smaller pieces. In a small bowl, toss the avocado gently with the remaining teaspoon of lime juice and a pinch of salt.

To the cabbage mixture, add 3 tablespoons of the cilantro, 3 tablespoons of the yogurt, and 3 tablespoons of the pecans. Toss well and taste. Add a teaspoon or two more of maple syrup to balance the tang a bit, if you like. Add up to a tablespoon more yogurt for a slightly creamier slaw, and add a pinch more salt, if needed. Mix well and transfer to a serving bowl. Garnish with more cilantro and pecans.


Midwinter Midweek Mahogany Mushrooms

Except for an ill-fated attempt to grow mushrooms in a box last winter and the occasional mini-fungi that pop up in the garden mulch, we do not grow mushrooms here on the farm. I guess that’s one of the reasons I’ve neglected writing much about this most meaty of vegetables.

But yesterday I was paging through Fast, Fresh & Green, looking for appropriate recipes for two classes I’ll be teaching at Stonewall Kitchens in Maine in May, and I stumbled upon these Mahogany Mushrooms. Oh, I’d forgotten how much I love cooking mushrooms like this. Chunky, fast, hot, browned, glazed–yum. Wan, undercooked, undercolored mushrooms are not my thing. If you follow this technique, that fate will not befall you.

Just to check, I made a batch this morning and Farmer and I ate them for lunch with some scrambled eggs. He gave the mushrooms ten licks (his rating system—it has to do with how much he licks his chops after sampling a dish). We did have a little problem with a slightly smoky kitchen since the front door is taped up for the winter and of course there is no ventilation hood in our antiquated kitchen. So when Roy got home from roofing, he was kind of wondering what Farmer and I had been up to. But he wonders that most days.

Seriously, I think Mahogany Mushrooms are a perfect side dish or antipasto for this time of year and that’s why I’m sharing them with you. Great with hamburgers or roast chicken or sautéed winter greens, or yes, eggs.

Mahogany Mushrooms

Sautéing over pretty high heat keeps these mushrooms juicy while getting them brown at the same time. A tangy glaze gives them a beautiful sheen, too.

____________________________

1 tablespoon soy sauce

1 tablespoon fresh lemon juice

2 teaspoons dark brown sugar

2 teaspoons ketchup

1/2 teaspoon Worcestershire sauce

2 tablespoons unsalted butter

2 tablespoons extra-virgin olive oil

1 pound Cremini (or baby bella) mushrooms, quartered if large, halved if small

3/4 teaspoon kosher salt

2 teaspoons minced fresh garlic

___________________________________

In a small bowl, whisk together the soy sauce, lemon juice, brown sugar, ketchup, Worcestershire sauce, and 1 tablespoon water and set the bowl near the stove. Put a shallow serving dish near the stove as well.

In a 10-inch straight-sided sauté pan, heat 1 tablespoon of the butter with the olive oil over medium-high heat. When the butter is melted, add the mushrooms and the salt and stir right away. Continue stirring just until the mushrooms have absorbed all the fat.

Let the mushrooms sit undisturbed and cook for 2 minutes, then stir once. Don’t worry; the pan may look crowded and dry, but keep the heat up at medium high. Let sit and cook again, stirring infrequently (they will “squeak” when you stir them), until the mushrooms are shrunken, glistening, and some sides have developed a deep orange-brown color,  9 to 10 minutes (the bottom of the pan will be very brown).

Turn the heat to low and add the garlic and the remaining 1 tablespoon butter. Stir and cook until the butter is melted and the garlic is fragrant, about 30 seconds. Whisk the soy sauce mixture again and very carefully add it to the pan. You’ll need to scrape out the brown sugar, but don’t stand directly over the pan as there will be sputtering. Stir and cook just until the liquids thicken slightly and coat the mushrooms, another 15 to 20 seconds. Quickly transfer the mushrooms to a shallow serving dish, scraping all of the sauce out of the pan with a rubber spatula. Let sit for a few minutes and serve warm.

Serves 4


Sleepless on State Road, Plus Twenty Reasons to Buy Cookbooks for Christmas

Lately I have been waking up in the middle of the night. I have trouble falling back asleep, so I play the alphabet game that Libby, Roy and I do on the ferry rides back and forth from Falmouth. It takes on a different guise every night. Sometimes I start naming our (ever-increasing) chicken coops in alphabetical order—an idea we’ve thought of to help identify the groups of chickens. So far we have the Aquinnah Ladies, the Beach Road Babies, and the Chilmark and Chappy Chickens. I have imagined a future of 26 chicken coops (God forbid!) with names that go all the way up the alphabet to Menemsha and No-Man’s Land and Quitsa and Wasque, too. These are all places on the Vineyard, of course.

The other night I got tired of naming chicken coops (but not tired enough to fall asleep) so I began to make lists. Lists of my favorite recipes in my first two books. Okay, I will just have to be honest and admit that I did fall asleep partway through this task, so it works. I hope, of course, this doesn’t mean that thinking about recipes is boring—I prefer to think of it as comforting and satisfying! (Actually, I got kind of boggled by all the choices and couldn’t quite make up my mind.)

I thought of this because I get asked a lot—especially on radio—what my favorite recipes in my books are. Of course everyone knows you’re not supposed to play favorites with your own children, but, um, recipes aren’t really children so I think it’s okay.

Also, I have been thinking a lot about shopping locally for Christmas and about supporting independent bookstores. This is really a make-or-break time of year for brick-and-mortar bookstores, so it is extra-important to patronize them. (On the Island that means Bunch of Grapes in Vineyard Haven, and Edgartown Books in Edgartown, where I will be signing books on December 8.) Besides, for whatever few extra dollars you spend there (which then goes into the local economy), you get the free experience of browsing in a cozy, friendly bookstore—looking at all those books, seeing friends, perhaps having a cup of cider—and just enjoying the whole experience.

So in that spirit (and because I feel guilty that I sometimes don’t promote my own books as much as I should—ah, but that’s a whole other story!), I’m giving you 20 reasons (10 each from Fast, Fresh & Green and The Fresh & Green Table) to visit your local bookstore, buy cookbooks for holiday presents, and have something to think about and savor if you wake up at night during the stressful holiday season! Here goes (And let me tell you, in the end it was NOT easy to narrow down to 10 for each!):

Top Ten Favorite Recipes from Fast, Fresh & Green:

  • Sweet Potato Mini-Fries with Limey Dipping Sauce and Spiced Salt
  • Harvest Gratin of Butternut Squash, Corn, and Leeks
  • Caramelized Plum Tomatoes in an Olive Oil Bath
  • Roasted Brussels Sprouts with Orange Butter Sauce
  • Vanilla and Cardamom Glazed Acorn Squash Rings
  • Braised Fingerlings with Rosemary and Mellow Garlic
  • Corn Sauté with Chile and Lime
  • Bacon and Rosemary Sautéed Brussels Sprouts and Baby Bellas
  • Crisp-Tender Broccoflower with Lemon-Dijon Pan Sauce and Toasted Parmigiano Bread Crumbs
  • Grill-Roasted Bell Peppers with Goat Cheese and Cherry Tomato Dressing

  Top Ten Favorite Recipes from The Fresh & Green Table:

  • Chile Rice with Green Beans & Toasted Pecans
  • Spaghetti with Roasted Cherry Tomatoes & Spicy Garlic Oil for Two
  • Grilled Zucchini, Bell Pepper, Goat Cheese & Grilled Bread Salad
  • Warm Winter Salad of Roasted Root Fries
  • Spicy Noodle Hot Pot with Bok Choy, Ginger, Lime & Peanuts
  • Crisp Red Potato Patties with Warm Asian Slaw & Limey Sauce
  • Savoy Cabbage, Apple, Onion & Gruyere Rustic Tart
  • Warm Wheatberries with Roasted Brussels Sprouts, Toasted Walnuts & Dried Cranberries
  • Walk-in-the-Woods Grilled Pizza
  • Potato Galette with Rosemary & Two Cheeses