Tag Archives: Winter Squash

Best Veggie Sides for Thanksgiving, Revisited!

DSC_2822_01
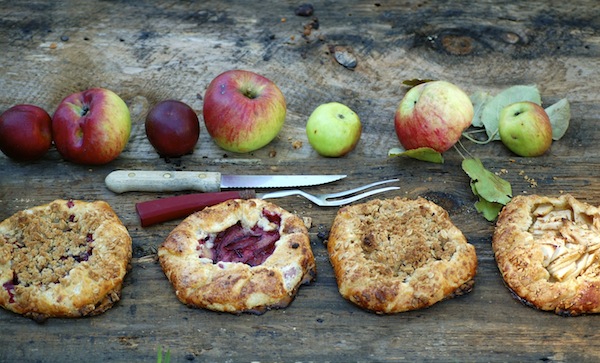
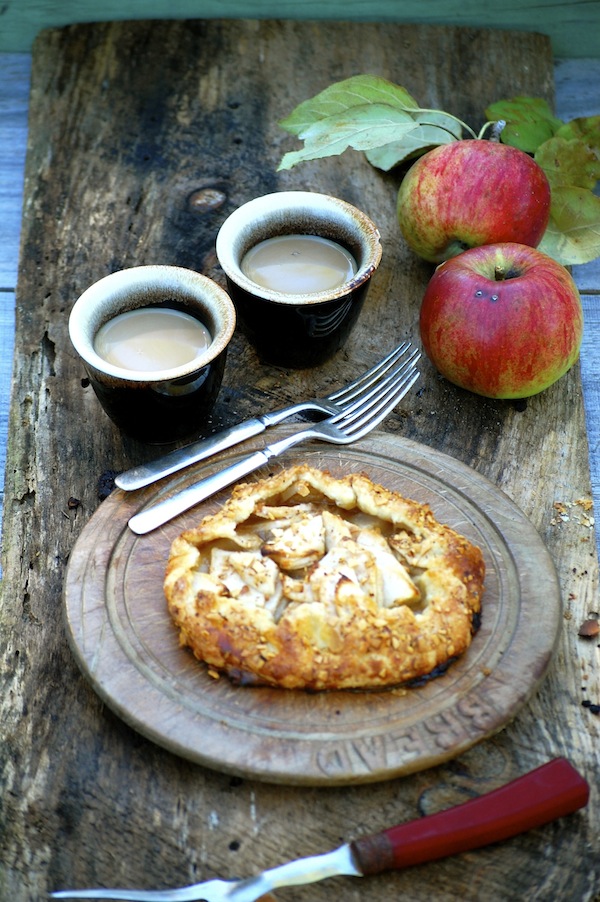
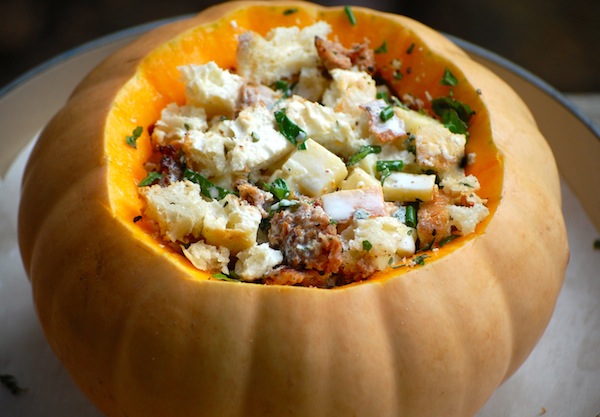
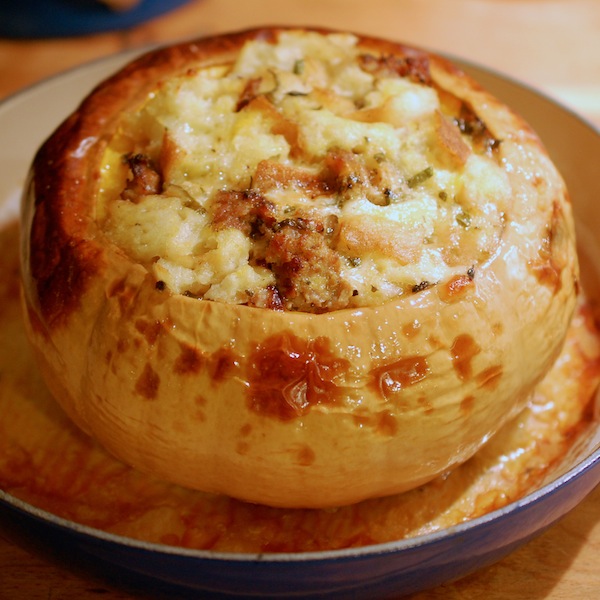
Here I go again reposting–so sorry, but once again, no time to create some new recipes for you for Thanksgiving, and time is flying. (And,  of course, the new book recipes are TOP SECRET…just kidding, I’ll start posting a few of those as pub date nears.) Anyway, I thought you’d appreciate a reminder of some of these amazing veggie side dish recipes on sixburnersue, so here goes. So while, yes, you’ll recognize most on this list, if you’re like me, you may have forgotten some. Reminders aren’t all bad!

I hope you all have a wonderful holiday with dear friends and delicious food.

Okay, here are our favorites from past Thanksgivings.

1. Crispy Smashed Potatoes (photo above)

2. Roasted Butternut Squash with Cranberry-Ginger Butter and Toasted Walnuts.

3. Roasted Brussels Sprouts with Orange Butter Sauce

DSC_3037_1


4. Mashed Yukon Gold Potatoes with Roasted Garlic

5. Thanksgiving Gratin of Butternut, Corn, Squash & Leeks

6. Potato Galette with Fresh Rosemary & Two Cheeses

RoastedBeetJewelsPg.205
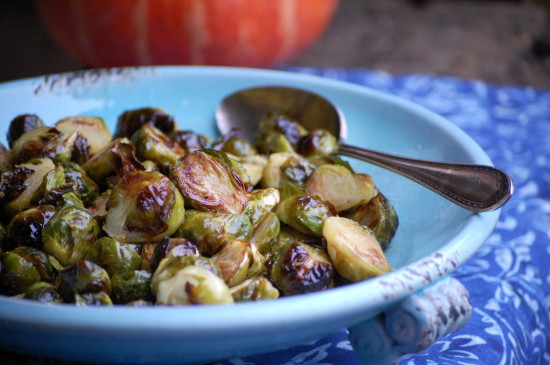
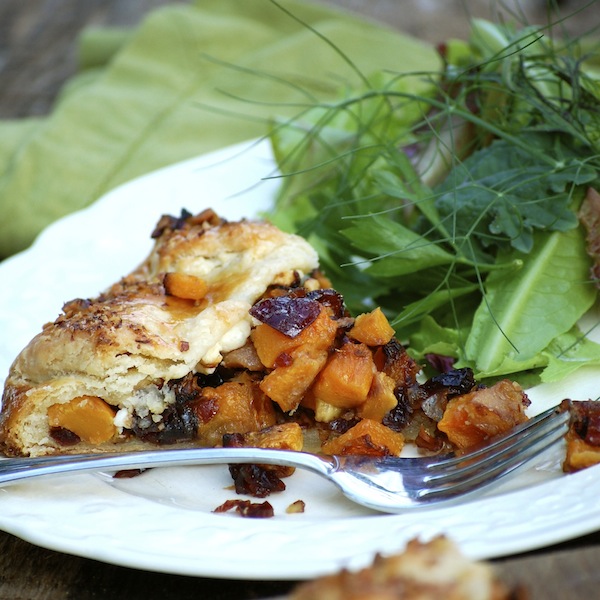
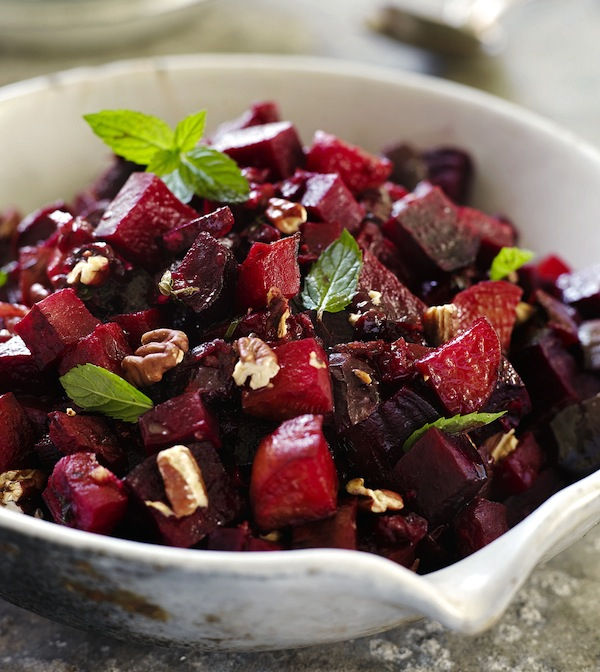
7. Roasted Beet Jewels with Cranberries, Pecans & Balsamic Butter

8. Roasted Turnips & Pears with a Rosemary Honey Drizzle

9. Potato Gratin with Gruyere, Thyme & Horseradish

10. Caramelized Turnips, Potatoes, & Carrots with Onions & Thyme

turnip overhead

Tart Art: Recipes for Sweet or Savory Rustic Tarts

DSC_0626I’ve been looking for a great excuse to repost this blog on rustic tarts. Well, it being the eve of you-know-what, I don’t thing I even have to mention why you might want to totally distract yourself with an incredibly delicious cooking project. (Perhaps you don’t have a TV or the internet in your kitchen.) But even if you don’t feel like cooking today or tomorrow, chances are that either a sweet or savory tart might fit perfectly into one of your holiday menus. So, Ta da! A repost of where to find directions to all my yummy rustic tart recipes.

DSC_9313

Sweet or savory, these open-faced pies can be everything from appetizer to dessert—and even breakfast. A couple years back, I wrote and photographed a story called “Tart Art” for Martha’s Vineyard Magazine, and now the recipes are all online. It’s a great place to go for my all-purpose, buttery, flaky dough recipe—and to find recipes for both my versatile fruit filling (apples, pears, or plums) and for two different savory fillings.

DSC_0706

The fruit fillings work for sweet rustic tarts that are as delicious for dessert as they are the next day for brunch or an easy leftover breakfast. And if you’ve got a copy of Fresh from the Farm on hand, you can find one of my favorite variations in the recipe for Little Pear Crostatas with Hazelnut Crisp Topping. (Rustic tarts go by the name crostata in Italy and galette in France.)

DSC_1548

The savory fillings I did for Martha’s Vineyard Magazine—Savory Cabbage, Apple & Cheddar and Savory Roasted Butternut, Pear, and Cranberry—are variations on the fillings I did for my tart chapter in The Fresh and Green Table. Not only are these savory tarts deeply flavored and satisfying (great with soup or salad), but they are a lot of fun to put together.

DSC_1915

For step by step assembling instructions, you’ll want to look back at the directions and the photos I included in a previous blog, which includes a link to one of the recipes from The Fresh & Green Table. (The Seven Treasure Roasted Winter Veggie Tart is also a favorite in The Fresh & Green Table.) And over on the Martha’s Vineyard Magazine website, you’ll see that I’ve given you options for dividing the dough into either two or four pieces to make two bigger or four smaller tarts.

So you’ve got options.

And when summer comes around (we can be hopeful, right?) don’t forget about my most favorite tart of all—the Roasted Tomato Rustic Tart in Fresh from the Farm!

xroastedtomatotart


Kitchen Travel: From Point A to Point B = Pumpkin Hand-Pies

photo-231Sometimes, in my efforts to use up food, I never know what I’m going to wind up with in the kitchen. This week, among far too many things I’d amassed in the fridge, a container of roasted squash was staring at me from behind a bag of kale. I have no idea what I’d been planning to do with it when I pulled it out of the freezer. Maybe make my Spiced Butternut and Cranberry Quick Bread from Fresh From the Farm? Usually I wait until closer to Christmas time to do that. And I know it wasn’t one of many different butternut soups I make. (Though soup is the main reason I roast and freeze winter squash “meat.”)

Puzzled, I returned to my computer, where I happened across an email from Food 52 with a “Genious Pumpkin Butter” recipe in it. I’m not really a fruit butter kind of gal, but I clicked on this because I loved the photo and the deep color of the pumpkin butter. When I got there, I realized why it looked so appealing. In a word (one of my favorite words): Caramelization. The pumpkin (or squash) is basically roasted twice, first to get the flesh tender and scoopable (and out of the skin); second with brown sugar, spices, and a little butter in a shallow baking pan so there is lots of contact with direct heat. You stir the squash mixture from time to time as it bakes and releases a lot of moisture, making it drier, much more flavorful, and deeply colored.

I’d already done the first part—check. So I measured the roasted squash I had (3 cups) and set about to make this right away. (I cut the recipe in half  and used a 7 x 11 Pyrex baking dish.) The house began to smell holiday-fragrant, and stirring the squash every once in a while was one of those comforting and tactile pleasures that make cooking so satisfying.

photo-228

I ate some right out of the pan not long after it came out of the oven–delicious. Like pumpkin pie filling only much tastier and more concentrated. Which reminded me, of course, that I now had to do something with the squash butter (thinking Roy was really not going to be interested in squash butter crostini for dinner.) So once again, fate (and web surfing) intervened, and as I was perusing The New York Times thanksgiving coverage, I came upon Melissa Clark’s simple pie dough recipe. I had just seen a recipe for cranberry hand pies on another site, and suddenly I knew what I wanted to do—make mini pumpkin (or squash) hand-pies.

After making and chilling Melissa’s easy dough, I promptly stopped looking at anyone else’s recipes, which might have been a mistake, because I haven’t made hand-pies in centuries. But I was already having so much fun with my old pastry cutters, flour flying all over the place.

photo-237 photo-235So only after I had already cut out circles that were rather small, cut little windows out of them, and spooned a heaping portion of roasted squash on to them, did I realize that folding one half of this circle of dough on to itself (to make a half-moon shape) was going to be a stretch and a squish. I should have made bigger circles and smaller cut-outs. Whatever, I said! And forged ahead again, baking them anyway, and then going on to use the rest of the dough to make full-circle hand-pies that held the filling more demurely. (The half moons were cuter, though, even if they were a bit stuffed.)

But wait! Half way through I also stopped and folded a couple tablespoons of mascarpone cheese into the pumpkin butter and tried that as a more “pie-ish” filling. The first one of those I tasted I loved and promptly filled the rest of the dough with that stuff. Later, after everything cooled–and more sampling ensued–I decided that I actually liked the straight roasted squash butter filling better. The crust was so flaky and buttery that it didn’t need a creamier filling.

photo-230

Well, in the end these things were very cute and very tasty. But of course I can’t give you a full recipe, because I was playing, rather than developing! But if you’re intrigued (and the little pies would be great on a Thanksgiving dessert buffet—they don’t even need to be warmed up), you can certainly grab the pumpkin butter and pie dough recipes and have at it yourself. I would say that in the end I got about 12 to 14  hand pies out of the one dough recipe. (And there is plenty of leftover pumpkin butter, so you could certainly make more dough to yield more pies.) The photo-236only other things you will need are a little egg wash (made from one egg yolk and a bit of cream) and some coarse sugar. I brushed a little of the egg wash around the edges of the dough circles before sealing them. And I also brushed the tops of the pies—for color and to help the sugar adhere. I used some raw cane sugar I happened to have around, but a cinnamon sugar mix might be nice to try, too.

P.S. If you’re in the process of making up your Thanksgiving menu, and you’re looking for side dish ideas, I’ve been posting my favorite side dishes on Face Book at Susie Middleton Cooks. And you can click here for a link to some of my older favorites.

P.P.S. My apologies for the fuzzy (and poorly lit) photos–my good camera has now left the repair place and apparently is being sent back to the “factory” for repair. Yikes.


Stuffing and Roasting a Long Island Cheese Pumpkin. Yes.

DSC_3456Totally out of character, I decided to stuff and roast a pumpkin. Totally in character, I decided to do this because someone gave me a very pretty pumpkin, one that seemed at first glance like it would be a more efficient holder-of-stuffing than a sugar pumpkin. Not that there’s anything wrong with sugar pumpkins. But, look,  these Long Island Cheese pumpkins (above) are pretty suave looking, don’t you think? Okay, maybe suave is a bad word, but elegant, graceful, or charming would do. Charming in a Cinderella-coach kind of way. In fact, there is something called a Cinderella pumpkin that looks quite similar to a Long Island Cheese pumpkin, only it’s bigger and redder.

The Long Island Cheese pumpkin came from Simon Athearn, farmer at Morning Glory Farm here on the Vineyard. Roy ran into him on a run to Morning Glory to pick up some regular field pumpkins we were buying wholesale for our farm stand. Simon is a good cook himself. (And among other things, a talented grower of Long Island Cheese pumpkins, as Morning Glory Farm has many of them this year. Take note, Islanders—go get yourself one!) He handed the pumpkin to Roy and suggested I make something with it. He mentioned he’d been filling his with a mix of potatoes and sausage. And he said that the squash itself was delicious.

When the pumpkin arrived at home, I was intrigued, because I actually tried to grow a few of these last year (no luck) and anything that has “cheese” in the name is okay with me. (The name comes from the fact that the pumpkin resembles a wheel of cheese, not from its flavor.) So I thought for once I’d put aside the little thing I have about stuffed vegetables.

I poked around and found a recipe by Dorie Greenspan, a cook and food writer I greatly admire. (She actually taught me a course on recipe writing at culinary school many years ago.) The recipe, called Pumpkin Stuffed with Everything Good, is from her book, Around My French Table. (But you can find it here on Epicurious.). The “everything good” part does not refer to a kitchen sink list of stuff, but a lovely combination of bread, gruyere cheese, thyme, a bit of bacon (I used sausage), garlic, some herbs, and heavy cream. Now that is my kind of stuffing, I thought.

DSC_3363

Ultimately, a recipe for stuffing and cooking a pumpkin can only really be a set of guidelines, but I have to say, Dorie’s “guidelines” (her tips, her timing, and the proportions of ingredients) worked beautifully—of course! Our 4-pound pumpkin was tender and the stuffing puffed in about an hour and 45 minutes. We took the cap off at that point to brown the top of the stuffing a bit.

DSC_3384

We let the pumpkin rest out of the oven for 10 minutes or so.  (Unfortunately, it was now too dark to shoot a nice photo in natural light, so this scary indoor one will have to do.) Then we scooped out the stuffing, which had a lovely ethereal, almost soufflé-ish texture, along with the tender bright-orange squash flesh. The stuffing was delicious, infused with the flavors of the thyme, sausage, garlic, and gruyere. And the squash, like its color, was bright tasting—almost a bit citrusy, I thought. Very nice, and not at all stringy. (It turns out that Long Island Cheese pumpkins are of the Cucurbit moschata species, along with butternut squash and other squash that tend to have less stringy flesh. It is also an heirloom that once was grown widely for pie-making, and is now making a come back in popularity.)  Altogether, the stuffing with the squash made a really nice “one-pot” (one-pumpkin?) supper, with leftovers.

Now I am curious about what the Long Island Cheese pumpkin flesh would taste like roasted and caramelized. (You’d have to cut the pumpkin into wedges or slices to do that.) I think it would be great with a bit of goat cheese, cilantro, and a drizzle of maple-lime butter.

So maybe that’s why we’re now in possession of a few more of these lookers. Tomorrow I am off to give a Fresh From the Farm book talk at Old Sturbridge Village. Maybe I’ll take one of the pumpkins with me for show and tell!. And while I’m driving, I’ll dream up something else to do with the rest! Though I would definitely make Dorie’s recipe again. Maybe even with a sugar pumpkin.

DSC_3461

Winter Garden Salad: A Template Recipe for Greens + Roots

If we didn’t have 150 pounds of pork in the freezer, I could eat a warm salad of winter greens and roasted veggies every night. (Roy, not so much.) This is one of those recipe/techniques that I unapologetically come back to again and again—Warm Winter Salad of Roasted Root Fries (The Fresh and Green Table), Warm Bistro Salad with Tiny Roasted Root Vegetables and Bacon Dressing (Fast, Fresh & Green), and Quick-Roasted Butternut Squash and Pear Salad with Ginger Lime Vinaigrette (coming in Fresh from the Farm), to name a few. (Hmmm, it appears I’m not averse to sneaking pork into these things, so you could certainly have your salad, and your bacon, too.)

The appeal of a warm salad with crispy, yummy roasted veggies served atop deep, dark greens with a bracing vinaigrette is the interplay between fresh and comforting. I also like the textural contrast, and to be honest, the visual appeal. These days, I don’t compose the salads so much as scatter-and-platter them. It’s a looser, more rustic look, and served family-style, more casual. But you can always arrange the salads on individual serving plates if you like.

It occurred to me this week that I should back up, look at the architecture of these salads, and come up with a template you could use, depending on whatever greens and winter veggies you’ve got hanging around.

Plus, I needed an excuse to show off my greens that are still alive in the market garden. (Ahem, again, unapologetic…) So this morning after my chicken chores (no frozen water—yay!), I took a bowl and scissors and collected a nice combo of mizuna, Ruby Streaks mustard, Russian kale, arugula, tat soi, parsley, a few baby bok choy leaves, and even a few carrot tops. It’s amazing what lives through freezing temperatures and unfortunate ice formations; the arugula is particularly hearty, and one of my lettuces, Winter Marvel, acts like it doesn’t even know its December. (Alas, soon enough, nothing will be growing, even if it stays alive, since we’re now down below the critical mark of 10 hours of daylight. I’ve got lots of lettuce and greens down in the hoop house which I am just hoping to keep alive and harvest sparingly until early February, when 10+hours returns and they’ll start growing again.)

Realistically, most of us will be harvesting greens for our winter salads from the grocery store, so here’s your chance to buy baby kale, escarole and frisee, sturdy spinach, and anything that’s got some backbone or body. Make your own custom mix, and try to steer away from bagged mixes of salad greens, which tend to be less fresh than heads or bunches and also contain filler lettuces which don’t hold up to warm vinaigrettes too well.

For your veggie mix, choose from sweet potatoes, potatoes, carrots, parsnips, turnips, rutabagas, beets, or butternut squash. Dice them quite small so that they’ll roast quickly; most won’t need peeling—but for the butternut. (For a pretty all squash-salad, you could use thinly sliced acorn and/or Delicata rings, which don’t need peeling and will also cook quickly.) Add diced pears or apples to the veggie mix if you want, and customize your salad with whatever toasted nuts and good quality cheeses you like. Use your favorite vinegar in the warm vinaigrette, and don’t be shy with a squeeze of lemon or lime to juice it up.

Here’s my template—I hope it will make a nice starting point for you. If you come up with a really delicious combo, I’d love to hear about it!

Warm Salad of Roasted Root Veggies and Winter Greens

Be sure to cut your veggies into evenly small pieces so they’ll all cook at the same rate. Don’t be tempted to crowd them on one pan, either—a little room around them will brown them up better. (Unless, of course, you want to cut this recipe in half, which is perfectly doable.) If you decide to include beets in your veggie mix, toss them with a little oil and salt separately from the rest or they’ll tend to color everything else.

___________________________

For the salad:

1½ to 1¾ pounds combination sweet potatoes (unpeeled), potatoes (unpeeled), carrots (peeled), parsnips (peeled), turnips (unpeeled), beets (unpeeled), butternut squash (peeled), firm-ripe pears (peeled), or Golden Delicious apples (unpeeled), cut into small dice (about 3/8-inch in diameter) (about 5 to 6 cups)

4 tablespoons extra-virgin olive oil

Kosher salt

6 to 7 cups combination sturdy mixed winter greens (such as baby kale, escarole, frisee, arugula, mustard, or tat soi)

¼ cup chopped toasted pecans, walnuts, almonds or hazelnuts

½ to 2/3 cup crumbled good quality blue cheese, feta cheese, goat cheese or 1/3 cup coarsely grated aged gouda or Parmigianno

3 tablespoons coarsely chopped dried cherries, cranberries, raisins, figs, pitted dates, or other dried fruit (optional)

For the vinaigrette:

1/3 cup extra-virgin olive oil

1 large shallot, sliced thinly

2 tablespoons sherry vinegar, balsamic vinegar, white balsamic vinegar, or cider vinegar

1 tablespoon maple syrup

1 teaspoon Dijon mustard

1 teaspoon fresh lemon or lime juice (more to taste)

½ teaspoons lemon or lime zest

1 teaspoon coarsely chopped fresh thyme leaves (or other herb of choice)

Kosher salt and freshly ground pepper

___________________________________

Preheat the oven to 450°F. Line two large rimmed heavy-duty baking sheets with parchment paper. In a large, wide mixing bowl, combine the veggies, the 4 tablespoons olive oil, and a scant teaspoon kosher salt. Toss well and spread in one layer on the two baking sheets. Roast, rotating the sheet pans once (and flipping the veg with a spatula if you like), until the veggies are nicely browned and tender, about 28 to 30 minutes. Let cool for a couple minutes on the sheet pans and then combine in a mixing bowl.

While the vegetables are roasting, put the greens in a wide heat-proof mixing bowl. Set out a serving platter or four serving plates.

Make the warm vinaigrette: Heat the 1/3 cup olive oil in a small nonstick skillet over medium heat. Add the sliced shallots and a pinch of salt and cook, stirring occasionally, until the shallots are browned and crisp, about 6 to 8 minutes. Take the skillet off the heat and remove the shallot rings with a fork, transferring them to a paper-towel lined plate. Let the oil cool for 3 to 5 minutes. Add the vinegar, the maple syrup, the Dijon, the juice, the zest, the herbs, ¼ teaspoon salt, and several grinds of fresh pepper. Whisk vigorously until the dressing is mostly emulsified. (Alternatively, first transfer the shallot-infused oil to a heat-proof Pyrex liquid measure, add the other ingredients and whisk well. This is a slightly less awkward way of making the dressing). Taste and adjust seasoning, adding more lemon or lime juice, salt or pepper as needed.

Season the greens with a sprinkling of kosher salt and drizzle over them a few tablespoons of the warm vinaigrette. (Be sparing at this point). Toss well, taste, and add a little more dressing if necessary. Arrange most of the greens on your platter or serving plates. Sprinkle with half of the nuts, cheese, and fruit.

Season the roasted veggies with a pinch more salt, and dress them lightly with 1 to 2 tablespoons of the vinaigrette. Toss well and scatter over the greens. Garnish with remaining nuts, cheese, fruit, greens, and reserved shallots. Serve right away, passing the remaining dressing if desired.

Serves 4

P.S. Farmer enjoyed harvesting greens this morning, too!


Capturing Time in a Basket of Blue Eggs

Just like that, the frost came, the leaves fell, the days shortened, and the blue eggs appeared. Sometimes, there isn’t a logic to what happens on the farm, and since change is constant around here, it’s easy to miss the subtle shifts. But then you walk outside one morning and it hits you—another season on the farm has gone by and while you’re already busy planning for the next one, there’s one right here, right now. A spectacular moment in time, one that can’t necessarily be defined or pinned down, just marveled at.

There’s really no corollary between golden leaves and blue eggs; it just happens that the Aracaunas (who grew big and beautiful over the summer) started to lay in earnest this week and we finally have a whole clutch of blue and green eggs to ogle. We’ve been wondering if all the eggs would be the color of Sugar’s—a paler shade of Robin’s egg blue. So far there’s a murky tidal green, a Sugary blue, and one true teal.

The Aracaunas themselves match the leaves that are falling by the zillions, Roy raking them up in bursts of energy while I avoid that least favorite task as best I can. I do haul a cart or two into the garden every now and then, as I am ripping out dead veggie plants, adding compost to garden beds and covering them up with leaves and mulch for the winter. I am weighing down the leaves with spent sunflower and zinnia stalks, which are as stiff as bamboo.

I am also nursing the hoop house back to life, filling beds with transplants and seeds, harvesting arugula and kale, discouraging mice. We are curing pumpkins and winter squash for the first time in the green house, too. I’m especially excited about the Japanese kabocha squash we grew in the back field, though I hope we didn’t harvest it too soon. The vines weren’t quite dry, but they needed to come out for Roy to finish prepping the new field, which is looking spiffy.

And wouldn’t you know it, just ahead of the freezing weather, Roy reached water with the well pipe he’s been driving, driving, driving down into the ground. The new well will provide a closer water source for the 500 chickens and will also irrigate the new field next summer.

Overnight, the summer veggies disappeared from the farm stand. I decided not to foist any more green tomatoes or free jalapenos off on anyone, though we’re still harvesting greens and packing them up for egg customers to discover in the fridge.

The skies darkened and the first rains came over the weekend, happily driving us inside to play board games with Libby. Or I should say, to lose to Libby while playing board games. The marathon Gardenopoly tournament ended like this: Libby—$8,000 and every single property; Dad—bankrupt; Susie—$1. Watching her squirm with delight is one of those moments in time that I really wish I could pin down. As she barrels (or more accurately, skips and runs) towards 12 years old, I want to stay here in 11-year-old world with her just a little longer.

One thing I know for sure: While my memory isn’t so great any more, and some of these moments are going to get fuzzy for me down the road, Libby won’t forget. She’s got a whole lifetime to carry happy farm memories forward. Blue eggs and crazy colorful chickens. Leaf piles and fairy houses. Blustery days, board games, beach walks. Arrowheads, deer antlers, sharks teeth, starfish. Turtles, garden snakes, baby skunks. Owl spotting, sheep watching, pig petting. And hanging out with her best furry friend—Farmer, of course.

Stormy Minestrone, A Recipe for Comfort

All I can think about today is soup. This may be because I have too many vegetables crowding up the fridge. After another round of recipe development and a pre-hurricane sweep of the garden, I am left with the clear makings of minestrone—everything from a five-pound bag of carrots to three awkwardly space-hogging baby fennel bulbs. I have a big basket of winter squash I keep stumbling over in the pantry, and I have a little handful of green beans I just plucked off the dying vines this morning. I even have a few cranberry beans that are finally ready to harvest, from plants that miraculously show very little storm damage.

Our storm damage, in fact, was minimal. Had circumstances been different—if Sandy hadn’t taken a left turn when she did—we would likely be facing a very different winter here on the farm. Instead the hoop house is still standing, the animals are all fine, and in fact, we have another flock of laying hens due to arrive here this week (more on that soon). So thankfully, Roy is building—rather than rebuilding. Now, of course, I hear that a big Nor ‘Easter is coming up the coast this week. So maybe we are not out of the woods yet. But still. I can’t stop thinking about Staten Island and the Rockaways and Seaside Heights. All those folks still without power and nights getting really chilly. And lots of friends on the coast of Connecticut with serious flood damage. We did have plenty of coastal erosion up here on the Island and flooding in the lowest harbor areas in the towns, but most homes were safe and dry (and warm).

Everyone knows it could have been different, though. One Island friend posted an idea on Facebook a couple days ago for a coats-and-warm-blankets drive, and seemingly overnight, boxes outside of Island businesses filled up with donations, and volunteers have come forward to drive the items down to a particularly hard-hit neighborhood in Queens.

I will be here, making hot and comforting soup, sort of a crazy response to feeling for other people who are cold. It’s like I have a sympathetic and not entirely imaginary chill that must be chased away. We human beings have strange responses to things—I know I can’t share my soup with those folks, but I’m hoping someone else will share their hot food with someone cold and hungry, and in the meantime I’m sending comfort-soup-karma out as best I can.

Here’s my Fall Farmers’ Market Minestrone recipe from The Fresh & Green Table. Deeply flavored without any meat at all, it’s a good starting point for comfort soup, but feel free to vary the veggies as you please.

Fall Farmers’ Market Minestrone  

Recipe copyright Susie Middleton, from The Fresh & Green Table (Chronicle Books, 2012).

The secrets to this meatless minestrone include lots of aromatic veggies and a Parmigiano rind. I usually finish the soup with grated Parmigiano and/or a bit of gremolata (a mix of freshly chopped parsley, lemon zest, and garlic). But if you don’t want to bother with the gremolata , it’s perfectly delicious without it.

______________________________

1/4 cup extra-virgin olive oil

2 cups medium-diced onions (about 1 large or 2 medium)

2 cups thinly sliced Savoy cabbage (about 1/4 small head)

1 cup thinly sliced fennel bulb (quartered and cored first, about 1/2 small bulb)

1 cup thinly sliced carrots (about 2 carrots)

Kosher salt

1 cup peeled, medium-diced butternut squash (about 4 to 5 oz.)

1 cup large-diced stemmed Swiss chard leaves (thinly slice stems separately and include them, too)

1 Tbsp. minced fresh garlic (plus 1/2 tsp. if making gremolata)

1 Tbsp. chopped fresh thyme

2 tsp. chopped fresh rosemary

1 tsp. ground coriander

1 Tbsp. tomato paste

1 14 1/2-oz. can diced tomatoes (I like Muir Glen), well drained

1 2-inch Parmigiano-Reggiano rind

½ cup ditalini pasta or other very small pasta

1 cup thinly sliced green beans (about 4 oz.)

½ to 1 cup fresh corn kernels (optional)

1 to 2 tsp. lemon juice

½ tsp. lemon zest (if making gremolata)

2 Tbs. chopped fresh parsley

1/3 cup coarsely grated Parmigiano Regianno

______________________________

a 5- to 6-quart Dutch oven or other large soup pot, heat the olive oil over medium heat. Add the onion, fennel, cabbage, carrots and 1 tsp. salt. Cover and cook, stirring occasionally, until the onions are softened and mostly translucent and the cabbage is limp, about 6 to 8 minutes. Uncover and continue cooking, stirring occasionally, until much of the cabbage is browning and the bottom of the pan is browning as well, about another 8 to 9 minutes.

Add the 1 Tbsp. garlic, the thyme, the rosemary, the coriander, and the tomato paste. Stir until fragrant, about 30 seconds. Add the butternut squash, the chard, the diced tomatoes, and 1 ½ tsp. salt and stir well until incorporated. Add the Parmigiano rind and 8 cups water.

Bring to a boil, reduce to a simmer, and cook, stirring occasionally, for 10 minutes. Add the ditalini and cook another 8 minutes. Add the green beans and the fresh corn (if using) and cook for 4 to 5 more minutes. Remove the pot from the heat, remove the Parmigiano rind, and stir in 1 tsp. of the lemon juice. Let cool for a few minutes; taste and adjust for salt, pepper, and lemon juice.

For the gremolata (optional), combine the 1 tsp. garlic, the lemon zest, and the fresh parsley in a small bowl.

Garnish each portion of hot soup with some of the gremolata or chopped parsely and some of the Parmigiano.

Yields 8 cups, Serves 6


Best Roasted Brussels Sprouts + 10 Fave Thanksgiving Sides

This time last year I was preparing to be on television the day before Thanksgiving. (The Martha Stewart Show—I cooked quick veggie sides from Fast, Fresh & Green.) A few years back I did a satellite media tour around this time to promote Fine Cooking’s book How To Cook A Turkey. The year before that, I did a radio blitz for most of November and December to promote all the holiday tips and recipes on Fine Cooking’s website (which, if you haven’t looked lately, is by far the best place to go to plan your Thanksgiving menu. Check out the cool interactive Create Your Own Menu Maker. But I’m not biased or anything.) Well, you can imagine how relieved I am not to be PR-ing this holiday season. I did in fact just record some radio spots for Fine Cooking that will soon air on WGBH (I’ll keep you posted); but they were a whole lot of fun to do—and they didn’t require a new wardrobe or an anxiety attack.

So we are free and clear to have a simple and quiet Thanksgiving at the farmette (yippee!). I still have squash, rutabagas, onions, kale, arugula, herbs, and salad greens from the garden, plus green beans, corn, and roasted tomatoes that I froze, so we will be able to make most of the meal über-local. I will wander across the street to the West Tisbury Winter Farmers’ Market on Saturday to see if I can get the rest of what I need.

Regardless of where you plan to get your goodies, most of you, I know, have this one thing on your mind: What kinds of dishes can I cook that are easy and delicious, that everyone likes, and that will serve a decent-sized crowd? To that end, I’ve gathered a list of ten of my own favorite side dish recipes that serve at least six people (below). Some of these recipes reside on sixburnersue.com, but several are ones I developed a few years back for an “updated classics” story on Thanksgiving sides for (you guessed it) Fine Cooking magazine. And I also threw in a “create your own” creamy veggie soup from another FC article I did years ago, in case yours is the kind of family that likes to start the meal with an elegant soup (or needs options for vegetarians).

But for the tenth recipe on the list, I couldn’t resist posting my Roasted Brussels Sprouts with Orange Butter Sauce. This is a recipe I originally created for Fast, Fresh & Green but that I tweaked last year for the TV gig so that it would feed more people. I just remade it this morning and am happy to confirm that it is not only delicious, but possibly one of the fastest and easiest Thanksgiving side dishes ever to make.

Here’s my list:

1. Green Beans with Crispy Pancetta, Mushrooms, and Shallots

2. Roasted Turnips with Maple and Cardamom

3. Pomegranate-Balsamic-Glazed Carrots

4. Bourbon Sweet Potato and Apple Casserole with a Pecan Crust

5. Creamy Baked Leeks with Garlic, Thyme, and Parmigiano

6. Mashed Yukon Gold Potatoes with Roasted Garlic

7. Thanksgiving Gratin of Butternut Squash, Corn & Leeks

8. Potato Galette with Fresh Rosemary & Two Cheeses

9. Creamy Vegetable Soup (Pick Your Own Veggie!)

10. Roasted Brussels Sprouts with Orange Butter Sauce (see below)


Roasted Brussels Sprouts with Orange Butter Sauce

I’ve roasted Brussels sprouts a few different ways, but you can’t beat this method for volume (large rimmed sheet pans hold a lot), quickness (16 to 18 minutes in a 475° oven), and great results (by halving the sprouts and roasting them cut-side down, the tops and bottoms brown but the interiors steam). The flavorful butter sauce gives the nutty roasted sprouts just the right touch of tangy-sweet richness to make this completely holiday-worthy.

_________________________________________

2 lb. small Brussels sprouts, trimmed and halved lengthwise

1/4 cup extra-virgin olive oil

1 tsp. kosher salt

1 Tbsp. plus 1 tsp. balsamic vinegar

2 Tbsp. pure maple syrup

2 Tbsp. fresh orange juice

1 tsp. finely grated orange zest or lemon zest

4 Tbsp. cold unsalted butter, cut into 16 pieces and kept chilled

________________________________________________

Preheat the oven to 475˚F. Line two large heavy-duty rimmed sheet pans with parchment paper. In a mixing bowl, toss the Brussels sprouts with the 1/4 cup olive oil and 1 tsp. of the salt. Divide the sprouts between the two sheet pans and arrange them, cut-side down. Roast until brown and tender, 16 to 18 minutes. (The tops will be dark brown and crispy and the sprouts should feel tender when pierced with a paring knife.) Transfer the sprouts to a mixing bowl.

Combine the balsamic vinegar, maple syrup, orange juice, and orange zest in a small saucepan. Heat the mixture over medium heat just until it’s hot (you will see a bit of steam), but not simmering. Remove the pan from the heat and add the cold butter, several pieces at a time, whisking constantly until the mixture is smooth and creamy. (Don’t reheat the mixture or the butter will break and the sauce won’t be creamy.) Pour the sauce over the sprouts and stir thoroughly but gently until most of the sauce has been absorbed. Transfer the sprouts and any remaining sauce to a serving platter and serve right away.

Serves  8

Farm Critters, Chicken Butts, and A Thanksgiving Butternut Squash Gratin

When I first got to the Vineyard, I was totally charmed by farm animals. Back in my suburban  I-95 world, I hadn’t run into a lot of pigs and goats, much less a baby lamb or a pair of hulking oxen. I traipsed (okay, maybe trespassed) all over the Island, taking pictures of anything with four legs or feathers. I got lucky I guess, or maybe I was entranced, because I took a lot of nice photos of critters (some of my favorites are above). Sometimes the animals even looked at the camera.

Lately it seems my luck (or probably my patience) has run out. Granted I don’t have a lot of time to wander around stalking farm animals. But when I do get close to a critter with the camera, I get mooned. Yeah, butts. Especially chicken butts. This week, I wanted to blog about our chickens…and their beautiful eggs…and about how wonderfully efficient they are at processing leftover food (and other farm compostables, like pumpkins). Yes, I know I’ve talked about this before, but after ranting about waste and expense last week, I had to share the satisfaction I got out of watching the hens efficiently turn our jack-o-lantern into fertilizer.

But the ladies would not cooperate for a good picture. When I got in the pen with them (to avoid shooting through the deer fencing), of course they all rushed away from the pumpkin and towards me. I crouched down to frame the shot and Perky jumped on my leg for a visit, while Martha and Opti started pecking at my boots. Very distracting. In the end, the best shots I got were of tail feathers. Granted those chicken butts are cute (and soft, too). But they’re still butts.

Oh, well. I finally realized that Thanksgiving is a breath away, and that it might be nicer if I paid attention to our country’s biggest cooking holiday for this blog instead of some chicken whim of mine. So I marched into the kitchen and made a new version of one of my favorite gratins from Fast, Fresh & Green—this one with a big enough yield to warrant a place on the Thanksgiving table. It turned out so well that Roy and I both snacked our way through the afternoon on it.  It features my favorite fall harvest combo—butternut squash, leeks, and corn—and, oh yes, a bit of cream and Parmigiano, plus thyme and just a hint of lemon.

Next week, I’ll offer up a green veg recipe for the Thanksgiving table—if I don’t get distracted by a baby goat or a stray dog or something.

Thanksgiving Gratin of Butternut Squash, Corn & Leeks

Since Thanksgiving is a crazy cooking day, here are some make-ahead tips for this recipe: Dice, chop, and otherwise prep all the ingredients ahead. (And buy already-peeled butternut.) Then go ahead and sauté your leeks, garlic, and corn, too. (If you’re working hours ahead, refrigerate.) You can grease the gratin dish ahead as well. Then all you’ll have to do is combine and assemble before cooking.

_________________________

2 tablespoons plus 1 teaspoon unsalted butter

1 1/2 cups fresh breadcrumbs

2 tablespoons extra-virgin olive oil

kosher salt

2 cups thinly sliced leeks (white and light green part only, about 2 large), rinsed well but not dried

2 teaspoons minced fresh garlic

1 1/4 cups corn kernels (from about 3 ears)

1/2 cup plus 2 tablespoons heavy cream

1/2 cup plus 2 tablespoons low-sodium chicken broth

½ teaspoon freshly grated lemon zest

freshly ground black pepper

2 teaspoon finely chopped fresh thyme leaves

1 1/4 pounds peeled, seeded butternut squash, cut into ½-inch dice (about 4 cups)

1/2 cup finely grated Parmigiano-Reggiano

__________________________________

Heat the oven to 400 degrees F. Rub a 2-quart shallow gratin dish with 1 teaspoon of the butter.

In a small bowl, combine the breadcrumbs, 1 tablespoon of the olive oil, 1/4 teaspoon salt and mix well.

In a medium (10-inch) heavy nonstick skillet, melt the remaining 2 tablespoons of the butter with the remaining tablespoon of olive oil over medium-low heat. Add the leeks (with any water still clinging to them) and 1/4 teaspoon salt; cover, and cook, stirring occasionally, until softened and translucent, about 5 minutes. Uncover and continue to cook, stirring frequently, until the leeks are shrunken and lightly browned in places, 10 to 12 minutes more. (The pan will dry out.) Add the minced garlic and stir until softened and fragrant, about 30 seconds.

Add the corn kernels, 1/4 teaspoon salt, and a few grinds of fresh pepper. Cook, stirring, until the corn has lost its raw look, is glistening, and is slightly shrunken, about two minutes. Take the pan off the heat and let the mixture cool for five to ten minutes.

Combine the heavy cream and the chicken broth in a liquid measure. Add the lemon zest, a scant 1/2 teaspoon salt, and a few grinds of pepper. Stir to mix well.

Add the corn-leek mixture and the herbs to the diced squash and toss well to combine. Transfer the mixture to the gratin dish and arrange as evenly as possible. Sprinkle the Parmigiano on the vegetables. Stir the cream mixture one more time and pour and drizzle it over everything. Be sure to scrape out any seasonings left in the liquid measure. Sprinkle the breadcrumbs evenly over all.

Bake until the crumb topping is deep golden and the squash is tender when pierced with a fork, 42 to 45 minutes. The juices should have bubbled below the surface of the vegetables, leaving browned bits in a line around the edge of the pan.

Serves 6 to 8 as a Thanksgiving side dish

An Apple Taste-Test, A Giant Leek, and A Butternut Squash Soup for All

Libby loves apples. Roy does not. Nevertheless, I subjected them both to an apple taste-test last Saturday. They were good sports, even when I suggested they use words like “tangy” and “tart” to describe an apple’s flavor rather than “sour” and “yucky.” Actually, Libby was right there with me through the whole thing, but we noticed Roy was standing next to the compost bucket for most of the time, and I’m not entirely sure he really ate all of his apple portions. (Libby, on the other hand, called for a time-out half way through; I’d forgotten to tell her just to take a bite, not eat the whole wedge.) It didn’t matter that we all gradually lost steam, because the last apple was so crisp and juicy and flavorful and WOW! that it woke us all up and easily claimed it’s spot as number one. It was a Honey Crisp, which probably won’t surprise many of you. This one happened to be Island grown, too, and it was a doozy.

We picked up all the apples at Morning Glory Farm’s farm stand that afternoon, where we’d gone to get a big pumpkin for Libby and some vegetable treats for me. One thing I couldn’t resist tucking into my shopping bag was the biggest leek I’d ever seen—so big that I had to measure it when I got home! So much nicer than the average stubby leek you get at the grocery store…Anyway, while we were browsing, I noticed all the apples and remembered that I wanted to do a taste test again this year. There are so many different varieties of apples that you could never stop discovering delicious new ones.

The selection we brought home this year didn’t include some favorites like Fuji or Gala or Pink Lady. But we did find two new ones we liked a lot in addition to the Honey Crisp (double accent on the crisp). The first was Golden Supreme, a tastier relative of Golden Delicious. It was crisp, juicy and closer to the sweet end of the scale than the “sour” end. (Perhaps that’s why we three immediately liked it.) Supposedly a good cider apple, the Golden Supreme would be great in pies and tarts, too. Our third favorite, Paula Red, had a nice balance of acidity and sugar, but its texture and flavor make it a better destination for applesauce than pies.

In the end, we (at least Libby and I) enjoyed most of the apples. Except the Rambour Franc (also known as the Summer Rambo), which was quite mealy. I thought I remembered loving this apple, and it turns out I’m not crazy. (Well at least not on this issue.) I just read that it’s a summer apple—not a keeper—and best eaten shortly after picking. I must have had one earlier in the season last year. No matter—the texture didn’t bother the hens, who were only too happy to dispense with it.

But that still left me with pieces of apples, one giant leek, and one lovely Morning Glory Farm butternut squash to do something with this morning. So I made soup. But instead of loading the soup up with spices, I let the main ingredients star—and just gave them a hefty punch of fresh ginger. Often I make more complex squash soups, but I wasn’t in the mood today, and I liked what I wound up with—a very silky texture and pleasant flavor. If I had all the time in the world, I’d make a different soup every day. Well, actually, I did made soup every day in one job long ago. Come to think of it, maybe soup once a week is fine. After all, it’s hard to feed leftover soup to a chicken.

Butternut Squash, Apple, Leek & Ginger Soup

Choose apples with assertive flavor for this soup. I wound up using the Honey Crisp (better known as an eating apple) and the Golden Supreme and I think they worked nicely with the fresh ginger. As always, be very careful when pureeing hot soup. In fact, let the soup cool down a bit before blending (in batches) and keep a dish towel over the lid with just a small opening to vent steam. I used my garden Serrano peppers (which are very mild) in this soup. If yours are hot, pare out the veins and seeds before chopping and use less.

________________________________

2 tablespoons unsalted butter

1 tablespoon extra-virgin olive oil

2 cups sliced leeks (white and light green parts only, from about 3 medium leeks), well washed

kosher salt

1 tablespoon plus 1 teaspoon finely chopped fresh ginger

2 teaspoons minced fresh garlic

1 to 2 small Serrano peppers, finely sliced (less if peppers are very hot)

4 cups medium-diced peeled butternut squash (about 1 pound 3 ounces, or the neck of a medium squash, peeled)

2 cups medium-diced peeled apples (about 12 ounces or 2 apples)

5 cups low-sodium chicken broth

a few drops balsamic vinegar

garlic chives or chives for garnish

___________________________________________

In a 4- to 5-quart Dutch oven, heat the olive oil and butter over medium heat. When the butter has melted, add the leeks (with any water clinging to them) and 1/2 teaspoon kosher salt, and stir well. Cover and cook, stirring occasionally, until the leeks are well-softened, about 10 minutes. Uncover and continue to cook, stirring frequently, until the leeks are lightly browned, 6 to 8 minutes more. Add the ginger, garlic, and Serranos and cook, stirring, until fragrant, about 30 seconds. Add the butternut squash, the apples, 1 teaspoon kosher salt, and the chicken broth and stir well. (Scrape the bottom of the pan as well to bring up any flavorful browned bits.) Bring to a boil, reduce to a simmer and cook, covered, until the squash and apples are very tender, about 20 minutes. Take the pot off the heat, uncover, and let cool for 10 to 15 minutes.

Puree the soup in three batches (fill the jar only about half way or just a little more) and cover the blender lid partially with a folded dishtowel (leave a vent opening uncovered to let steam out) to prevent hot soup from splashing on you. Combine the batches in a mixing bowl. Taste. Add a few drops of balsamic vinegar to pick up all the flavors and stir well. Taste again. Add salt only if necessary. Return the soup to the (rinsed) soup pot and gently reheat. Serve hot, garnished with the chives.

Serves 4