Category Archives: main dishes

And We’re Off! Simple Green Suppers is Live!


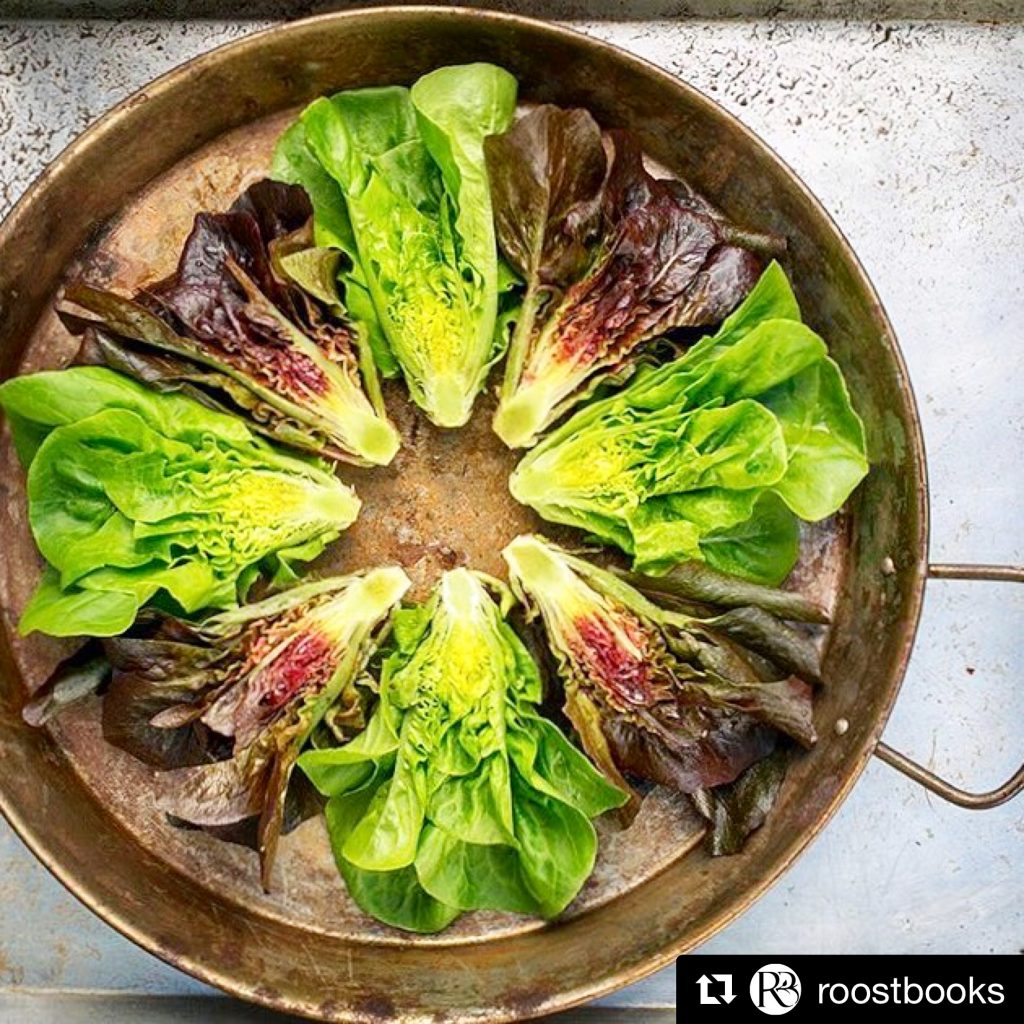
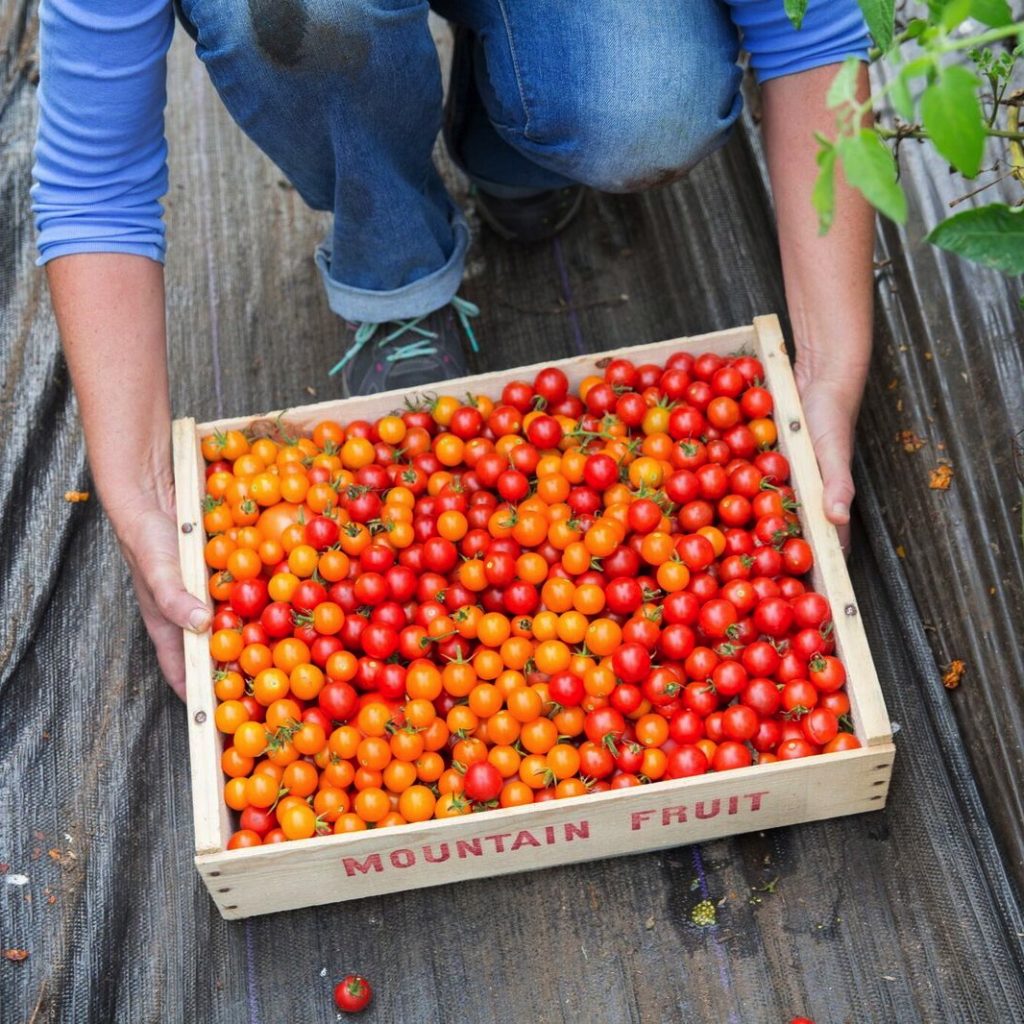
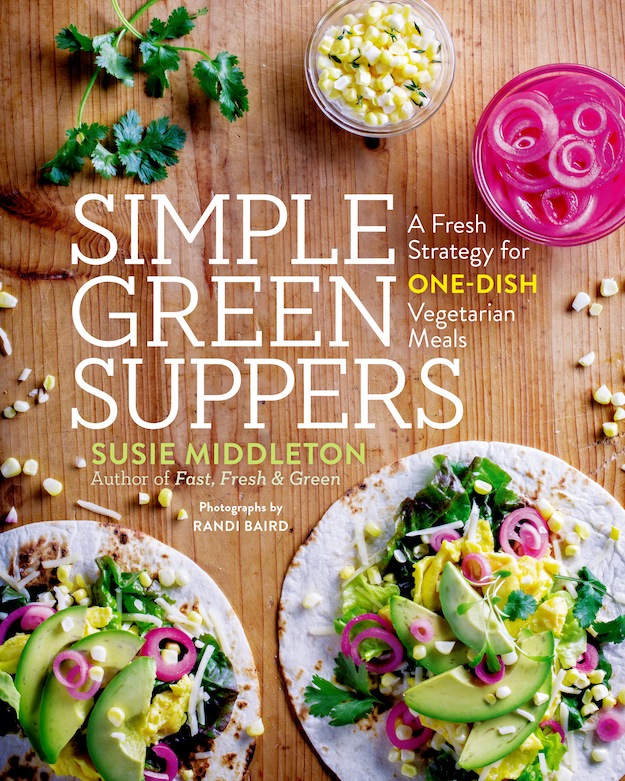
Just a quick update to let you know that Simple Green Suppers is off and running. We had a really awesome launch party at Morrice Florist. And we’re getting some great buzz! This week I’m guest-hosting the Instagram feed of my publisher @Roostbooks so please follow along to ogle some of @randibairdphoto‘s amazing photos. You’ll even get a glimpse at some great photos (like the one above of Little Gem and baby red Romaine lettuce, and the one of cherry tomatoes below) that didn’t make it into the book. (We took a ton of photos.) And while you’re at it, be sure to follow my Instagram feed @sixburnersue. If you’ve gotten the book and are enjoying it already, we’d really appreciate a 5-star (!) review on Amazon!

Just published this week–a great feature in Martha’s Vineyard Magazine (photo below) highlighting some of the recipes from the Toast chapter (with my, ahem, opinionated viewpoint on the best way to make toast!). And a feature blog on MindBodyGreen using leftovers from the Baby Potato, Greens, and Chickpea Hash in dishes throughout the week.

I’ve been doing some radio interviews and tomorrow I’ll return to my favorite–The Food Schmooze with Faith Middleton on WNPR.  Back in my Fine Cooking days, I used to ride up to New Haven every few weeks to be on the show with Faith and Chris Prosperi, and it was so much fun. 

In just a few weeks, I’ll be at the Grand Tasting at the Martha’s Vineyard Wine Festival (Saturday, May 13), so if you happen to be going, stop by my table! And I promise I’ll let you know about other events and news coming soon. (Garden is getting going too.)

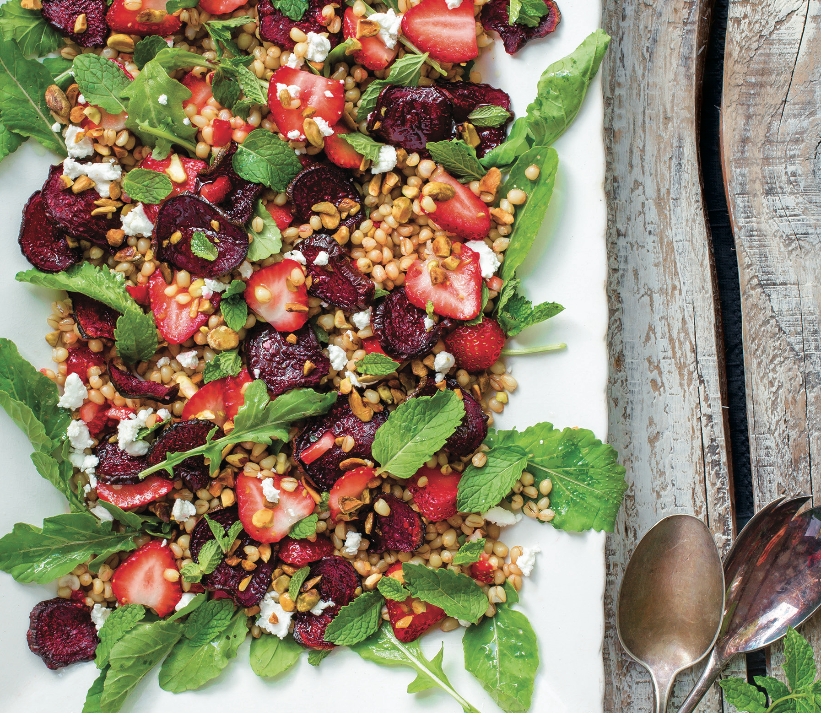
In the meantime, I leave you this teaser from today’s Instagram activity. Quick Roasted Beet, Arugula, and Wheatberry Salad with Strawberry-Balsamic Dressing. (That would be on page 40 in the book!)

All photos here by Randi Baird Photography.

A Few Small (and Big) Ways to Use Miso In Recipes


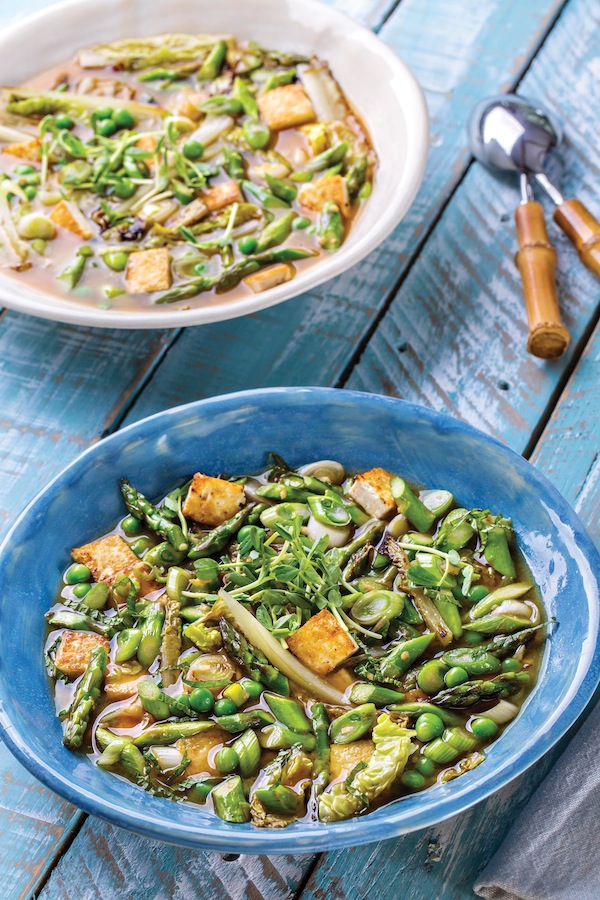
When I tiptoed over the mostly-vegetable line into the all-vegetarian world, I finally got friendly with miso. So when I wrote Simple Green Suppers, I took advantage of miso’s deep flavors in several different ways. Probably my favorite recipe is a simple Lemon Miso Butter (great on sautéed vegetables or in grain dishes), but I also use miso in a delicious Crystallized Ginger-Miso Dressing (on an asparagus and grapefruit salad, and more), and in soups and broths, including the wonderful Spring Miso Broth with Stir-Fried Asparagus, Romaine, Scallions, Tofu, and Mint recipe pictured above.

If you’re not friendly with miso yet, here’s a little background: Miso is a nutritious fermented bean paste, and making it is an ancient Japanese craft. Usually, fermentation begins with soybeans, salt, and koji (a fermenting fungus); sometimes grains or legumes like barley, rice, or chickpeas are added. The miso is aged for varying lengths of time; generally older misos will have more umami flavor and the saltiness will have mellowed somewhat.

The color of miso will tell you something, too. Generally, the lighter colored misos are the mildest (and most versatile). I use white (sometimes labeled yellow) shiro miso most often, especially for dressings and sauces (top right in photo below). But I also like the darker misos—in broths and soups especially. Great miso is now made in the U.S. In fact, my favorite miso is made right here in Massachusetts, by the South River Miso Company in Conway. I especially like their one-year azuki bean miso (bottom right below) and their three-year barley miso (middle bowl, below), but all of their varieties are delicious and worth seeking out.

However, you don’t have to go out of your way to find miso. Most major supermarkets and all natural food stores carry at least a small variety of misos. All misos have an alluring sweet-salty-funky flavor that’s hard to beat for flavor-boosting.

It’s fun to try out a range of misos; just know that you may need to use a little less of a darker miso or add a little more water (or other ingredients) to taste. A good starting point for soup is one tablespoon per cup of water. If you like, you can strain your broth if using a chunky artisan miso. Keep in mind that all miso pastes destined for soups should be dissolved in hot water, but never boiled. Boiling can destroy flavor and nutrients.

So now, time for you to get friendly with miso, too—though maybe you already are! Either way, I think you’ll enjoy these two recipes. (And you’ll have to get a copy of Simple Green Suppers for the soup recipe above. I know, what a tease. But just a friendly reminder if you haven’t pre-ordered the book–well, you could certainly do it now.)

Lemon-Miso Butter

Make this handy flavor-booster ahead; cover and keep in the fridge for up to a week. In Simple Green Suppers, I use this butter in a recipe for Stir-Fried Black Rice with Baby Bok Choy and Asparagus, and in a recipe for Parsnips and Creminis with Wheat Berries. But you can use it on any stir-fried or sautéed veggies or with rice; be sure to add the butter to the recipe while the veggies or grains are still hot. Double this recipe if you like. (If you need to soften butter quickly to make this, cut it into a few pieces and microwave for a few seconds, but don’t melt it.)

Makes ¼ cup

2 tablespoons unsalted butter, softened

2 tablespoons white (Shiro) miso

1 teaspoon freshly grated lemon zest

In a small bowl, combine the butter, the miso paste, and the lemon zest. Use a small silicone spatula or wooden spoon to mash together until well combined.

Recipe copyright Susie Middleton, from Simple Green Suppers: A Fresh Strategy for One-Dish Vegetarian Meals (Roost Books).

Crystallized Ginger-Miso Dressing

I have to admit this dressing is one of my favorite recipes. It features crystallized ginger with assists from lime, maple, and miso. I love it on an Asparagus, Grapefruit, and Sushi Rice recipe in Simple Green Suppers, but it is equally good with broccoli, green beans, cabbage, or lettuce. Double or triple if you like.

Yields about 1/3 cup

1 tablespoon rice vinegar

1 tablespoon plus 1 teaspoon fresh lime juice

1 tablespoon plus 1 teaspoon minced crystallized ginger

1 tablespoon maple syrup

1 tablespoon minced cilantro

1½ teaspoons white (Shiro) miso

In a small bowl, combine the rice vinegar, the lime juice, the crystallized ginger, the maple syrup, the cilantro, and the miso. Whisk well.

Recipe copyright Susie Middleton, from Simple Green Suppers: A Fresh Strategy for One-Dish Vegetarian Meals (Roost Books).

Top Photo by Randi Baird, Randi Baird Photography


What One Vegetarian Really Eats (and Cooks)

DSC_0189A year ago this January, I hopped a very short fence. I went from eating not a lot of meat, to eating no meat at all. Technically, I became a vegetarian, though I have eaten the occasional fish or shellfish when it has been offered to me.

Now that I am in the thick of writing and editing the text and recipes for my vegetarian cookbook (which will come out in Spring 2017 from Roost Books), I am thinking hard about strategies and tips for readers. But I am also thinking about what fun I have had developing the recipes—how the creative challenge for this book has been the best yet, because it is has essentially given me a blueprint for eating.

I can’t wait (though I must—and, ahem, I must also finish the manuscript, complete the last photo shoot, and a list of other things…before it even gets to my editor!) for the book to come out so that I can cook from my own recipes every night. And sadly, I won’t be able to share any of those recipes with you until we get close to publication.

But I thought for those of you who are contemplating a shift, it might be interesting to share with you what one vegetarian really eats. (And I say really or actually, because this is not theoretical. Since I, like most year-round Islanders, cook the vast majority of my food at home, this is truly what I eat.) Remember, I’m not a nutritionist—my gig is cooking technique—and I’m only one person, so take it for what it is.

DSC_0217

I will say, though, that cooking vegetarian truly is a blast (if you like to cook), because the creative possibilities are endless. I never come at it from the “what can I replace the meat with” (in fact, I’m not big on meat-replacement type proteins); I always come at it from the “how I can turn these vegetables into a delicious, filling meal?”

Here are some of the things I eat and cook with on a regular basis (in addition to the obvious—vegetables!):

DSC_0197Nuts. Toasted. Toasted nuts have an almost cocoa-like umami thing going on, so they taste delicious and are very filling. Almonds are at the top of my list, with pecans and walnuts next. I stock pine nuts, hazelnuts, and, of course, peanuts and natural peanut butter. (Pepitas, too, which are seeds, not nuts.) I use nuts not just in salads, but in grain and bean dishes, too.

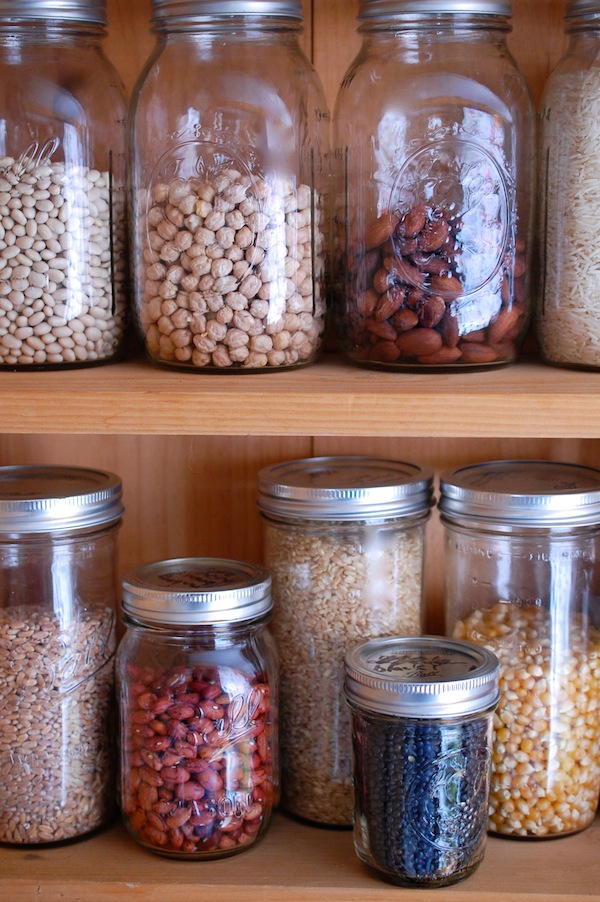
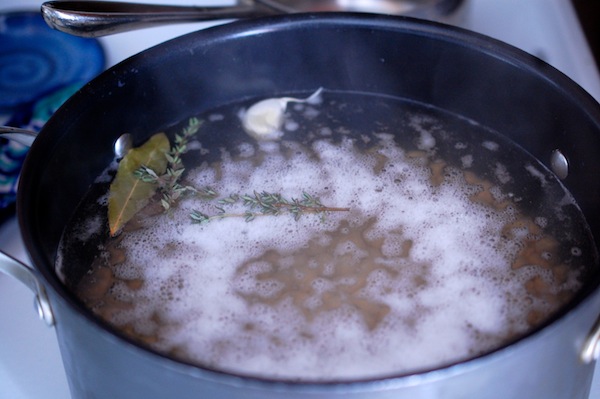
Chickpeas. Sheepishly, I have to admit that, like a lot of vegetarian converts, I have fallen totally in love with chickpeas. (I’m simmering a pot on the stove right now on this first snowy day in January, though I stock canned chickpeas, too.). In addition to the great flavor and rich texture, chickpeas have a distinct advantage over most other beans and legumes—they hold up well in all kinds of cooking. In fact, you can even brown them by sautéing or roasting; and as you know, I love browning because that means caramelization and extra flavor!

DSC_0199

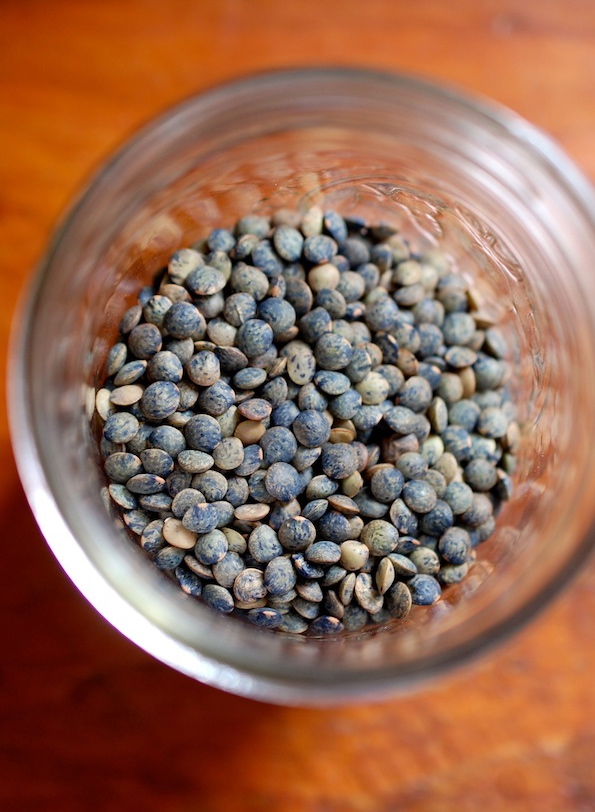
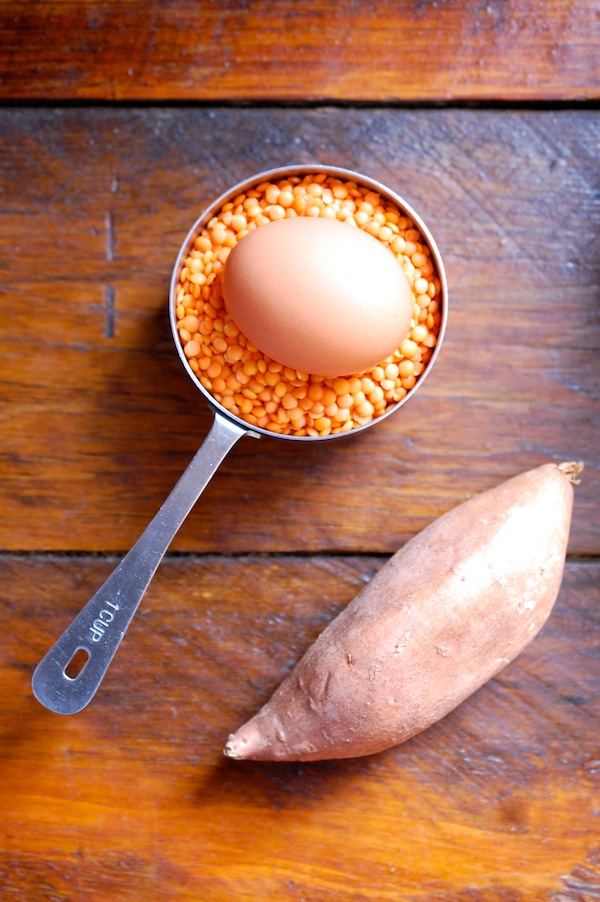
Lentils. While I eat all beans (always soaked first before cooking, or canned), I’ve become more of a fan of lentils in the last year. For one thing, they cook very quickly—in less than 20 minutes in many cases. Secondly, you can now find black Beluga lentils and small French green (DuPuy) lentils in many more grocery stores, and I find the firmer texture of these more pleasing than that of the larger common brown lentils. Red lentils are also quick and delicious in soups and porridge-like dishes. And all lentils have assertive flavors that go well in soups, salads and sautés.

lent


DSC_0186Avocados. Yes, I know we think of avocadoes as a vegetable, but they are really something unto themselves (and technically a fruit), and I have to mention them because they have that uniquely rich and filling thing going on (good fat, don’t you know?). And, I eat a lot of them. On toast, in salads, with tortillas, in egg sandwiches. Alone with lemon and olive oil and salt. With chickpeas! And nuts!

Grains. I’ve always been a fan of grains, but I like them and use them even more now that I’ve figured out I can cook them ahead and hold them in the fridge or freezer, and that I can use them sometimes almost like a condiment, or as one of many ingredients in a dish. Sitting down to a big bowl of grains can get monotonous. Putting some grains in a salad, a soup, a taco, whatever, is much more interesting. My favorites are wheat berries, farro, short grain brown rice, and oats (granola for breakfast!) but I stock lots of (gluten-free) quinoa, as well as millet and many different kinds of rice.

DSC_0200

Eggs. I’m not vegan or dairy-free, so I still turn to eggs for some of my protein. (That may change at some point, but for now, I’m an egg eater.) The best thing about an egg (like a lot of these ingredients that play well with others) is that you can add one to just about anything. Sure, you can make a meal just on eggs, but you can also add an egg to a grain or bean dish, a broth or a sauté.

DSC_0224

Those are the things that I most often pair with vegetables to make my meals. (Remember, vegetables have protein, too.) I do eat pasta and bread , too, though I choose whole-grain when I can. And again, I often use these carbs in smaller amounts rather than in starring roles. But there’s nothing like a great piece of artisan multi-grain toast for transporting any number of veggie toppings to a great destination.

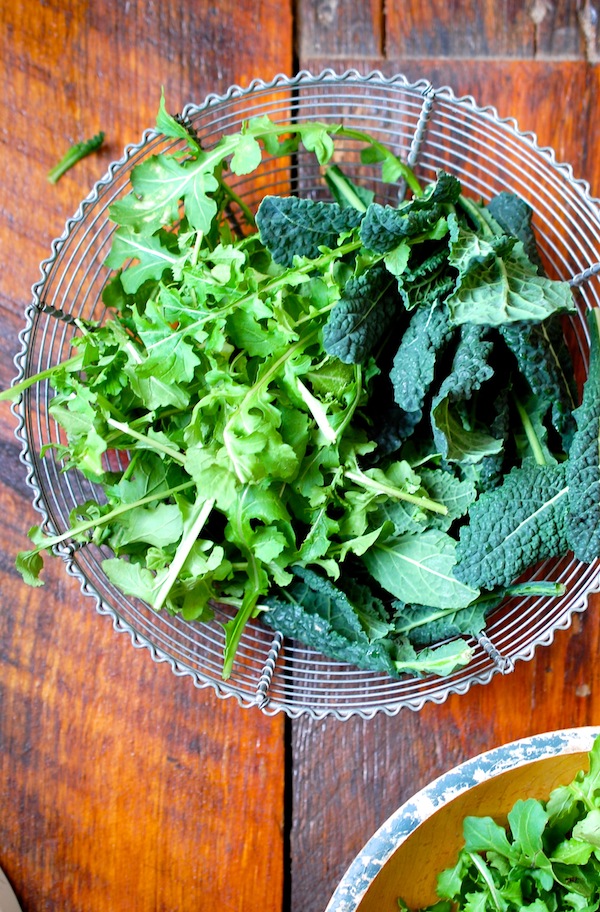
As for the vegetables themselves, I eat leafy greens every day. They are the easiest, quickest, and most flavorful vegetables to make a meal with. (The arugula in this picture was taken from plants still growing under hoops outside.) Alliums of all kinds (onions, shallots, garlic, scallions) make their way into almost everything I cook, and my fanaticism for tomatoes extends to this time of year with roasted tomatoes in the freezer and sundried tomatoes in the fridge. This time of year I also gravitate towards colorful root and winter vegetables like carrots, sweet potatoes, and butternut squash. Along with the aromatic ingredients I always keep around—citrus, fresh ginger, vinegars, hot sauces, spices, maple syrup and honey, miso, tahini, tamari, parmesan cheese—and any fresh herbs I can procure (my rosemary pot is indoors, still alive, for now!), I eat well.

DSC_0211

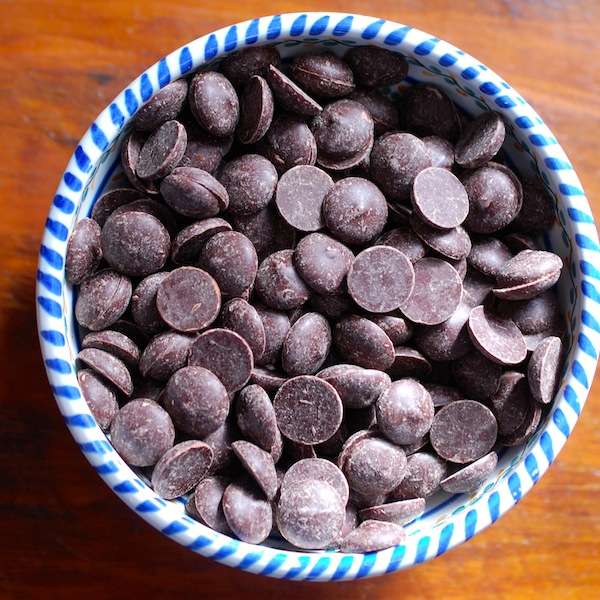
Happy eating and cooking to you, too, in this new year. And don’t forget the daily chocolate imperative. (My little bowl of chips, always by my side!)

DSC_0202


Deviled Eggs and Popovers, Bread Pudding and Frittata Recipes–Happy Easter Eggs!

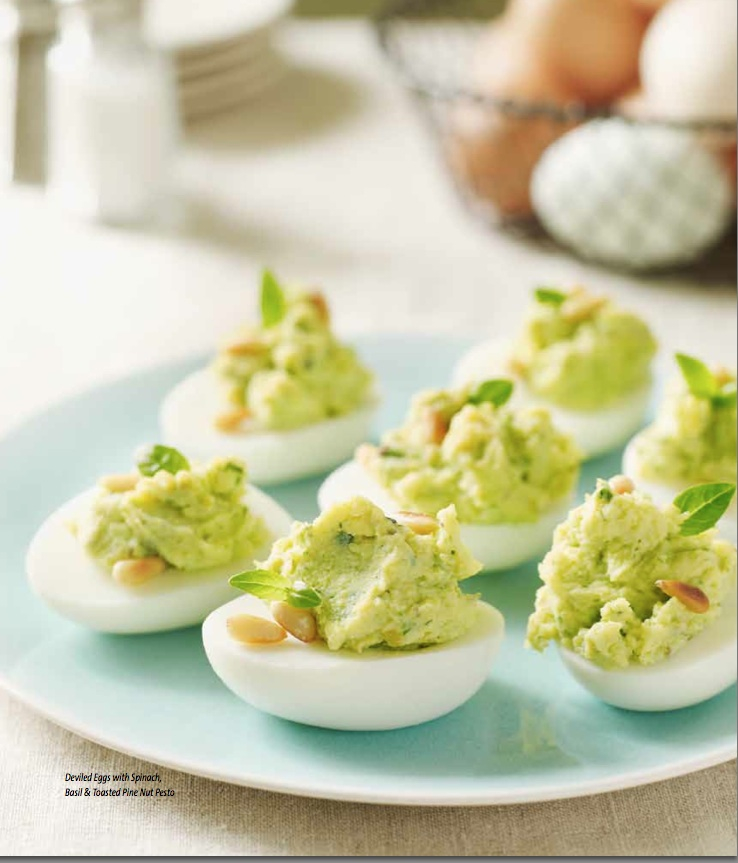
 deviled eggs

With hundreds of chickens (how many exactly, we’re not sure, as witnessed by a heated argument last night about this statistic), Easter eggs take on kind of a special importance around here. I started my day off washing eggs, and Roy will wash more when he gets home. The farm stand will be busy all weekend, with lots of seasonal residents on Island and, of course, eggs on everyone’s mind.

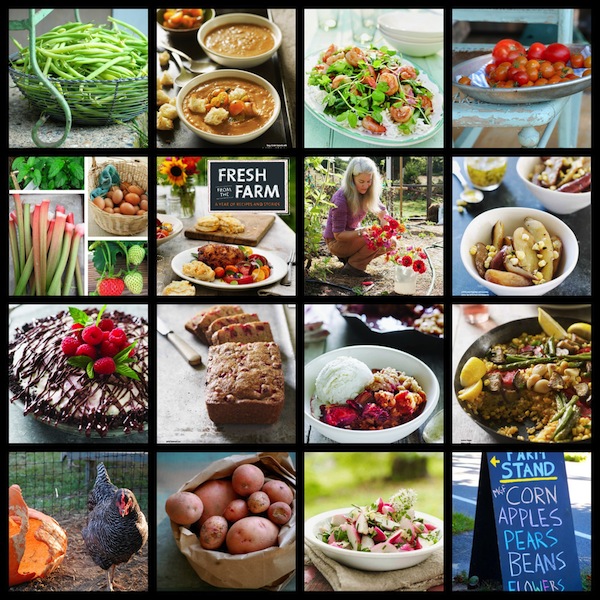
So since we’re busy here today, I am doing a quick round-up of some of my favorite egg recipes on Sixburnersue.com, and also giving you, right here, our farm recipe for deviled eggs, which happens to feature a yummy spinach-basil pesto recipe. (Recipe is from Fresh From the Farm: A Year of Recipes and Stories.) I hope you have a joyful—and delicious—Easter weekend. (And, oh, we have somewhere between 400 and 500 chickens, with 200 more on the way…we think.)

Here are my family’s favorite, popovers.

Here’s a nice asparagus bread pudding for a crowd.

Here’s a lovely leek, spinach, thyme, and gruyere frittata with more egg ideas, and here’s another delicious frittata with fingerling potatoes and goat cheese. 

And one of my very favorites–the Green Island Farm egg sandwich.

And here are those delicious deviled eggs:

Deviled Eggs with Spinach, Basil & Toasted Pine Nut Pesto  

Recipe copyright Susie Middleton, from Fresh From the Farm (Taunton Press, 2014) Photo at top by Alexandra Grablewski.

Even if you don’t live with 557 hens and a man who’d be happy eating meat loaf and deviled eggs every day, you should still have a great recipe for deviled eggs in your repertoire. Our favorite version goes green (and tasty) with a little Spinach, Basil & Toasted Pine Nut Pesto (recipe below) and a touch of lemon zest. No fancy piping required, though we do like to garnish with a tiny basil leaf and a pine nut. Wait to garnish until just before serving.

Makes 12 deviled eggs

__________________________________________

6 Hard-Cooked Eggs (see note below), peeled and sliced in half lengthwise

3 tablespoons mayonnaise

1 1/2 teaspoons Spinach, Basil & Toasted Pine Nut Pesto (recipe below), drained of excess olive oil

1/2 teaspoon fresh lemon juice

1/4 teaspoon freshly grated lemon zest

Kosher salt

Freshly ground black pepper

12 tiny fresh basil leaves, for garnish

12 whole toasted pine nuts, for garnish

_________________________________________

Gently scoop or squeeze out the yolk from each egg half. Arrange the whites on a plate.

In a small bowl, mash together the yolks, mayonnaise, pesto, lemon juice, lemon zest, a pinch of salt, and several grinds of fresh pepper until you get a smooth, pale-green filling. (I use a small silicone spatula.) Using a small spoon or mini spatula, spoon or dollop the mixture evenly back into the egg white halves. (I like to let the mixture sort of fall off the spoon, but do whatever works for you!)

Garnish each half with a basil leaf and a pine nut.


Spinach, Basil & Toasted Pine Nut Pesto

Recipe copyright Susie Middleton, from Fresh From the Farm (Taunton Press, 2014)

Lovely green spinach leaves are my inspiration for a greener basil pesto.    Together with toasted pine nuts and lots of Parmigiano, they make a delicious, versatile sauce, which I use not only in deviled eggs, but over grilled veggies, in vinaigrettes, and even as a burger mix-in. Don’t forget to toast the pine nuts before you make the pesto.

Yields 1 1/3 cup 

_________________________________

1 large clove garlic

1 1/2 cups packed fresh baby spinach leaves

1 1/2 cups packed fresh basil leaves

1/3 cup toasted pine nuts

1/2 cup extra-virgin olive oil; more if needed

1/3 cup grated Parmigiano-Reggiano

Kosher salt

Freshly ground black pepper

1 teaspoon fresh lemon juice

_______________________________

In the bowl of a food processor, process the garlic clove until it is minced. Add the spinach, basil, pine nuts, and 1 tablespoon olive oil. Process, stopping to scrape down the sides as necessary, until finely chopped. Add the Parmigiano, 1/4 teaspoon salt, several grinds of fresh black pepper, and the lemon juice and process until well-combined. With the motor running, gradually pour the remaining olive oil through the feed tube and process until you get a nice smooth pesto. If the pesto is too stiff, add a bit more olive oil, 1 tablespoon at a time, until you get the right consistency.


To Hard-Cook Eggs: To cook eggs for salads or to use as deviled eggs, put them in a saucepan wide enough to hold them in one layer and cover them cold water (that comes up an inch over the eggs). Bring the water to a slow boil over medium-high heat and once the water is boiling, immediately remove the pan from the heat. Cover the pan and steep the eggs for 12 minutes. Carefully drain off the hot water and run cold water over the eggs until they are cool to the touch. (Or plunge into an ice-bath.) Refrigerate until completely chilled before peeling.


In the Winter Kitchen: Grains, Greens, Citrus & Sunlight

cit 4My pal Barney and I have been in the Laboratory all morning, mad-sciencing up creations to satisfy my winter cravings. For some reason, I am fixated on dark green vegetables, grains of all kinds, and citrus in every color. Plus, crunchy stuff. (My new love is roasted chickpeas). And then, I am putting them altogether for lunches and dinner. (My other new fixation is cooking grains ahead.)

DSC_0294

So first Barney and I had a nice cup of coffee.

DSC_0303

Then we snacked on the roasted chickpeas I made yesterday. Honestly, these are better fresh out of the oven, but they do keep okay for a day or two.

DSC_0063

Here’s how you make them: Rinse, drain, and thoroughly dry a can of chickpeas. Toss with enough of a neutral oil  (I like grapeseed) to coat well and season with about ½ teaspoon kosher salt. Spread on a parchment-lined baking sheet and roast at 400°F until browned and shrunken, 30 to 35 minutes.

DSC_0250

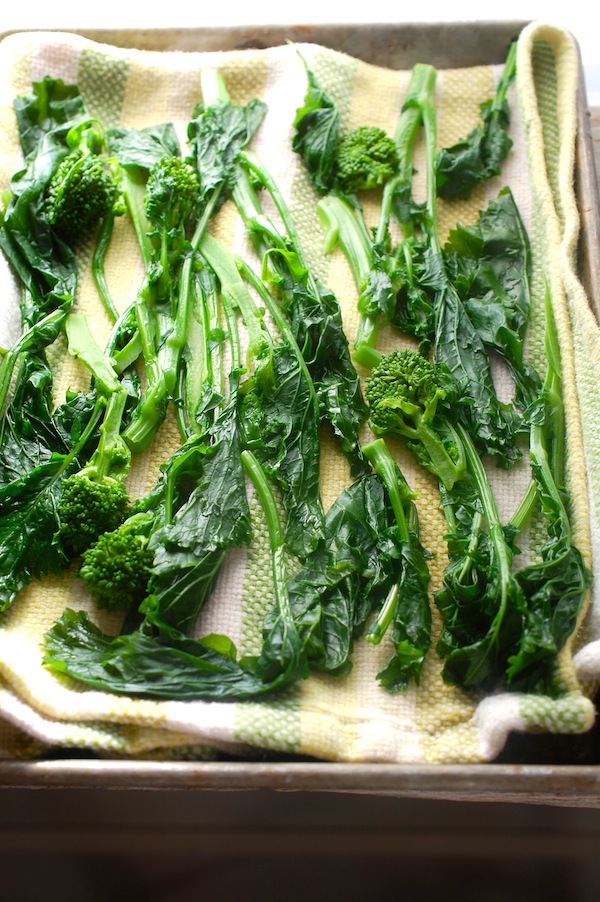
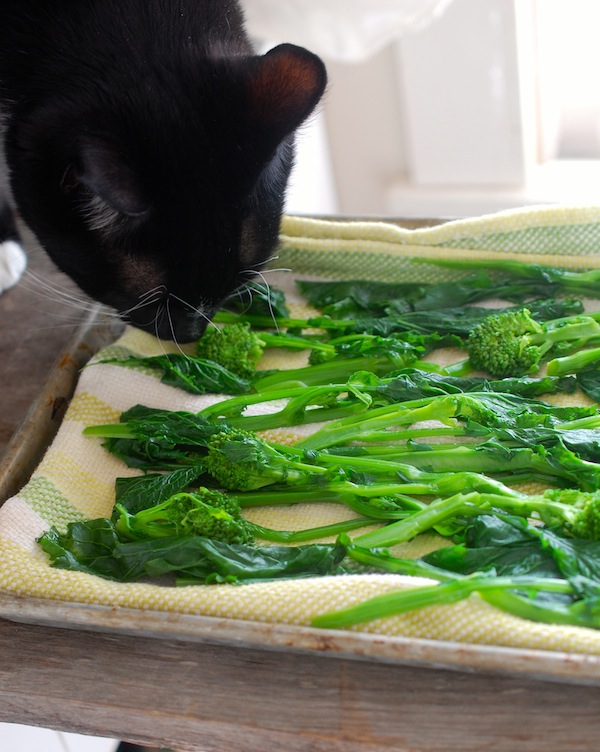
Then Barney and I par-boiled some broccoli raab. If you’re not familiar with raab (aka rapini) it’s actually a turnip relative and has a distinct bitterness which is highly satisfying, especially when paired with lemon or anything spicy. (Goat cheese is another good companion for raab, as are garlic and ginger.)

DSC_0270

You all know how much I love to roast most vegetables, and that I’m not much for boiling them, but broccoli raab is an exception. I almost always cook it in boiling salted water for about 4 minutes—even before finishing it in a sauté pan with garlic, as I did today. I also cut the thickest parts of the stems off and then split the stems down the middle so that the pieces are all about the same thickness.

DSC_0065

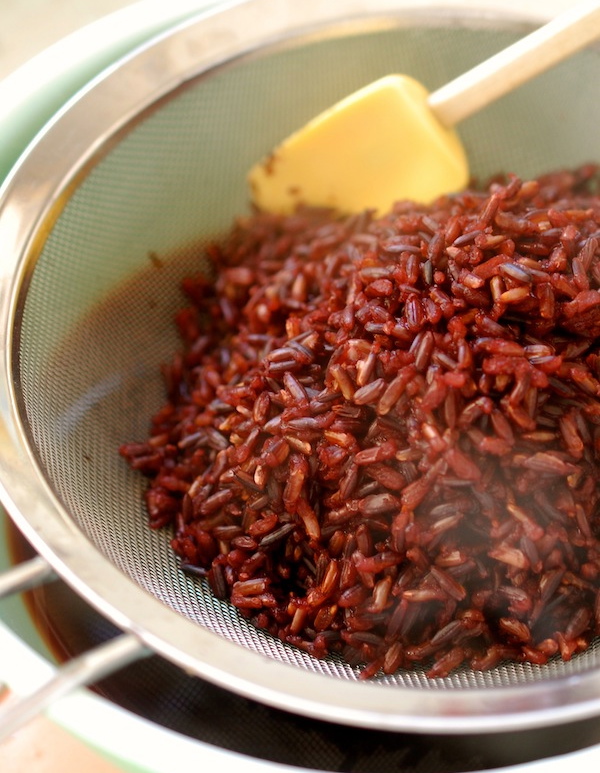
Meanwhile, on the back of the stove, a big pot of boiling water was going. I plunked a cup of black rice in it, stirred, lowered the heat just a tad (still boiling) and let the rice cook in the boiling water until tender. (About 28 minutes for me today.) Then I drained it and spread the rice on a sheet pan to cool.

br

I refilled the pot, brought it to a boil, and cooked a cup of farro the same way. I overcooked the farro today because I forgot to look back at one of my own recipes and thought I remembered the cooking time was about 40 minutes. In reality, it’s only 30. (There is also such a thing as par-cooked farro that cooks in 10 minutes.)

DSC_0094

That mistake aside, this boiling water method (as opposed to the pilaf method with a measured amount of water) is really a great way to cook grains in big amounts that you want to store and eat throughout the week. You don’t have the frustration of finding all your liquid simmered out and your grain undercooked; simply use a spoon to fish out a few grains every so often to see if they’re done. They should still be just a tiny bit toothy when you bite into them, and with some grains, just beginning to split open a bit.

DSC_0237

You can store them (after thoroughly cooling them) in plastic containers in the fridge. (You can also freeze cooked grains.) One note on salt: I don’t salt the water at first but tend to add some halfway through cooking. That said, the grains will still need to be generously seasoned when prepared for eating.

DSC_0175

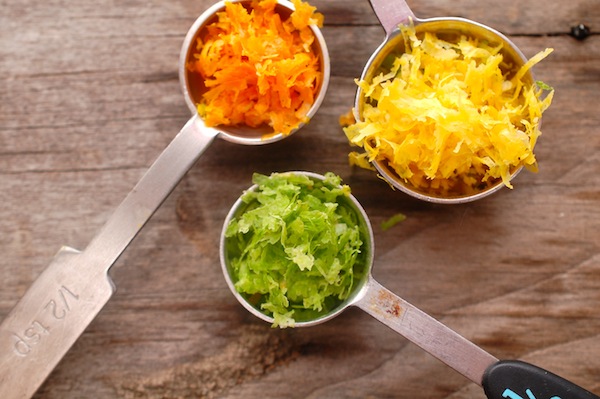
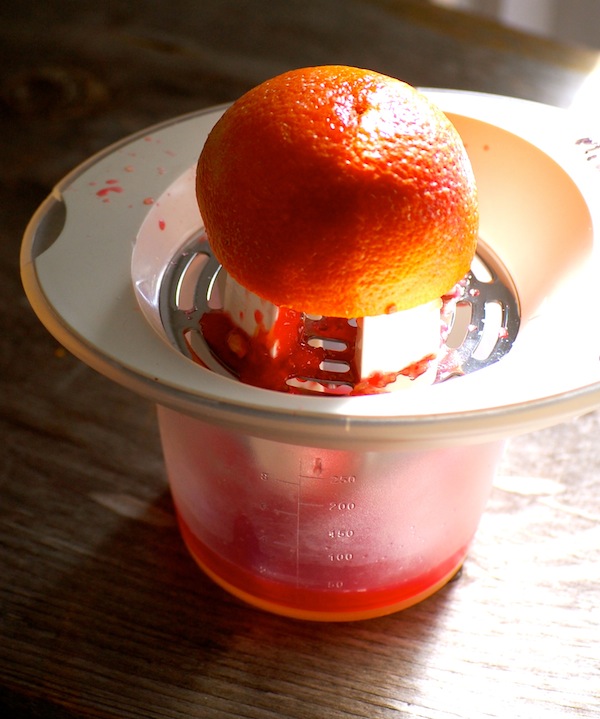
Next Barney and I pulled out all the various citrus fruits I’ve been stockpiling—a Meyer lemon, a blood orange, a Minneola orange, a clementine, a navel orange, a regular lemon, and a lime. Mostly I just wanted to cut them open, take pictures of them, and then eat some…but I also wanted to dress my grains with some juice and zest.

DSC_0228

I am a citrus zest freak and put it in everything.

Lastly, I put everything together to make lunch (which wound up being dinner, too, though I did make pork chops for Roy, since he does not appreciate the meatless meal the way I do!). I put a cup of cooked black rice and a cup of cooked farro into a microwavable bowl and reheated them for a minute and a half. (Remember this, as it is easy to do on a weeknight if you’ve got grains already made and stashed in the fridge.)

DSC_0314

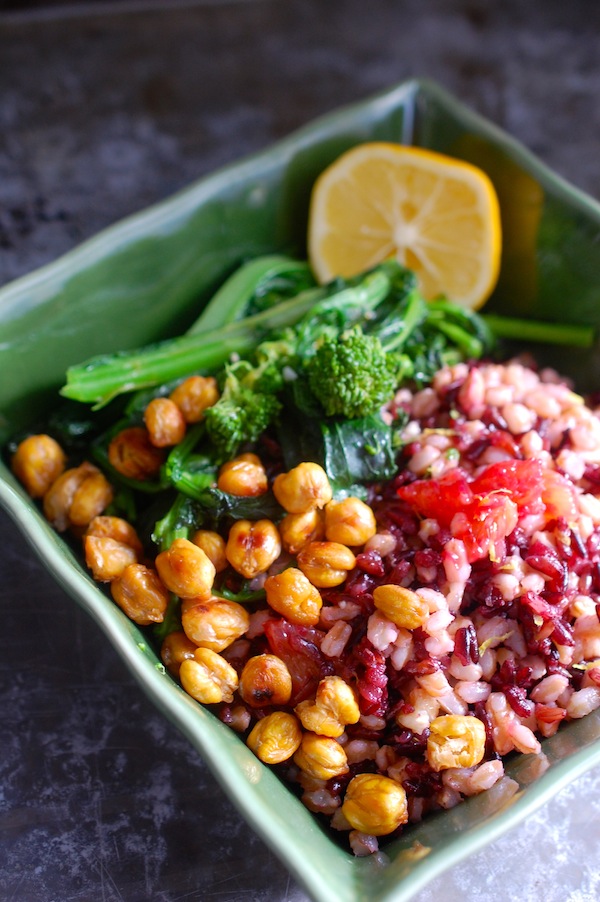
I juiced ½ of the blood orange and ½ of the Meyer lemon and added about a tablespoon of each to my grains. I seasoned with plenty of salt, too. In a little skillet, I heated up a bit of oil and a tiny bit of butter and softened ½ teaspoon or so of minced garlic in it. I tossed most of the softened garlic in with the grains and added 4 ounces of the broccoli raab to the skillet, tossing to warm it through in the garlic-scented oil. I stirred up the grains, tasted, and piled in a serving dish, arranging the raab and a smattering of roasted chickpeas alongside. I squeezed the other Meyer lemon half over the raab, and at the last minute, decided to cut the blood orange segments out of the unused half and toss them in, too. Often I used dried fruit and toasted nuts with grains, but it was a nice switch to have the crunchy chickpeas and the fresh citrus segments.

DSC_0362

There are lots of ways to turn grains into filling meals (think beans, roasted veggies, sautéed mushrooms), so I encourage you to do your own mad-scientist experimenting. Just be sure to season with plenty of bright ingredients (vinegars, fresh herbs, Asian condiments, as well as citrus).

But don’t be surprised when your trusty assistant loses interest in the experiment—especially if there are birds outside the window to keep an eye on.

DSC_0300


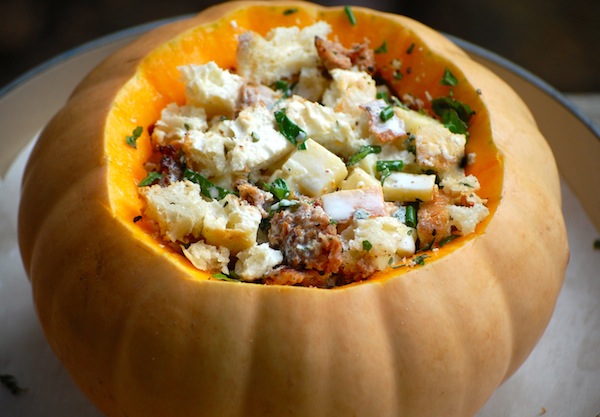
Stuffing and Roasting a Long Island Cheese Pumpkin. Yes.

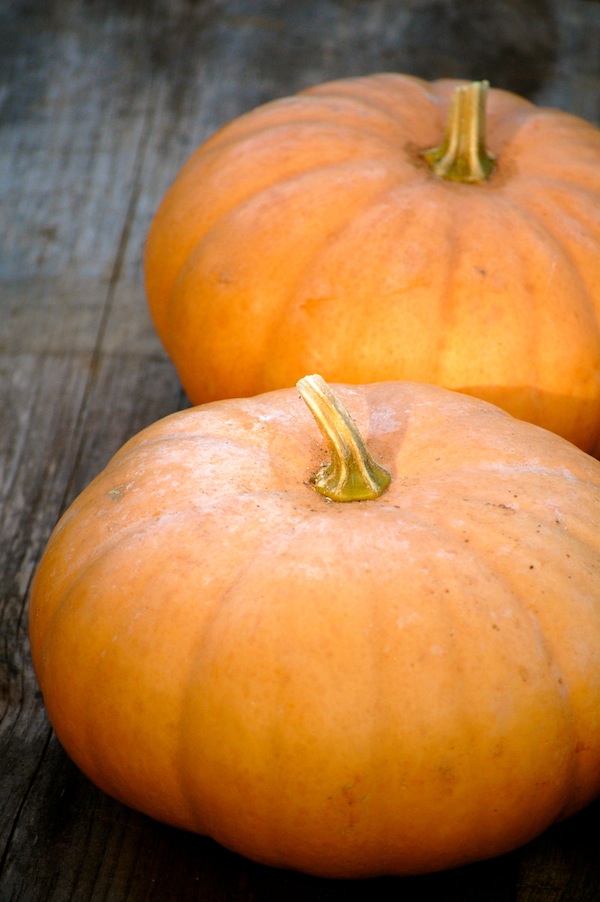
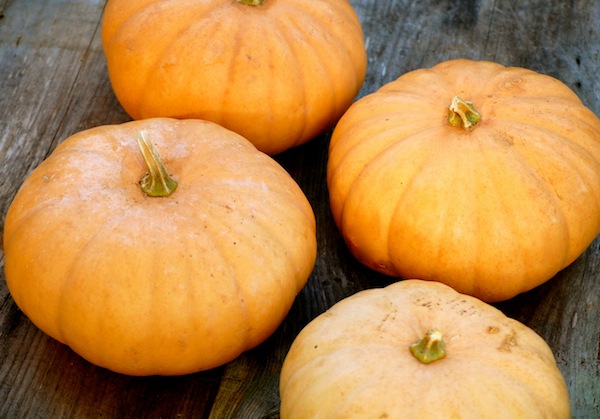
DSC_3456Totally out of character, I decided to stuff and roast a pumpkin. Totally in character, I decided to do this because someone gave me a very pretty pumpkin, one that seemed at first glance like it would be a more efficient holder-of-stuffing than a sugar pumpkin. Not that there’s anything wrong with sugar pumpkins. But, look,  these Long Island Cheese pumpkins (above) are pretty suave looking, don’t you think? Okay, maybe suave is a bad word, but elegant, graceful, or charming would do. Charming in a Cinderella-coach kind of way. In fact, there is something called a Cinderella pumpkin that looks quite similar to a Long Island Cheese pumpkin, only it’s bigger and redder.

The Long Island Cheese pumpkin came from Simon Athearn, farmer at Morning Glory Farm here on the Vineyard. Roy ran into him on a run to Morning Glory to pick up some regular field pumpkins we were buying wholesale for our farm stand. Simon is a good cook himself. (And among other things, a talented grower of Long Island Cheese pumpkins, as Morning Glory Farm has many of them this year. Take note, Islanders—go get yourself one!) He handed the pumpkin to Roy and suggested I make something with it. He mentioned he’d been filling his with a mix of potatoes and sausage. And he said that the squash itself was delicious.

When the pumpkin arrived at home, I was intrigued, because I actually tried to grow a few of these last year (no luck) and anything that has “cheese” in the name is okay with me. (The name comes from the fact that the pumpkin resembles a wheel of cheese, not from its flavor.) So I thought for once I’d put aside the little thing I have about stuffed vegetables.

I poked around and found a recipe by Dorie Greenspan, a cook and food writer I greatly admire. (She actually taught me a course on recipe writing at culinary school many years ago.) The recipe, called Pumpkin Stuffed with Everything Good, is from her book, Around My French Table. (But you can find it here on Epicurious.). The “everything good” part does not refer to a kitchen sink list of stuff, but a lovely combination of bread, gruyere cheese, thyme, a bit of bacon (I used sausage), garlic, some herbs, and heavy cream. Now that is my kind of stuffing, I thought.

DSC_3363

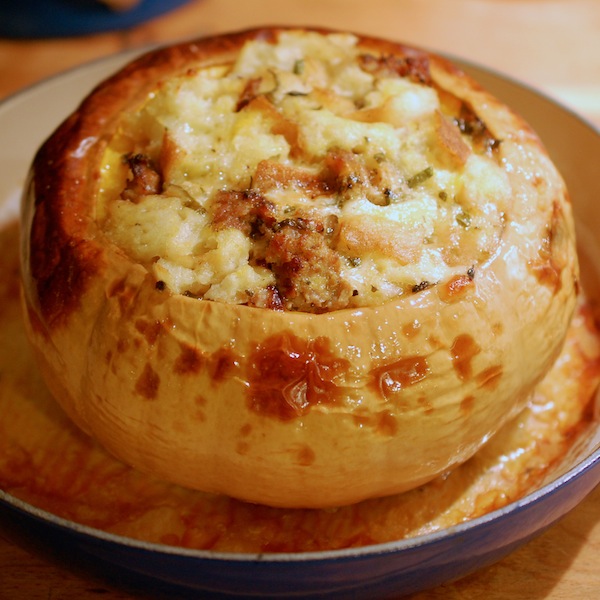
Ultimately, a recipe for stuffing and cooking a pumpkin can only really be a set of guidelines, but I have to say, Dorie’s “guidelines” (her tips, her timing, and the proportions of ingredients) worked beautifully—of course! Our 4-pound pumpkin was tender and the stuffing puffed in about an hour and 45 minutes. We took the cap off at that point to brown the top of the stuffing a bit.

DSC_3384

We let the pumpkin rest out of the oven for 10 minutes or so.  (Unfortunately, it was now too dark to shoot a nice photo in natural light, so this scary indoor one will have to do.) Then we scooped out the stuffing, which had a lovely ethereal, almost soufflé-ish texture, along with the tender bright-orange squash flesh. The stuffing was delicious, infused with the flavors of the thyme, sausage, garlic, and gruyere. And the squash, like its color, was bright tasting—almost a bit citrusy, I thought. Very nice, and not at all stringy. (It turns out that Long Island Cheese pumpkins are of the Cucurbit moschata species, along with butternut squash and other squash that tend to have less stringy flesh. It is also an heirloom that once was grown widely for pie-making, and is now making a come back in popularity.)  Altogether, the stuffing with the squash made a really nice “one-pot” (one-pumpkin?) supper, with leftovers.

Now I am curious about what the Long Island Cheese pumpkin flesh would taste like roasted and caramelized. (You’d have to cut the pumpkin into wedges or slices to do that.) I think it would be great with a bit of goat cheese, cilantro, and a drizzle of maple-lime butter.

So maybe that’s why we’re now in possession of a few more of these lookers. Tomorrow I am off to give a Fresh From the Farm book talk at Old Sturbridge Village. Maybe I’ll take one of the pumpkins with me for show and tell!. And while I’m driving, I’ll dream up something else to do with the rest! Though I would definitely make Dorie’s recipe again. Maybe even with a sugar pumpkin.

DSC_3461

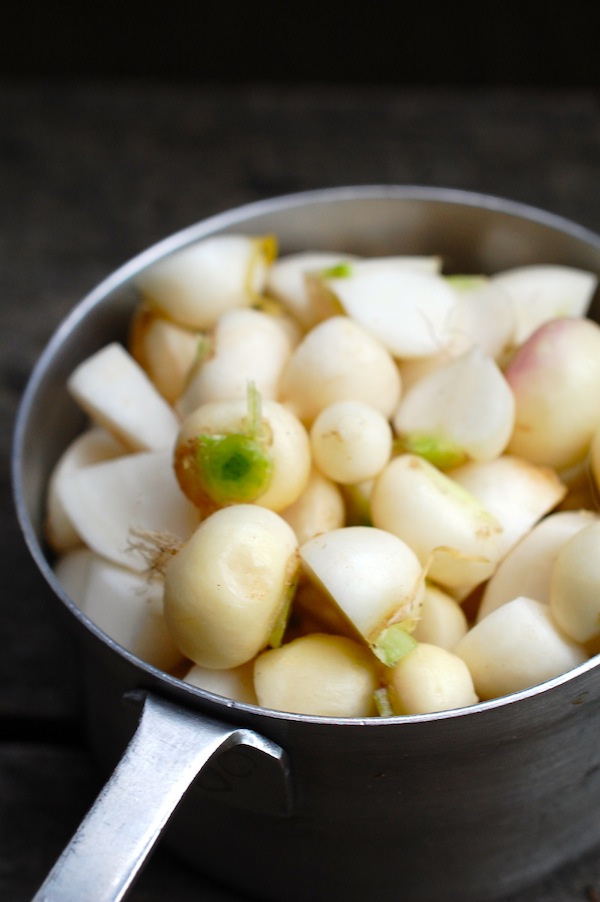
How DO You Cook Those Japanese Baby Turnips, Anyway?

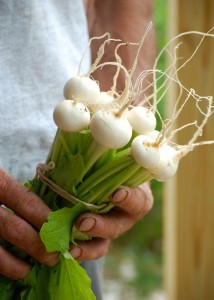
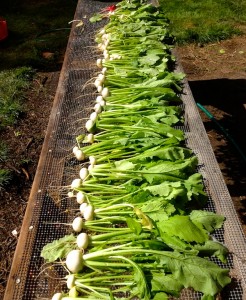
DSC_5455bunch 2We are just coming to the end of our first-ever harvest of Tokyo turnips, aka Japanese baby turnips. They aren’t really babies, but they are really delicious and beautiful and tender and juicy. (The greens are delicate and tasty, too.) We’ve never grown them (or a similar variety called Hakurei that’s popular at farmers’ markets) before, so I am pretty darn excited that they did well, and I can’t wait to grow more. I’m sure our cool weather helped, so I probably won’t seed again until fall.

It’s unusual for me to sell a vegetable at the farm stand that I haven’t cooked with much. And while I could certainly guess by the juicy raw texture and flavor that both minimal cooking (steaming, quick-braising, glazing) and browning (roasting, sautéing and stir-frying) would probably work with these, I couldn’t quickly reference one of my own recipes to help people cook them.

photo-64Fortunately, many of our farm stand customers are adventurous and competent cooks, so several of them forged ahead without me! One woman found a recipe for a nice sauté with potatoes in my fellow Island cookbook author friend Cathy Walther’s Greens, Glorious Greens, and on FaceBook, another cookbook author friend, Diane Morgan, suggested finishing a sauté with miso butter. I don’t have Cathy’s Greens book, though I know it’s a classic and well worth checking out, but I do have Diane’s award-winning Roots, and I can tell you there are more than a few really delicious recipes for turnip dishes in it, including one called Kashmiri-Style Turnips with Greens that led me to think I wasn’t crazy to want to pair cilantro (and ginger) with the baby turnips. The cilantro is flourishing in the cool spring garden, alongside the turnip bed.

Today (thank God for the rain!) I finally got a chance to mess around with the Japanese turnips in the kitchen. Since we had sold all the good-sized and blemish-free roots at the farm stand, I was left with only teeny-tiny roots and some bigger damaged roots, so I had no choice but to cut everything about ½-inch in size. (That meant no cutting for the teeniest mini-marbles.) But I think I would favor that size anyway—or wedges if all my roots were similar sized—for the quickest cooking. I did both a quick par-boil and a quick sauté, adding the greens only briefly to wilt at the end in the sauté , and with lemon and butter, found that the baby turnips really do make a super-quick spring side dish.

DSC_5438

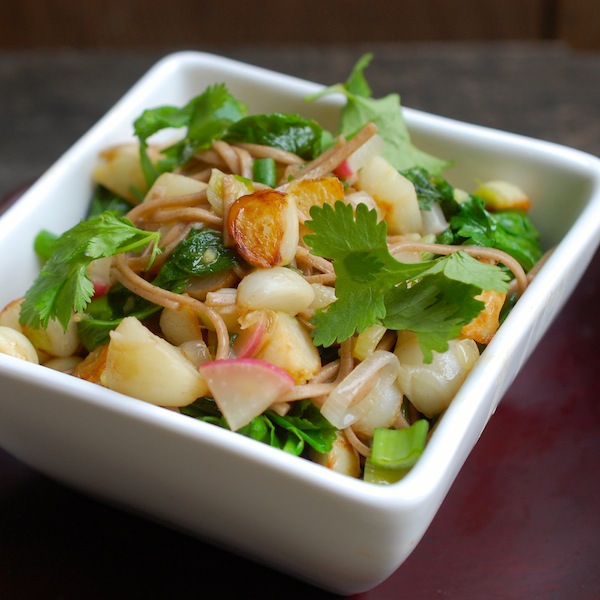
DSC_5233Then I indulged my desire to go Asian, and did a stir-fry with soba noodles—and ate the whole thing for lunch. (It would have served two easily with some grilled shrimp. Photos very top and below.) Originally I thought I might go all the way and turn it into an Asian noodle soup, as the greens would be so perfect for one of these. (And one small turnip—generally about 2 inches in diameter—has a lot of greens attached.) But I was afraid the turnip roots would get lost in the soup, so I kept it noodle-y. I’m including the recipe below in narrative form, as I wouldn’t want to give you a set-in-stone recipe without testing again with more uniform turnips and more exact proportions.


To make Soba Noodles with Stir-Fried Baby Turnips, Ginger & Cilantro: DSC_5470

Cook a handful of soba noodles separately in boiling water. (Follow the package directions, but shorten the cooking time a bit.) Drain and hold. Get out a non-stick stir-fry pan or a big non-stick sauté pan and heat just a couple teaspoons of vegetable oil (I used grapeseed oil) over medium heat. Add about a cup of diced baby turnip roots (trimmed) and a couple big pinches of kosher or sea salt. Cook, stirring, until lightly browned, about 5 minutes. Add a teaspoon of chopped fresh ginger, one-half teaspoon of chopped garlic, about ¼ cup thickly sliced spring onions or scallions, and a couple tablespoons of quartered, sliced radishes. (If I’d had a small Serrano pepper, I would have added a bit of it, chopped, too.)

Stir, cooking, until fragrant and a bit softened. Add a half cup of chicken broth or other broth and about 2 cups torn, stemmed turnip greens. Stir until the greens are wilted. Add the soba noodles and stir well to combine. Add a mix of fresh lemon (or lime) juice and soy sauce (one-half to one teaspoon of each or to taste) and a tablespoon or more of torn fresh cilantro leaves. Stir, remove from the heat, transfer to a serving bowl and garnish with a bit more cilantro and some sliced spring onion or scallion green tops.  (Serves 1 or 2)


photo-66P.S. I almost completely forgot. The first thing I actually did with the baby turnips a few days ago was to add them to one of my slow-sautes with carrots and potatoes. I’d forgotten I had a few in the fridge, and cut them just as a i was starting to cook the potatoes and carrots. They cook a little more quickly than purple-topped turnips, so you can certainly use them deliciously in one of these, but I might add them half-way through cooking.


It’s Pub Day! Celebrating Fresh from the Farm with a Winter Green Market Meatloaf Recipe

FFF square black sm collage b


This is it—Fresh from the Farm: A Year of Recipes and Stories is now officially published, as of this morning. Yippee!

I have no idea what this actually means. But I just learned that pub dates are apparently always on Tuesdays. Who knew?

My secret source revealed that the “pub” date is a date set in order to back up and create a “release” date, when the books begin to ship from the distribution warehouse. The scheduling masters try to work everything out (considering distance-to-travel, etc.) so that most of the books are in most of the outlets they’re supposed to be in by the “pub” date.

I like the idea of hundreds of boxes of Fresh from the Farms hopping on trucks and traveling far and wide to get to their destinations.

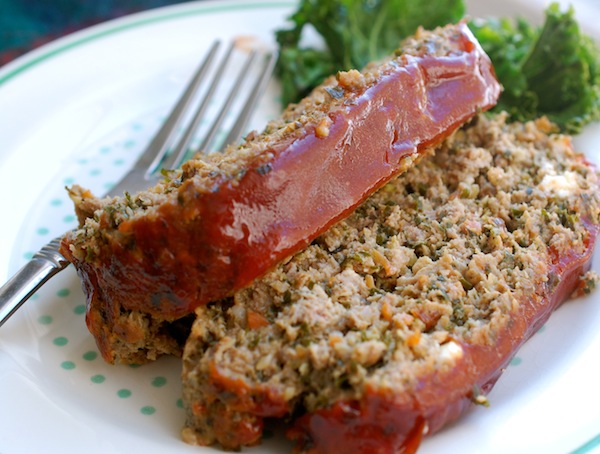
DSC_2568So to celebrate their safe arrival, I’m offering up what really and truly is one of my favorite recipes in the book—Winter Green Market Meatloaf. I named it that because I first made it with the goodies I got at our Winter Farmers’ Market—including onions, carrots, kale (yes, kale), local feta cheese, and local ground pork and beef. The meatloaf is terrifically moist and tasty, and the sauce on the outside has a great zing to it.

I also chose this recipe, because of course, it’s February, and meatloaf makes a little more sense than say, a corn sauté, or a strawberry crisp. But the cool thing about Fresh from the Farm, which is arranged seasonally in three sections, is that it spans almost the entire year, and the recipes in the fall section (like the meatloaf) are plenty appropriate for mid-winter, too.

I made the meatloaf yesterday so that I could take pictures of it (it’s not photographed in the book), and wound up sending half of it off with a couple of newspaper reporters who were here visiting the farm and talking with me about the book. (We have our big author event at Bunch of Grapes bookstore this Saturday at 3 pm, which I’m really excited about. Libby will be here and able to come with us, and I’ll be cooking up a storm this week to bring along plenty of recipe samples.)

For me, pub day is exciting, but considering the travel and the radio spots and all the other efforts coming up to promote the book, there’s no easing back. I am just looking ahead with an eye towards keeping my energy level up—while Roy and I also seriously begin to prepare for the growing season. Yikes. And while at first I thought it was a little strange to bring a book like this out in February, now I am really thankful that it gives me the window of opportunity to promote it this spring by doing some traveling before the farm gets really busy. Next stop: Washington, D.C., my hometown: A great event at La Cuisine on March 1, and the Dupont Circle Farmers’ Market on March 2. Maybe I’ll see some of you there!

Enjoy the meatloaf, and by the way, if you really want to make somebody happy on Valentine’s Day, this is a decidedly comforting way to do it. You could serve these mashed potatoes with it, or even the crispy smashed potatoes.

DSC_2576

Winter Green Market Meatloaf Recipe
 
Yes, there’s actually kale in this incredibly moist and flavorful meatloaf. (Feta cheese, too!) Tossing the veggies and plenty of garlic into the food processor makes a finely minced mixture perfect for lightening up meatloaf. I always eat at least a nibble of this warm out of the oven, but resting for a few minutes is a good idea; it will be easier to slice. It’s also delicious leftover, reheated or even cold, pâté style. Recipe copyright Susie Middleton, 2014, from Fresh from the Farm: A Year of Recipes and Stories (The Taunton Press, 2014.)
Author:
: main dish
Serves: 4 to 6
Ingredients
  • ¾ cup fresh breadcrumbs (about 1 English muffin)
  • 3 tablespoons milk
  • ½ cup ketchup
  • 2 tablespoons Worcestershire sauce
  • 2 tablespoons brown sugar
  • 1 tablespoon reduced sodium soy sauce
  • 1 tablespoon Dijon mustard
  • 1 large carrot (about 3 ounces), coarsely chopped
  • 1 small onion (about 4 ounces), coarsely chopped
  • 4 large cloves garlic, peeled
  • 1 small serrano pepper, cut into 3 or 4 pieces
  • 2 cups (packed) coarsely chopped kale (about 2 ounces)
  • 2 tablespoons unsalted butter
  • Kosher salt
  • 1 pound 80 to 85% ground beef
  • ½ pound ground pork
  • 3 ounces crumbled good-quality feta cheese
  • 1 large egg
  • Freshly ground black pepper
  • 2 tablespoons (lightly packed) chopped fresh oregano
Directions
  1. Heat the oven to 350°F. Line a large rimmed heavy-duty baking sheet with parchment paper.
  2. Put the breadcrumbs and milk in a small bowl and mix. Let sit. In a small bowl, whisk together the ketchup, Worcestershire, brown sugar, soy sauce, and Dijon.
  3. In the bowl of a food processor, combine the carrots, onions, garlic, serranos, and kale. Pulse until very finely chopped, scraping down the sides as necessary to incorporate the kale.
  4. In a medium (10-inch) nonstick skillet, melt the butter over medium-low heat. Add the chopped veggies and ½ teaspoon salt. (The pan will be crowded.) Cook, stirring, until gently softened and very fragrant, about 5 minutes. Transfer to a plate and let cool (about 10 minutes).
  5. In a large mixing bowl, combine the veggies, beef, pork, feta, egg, several grinds of pepper, the oregano, ½ teaspoon salt, the breadcrumb mixture, and 3 tablespoons of the ketchup mixture (reserve the rest for brushing on the loaf). Using your hands, mix all of the ingredients together thoroughly without mashing too much. Transfer the mixture to the baking sheet and shape into a long, narrow loaf about 9 inches long and 4 inches wide. Spoon the rest of the ketchup mixture down the length of the top of the loaf and gently spread or brush it over the sides.
  6. Bake the meatloaf until an instant-read thermometer registers 160° to 165°F, 55 to 60 minutes. Let rest for 5 minutes before slicing and serving.


Please note: The terrific finished food photos in the collage at top were taken by Alexandra Grablewski for Fresh from the Farm: A Year of Recipes and Stories (The Taunton Press, 2014).


How to Make a Savory Rustic Tart with an Easy, Flaky Dough

xroastedtomatotartxTART DOUGH 20

My affection for buttery, flaky crusts and sweet, caramelized vegetables came together one magical day many years ago. I realized that the wonderfully easy food-processor tart dough I had learned as a young cook at Al Forno restaurant wasn’t just for dessert. As much as I like a good rustic fruit tart (and there is one to die for—Little Pear Crostatas with Hazelnut Crisp Topping—in Fresh from the Farm), I am always looking for a good destination for roasted or sautéed vegetables, too. And these fun-to-make, free-form tarts (no special pan needed) are perfect for showcasing all kinds of veggies.

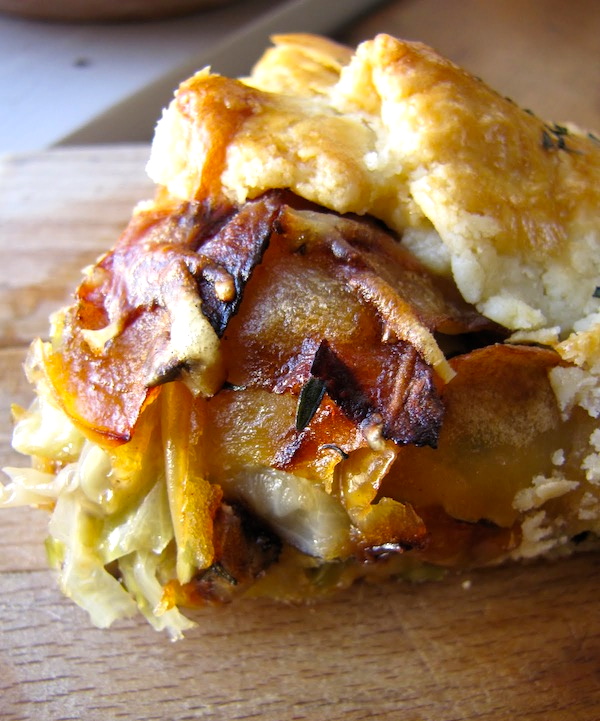
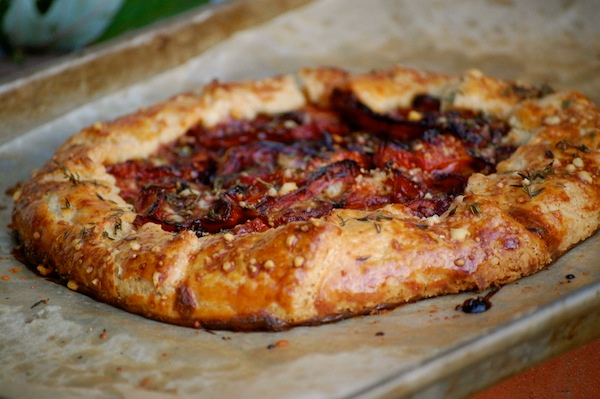
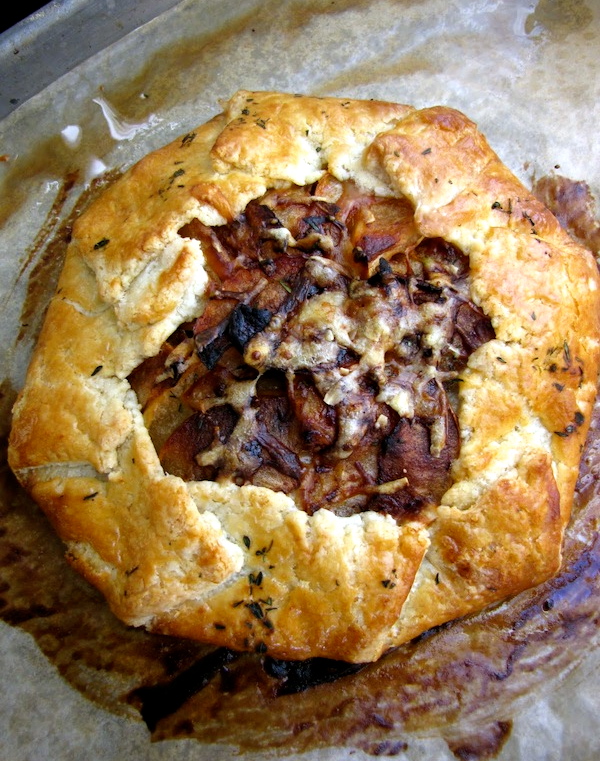
xTARTS Ratatouille 2I really played out this idea in The Fresh & Green Table with four delicious recipes—Roasted Ratatouille Tart with Goat Cheese & Mint; Seven-Treasure Roasted Winter Veggie Tart; Roasted Butternut Squash, Cranberry, Shallot & Pecan Tart; and Savoy Cabbage, Apple, Onion & Gruyere Tart (pictured here). And, not being able to help myself, I’ve done it again in Fresh from the Farm with one of my favorite ingredients, roasted tomatoes (see photo at top.)

I’ve never blogged about the tarts, though, because the recipes take up a lot of vertical space. With both the tart dough and the completed tart recipe needing to run together, your eyes would get tired!

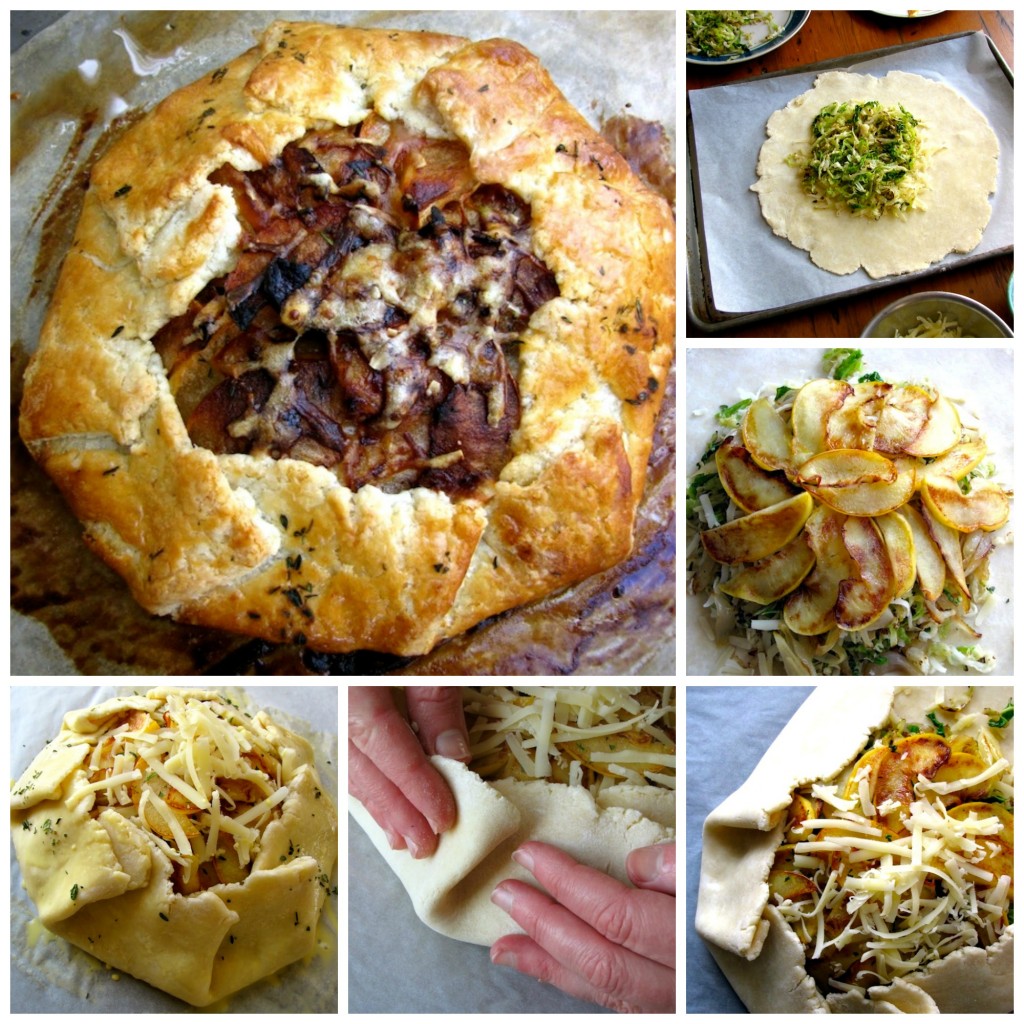
But today I was organizing some old photos and came across a series of decent test photos that Roy and I took while developing the tarts for The Fresh & Green Table. I realized that publishing them would go a long way towards illuminating the technique of making the dough and assembling the tarts, so I’ve decided to go ahead and post these photos here today. (Therefore, if you’re looking at one of the tart recipes in my book, you can now get a little idea of what the process is like by looking here. Next I should probably do a video!)

You’ll also find the tart dough recipe after the photos. And I will put the recipe for the Savoy Cabbage, Apple, Onion & Gruyere Tart (the one in these process photos) in a separate post so that you can print it out on its own (and make it right now, while winter cabbage reigns supreme). One of these days I will also finally get my recipe formatting software working—and then the recipes will truly be print friendly. It’s on the list, I promise.

By the way, rustic tarts are also variously called crostatas and galettes.

Making and Assembling a Savory Rustic Tart
xTART DOUGH 2

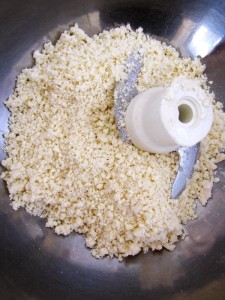
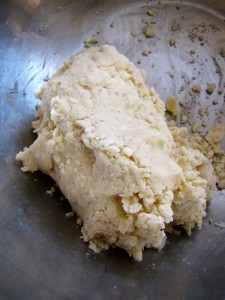
xTART DOUGH 1After pulsing the flour, salt, cold butter and a little ice water together in a food processor until the mixture looks like small pebbles, dump the mixture into a large mixing bowl. Use your fingers and the palm of your hand to knead the loose dough together into a mass.
xTART DOUGH 4xTART DOUGH 3

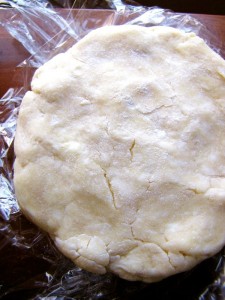
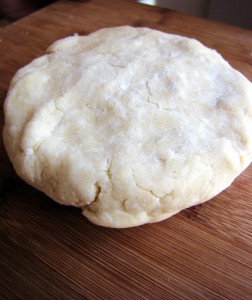
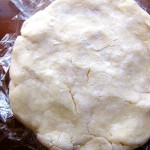
On a floured surface, pat and shape the dough into two flat disks, each about an inch thick. Wrap well in plastic and refrigerate for an hour or up to two days. Or freeze for a few weeks.
 

xTART DOUGH 5

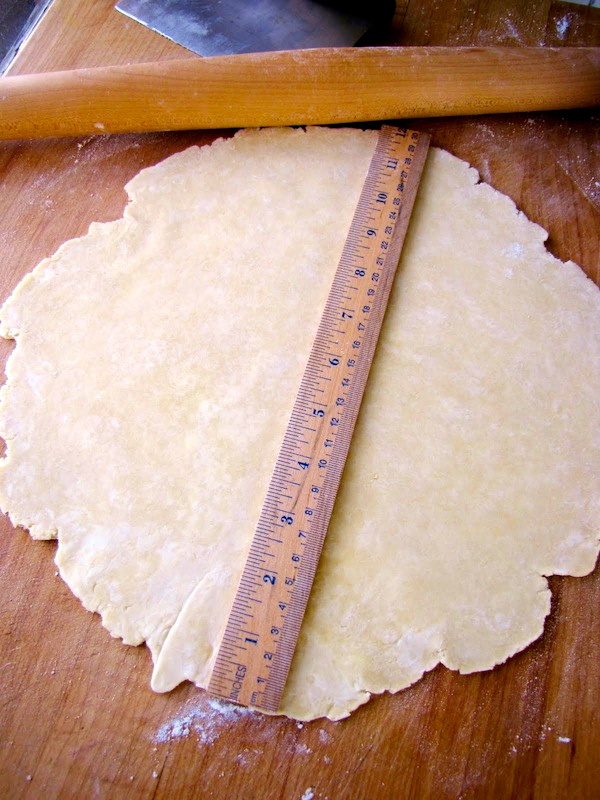
Remove dough from fridge 30 to 45 minutes before rolling. Flour a large surface, get out a ruler, and begin rolling the dough disk out, lifting the dough up, tossing a little more flour underneath, and giving it a quarter turn after every roll. The lifting and flour help prevent sticking; the turn helps with shaping a rough circle. (I like a French pin with tapered ends, which also helps to keep you from rolling over the edges of the dough, which will squish it.) Continue to roll the dough until you have a circle roughly 12-inches wide.
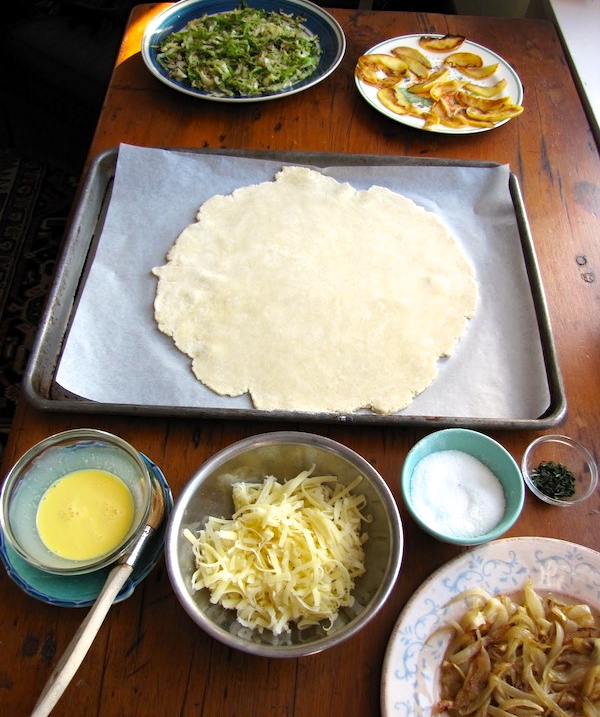
xTART DOUGH 6Transfer the dough to a parchment- lined heavy duty baking sheet.

Make an egg wash by combining an egg yolk and heavy cream.

Arrange all your filling ingredients around your baking sheet to make assembly easiest. (In most tart recipes, you can cook the filling ingredients during the time it takes for your dough to come back up to cool room temperature.)
xtart dough 8

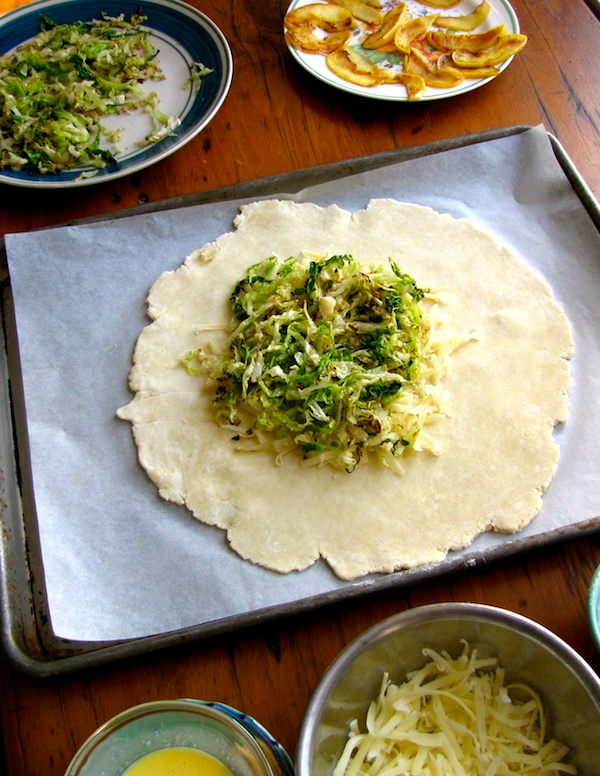
Arrange your first ingredient (usually cheese; in this case gruyere) in the center of the dough, leaving a 2-inch border all the way around. (Note, I could have done a much better job on this one–looks like 2 inches on one side and 4 on another! Maybe it was the camera angle.) Top with your next layer (in this case, sautéed cabbage).
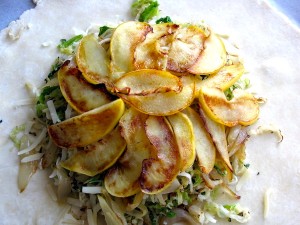
xTART DOUGH 11xTART DOUGH 10Continue layering your filling ingredients until you are done.
xTART DOUGH 14

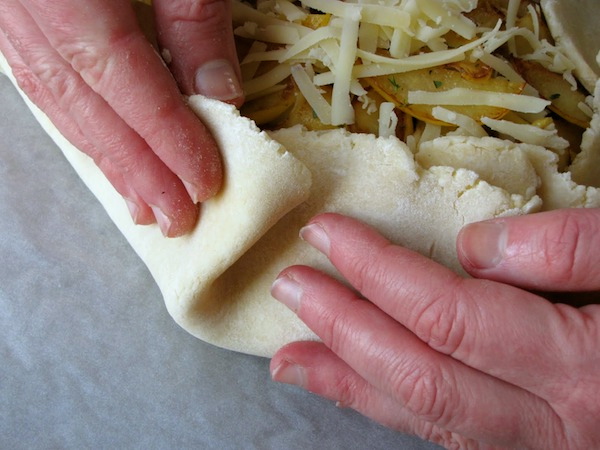
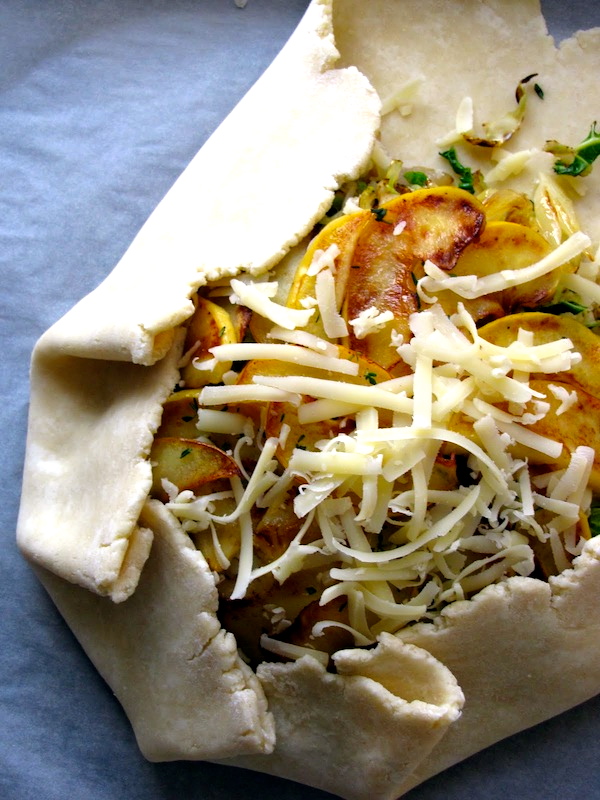
However you are most comfortable, pleat the edges of the dough up and over the filling.
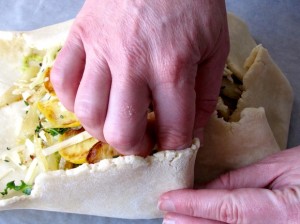
xTART DOUGH 12

I often use the thumb and fingers of one hand to pinch while using the other hand to pull the dough up and begin the fold. (Okay, folks, by now you realize I don’t stand a chance at a career as a hand model. Yes, Roy took these pictures and those are my big hands!)
 

xTART DOUGH 16

xTART DOUGH 19


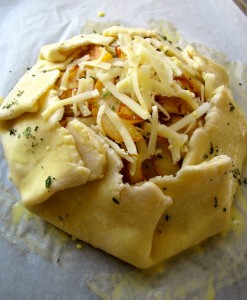
I find one pleat about every three  inches works well.  Continue pleating until the tart is contained. If cracks develop, don’t worry—you can pinch the dough together to seal it.

Brush the edges of the tart (and underneath the pleated folds) with egg wash. Sprinkle with herbs, a little cheese, or a bit of coarse salt.
xTARTS Cabbage 5


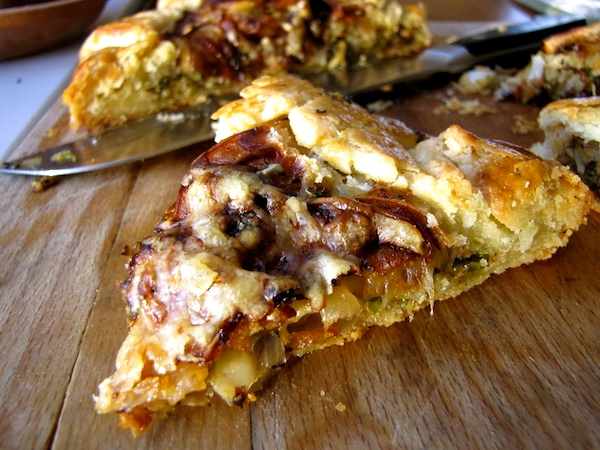
Bake until golden all over (see top photos) and brown and crisp on the bottom (check with a spatula). Depending on the size of the tart, this usually takes about 40 to 45 minutes at 400 degrees.
xTARTS Cabbage 2

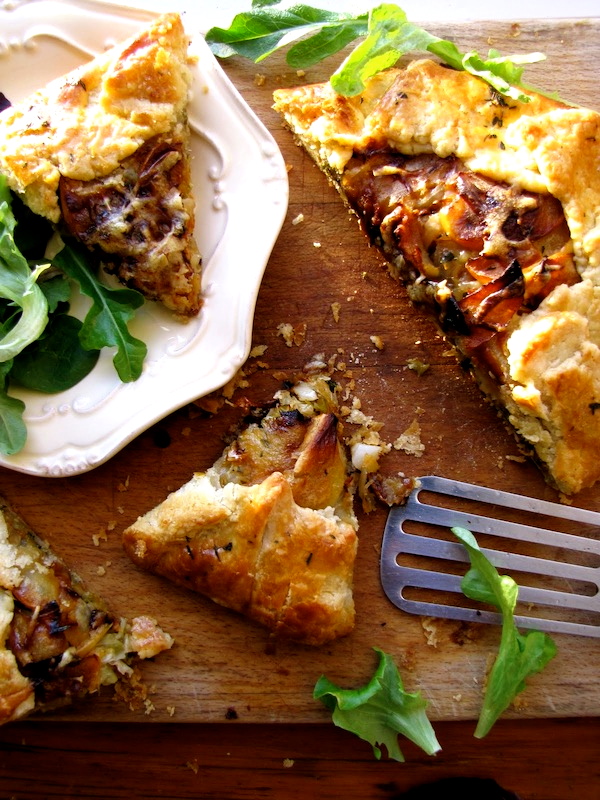
Let cool for several minutes and cut into serving pieces. Salad or soup optional!
 

xTART DOUGH 4 xTARTS Ratatouille 2Savory Rustic Tart Dough Recipe

Easy, make-ahead, absolutely delicious. I swear, you no longer have to be afraid of pastry dough—of making it, rolling it out, shaping it—any of that. Yes, you’ll need a food processor (my favorite tool for making pizza dough, too), but oh, will you be happy with this ultra-buttery flaky crust.

The one thing you should keep in mind when making this dough is timing. It really works best to make the dough ahead. While it only takes 10 minutes to make, the dough needs to rest and chill in the fridge for at least an hour (and up to 2 days), and then, after taking it out of the fridge, it will need to warm back up to “cool” room temperature*, which will take about 45 to 55 minutes. So it’s a great idea to make the dough some morning or evening when you have just a few spare minutes. Pop it in the fridge and then when you’re ready to make a tart, you’ll only need to set aside the time it takes to warm it back up—and that’s the perfect amount of time to make your filling. It’s also really a joy to be able to reach in and grab that little wrapped present of dough already made up. (The dough will also keep in the freezer for 3 or 4 weeks.)

Makes enough dough for two 8- to 9-inch Rustic Tarts.

2 cups (9 ounces) unbleached all-purpose flour

1/2 teaspoon table salt

1/2 pound (16 Tbsp.) very cold unsalted butter, cut into ½-inch cubes

1/4 cup ice water

In the bowl of a food processor, combine the flour and salt. Pulse briefly to combine.

Add the cubes of butter. Pulse quickly about 20 times, or until the butter particles are quite small (like tiny pebbles). With the motor running, add the ice water in a steady stream. (This will take about 10 seconds). Stop the motor. Then pulse quickly six or eight times—just until the mixture begins to come off the sides of the bowl and clump together. The mixture will still be somewhat loose and crumbly—that’s okay. You will bring the dough together in the next step.

Turn the mixture out into a big mixing bowl and knead it briefly against the sides of the bowl to finish bringing it together into a dough. (Once you have incorporated all of the crumbs, knead once or twice to smooth out the dough just a bit. While you don’t want to over-handle the dough, you also don’t want to be afraid to handle it as much as you need to in order to bring all the bits of the dough together, as it will ultimately be easier to roll out.)

Divide the dough in half. (If you have a scale, you can weigh the dough pieces to make sure they’re of equal or close-to-equal weight. They should each weigh about 9 1/2 oz.)

Shape each piece into a disk about 1-inch thick (and about 4 inches across). (Again, don’t be afraid to handle the disk just enough to smooth out cracks and make a tidy disk.) Dust lightly with flour, wrap in plastic, and refrigerate for at least 1 hour or up to two days. (You will need to remove the dough from the fridge 45 minutes before rolling it.)

Alternatively, you can freeze the dough for up to a month. Defrost it in the fridge overnight before using.

*NOTE: Depending on how long your dough disk has been refrigerated, it will most likely be between 50 and 42 degrees when you take it out. Anything in this range is rock hard. You’re looking for the dough to warm up to about 60 degrees. Don’t worry, you don’t have to take its temperature—it will be ready when it is still slightly cool but somewhat pliable. Again, depending on the temperature the dough was chilled to, and the temperature of your kitchen, this will take anywhere from 40 to 60 minutes—leaving 45 or so minutes is a good bet, but also don’t worry if you get behind. There is a decent window of time, and on all but the hottest of days (or kitchens), it can usually sit for up to 30 minutes more before it gets too warm.


The Ultimate Destination for Winter Cabbage: A Savory Tart

xTARTS Cabbage 3 This week I am posting a primer on how to make one of my very favorite things in the whole world–a savory rustic tart (aka crostata or galette). Be sure to check out that post–not only for tips and photos on making the dough and assembling the tarts–but also for the easy food-processor dough recipe, too. Then come back over here for a complete recipe for filling and assembling the cabbage, apple and onion tart (recipe follows). If you’ve got a copy of my cookbook The Fresh & Green Table, you can also use the guidelines over on that post to help you make either the Roasted Ratatouille Tart with Goat Cheese & Mint; the Seven-Treasure Roasted Winter Veggie Tart; or the Roasted Butternut Squash, Cranberry, Shallot & Pecan Tart. There’s also a Rustic Roasted Tomato Tart recipe (my favorite yet) in my new book, Fresh from the Farm: A Year of Recipes and Stories.

I hope you’ll try one of these fun-to-make free-form tarts. The crust is flaky, buttery, and delicious, and the savory fillings are the perfect counterpart. Serve a slice with a salad or a bowl of soup–or have a piece for breakfast!

PicMonkey Collage


Savoy Cabbage, Apple, Onion & Gruyère Rustic Tart

IMG_5669_1

When I was developing my rustic tart recipes for The Fresh & Green Table, the filling for this tart was the surprise favorite with friends I never thought would be cabbage-eaters. So I highly recommend this as a great way to introduce people to the ethereal (and traditionally Alsatian) combination of sautéed cabbage and onions, nutty gruyere cheese, sweet-tart sautéed apples, perky fresh thyme, and buttery, flaky crust.

I also recommend closely following my sautéing directions for the filling—especially the cabbage. You’ll be cooking it in a relatively dry pan over relatively high heat, so that it will quickly brown (almost toast) rather than steam. This is the secret to bringing out the wonderfully complex nutty flavor in cabbage. Be sure to use the beautiful crinkly-leaved variety of cabbage known as Savoy for this. (You’ll find it in the grocery right next to green cabbage; it’s round, too, but with dark-green outer leaves.) The filling components cool quickly, so you can make them in about the time you’ll need to let your dough warm up after taking it out of the fridge.

Makes one 8- to 9-inch tart. Serves 4  

____________________________________________________

For the egg wash:

1 egg yolk

2 Tbsp. heavy cream


For the filling:

2 Tbsp. unsalted butter

1 Tbsp. extra virgin olive oil

1 medium onion (6 to 7 oz.), thinly sliced

6 oz. Savoy cabbage, thinly sliced (about 3 cups packed)

1/2 Golden Delicious apple, unpeeled, cored and thinly sliced (about 1/8-inch thick)

kosher salt


For the tart:

3/4 cup (about 3 oz.) grated Gruyère cheese

1 tsp. lightly chopped fresh thyme leaves

flour for dusting

1 disk Savory Rustic Tart Dough (recipe here), made ahead, chilled for at least one hour, and removed from refrigerator 45 to 55 minutes before assembling tart

________________________________________________________________________________

Preheat the oven to 400 degrees F. Set an oven rack in the center of the oven.
Make the egg wash

Whisk together the egg yolk and heavy cream in a small bowl, cover with plastic, and set aside.
Make the filling

In a heavy 10-inch nonstick skillet, heat 1 Tbsp. of the olive oil and 1 Tbs. of the butter over medium-low heat. Add the onion and a pinch of salt, cover, and cook, stirring occasionally, until the onion is limp and translucent, 5 minutes. Uncover, turn the heat to medium, and cook, stirring occasionally, until the onions are golden brown, about another 6 to 8 minutes. Transfer the onions to a plate to cool.

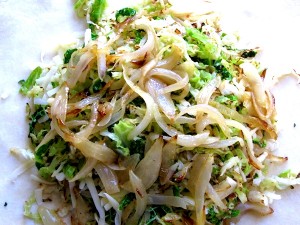
Add 1/2 Tbsp. butter to the pan, turn the heat to medium high, and add the cabbage and another big pinch of salt. Cook, tossing with tongs occasionally (only once or twice at first; let the cabbage have contact with the pan), until the cabbage is limp and nicely browned in spots all over (the thinnest pieces will be all brown but the green color will still be bright in the bigger pieces), about 5 minutes. Transfer the cabbage to a plate to cool.

Take the pan off the heat, and let it cool for a minute or two before returning to the heat. Reduce the heat to medium and add the remaining 1/2 Tbsp. butter. When the butter has melted, add the apple slices, season them with a pinch of salt, and spread them out in one layer (tongs help here). Let them cook undisturbed until very lightly brown on the bottom side, about 2 minutes. Flip and cook until the other side is very lightly browned, another 2 minutes. Transfer the apples to a plate to cool.

Make the tart

(For help with assembling the tart, check out the “How to Make A Savory Rustic Tart” photos here.)

Line a large heavy-duty rimmed sheet pan with a piece of parchment paper and position it next to a large cutting board or other surface you will use to roll out the dough. Arrange the cabbage, onions, apples, thyme and Gruyère around your work area.

Sprinkle your work surface lightly with flour and spread it around with your hand. Put the disk of dough in front of you and lightly tap it with the rolling pin to start softening and spreading it. Then gently roll it out, lifting and giving the disk a quarter-turn after each roll, until you have a roughly 12-inch circle. Try not to roll your pin over the edges of the dough, as that will tend to make the edges thinner than the center. (If your edges get very ragged or torn, it’s okay to patch them back together or trim them a bit.) If at any time the dough feels like it is sticking, lift it up and toss a bit of flour underneath it and/or over it.  Transfer the dough to the baking sheet by rolling it up or draping it over your rolling pin and unrolling or undraping it on the baking sheet.

Sprinkle a quarter of the Gruyère over the dough, leaving a two-inch border around the edge. Arrange half of the cabbage over the Gruyère. Arrange half of the onions over the cabbage. Sprinkle them with a little bit of fresh thyme, and top with another quarter of the Gruyère. Repeat with the remaining cabbage and onions, and sprinkle again with a little thyme and another quarter of the Gruyère. Arrange the apples, very slightly overlapping, in the center of the tart (they will not cover all the filling). Sprinkle with a tiny bit of thyme and the remaining Gruyère.

Pleat and fold the edges of the dough up and over the outer edge of the filling all the way around the tart.  (You will be folding in that 2-inch border.) You don’t have to go crazy making a lot of pleats—folding a piece of dough in about every 2 to 3 inches around the tart will get you the results you want (you’ll have about 8 or 9 folds).

Brush the edges of the dough with some of the egg wash (you won’t use it all), and sprinkle the edges of the tart with any remaining thyme.

Bake until nicely golden all over and crisp and brown on the bottom (check with spatula), about 38 to 40 minutes. Let cool for a few minutes and use the parchment paper to slide the tart on to a cutting board. Cool for another 5 to 10 minutes before slicing and serving.