Category Archives: The Recipes

Birthday Worthy: Silver Queen Corn & Fastest Fudge Cake

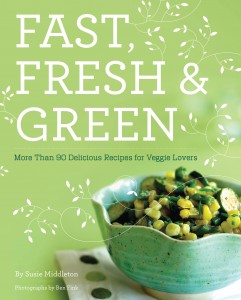
This week I had to write my own book review for the Huffington Post. A little awkward, yes indeedy. But a good opportunity, so I took it. The fun part was choosing a sample recipe from Fast, Fresh & Green that I thought a wide range of people might like—and that was spot-on seasonal. My first thought: Corn. Second thought: Corn Sauté. Third thought: Corn Sauté with Chile & Lime.

Choosing a corn recipe wasn’t a hard decision. I have a not-very-well-kept-secret sweet tooth, and I’ve loved good fresh corn since I was a kid. (The grown-up in me adds stuff like lime and chiles to temper the sweetness.) And up here in New England, the first corn is just starting to come in from the fields; so that means folks south of us are already indulging. The timing for a corn recipe was perfect.

Plus, I couldn’t stop thinking about corn for another reason: It’s birthday week.  My Dad is turning 80 tomorrow, I am turning um…well, something that ends in 8…on Sunday, and Libby turned 8 today! To celebrate with Dad, we are hopping in the car and driving down to Lewes, Delaware, where I spent my childhood summers—and first fell in love with corn.

In those days (the dark ages, I know), the highway into town was lined with hundreds of acres of corn fields. (Now many of those fields are golf courses and retirement communities.) And all that corn was the pearly white, super sweet variety known as Silver Queen. The kernels were always tiny and juicy—not only delicious, but much easier on the teeth than this tough stuff you get in the grocery store these days. I’ve been told there’s an even sweeter variety of white corn around now, but I don’t seem to find either that or Silver Queen up here much. New Englanders seem partial to Butter and Sugar (yellow and white) varieties.

When we celebrate everyone’s birthday on Saturday, two things I know for sure. We’ll have corn and we’ll have chocolate cake. It might not be corn on the cob, slathered with butter, as it used to be. It might be one of my corn-off-the-cob sautés (a little easier on the teeth and oh, so tasty!), hopefully made with Silver Queen. And it won’t be my grandmother Honey’s famous chocolate cake. (She’s the one to whom I dedicated Fast, Fresh & Green. She was such a seat-of-the-pants great cook that no one can actually recreate that cake.) But I’m planning to make one of my favorite easy Fine Cooking recipes, Alice Medrich’s Fastest Fudge Cake. Libby and I made it last weekend in anticipation of her birthday, and after I poured the fancy-looking ganache on top, she decorated it with M& Ms, gummy bears, and pieces of (homemade) chocolate chip cookies! We carried the cake to the beach, and 20 people must have stopped us along the way to coo over the cake (and Libby). I think my 80-year-old Dad will enjoy it as much as she did.

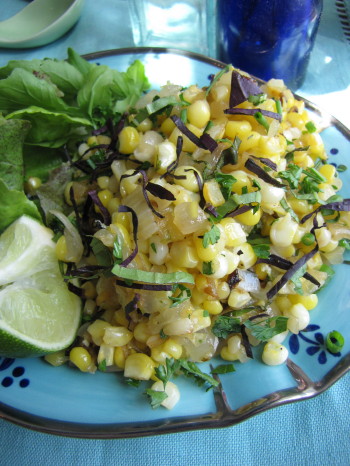
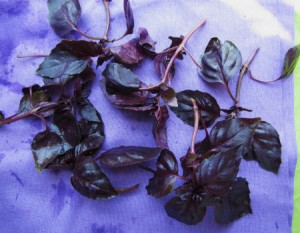
All this thinking and writing about corn was too much for me, though. I couldn’t wait until Saturday for Silver Queen, so I bought some New England corn yesterday and made one of my sautés. (Recipe follows.) I substituted a few things in the Fast, Fresh & Green recipe, adding fresh ginger and garlic and taking out the chile powder, and using purple basil (rescued from the farm stand—it doesn’t sell), chives, and parsley in place of the cilantro. Kept the lime though. (You could sub lemon if you wanted.) Wow, this one was so good—the lime/ginger/sweet onion/sharp basil thing with that sweet corn really works—that I combined the leftovers with a little goat cheese and put them in a frittata for lunch. Just for me, of course.  Sweet.
Summer Corn-off-the-Cob Sauté with Garlic, Ginger & Fresh Herbs

Don’t worry when you see a lot of brown stuff building up on the bottom of the pan. When you sauté corn, it always releases a bit of starch, which causes the browning. That brown stuff tastes really good though, so I incorporate a couple ways to get it back into the sauté. First, I suggest that you let the sauté sit for a few minutes in the pan after cooking. As the vegetables rest, they (especially the onions) will release some moisture that will loosen some of the browned bits, and you can then stir them in. Secondly, after you squeeze the lime in, you can use that bit of added moisture to get a bit more of the browned bits up. A wooden spoon works best for this.

________________________________________

1 tablespoon plus 1 teaspoon unsalted butter

1 tablespoon extra-virgin olive oil

1 1/2 cups small-diced yellow onion (6 to 7 ounces, or 1 medium-large onion), preferably sweet

Kosher salt

2 cups fresh corn kernels (cut from 4 medium ears)

1 tablespoon finely chopped fresh ginger

1 heaping teaspoon minced fresh garlic

1 teaspoon freshly grated lime zest

Freshly ground pepper

1/4 lime

3 tablespoons chopped fresh tender herbs (basil, parsley and chives are a nice combo)

______________________________________
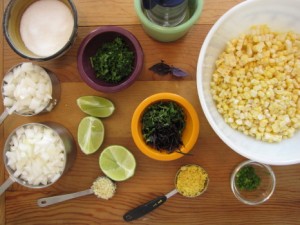
Melt 1 tablespoon of the butter with the olive oil in a 10-inch straight-sided skillet over medium-low heat. Add the onions and 1/2 teaspoon salt, cover, and cook, stirring occasionally, until translucent, about 5 minutes. Uncover, turn up the heat to medium, and sauté, stirring frequently, until lightly browned, another 4 to 5 minutes.

Add the remaining 1 teaspoon butter, the corn kernels, and another 1/2 teaspoon salt. Cook, stirring frequently and scraping the bottom of the pan with a wooden spoon, until the corn is tender but still slightly toothy to the bite, 4 to 5 minutes. (It will begin to intensify in color, glisten, and be somewhat shrunken in size). Add the ginger and garlic and cook, stirring, until very fragrant, 30 seconds to 1 minute. Stir in the lime zest and remove the pan from the heat. Let the corn sauté sit undisturbed for 2 to 3 minutes (moisture released from the vegetables as they sit will loosen browned bits) and stir again, scraping up the browned bits from the bottom of the pan.

Season the sauté with a few generous grinds of pepper and a good squeeze of the lime. Stir in half of the herbs. Let sit for another couple of minutes if you have time. Stir and season to taste with more salt, pepper, or lime juice. Stir in the remaining herbs just before serving.

Serves 3 to 4 as a side dish

Tip: I find the safest way to cut corn off the cob is to snap the shucked ears in half first. This takes a little elbow grease, but works fine. Then put one half, cut side facing down, on a large cutting board and slice down the cob with a sharp knife using a sawing motion. Keep turning the cob until you’ve cut off all the kernels. Repeat with the other half. For convenience, I also put a large (old) dishtowel over my cutting board before I start. When I’m done cutting, I can fold the corners of the towel up and easily transfer the kernels to a bowl. Any way you do it, be aware that corn kernels do have a tendency to go flying when you cut them.

Don’t Let Your Zukes Go To The Dogs

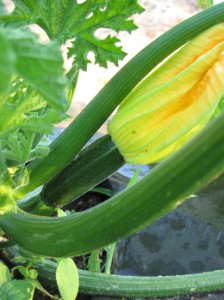
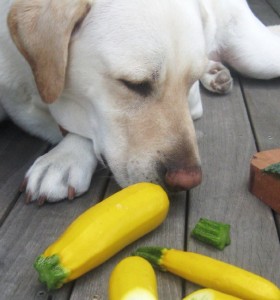
Our first little zucchinis appeared on the scene yesterday. We picked them, put them out at the farm stand, and someone bought them. Yeah, I know. That won’t last forever. There will come a time, say mid-August, when you won’t be able to give away a summer squash, they’ll be so ubiquitous. Just don’t do what I did a few years ago and try to feed them to your dog. (Poor Gus.) Honestly, there are plenty of delicious things to do with summer squash, and I’m determined to convert a few squash-bashers (that’s you Katie and Eliza) this summer with a couple of my recipes.

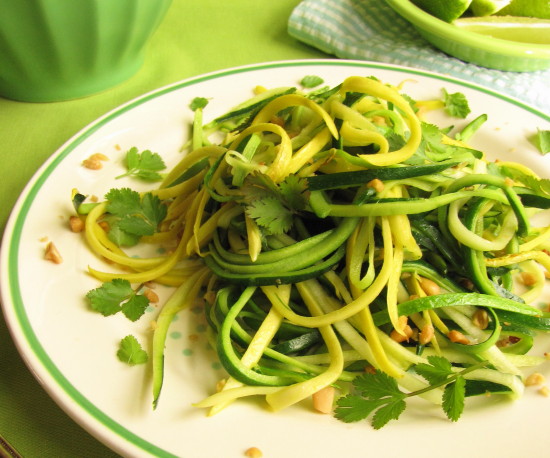
The first is a really, really quick (did I say quick?) sauté that requires very little effort to deliver a dish with restaurant-quality good looks and a lovely flavor and texture. The only caveat is that you have to hop yourself over to a housewares or kitchen store and pick up a groovy tool called a hand-held julienne peeler. It’s not expensive (about $6), and is just the coolest thing. Drag it along the outside of a summer squash, and it makes beautiful zucchini “ribbons.” (Use it to make strips of Parmigiano cheese for a salad, too, or to grate beautiful strands of carrots for a salad.)

The zucchini ribbons need only a quick toss in a hot sauté pan to be perfectly cooked—tender, but still al dente (sort of like linguine!). I like to make a little brown butter in the pan first, and to finish these sautés with a squeeze of lemon or lime, a few chopped toasted nuts, and a smattering of chopped bright fresh herbs like mint, cilantro, basil, or tarragon. There’s a version of this recipe in Fast, Fresh, & Green with lemon and hazelnuts, but the one I’ve included here (below) has a nice combination of lime, cilantro and mint.

I’ll post more squash recipes as the summer goes on, but I also suggest that you check out the new issue of Fine Cooking magazine (August/September, on newsstands next week) which has a beautiful zucchini story written by my cook-farmer friend Mary Ellen Driscoll. It includes a recipe for fried squash blossoms.

Zucchini Ribbons With Lime, Garlic, Cilantro & Mint

It takes a few peels to get the hang of the julienne peeler. I like to run the peeler all the way down the length of the squash for the longest pieces, but it’s easier on the fingers to hold the squash at one end and peel half way down and then flip it around and do the same thing. The shorter ribbons are just as pretty as the longer ones.  Whatever you do, discard the core—you want most of your ribbons to have a bit of skin on them for the best texture.

_________________________________________________

1 pound young zucchini or yellow squash, ends trimmed, washed and dried

1 ½ tablespoons unsalted butter

1 large clove garlic, smashed

1/2 teaspoon kosher salt, more to taste

2 teaspoons fresh lime juice

2 tablespoons finely chopped toasted pine nuts or toasted sliced almonds

1 tablespoon chopped fresh cilantro, mint, or a combination

________________________________________________

Set out a large mixing bowl. Working over the bowl, peel the squash lengthwise with the julienne peeler into thin strips. Work all the way around the squash until you get to the thick seed core. Discard the core. Break the strips up with your hands, as they can tend to clump together.

In a large nonstick skillet, heat the butter over medium-high heat. When the butter has melted, add the smashed garlic clove and cook, occasionally flattening the garlic clove with a spatula, just until the butter and the garlic clove start to turn a light brown. Remove the garlic. Add the squash strips and the ½ teaspoon kosher salt and cook, tossing with tongs, just until the squash have become pliable, about 1 minute.

Remove the pan from the heat and add the lime juice and most of the chopped nuts and herbs. Toss well. Taste and season with more salt if desired. Serve garnished with remaining nuts and herbs.

Serves 3 to 4 as a side dish

Summer’s First Basil Pesto—And 10 Things To Do With It

A nice couple stopped by the farm stand early this morning while I was still getting the veggies and herbs set up. “We’re in need of basil,” they announced. “How much?” I said. “About this much,” the man gestured, hands open as if he were about to pass a basketball. “Okay, I’ll go pick it for you if you’ve got a second. You can go take a look at the baby goats if you like.”

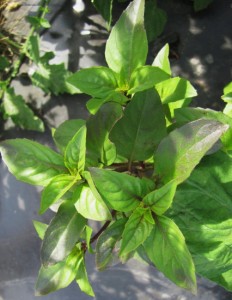
Off they went and I headed to the garden to harvest the basil. We’ve got sweet basil, lime basil, Thai basil (right), and purple basil, all flourishing in the semi-shade among the tomato plants. Those tomatoes, so spindly when we transplanted them, are now lush and vigorous, covered with little yellow blossoms and tiny green fruits. We planted 40 tomato plants, and basil between each, so basil is something we have oodles of. I was so happy to be able to go out and harvest something I grew myself and hand it over to some appreciative folks who wanted and needed it.

This whole weekend has been like that. Out by the road, we have a new sign that Roy made, and with the crush of visitors to the Island for the July 4th holiday (and those adorable baby goats), the farm stand is hopping. This morning we sold our first harvest of fingerling potatoes, and yesterday we couldn’t keep bunches of carrots around for longer than it took to pull them out of the ground.  I get goose bumps just thinking about it—I’ve always wanted to grow and sell vegetables, and now here we are actually doing it. Only wish we had planted more, as we can already see we’ll run out of carrots (and lots of stuff) well before the next planting can mature.

Now I have another dilemma. We’re going to a potluck party this afternoon, and I, of course, have to bring something garden-y, something vegetable-y—something you’d expect the author of a vegetable cookbook who grows vegetables to bring to a potluck. But I don’t want to harvest anything we can sell!! So I thought about that basil. There’s plenty of it, and the more you pick it, the bushier it gets. So last night I made my first batch of pesto for the summer.

I had the Parmigiano and the olive oil, but my pine nuts were rancid. After swearing at the Stop ‘n Shop, I decided to make pesto without nuts.  (I don’t know why I go anywhere near that grocery store, except that last weekend I had a cooking demonstration to do at Morning Glory Farm, and needed a lot of pine nuts for a Swiss chard dish. Two out of the three jars I bought were bad. Yuck. Be sure to smell nuts before you use them, and when you buy them fresh, store them in the freezer if you’ll not be using them all right away.)

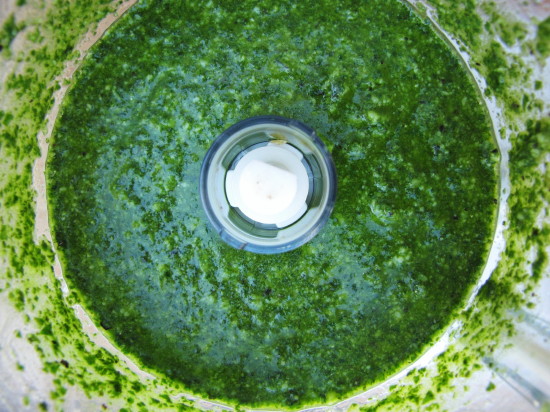
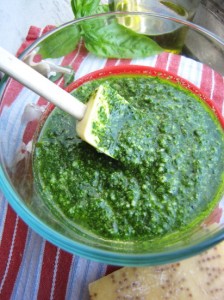
My pesto came out plenty tasty. (I added a little parsley, too, to keep it a bit greener.) So you can certainly make pesto without pine nuts, or you can substitute walnuts or almonds. But ideally, I not only like to use the pine nuts, but I also like to toast them first to pump up the flavor. Here’s the basic basil pesto recipe I usually follow (more or less!). I find the food processer easiest for making a quick pesto. Following the recipe are some ideas for what to do with your pesto once you make it.

Food Processor Basil Pesto

________________________________________

A 1-inch chunk of Parmigiano or ¼ cup grated Parmigiano

1 clove garlic

¼ cup toasted pine nuts

3 cups packed fresh basil leaves

1 tablespoon plus ½ cup extra virgin olive oil

kosher salt

several grinds of fresh pepper

___________________________________________

Get out your food processor. (I have a smallish one I like to use. Not tiny, but not huge.)

If your Parmigiano is a chunk, cut off about a 1-inch piece and process that until it is nicely grated. (Grating Parmigiano in the food processor turns it into fine sandy pebbles, giving a bit more body to something like pesto than finely grated cheese would.) Add the garlic clove and process until minced.

If you’re using grated Parmigiano (and make sure it is Parmigiano, not the pre-grated fake stuff, which will taste like dust, or worse), start by putting the garlic clove in the processor first and processing it until minced. Then add the grated cheese. Next, add all of the toasted pine nuts and process.

Add all of the basil, a good pinch of salt, several grinds of fresh pepper and a tablespoon or so of the olive oil. Process until very pasty. Then, with the processor running, gradually add the rest of the olive oil—or as much as you like—through the feed tube to get a nice, smooth pesto. Adding the olive oil with the motor running will help the pesto emulsify a bit for a more creamy texture. Taste again and add more salt and pepper to taste if you like.

Yields about 1 cup.

How to use your pesto:

  • In a vinaigrette. Combine with white balsamic vinegar, a little lemon juice and a bit more olive oil. Drizzle on grilled vegetables, green beans or new potatoes.
  • On pizza. Use as a base instead of tomato sauce. Add sliced cherry tomatoes and fresh mozzarella.
  • In sandwiches. Sure, you can use it on bread, but try it in a different kind of sandwich—one made with two slices of grilled eggplant or grilled zucchini. After cooking the veggies, let them cool and put a bit of goat cheese or mozzarella and some pesto between two slices for a fun appetizer or side dish.
  • On pasta, of course! Toss with warm angel hair or linguine, fresh peas, and grilled shrimp. Yum.
  • With fish. Top a white fish fillet like halibut or striper with a bit of pesto and some fresh breadcrumbs before baking.
  • On crostini. Slice and toast baguette, spread with pesto, top with a slice of fresh mozzarella and a roasted or sundried tomato.
  • With soup. Swril a little pesto into a cold carrot or potato or tomato soup. Or drizzle some into a seafood chowder.
  • In a dip. Layer softened goat cheese, pesto, chopped sundried tomatoes, and chopped toasted pine nuts in a wide, straight-sided dish (4 or 5 inches across, a few inches deep). Repeat the layers. Serve with crackers or bread.
  • With eggs. Add a little pesto to omelettes, frittatas, or even scrambled eggs.
  • On tomatoes. Dress up the classic tomato and fresh mozzarella antipasto with pesto instead of fresh basil and a smattering of pitted Nicoise olives.

Beet Candy—Bet You Can’t Eat Just One

It is well documented that I will roast anything that will stand still long enough. So yesterday, when I accidentally harvested some baby beets while pulling weeds, the beets didn’t stand a chance. I’d barely been home for a minute when I turned the oven on to 450°F.

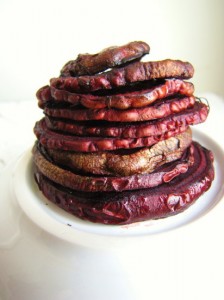
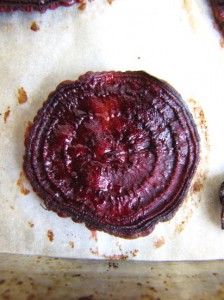
While I’m happy to slow-roast beets at a lower temperature, my very favorite thing to do with them is to slice them thinly and cook them hot and fast. The resulting “chips” are so sweet that I sometimes call them beet candy. I first discovered I could make beet candy when chef George Germon let me concoct a salad for the menu one night at Al Forno restaurant in Providence, RI, where I was a cook. He had some lovely mâche (a delicate leafy green), and I thought beets, goat cheese, and toasted walnuts would complement it. But I didn’t have a lot of time, and the wood-fired ovens at Al Forno are always running super-hot, so I decided to slice the beets really thinly and spread them out on a baking sheet to roast quickly. When they came out of the oven, they were shrivel-y and a bit black around the edges, but incredibly tender and sweet—in that deeply caramelized roasty-toasty kind of way.

I’ve loved these quick-roasted beets ever since. So much so that I keep writing about them. Fine Cooking.  Fast, Fresh & Green.  Now Sixburnersue. You’ll have to forgive me, but here I go again with the recipe—in case you missed it. It’s such a great way to convert beet haters into beet lovers that I don’t want anyone to be without it in beet season.
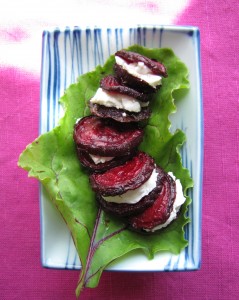
You can gobble quick-roasted beet slices right off the sheet pan. Or toss them into a citrus marinade (after roasting) and tuck them into salads. Sometimes I like to gussy them up by making little beet and goat cheese sandwiches, which I serve as appetizers. I mix some fresh goat cheese with a small amount of chopped fresh herbs or lemon zest, then dollop some on one beet slice, and top that with another. Yeah, a little fussy, but so darn cute.

Quick-Roasted Beets

This recipe is adapted from the version in Fast, Fresh & Green. The only slightly tricky part is slicing the beets. Start with a sharp, thin-bladed knife (I love my ceramic knife). Then, if your beets are too wobbly or unwieldy to hold straight, slice a very small sliver off the bottom and the beet will stay more stable when slicing. Then just cut round slices that are between 1/8 and ¼-inch thick (3/16 is ideal!). You don’t want paper-thin, or the beets will burn, so there’s no need to get out the mandolin.  Here’s another tip: to prevent your cutting board from getting stained with beet juice, cover it with a piece of parchment paper or part of a brown paper bag before slicing.

__________________________________________

About ½ pound beet roots (1 bunch, about 4 or 5 small or 3 medium, stalks and leaves trimmed), scrubbed but unpeeled, very thinly sliced crosswise

1/2 teaspoon kosher salt

1/2 teaspoon coarsely chopped fresh thyme leaves (optional)

1 tablespoon extra-virgin olive oil

_________________________________________

Preheat the oven to 450°F. Line a large (18- x 13- x 1-inch) heavy-duty rimmed sheet pan with a piece of parchment paper. Put the beet slices in a mixing bowl and toss thoroughly with the salt, thyme, and olive oil. Arrange the slices, evenly spaced, on the sheet pan (it’s okay if they touch). Roast until the beets are tender, shrunken, wrinkled, and glistening, 16 to 18 minutes. (If your beets are very small, they can roast in as little as 10 to 12 minutes.) The smallest slices will be black around the edges. Let cool for a few minutes and serve warm. Or refrigerate for up to a couple of days.
Serves 2 as a side dish or 4 as an appetizer

The Gold Rush (Or Why We Couldn’t Wait to Dig Up Potatoes)

We cheated. It’s not really time yet to harvest the potatoes, but we just had to check one plant. You know, to make sure there were tubers growing under all that foliage. Besides, it was Friday night and we were looking forward to an all-local dinner. We had just stopped to see Jeff Munroe, the Vineyard’s chicken man, and picked up a freshly slaughtered chicken for the grill. A big salad with our arugula, mizuna, lettuce, and peas was on the menu. All we needed were potatoes, right?

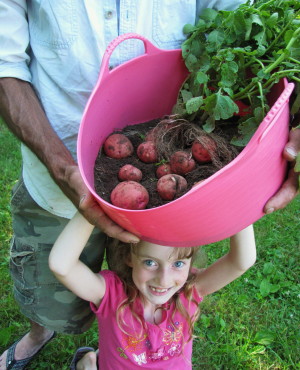
While I butterflied the chicken and cleaned the greens, Roy and Libby ran over to the garden, pitchfork in hand. They came back toting a potato plant—and about a pound and a half of Red Gold potatoes—in the big pink harvest bucket.  I jumped up and down for joy. Everyone giggled. Our own potatoes—how very cool is that? (We are easily amused, I guess.)

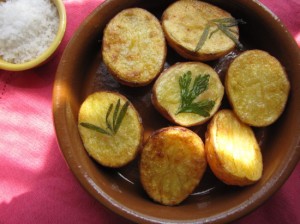
I wanted to cook them simply to see what the taste and texture was like. We bought our Red Gold seed potatoes from FedCo’s Moose Tubers catalogue, because they sounded like a fun and flavorful alternative to Yukon Golds, and because they were supposed to yield early and abundantly (we could already agree on that point). So I wound up boiling them until just tender and then frying them, cut-side down, until golden (directions below). I was surprised at how flaky the texture was for a red-skinned potato. It was almost as tender as a baking potato. And that rich yellow flesh was nutty and buttery tasting—perfectly delicious.

We’re trying to restrain ourselves from digging up any more Red Golds right now. The catalogue says about 65 days,  and it’s only been about 56.  The plant we did unearth clearly had a few more tubers forming, so we need to be patient. And then there’s that row of French Fingerlings waiting for us…

In the meantime, I guess we can line up with the rest of the folks who’ve discovered how rewarding potatoes are to grow. Our biggest problem has been keeping up with the ravenous Colorado Potato Beetle, who arrived early and with all of his kinfolk. The best way to dispatch them (in an organic garden) is to simply squish them (or their orange eggs that cluster on the back of leaves) with your fingers. Amazingly, this is an activity that Libby actually enjoys. (How many 7-year-old girls do you know who are fascinated by bugs?) So I’m grateful for that. Not so grateful that nature-loving father and daughter brought me a Garter snake as a present yesterday (to live in the garden!?). But I can hardly complain.

Golden Fried Potatoes

Choose small potatoes that are all about the same size and cut them in half lengthwise. Put them in a saucepan just big enough to hold them in one layer and cover them with cold water by at least an inch.  Add a good bit of kosher salt. (I use 1 ½ teaspoons for a pound of potatoes.)  Bring to a boil, lower to a gentle simmer, and cook until just tender, about 15 minutes for freshly dug potatoes, 20 to 25 for older potatoes.

Drain the potatoes well and let them cool for a bit on a dishcloth. Meanwhile, heat about a tablespoon of olive oil and about a tablespoon of butter in a large frying pan (nonstick works fine if it has a heavy bottom) over medium heat. When the butter is bubbling, sprinkle salt on the cut side of one potato (press an herb leaf on, too, if you like), and put the potato in the fat, cut side down. Repeat with the remaining potato halves. Cook, without turning the potatoes (but occasionally swirling the fat in the pan around them), until they are golden brown on the bottom (check carefully with a thin spatula), about 10 to 12 minutes. Transfer to a serving plate and serve warm, with or without a dollop of sour cream, a smattering of chives, and another sprinkle or two of salt.

Three Reasons to Celebrate: Baby Goats, Sugar Snap Peas, & A Second Printing

I watched a goat give birth this morning. It was maybe the coolest thing I’ve ever seen.

I was going to blog about something else today. Actually yesterday. And then yesterday went by and now today has, too. That is how my life goes these days, here in my new world. When I get up, I think there is something so important to do that I must focus entirely on it—be productive, get it done, do my work.  But the universe always has other plans for me. And if I just remember to pay attention to that, I get to experience the most amazing things.

So while Roy and I went over to the farm especially early this morning—ostensibly to water and harvest and be out of there by 8—Basil and Snowflake, two pygmy goats, had other plans (the goat pen is right next to our vegetable garden). By the time we got there, Basil had given birth during the night to two healthy kids, both females (does). One was a little grey and white patchy thing, already cleaned up and awkwardly skipping and hopping around like a tipsy gypsy. She even managed to climb on mama’s back.  The other little girl was black with white ears, and she was much bigger (and less squirmy) than her sister.

Snowflake was in labor. Never having given birth myself, I wasn’t exactly sure by her bleating and writhing what the whole timing scenario was! Fortunately, Randy and Rebecca (the farm owners) soon arrived to check on Snowflake. Randy had been up during the night helping Basil along with the second kid, who needed a small tug to get out. Basil, though, as it turns out, is a veteran Mom. For Snowflake, this was the first time.

Randy talked soothingly to her, but let her push. Two little white hooves followed by two little black legs appeared. And then, as we all stood watching (Snowflake had positioned herself in the breezeway of the shed so we could all see), swoosh!—the kid spilled out in a tidy (wet) bundle. Not a few seconds later it lifted its head and squiggled in the hay. Bravo Snowflake!

The second kid apparently followed not long after. I missed that but came back with my camera a short while later in time to watch Snowflake lick them (a little black doe and a little black buck) clean.  Even though I had emptied the chip in my camera, I still ran out of space after a half-hour or so. I was mesmerized.

Frankly, I was just as excited about the goats (and the appearance of the first sugar snap peas in the garden) as the other news I was going to blog about—that the second printing of Fast, Fresh & Green arrived in warehouses yesterday.

I have to admit, I have very mixed feelings about bragging about my book. I wasn’t brought up to flaunt success, and yet I know two things: One, I didn’t do this book all by myself, and the folks who helped me deserve to share in the good news. I owe it to them (and these are not the people who are logging on to Facebook and Twitter on a regular basis, so they are not going to see the reviews) to keep them updated. Secondly, I know what it feels like to be grateful. In my post midlife-crisis world, not only do I get to be present for a lot of cool stuff, but I also get to know that terrific feeling of gratitude—of knowing you’re the recipient of good karma that you’re not necessarily wholly responsible for.

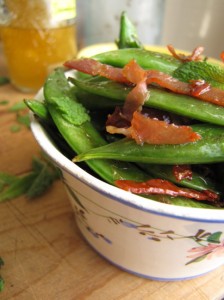
So to celebrate Fast, Fresh & Green (and those sugar snap peas I’m going to harvest for the farm stand tomorrow!), here’s a quick recipe, Sautéed Sugar Snaps with Salami Crisps. It’s one of my very favorites in the book for its inarguable simplicity.  And for anyone with lots of time on their hands (that’s you, Mom and Dad!!) who would like to see some of the recent coverage of FFG, there’s a list of links after the recipe. I’m particularly grateful to the articulate Tom Philpott of Grist.org for acknowledging my primary goal—to encourage people to cook at home more.  To me, there’s no better way to practice being present—and grateful—than spending time cooking (and eating) at home every day with friends and family.

Sautéed Sugar Snaps with Salami Crisps

___________________________________

1 ounce very thinly sliced Genoa salami

1 teaspoon extra-virgin olive oil

½ pound sugar snap peas, tails removed

1/8 teaspoon kosher salt

___________________________________

Stack the salami slices and cut them across into ¼-inch wide strips. Pull the strips apart and spread them in one layer on the cutting board; they are much easier to add to the pan when they are not clumped together.

In a large (12-inch) nonstick skillet, heat the 1 teaspoon olive oil over medium heat. When the oil is hot (it will loosen up and spread out), add the sugar snap peas and season them with the 1/8 teaspoon salt. Toss well. Cook, stirring occasionally, until the peas turn bright green, blister, and begin to turn a very light golden brown in spots, about 3 minutes. Add the salami strips and toss well.

Continue to cook, stirring occasionally, until the peas are browned in spots on both sides and the salami strips have shrunken, turned a darker brown color, and feel crisp, 3 to 4 minutes. (The salami will probably be crisp on the edges but still somewhat pliable after 3 minutes. You can stop at that point if you do not want to cook the peas further, but I like the texture of the fully crisp salami, and the peas stay crisp even when cooked more.) Transfer to a serving platter or dinner plates.

Serves 3

_____________________________________________________________

Here are links to some recent reviews of Fast, Fresh & Green.This is only a partial list and my thanks go to the many bloggers who have taken FFG for a test spin and enjoyed the ride!

How to Be Fast, Fresh & Green in the Kitchen (Grist)

To Market, To Market: 10 Top Summer Cookbooks (NPR)

Book Report: We Pick 11 New Cookbooks (Washington Post)

Ideas For What to Do With Summer’s Bounty (Associated Press)

Favorite Cookbooks: Fast, Fresh & Green (Eat Well, Eat Cheap blog)

Oh What A Week–In the Garden, and the Kitchen, Too

Maybe it’s a cheap shot to blame it on the stars, but when I heard there was a rare planetary alignment going on this week, I felt relieved. Apparently this is the kind of event that makes everyone feel a little crazy, a tad more pressed and stressed. Now we had our excuse for running around like chickens with our heads cut off all week.

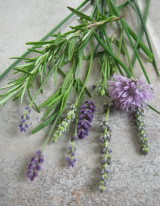
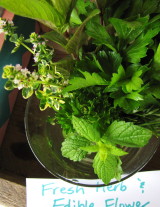
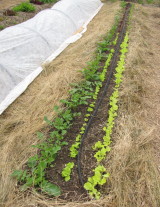
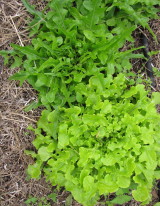
We were dog sitting and house sitting. Still working madly on building structures in the garden, still harvesting greens and herbs for the farm stand every morning (photos above), still watering, weeding, and bug-picking. Amen. Roy was working on three different jobs, and I was developing recipes and taking pictures for a new book proposal.

Yesterday I spent a couple hours on my belly crawling around a hoop house clearing out nasty weeds. (This was pretty fun, actually. At least hot air rises, so it was cooler on the floor.) This morning we got up early to go rake up some hay from a friend’s field, still needing more for our garden pathways and for mulch.  (And this, I have to tell you, wasn’t just fun but incredibly calming. When the planets are conspiring to drive you crazy, grab a pitchfork and head for a golden rolling field dotted with apple trees and pines, cows grazing in the distance. All will be right with the world.)

So no complaining. Absolutely not. It’s all good stuff, and productive, too. Here’s a look at what emerged from our crazy week. And for this we thank our lucky stars.

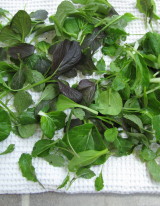
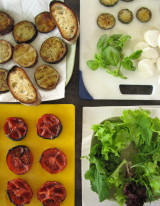
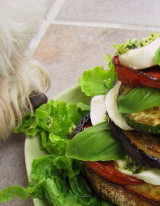
Over in the kitchen of the lovely house we were camping out in, I spent some time salvaging tiny bok choy and kale leaves from thinnings I’d plucked in the garden (above left). Once I got the roots off  and washed them well, I had just enough leaves for a side dish— the fastest and simplest of sautés with slivered garlic. One morning I roasted and sauteéd a bunch of summer vegetables (yeah, a little ahead of the season) for a main-dish salad I’m developing. My doggy friend Wally (right) got pretty interested when I put the dish on the floor to photograph.

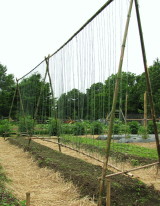
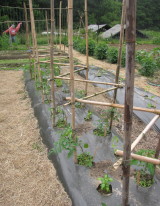
Back in the garden, Roy built a trellis for our pole beans (left) and a cool support structure for our tomatoes (center), both from bamboo that we had also gone on safari to retrieve. (Well, not really, but it felt like that. If you’ve ever been in a forest of bamboo–and tried to cut some down without a power tool, you’ll know what I mean. We got out the power tool.)  We also prepared the squash and eggplant beds and planted both. We  weeded the new lettuce bed and laid down a thicker layer of hay than we’d originally thought was necessary. Darn weeds.

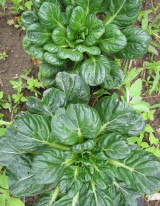
Meanwhile, I lopped off several heads of Tat soi (left) and dinner-plate sized lettuces (right) every day for the farm stand. The next crop of baby lettuces and more arugula are not far behind, planted a few weeks ago. (It may be getting too hot for arugula now, though. It’s pretty spicy.)

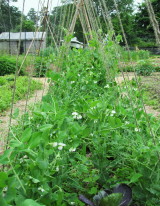
Lots of other veggies are making progress, and I’m most excited about the peas which have started to emerge from a flourish of little white flowers. It’s hard for me not to eat the shoots and flowers right now, but I know I need to leave them alone to produce more actual peas.

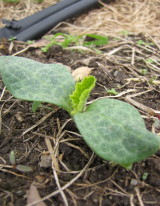
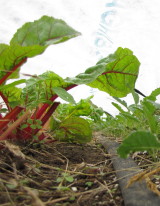
I’m also ridiculously excited about the carrot bed, which I have been weeding and thinning meticulously. (And photographing–those boots of mine wind up in more garden shots than I can count!). We’re growing three kinds of carrots including Little Finger and Scarlet Nantes. We planted Sunburst Hybrid summer squash (the little Patty Pan shape) and Wee-B-Little pumpkins, among other squashes (middle). And under the row cover, more chard and bok choy are on the way.

Tonight we’re going to transplant the Brussels sprouts. Did I mention I love vegetables?

Desperately Seeking Strawberries for Susie (and Ice Cream)

One of my favorite parts about the CSA I belonged to last year was the weekly strawberry picking in June. This year, with my own market garden, I knew I couldn’t join the CSA, but I was resting easy thinking the strawberry patch would be open to the public like it was last year.

Never assume anything.

Naturally, due to weather conditions causing blossom drop, the strawberry crop wasn’t large enough to share with non-CSAers. Big bummer, as there aren’t any other pick-your-own strawberry patches on Martha’s Vineyard.  Years ago I lived on Aquidneck Island (home to Newport, Rhode Island) and every June we’d head over to Quonset View Farms, high up in the middle of the island where the cold fog off the ocean just kisses the plants and fades away in time for daily sun baths. The soil must be pretty special there, too, as I swear I’ve never tasted strawberries so sweet and juicy. At Quonset View, it was hard to get out of the field without eating most of your berries.

Ever since then, I haven’t really been able to eat much in the way of commercial strawberries, which tend to be hard and white in the middle and short on flavor. I wait 11 months for the real deal. It’s kind of torturous, but pretty blissful when the local berries ripen. I try to pick enough to freeze some for later months, too, but they never last very long.

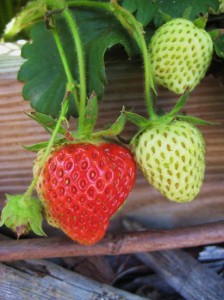
My longing was made even worse this year by the fact that Rebecca has been selling strawberry plants at the farm stand where my garden is. Every day that I pass by these beauties, another berry ripens on one of the plants, red and juicy and drooping seductively on its green stem, just begging to be eaten.

I finally broke down and bought a couple of the plants (and plunked them in the garden), mostly because my 7-year-old gardening (and cooking) companion Libby insisted. I tried to explain that strawberries are perennial and also that just a couple plants wouldn’t yield much, but she wouldn’t hear of it. So we have been ritually sharing each single berry on these two plants as they ripen.

I also finally got myself in the car and went down-Island to visit two farms that I thought might be selling their strawberries. It wouldn’t be quite the same as picking my own, but time was running out. I struck gold at both Norton Farm and Morning Glory Farm, and I finally had enough strawberries to do what I’ve been waiting a year for—to make ice cream.

Last year, the June-July issue of Fine Cooking magazine arrived just before strawberry-picking time, and it had in it the most amazing article on creating your own custom-flavored ice cream.  The recipe came from pastry wizard David Lebovitz, and the step by step “create your own” approach is a regular Fine Cooking feature. I thought the format was a brilliant choice for an ice cream recipe, because it allows you to flavor your custard with whatever infusions, add-ins, and/or mix-ins you like to make practically anything—from Hazelnut Chocolate Chunk and Double Ginger to Irish Coffee or Rocky Road.

For my first go-round, I knew I wanted something fruity. I have strong memories of home made fresh Delaware white peach ice cream. My father used to make it in a big old fashioned ice-cream maker on the front porch of our beach cottage in August when I was a little girl. Profoundly comforting. I knew peaches weren’t in season yet (and sadly, not nearly so good up here), but that strawberry patch was beckoning. So to test out the recipe, I chose pureed strawberries and vanilla extract for my flavor add-ins.

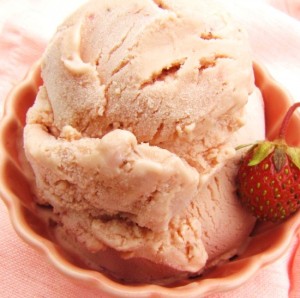
Wow. The ice cream was to die-for, rich and silky from the egg yolks and cream, and packed with true strawberry flavor. I fell in love with it. And I’ve waited a whole year to make it again.

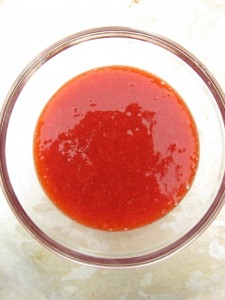
Late last week, I got out my little hand-cranked Donvier ice-cream freezer and made sure the cannister was chilling in the freezer. I made the strawberry puree on Thursday (photo at left), and the custard Friday morning. I chilled both and waited for my friend Libby to arrive. Friday night, after a chicken kabob barbeque (with a salad of all our own salad greens and radishes, of course), we sat down to play Sorry and to freeze the custard, each one of us taking a turn at the crank as we went around the game board. When it was about the texture of soft-serve, we couldn’t wait any longer and spooned it into sugar cones. For a moment there wasn’t a sound but for a little slurping and crunching. And then, from Libby, “When can we make more?”

Here’s the recipe, adapted and collapsed from the “make your own” format. If strawberry ice cream isn’t your thing, or you simply want to try other flavor combos,  visit the cool interactive feature on Fine Cooking’s website.

Strawberry-Vanilla Ice Cream

Adapted from Fine Cooking magazine article by David Lebovitz; for more ice cream recipes, visit finecooking.com.

1 pound ripe strawberries, washed and hulled

1 1/4 cups granulated sugar

2 cups heavy cream

5 large egg yolks

1 cup whole milk

table salt

1 teaspoon vanilla extract

Make the strawberry puree: In a blender, puree the strawberries until completely smooth. Strain the berry puree through a fine-mesh sieve into a bowl or glass measure. (Press on the solids to be sure to extract all of the juice.) Stir in 1/2 cup of the granulated sugar. Refrigerate the puree until ready to use. (Can be done 24 hours ahead.)

Prepare an ice bath: Fill a large bowl with several inches of ice water (half ice, half water). Set a smaller metal bowl (such as a stainless steel mixing bowl, at least a 6-cup capacity), in the ice water. Pour 1 cup of the heavy cream into the inner bowl. (This will help the custard cool more quickly when you pour it in later). Set a fine-mesh strainer on top.

Make the custard: Whisk the egg yolks in a medium bowl and set aside. In a medium saucepan, mix the remaining 1 cup of the cream with the milk, the remaining ¾ cup sugar, and a pinch of salt. Heat the mixture over medium-high heat, stirring occasionally, until the sugar dissolves and tiny bubbles begin to form around the edge of the pan, 3 to 4 minutes. In a steady stream, pour half of the warm cream mixture into the egg yolks, whisking constantly to prevent the eggs from curdling. (This is called “tempering” – a good step when making any kind of custard. Be sure to pay close attention during this.)

Pour the egg mixture back into the saucepan and cook over low heat (or medium low if your stove is electric!), stirring constantly and scraping the bottom with a heatproof cooking spoon or spatula until the custard thickens slightly and measures 175°F to 180°F on an instant-read thermometer, anywhere from 4 to 10 minutes. (The custard will be a bit more viscous and thick enough to coat the back of a wooden spoon, holding a line drawn through it with a finger.) Don’t let the sauce overheat or boil or it will curdle.

Immediately strain the custard into the cold cream in the ice bath.

Cool the custard: Stir the custard frequently over the ice bath until an instant-read thermometer measures 70°F. Add the vanilla extract and stir. Add all of the strawberry puree and mix well. (This is one of the totally fun parts—watching the pink and cream swirls come together!).

Chill and freeze the custard: Chill the strawberry-vanilla custard mixture in the refrigerator for at least 4 hours (or overnight—in fact, it holds for two days.) Freeze the ice cream in your ice cream maker according to the manufacturer’s instructions.

Note: This recipe yields about 1 quart. My small ice cream maker only makes one pint at a time. If you’re in that boat, simply keep the remaining custard chilled and use it in the next day or two.


Here at Lettuce Central, We Love Our Vinaigrette

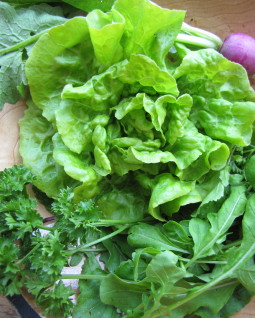
As if it weren’t bad enough to live with 400 seedlings in our tiny apartment all winter, now we have a LPU (lettuce processing unit) in the kitchen. This is not an official piece of equipment, but rather a collection of big stainless steel bowls, salad spinners, dish towels, and assorted plastic bags, trays, and coolers that I use to wash, dry and pack the lettuce and greens we’re harvesting from the garden in order to sell them at the farm stand.

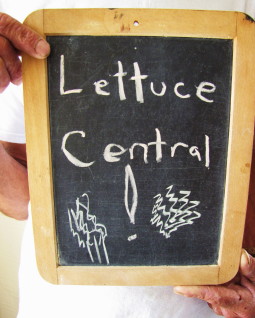
There comes a point every evening and every morning when pretty much every surface is covered with lettuce or greens of some sort. I don’t yet have my system worked out perfectly, so my partner, Roy, is finding this chaos all very amusing. Only yesterday did I realize he’d written “Lettuce Central” on our blackboard next to the kitchen door a few days ago. I’d been so distracted, I hadn’t even seen it.

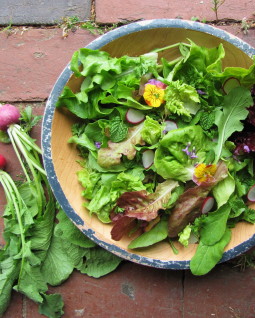
It’s all pretty swell though, as I am totally enchanted with the lettuces and greens, and with our success in growing them, despite their wobbly start as spindly seedlings in the apartment. And the best perk is the killer salads we are having every night for dinner.

But you don’t have to grow your own lettuce to make a really good green salad—just keep things simple. Stick with mostly greens (forget the big hulking cherry tomatoes and chunks of raw bell pepper—they’re distracting), and try a combination of tender lettuces and a little bit less of something assertive (I love Bibb lettuce with a bit of arugula or mizuna). You can even toss in a few baby herb leaves or finely sliced fresh herbs like mint, parsley or basil for a tiny surprise hit of flavor.

Take the extra time to buy individual heads of lettuce and bunches of greens—they’re much fresher and tastier than bagged lettuce. Wash them well, and be sure to spin them dry as dressing won’t cling to wet leaves. Lastly, make your own tasty house vinaigrette. Bottled salad dressings are full of things you don’t want to be consuming. Plus they taste, well, bottled.

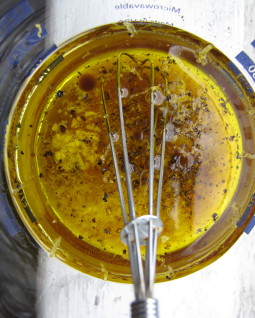
A vinaigrette in its simplest form is 3 parts oil to 1 part acid (vinegar, or a combination of vinegar and citrus juice). With a pinch of salt or a dab of mustard to emulsify the two, you can make a vinaigrette in seconds. Or add an extra flavor or two—fresh pepper, minced garlic, lemon zest, chopped herbs—and you’ve got a custom dressing with only a few more minutes of work. Make a decent-sized batch, and you’ll have homemade vinaigrette in the fridge for a couple weeks of dinner salads.

Here’s a recipe for our favorite house vinaigrette.

Lemon-Sherry Vinaigrette for Summer Salads

_______________________________

7 tablespoons extra-virgin olive oil

2 tablespoons sherry vinegar

½ teaspoon freshly grated lemon zest

½ teaspoon fresh lemon juice

½ teaspoon honey

½ teaspoon Dijon mustard

¼ teaspoon minced fresh garlic

several grinds of fresh pepper

½ to 1 teaspoon thinly sliced fresh mint (optional)

________________________________

Combine all the ingredients in a bowl or glass measure and whisk until emulsified. Or combine in a glass jar with a lid and shake the jar until the ingredients are emulsified. Store covered in the fridge for two weeks.

Yields about 2/3 cup

Chop Chop! Don’t Forget the Stems in a Swiss Chard Sauté

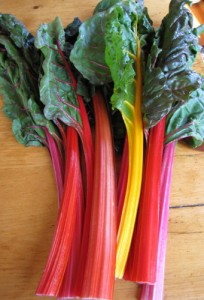
The second coolest thing about Swiss chard is that it cooks so darn fast. (The first coolest thing being its amazing neon color—especially the Bright Lights and Rainbow varieties.) So I hate to spoil the party, but I’m going to. My recipe takes a bit longer than the standard sauté.

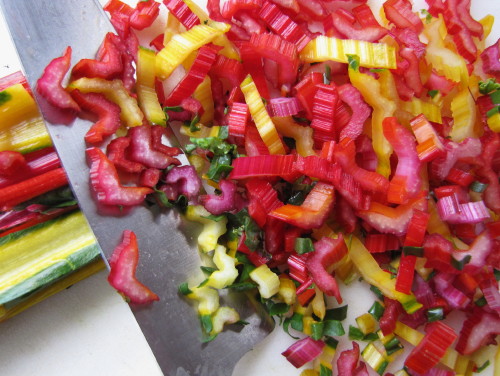
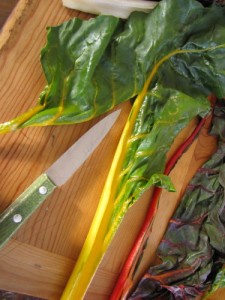
That’s because most recipes tell you to discard the chard stems and “use them for vegetable stock” or something else. (I know how many of you are busying yourselves making vegetable stock.) This is so you can then wilt the leaves like spinach and have a side dish in seconds. But if you have a few extra seconds (okay, minutes), you can simply slice up those stems and cook them until crisp-tender before adding the leaves to the pan. The stems add nice texture and make the side dish feel a little more substantial, too.

I’m a big fan of sweet and sour combinations with greens. Swiss chard has an especially mineral-y flavor, so I love to smooth out its rough spots with a flavor combo like maple and balsamic (in this recipe, along with ginger) or honey and sherry vinegar (or lemon). You can also use a caramelized aromatic (like sautéed shallots) to stand in for the sweetness and to add body. And garlic always plays well with greens. So fiddle around with flavors once you get your prep and technique down for this easy weeknight chard sauté.

(P.S. We just harvested our first Swiss chard, as well as Russian Kale, Lacinato, Tat Soi, Purple Pak Choi, Royal Oakleaf Lettuce, Tom Thumb Bibb Lettuce, and Lollo di Vino lettuce. We’re stocking a cooler out at Native Earth Farm stand with goodies, so stop by if you’re driving up-island. More details soon!)

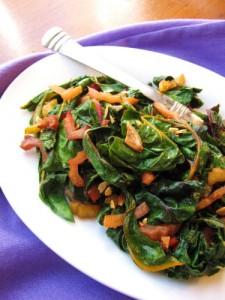
Swiss Chard with Balsamic, Maple Syrup and Fresh Ginger

______________________________________

1 ½ teaspoons maple syrup

½ teaspoon balsamic vinegar

1 bunch (12 to 13 oz.) Swiss chard, unstemmed, rinsed and dried

1 tablespoon extra-virgin olive oil

kosher salt

1 ½ teaspoons minced, peeled fresh ginger

1 tablespoon unsalted butter

2 tablespoons chopped or sliced toasted almonds

______________________________________

In a small bowl, whisk together the maple syrup and the balsamic vinegar.

Pull or cut away the stems from the chard leaves. Cut or rip the leaves into large (2- to 3-inch pieces) and wash and dry them well. Rinse the stems and slice them crosswise into thin (1/4-inch) pieces.

Heat the olive oil in a large (11- to 12-inch) nonstick skillet over medium-high heat. Add the chard stems and a pinch of kosher salt, and cook, stirring occasionally, until shrunken and beginning to brown lightly, 7 to 8 minutes. (They will begin to crackle in the pan as moisture evaporates.) Add the fresh ginger, stir, and cook just until fragrant, a few seconds. Add all of the chard leaves and ¼ teaspoon kosher salt and toss until just wilted (45 seconds to 1 minute). Scrape the balsamic-maple mixture into the pan, stir, and remove from the heat. Add the butter and toss and stir until it is melted. Serve warm, garnished with toasted sliced or chopped almonds if desired.

Serves 2 to 3