Tag Archives: Potatoes

A New Tradition—Crispy Smashed Potatoes—and More Thanksgiving Recipe Picks

We left the pot-luck early with an empty platter. It wasn’t the first time this had happened, but still I was surprised at the sheer snarfing speed of the crowd. The party was really just getting going when we had to dash off to take Libby to the boat, but somehow, between the freshly shucked oysters, the beer bottles twisting open, and the first bites of juicy roast pig, the crispy potatoes had evaporated. I’d never even taken the tinfoil off. But someone had, and a flashmob of snackers had downed 45 crispy potatoes in no time.

When we got in the car, Libby was grinning and wide-eyed, clearly ready to give me credit for this disappearing act. But I told her, “It’s a dirty trick, you know, putting a platter of fried salty potato thingies in front of hungry people, people who’ve probably been raking leaves or rounding up sheep or wading in freezing waters for scallops all morning. They don’t stand a chance against a crispy potato. Once you eat one, they’re like potato chips or popcorn—you have to have more.”

So, yeah, I did not invent potatoes+salt+oil, but I did noodle a fun variation on this theme some years ago for Fine Cooking magazine, and I noodled the idea a little further for The Fresh & Green Table, where I turned the crispy smashed potatoes into a warm salad with a bit of Asian slaw. And somewhere, some potluck along the way, I also discovered a bonus: These crispy smashed potatoes don’t have to be served hot. They’re just fine at room temperature, which makes them ideal for a buffet, or, say, something like Thanksgiving dinner, when keeping everything hot seems to be one of the biggest challenges. So after the potluck, I began to think I should hand over the recipe here at sixburnersue.com in time for turkey day.

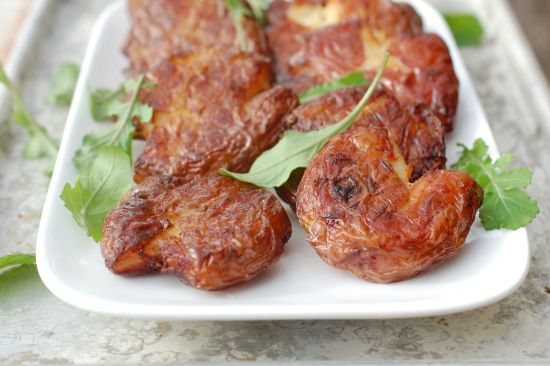
Now I am really not suggesting that you replace the mashed potatoes with these smashed potatoes. (They are literally smashed—you boil little red potatoes until tender and then gently smush them down with the palm of your hand. Then you toss with lots of oil and salt and roast at very high heat. Because they’ve already been boiled, they wind up with a fluffy texture inside and a very crispy texture outside.) But if you have a big crowd and serve lots of different kinds of food, there’s no reason not to make these, too, since they can be partially done ahead and popped in the oven when the turkey comes out to rest.

Or, heck, forget about Thanksgiving day and make them over the weekend or some other time during the holidays. They’re pretty good with roast beef. Or just about anything else.

And if you need some other great side dish ideas for the holiday, see my top ten suggestions from last year or browse Fine Cooking‘s terrific collection of Thanksgiving menus and recipes.


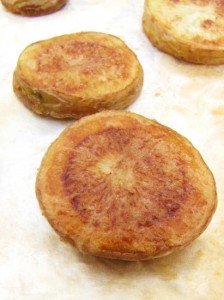
Crispy Smashed Potato Patties

Recipe copyright Susie Middleton, adapted from The Fresh & Green Table, Chronicle Books, 2012
Baby red potatoes—about 1 1/2 to 1 3/4 ounces each—are my favorites here. You can use slightly bigger potatoes, but keep them all about the same size for the best results. I used to toss these with olive oil, but I found that some olive oil got an offer flavor from the very high heat. Now I use vegetable oil. Canola is fine, but lately I’ve been using Spectrum’s high-heat safflower oil and that has a really clean taste.

___________________________________

16 baby red potatoes (consistently sized)

kosher salt

1/2 cup canola or safflower oil

__________________________________

Preheat the oven to 475°F. Line a heavy-duty rimmed baking sheet with aluminum foil and a piece of parchment paper on top. Arrange a double-layer of dish towels on a large cutting board or your kitchen counter. Put the potatoes (preferably in one layer) in a large Dutch oven and cover with at least 1 1/2 inches of water. Add 2 teaspoons kosher salt, cover loosely, bring the water to a boil, and reduce to a simmer. Uncover and cook until the potatoes are tender all the way through, but not falling apart, about 18 to 20 minutes. (Check with a paring knife.)

Using tongs or a slotted spoon, transfer each potato to the dish towels, arrange them a few inches apart, and let them cool for a few minutes. Using another folded dish towel, gently press down on each potato to flatten it into a patty about 1/2 inch thick (or up to 3/4-inch). The patties don’t have to be perfectly even, and a few pieces of potato may break off (no matter—you can still roast them). Let the patties cool for a few minutes more, transfer them to the baking sheet, and let them cool for 10 to 15 minutes longer. (Or, at this point, you can hold the potatoes in the fridge for up to 24 hours, covered with plastic. Bring to room temp before roasting.)

Sprinkle 1/4 teaspoon kosher salt on the potatoes and pour the 1/2 cup oil over them. Carefully flip the potatoes over, and season this side with a scant 1/2 teaspoon kosher salt. Rub with some of the oil, making sure that the potatoes are well-coated with oil on all sides. Roast (turning once with a spatula—carefully—halfway through cooking) until they turn a deep orange brown (a little darker and crisper around the edges), about 28 to 30 minutes.

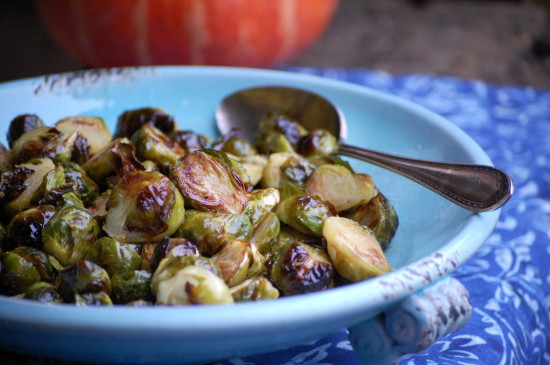


Best Roasted Brussels Sprouts + 10 Fave Thanksgiving Sides

This time last year I was preparing to be on television the day before Thanksgiving. (The Martha Stewart Show—I cooked quick veggie sides from Fast, Fresh & Green.) A few years back I did a satellite media tour around this time to promote Fine Cooking’s book How To Cook A Turkey. The year before that, I did a radio blitz for most of November and December to promote all the holiday tips and recipes on Fine Cooking’s website (which, if you haven’t looked lately, is by far the best place to go to plan your Thanksgiving menu. Check out the cool interactive Create Your Own Menu Maker. But I’m not biased or anything.) Well, you can imagine how relieved I am not to be PR-ing this holiday season. I did in fact just record some radio spots for Fine Cooking that will soon air on WGBH (I’ll keep you posted); but they were a whole lot of fun to do—and they didn’t require a new wardrobe or an anxiety attack.

So we are free and clear to have a simple and quiet Thanksgiving at the farmette (yippee!). I still have squash, rutabagas, onions, kale, arugula, herbs, and salad greens from the garden, plus green beans, corn, and roasted tomatoes that I froze, so we will be able to make most of the meal über-local. I will wander across the street to the West Tisbury Winter Farmers’ Market on Saturday to see if I can get the rest of what I need.

Regardless of where you plan to get your goodies, most of you, I know, have this one thing on your mind: What kinds of dishes can I cook that are easy and delicious, that everyone likes, and that will serve a decent-sized crowd? To that end, I’ve gathered a list of ten of my own favorite side dish recipes that serve at least six people (below). Some of these recipes reside on sixburnersue.com, but several are ones I developed a few years back for an “updated classics” story on Thanksgiving sides for (you guessed it) Fine Cooking magazine. And I also threw in a “create your own” creamy veggie soup from another FC article I did years ago, in case yours is the kind of family that likes to start the meal with an elegant soup (or needs options for vegetarians).

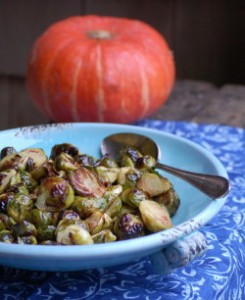
But for the tenth recipe on the list, I couldn’t resist posting my Roasted Brussels Sprouts with Orange Butter Sauce. This is a recipe I originally created for Fast, Fresh & Green but that I tweaked last year for the TV gig so that it would feed more people. I just remade it this morning and am happy to confirm that it is not only delicious, but possibly one of the fastest and easiest Thanksgiving side dishes ever to make.

Here’s my list:

1. Green Beans with Crispy Pancetta, Mushrooms, and Shallots

2. Roasted Turnips with Maple and Cardamom

3. Pomegranate-Balsamic-Glazed Carrots

4. Bourbon Sweet Potato and Apple Casserole with a Pecan Crust

5. Creamy Baked Leeks with Garlic, Thyme, and Parmigiano

6. Mashed Yukon Gold Potatoes with Roasted Garlic

7. Thanksgiving Gratin of Butternut Squash, Corn & Leeks

8. Potato Galette with Fresh Rosemary & Two Cheeses

9. Creamy Vegetable Soup (Pick Your Own Veggie!)

10. Roasted Brussels Sprouts with Orange Butter Sauce (see below)


Roasted Brussels Sprouts with Orange Butter Sauce

I’ve roasted Brussels sprouts a few different ways, but you can’t beat this method for volume (large rimmed sheet pans hold a lot), quickness (16 to 18 minutes in a 475° oven), and great results (by halving the sprouts and roasting them cut-side down, the tops and bottoms brown but the interiors steam). The flavorful butter sauce gives the nutty roasted sprouts just the right touch of tangy-sweet richness to make this completely holiday-worthy.

_________________________________________

2 lb. small Brussels sprouts, trimmed and halved lengthwise

1/4 cup extra-virgin olive oil

1 tsp. kosher salt

1 Tbsp. plus 1 tsp. balsamic vinegar

2 Tbsp. pure maple syrup

2 Tbsp. fresh orange juice

1 tsp. finely grated orange zest or lemon zest

4 Tbsp. cold unsalted butter, cut into 16 pieces and kept chilled

________________________________________________

Preheat the oven to 475˚F. Line two large heavy-duty rimmed sheet pans with parchment paper. In a mixing bowl, toss the Brussels sprouts with the 1/4 cup olive oil and 1 tsp. of the salt. Divide the sprouts between the two sheet pans and arrange them, cut-side down. Roast until brown and tender, 16 to 18 minutes. (The tops will be dark brown and crispy and the sprouts should feel tender when pierced with a paring knife.) Transfer the sprouts to a mixing bowl.

Combine the balsamic vinegar, maple syrup, orange juice, and orange zest in a small saucepan. Heat the mixture over medium heat just until it’s hot (you will see a bit of steam), but not simmering. Remove the pan from the heat and add the cold butter, several pieces at a time, whisking constantly until the mixture is smooth and creamy. (Don’t reheat the mixture or the butter will break and the sauce won’t be creamy.) Pour the sauce over the sprouts and stir thoroughly but gently until most of the sauce has been absorbed. Transfer the sprouts and any remaining sauce to a serving platter and serve right away.

Serves  8

Cooking Out: Garden Potatoes on the Grill

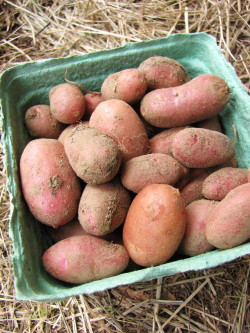
Finally, we’re harvesting our potatoes—Red Golds and French Fingerlings, too. Every morning Roy forks up a plant or two and we ooh and ah over the tubers that tumble off the roots. (The potatoes are Roy’s babies, so he gets to decide how many we pull up every day!) There are always a few that are only the size of marbles—I slip them in my pocket and roll them around in my fingers from time to time, as if they were lucky garden charms. The rest I weigh and portion into those cute little green berry baskets for the farm stand. Any extras I get to keep. And cook for dinner. Yum.

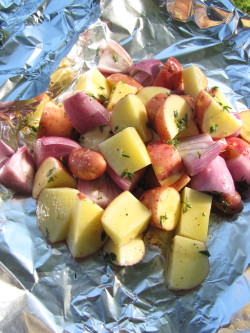
The other night I had a few of both kind left over, and they were all different sizes. So I cut them up into pieces about the same size so they’d cook at about the same rate. But instead of roasting them, I decided to cook them on the grill using a method I developed for Fine Cooking years ago. Basically, it’s just cooking in a foil package (not a radical concept!), but the trick is to make a package of even thickness so that all the potatoes cook at about the same rate (see directions in the recipe below).

The big payoff here is that by putting the foil package over the direct heat of the grill, the potatoes get some great browning (and flavor) and cook through, too. I wrap the potatoes in three layers of foil so that they don’t burn, and I flip the potato package once during cooking so both sides have contact with the hot grill grates.

To keep the potatoes from drying out, I do two things: I toss them with plenty of olive oil, and I include aromatic veggies (like onions, mushrooms, or peppers) that give off both moisture and flavor as they cook. Garlic cloves are yummy additions, too, as are hearty fresh herbs like thyme and rosemary. I used quartered shallots in the version I made the other night. They were tasty, but the smaller pieces of shallot almost burned so I’d leave them out. I also wish I’d had the mushrooms on hand to add, so I’ve included the suggestion below.

My potatoes cooked—just like my old recipe said they would!—in about 45 minutes, but this might depend on the grill you’re using. To see if your potatoes are done, remove the package from the grill and very carefully peel back the foil with tongs (the steam will be hot). Poke one or two with a paring knife. If they need more time, just wrap the package back up and continue cooking. If they seem like they’re brown enough already, put the package over a burner turned to low, but keep the other burners on medium.

This is definitely a method worth playing around with, as it’s a great hands-off way to cook potatoes on a summer night when you’d rather cook out than turn your oven on.

Grilled Potato “Packages”

Mushrooms are a good addition to this mix. If you include them, use 3 or 4 ounces and reduce the amount of potatoes slightly.

_______________________________________________

12 ounces red, gold, and/or fingerling potatoes, cut into 1-inch pieces

2 large shallots or one small yellow or red onion, cut into chunks (discard smaller pieces)

3 tablespoons extra-virgin olive oil

2 teaspoons thyme leaves or roughly chopped rosemary

1 teaspoon kosher salt

freshly ground black pepper

____________________________________________

Heat a gas grill on medium heat. (My gas grill is new and runs fairly hot so I turn the dials to just below medium. ) Combine all the ingredients, including several grinds of fresh pepper, in a bowl and mix well. Measure out three sheets of (regular) aluminum foil. Each should be about 20 inches long. Overlap two pieces in a cross pattern. Mound the potato mixture in the middle of the cross and spread it out evenly into a square of even thickness (about 1 1/2 inches). Fold each piece of foil in and over the potatoes to wrap the package, and wrap the third piece of foil around the package for a good seal.

Put the package directly on the grill grate and cover the grill. Cook for 20 minutes (you’ll hear sizzling) and flip over. Cook for 20 to 25 minutes more. Remove the package from the grill and open it carefully with tongs. (It will release hot steam.) The potatoes should be nicely browned in places and will be tender when pierced with a paring knife. If they aren’t tender yet, rewrap and cook for 10 minutes longer.

Serve warm.

Serves 3 as a side dish

Instant Gratification: Roasted Fingerling & Watercress Salad

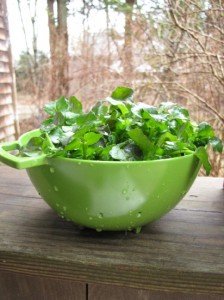
It’s funny how things come together in the kitchen. This week I’ve had lots of fingerling potatoes lying around, as I’ve been developing recipes with them for Vegetarian Times magazine. As it happens, I also treated myself yesterday to a watercress gathering excursion. Nice to be out in the quiet of the early morning under clearing skies, walking along a damp compost-y path beneath a gradually thickening canopy of budding branches. (Buds—finally.) I had my little scissors, a bag, and my camera. Sadly, I couldn’t linger long—lots of recipe testing scheduled for the day. But I crouched low in the black mud, hung over the stream, and snipped enough crisp clusters of Leprechaun-green watercress to fill my bag. And then reluctantly carried on my way. Retreating out of the cool forest, I heard the buzz of cars on the roadway calling me out of my reverie.

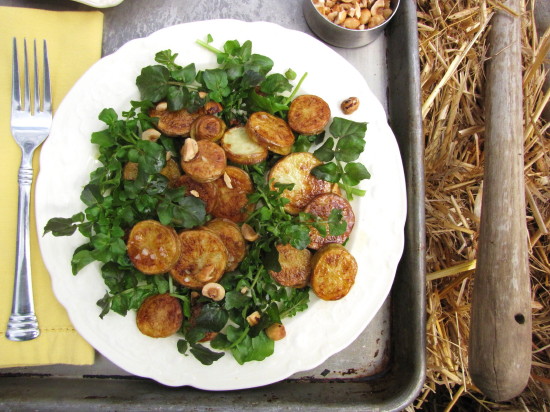
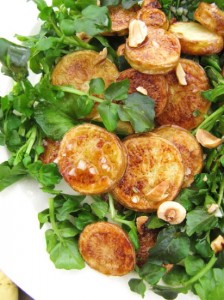
Back home at lunch time (after another recipe test—Asian slaw), I looked at the fingerlings and the watercress and thought: Warm salad. It’s no secret that my favorite way to cook fingerlings is brown-braising. But right then, I wanted instant gratification, and I looked at the little knobby potatoes and thought slicing them into coins and quick-roasting them would get me my hit. Sure enough, the little coins were golden on the outside, moist on the inside after 20 minutes at 450 degrees. I scrunched up some handfuls of washed watercress and scattered them on white plates. On went the roasted potatoes and a super-quick warm dressing I made in the skillet with sautéed garlic, olive oil, and red wine vinegar. I happened to have some toasted hazelnuts around, so I scattered a few of those on, too. Simple and lovely. Nothing I like better than a warm salad, especially with something so crazy delightful as freshly picked watercress. Now, I can’t wait ‘til I can harvest our own greens. (Just a few weeks away, maybe—the first arugula seeds I sowed in the garden last week sprouted today—yippee!)

One little suggestion: If you decide to whip yourself up a warm fingerling salad like this (which you could certainly do with arugula or any other assertive green), the dressing would be even better if you cooked a slice of bacon in the skillet first! Course you could skip the greens altogether, too, if you liked. Those little roasted fingerling coins tasted pretty yummy straight off the sheet pan.

Roasted Fingerling Potato & Watercress Salad

Printable Version of Recipe

All the amounts in this recipe are flexible, and you could vary the dressing or add garnishes as you like. This is really more like a serving suggestion, simply meant to inspire you to pair warm vegetables with cool greens. Just be sure your potato pieces are well-coated in oil for the best roasting. I find slicing the potatoes a little thicker than 1/4-inch, but not quite 1/2-inch (voila, 3/8-inch!) is just about right for cooking through and browning up at the same time in a hot oven.

___________________________________

12 oz. fingerling potatoes, unpeeled, sliced crosswise into “coins” about 3/8-inch thick

2 1/2 to 3 tablespoons extra-virgin olive oil

kosher salt

4 to 5 ounces stemmed watercress, washed (or other assertive greens in small pieces)

1/2 teaspoon minced fresh garlic

1 teaspoon red wine vinegar

1/4 teaspoon maple syrup

2 tablespoons finely chopped toasted hazelnuts or almonds (optional)

1 tablespoon crumbled good-quality blue cheese (optional)

__________________________________________

Heat the oven to 450 degrees F. Cover a large sheet pan with parchment paper. Toss the fingerling pieces with 1 1/2 to 2 tablespoons of the olive oil and 1/4 teaspoon kosher salt. Spread them out in one layer on the parchment paper. Roast under tender all the way through and golden brown on the bottom, about 20 minutes. (Don’t worry if the coins aren’t very brown on the tops—they will be quite golden on the bottom, so just flip them.)

Meanwhile, distribute the watercress on three salad plates (or two for bigger salads). In a small skillet, heat the remaining 1 tablespoon olive oil and the minced garlic over medium-low heat. Stir gently and cook until the garlic begins to sizzle, about 3 to 5 minutes (don’t let the garlic brown.) Add the red wine vinegar, the maple syrup, and a pinch of salt and stir. Remove the skillet from the heat.

Arrange the warm potatoes amongst the watercress and drizzle or spoon the warm dressing over the salads. Sprinkle a tiny bit more salt on each salad, and garnish with the nuts and/or cheese if desired. Serve right away.

Serves 2 or 3

St. Patty’s Day & Sixburnersue: A Gratin Recipe to Celebrate

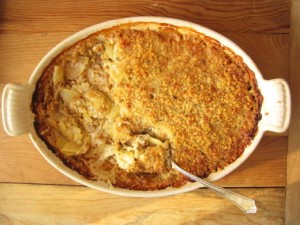
St. Patrick’s Day, 2011, is sixburnersue.com’s unofficial one-year anniversary. At least that’s what I’ve decided. Actually, let’s make it official. And next year, we’ll have a proper celebration with two green cupcakes and two green candles. This year, we will have to make do with a yummy cabbage and potato gratin recipe.

I’m not sure of the exact day sixburnersue.com went live last year, but I know by St. Patty’s Day I was blogging in real time. And strangely enough, the blog I wrote on sautéed cabbage for the green holiday turns out to be one of the most visited pages on this site. (Along with a post on ten things to do with celery root! Go figure. Posts on more glamorous veggies like fingerling potatoes and asparagus get a lot of hits, too, but I think there may be a shortage of good cooking info out there on less sexy veg.)

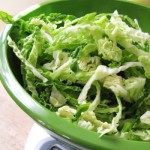
My favorite cabbage is the crinkly Savoy (beautiful dark green on the outside, pale on the inside), and yes, I love to sauté it to bring out its sweeter, nuttier side (see last year’s blog.) Then I use it as a rustic tart filling, a pizza topping, a bed for meat, a stir-in for mashed potatoes, or as a bed for a savory gratin, like the potato and Gruyére one here. Of course my main motive for posting this recipe today is to give you an alternative to boiled cabbage (not my favorite). Actually, I’d be happy if you skipped the corned beef, too, and went with roast leg of lamb. But, yeah, you didn’t ask for my opinion on that, did you?

Whatever you eat on Thursday, may the (good) luck of the Irish be with you. (We have more than a little of it here in our household. Just ask the man with the shamrock tattoo.) And if you’re the praying kind, ask St. Patrick for a little luck to rub off on our friends in Japan.

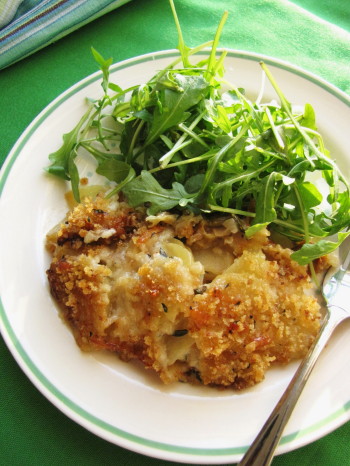
St. Patrick’s Day Potato, Cabbage, Onion, Apple & Gruyère Gratin

This delicious gratin is a pretty rich side dish, so a little goes a long way. Serve it with roast lamb, corned beef, or a big warm salad. It will take you about an hour to get it in the oven, and about an hour and a bit to cook, so plan your menu accordingly. When prepping, don’t be tempted to under-brown the cabbage or the onions. To slice the potatoes thinly, cut them in half first, lay them cut side down, and slice across with a thin-bladed knife such as a Santoku. (You don’t need to use a mandolin).  

__________________________________________

1 tablespoon unsalted butter, plus more for rubbing the baking dish

1 1/2 cups coarse fresh breadcrumbs

3 ounces Gruyère cheese, grated (1 1/4 cups packed)

3 tablespoons olive oil

1 tablespoon plus 1 teaspoon coarsely chopped fresh thyme leaves

kosher salt

2 small yellow onions (9 to 10 ounces total), thinly sliced (about 2 cups)

2 teaspoons minced fresh garlic

2 cups thinly sliced Savoy cabbage (about 7 ounces)

1 Jonagold, Pink Lady, or Golden Delicious apple, peeled, cored, quartered and thinly sliced crosswise

1 lb. Yukon Gold potatoes, peeled, halved and very thinly sliced

3/4 cup heavy cream

3/4 cup low-sodium chicken broth

_________________________________________

Heat the oven to 350 degrees F. Rub a 2-quart shallow gratin dish (or a 11 x 7 Pyrex baker) with a little butter.

In a small bowl, combine the breadcrumbs, 2 tablespoons of the grated Gruyère, 1 tablespoon of the olive oil, 1 teaspoon of the chopped thyme and a good pinch of salt. Set aside.

In a 10-inch heavy nonstick skillet, melt 1/2 Tbsp. of the butter with 1 Tbsp. of the olive oil over medium-low heat. Add the onions and 1/4 tsp. of salt, cover, and cook, stirring occasionally, until softened and translucent, 6 to 7 minutes. Uncover, raise the heat to medium, and continue to cook, stirring frequently, until the onions are lightly browned, 6 to 7 minutes more. Add 1 teaspoon of the minced garlic, stir for a few seconds, and remove the pan from the heat.  Transfer the onion-garlic mixture to the baking dish and spread it evenly in one layer. Sprinkle 1/2 teaspoon thyme leaves over the onions.

Return the skillet to medium-high heat and add the remaining 1/2 tablespoon of butter and 1 tablespoon olive oil. When the butter has melted, add the cabbage and a pinch of salt. Stir and let sit for a minute for browning to begin. Then cook, tossing frequently with tongs, until cabbage is limp and browned, 4 to 5 minutes. Add the remaining 1 tsp. garlic, stir well, and remove the pan from the heat. Transfer the cabbage mixture to the baking dish and spread in one layer. Sprinkle 1/2 teaspoon thyme leaves over the onions.

In a mixing bowl, combine the sliced potatoes, the sliced apples, the remaining Gruyère, the remaining thyme, the cream, the chicken broth, and 3/4 teaspoon salt. Gently mix with a silicone spatula and transfer to the baking dish, spreading the mixture evenly over the cabbage and onions. (Sometimes it’s easier to transfer the solids first. Lift the potatoes and apples out of the liquids with your hands and spread them in the dish; then gently pour the liquids over all.) Make sure everything is evenly distributed and use your hands to press down gently on the potatoes and apples to let the liquids come up around them.

Cover the top of the gratin with the breadcrumb mixture. Bake until the potatoes are tender (check both the middle and sides of the dish with a paring knife) and the top is brown (there will be a brown line around the edge where the liquids have reduced), about 65 minutes. Let cool for several minutes before serving.

Serves 6 as a side dish

My Favorite Tip (And Recipe) For Thanksgiving Mashed Potatoes

One of the best things about working at Fine Cooking magazine all those years was the wealth of great tips I gleaned from the chefs, cookbook authors and other amazing cooks we worked with to produce the stories. One of my favorite Thanksgiving “A Ha!” moments was discovering how to keep the mashed potatoes warm. After you finish making them, put them in the top pan of a double boiler, or even better, in a large, wide shallow stainless steel (heatproof) mixing bowl. Cover with foil or a lid and hold over gently simmering water for up to 2 hours! You’ll need to check the water every once in a while, but there are a couple of great things about this tip. First, the people who have a thing about being served less than piping-hot food (you know who you are, Dad) will be very happy. Secondly, you, as the cook, will not have to worry about making the mashed potatoes (along with everything else) at the last minute.

Of course, there are a few other tips to making good mashed potatoes. Probably the most important is not to over-mash. If you overwork potatoes (especially Russets), the starch will turn to glue. Usually, a stand mixer on high speed is the culprit here, so I always mash my potatoes with a hand-held masher. (We don’t mind ours a little rough; I also prefer to use Yukon Golds.) But a food mill will give you the most beautiful potato puree.

But instead of going on and on (for once I will stop myself!), I thought instead I’d offer my favorite mashed potato recipe for a crowd (below), and you can take a few more clues from that. (This one happens to included roasted garlic—yum—but you could leave it out.)

I hope everyone has a wonderful Thanksgiving holiday, and if you need help with your menu, I’d recommend checking out Fine Cooking’s Thanksgiving Menu planner, which not only has a ton of great recipes, but will generate a shopping list and time line for you after you select the recipes for your menu. Of course the Baking Gratins chapter in Fast, Fresh & Green has some delicious ideas, too. And if you’re looking for quick vegetable side dishes, remember to tune in to The Martha Stewart Show on the Hallmark Channel on Wednesday, November 24 at 10 a.m. to see me roasting squash, turnips, and Brussels sprouts!

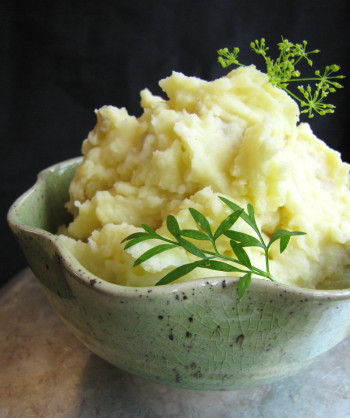
Mashed Yukon Gold Potatoes with Roasted Garlic

The roasted garlic in this recipe makes these potatoes irresistible, but you can use the proportions here to make perfectly delicious mashed potatoes without the garlic if you like. This recipe yields a lot – enough to serve 10 people at Thanksgiving. (I originally developed this for a holiday issue of Edible Vineyard magazine.) But you can easily cut it in half to serve it some other time.

_________________________________________________

4 pounds Yukon Gold potatoes, unpeeled, cut into 1-inch pieces

1 tablespoon plus 1 teaspoon kosher salt

10 tablespoons unsalted butter, at room temperature

Cloves from 2 heads roasted garlic (for directions, see below)

1 ¼ cups heavy cream, at room temperature

_________________________________________________

In a Dutch oven or other large, wide cooking pot, combine the potatoes, 1 tablespoon kosher salt, and enough cold water to cover the potatoes by about 2 inches. Bring the water to a boil, reduce to a simmer, and cook until the potatoes are tender, a total of about 25 to 30 minutes.
Drain the potatoes in a colander and return them to the cooking pot over very low heat. Toss the potatoes around for a few seconds to allow some of the excess moisture to steam off a bit. Add all of the butter, the garlic cloves, 1 teaspoon kosher salt, and 3/4 cup of the heavy cream. Using a hand masher and moving around the pot in a clockwise manner, mash the potatoes until they are coarsely mashed. Continue adding cream and mashing until the potatoes are mostly smooth. They will have a creamy texture with just a slight chunkiness and yummy bits of skin and garlic throughout. Towards the end of mashing, switch to using a heatproof silicone spatula to smooth the potatoes out a bit.  Serve hot right away or keep warm over simmering water (covered) for up to 2 hours.

_________________________________________________

To Roast Garlic: Heat the oven to 350 degrees. Take a very sharp chef’s knife and chop off about the top 3/4-inch of a head of garlic. (Or chop off enough so that each clove is slightly exposed). Leave the head in tact (do not separate the cloves) and place it on a double layer of aluminum foil. Drizzle the head (or the two heads, as in the case of the recipe above) with olive oil and wrap the aluminum foil up around the head. Place the package in a small casserole dish or on a small sheet pan and put it in the oven. Roast for 45 minutes or until the cloves are just tender and soft through. Let cool at least 15 to 20 minutes before squeezing the garlic cloves out of their skins by applying pressure to the base of the head.

The Gold Rush (Or Why We Couldn’t Wait to Dig Up Potatoes)

We cheated. It’s not really time yet to harvest the potatoes, but we just had to check one plant. You know, to make sure there were tubers growing under all that foliage. Besides, it was Friday night and we were looking forward to an all-local dinner. We had just stopped to see Jeff Munroe, the Vineyard’s chicken man, and picked up a freshly slaughtered chicken for the grill. A big salad with our arugula, mizuna, lettuce, and peas was on the menu. All we needed were potatoes, right?

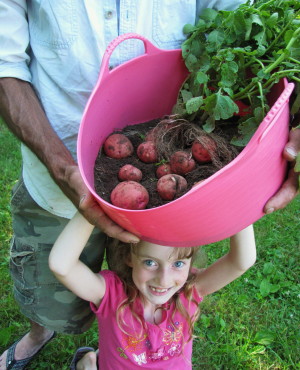
While I butterflied the chicken and cleaned the greens, Roy and Libby ran over to the garden, pitchfork in hand. They came back toting a potato plant—and about a pound and a half of Red Gold potatoes—in the big pink harvest bucket.  I jumped up and down for joy. Everyone giggled. Our own potatoes—how very cool is that? (We are easily amused, I guess.)

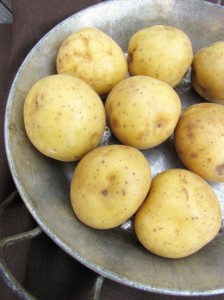
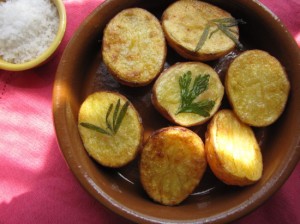
I wanted to cook them simply to see what the taste and texture was like. We bought our Red Gold seed potatoes from FedCo’s Moose Tubers catalogue, because they sounded like a fun and flavorful alternative to Yukon Golds, and because they were supposed to yield early and abundantly (we could already agree on that point). So I wound up boiling them until just tender and then frying them, cut-side down, until golden (directions below). I was surprised at how flaky the texture was for a red-skinned potato. It was almost as tender as a baking potato. And that rich yellow flesh was nutty and buttery tasting—perfectly delicious.

We’re trying to restrain ourselves from digging up any more Red Golds right now. The catalogue says about 65 days,  and it’s only been about 56.  The plant we did unearth clearly had a few more tubers forming, so we need to be patient. And then there’s that row of French Fingerlings waiting for us…

In the meantime, I guess we can line up with the rest of the folks who’ve discovered how rewarding potatoes are to grow. Our biggest problem has been keeping up with the ravenous Colorado Potato Beetle, who arrived early and with all of his kinfolk. The best way to dispatch them (in an organic garden) is to simply squish them (or their orange eggs that cluster on the back of leaves) with your fingers. Amazingly, this is an activity that Libby actually enjoys. (How many 7-year-old girls do you know who are fascinated by bugs?) So I’m grateful for that. Not so grateful that nature-loving father and daughter brought me a Garter snake as a present yesterday (to live in the garden!?). But I can hardly complain.

Golden Fried Potatoes

Choose small potatoes that are all about the same size and cut them in half lengthwise. Put them in a saucepan just big enough to hold them in one layer and cover them with cold water by at least an inch.  Add a good bit of kosher salt. (I use 1 ½ teaspoons for a pound of potatoes.)  Bring to a boil, lower to a gentle simmer, and cook until just tender, about 15 minutes for freshly dug potatoes, 20 to 25 for older potatoes.

Drain the potatoes well and let them cool for a bit on a dishcloth. Meanwhile, heat about a tablespoon of olive oil and about a tablespoon of butter in a large frying pan (nonstick works fine if it has a heavy bottom) over medium heat. When the butter is bubbling, sprinkle salt on the cut side of one potato (press an herb leaf on, too, if you like), and put the potato in the fat, cut side down. Repeat with the remaining potato halves. Cook, without turning the potatoes (but occasionally swirling the fat in the pan around them), until they are golden brown on the bottom (check carefully with a thin spatula), about 10 to 12 minutes. Transfer to a serving plate and serve warm, with or without a dollop of sour cream, a smattering of chives, and another sprinkle or two of salt.

A Potato Salad to Celebrate the Unofficial Start of Summer

I realize that this is Memorial Day weekend, not Fourth of July, so I may be jumping the gun a little by posting a potato salad recipe. But it’s been such a warm spring, and it’s looking like it will be a hot weekend all over the country, so I figured folks might be thinking about potato salad for picnics and barbeques.

Truthfully, this thought got me a little worried, as visions of store-bought, factory-made, gloppy potato salad came to mind.  There is nothing I hate worse than bad potato salad.

But then I breathed a sigh of relief, knowing that many of you all will be making your own delicious potato salads. In fact, you might even be scanning the web, looking for a lighter, brighter take on the classic American-style recipe. So I thought I’d post a favorite from Fast, Fresh & Green that’s got all the fresh flavors of spring, but that’s also assertive enough to pair with the grilled fare of summer—a  perfect season-bridger.

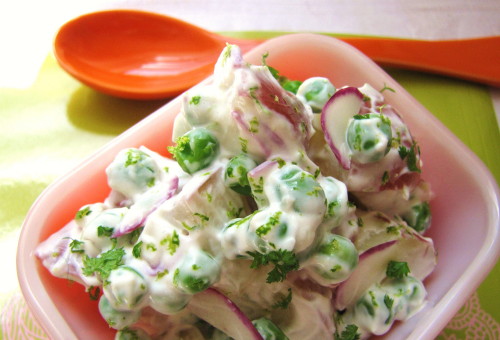
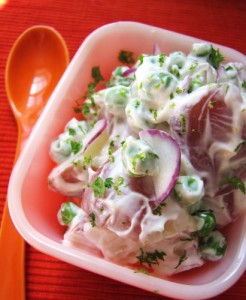
I made some of this New Potato Salad with Fresh Peas, Lime & Mint this morning and added a few slivers of baby radishes we pulled up from the garden yesterday. The lime zest and juice are the ingredients that really make this salad feel fresh, but lightening the mayonnaise with Greek yogurt helps a lot, too. In fact, these are two good tricks to remember when making any kind of mayonnaise dressing for a salad: Lighten the mayo with yogurt or whisked cream for a silkier texture, and always add extra lemon or lime for bright flavor. And don’t forget to salt the potatoes while you’re cooking them!

This salad is great with grilled lamb and grilled shrimp, but it’s also good as a main dish for lunch with some Bibb lettuce or as part of a vegetarian supper or picnic.

New Potato Salad with Fresh Peas, Lime & Mint

This recipe yields just enough to serve 4. You can easily double it, but you may find you want just slightly more dressing if you do. You can always whisk together just a bit more mayo, yogurt and lime and fold it in, or  you can start out by doubling all the ingredients, but only increasing the potatoes to 1 3/4 pounds instead of 2.

___________________________________________

1 pound baby Yukon gold or Red Bliss potatoes, quartered or cut into sixths for similar-sized pieces

2 ½ teaspoons kosher salt, more for seasoning

1 pound fresh peas in the pod, shelled to yield 1 cup peas (frozen peas are fine, too)

1/3 cup mayonnaise

¼ cup thick Greek yogurt (whole or 2%)

1 teaspoon (loosely packed) freshly grated lime zest (from about 1 lime)

½ teasoon fresh lime juice

¼ cup sliced scallions

2 to 3 tablespoons finely sliced fresh mint leaves

freshly ground black pepper

__________________________________________

Put the potatoes and 2 teaspoons of the salt in a large saucepan and cover with plenty of water. Bring to a boil, reduce to a simmer and cook until almost tender, about 10 minutes. Add the fresh peas (if using) and cook for 2 to 3 minutes more. (If using frozen peas, simply submerge them in a little tap water to defrost; then drain and dry.) Drain the potatoes and peas carefully in a colander and rinse them gently with cool water for a few minutes. Spread the potatoes and peas out on a small rimmed sheet pan and let cool. If you are in a hurry, you can refrigerate the potatoes like this and they will cool in about 20 minutes.

Meanwhile, whisk together the mayonnaise, the yogurt, the lime zest and the lime juice in a medium mixing bowl. Add the cooled potatoes and peas, the scallions, 2 tablespoons of the mint, ½ teaspoon kosher salt, and several grinds of fresh pepper. Mix gently but thoroughly with a silicone spatula. Taste and add a little more salt if desired. Garnish with the remaining mint .

Serves 4

A Golden Galette is My All-Time Favorite Potato Recipe

It’s not very forward-thinking to pronounce something your all-time-favorite-such-and-such recipe. What happens if a more delicious recipe comes along down the road and you change your mind? It’s a little like the boy who cries wolf. You can go around saying, “No, really, this one is my favorite,” but after a while, no one will believe you.

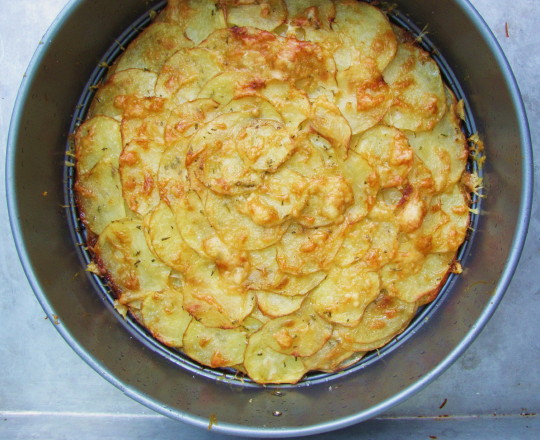
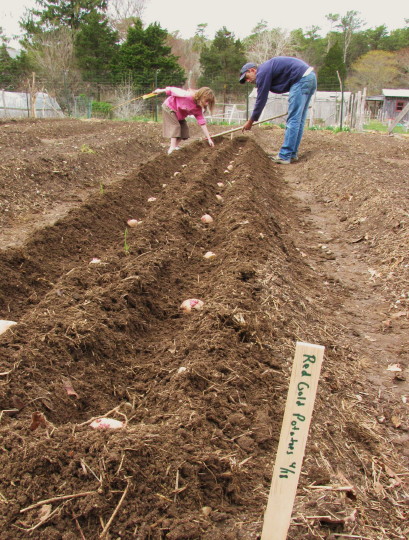
It’s very possible that I once bestowed this “favorite recipe” honor on another potato recipe of mine, one for a crispy roast smashed potato I developed for Fine Cooking magazine years ago, and that resides over at finecooking.com with many wonderful user reviews. And I have to say, the recipe for braised fingerlings I posted here a few months ago is pretty darn delicious. But yesterday, when I planted potatoes for the first time in my life, it was this recipe for a potato and cheese “galette” that I was dreaming of making later in the summer when we harvest our first Red Gold potatoes (photo below). So I’m going to risk my rep and call this galette my favorite potato recipe. (It  has something to do with the crispy factor.)  Just don’t blame me when I get all excited about a new potato salad or roasted garlic mashed potatoes or crispy slow-sautéed potatoes in some future blog. I can’t help myself.

One of the things I love best about the galette is the easy method. A galette is a layered potato dish, very similar to what the French call Potatoes Anna, except that instead of having to flip it in a pan on the stovetop (something I’m notoriously bad at), you get to bake it in a tart pan or cheesecake pan (anything with a removable rim).  All you do is arrange thinly sliced potatoes in slightly overlapping circles, sprinkle on a bit of cheese, and repeat. Bake until tender inside, crispy outside. Cut into wedges to serve.  You get the idea.

Better still, the galette is incredibly versatile. I like to use it as a sort of a bed for sliced roast chicken or grilled steak. A small wedge also nestles nicely next to a salad or can be served with a bowl of soup. It’s even good at room temperature as a snack. After a galette cools, I cut the whole thing into wedges, even if I’m not serving it all right away, as the wedges can be kept in the fridge for a day or two and easily reheated, one at a time if you like.

Potato Galette with Fresh Rosemary & Two Cheeses

Be sure to use good Parmigiano and gruyere cheese in this recipe. With so few ingredients, the quality (and flavor) of the cheese makes a different. You can substitute fresh thyme for the rosemary if you like. Stick with yellow-fleshed potatoes for this recipe; red skinned-potatoes and Idahos do not work as well in this kind of dish. You don’t need to peel the potatoes.

_______________________________________________

3 tablespoons plus ½ teaspoon extra-virgin olive oil

1 ½ pounds Yukon Gold potatoes (about 4 medium)

1 ½ teaspoons chopped fresh rosemary

¾ cup grated Gruyere cheese

1/3 cup finely grated Parmigiano Reggiano

kosher salt

_______________________________________________

Heat the oven to 375°  and arrange one rack in the middle of the oven.  Rub a 9- inch tart pan or a 9 ½-inch cheesecake pan with ½ teaspoon of the olive oil. (Make sure the pan has a removable bottom.)

Put the potatoes on your cutting board and trim a small slice off the bottom of each to stabilize it. Trim off and discard the very ends of the potatoes. Then cut the potatoes crosswise into very thin slices. Use a sharp, thin-bladed (but strong) knife—a Santoku knife works great for cutting thin potato slices. Slice as thinly as you can, but don’t worry in the least if the slices are inconsistent; the galette will still cook evenly as long as you don’t include any really thick slices. If you have a mandolin, you can certainly use it, but you don’t need to.

Put the potato slices, the chopped rosemary, and the remaining 3 tablespoons of olive oil into a mixing bowl and toss thoroughly to coat.

Cover the bottom of the pan with a layer of potato slices, starting by making a ring of slightly overlapping slices all the way around the outside edge, and then working inward, laying down more rings of slightly overlapping slices until the bottom is covered. Sprinkle the potatoes with a tiny bit of kosher salt (about 1/8 teaspoon) and then sprinkle about 1/3 of the gruyere and 1/3 of the Parmigiano over all. Arrange another layer of potatoes over that, season again with salt, sprinkle with 1/3 of each cheese again, and finish with a top layer of potatoes and cheese.

Bake the galette until the top is golden brown and a fork easily pierces the layers of potato, about 45 to 50 minutes. Let the galette cool for 10 to 15 minutes in the pan. Run a thin knife around the edge to unstick any cheese and remove the cheesecake ring or the tart ring, leaving the galette on the bottom of the pan. Use a thin spatula to gently release the galette from the pan bottom, and transfer the galette to a cutting board. Cut into 6 or 8 pie-shaped pieces. Serve warm.

Serves 6 to 8


Bitter Gets Sweet (I Swear!): A Recipe for Caramelizing Turnips In a Cast Iron Skillet

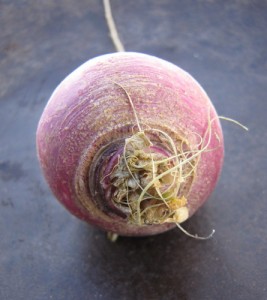
I know you are thinking I have lost my mind. Last week it was celery root; this week it’s turnips. “Can’t she write about something delicious—or something my family will actually eat?” I hear you asking. I’m sorry, but I just couldn’t pass up the chance to tell you about this—the absolutely most delicious way to cook turnips.

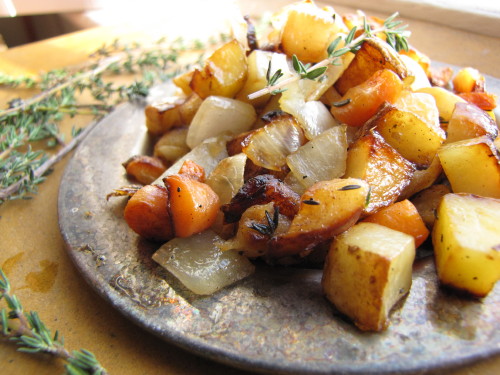
In fact, I’ve already written about this technique—slow-sautéing in a cast-iron skillet—once this week. I moonlight as an occasional blogger over at the Huffington Post’s Green Page, and this week I’ve been participating in their latest challenge—The Week of Eating In. At first I felt a little silly saying, “Sure, I’ll eat in for a week,” since I already cook and eat most of my meals at home. (Plus I just recently posted my opinion on why I think everyone else should cook at home more, too!) But then I realized I could help other people in the challenge by posting tasty ideas for cooking veggies at home.  And since I had just made my slow-sautéed turnips, potatoes, carrots, and onions for like the 12th time this winter, I figured I’d share that yummy idea on Huff Post.

Over here, I wanted to post the whole recipe (and a few more photos), and to also let you know that there are many more “slow-sautés” coming in my cookbook, Fast, Fresh, & Green. The recipes in the book were developed for a straight-sided stainless steel sauté pan, since I think more people own them than cast-iron pans. But cast-iron is so perfect for this kind of dish, because it captures and distributes heat so evenly, that I wanted you to be able to try it if you can. (You can get a pre-seasoned Lodge cast iron skillet for about $15.)

I start this kind of sauté by dicing (pretty small but not too fussy) whatever roots I’ve got on hand and piling them into the skillet with lots of olive oil and herb sprigs. The pan will be really crowded at first—that’s okay. As the vegetables cook, they brown and steam at the same time (and they shrink quite a bit). I always add some aromatic allium—onion, leeks, or shallots—about halfway through cooking for added moisture and flavor.

But the most important thing I do is to keep my ears tuned to the sizzling in the pan. It should be a steady, perky sizzle—but nothing too explosive sounding. The sizzle’s your cue to how fast the veggies are cooking. You want them to brown and steam at about the same rate, because your ultimate goal is deeply browned (yes, caramelized) vegetables that are cooked through, too. This is much easier than I’m making it sound. All you need to do is stir every once in awhile and maybe adjust the heat once or twice. The veggies will be done in about 35 to 40 minutes—but you’ll have plenty of time to make whatever else you’re having for dinner while they’re cooking. (By the way, for vegetarians, these sautés are hearty enough to plunk in the middle of the plate.)

Caramelized Turnips, Potatoes, & Carrots with Onions & Thyme

If you don’t have a cast iron pan, you can make this recipe in a 10-inch straight-sided sauté pan (stainless interior). The browning won’t be quite as even, and you might need to add a bit more oil, but the results are still very tasty.

___________________________________________________________

3 tablespoons extra-virgin olive oil, more if needed

½ pound purple-topped turnips, trimmed but not peeled, cut into ½-inch dice

½ pound Yukon Gold potatoes, unpeeled, cut into ½-inch dice

½ pound carrots, trimmed and peeled, cut into ½-inch dice

½ teaspoon kosher salt, more if needed

5 to 6 thyme sprigs

1 medium onion (about 5 ounces), cut into medium dice

___________________________________________________________

In a 10 or 11-inch cast iron skillet, heat the 3 tablespoons olive oil over medium-high heat. Add the turnips, potatoes, carrots, salt, and herb sprigs and stir and toss well to combine and to coat with the oil. (The pan will look crowded.) Reduce the heat to medium and cook, stirring and flipping occasionally with a metal spatula, for about 20 minutes. (Listen to the pan—you should hear a gentle sizzle, not a loud one. If the vegetables are browning too quickly, reduce the heat a bit to maintain that gentle sizzle. If they seem dry, add a bit more olive oil.) Add the diced onion and continue to cook, stirring and flipping with the spatula, until the vegetables are deeply browned and tender all the way through, about another 15 minutes. Remove the herb sprigs before serving. Taste and season with more salt if you like.

Serves 3 to 4