Category Archives: The Recipes

In the Winter Kitchen: Grains, Greens, Citrus & Sunlight

cit 4
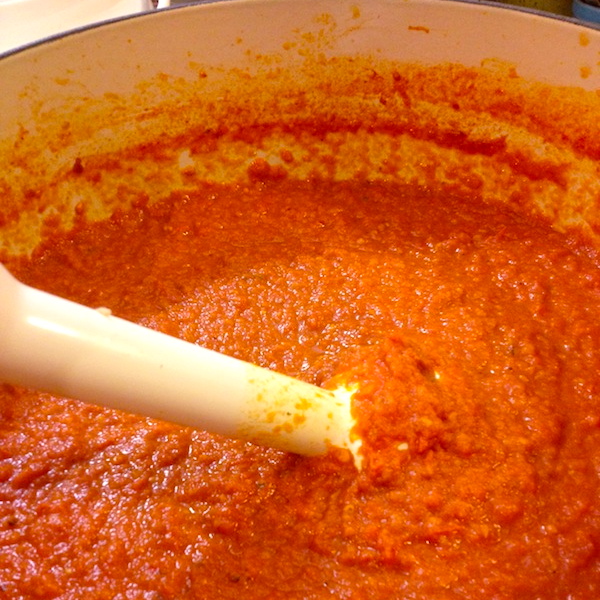
My pal Barney and I have been in the Laboratory all morning, mad-sciencing up creations to satisfy my winter cravings. For some reason, I am fixated on dark green vegetables, grains of all kinds, and citrus in every color. Plus, crunchy stuff. (My new love is roasted chickpeas). And then, I am putting them altogether for lunches and dinner. (My other new fixation is cooking grains ahead.)

DSC_0294

So first Barney and I had a nice cup of coffee.

DSC_0303

Then we snacked on the roasted chickpeas I made yesterday. Honestly, these are better fresh out of the oven, but they do keep okay for a day or two.

DSC_0063

Here’s how you make them: Rinse, drain, and thoroughly dry a can of chickpeas. Toss with enough of a neutral oil  (I like grapeseed) to coat well and season with about ½ teaspoon kosher salt. Spread on a parchment-lined baking sheet and roast at 400°F until browned and shrunken, 30 to 35 minutes.

DSC_0250

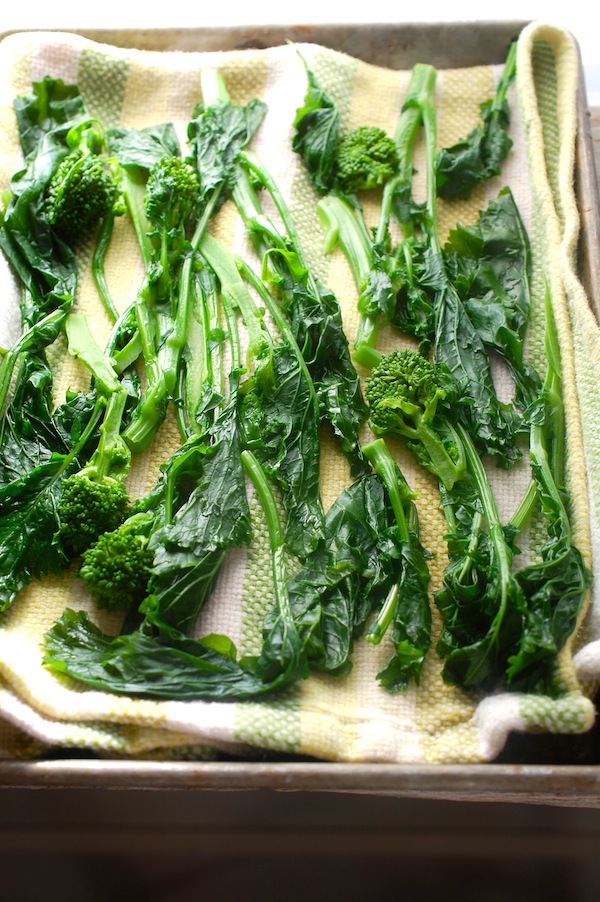
Then Barney and I par-boiled some broccoli raab. If you’re not familiar with raab (aka rapini) it’s actually a turnip relative and has a distinct bitterness which is highly satisfying, especially when paired with lemon or anything spicy. (Goat cheese is another good companion for raab, as are garlic and ginger.)

DSC_0270

You all know how much I love to roast most vegetables, and that I’m not much for boiling them, but broccoli raab is an exception. I almost always cook it in boiling salted water for about 4 minutes—even before finishing it in a sauté pan with garlic, as I did today. I also cut the thickest parts of the stems off and then split the stems down the middle so that the pieces are all about the same thickness.

DSC_0065

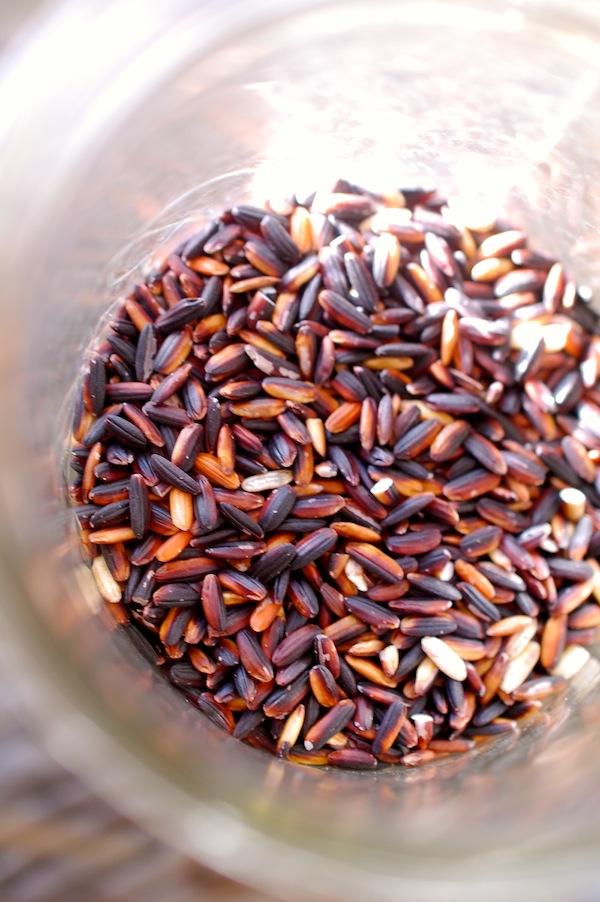
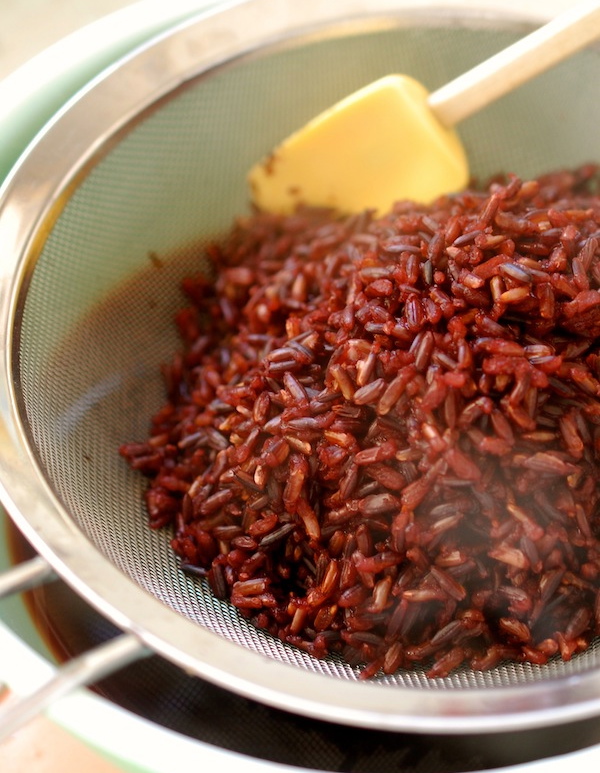
Meanwhile, on the back of the stove, a big pot of boiling water was going. I plunked a cup of black rice in it, stirred, lowered the heat just a tad (still boiling) and let the rice cook in the boiling water until tender. (About 28 minutes for me today.) Then I drained it and spread the rice on a sheet pan to cool.

br

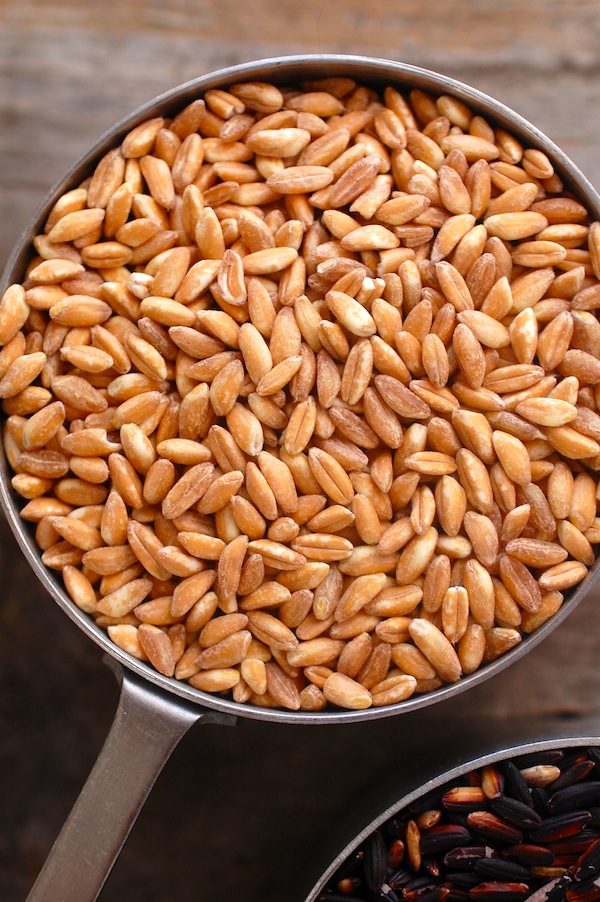
I refilled the pot, brought it to a boil, and cooked a cup of farro the same way. I overcooked the farro today because I forgot to look back at one of my own recipes and thought I remembered the cooking time was about 40 minutes. In reality, it’s only 30. (There is also such a thing as par-cooked farro that cooks in 10 minutes.)

DSC_0094

That mistake aside, this boiling water method (as opposed to the pilaf method with a measured amount of water) is really a great way to cook grains in big amounts that you want to store and eat throughout the week. You don’t have the frustration of finding all your liquid simmered out and your grain undercooked; simply use a spoon to fish out a few grains every so often to see if they’re done. They should still be just a tiny bit toothy when you bite into them, and with some grains, just beginning to split open a bit.

DSC_0237

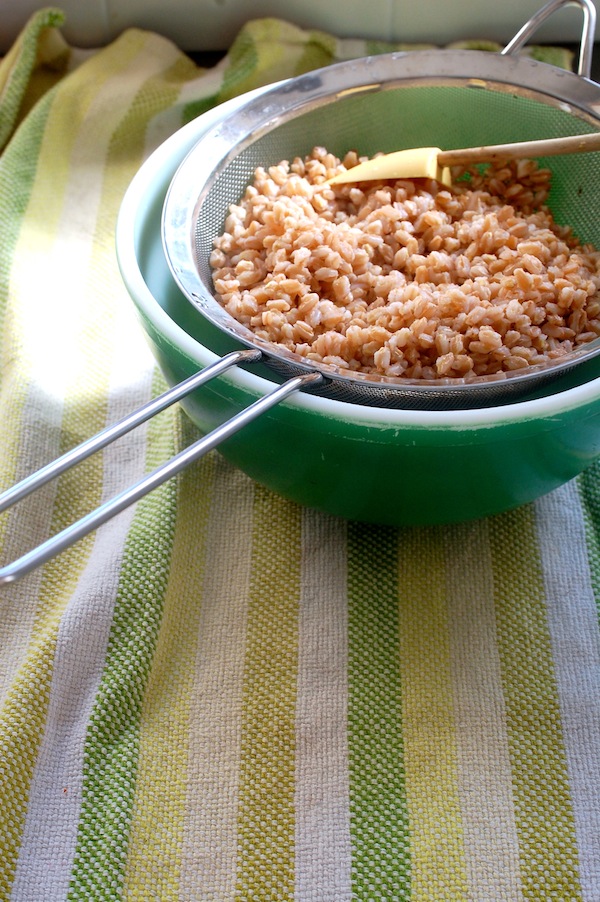
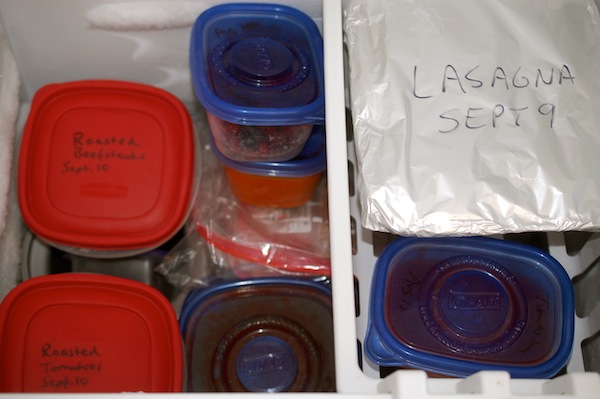
You can store them (after thoroughly cooling them) in plastic containers in the fridge. (You can also freeze cooked grains.) One note on salt: I don’t salt the water at first but tend to add some halfway through cooking. That said, the grains will still need to be generously seasoned when prepared for eating.

DSC_0175

Next Barney and I pulled out all the various citrus fruits I’ve been stockpiling—a Meyer lemon, a blood orange, a Minneola orange, a clementine, a navel orange, a regular lemon, and a lime. Mostly I just wanted to cut them open, take pictures of them, and then eat some…but I also wanted to dress my grains with some juice and zest.

DSC_0228

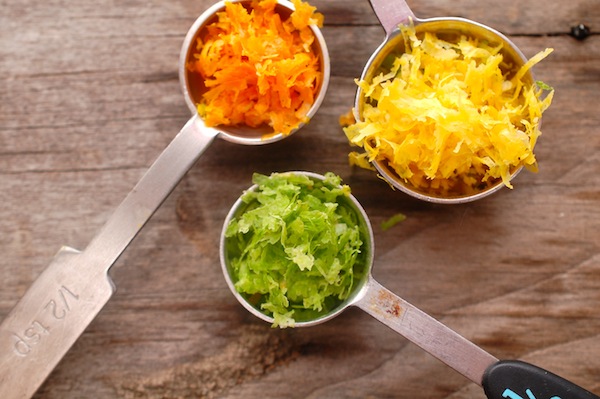
I am a citrus zest freak and put it in everything.

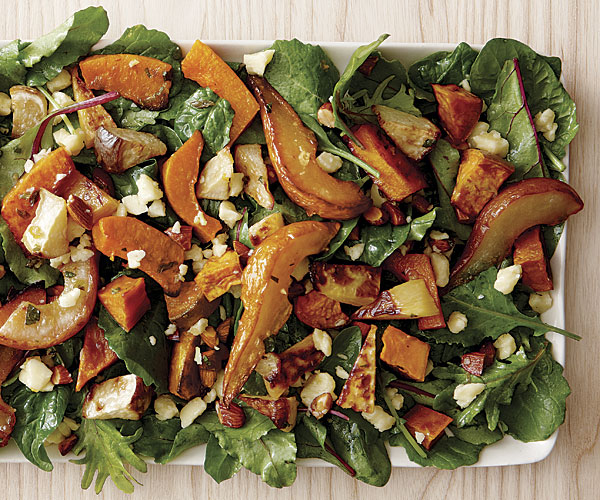
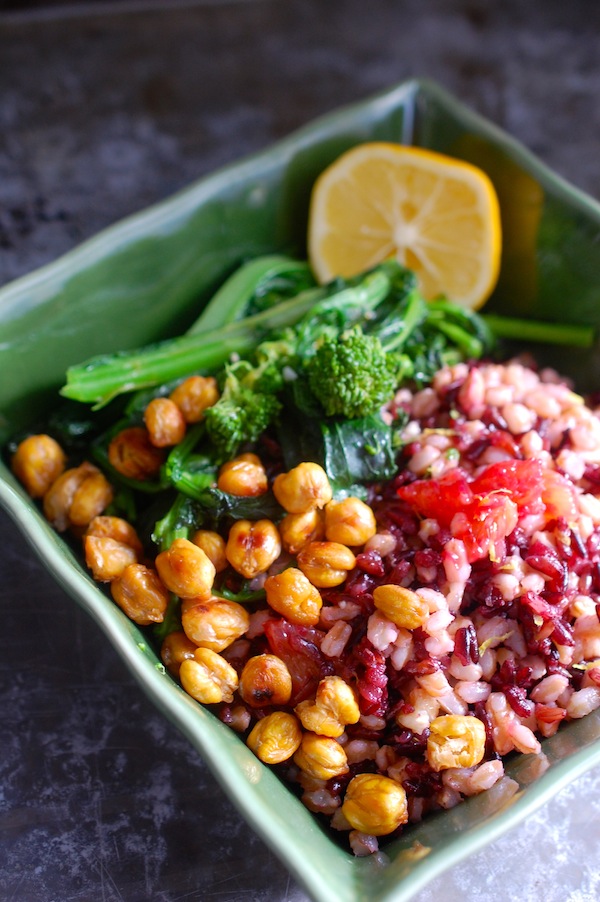
Lastly, I put everything together to make lunch (which wound up being dinner, too, though I did make pork chops for Roy, since he does not appreciate the meatless meal the way I do!). I put a cup of cooked black rice and a cup of cooked farro into a microwavable bowl and reheated them for a minute and a half. (Remember this, as it is easy to do on a weeknight if you’ve got grains already made and stashed in the fridge.)

DSC_0314

I juiced ½ of the blood orange and ½ of the Meyer lemon and added about a tablespoon of each to my grains. I seasoned with plenty of salt, too. In a little skillet, I heated up a bit of oil and a tiny bit of butter and softened ½ teaspoon or so of minced garlic in it. I tossed most of the softened garlic in with the grains and added 4 ounces of the broccoli raab to the skillet, tossing to warm it through in the garlic-scented oil. I stirred up the grains, tasted, and piled in a serving dish, arranging the raab and a smattering of roasted chickpeas alongside. I squeezed the other Meyer lemon half over the raab, and at the last minute, decided to cut the blood orange segments out of the unused half and toss them in, too. Often I used dried fruit and toasted nuts with grains, but it was a nice switch to have the crunchy chickpeas and the fresh citrus segments.

DSC_0362

There are lots of ways to turn grains into filling meals (think beans, roasted veggies, sautéed mushrooms), so I encourage you to do your own mad-scientist experimenting. Just be sure to season with plenty of bright ingredients (vinegars, fresh herbs, Asian condiments, as well as citrus).

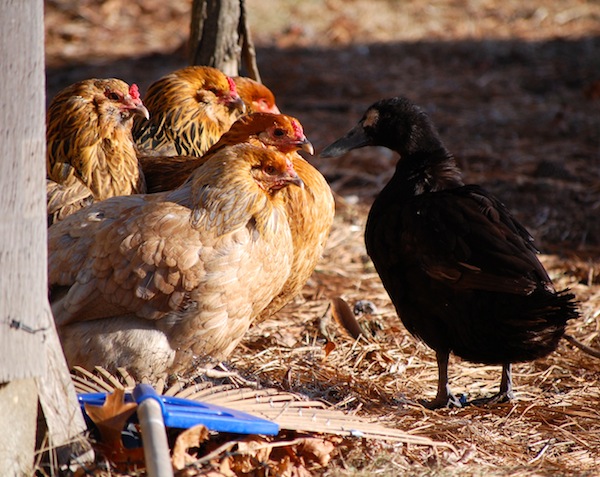
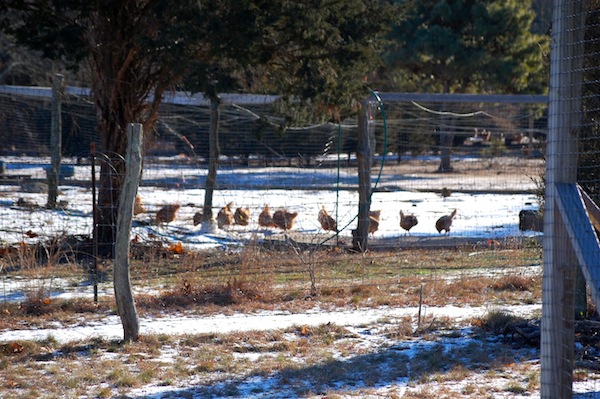
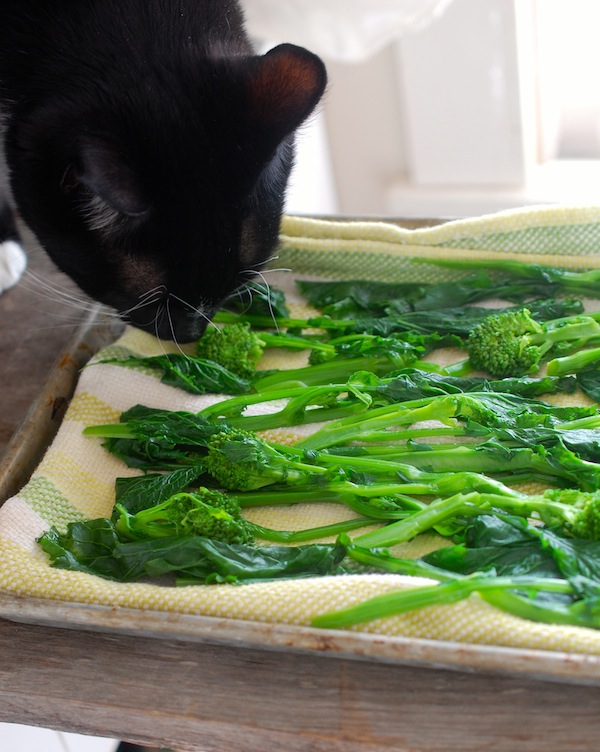
But don’t be surprised when your trusty assistant loses interest in the experiment—especially if there are birds outside the window to keep an eye on.

DSC_0300


Keep Warm and Cook Something Delicious

DSC_0048Wherever you are, I’m sure you’re cold. If you’re in Minnesota, God bless you. Roy spent his elementary school years in Duluth and he has vivid memories of walking to school through snow banks much taller than he was. Martha’s Vineyard is downright tropical compared to that.

DSC_0011DSC_0027Thought you might like to see our thermometers here. It was 0° when Roy first went out, but by the time Farmer and I got our gear on, it was  8° on the farm stand (right) and 24° in the hoop house (left). The hoop house was warming up pretty rapidly in the sun, too. Inside, the greens are covered by both a layer of fabric row cover and a layer of plastic, so they should be okay. Lettuce actually withstands very cold temps (due to a sort of anti-freeze effect) as long as it doesn’t get direct frost or cold wind. We have kale, broccoli, and arugula under cover, too. I’m hopeful.

In the garden, the parsley seems to miraculously radiate a green glow, despite everything.

DSC_0038

DSC_0008

Heading back Inside, I rifled through the freezer and pulled out some of our own tomatoes—roasted and frozen in September—and our own pesto, made with the last of the basil in October, I think. Making baked pasta tonight, a memory of warmth on a cold night. A few days ago I made split pea soup (a Roy favorite) and pulled out my old Joy of Cooking to see the notes I made years ago on how I like to make this classic. I noticed (maybe for the first time), that Irma Rombauer suggests to serve the soup with “croutons, or sour black bread and Jellied Pig’s Feet (p. 511).” How interesting!

photo-312

I also made creamy polenta (for myself, not a Roy favorite) last week, poured it into a baking dish, and cut pieces out several nights running. I pan-fried them and served them with sautéed broccoli greens and kale from the hoop house. By the way, last year when I blogged about broccoli greens, I had no idea they’d be making their way into grocery stores this year. The current edition of Fine Cooking magazine has an article about how Foxy Organics is now growing and selling broccoli leaves (under the name Broccoleaf) to grocery stores. (I wrote about this and other new veggies on The Huffington Post yesterday). You can check out Fine’s Cooking’s info on broccoli leaves here and a great recipe for Broccoli Leaf Tortellini Soup here. Oh, and I almost forgot—that new issue of Fine Cooking also has a feature by yours truly on roasted winter vegetable salads. To get the full effect of the gorgeous photos and layout (and flexibility of the master recipe), you’ll want to pick up the magazine. But many of the recipes are online, too. Click here for the Roasted Winter Vegetable and Pear Salad with Cheddar and Almonds recipe. (Photo of salad below is by Scott Phillips, courtesy of FineCooking.com.)

051133047-01-squash-sweet-potato-pear-salad-recipe_xlg

Undoubtedly, you are concocting something delicious in your own kitchen to keep warm. Regardless, I hope you’re staying inside, unlike our chickens and ducks, who have the option of huddling in their coops, but prefer to roam around and eat bits of snow on a day like this—crazy!

DSC_0019

Even crazier is that I am on egg-collecting duty today (I just remembered—yikes!) and now I have to layer-up (two of everything) and go down to the (7) coops and collect (hundreds of) eggs. Can’t wait.

DSC_0031


Feeling Cookie-ish, Part 2: Dark Chocolate Crackle Cookie Recipe

DSCN0945Chocolate and orange—Love it or hate it? This is one of the (grueling) debates we used to have in the Fine Cooking magazine test kitchen when it came time to test recipes for the holiday issues. There was always a chocolate soufflé or chocolate something that had orange zest or oil added to it. Some of us were firmly on the side of “no orange in my chocolate!” Me, I happen to be a fan. That bright, citrusy tang adds complexity by bringing out the fruity side of a good bittersweet chocolate.

But, yeah, in the scheme of things, these are not the kinds of debates that are going to keep us awake at night. (Although they are a good diversion from things that are!) And really, the one thing they remind me of this time of year is what a gift those test kitchen tastings were. After eight years at Fine Cooking—and hundreds of recipes tasted—I had this huge collection of taste memories to refer to whenever I needed a recipe for a special occasion (or any time, really). Of course the memories were tied to recipes printed in the magazines, and I still have all 130+ regular issues on the bookshelf right behind me. But lucky for you, they are all (mostly) online at this point (and available in a CD). And better still, recipes have been collected into specially themed magazines which are easy to reference. So when it comes time to start baking cookies in December, I just pull out my Fine Cooking Cookies issue. (You can purchase it for $7.49 in the Taunton Store right now).

Most of my favorite cookie recipes are from my favorite baker, Abby Dodge (the author of several outstanding cookbooks, including The Weekend Baker). I got to know Abby when we were mere children (ha!) in the early days of Fine Cooking. Abby was the magazine’s first test kitchen director.

She is a chocolate genius.

DSCN0936

So even though I realize this is supposed to be a blog about cooking and growing vegetables, I am going to share Abby’s Dark Chocolate Crackle Cookie recipe with you today. I simply have cookie-brain right now. After posting the Giant Molasses Crinkles recipe last week, I thought, well, I’ll just keep on cookie-ing for now! Since my Dad is arriving today and he is a fellow-chocolate lover (he used to secretly steal bites out of my chocolate Easter bunnies), I figured it was a good time to make what may be my favorite holiday cookie (at least in the top three).

And yes, there is orange zest in this chocolate recipe. But the wonderful news is that the cookie is delicious with and without it. I’ve used the suggested 2 teaspoons, occasionally 1 teaspoon, and sometimes none. All have been wonderful. There is a lot of cocoa and chocolate here, but the investment is worth it since the recipe yields a lot.        

photo-277Dark Chocolate Crackle Cookies

Recipe by Abigail Johnson Dodge from Fine Cooking Magazine Issue 89

These deeply flavorful chocolate cookies have a light, cakey, almost-brownie-ish interior. They are fragile when hot, so let them cool for several minutes on the cookie sheets before moving. You can freeze balls of dough for up to 1 month instead of cooking them all right away. Thaw them overnight before proceeding with the recipe.

Yields about 5 dozen cookies


 11-1/4 oz. (2-1/2 cups) unbleached all-purpose flour

1 tsp. baking soda

1/4 tsp. table salt

8 oz. (1 cup) unsalted butter, at room temperature

2 cups firmly packed light brown sugar

2 oz. (2/3 cup) natural, unsweetened cocoa, sifted if lumpy

2 tsp. finely grated orange zest

1 tsp. pure vanilla extract

3 large eggs

8 oz. bittersweet chocolate, melted and cooled until barely warm

3/4 cup (4 oz.) chopped chocolate (white, bittersweet, or semisweet)

1/3 cup granulated sugar; more as needed

Position a rack in the center of the oven and heat the oven to 350ºF. Line three large cookie sheets with parchment or nonstick baking liners.

In a medium mixing bowl, whisk together the flour, baking soda, and salt. In the bowl of a stand mixer fitted with the paddle attachment (or in a large mixing bowl with a hand mixer), beat the butter, brown sugar, cocoa, orange zest, and vanilla on medium speed until well combined, about 4 minutes. Add the eggs one at a time, beating briefly between additions. Add the cooled chocolate and mix until blended, about 1 minute. Add the dry ingredients and mix on low speed until almost completely blended, about 1 minute. Add the chopped chocolate and mix until blended, about 15 seconds.

Shape the dough into 1-1/4-inch balls with a small ice-cream scoop or two tablespoons.

Pour the granulated sugar into a shallow dish. Dip the top of each ball in the sugar and set the balls sugar side up about 1-1/2 inches apart on the prepared cookie sheets. Bake one sheet at a time until the cookies are puffed and cracked on top, 11 to 12 minutes. Let the cookies cool on the sheet for 5 minutes before transferring them to a rack to cool completely.

DSCN0964


The Swirl of Winter and A Cookie for a Cold Day

photo-261It feels a bit swirly here in my world. I know swirly isn’t really a word (or at least not the right word), but often I need to merge two or three words to find something that sounds like what it is. Swish, whoosh, whorl, curl, squirrel. I’m looking for a word that says I’m feeling a little squirmy and wind-blown and short of breath. Partly because every time I walk out the door, the wind, the relentless wind, is cranking up again. Sending leaves scampering and tearing a thousand tiny branches from the trees. It’s getting dark so early, too, and even on the sunnier days, the skies seem to be the color of stone and riddled with buckshot clouds. Ominous, in a not very subtle way. In the short window of daylight, there’s not nearly the time we need to clean the fields, mulch the beds, gather tools strewn near and far. And those are not even things at the top of the list. How did it get to be December?

photo-272

Time is not slowing down the way I thought it would come winter. (Ha! Yet another reminder that I am not in control.) I clear my desk of one thing and four more piles show up. I go into the kitchen to test a recipe and come out with four more things I want or need to cook. There are cookbooks and magazines piled everywhere. And books I’ve been meaning to read. Farm paperwork to do.

I have a bad habit, too, of worrying about the future, especially on dark, cold, windy days. Like everyone else on the planet, I go from feeling like I’m absolutely going in the right direction to wondering what in the world I’m doing. I especially like to have self-debates about the merits of writing cookbooks as part of one’s income plan. Yesterday evening I found out that Fresh From the Farm: A Year of Recipes and Stories was chosen to be on NPR’s list of great reads for 2014. An honor and a total surprise. I let myself be very excited about it, just because you have to do that to be good to yourself. What does it mean? Will it help sell more copies? Who knows!

photo-274

But I know it is good to be back in the kitchen cooking now. And I see, looking back at some of my recent Instagram photos, that apparently swirly things are not all bad in my world. (I’m coming to the end of my second 100 days straight of farm photos on Instagram.) I take a lot of comfort in the concentricity of say, a sweet potato-parmesan-goat cheese galette I made for Thanksgiving (top photo). (And, believe it or not, concentricity is a real word). Or the curly life lines of a freshly sawn tree trunk.

DSCN0868

Or the uber-familiar circle of a favorite cookie. Like the giant molasses crinkles I made today, just because. Because December means cookies to me. Lots of cookies. (Cookies are the antidotes to grey days, don’t you know?) And because these giant molasses cookies are a recipe from Fresh From the Farm, part of a bigger pear dessert. (This is where I am supposed to remind you that cookbooks make great holiday gifts… And that cookbook authors will be eternally grateful to you for your purchases…) And because the cookies remind me of my best friend Eliza, to whom I wish I lived closer. And of my mom, who is coming to visit (with my Dad, of course) next week. It will be their 60th wedding anniversary this month.

I bet they wonder where 60 years went. Me, I look at the shiny splotchy warm patina of my metal tart pans and baking sheets in these photos, and I wonder where 20, even 30 years went. I’ve had these things that long. Clearly my memory bank is swirling around a lot these days, too, circling back.

Tonight we’re celebrating Roy’s birthday. With freshly caught bay scallops a friend dropped off for us. And a simple vanilla cake I made this afternoon. And cookies, of course. Here’s the recipe.

DSCN0858Big Molasses Crinkle Cookies

This is a softer, chewier version of a childhood favorite. It’s also a bit bigger (as in diameter), since I roll the dough into fairly large balls. They bake out at between 3 and 4 inches across. The dough needs to be chilled for 45 minutes to an hour, but it can also be chilled overnight if you like. The cookies freeze well, too.

Makes 16 four-inch cookies

__________________________________________________________

2 1/4 cups (10 1/2 ounces) unbleached all-purpose flour

2 teaspoons baking soda

1 teaspoon ground cinnamon

1 teaspoon ground ginger

1/2 teaspoon ground cloves

Table salt

3/4 cup (1 1/2 sticks) unsalted butter, at room temperature

1 cup dark brown sugar

6 tablespoons granulated sugar

1 large egg

1/4 cup unsulphured molasses

1 tablespoon vegetable oil

____________________________________________________

In a small mixing bowl, whisk together the flour, baking soda, cinnamon, ginger, cloves, and 1/4 teaspoon salt.

In the bowl of a stand mixer, combine the butter, brown sugar, 2 tablespoons of the granulated sugar, and a pinch of salt. Beat on medium speed until light and fluffy, about a minute. Stop the motor and scrape the sides down. Add the egg and beat on medium speed until combined. With the motor running, slowly add the molasses and the vegetable oil and beat on medium-low speed until well combined. Stop the motor and scrape the sides down. With the motor running on low, spoon in the dry ingredients gradually and mix until just combined (you’ll still see some flour). Remove the bowl from the mixer and use a silicone spatula to finish gently mixing the last bits of flour into the dough.

Chill the dough in the refrigerator for an hour or so.

Heat the oven to 375° F degrees. Line two rimmed baking sheets with parchment. Put the remaining 4 tablespoons granulated sugar in a shallow bowl. Put a small bowl of water out. Roll the dough into big balls that are about 1 1/2-inches (or a smidge bigger) in diameter. Dip each ball in the sugar and roll around to coat. Put each on the baking sheet. Sprinkle each dough ball with a little water. Repeat, spacing dough balls 4 to 5 inches apart on the baking sheets. (You’ll get 4 to 5 cookies on a sheet pan.)

Bake until the cookies are set around the edges, slightly puffed (they will collapse as they cool), and crackled on the top, 11 to 13 minutes, rotating the baking sheets to opposite racks halfway through cooking. (Smaller cookies will cook in about 10 minutes.) Cool on the baking sheets. Repeat with the remaining dough, putting new parchment on the baking sheets.

Keep the cookies well wrapped in plastic inside of a zip-top bag in the freezer or well wrapped at room temperature for a day or two. To warm cookies, place on a parchment-lined baking sheet in a 350°F oven for 2 to 4 minutes.


Kitchen Travel: From Point A to Point B = Pumpkin Hand-Pies

photo-231Sometimes, in my efforts to use up food, I never know what I’m going to wind up with in the kitchen. This week, among far too many things I’d amassed in the fridge, a container of roasted squash was staring at me from behind a bag of kale. I have no idea what I’d been planning to do with it when I pulled it out of the freezer. Maybe make my Spiced Butternut and Cranberry Quick Bread from Fresh From the Farm? Usually I wait until closer to Christmas time to do that. And I know it wasn’t one of many different butternut soups I make. (Though soup is the main reason I roast and freeze winter squash “meat.”)

Puzzled, I returned to my computer, where I happened across an email from Food 52 with a “Genious Pumpkin Butter” recipe in it. I’m not really a fruit butter kind of gal, but I clicked on this because I loved the photo and the deep color of the pumpkin butter. When I got there, I realized why it looked so appealing. In a word (one of my favorite words): Caramelization. The pumpkin (or squash) is basically roasted twice, first to get the flesh tender and scoopable (and out of the skin); second with brown sugar, spices, and a little butter in a shallow baking pan so there is lots of contact with direct heat. You stir the squash mixture from time to time as it bakes and releases a lot of moisture, making it drier, much more flavorful, and deeply colored.

I’d already done the first part—check. So I measured the roasted squash I had (3 cups) and set about to make this right away. (I cut the recipe in half  and used a 7 x 11 Pyrex baking dish.) The house began to smell holiday-fragrant, and stirring the squash every once in a while was one of those comforting and tactile pleasures that make cooking so satisfying.

photo-228

I ate some right out of the pan not long after it came out of the oven–delicious. Like pumpkin pie filling only much tastier and more concentrated. Which reminded me, of course, that I now had to do something with the squash butter (thinking Roy was really not going to be interested in squash butter crostini for dinner.) So once again, fate (and web surfing) intervened, and as I was perusing The New York Times thanksgiving coverage, I came upon Melissa Clark’s simple pie dough recipe. I had just seen a recipe for cranberry hand pies on another site, and suddenly I knew what I wanted to do—make mini pumpkin (or squash) hand-pies.

After making and chilling Melissa’s easy dough, I promptly stopped looking at anyone else’s recipes, which might have been a mistake, because I haven’t made hand-pies in centuries. But I was already having so much fun with my old pastry cutters, flour flying all over the place.

photo-237 photo-235So only after I had already cut out circles that were rather small, cut little windows out of them, and spooned a heaping portion of roasted squash on to them, did I realize that folding one half of this circle of dough on to itself (to make a half-moon shape) was going to be a stretch and a squish. I should have made bigger circles and smaller cut-outs. Whatever, I said! And forged ahead again, baking them anyway, and then going on to use the rest of the dough to make full-circle hand-pies that held the filling more demurely. (The half moons were cuter, though, even if they were a bit stuffed.)

But wait! Half way through I also stopped and folded a couple tablespoons of mascarpone cheese into the pumpkin butter and tried that as a more “pie-ish” filling. The first one of those I tasted I loved and promptly filled the rest of the dough with that stuff. Later, after everything cooled–and more sampling ensued–I decided that I actually liked the straight roasted squash butter filling better. The crust was so flaky and buttery that it didn’t need a creamier filling.

photo-230

Well, in the end these things were very cute and very tasty. But of course I can’t give you a full recipe, because I was playing, rather than developing! But if you’re intrigued (and the little pies would be great on a Thanksgiving dessert buffet—they don’t even need to be warmed up), you can certainly grab the pumpkin butter and pie dough recipes and have at it yourself. I would say that in the end I got about 12 to 14  hand pies out of the one dough recipe. (And there is plenty of leftover pumpkin butter, so you could certainly make more dough to yield more pies.) The photo-236only other things you will need are a little egg wash (made from one egg yolk and a bit of cream) and some coarse sugar. I brushed a little of the egg wash around the edges of the dough circles before sealing them. And I also brushed the tops of the pies—for color and to help the sugar adhere. I used some raw cane sugar I happened to have around, but a cinnamon sugar mix might be nice to try, too.

P.S. If you’re in the process of making up your Thanksgiving menu, and you’re looking for side dish ideas, I’ve been posting my favorite side dishes on Face Book at Susie Middleton Cooks. And you can click here for a link to some of my older favorites.

P.P.S. My apologies for the fuzzy (and poorly lit) photos–my good camera has now left the repair place and apparently is being sent back to the “factory” for repair. Yikes.


Heirloom Seeds, A New Kale Cookbook, and A Passion for Veggies That Won’t Let Up

KaleGloriousKale_CVR_P6.jpg coverSafe to say I am pretty geeky about all things vegetable-y. I especially love to learn about new and different vegetable varieties. So when I got my hands on my friend Cathy Walther’s new kale cookbook, Kale Glorious Kale, I was in heaven. Right there on page four was this beautiful photo of nine different kinds of kale. We only grow three different kinds, but I would love to grow more. Down the road, farmer Rusty Gordon grows 13 different kinds at Ghost Island Farm. For the book, Cathy interviewed Rusty about growing kale, so I learned that Rusty’s favorite variety is Beira, a specialty kale originally from Portugal that resembles collard greens.

kale types screen shot

Cathy also touched base with legendary plant breeder Frank Morton, of Wild Garden Seed Co. in Philomath, Oregon. I know his name from the research I’ve done on lettuce varieties, but I didn’t realize that he had developed the lovely and tender White Russian kale, a cross between Red Russian and Siberian, and the sexy Red Ursa. He mentions that Red Ursa has particularly sweet stems, and that sugar tends to concentrate in stems. Throughout Kale, Glorious, Kale, Cathy goes on to feed my curiosity with flavor-pairing charts, technique tips, growing tips, and fun kale anecdotes, many appearing as “The Kale Chronicles” throughout the recipe chapters.

Cushaw in Freeman GardenFreeman Root Cellar-2As it happens, the same week I got Cathy’s book, I was invited to speak at Old Sturbridge Village, a very cool living history museum in central Massachusetts that replicates an 1830’s New England village. The museum is very active in preserving heritage breeds of animals and in growing and saving the seeds of heirloom vegetables. Much to my delight, the folks who invited me to speak that night brought along a selection of heirloom vegetables from the working farm in the village to display around the room. I could barely keep my eyes off this bounty, and later on, I asked OSV’s Debra Friedman to give me a little background on some of the vegetables. I think Deb knew I was pretty excited, because wouldn’t you know it, guess what showed up in my mailbox this week? Seeds! Boston Marrow Squash, Green Nutmeg Melon, Canada Crookneck Winter Squash, Jacob’s Cattle Bush Bean, Red Wethersfield Onion—oh, my! Roy is going to groan when I tell him we need more room for heirloom vegetables. I am pretty thrilled, though. Thanks Deb.

photo-178I think Roy is onboard with planting more kale, though. Which is a good thing, as I am excited about all the delicious ways to cook it that Cathy offers in her new book. I’ve already made Kale Granola (recipe below), and it rocks. I’m sort of a granola freak anyway, and since I’ve been late to embrace the crispy kale trend, this gave me a chance to do both at once. But with Kale and Feta Pizza; Kale Caesar Salad; Tortilla, Shrimp & Kale Soup; Cider-Braised Kale and Chicken; Kale Latkes; and Cathy’s already famous Kale, Pumpkin Seed and Bacon Brittle (yes!), there is a lot to look forward to.  (She even has a gorgeous section on kale cocktails.) That is, if I can stop reading the “Kale Chronicles” or gazing at Alison Shaw’s stunning photos.

There doesn’t seem to be a limit to the kick I get out of vegetables. Reading about them, growing them, cooking them, photographing them. In fact, I don’t see this passion losing steam any time soon. So stand by–now that I’m back indoors with time to cook, I’m tinkering again!

photo-177Cathy Walther’s Kale Granola from Kale, Glorious Kale (Countryman Press, Sept. 2014)

Cathy says in her headnote, “The combination of kale, oats and nuts is crunchy and satisfying. Everyone likes to munch on this as a snack—it doesn’t even seem to last until breakfast to top yogurt, mix with fruit or serve with milk. It’s easy to vary the nuts and the dried fruit with your favorites.


5 cups curly kale (stripped from stalk, chopped or torn into large bite-sized pieces, rinsed and dried well)

6 tablespoons virgin coconut oil, divided (see Cook’s Note)

¾ teaspoon kosher salt

¼ cup light brown sugar

6 tablespoons pure maple syrup

3 cups rolled oats

1 cup broken pecans, broken walnuts, or sliced almonds

½ cup sunflower seeds

¼ cup sesame seeds

1 cup dried cranberries, roughly chopped

¼ cup dried apricots, chopped into ¼-inch pieces

¼ cup raisins, roughly chopped


1. Preheat the oven to 300° F.

2. Make sure the kale is well dried. Place the kale in a bowl with 1 tablespoon of the coconut oil and ¼ teaspoon of the salt. Knead or massage with your hands until the coconut oil is rubbed on all the leaves. Set aside.

3. In a small bowl, whisk together the remaining 5 tablespoons of coconut oil, and the brown sugar, maple syrup and remaining ½ teaspoon of salt. In another larger bowl, combine the nuts, oats, and seeds.

4. Take 2 tablespoons of the wet ingredients and combine with the kale. Rub it over the leaves. Pour the rest over the oat mixture and mix very well until incorporated and the oats are completed covered.

5. Line two 12×17-inch baking sheets with parchment paper or a silicone mat. Place the oats on one sheet, spreading them out evenly, and the kale on the other sheet. (The kale seems to crisp up better separately, but you can mix the kale and oats together and it will work.) Bake all for 25 to 30 minutes, mixing two or three times to prevent the outer edges from burning, and also rotating the pans. I sometimes switch the oven setting to “convection bake” if the mixture doesn’t seem to be crisping up. Remove the kale when it is crispy, but not browned. Remove the oats when they are crispy or nearly crispy and before the nuts are burned. Both will get crispier once they sit on the counter to cool.

6. When cooled, combine the kale with the oats. Add the dried fruit. Pack into mason jars for storage.

Cook’s Note (on Coconut Oil) from Cathy: “I’ve switched to coconut oil instead of canola oil for making granola (though substitute canola or another vegetable oil if that is what you have). I love the subtle flavor coconut adds, and nutritionists are recommending its healthier properties. In warmer weather, coconut oil looks like an oil; in cooler weather it tends to solidify. For this recipe, if it has solidified, I usually put the jar in a saucepan of hot water until it becomes liquid again. Also, if you mix it with cold maple syrup it tends to solidify again, which makes it hard to coat the oats and kale, so I usually just have the maple syrup at room temperature or heat it up very slightly before mixing the liquid ingredients.”


Delicious Roasted Garlic and Cranberry Bean Dip

photo-161

Depending on the season, the month, the hour, the minute, my vote for “prettiest garden vegetable” changes. My allegiance is fleeting, I know, but I can’t help it when something new bursts on the scene. Right now, I am totally captivated by cranberry beans. This year’s variety, planted in July after the peas came out, is Vermont Cranberry Bean, and it took a little longer to mature than the similar Borlotti bean I’ve grown in the past. (In the confusing world of bean varieties, there happen to be several different shell beans with similar characteristics but slightly different growing habits that are referred to as cranberry beans.)

But with both the varieties I’ve grown, the “harvest me” sign is the same—the background color of the pod turns from green to white. (The “speckled” foreground color of course is bright pink.) Inside, the beans are plump and pinkish, also having lost all signs of greenness.

As the beans begin to dry out, their color darkens to a deep magenta (on the upper left in the photo above.) You can let the beans dry out either on the plant or in a dry spot if you want to save them to use over the winter. But I prefer to nab the beans at their plump, pinkish stage, because fresh shell beans are a real treat. Their defining characteristic is a very smooth, creamy texture, achieved after simmering for only about 25 minutes. Usually at that point, I will toss the beans in warm garlic and rosemary oil (and sometimes cooked pancetta) and serve them over arugula, Roman-style. Or I will use them as a great excuse to make minestrone. (Either way, their lovely color dulls, unfortunately.)

photo-144

But this year I wanted to do something else with them, and I landed on the perfect thing when I came across an old recipe of mine for a white bean and roasted garlic dip. How much better the cranberry beans would be, I thought, with their lovely texture. Sure enough, when I made the dip/spread/puree yesterday, the texture was almost fluffy and pillowy. And the flavor awesome.

photo-154photo-156I ate some of the puree on toasted ciabatta, but you could serve it with raw vegetables or pita as a dip or even use it as a bed for grilled or roasted lamb or pork.

If you don’t see cranberry beans or any other fresh shell bean in your market this fall, you can make this with dried beans (such as Great Northerns)  that you cook until very tender. Remember to save the cooking liquid to thin the puree a bit.

Roasted Garlic and Cranberry Bean Puree/Dip/Spread

1 ½ cups shelled fresh Cranberry beans (from about a pound of pods)
2 small spring fresh rosemary
6 cloves roasted garlic (see Tip below)
3 tablespoons extra-virgin olive oil
kosher salt

Put the beans, the rosemary, and a pinch of salt in a large saucepan and cover with cold water by at least an inch and a half. Bring to a boil, reduce to a simmer, and cook until very tender, about 25 minutes. You can add about ¼ teaspoon of salt after 15 or 20 minutes if you like. Remove the pan from the heat and use a slotted spoon to transfer the beans to a plate or bowl. Reserve the cooking liquid. (In other words, don’t throw it away, you’re going to use it!). Let everything cool for 10 or 15 minutes. Discard the rosemary sprigs, but don’t worry if a few wayward leaves are left behind to go into the puree.

photo-159In the bowl of a small food processor, combine the beans, the roasted garlic, the olive oil, 2 tablespoons of cooking liquid, and ¼ teaspoon salt. Process, stopping often to scrape down the sides of the bowl, until the mixture is just roughly chopped. Add more cooking liquid, a few teaspoons at a time, if necessary, and continue processing until you achieve a light, creamy texture. (Taste at this point to discern the texture, because the look will still be a bit coarse. You don’t want to process or add any more cooking liquid than is necessary, though this is probably a matter of personal taste!) Serve right away or refrigerate. It will hold well for a day or so. Bring it to room temperature before serving.

Roasting Garlic Tip

Instead of roasting a whole head of garlic, I usually break the head into individual cloves, toss them with olive oil, arrange in a small baking dish, cover with foil, and bake at 375°F for 30 to 35 minutes. Then I pop the cloves out of their papery skins. It’s a little quicker, and maybe a bit less messy, though some of the cloves will brown a bit from contact with the pan. Using all larger cloves is a way around this problem.

Slow-Sautéed Green Beans, Before The Frost Comes

DSC_3498We’re in between the color and the cold right now.

DSC_3487

But no frost yet. So we still have flowers. Round two or three or four on the self-seeding calendulas.

DSC_3313

And we still have green beans. Yay. Rattlesnake pole beans. Double yay. Lucky we are that the trellis hasn’t blown over in this Nor ‘Easter whiffling past. But even if it had, I’d be out there picking through the vines on the ground.

photo-114

I can’t pick every day now, though, because the plants are flowering less and yielding less beans. It’s not efficient to spend time going up and down the row, squatting up and down to check every vine, if you’re not going to come away with much.

photo-116So when I do pick, some of the beans tend to be on the larger side. If they are really getting fat, I leave them, because the Rattlesnakes will eventually yield edible seeds. Some of them (see photo at right) are already plump and podding.

But if they are just a little bit beyond the filet-ish stage, I have my excuse for a slow-sauté. Every year I talk about slow-sautéed green beans on Sixburnersue. (Sorry.) I love the technique because it brings out the nutty, earthy, satisfying side of green beans, while adding the delicious side notes of aromatic veggies and herbs that cook in the pan, too. And though it certainly isn’t required, a bit of bacon, ham, or pancetta in the pan never hurts.

Last night I made a vegetarian version of one of these sautés with the Rattlesnakes, some shisito peppers, and shallots, and served it over polenta. But because my good camera is malfunctioning (it needs to be cleaned, but my car is also malfunctioning so getting to the camera shop is going to be tricky!), I don’t have a nice photo of the dish to show you. It is probably just as well, because while these beans are delicious, they aren’t the prettiest.

Of course, because I love the technique so much, I had to include it in Fresh from the Farm: A Year of Recipes and Stories. So I thought I’d share that recipe (Slow Sauteed Green Beans with Shiitakes and Prosciutto) with you here, even though when I wrote it we were growing Kentucky Wonder and Fortex pole green beans, not Rattlesnakes. Now that I’ve discovered Rattlesnakes, there’s no going back. But any green bean (pole or bush), as long as it isn’t too thin, will work here.  Get out your skillet and go for it.

Slow-Sautéed Green Beans with Shiitakes and Prosciutto

Recipe copyright Susie Middleton from Fresh From the Farm: A Year of Recipes and Stories.

You won’t believe how crowded the pan is when you first load it up with all these veggies; but with this terrific (and straightforward) technique, the veggies will slowly soften, brown, and shrink into a delicious and tender tangle of deep flavor. The browning will start happening fast in the second half of cooking, but don’t jump the gun and stop the cooking too soon. Just stir more frequently and really let everything get a deep brown color for the most lovely flavor.

 Serves 4

________________________________________________________________

2 teaspoons maple syrup

2 teaspoons sherry or white balsamic vinegar

3 tablespoons extra-virgin olive oil

1 pound green beans, trimmed

7 to 8 ounces shiitake mushrooms, stemmed and halved (or quartered if large)

8 cloves garlic, peeled and halved

2 ounces thinly sliced prosciutto, torn into small (1- to 2-inch) pieces

4 medium sprigs fresh rosemary

Kosher salt

___________________________________________________________________

In a small bowl, combine the maple syrup and vinegar.

In a large (12-inch) nonstick skillet, heat the olive oil over medium heat. Add the beans, mushrooms, garlic, prosciutto, rosemary, and 1 teaspoon salt. Toss well with tongs to coat. Cover the pan and cook, stirring occasionally, until all the green beans have turned bright green, are beginning to turn brown, and have begun to lose their stiffness, 10 to 12 minutes. Uncover and cook, stirring more frequently, until all the beans are very deeply browned (the mushrooms and garlic will be browned and tender, too), 15 to 17 more minutes. Remove the pan from the heat and taste a bean and a mushroom for salt. Season lightly if necessary (the mushrooms may have absorbed more of the salt). Stir in the maple-vinegar mixture. Remove the rosemary sprigs and transfer to a serving platter or plates. Eat right away.

Stuffing and Roasting a Long Island Cheese Pumpkin. Yes.

DSC_3456Totally out of character, I decided to stuff and roast a pumpkin. Totally in character, I decided to do this because someone gave me a very pretty pumpkin, one that seemed at first glance like it would be a more efficient holder-of-stuffing than a sugar pumpkin. Not that there’s anything wrong with sugar pumpkins. But, look,  these Long Island Cheese pumpkins (above) are pretty suave looking, don’t you think? Okay, maybe suave is a bad word, but elegant, graceful, or charming would do. Charming in a Cinderella-coach kind of way. In fact, there is something called a Cinderella pumpkin that looks quite similar to a Long Island Cheese pumpkin, only it’s bigger and redder.

The Long Island Cheese pumpkin came from Simon Athearn, farmer at Morning Glory Farm here on the Vineyard. Roy ran into him on a run to Morning Glory to pick up some regular field pumpkins we were buying wholesale for our farm stand. Simon is a good cook himself. (And among other things, a talented grower of Long Island Cheese pumpkins, as Morning Glory Farm has many of them this year. Take note, Islanders—go get yourself one!) He handed the pumpkin to Roy and suggested I make something with it. He mentioned he’d been filling his with a mix of potatoes and sausage. And he said that the squash itself was delicious.

When the pumpkin arrived at home, I was intrigued, because I actually tried to grow a few of these last year (no luck) and anything that has “cheese” in the name is okay with me. (The name comes from the fact that the pumpkin resembles a wheel of cheese, not from its flavor.) So I thought for once I’d put aside the little thing I have about stuffed vegetables.

I poked around and found a recipe by Dorie Greenspan, a cook and food writer I greatly admire. (She actually taught me a course on recipe writing at culinary school many years ago.) The recipe, called Pumpkin Stuffed with Everything Good, is from her book, Around My French Table. (But you can find it here on Epicurious.). The “everything good” part does not refer to a kitchen sink list of stuff, but a lovely combination of bread, gruyere cheese, thyme, a bit of bacon (I used sausage), garlic, some herbs, and heavy cream. Now that is my kind of stuffing, I thought.

DSC_3363

Ultimately, a recipe for stuffing and cooking a pumpkin can only really be a set of guidelines, but I have to say, Dorie’s “guidelines” (her tips, her timing, and the proportions of ingredients) worked beautifully—of course! Our 4-pound pumpkin was tender and the stuffing puffed in about an hour and 45 minutes. We took the cap off at that point to brown the top of the stuffing a bit.

DSC_3384

We let the pumpkin rest out of the oven for 10 minutes or so.  (Unfortunately, it was now too dark to shoot a nice photo in natural light, so this scary indoor one will have to do.) Then we scooped out the stuffing, which had a lovely ethereal, almost soufflé-ish texture, along with the tender bright-orange squash flesh. The stuffing was delicious, infused with the flavors of the thyme, sausage, garlic, and gruyere. And the squash, like its color, was bright tasting—almost a bit citrusy, I thought. Very nice, and not at all stringy. (It turns out that Long Island Cheese pumpkins are of the Cucurbit moschata species, along with butternut squash and other squash that tend to have less stringy flesh. It is also an heirloom that once was grown widely for pie-making, and is now making a come back in popularity.)  Altogether, the stuffing with the squash made a really nice “one-pot” (one-pumpkin?) supper, with leftovers.

Now I am curious about what the Long Island Cheese pumpkin flesh would taste like roasted and caramelized. (You’d have to cut the pumpkin into wedges or slices to do that.) I think it would be great with a bit of goat cheese, cilantro, and a drizzle of maple-lime butter.

So maybe that’s why we’re now in possession of a few more of these lookers. Tomorrow I am off to give a Fresh From the Farm book talk at Old Sturbridge Village. Maybe I’ll take one of the pumpkins with me for show and tell!. And while I’m driving, I’ll dream up something else to do with the rest! Though I would definitely make Dorie’s recipe again. Maybe even with a sugar pumpkin.

DSC_3461

Making Tomato Sauce While the Sun Shines

DSC_1006Until I moved to West Tisbury, the agricultural center of Martha’s Vineyard (that translates to small, rural town with many farms), I didn’t fully understand the origin of the expression “Making hay while the sun shines.”

Now that I am surrounded by hay fields, I’ve learned to note the passing of warm weather months according to whether it’s the first, second or sometimes even the third haying. The grass grows tall and down it goes. Cut, dried, rowed, and baled. It grows again and so on.

And I’ve also come to understand that rain and wet weather can ruin hay, so farmers look for a spell of sunny, dry weather to do the haying. Basically, they’re taking advantage of a window of opportunity.

DSC_1651It seems like there’s a lot of that proverbial “making hay while the sun shines” on a farm. For me this year it has been all about trying to do something with extra vegetables before they cross the line into compost. The race against time is especially frustrating because there is so very little spare time to begin with on a farm! (Well, especially a growing farm with only two people working on it.) The hours in between the morning and evening chores are when Roy and I try to get our other work done, while keeping an eye on the farm stand, too. (September is quieter, yes, but we’ve already sold out of eggs (30 dozen) today, so it isn’t that quiet!)

DSC_1660

DSC_1364Fortunately I got a magazine assignment to write about pickling, so I’ve been able to justify spending some of those in-between hours making pickles. The top shelf of the mud-room fridge is now Ball-jar central. And I did make blackberry jam.

But my hopes that this would finally be the year I’d be canning lots of tomatoes and tomato sauce were a bit unrealistic. (Though we do have a stack of quart Ball jars we keep hopefully tripping over, thinking they may still get used.) For one thing, I didn’t realize that the San Marzano tomato plants were indeterminate—meaning that they yield continuously. I thought they were determinate, and I imagined that at some point they would offer up a big batch of ripe plum tomatoes, and we would then stop everything and spend an afternoon canning. Ha! Turns out they’ve been continuously ripening since mid-August, so they must get dealt with periodically (and a few dozen or so at a time).

Secondly, after a great early yield, our beefsteak and plum tomatoes all began to suffer from disease brought on by stress. (It took us a while to figure out that a pressure valve in our irrigation system was malfunctioning.) As a result, most of the tomatoes (including the San Marzanos) have been developing small rot spots as they get close to ripening. Since we can’t sell damaged tomatoes, I’ve had to think of something to do with them once or twice a week, since many are perfectly fine for the most part.

DSC_8189

DSC_1757For any beefsteaks that aren’t too far gone, I’ve relied on my favorite technique. (Roasting, of course, but slow-roasting for these big guys.) Layered into containers, they freeze well for adding a great depth of flavor to just about anything in the winter months.

But for the San Marzanos, which still seem to be producing like crazy, I’ve been making small batches (a few quarts) of sauce for the freezer, which isn’t such a bad thing. (The freezer’s looking pretty promising, and I’m much happier with loads of tomato sauce rather than loads of pork like last year!)

DSC_1647

Making sauce so frequently has also let me perfect a tasty recipe that is easy to get started quickly so that I can do other things while it simmers away on the stove.

DSC_1002Here’s what I do: I chunk up a couple of our onions and several of our damaged carrots (which I have a lot of, too) and whiz them in the food processor. (I learned in my first restaurant cooking job how wonderful a generous amount of carrots can be in tomato recipes.) I melt butter (inspired by a Marcella Hazan recipe, I’ve switched from olive oil to butter in my sauce) in a big pot and sweat the veggies (salted of course) until they are soft. Meanwhile I mince several cloves of garlic and add that to the softened veggies. I sometimes add a splash of balsamic vinegar or a few red pepper flakes at this point.

Then I usually wind up taking the pot off the stove for a few minutes while I finish cutting up the tomatoes. But I don’t fuss over the tomatoes. In fact, I don’t peel or seed them—I just cut out any spots and roughly chop everything else. I add a bit more butter to the pot, add all of the tomatoes and bring to a simmer. (Usually the pot is full almost all the way up to the top.) I let the sauce bubble very gently on low heat and reduce by about half (until I like the consistency), usually between 2 and 3 hours. I stir when I walk by, of course.

photo-106After I take the stove off the pot, I let it cool a bit and then use my immersion blender to roughly puree it so that the remaining bits of skin won’t be bothersome to anyone. Then I portion into different sized containers, let cool some more, and refrigerate or freeze. Not rocket science, I know, but it is satisfying. And at least I don’t have to wring my hands over dumping beautiful tomatoes in the compost pile.