Category Archives: Ingredient IQ

Summer Veggies Have A Mind of Their Own

Harumph. I am so not very patient, and just cannot believe that the summer vegetables are on their own schedule, not mine. I mean, really. Hurry up, already!

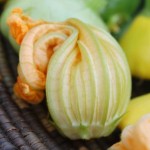
I am all disgruntled partly because while I did a good job on my spring planting, I once again under-planted for early summer. Peas and carrots are all gone, lettuce has bolted, bok choy a distant memory. And I apparently have still not mastered the art of controlling insects that eat chard and kale—argh! So I am putting undue pressure on the squash, beans, peppers, eggplants, flowers, and yes, tomatoes, to hurry up. (Fortunately, we’re getting a great yield on our potatoes, which Roy has been harvesting every day, and eggs are flying out of here as fast as we can gather and wash them.)

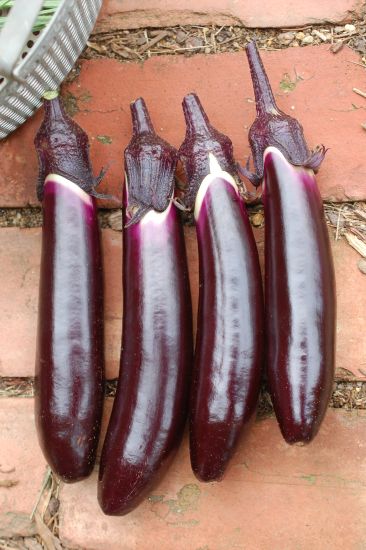
Finally this week we started to harvest a little of each of the summer veg. But am I grateful? Noooo, of course not. All I can do is complain (to myself) that there aren’t more. It takes a while for everything to really start producing, but I can’t wait! To make myself feel better (Roy does not seem at all concerned about this), I’ve been madly weeding and replanting the open beds with carrots, turnips, fall squash, more kale, more summer squash (to foil the squash borers) and whatnot. And, um, lecturing the eggplant. (“Could you try to produce more than one fruit at a time please?”) The poor eggplant—it’s a new variety called Orient Express, and it’s already providing fruit three weeks ahead of last year. (Apparently my patience gets shorter and shorter every year.)

At some point I realize that these conversations I’m having with myself and the vegetables are not very productive. And that, in reality, we have more of the summer veggies planted than we’ve ever had, so we should be overflowing in August. So when I start complaining about all the time we’re spending harvesting beans and tomatoes, you can just kick me. Or something.

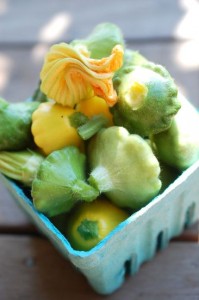
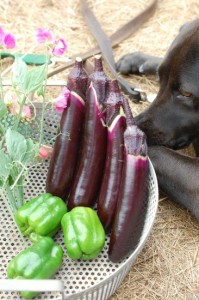
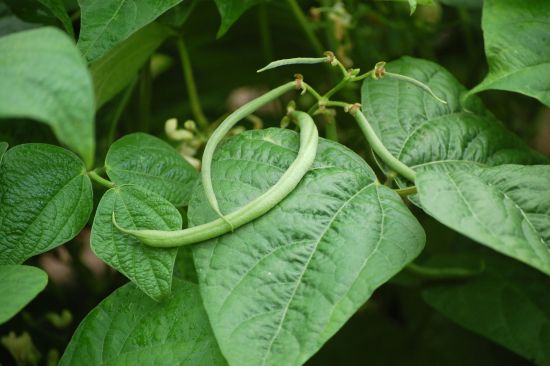
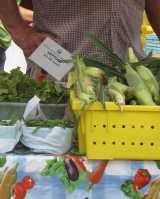
In the meantime, I’m offering a few pics of this week’s goodies. They do make my heart sing!


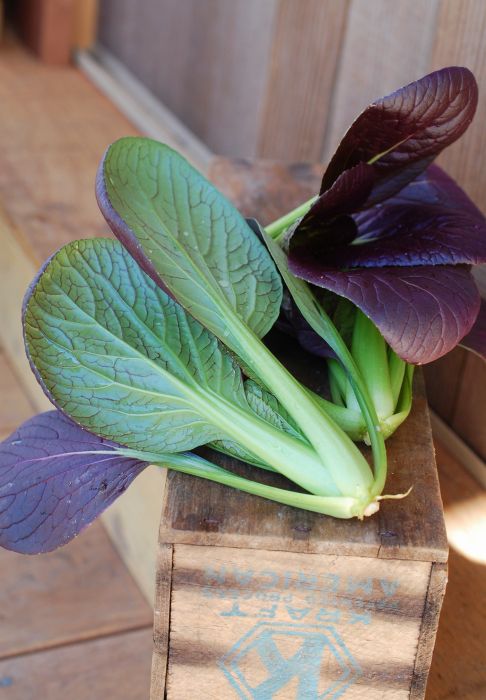
Pretty in Purple—Pak Choi for the Plate and Palate

It’s only May 1 and already we may have grown the prettiest vegetable we’ll see all season. (You can remind me I’ve said this when I start waxing on about peas and cherry tomatoes and Fairy Tale eggplants.) But honestly, this little purple pac choi (aka bok choy) is simply stunning. We can’t keep it at the farm stand for a minute, and I’m hoping I’ll get another round transplanted before it gets too hot. If you’re interested in growing this ethereal veggie (sweet, crunchy, tangy and light), you can still order seeds from Fedco and plant it in the fall.

Me, I think I’d better start eating more of the stuff. The purple color is the result of anthocyanins, which supposedly improve memory. I could use that, since I  completely forgot to make time for the blog post this week (a lot of farm work going on around here!) and now I am off to Maine to teach two classes at the fabulous Stonewall Kitchen this weekend. Wish you could all be there to join me!

New at the Grocery Store: Baby Kale + 10 Ways to Use It

We are just going to ignore the fact that 7 inches of snow fell here last night and pretend that it truly is spring.

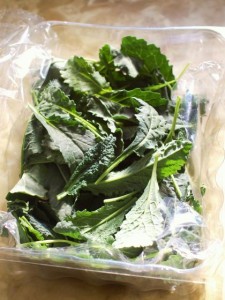
So let’s talk about spring greens, specifically baby kale. I am very excited that baby kale is finally making it into mainstream supermarkets. I’ve seen more of it just in the last couple months, since I first mentioned it in a blog post back in February. Now I’ve seen boxes (right) or bags of it in three different grocery store chains. (One to look for is Earthbound Farm’s Mixed Baby Kales.)

Mostly I am excited because baby kale is a much more versatile veggie than mature kale. (See ideas below.) It is also tastier, more tender, and a whole lot more palatable. Roy and Farmer both eat the stuff without blinking.

I’ve never been a big fan of the tough leaves of huge, curly-type kales, and in fact, when I wrote Fast, Fresh & Green four years ago, I insisted that everyone par-boil kale before using it in most other dishes, or confine it to soups and braises. I still think it’s a good idea to soften kale first before adding it to pastas or gratins, but now I don’t necessarily freak out when I see chefs and cooks “sautéing” raw kale. With a young or tender variety, a simple sauté is just fine. (But try “sautéing” the older, tougher leaves and you will still have something pretty chewy on your plate.) I’m even embracing kale salads!

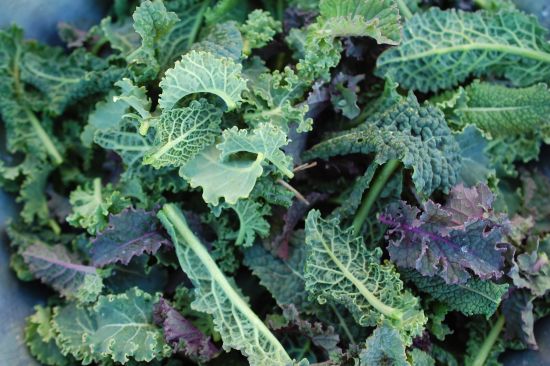
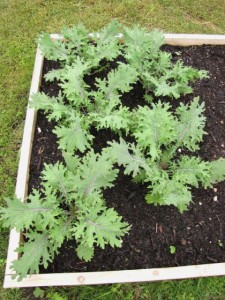
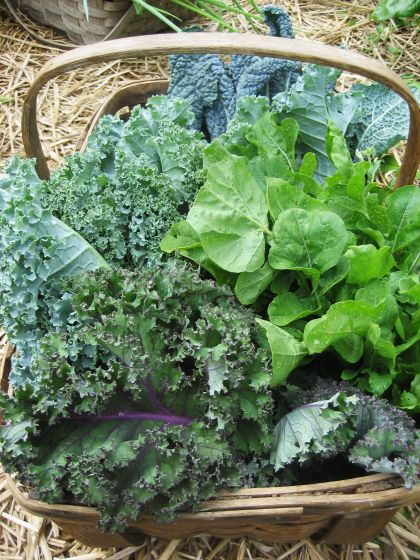
I’m also kind of excited about this baby kale trend, because I’m quite sure it came straight from the farmers’ markets. Market growers have been selling baby kale for a while, first in baby salad green mixes and then on its own. I have to laugh, as I stumbled into selling mostly baby and small leaves of kale at our farm stand (see mix at top), because I have trouble controlling damage from cabbage worms, which for some odd reason like the older, bigger leaves better than the little tender ones. Also, I can harvest the first baby kale leaves very early in the spring time, so it gives me something to sell while I’m waiting for other things. In fact, I’ve got the first little leaves of Red Russian Kale forming in the hoop house now (left).

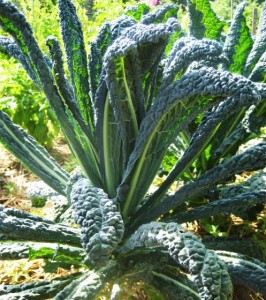
It’s also fun to see that the baby kale mixes in the grocery store are featuring a few different varieties of kale so folks can begin to notice the differences. The mix I bought yesterday has some baby Lacinato in it. This is the variety of kale (also called Tuscan Kale or Dinosaur Kale–shown growing at right) that really won my affection, and now I grow both a green and a purple variety of it.

Best of all, baby kale, whether you get it at the grocery store or the farm stand, is pretty much an instant side dish—even easier to prepare than spinach, since it is cleaner. (Small stems can be removed or not). Because kale grows upright, several inches off the ground, it doesn’t harbor dirt the way spinach does.

Okay, so here are some ideas for using baby kale. Why, you could practically eat the stuff every day. So now you have no excuses for avoiding this nutritional powerhouse:

1. Cook a simple sauté: Mince a clove of garlic and a half inch of fresh ginger, heat in olive oil with a few red pepper flakes until sizzling. Add kale leaves and a sprinkle of salt and toss until wilted.

2. Trick up the sauté: Do the above and add a combination of a couple teaspoons of balsamic vinegar, orange juice, and maple syrup in at the end. Stir and let thicken for a minute. Remove and eat right away. (Or sub soy sauce for the balsamic.)

3. Make a kale salad: Make a quick vinaigrette of fresh lemon juice, olive oil, a wee bit of anchovy (and/or a touch of honey) if you like, salt and fresh pepper. Toss the leaves well, rubbing the dressing in a bit with your hands. Let sit, then toss with crumbled fresh goat cheese or feta and toasted pine nuts or toasted almonds.

4. Make a frittata/savory bread pudding (like we did last night) with cubes of toasted English muffin, cheddar cheese, sausage, thyme, Dijon, and wilted baby kale. (Cook the sausage first and wilt the kale leaves with it.)

5. Make a topper: Put the salad (see No. 3 above) on top of grilled bread, pizza, toasted pita, naan or other flatbread.

6. Make a filler: Take the simple sauté (No. 1) and combine it with caramelized onions and a good aged cheese to make a yummy quesadilla filling or taco stuffing.

7. Make a quick soup: Infuse store-bought chicken broth with flavor by sautéing sausage, garlic, and shallots until brown. Simmer, add store-bought tortellini; add lots of kale leaves–and a dash of lemon or vinegar–at the end. Serve in shallow bowls, garnished with grated Parmigiano.

8. Pair with seafood: We eat a lot of our local bay scallops while they’re in season (now–soon to be over). I often do a quick scallop sauté (very high heat to cook them quickly, and again I use ginger and garlic, and usually a bit of lemon zest and/or orange juice) and fold kale leaves in at the end for a main-and-veggie-in-one supper, served over mashed potatoes or rice. You could do the same thing with shrimp. Or wilt the kale separately and use it as a bed for roast cod or salmon or halibut.

9. Try chips & drinks: Yes, you can make kale chips and green smoothies out of this stuff, too, but you’ll have to talk to someone else about that!

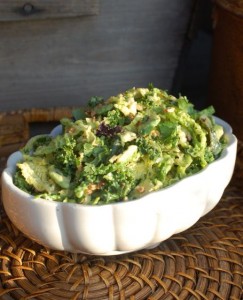
10. Don’t forget slaw: Add baby kale to coleslaw (right) or any other marinated veggie dish.


P.S. If you’re inspired and want to grow kale in your garden this year, here are three nice varieties: Red Russian, Lacinato, and Rainbow Lacinato. The latter—a cross between Lacinato and Redbor kale—is my favorite—a beautiful crinkly purple leaf with a tender texture. (You can get a hint of it in the couple of baby leaves shown in the top photo–the color is stunning.) Don’t spend money on kale starts (six-packs); it’s not necessary since kale germinates well and grows quickly. Sow seeds directly as soon as the soil warms up to about 50°. You can sow the seeds thickly if you are going to harvest baby greens, but later you’ll want to thin the plants to about 8 to 10 inches apart. You can let those plants grow and harvest new and bigger leaves all summer (and fall—and even into winter).


Photo below—greens from my friend Jessica Bard’s garden.


Midwinter Midweek Mahogany Mushrooms

Except for an ill-fated attempt to grow mushrooms in a box last winter and the occasional mini-fungi that pop up in the garden mulch, we do not grow mushrooms here on the farm. I guess that’s one of the reasons I’ve neglected writing much about this most meaty of vegetables.

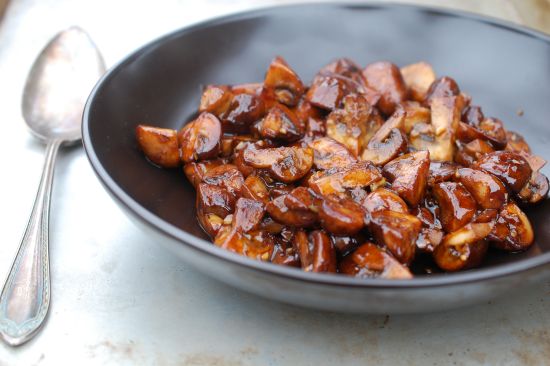
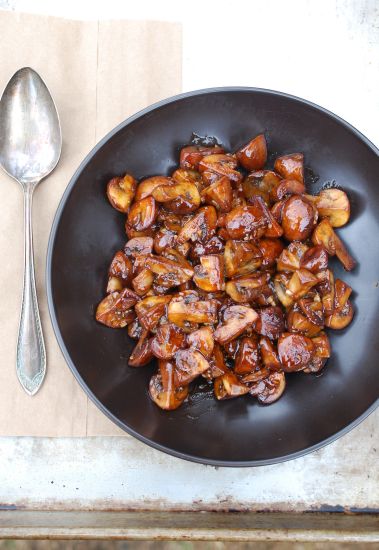
But yesterday I was paging through Fast, Fresh & Green, looking for appropriate recipes for two classes I’ll be teaching at Stonewall Kitchens in Maine in May, and I stumbled upon these Mahogany Mushrooms. Oh, I’d forgotten how much I love cooking mushrooms like this. Chunky, fast, hot, browned, glazed–yum. Wan, undercooked, undercolored mushrooms are not my thing. If you follow this technique, that fate will not befall you.

Just to check, I made a batch this morning and Farmer and I ate them for lunch with some scrambled eggs. He gave the mushrooms ten licks (his rating system—it has to do with how much he licks his chops after sampling a dish). We did have a little problem with a slightly smoky kitchen since the front door is taped up for the winter and of course there is no ventilation hood in our antiquated kitchen. So when Roy got home from roofing, he was kind of wondering what Farmer and I had been up to. But he wonders that most days.

Seriously, I think Mahogany Mushrooms are a perfect side dish or antipasto for this time of year and that’s why I’m sharing them with you. Great with hamburgers or roast chicken or sautéed winter greens, or yes, eggs.

Mahogany Mushrooms

Sautéing over pretty high heat keeps these mushrooms juicy while getting them brown at the same time. A tangy glaze gives them a beautiful sheen, too.

____________________________

1 tablespoon soy sauce

1 tablespoon fresh lemon juice

2 teaspoons dark brown sugar

2 teaspoons ketchup

1/2 teaspoon Worcestershire sauce

2 tablespoons unsalted butter

2 tablespoons extra-virgin olive oil

1 pound Cremini (or baby bella) mushrooms, quartered if large, halved if small

3/4 teaspoon kosher salt

2 teaspoons minced fresh garlic

___________________________________

In a small bowl, whisk together the soy sauce, lemon juice, brown sugar, ketchup, Worcestershire sauce, and 1 tablespoon water and set the bowl near the stove. Put a shallow serving dish near the stove as well.

In a 10-inch straight-sided sauté pan, heat 1 tablespoon of the butter with the olive oil over medium-high heat. When the butter is melted, add the mushrooms and the salt and stir right away. Continue stirring just until the mushrooms have absorbed all the fat.

Let the mushrooms sit undisturbed and cook for 2 minutes, then stir once. Don’t worry; the pan may look crowded and dry, but keep the heat up at medium high. Let sit and cook again, stirring infrequently (they will “squeak” when you stir them), until the mushrooms are shrunken, glistening, and some sides have developed a deep orange-brown color,  9 to 10 minutes (the bottom of the pan will be very brown).

Turn the heat to low and add the garlic and the remaining 1 tablespoon butter. Stir and cook until the butter is melted and the garlic is fragrant, about 30 seconds. Whisk the soy sauce mixture again and very carefully add it to the pan. You’ll need to scrape out the brown sugar, but don’t stand directly over the pan as there will be sputtering. Stir and cook just until the liquids thicken slightly and coat the mushrooms, another 15 to 20 seconds. Quickly transfer the mushrooms to a shallow serving dish, scraping all of the sauce out of the pan with a rubber spatula. Let sit for a few minutes and serve warm.

Serves 4


Happiness is: Backyard Berries & Black Raspberry Ice Cream

Recently my old friends have been calling to say, “What gives? You can’t possibly be that happy or having that much fun.” They’ve been reading the blog, and they’re getting suspicious.

Look, I’m sorry for the Pollyanna spin. No, my life is not perfect—no one’s ever is. But I doubt anyone wants to read about my bad hair days, and I certainly don’t want to write about them (at least not on sixburnersue!). And I can honestly say I am not making the good stuff up. The reason the universe is treating me so kindly these days, is that, well, I did my time. And while I was slogging through the bad stuff, I started to listen to my inner voice. It said, “Go berry-picking.”

I’m kidding, but only sort of. Life is short, and I finally resolved to enjoy every day by living and working around the things that make me happy. These aren’t things that would necessarily seem fun to everyone (take weeding, for example), but they work for me. And so when summer comes, I pick berries.
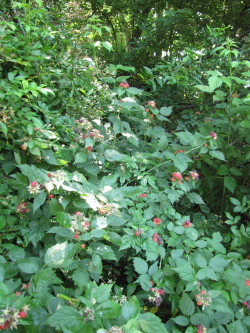
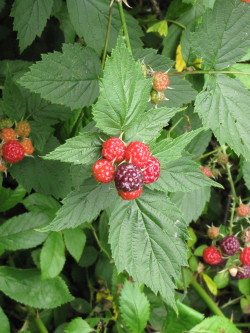
Only now I have berries in my back yard – seriously. This is about as close to fresh-food nirvana as it gets for me. I’d have to say Roy is pretty jazzed, too—we went wild blueberry-picking on one of our first dates, after all. He’s been hacking away at overgrowth to expose the hidden black raspberry canes that seem to be in every corner of this property. Tonight, as I was about to post this blog, right about the time the sky was turning completely black from an approaching storm, Roy came rushing in to grab a bowl from the kitchen. “I’ve found the mother lode!” he exclaimed as the door banged shut. Curious, I wandered outside and listened to see if I could tell where the hacking noise was coming from. Soon I realized he was deep in the brush that surrounds and hides the old crumbling stone foundation for what was once a great big barn. He emerged, clutching a bowl of plump berries the color of the darkening sky, about the same time the rain drops started falling.

We first noticed the berry canes in early summer, but we weren’t sure exactly which berry they were or whether they’d bear much fruit. Now we know. While we’ve also found a few straggly wild raspberries (and two high-bush blueberries) on the property, these black raspberries are prolific. Someone must have tended them at some point.
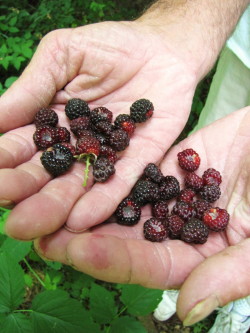
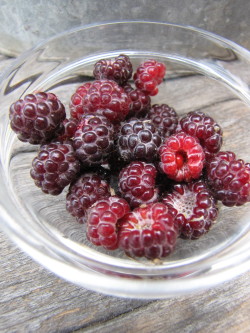
Black raspberries are cultivated in Oregon, but out East you find them mostly in the wild, or occasionally sold at farm stands. They look like small red raspberries and grow on long prickly canes, but they aren’t fully ripe until they darken to a deep blue-black. They taste different, too—that inky color (yes, rich in antioxidants) gives them a grapey, smoky tartness closer to black berries than raspberries, I think. They’re not too tart to pop in your mouth, though, and I’ve noticed that Roy, who isn’t generally a big fruit-lover, sneaks a few every time he picks some.

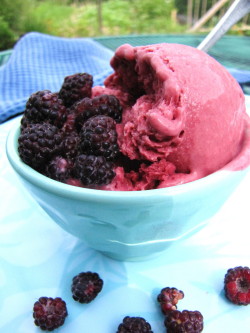
Me, I’ve been putting them on my cereal, mixing them with warm maple syrup to pour over French toast, and, drum roll please—making ice cream with them. The best damn ice cream ever. Sorry, I’ve been told my language (still) needs work. But really, there’s something about the marriage of black raspberries and a creamy custard that’s incredibly delicious–a classic.

To make the ice cream, I used the same Fine Cooking recipe I used last year to make the strawberry ice cream, only I cut the recipe in half. The custard base, mixed with the berry puree, was (and is) delicious. The only problem this time around is that my ice cream has not really frozen past the consistency of a thick smoothie (or a very creamy gelato). Certainly okay by me, as I’d be happy just to drink the stuff. And I’m 99 percent sure this is an issue with my freezer (and my ice-cream-maker canister), but I bring it up just in case it’s the result of cutting the recipe in half. So I share the half-recipe with the caveat that if you’ve got copious amounts of berries (of whatever sort), go ahead and make the full recipe as detailed in the strawberry post last year. And maybe splurge on a good ice-cream maker (I wish!).
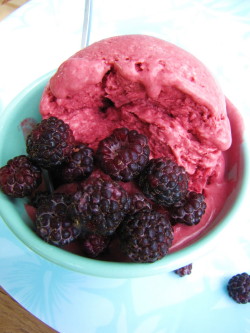
Black Raspberry Ice Cream (Half-Recipe)

Adapted from Fine Cooking magazine article by David Lebovitz; for more ice cream recipes, visit finecooking.com.

With this small-batch recipe, it’s a little difficult to read an instant-read thermometer in the shallow custard in the sauce pan. Look for visual clues to know the custard has thickened. I used three medium egg yolks since the full recipe called for 5 large egg yolks. If you don’t have medium eggs, go ahead and use 3 yolks from large eggs. Your custard may thicken up a bit more quickly.

__________________________________________

1/2 pound ripe black raspberries (or other cane berries), rinsed

1/2 cup plus 2 tablespoons granulated sugar

1 cup heavy cream

3 medium egg yolks

1/2 cup whole milk

table salt

1/2 teaspoon vanilla extract

_______________________________________

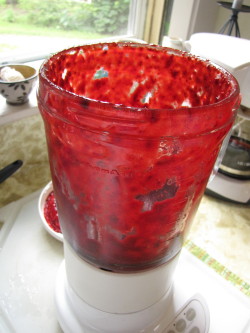
Make the berry puree: In a food processor, puree the black raspberries until completely smooth. Strain the berry puree through a fine-mesh sieve into a bowl or glass measure. (Press on the solids to be sure to extract all of the juice.) Stir in 1/4 cup of the granulated sugar. Refrigerate the puree until ready to use. (Can be done 24 hours ahead.)

Prepare an ice bath: Fill a large bowl with several inches of ice water (half ice, half water). Set a smaller metal bowl (such as a stainless steel mixing bowl) in the ice water. Pour 1/2 cup of the heavy cream into the inner bowl. (This will help the custard cool more quickly when you pour it in later). Set a fine-mesh strainer on top.

Make the custard: Whisk the egg yolks in a medium bowl and set aside. In a medium saucepan, mix the remaining 1/2 cup of the cream with the milk, the remaining sugar, and a pinch of salt. Heat the mixture over medium-high heat, stirring occasionally, until the sugar dissolves and tiny bubbles begin to form around the edge of the pan, 3 to 4 minutes. In a steady stream, pour half of the warm cream mixture into the egg yolks, whisking constantly to prevent the eggs from curdling. (This is called “tempering” – a good step when making any kind of custard. Be sure to pay close attention during this.)

Pour the egg mixture back into the saucepan and cook over low heat, stirring constantly and scraping the bottom with a heatproof cooking spoon or spatula until the custard thickens slightly and measures 175°F to 180°F on an instant-read thermometer, anywhere from 2 to 6 minutes. (Mine thickened up quickly.)The custard will be a bit more viscous and thick enough to coat the back of a wooden spoon, holding a line drawn through it with a finger. Don’t let the sauce overheat or boil or it will curdle.

Immediately strain the custard into the cold cream in the ice bath.

Cool the custard: Stir the custard frequently over the ice bath until an instant-read thermometer measures 70°F (or the custard feels to be at about room temperature—this won’t take long). Add the vanilla extract and stir. Add all of the black raspberry puree and mix well.

Chill and freeze the custard: Chill the custard mixture in the refrigerator for at least 4 hours (or overnight—in fact it holds for two days.) Freeze the ice cream in your ice cream maker according to the manufacturer’s instructions.

Makes about one pint.
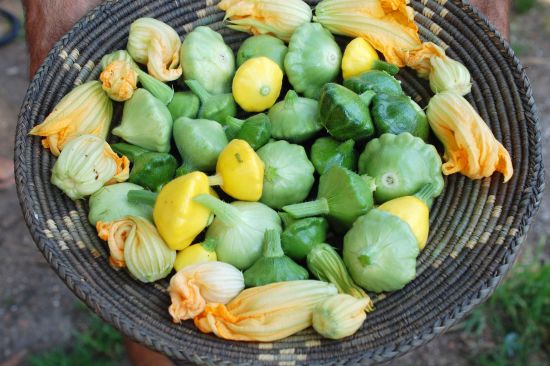
Pick Your Own Mint & Make a Refreshing Apple-Lime Spritzer

You meet the most interesting people. If you have a farm stand in your back yard, that is. The farm stand didn’t start out as close to the house as it is now, but there were a couple of little problems that forced our decision to move it down the driveway. On a positive note, now when people get out of their cars, they get a great view of the garden, and some even wander over to take a look at the chickens and Cocoa bunny. Also, since I am often outside working, I get to meet more of them now.

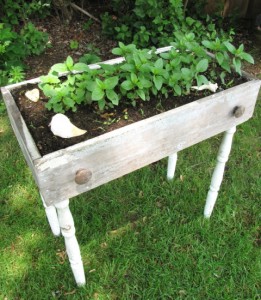
This past weekend I was chatting with a lady who’d just returned from a trip to Paris with her husband. She had her eye on our “pick your own mint” patch (which is actually mint planted in an old dresser drawer—very cute!), because she wanted to recreate a drink she had in Paris for her friends on the Vineyard. She told me it was a (non-alcoholic) combination of lime juice, apple juice, and mint, with lots of ice and a splash of soda. I didn’t get any more details, but the notion of making one of these stuck in my head because it sounded so refreshing, and I love any concoction that takes advantage of the lime-mint synchronicity.

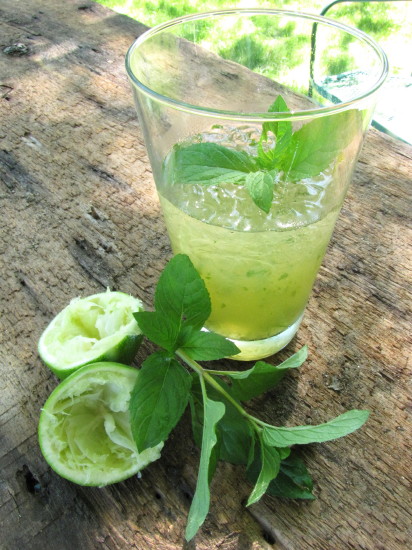
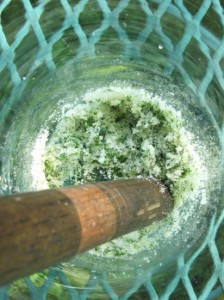
Back at my desk, I did a quick Google search of similar drinks and couldn’t find one just like that. But since the drink sounded a bit like a mojito to me, I decided to follow the method in a mojito recipe by Jen Armentrout over at Finecooking.com. I started out by using the handle of a wooden spoon to “muddle” the mint with a little bit of sugar (not too much since apple juice is sweet, also). I added a pretty generous amount of freshly squeezed lime juice, a little apple juice, lots of crushed ice and a bit of club soda. It was delicious and a dead-on thirst quencher. I drank the whole thing right up as I seem to be constantly thirsty from working outside. But I’ve no doubt you could sip on one, too (and add a splash of your favorite spirit), in the cool shade of a maple—or a palm—tree.

Apple-Lime-Mint Spritzer

For a printable recipe, click here.

I have a wonderful old wooden spoon that’s about 2 feet long (I think it must have been used for candy making) and has a thick handle perfect for “muddling” the sugar and mint. But look around your kitchen and you’ll likely find something (shorter!) that will work. To make crushed ice, put ice cubes in a zip-top bag and bang with a wooden meat mallet or other heavy object.

____________________________________

6 to 8 big peppermint or spearmint leaves, plus an extra sprig for garnish

1 tablespoon sugar

2 tablespoons fresh lime juice

1/4 cup apple juice

crushed ice

club soda

_____________________________________

Put the mint leaves and the sugar in a tall glass. Crush the mint leaves with the  handle of a wooden spoon until the mint is macerated and broken up. (The sugar will have a green tint.) Add the lime juice and stir well. Add the apple juice and a generous amount of crushed ice. Top off with club soda. (Start with a small amount of soda, taste and add more if you like.) Garnish with a mint sprig.
Serves one

My Favorite Herb of all Time is Thyme

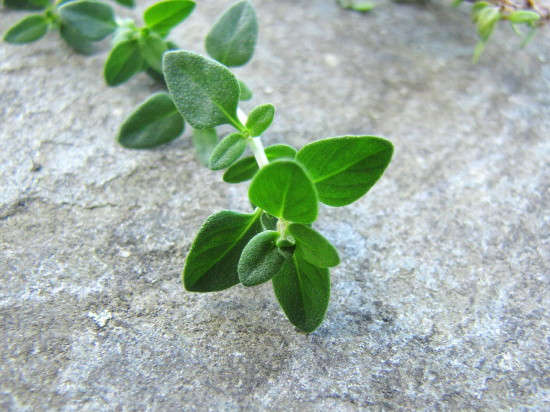
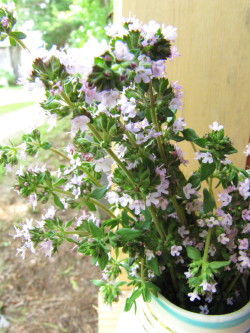
Sorry for the bad-pun headline, but I do love fresh thyme. Right about now I’m getting to use a lot of it, for two reasons. First, I’ve got several plants flourishing, both right outside the kitchen door and also along the edge of the vegetable garden. Secondly, I keep cutting bunches to sell at the farm stand, and no one buys it. So it goes. Herbs are not a huge seller, even in the high months, but I stubbornly put them out there, just in case. Secretly, I just like to look at the pretty little bunches arranged in cute cups. Thyme and all the rest of the herbs cut fresh from the garden last a remarkably long time compared to store-bought herbs. (And despite how pretty they look at room temperature in a little container, they will keep even longer in the fridge in a sealed zip-top bag. Dry them well before storing.)

My friends in the test kitchen at Fine Cooking magazine, where hundreds of my recipes have passed through, used to give me a hard time about the amount of fresh thyme I use in my recipes. Everyone groans when they see thyme on the ingredient list, because it means somebody has to pick all the little leaves off the stem. But it’s really not that big of a deal. (Libby actually likes to do it. I told her—in my version of Huck Finn getting Tom Sawyer to paint the picket fence—that it’s an important job for a sous chef.)

The easiest way to pick thyme is to slide two fingers down the stem (from flowering end backwards), stripping the leaves as you go. Usually this works pretty well, but it does depend on the variety of thyme. If you decide to grow your own, pick a variety at the nursery with relatively big leaves spaced far apart on the stem. I usually buy something labeled “common thyme” as opposed to the “English” thyme. There are lots of other varieties; lemon thyme always seems to grow quickly, and I love brushing my hand through it and smelling it in the garden, but it can be overpowering in the kitchen if not used judiciously (it’s good with fish and in chowders).

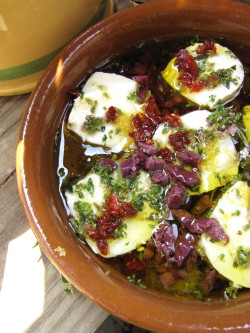
I use thyme (both the leaves and flowers) in vinaigrettes and herb butters, in fresh tomato sauces and pan sauces, with roasted potatoes and roast chicken, and in egg and pasta dishes, too. But a favorite simple destination for it is a marinated goat cheese appetizer I’ve been making for years. I sprinkle fresh thyme leaves, a little lemon zest, chopped sundried tomatoes and olives over medallions of fresh goat cheese, pour olive oil over them, and let marinate in the fridge for a few hours. I bring the whole thing back to room temperature before serving, and the creamy, herby, salty cheese makes a wonderful summer topping for crackers or crostini. It’s also a quick and easy dish to make for a party. Last night we were invited, along with a few other couples, to a wonderful bouillabaisse dinner at our friends Buck and Kay Goldstein’s open, airy house high on a hill in Chilmark. Buck and Kay have mastered the art of Zen entertaining (and Kay is an amazing cook), so while we arrived with goat cheese appetizer in hand, we left with contentment, full bellies, and the pleasure of having been in good company, too.

Marinated Goat Cheese with Fresh Thyme and Lemon

For a printable recipe, click here.

This is a great hors d’oeuvre to take to a party. Make it a few (or several) hours ahead, refrigerate it, and then let it warm up a bit before putting out with toasted baguette slices or crackers. After serving, there will probably be some olive oil left in the dish. Save it and drizzle it over grilled or toasted bread the next day.

_______________________________________

1 4-ounce log fresh goat cheese, sliced into 6 pieces

1 heaping tablespoon fresh thyme leaves and flowers, lightly chopped, plus a sprig or two for garnish

1 packed teaspoon fresh lemon zest

2 teaspoons finely chopped pitted black olives

2 teaspoons finely chopped sundried tomatoes

sea salt or kosher salt

½ cup extra virgin olive oil, more if necessary

Toasted crostini, baguette slices, or crackers for serving

_____________________________________________

Arrange the slices of goat cheese snugly in one layer in a small shallow dish. (I use a little straight-sided tapas dish for this, but a small gratin dish would work, too.)  Sprinkle the thyme, lemon zest, olives and sundried tomatoes over and around the cheese, and sprinkle the cheese with a little sea salt. Pour over the olive oil. It should just barely cover the cheese. Add more if necessary. Let the cheese marinate in the refrigerator for a few hours, and bring it to room temperature about 45 minutes before serving. Put the dish of cheese, the baguette slices or crackers, and a couple small knives out for serving.

Serves 6

Back Door Gifts and Cinnamon-Rhubarb Muffins

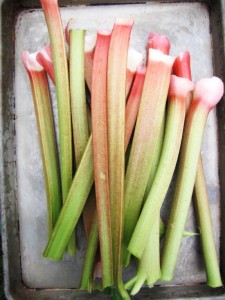
A pile of freshly cut rhubarb stalks appeared at our back door last week, courtesy of our neighbor Ralph. This is one of the strange and wonderful things about living on the Vineyard: People are in the habit of sharing…without much fuss or fanfare. Stuff just shows up, unbidden but much appreciated. In the short time we’ve been living in the farmhouse, we’ve been the grateful recipients of beach plum jelly, wild cherry jam, honey, eggs, lobsters, codfish, sweet potatoes, pickles, warm bread and kale soup, to name a few things.

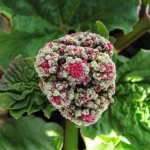
I was particularly excited to see those beautiful rhubarb stalks, since I won’t be harvesting any this year from the new plant I plopped in the ground a few weeks ago at the southeast corner of the garden. As soon as I got the plant, it immediately sent up its monstrous flower stalk. The flower is fascinating (see photo), but after admiring it for a while, I lopped it off, hoping to return the plant’s energy to its stalks. Still, it’s a baby plant and I won’t be cooking from it this year.

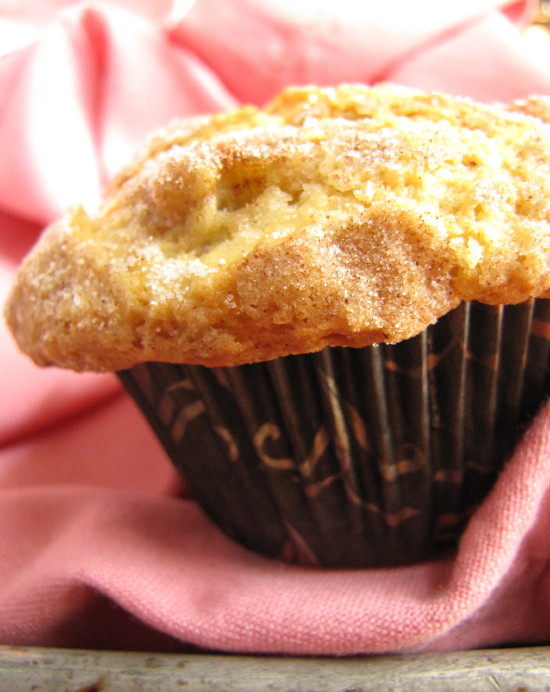
I knew right away what I wanted to make with the rhubarb gift—a favorite Fine Cooking recipe from years ago. It’s a fabulously tender muffin from award-winning North Carolina baker Karen Barker. The tart little rhubarb bits melt into these light coffee-cake-like treats, which are topped with cinnamon sugar. The batter has sour cream, melted butter, cinnamon, and vanilla in it, and it comes together really easily. Twenty minutes in the oven and nirvana. Roy was home from work cutting and pounding out a piece of copper in his shop when the muffins came out of the oven. So I stopped snapping photos long enough to get a few warm muffins out to him. He likes anything with cinnamon sugar on it, but especially if it’s straight out of the oven.

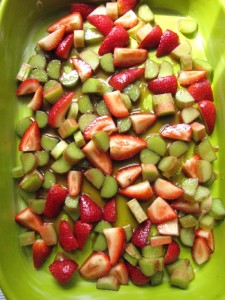
I had enough rhubarb left over to mess around again with a strawberry-rhubarb compote I’ve been tinkering with. I’ve seen a lot of blog posts lately about roasted strawberries (something we also did at Fine Cooking years ago!) and was hoping I could make an oven–roasted compote with both rhubarb and strawberries that would be a bit roasty-flavored and perhaps would keep the rhubarb together better than a stovetop version. I won’t bore you with my experiments (which included some ghastly rhubarb “chips!”) but I will give you the parameters (below) for the compote as it stands now, because it’s an incredibly easy, versatile, seasonal condiment. I use it most often in my favorite treat—yogurt and granola parfaits—but I also put it in smoothies (with frozen bananas) and on pancakes. And of course it would be great on vanilla ice cream.

I’ve resigned myself to a syrupy, soft-fruit dessert-topping-ish kind of compote, and this texture is just a-okay with me. What I’m not quite happy with yet is the sweet-tart flavor balance. My first version wasn’t quite sweet enough and the second version was too sweet. But just futzing with the sweetness won’t necessarily fix this, because rhubarb has a unique tartness that doesn’t really get mitigated by more sweet. Sweet flavors can hang out with rhubarb, but not knock it back altogether. Too much sweet and you just get cloying. Right now I also have a bit of balsamic vinegar (great with strawberries) and orange juice in this, and I’m thinking to knock those back even more and switch out more of the plain sugar for more maple syrup. (I’m wondering about adding vanilla, too?) But since I probably won’t get to the next version any time soon, I’m leaving the tweaks up to you. (I don’t usually offer experiments on the blog—I like to give you finished recipes, but something like this really does involve a measure of personal taste!) In the directions following, I’m suggesting a middle road on the maple and sugar and a little less balsamic then my last batch.

Strawberry-Rhubarb Compote: Heat the oven to 425 degrees and butter a 3-quart baking dish. Slice 8 ounces of rhubarb into 1/2-inch pieces (a scant 2 cups), and quarter or halve about 10 ounces of (organic or local) strawberries (2 cups). Put them in a mixing bowl with 2 to 3 tablespoons sugar, 3 tablespoons maple syrup, 2 tablespoons orange juice, and 1/2 teaspoon balsamic vinegar. Sprinkle with a little salt, toss well, and scrape and pour out into the baking dish. Spread in one layer. Bake for 20 minutes, stir gently with a silicone spoon, and continue baking until the liquids are syrupy (but not too reduced or they will burn), about another 6 to 10 minutes. Let cool in the pan, transfer to a glass or ceramic container and keep in the fridge for a week or so. This makes about 1 cup compote.

P.S. I seem to have a thing for saucy rhubarb recipes–see my chutney recipe I posted last spring. (This year I gave in to the classic strawberry pairing!)

Winter Squash Taste Test: Geeky, Yes, But Don’t You Want to Know the Results?

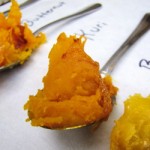
Sometimes, you just don’t know what you’re getting yourself into. Take my boyfriend, Roy, for example. I’m sure when he met me, he had no idea that one day he’d be standing around the kitchen island (which he built for me) with seven spoons and a heap of roasted squash in front of him. Fortunately, what I didn’t know (but suspected) when I met him, is that he’s a really good sport. Last Sunday, he agreed to do the winter squash taste test with me. Lucky him.

I dreamed up this little experiment after we found ourselves in possession of several different kinds of winter squash. I’ve loved taste comparisons ever since I was introduced to them at culinary school years ago. We did a lot of them at Fine Cooking, too, in order to recommend brands of chicken stock or canned tomatoes or olive oil to cooks. The worst taste test we ever did was butter. Tasting 8 different brands of butter in one morning will make anyone feel sick. The best? Bittersweet chocolate, of course. In fact, I’ve learned so much about flavor differences in both natural and manmade products over the years from taste tests, that I’m constantly urging other cooks to conduct their own at home. (A great place to start is with something you buy and use a lot, like extra-virgin olive oil. Buy a few different grocery-store brands and taste them side by side to find your favorite—you’ll be amazed at how different they are. Lately I’ve been liking Trader Joe’s Spanish olive oil.)

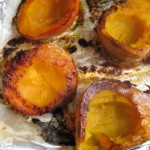
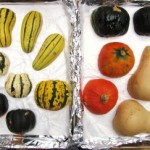
But not to belabor the point, here’s how we conducted the squash test: I cut each of the squash in half, scooped out the seeds, seasoned them ever so lightly with a little salt, and roasted them, cut side-down, on buttered parchment paper, until they were completely tender and lightly caramelized (about 1 hour 20 minutes on average). I turned the squash over, let them cool a bit, and scooped some of the flesh out of each for us to taste side by side. We each had one or two bites of each squash, and I took notes on the taste, texture, and color.

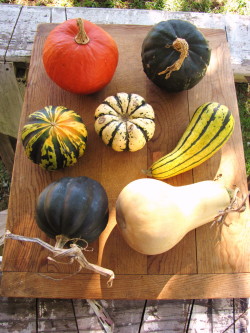
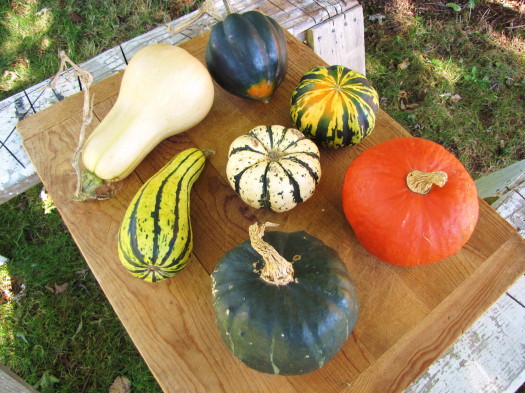
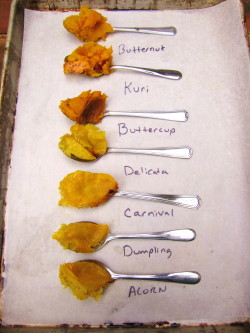
The first thing I noticed of course, before we even tasted, was the big range in color and texture among the squash. (To identify the squash, see the photo at the end of the blog with IDs underneath.)The Red Kuri, Buttercup, and Butternut squash have deep orangey-red flesh and a dense texture. The Delicata, Acorn, Sweet Dumpling, and Carnival all had a more yellowy golden flesh, although within them, the texture varies (Delicata and Dumpling being creamy, Acorn and Carnival more fibrous.) The cool part of the comparison, though, was how different they all tasted. Here’s what we thought.

Butternut—smooth, rich, dense flesh with a distinctively nutty flavor
Red Kuri—texture like a baked potato, very robust smoky-nutty flavor, intensely “squashy” in a good way; deeply colored (Susie’s favorite)
Buttercup—dense flesh with a very flavorful flesh reminiscent of caramel and peanuts
Delicata—very creamy flesh, light and bright tasting, flavor hints of summer squash
Carnival—moderately fibrous flesh, light sweet-sour flavor, our least favorite (sorry, Carnival)
Sweet Dumpling—flesh is a bit fibrous but creamy too, very sweet with a bit of tang, a light flavor
Acorn—fibrous texture but with a complex nutty-sweet-bright flavor (Roy’s favorite)

So there you have our unofficial and biased results. I’d recommend trying the Red Kuri if you haven’t, and I’d consider using it or Buttercup in place of Butternut in soups for a richer flavor. Though Carnival is a beguiling looking squash, I’d definitely stick with the similar but better tasting Acorn for stuffing, or go with the pleasantly sweet and creamy Delicata or Dumpling.

Squash IDs, clockwise, starting from top left: Butternut, Acorn, Carnival, Red Kuri, Buttercup, Delicata, Sweet Dumpling

Peaches & Cream: A Taste of Summer in Lewes, Delaware

Traveling is not my forte. I always pack too much, eat bad fast food that I don’t want, and wind up becoming cranky and homesick.  I like to think this is because I was born under the sign of Cancer (with Cancer-rising, too—the double whammy). This accounts for both my extreme homebodiness and my crabbiness when hungry (and when my edible options are less than desirable). Every Zodiac sign has a body part associated with it. For Cancers, it’s the stomach.

In fact, if it weren’t for things like farmers’ markets, sweet shops (freshly made ice cream or artisan chocolates, preferably), and coffee joints, you would not want to travel with me. But if a town can supply me with these three things, I’m good.

I’d have to say, on the farmers market/sweet shop/coffee joint scale, it would be hard to rank as high as a town like Portland, Oregon, where I visited this spring. I slurped deep dark hot chocolate at Cacao (kind of a chocolate bar that sells chocolate bars—as well as chocolate drinks), squirreled away fresh hazelnuts, buckwheat honey, and aged cheddar from the knock-your-socks off Saturday farmers’ market, and treated myself to a cup of my favorite Major Dickason’s Blend at Peet’s every morning. Portland has a reverence for coffee, for farming, for cooking, and for hand-crafted artisan foods like no other town I’ve seen.

So it is hardly fair to talk about Lewes, Delaware, in the same breath. As food towns go, little Lewes is not going to burn a hole in your Zagat Guide. But I’m afraid it would be on Page One of the Susie Guide. It’s a sentimental thing, for sure. My Dad’s family has been living (and eating) in this coastal town for 300 years, and it’s there that I learned to pick crabs, eat corn on the cob with my new adult teeth, make homemade peach ice cream and Beach Plum jelly with my Dad, and dig clams with my cousins. My best food memories are all right there. Or at least they were last weekend when we traveled down to celebrate my Dad’s 80th birthday.

On Saturday, when I walked down Second St. past St. Peter’s Church where all my relatives are buried in the cemetery, past the old Victorian house my great-grandmother lived in, and onto Ship Carpenter Street and the grassy grounds of the Lewes Historical Society, I got goose bumps. Here was the farmers’ market in full swing. It’s a young market—only 5 years old—but it has caught on strong, and now it attracts growers and food artisans from all over the Delmarva peninsula. I looked around, and it seemed like a whole group of unknown friends had made a secret effort to keep all my childhood food memories alive.

Right there was the white sweet corn—the very sweetest, juiciest corn you will ever find anywhere (it’s the Delaware soil, they say). I embarrassed myself by asking if this variety was Silver Queen. “No, we haven’t grown that one in years,” the (young) kid told me. “This one’s called Argent.” “Argent as in A-r-g-e-n-t?” I said. “Something like that,” he replied. (That night, I discovered that Argent, however you spell it, is even better than Silver Queen—or at least my memory of it.)

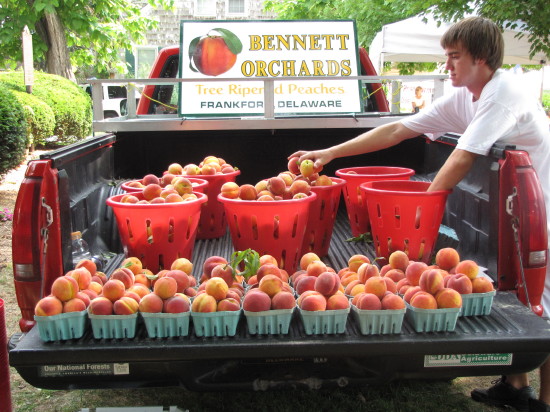
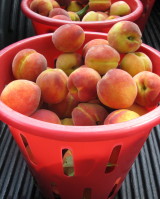
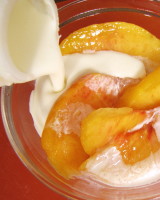
Stuffing a dozen ears into my bag, I lurched over to the big truck under the maple tree that was loaded up with red bushels of peaches. Peaches! Oh Boy! Real, tree-ripened, fragrant, soft Delaware peaches. Not my favorite white variety (they’ll be ripe next week, the nice folks from Bennett Orchards told me), but a very fabulous yellow variety called Red Haven. Bennett Orchards (in Frankford, Delaware, less than 30 miles from Lewes), I learned, grows 19 different varieties of peaches from July through early September, and I am already sad that I will not get to sample the other 18 varieties this summer. (I took my little stash home and sliced the first one up raw and drizzled it with what is arguably Lewes’ true claim to culinary fame—ultra rich, buttery yellow Lewes Dairy heavy cream.) This is the way my grandmother Honey served peaches. Peeled & sliced. With Lewes cream. Period. Nothing better.

By the time we waded out of the farmers’ market (it was 90+ degrees and 75% humidity, so we were literally wading), we also had a wedge of Talbot Reserve cheese from Chapel’s Country Creamery in Easton, Maryland, a jar of local honey, and, among other tidbits, a bumper sticker (“No Farms, No Food”).

I figured the farmers’ market would be the highlight of the day, but I didn’t know what my Dad and sister had in store for us that night: a ride out to Hopkins Creamery for ice cream. (I’d never been.) On the drive out through the cornfield-lined back roads of Lewes, Dad and Ellie kept talking about the smell of cow poo and the best ice cream ever in the same breath.

Sure enough, as twilight faded, we saw a huge silo looming ahead, silhouetted in the blue-grey sky, its painted decoration of ice cream cones barely discernible. We trolled around for a parking spot and eyed the long lines of folks outside the creamery—which is right next to the huge dairy barn full of cows. We didn’t have to get out of the car to breathe in the familiar odor of cow manure.  Judging by the long lines, this seems to be an experience most folks appreciate—knowing exactly the source of their ice cream. But it kept my mom at home in air-conditioned, odor-free comfort. Too bad, as she missed the best ice cream I’ve ever had. After our turn in a long line, I followed suit with Dad and Ellie and chose Cappuccino Delight, a coffee ice cream with bits of toffee in it. (Roy had his favorite—vanilla.) The rich, buttery, full-fat ice cream was heavenly, even better licked off a crunchy sugar cone while watching a new calf lounge in the hay of the open dairy barn.

What a great trip—sweet corn, peaches, cream, cheese, ice cream. Oh yeah, we did roast a lot of tomatoes and cook green beans, too. It wasn’t a total vacation from (green) vegetables. And I didn’t get a stomach ache; not even once.