Category Archives: The Recipes

The 50-Pound Onion Harvest and The Mystery Egg

Fortunately, we did not have to move the hens into the mudroom during the hurricane.

Aside from the obvious drawbacks to this plan, there simply wouldn’t have been room, what with the hundreds of tomatoes and the 50 pounds of onions hanging around. With the storm coming, we did harvest just a wee bit more than we normally would have. But even on an ordinary day, the house is overrun with vegetables for the farm stand at this point.

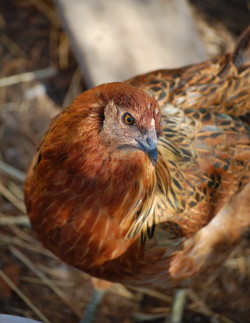
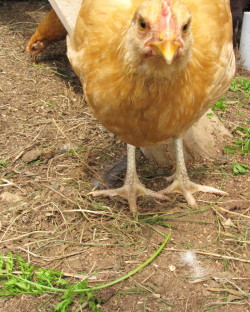
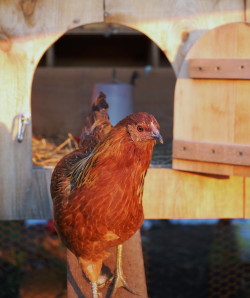
As it turns out, moving the hens anywhere away from their coop might have been particularly upsetting just about now. They’ve been clucking like crazy lately and we thought maybe it was the change in barometric pressure. Apparently, it’s pressure of a whole different sort that’s bothering them, because we found our first egg on Wednesday morning. We’re very proud of the mama (whoever she is), because she got pretty close to the nesting box. We found the little brown egg lying in the hay in a dark corner of the coop. Yesterday, our hen-whisperer friend Katherine gave us some fake eggs to put in the nesting boxes, so hopefully the next mama will actually lay in one of the boxes. We thought for sure the first layer must be Sugar (below), who’s been making the loudest fuss lately. But since she’s our only Aracauna, and they are supposed to lay blue or green eggs, it wasn’t her. She must still be working on her first. Probably it was Martha, who’s all-business and, after all, Chief Hen. I can see her dropping her first egg like it’s no big deal.
We feel really lucky that the animals and the vegetables got through Hurricane Irene unscathed. I am a little worried though that we are due to get nailed at some point. (A farm stand customer just stopped in to tell me that another tropical storm is headed our way next week.) Because for some reason, the Island just hasn’t been in the path of the worst of this year’s storms—from the bad snows this winter to the recent deluge that soaked the rest of New England.

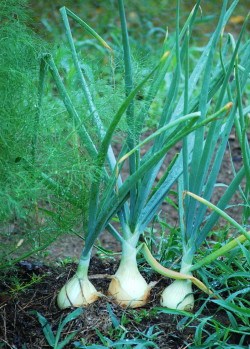
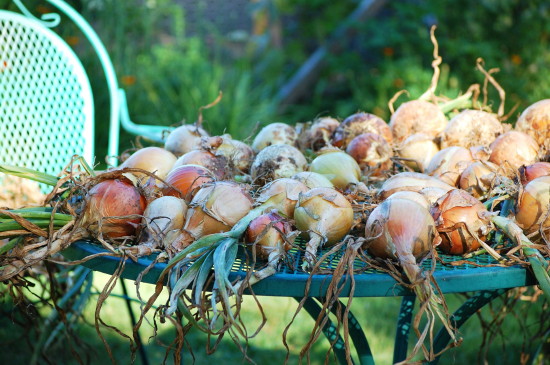
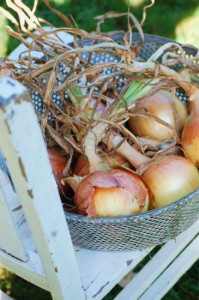
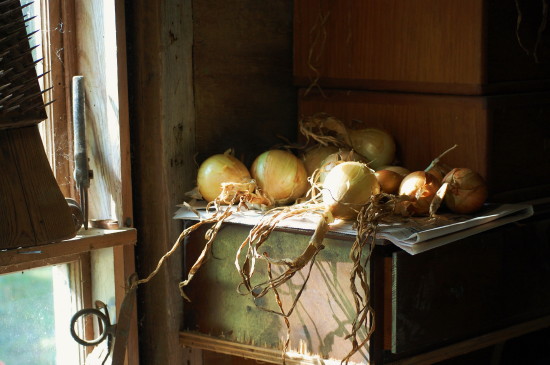
There is something delicious about this post-hurricane weather, though. Crystal blue days and piercing late summer sunshine are giving me just the window I need to get the garden beds replanted (more arugula, turnips, lettuce, and bok choy) for the next two months of Indian summer we get out there, thanks to the warm ocean air. It’s also the perfect weather for drying out those 50 pounds of onions. At one point during the storm, they were in my office—on top of and underneath my desk. I didn’t mind so much as I am totally tickled by how great they came out. They were easy to grow and over the last several weeks, they bulbed up into bodacious plump beauties. This week I’ve had them outside during the sunlight hours to finish the drying process. (Top photos.) The stems need to wither from perky green to brittle brown, and a few nice layers of golden onion skin will assure they keep for many months. (Final destination: the barn. See photo at bottom.)

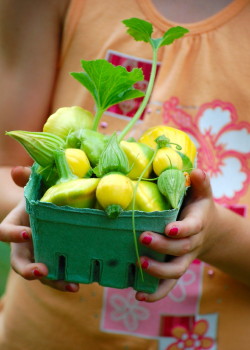
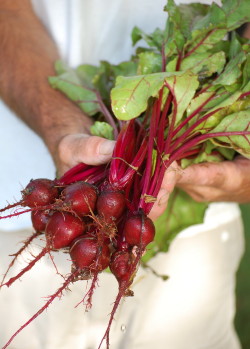
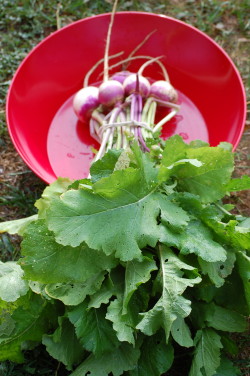
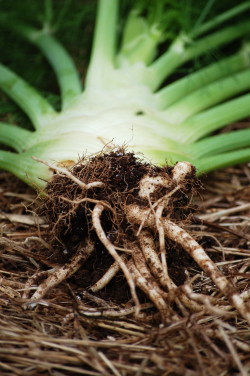
The whole idea behind the onions was to supply my kitchen for the winter (and not to sell them at the farm stand). But I’ve lost a dozen or so already to begging farm stand customers who’ve seen them in the yard spread out everywhere over tables and chairs. Who’d have thought people would want to buy onions at a farm stand? But then again, I had no idea how beautiful the harvest would be. These are some of the best things about tending the farmette—the little surprises, like a freshly laid egg or a beautiful heap of onions. (I’ve been snapping shots of my turnips and fennel, too. I can’t get over how gorgeous they are straight out of the ground, with all their greens and roots attached. So different from the grocery store.)
People ask me what I’m going to do with all those onions, and I just smile. I use onions in everything. We’ve already been grilling them (last night for fajitas), including them in roasted and slow-sautéed veggies (with those turnips and some of our carrots and potatoes, too), and this weekend I hope to make one my summer gratins or “tians” with our tomatoes and zucchini. If you’ve never made one of these summer gratins, you simply must. Everyone loves them. If you’ve got a copy of Fast, Fresh & Green (and if you don’t, ahem!, you should), turn to p. 201 and make the Summer Vegetable and Tomato Tian with Parmesan Bread Crumbs. Or, you can find one of my very first tian recipes over at finecooking.com. Next up for the onions and fennel and tomatoes and kale: Hurricane Soup!

Ten Things We Love About the Martha’s Vineyard Ag Fair – including our Blue Ribbon Cherry Tomatoes!
If you don’t want to be kept awake by bloodcurdling screams three August nights in a row, you’d best not live directly across the street from the fairgrounds, as we do. If you don’t like fried dough, cute farm animals, antique tractors, or watching grown women throw skillets in the air, probably the Martha’s Vineyard Agricultural Society Fair is not for you. If, on the other hand, you’re like us and the idea of nonstop animal oogling and fair-food snarfing, combined with the chance to revel in a grand celebration of traditional crafts—from pickling and pie-baking and flower-arranging to sheep-shearing and wood-cutting and draft-horse pulling—you’d be pretty happy with the free four-day passes we got to the Fair this year. (All abutting neighbors get free tickets, an entirely effective antidote to listening to ride screams and merry-go-round music for four days! And I must say, not having to brave traffic, pay for parking, or pay an entrance fee really improves one’s attitude to a crowded event.)

Libby and Roy and I are shameless. We’ve been every day (and it’s not over yet). Our friend Katie Hutchison joined us for a day and a half, and together we covered a lot of ground. I thought it would be fun to let you know our very random and unofficial top ten (oops, turned out to be twelve) things we love about the Fair—this year, at least. And that’s not even including the cool parade the organizers added this year in honor of the 150th anniversary of the Fair. We enjoyed that last Tuesday night. The Fair itself began on Thursday.

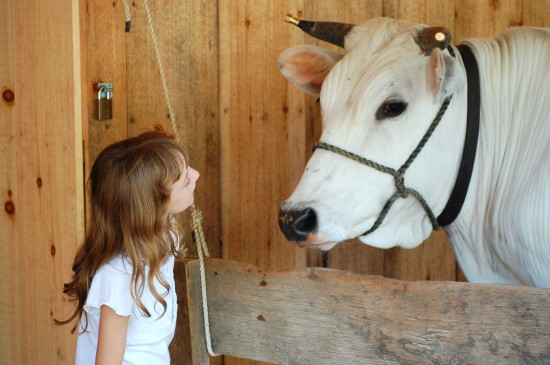
1. The Oxen. I’ve been infatuated with these big beasts since the day I first met a pair at my farmer friend Liz Packer’s place in my early days on the Island. Raised in pairs as a team, these hard-working cattle pull heavy loads, including rocks, logs, and plows, and the Fair offers a chance for teams to compete against each other. This year, Libby made friends with a handsome white fellow (photo at top of blog), and we watched a little of the pulling competition (above).

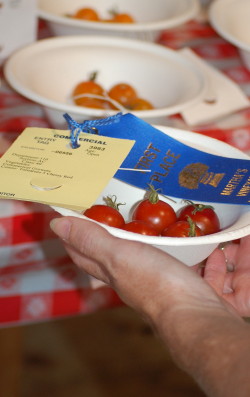
2. The Hall. When the doors to the Agricultural Hall open around 2 pm on Thursday, it’s like Christmas. Everyone wants to know if Santa (aka The Judges) left a ribbon on his or her Fair entry—whether it’s a work of art, a carefully cultivated vegetable, a quilt, a flower arrangement, or a collection of eggs. This year, again we weren’t disappointed. Though we didn’t enter as many categories as last year, we took a blue ribbon for our red cherry tomatoes, and a red ribbon for both our green beans and onions (all in the commercial, or professional category. I still think there is much stiffer competition in the home-growers catgory!). We were psyched.

3. Root Beer Floats. Our favorite snack, hands-down, comes from The Floaters booth.

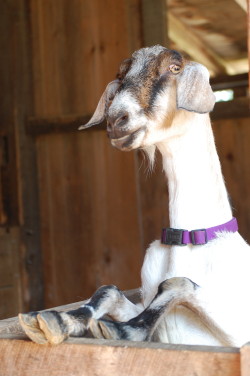
4. Goats. We all (Katie included) have a thing about goats. This one pictured here is a totatally cool Alpine dairy goat owned by Matthew Dix and Rebecca Miller of North Tabor Farm. I think she won a blue ribbon for her fine form.

5. The Rides. Watching them, that is. I am not a ride person, but I got a big kick out of watching Libby and Roy on the Octopus. From solid ground, with my camera.

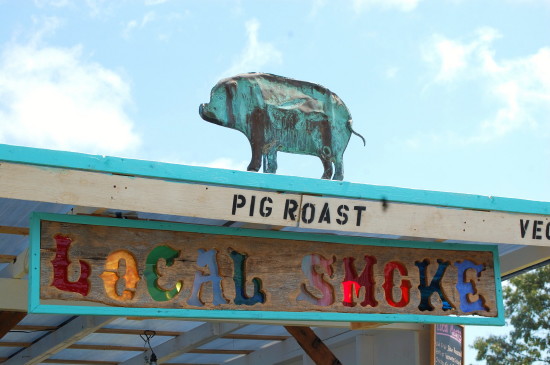
6. Local Smoke. My favorite food booth by far. Locally raised pigs and chickens smoked by Island native Everett Whiting, served as killer sandwiches with bright, fresh slaw, just a bit of tangy sauce, and a side of corn and tomato salad. Awesome.

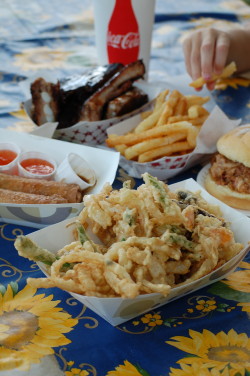
7. Chowing Down. I admit, we didn’t get every bite to eat from Local Smoke. We indulged in some pretty bad-for-you stuff, including veggie tempura, eggrolls, fries, and pork ribs (for Libby—her favorite). We also sampled fruit smoothies, candy apples, cupcakes, lemonade, and grilled corn on the cob (another Libby favorite). We didn’t all eat all of these things, and certainly not altogether, but it was a pig-out nonetheless.

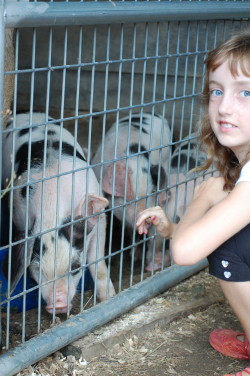
8. Piglets and Baby Chicks. Libby and I could spend hours at the barn staring at the baby animals. (In fact, we’re going back for one more look a little later.) In particular, we noticed that a prize-winning hen had just hatched some baby chicks the other night, and we couldn’t take our eyes off them. And who doesn’t love piglets? An especially cute bunch of Gloucester Old Spots (and their mama), owned by Grey Barn farm, got our attention—and a few pats from Libby.

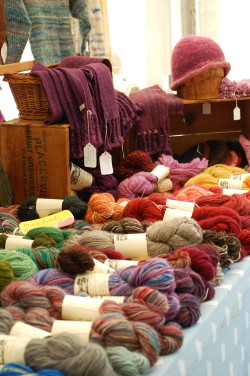
9. The Fiber Tent. None of us knit or spin wool or anything like that, but you can’t help but be inspired by the gorgeous colors and textures – and the folks who practive this art – when you walk through this arena. Of course, there are live sheep and lambs  hanging around as well!

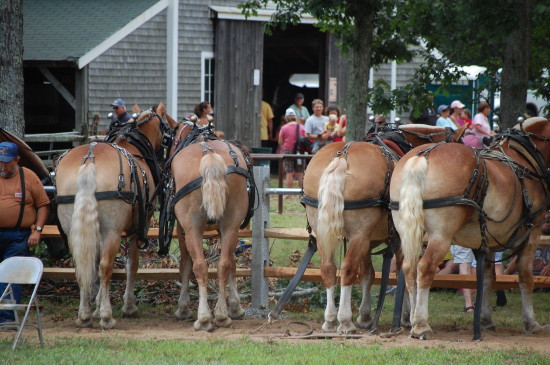
10. The Draft Horses. Like the oxen, these awe-inspiring horses (one breed is descended from horses believed to live 30,000 years ago, depicted in cave drawings) are also stunning to watch when they compete in a weight-pulling contest, too. (I think they even look impressive from behind, standing still…)

11. The Pet Show. Maybe our favorite event this year. (Yes, there’s a theme here. In our family, we’re all about the food and the animals!) We sat in front of the stage and watched nearly a full hour of this quirky event. Dr. Milk Bone, a 27-year veteran of the pet show, interviews small children (and sometimes adults) who present their family pets, from garden snakes and goats to shy cats and Happy Birthday-singing dogs (above), and coax them into performing tricks (or not, sometimes).

12. Family Time. When I told Libby I was writing up our favorite things about the Fair, she told me that number one on her list would be that it’s a fun way to spend time all together. There you have it. We might not be the healthiest eaters, but we do know how to have a good time!

A Video of the Farmette, A Paella Dinner, and A Recipe for Unsellable Tomatoes

Darn it all, wouldn’t you just know it—this is the time of year when there’s so much going on at the farmette that I could write a blog every day. Except, ironically, there’s no time to write—too busy!

So today I’ll just have to give you a quick update on the goings on around here, because tomorrow I’m off to Boston to sign books at the Dewey Square Farmers’ Market, and I spent this morning cramming in the last bit of proofreading I needed to do on the galley of Fresh & Green for Dinner in order to get it off to Fed Ex in time to reach San Francisco by tomorrow. (It’s very exciting to see the design of the new book shaping up, even though publication is still many months away.)

First, great news: My friend Katie Hutchison, who kindly took care of the farmette with her husband Chris Hufstader while we were in Delaware, secretly made a video of their farm-keeping experience here at Green Island Farm and posted it on her website. Katie, who is an accomplished architect, photographer, and writer, is admittedly new to gardening and occasionally posts about her “Idjit” garden plot in a Salem, Mass., community garden. As you can tell, Katie’s not afraid to poke fun at herself, and her sense of humor is evident in the video—you’ve got to see it!

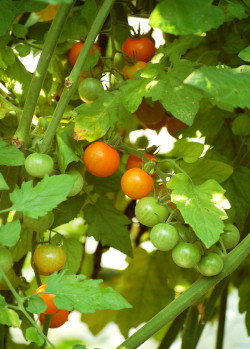
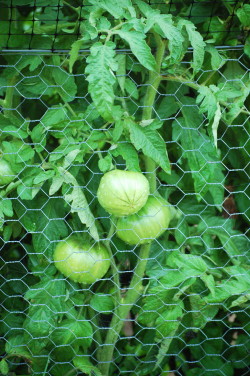
More good news: The garden is thriving (see photos) and so is the farm stand. In fact we’re pretty much selling out of everything we can harvest every day, now that the August visitors have arrived on the Island. (Obama will be here soon!) It’s killing me that we don’t have more to sell (can’t wait ‘til next year), but I’m also getting an invaluable sense of what the market wants. We’re dead on with our cherry tomatoes—all the varieties are producing well, we’re harvesting several pounds a day, and folks love the colorful pints. I just wish the beefsteak tomatoes would speed up. They’re big and fat—and very green. Our green beans are definitely getting folks to drive down the driveway, but again, it’s frustrating that we don’t have more of them (the beans, not the customers). It takes Roy and I (and sometimes a house guest!) at least a half-hour to pick them in the morning, and then we only wind up with a few pounds. But that’s how it goes.

It’s been fun to watch the farm stand traffic pick up, and I’m meeting all kinds of interesting people. One friendly couple from San Francisco (yes) has stopped by three times this week, and I had a nice conversation with two ladies from Southern Italy the other day. Sometimes an old friend who is visiting the Island will unexpectedly come down the driveway and surprise me (it happened this morning—hi Margo!).

And speaking of friends and visitors…August on the Vineyard means lots of both. And since the farmette is such a welcoming (and entertaining) place (most popular: the bunny and the rope swing), we seem to be a central gathering spot. Last week I almost cried when I stood in the backyard with two of my dear friends and former staff members from my Fine Cooking days, food writers Tony Rosenfeld and Sarah Jay. Tony was only on the Island for a day, but stopped to say hello and brought some Italian friends along with him. After touring the garden, the Italians convinced me that my arugula wasn’t too spicy!

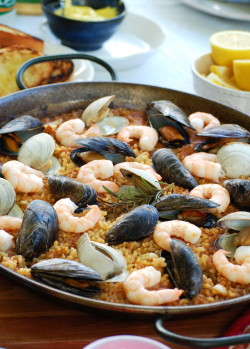
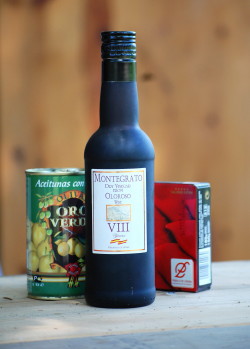
Fortunately Sarah and her two daughters were here for the better part of last week and we had lots of time to catch up—and to cook together. Sarah is an expert in Spanish cooking and runs a successful business importing paella pans and selling all kinds of Spanish goodies from her terrific website, paellapans.com. Not only did she bring me a wonderful bottle of sherry vinegar, as well as piquillo peppers, olives, and chorizo, but she made us a seafood paella while she was here. I’m a huge fan of Sarah’s paella (recipes here), which she learned to cook while living with a family in Spain, but it was Roy’s first really authentic paella. And he loved it.

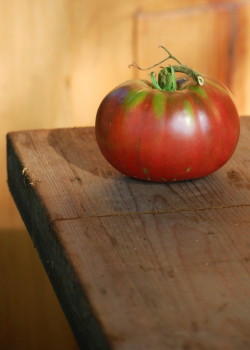
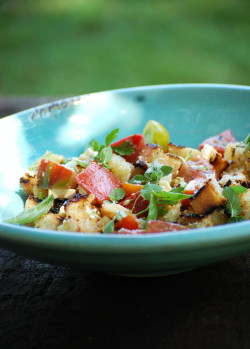
The day after Sarah left, I missed her. Right about lunch time, I started thinking about those Spanish ingredients she brought me. Hmmm. As it happens, I was also staring at a damaged Cherokee Purple (heirloom) tomato from the garden that needed to be carved up and eaten right away. (Ironically, this happens a lot – we have a garden full of lovely vegetables, but we wind up eating the overgrown beans, the holey greens, the deformed carrots, and the over-ripe tomatoes because the good stuff goes to the farm stand!) I’ve also been on a grilled bread kick, so I decided to make a grilled bread-tomato salad with olives, sherry vinegar, feta cheese (left over from a delicious salad Sarah made while she was here) and lots of fresh herbs. I guess it was an Italian-inspired salad with Spanish ingredients and a Greek twist! Whatever it was, it was delicious. So I’m passing the recipe on to you in honor of good friends and summer visitors and farm stand customers everywhere. It makes enough for two, but if you’re like me and a juicy heirloom tomato falls into  your lap, you might not want to share it.

Spanish Grilled Bread, Tomato & Fresh Herb Salad

You can use any variety of juicy tomatoes in this salad—as long as they’re juicy. (Did I mention juicy?) When you grill or toast the bread, don’t overdo it—leave it a little chewy so that it will soak up the dressing and all those tomato juices. This recipe makes a generous lunch for one or a supper side dish for two, but you can easily double or triple it to serve a crowd. I like lots of basil and mint in this (I pick the tiniest leaves from my plants and throw them in whole), but parsley, chives, or a judicious amount of fresh oregano can go in the mix, too.

___________________________________________

1 tablespoon extra virgin olive oil

2 teaspoons good-quality sherry vinegar

3/4 pound (or a little more) juicy tomatoes (a combo of beefsteak and cherry is nice), cut into small chunks or quartered if small

2 ounces feta cheese, cut into small cubes

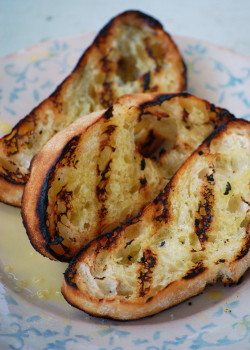
2 1-inch thick slices ciabatta or other narrow loaf artisan bread, brushed generously with olive oil, sprinkled with salt, and grilled or broiled until toasty, cut into small cubes

8 to 12 Spanish green olives, smashed and pitted

1/4 teaspoon minced fresh garlic

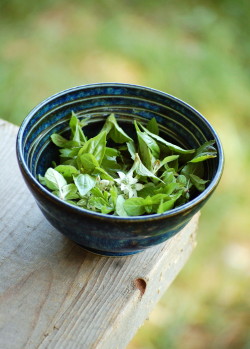
1/4 cup small whole herb leaves (basil and mint)

kosher salt

_____________________________________________

In a small bowl, combine the olive oil and sherry vinegar. Set aside.

In a medium mixing bowl, combine the tomatoes, feta, bread, olives, garlic and half of the whole herbs. Sprinkle with salt and pour over the olive oil-vinegar mixture. Toss and mix well. If desired, toss and let sit for 15 minutes to let the bread absorb the tomato juices (but it isn’t necessary). Turn out into a pretty shallow serving bowl and garnish with the remaining herbs.

Serves 2

My Gig as a Dream Girl (and How I Got a New Camera)

When I die, my obituary will be juicy I’m sure. There’s that time my picture appeared in the National Enquirer (no kidding). And those television appearances on Romper Room and The Martha Stewart Show. And of course, my double life (just kidding—sort of).

And now I get to add Dream Girl to my resume. I got “sold” at an auction. Not into slavery or anything. Far from it. In truth I was part of a package deal offered at last year’s Possible Dreams charity auction on the Vineyard. My dream partner was Dawn Braasch, owner of Bunch of Grapes bookstore in Vineyard Haven—and of a fabulous old sea captain’s house that she has restored beautifully. Our package was dinner and a cooking class for six by Susie Middleton in the spacious and lovely kitchen of Dawn Braasch’s home (with house tour).

The couples who offered the winning bid for us agreed on a dinner date when everyone could get together, and it turned out to be this past Saturday night.

Farm Girl has been a little cranky lately, having had very little time to spend in the garden, what with road trips, book galley and magazine deadlines, book signings (PR Girl is not my favorite hat to wear), and general summer-on-the-Vineyard craziness. And my natural inclination might have been to be suspicious of cooking dinner for complete strangers. But from my first email with Joann Frechette, my point-person on the guest list, I had a good feeling. This was going to be fun; I just knew it.

So I put on my Dream Girl hat, prepped in my tiny hot kitchen, zipped around the Island to get great ingredients (the best being two locally raised chickens from Jeff Munroe’s The Good Farm), and arrived at Dawn’s. (Actually, I should say, arrived at Dawn’s with Roy, who helped restore Dawn’s house and was enlisted to join in the fun.) Dawn’s table setting (not to mention the cool icy pitchers of Pimm’s Cup and whiskey sours she’d made for the guests) took my breath away.

When Joann and the other guests (Bob Nash, Sandy Miller, Don McKillop and Susan Davy) arrived, we chatted a bit—and then went right to work. And that’s when I knew for sure what a great group they were. I did a quick demo of making free-form rustic summer fruit tarts from a great food-processor dough, and then each guest got a chance to roll, fill, shape, and top his or her own blueberry tart. Not only did everyone pull this off, but they did it in short order—and the tarts looked stunning.

For the rest of the dinner, we made the Caramelized Plum Tomatoes, the Corn Saute with Chile and Lime  (similar recipe here), and the Grilled Shiitake Mushrooms from Fast, Fresh & Green along with grilled bread, a nice green salad, and the chickens (butterflied and roasted and served with jus and lemon-rosemary drizzling oil). Dawn had chosen great red and white wines to go perfectly with everything. Of course as I sat down at the table, I had a litany of “oh, nos” dancing in my head as I realized my salad dressing didn’t taste the way I wanted it to, the mushrooms and bread were both a little extra toasty…and all those kinds of thoughts that go through a cook’s head. But in truth, the food, the wine, and the setting were just props for a fun and relaxed meeting of old and new friends. Our Dream winners couldn’t have been lovelier people.

In fact, the story ends with an incredible gift. Susan Davy (who along with artist husband Don owns the Dragonfly Gallery in Oak Bluffs) emailed me Sunday morning with an offer. She’d heard me talk about needing a new camera (mine was stolen in New Jersey and I have been wringing my hands over the cost of buying a new one, especially since I know I have to take the opportunity to move up to a SLR camera—finally.) She explained that she had a Nikon D40 she hadn’t been using since she’d bought a new camera, and that she would like to loan it to me to use for awhile. And that she’d talk me through operating it. Amazed, I thought about this offer all afternoon, and then, of course, said yes. And thank you. And, is this a Dream?

P.S. I haven’t had much time to play with the new camera yet, but couldn’t resist sharing a few photos (top and below) I took around the farmette, since I am so tickled that I actually get killer depth of field (that artful blurry background!) with the D40. (And I unfortunately don’t have any photos from the Dream dinner to go with the blog.) Now I wish I just had a few weeks to do nothing but take pictures. Yeah, keep dreaming Susie.

We Brake for Farm Stands — and Fairy Tale Eggplants

The car was packed to the gills—no lie. We rearranged the sleeping bags, two coolers, bags of beach towels and bathing suits, two beach chairs, and one hermit crab in a small cage to fit three blueberry bushes into the way back. Gifts from my Dad, the blueberries–in our minds–already had a home in our garden. No way were we leaving them in Delaware. We tucked Libby and her stuffed animals Croc and Humphrey into a small spot in the back seat, next to three flowering annuals we’d bought on the way down. And off we went, leaving Lewes early Monday morning for the long drive (and ferry ride) home to Martha’s Vineyard. At least the outside temperature was a cool 88—16 degrees cooler, in fact, than on the drive down. (Yes, that’s 104 degrees F.)

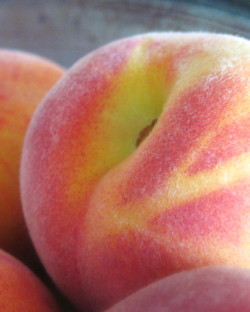
With a full car and nine hours of highway ahead of us, we had no business braking for farm stands. But we did. Pretty soon we were cramming bags of Silver Queen corn into any fissure we could find. The nice farm stand guy at one place talked us into a new variety of melon – something called Candy Orange, a cross between a honeydew and a cantalope. A couple quarts of fresh peaches, a box of blueberries, and a few other fruits later, the car began to smell. Not a bad smell, just a very fragrant, perfumey smell. Roy thought it was rather mango-ish. All I could think about was whether the fruit would make it back without rotting or bruising something terrible. What I like best about farm stand fruit is that most of it is picked ripe or nearly ripe. But that means long car travel is about the worst way to treat these fragile babies.

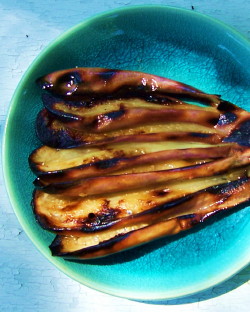
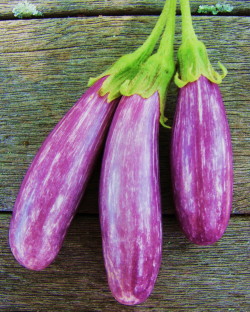
Most of the fruit survived (except one juicy peach that Libby and I shared in the car, random rest-stop napkins grabbed to catch the drips) as did the other goodies we nabbed at the farm stands. Silly me, I fell in love with something new – a box of little Fairy Tale eggplants – only to remember when I got home that I actually grew a few of these in my first garden on the island. (Photo at top left is evidence. Memory loss is worse than I thought, I guess!) I am a sucker for mini vegetables (like the little pattypan squash we grow and sell), so when I saw these I instantly thought we should grow them for our own farm stand next year. And maybe we will. In the meantime I had to figure out what to do with some of them today (a quart is a lot!). (Fortunately, many of the other goodies went straight away to the kind friends who looked after the chickens, the farm stand, and the garden while we were gone.)

From some other vague part of my brain came the memory of eggplant “fans.” I thought this would be a cool and pretty idea for the little mini eggplants, and so I sliced away. I trimmed the tops of the fruits just enough so that they still hung together, and cut about four parallel lengthwise slices just a bit shy of the tips to make the “fans.” I brushed each slice with olive oil, sprinkled with salt, and lit the grill. Ten minutes later I had lunch. Just three or four minutes on each side was enough to cook these eggplants through (I hate undercooked eggplant). The skin was tender, the flesh soft, and the flavor, well—clean and sweet. Not quite as deep and earthy as a big globe eggplant, but not the least bit bitter or seedy either. I wound up smearing some of my slices with a little extra Humboldt Fog goat cheese our farm-keeping houseguests left in the fridge for us. Wow—that was a killer pairing. But the grilled eggplant would be great lots of ways: dressed with salsa or a drizzle of chimichurri, in a salad with arugula, fresh mint and a lemony vinaigrette, or just on their own as a cute side, antipasto, or starter. Farm stand finds are fun, huh?

P.S. Culinary highlights from the weekend in Delaware included a Fast, Fresh & Green signing at the wonderful Historic Lewes Farmer’s Market, my sister Eleanor’s delicious baby back ribs, and a trip to Hopkins Farm Creamery for cow-fresh ice cream (complete with barnyard smells). We didn’t get a chance to eat crabs, pick beach plums, or pan-fry some scrapple on this trip—next year!

P.P.S. My camera has met a sad fate, so I beg your patience while I research a new camera (and rob a bank to pay for it!).

Cooking Out: Garden Potatoes on the Grill

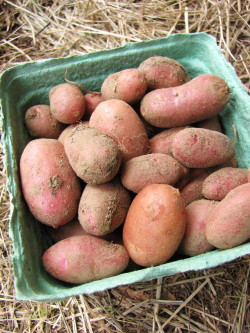
Finally, we’re harvesting our potatoes—Red Golds and French Fingerlings, too. Every morning Roy forks up a plant or two and we ooh and ah over the tubers that tumble off the roots. (The potatoes are Roy’s babies, so he gets to decide how many we pull up every day!) There are always a few that are only the size of marbles—I slip them in my pocket and roll them around in my fingers from time to time, as if they were lucky garden charms. The rest I weigh and portion into those cute little green berry baskets for the farm stand. Any extras I get to keep. And cook for dinner. Yum.

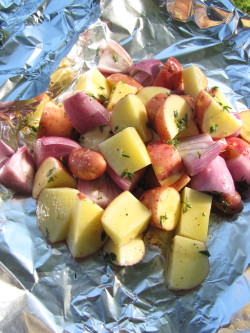
The other night I had a few of both kind left over, and they were all different sizes. So I cut them up into pieces about the same size so they’d cook at about the same rate. But instead of roasting them, I decided to cook them on the grill using a method I developed for Fine Cooking years ago. Basically, it’s just cooking in a foil package (not a radical concept!), but the trick is to make a package of even thickness so that all the potatoes cook at about the same rate (see directions in the recipe below).

The big payoff here is that by putting the foil package over the direct heat of the grill, the potatoes get some great browning (and flavor) and cook through, too. I wrap the potatoes in three layers of foil so that they don’t burn, and I flip the potato package once during cooking so both sides have contact with the hot grill grates.

To keep the potatoes from drying out, I do two things: I toss them with plenty of olive oil, and I include aromatic veggies (like onions, mushrooms, or peppers) that give off both moisture and flavor as they cook. Garlic cloves are yummy additions, too, as are hearty fresh herbs like thyme and rosemary. I used quartered shallots in the version I made the other night. They were tasty, but the smaller pieces of shallot almost burned so I’d leave them out. I also wish I’d had the mushrooms on hand to add, so I’ve included the suggestion below.

My potatoes cooked—just like my old recipe said they would!—in about 45 minutes, but this might depend on the grill you’re using. To see if your potatoes are done, remove the package from the grill and very carefully peel back the foil with tongs (the steam will be hot). Poke one or two with a paring knife. If they need more time, just wrap the package back up and continue cooking. If they seem like they’re brown enough already, put the package over a burner turned to low, but keep the other burners on medium.

This is definitely a method worth playing around with, as it’s a great hands-off way to cook potatoes on a summer night when you’d rather cook out than turn your oven on.

Grilled Potato “Packages”

Mushrooms are a good addition to this mix. If you include them, use 3 or 4 ounces and reduce the amount of potatoes slightly.

_______________________________________________

12 ounces red, gold, and/or fingerling potatoes, cut into 1-inch pieces

2 large shallots or one small yellow or red onion, cut into chunks (discard smaller pieces)

3 tablespoons extra-virgin olive oil

2 teaspoons thyme leaves or roughly chopped rosemary

1 teaspoon kosher salt

freshly ground black pepper

____________________________________________

Heat a gas grill on medium heat. (My gas grill is new and runs fairly hot so I turn the dials to just below medium. ) Combine all the ingredients, including several grinds of fresh pepper, in a bowl and mix well. Measure out three sheets of (regular) aluminum foil. Each should be about 20 inches long. Overlap two pieces in a cross pattern. Mound the potato mixture in the middle of the cross and spread it out evenly into a square of even thickness (about 1 1/2 inches). Fold each piece of foil in and over the potatoes to wrap the package, and wrap the third piece of foil around the package for a good seal.

Put the package directly on the grill grate and cover the grill. Cook for 20 minutes (you’ll hear sizzling) and flip over. Cook for 20 to 25 minutes more. Remove the package from the grill and open it carefully with tongs. (It will release hot steam.) The potatoes should be nicely browned in places and will be tender when pierced with a paring knife. If they aren’t tender yet, rewrap and cook for 10 minutes longer.

Serve warm.

Serves 3 as a side dish

Happiness is: Backyard Berries & Black Raspberry Ice Cream

Recently my old friends have been calling to say, “What gives? You can’t possibly be that happy or having that much fun.” They’ve been reading the blog, and they’re getting suspicious.

Look, I’m sorry for the Pollyanna spin. No, my life is not perfect—no one’s ever is. But I doubt anyone wants to read about my bad hair days, and I certainly don’t want to write about them (at least not on sixburnersue!). And I can honestly say I am not making the good stuff up. The reason the universe is treating me so kindly these days, is that, well, I did my time. And while I was slogging through the bad stuff, I started to listen to my inner voice. It said, “Go berry-picking.”

I’m kidding, but only sort of. Life is short, and I finally resolved to enjoy every day by living and working around the things that make me happy. These aren’t things that would necessarily seem fun to everyone (take weeding, for example), but they work for me. And so when summer comes, I pick berries.

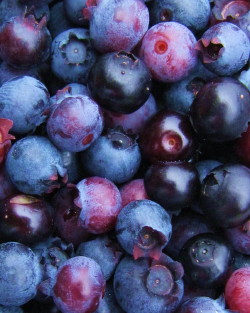
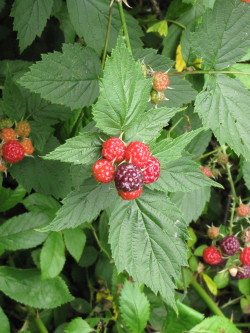
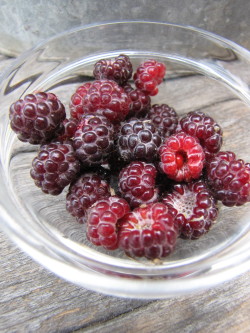
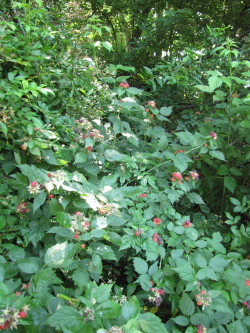
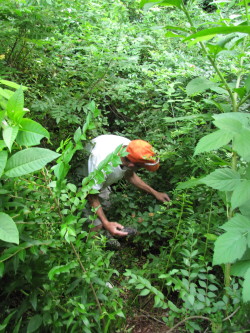
Only now I have berries in my back yard – seriously. This is about as close to fresh-food nirvana as it gets for me. I’d have to say Roy is pretty jazzed, too—we went wild blueberry-picking on one of our first dates, after all. He’s been hacking away at overgrowth to expose the hidden black raspberry canes that seem to be in every corner of this property. Tonight, as I was about to post this blog, right about the time the sky was turning completely black from an approaching storm, Roy came rushing in to grab a bowl from the kitchen. “I’ve found the mother lode!” he exclaimed as the door banged shut. Curious, I wandered outside and listened to see if I could tell where the hacking noise was coming from. Soon I realized he was deep in the brush that surrounds and hides the old crumbling stone foundation for what was once a great big barn. He emerged, clutching a bowl of plump berries the color of the darkening sky, about the same time the rain drops started falling.

We first noticed the berry canes in early summer, but we weren’t sure exactly which berry they were or whether they’d bear much fruit. Now we know. While we’ve also found a few straggly wild raspberries (and two high-bush blueberries) on the property, these black raspberries are prolific. Someone must have tended them at some point.

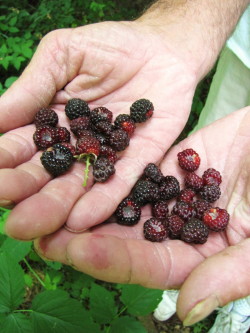
Black raspberries are cultivated in Oregon, but out East you find them mostly in the wild, or occasionally sold at farm stands. They look like small red raspberries and grow on long prickly canes, but they aren’t fully ripe until they darken to a deep blue-black. They taste different, too—that inky color (yes, rich in antioxidants) gives them a grapey, smoky tartness closer to black berries than raspberries, I think. They’re not too tart to pop in your mouth, though, and I’ve noticed that Roy, who isn’t generally a big fruit-lover, sneaks a few every time he picks some.

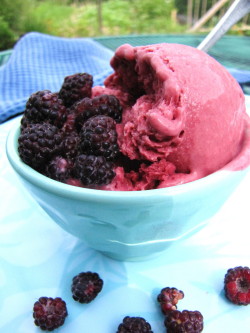
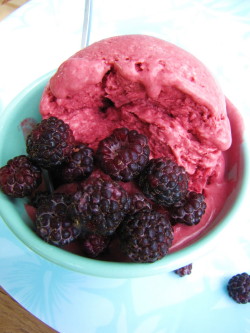
Me, I’ve been putting them on my cereal, mixing them with warm maple syrup to pour over French toast, and, drum roll please—making ice cream with them. The best damn ice cream ever. Sorry, I’ve been told my language (still) needs work. But really, there’s something about the marriage of black raspberries and a creamy custard that’s incredibly delicious–a classic.

To make the ice cream, I used the same Fine Cooking recipe I used last year to make the strawberry ice cream, only I cut the recipe in half. The custard base, mixed with the berry puree, was (and is) delicious. The only problem this time around is that my ice cream has not really frozen past the consistency of a thick smoothie (or a very creamy gelato). Certainly okay by me, as I’d be happy just to drink the stuff. And I’m 99 percent sure this is an issue with my freezer (and my ice-cream-maker canister), but I bring it up just in case it’s the result of cutting the recipe in half. So I share the half-recipe with the caveat that if you’ve got copious amounts of berries (of whatever sort), go ahead and make the full recipe as detailed in the strawberry post last year. And maybe splurge on a good ice-cream maker (I wish!).

Black Raspberry Ice Cream (Half-Recipe)

Adapted from Fine Cooking magazine article by David Lebovitz; for more ice cream recipes, visit finecooking.com.

With this small-batch recipe, it’s a little difficult to read an instant-read thermometer in the shallow custard in the sauce pan. Look for visual clues to know the custard has thickened. I used three medium egg yolks since the full recipe called for 5 large egg yolks. If you don’t have medium eggs, go ahead and use 3 yolks from large eggs. Your custard may thicken up a bit more quickly.

__________________________________________

1/2 pound ripe black raspberries (or other cane berries), rinsed

1/2 cup plus 2 tablespoons granulated sugar

1 cup heavy cream

3 medium egg yolks

1/2 cup whole milk

table salt

1/2 teaspoon vanilla extract

_______________________________________

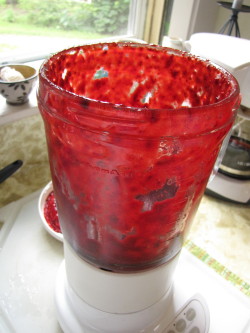
Make the berry puree: In a food processor, puree the black raspberries until completely smooth. Strain the berry puree through a fine-mesh sieve into a bowl or glass measure. (Press on the solids to be sure to extract all of the juice.) Stir in 1/4 cup of the granulated sugar. Refrigerate the puree until ready to use. (Can be done 24 hours ahead.)

Prepare an ice bath: Fill a large bowl with several inches of ice water (half ice, half water). Set a smaller metal bowl (such as a stainless steel mixing bowl) in the ice water. Pour 1/2 cup of the heavy cream into the inner bowl. (This will help the custard cool more quickly when you pour it in later). Set a fine-mesh strainer on top.

Make the custard: Whisk the egg yolks in a medium bowl and set aside. In a medium saucepan, mix the remaining 1/2 cup of the cream with the milk, the remaining sugar, and a pinch of salt. Heat the mixture over medium-high heat, stirring occasionally, until the sugar dissolves and tiny bubbles begin to form around the edge of the pan, 3 to 4 minutes. In a steady stream, pour half of the warm cream mixture into the egg yolks, whisking constantly to prevent the eggs from curdling. (This is called “tempering” – a good step when making any kind of custard. Be sure to pay close attention during this.)

Pour the egg mixture back into the saucepan and cook over low heat, stirring constantly and scraping the bottom with a heatproof cooking spoon or spatula until the custard thickens slightly and measures 175°F to 180°F on an instant-read thermometer, anywhere from 2 to 6 minutes. (Mine thickened up quickly.)The custard will be a bit more viscous and thick enough to coat the back of a wooden spoon, holding a line drawn through it with a finger. Don’t let the sauce overheat or boil or it will curdle.

Immediately strain the custard into the cold cream in the ice bath.

Cool the custard: Stir the custard frequently over the ice bath until an instant-read thermometer measures 70°F (or the custard feels to be at about room temperature—this won’t take long). Add the vanilla extract and stir. Add all of the black raspberry puree and mix well.

Chill and freeze the custard: Chill the custard mixture in the refrigerator for at least 4 hours (or overnight—in fact it holds for two days.) Freeze the ice cream in your ice cream maker according to the manufacturer’s instructions.

Makes about one pint.

Of Mice and Girls (And Baby Carrots, Too)

I’m always in a bit of a funk after Libby leaves. There’s a palpable void that I can’t quite describe, except that suddenly everything is much too quiet without her giggles and shrieks and pattering all around. After a few days we adjust and look forward to her next visit. But this time, after a particularly fun four-day holiday weekend, I’m missing her even more.

We did all the usual stuff you’d dream up for a swath of hot July days on Martha’s Vineyard—swimming at State Beach, heading up to Menemsha at sunset time for an instantly dripping chocolate-dipped soft-serve ice cream cone, hitting the arcade in Oak Bluffs for a round of games and prize-winning tickets. (I could have done without the giant inflatable Red Sox hammer, I’ll admit.)

But mostly we puttered around the farmette, where there’s no shortage of distractions for a girl with Libby’s expansive curiosity: Crickets, fireflies, chickens, bunnies, turkeys. Wild berries and wild flowers. Rope swing, sand pile, garden, farm stand. And the nice part is that the three of us can be outside within view of each other (I don’t have to worry about Libby) and working on different things. While I’m weeding in the garden and Roy’s cutting wood outside the shop, Libby will skip from spot to spot, stopping with news of the chickens or the discovery of a particularly interesting bug.

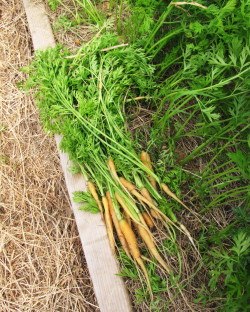
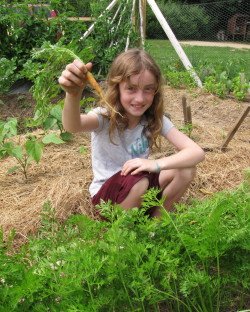
Occasionally, I’ll get lucky and Libby will help me in the garden. She’s particularly fascinated with the carrots, so thinning them was the perfect job for her this weekend. Together we held back the fronds and found the carrots that were too close together and held our breath to see what would come up when we tugged. Some were tiny, some were finger-sized, and some were just big enough for me to sauté up for dinner. The tops went to Cocoa and the chickens. (The not-quite-ready-for-prime-time carrots are just one of the many frustrations in my I-don’t-have-enough-stuff-to sell-at-the-farm stand-yet saga. I am tired of listening to myself complain about it, so I will leave that alone and just say that the baby squash and the baby carrots and the little bean plants had better be harvest-ready by next week!)

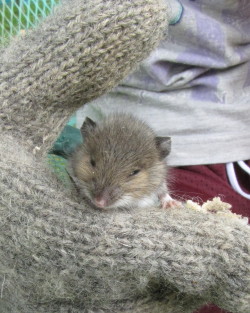
It’s a good thing I got Libby to help me with the carrots on Saturday, because on Sunday, along came Mousey. Roy and I have never seen Libby fall so hard for an animal. We thought she’d like the bunny, and we knew she’d love the chicks, but her heart now belongs to Mousey (for as long as Mousey remains breathing). Libby and I first saw Mousey scamper across the front step in the early morning. Later Mousey (not newborn, but probably only a few weeks old) stood frozen near the basement bulkhead doors. Dad found some old gloves and let Libby hold Mousey and feed her a bit of cheese. Several times we tried to return Mousey to wherever she came from, but she kept coming back to us. The discovery of Mousey’s expired brother, and the suspicion that a hawk or something else had gotten Mommy, confirmed that Mousey was an orphan. Soon Mousey had a comfy tissue-lined box to snuggle in and a saucer of local grass-fed cow’s milk to drink (only the best for Mousey). But mostly Mousey spent the day napping in Libby’s glove-lined hands, and I’m not sure who was happier—Libby or Mousey. Actually Mousey’s full name, according to Libby, is Lucky Mousey Joy. (Joy is Libby’s middle name.)

Libby’s mom Kelly is a really great sport about all this farm activity (and I so appreciate her sharing Libby with me), but I can only imagine what she was thinking when Roy and Libby got off the ferry with Mousey in a shopping bag. We could have kept Mousey here, of course, but she wanted to go with Libby, I’m quite sure.

Roy and I thought of Libby and Mousey as we ate our sautéed carrots last night (recipe follows). Hoping the days will fly by (and the carrots will grow big) until we see them both again. Well, Libby at least.

Every Night Sautéed Carrots

For a printable recipe, click here.

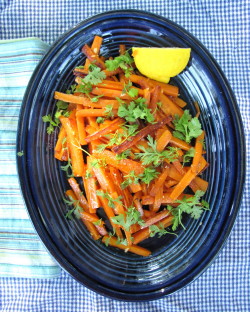
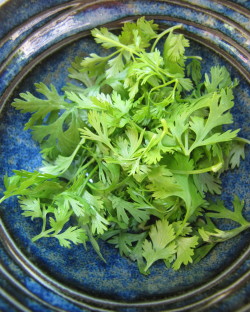
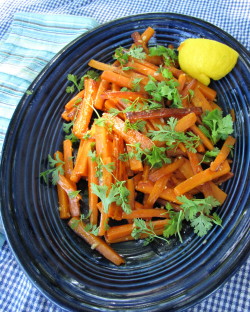
This is our house go-to method for weeknight carrots. Cooked over moderate heat in a covered skillet, the carrots get tender and lightly browned at the same time. I am picky about the way I cut carrots, as I think sticks hold together and brown up better than coins. Cutting sticks isn’t as hard as you’d think (see photo for progression) and they don’t need to be perfect. In this version, I use lemon, garlic, and cilantro (because I’ve tons of it in the garden) to season the carrots; but you could substitute lime, orange, ginger, mint or basil to customize these any night. Be sure to zest your lemon before juicing it.

_____________________________________________________

1 teaspoon fresh lemon juice, plus a couple lemon wedges for serving

1 teaspoon red wine vinegar

1/2 teaspoon honey

1 tablespoon unsalted butter, 1 teaspoon separated and chilled

2 teaspoons extra-virgin olive oil

1 pound carrots, peeled and cut into sticks 1/4 to 3/8 inch thick and 2 to 3 inches long

1/2 teaspoon kosher salt

1 teaspoon minced fresh garlic

1/4 teaspoon (packed) freshly grated lemon zest

2 tablespoons loosely packed fine cilantro leaves or 2 teaspoons chopped cilantro

________________________________________________________________

Put a serving dish near your stove. In a small bowl, combine the lemon juice, vinegar, and honey. Set aside.

In a large (12-inch) nonstick skillet, heat 2 teaspoons of the butter with the olive oil over medium heat. Add the carrots and salt and stir to coat. Cover the pan. (I use a sheet pan because my large skillet does not have a lid! It does not have to be a tight fit—letting a little air escape is good.) Cook, stirring occasionally at first and more frequently as the carrots begin to brown, until the carrots have shrunken, are just tender, and nicely browned on some sides, about 13 to 15 minutes. Uncover, reduce the heat to low, and add the garlic and lemon zest. Stir until fragrant, about 30 seconds. Drizzle the lemon juice mixture overall, toss, and remove the pan from the heat. Immediately transfer the carrots to the serving dish and garnish with the cilantro and the lemon wedges.

Pick Your Own Mint & Make a Refreshing Apple-Lime Spritzer

You meet the most interesting people. If you have a farm stand in your back yard, that is. The farm stand didn’t start out as close to the house as it is now, but there were a couple of little problems that forced our decision to move it down the driveway. On a positive note, now when people get out of their cars, they get a great view of the garden, and some even wander over to take a look at the chickens and Cocoa bunny. Also, since I am often outside working, I get to meet more of them now.

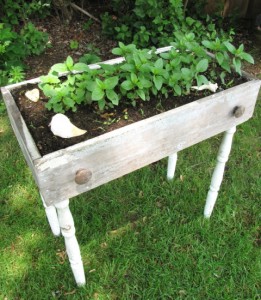
This past weekend I was chatting with a lady who’d just returned from a trip to Paris with her husband. She had her eye on our “pick your own mint” patch (which is actually mint planted in an old dresser drawer—very cute!), because she wanted to recreate a drink she had in Paris for her friends on the Vineyard. She told me it was a (non-alcoholic) combination of lime juice, apple juice, and mint, with lots of ice and a splash of soda. I didn’t get any more details, but the notion of making one of these stuck in my head because it sounded so refreshing, and I love any concoction that takes advantage of the lime-mint synchronicity.

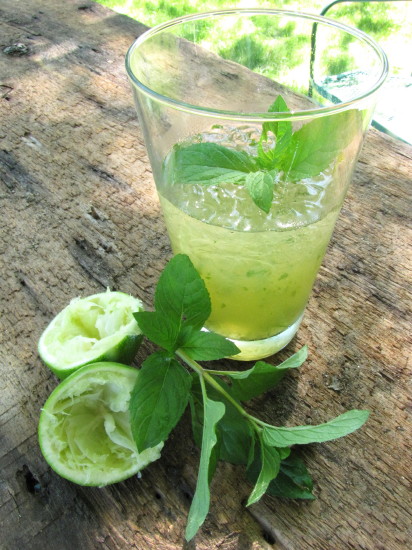
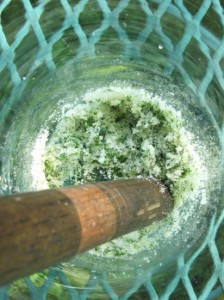
Back at my desk, I did a quick Google search of similar drinks and couldn’t find one just like that. But since the drink sounded a bit like a mojito to me, I decided to follow the method in a mojito recipe by Jen Armentrout over at Finecooking.com. I started out by using the handle of a wooden spoon to “muddle” the mint with a little bit of sugar (not too much since apple juice is sweet, also). I added a pretty generous amount of freshly squeezed lime juice, a little apple juice, lots of crushed ice and a bit of club soda. It was delicious and a dead-on thirst quencher. I drank the whole thing right up as I seem to be constantly thirsty from working outside. But I’ve no doubt you could sip on one, too (and add a splash of your favorite spirit), in the cool shade of a maple—or a palm—tree.

Apple-Lime-Mint Spritzer

For a printable recipe, click here.

I have a wonderful old wooden spoon that’s about 2 feet long (I think it must have been used for candy making) and has a thick handle perfect for “muddling” the sugar and mint. But look around your kitchen and you’ll likely find something (shorter!) that will work. To make crushed ice, put ice cubes in a zip-top bag and bang with a wooden meat mallet or other heavy object.

____________________________________

6 to 8 big peppermint or spearmint leaves, plus an extra sprig for garnish

1 tablespoon sugar

2 tablespoons fresh lime juice

1/4 cup apple juice

crushed ice

club soda

_____________________________________

Put the mint leaves and the sugar in a tall glass. Crush the mint leaves with the  handle of a wooden spoon until the mint is macerated and broken up. (The sugar will have a green tint.) Add the lime juice and stir well. Add the apple juice and a generous amount of crushed ice. Top off with club soda. (Start with a small amount of soda, taste and add more if you like.) Garnish with a mint sprig.

Serves one

Mustard Greens Are the New Baby Bok Choy – Really!

Who knew baby bok choy was such a star? It seems to be the most popular vegetable on the Island right now, and the little bit of it I planted in May is pretty much gone. I have another young patch coming along, but it prefers cool temps, so I’m afraid the weather might be too hot when it matures. In the meantime, while I wait for my next cooking green to get big enough to harvest (Swiss chard is close), I’m picking mustard greens to sell.

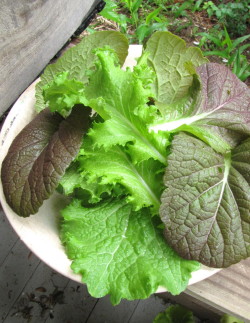
I’ve noticed that since I wrote “Mustard Greens” on the farm stand sign (instead of “Baby Bok Choy”), we’ve had fewer people pulling into the driveway. Well, harrumph! Doesn’t everybody know how tasty mustard greens are, too?! Okay, seriously, if I were to be honest I’d have to tell you that mustard greens are not as groovy as baby bok choy. For one thing, they don’t have that stand-up texture. But they are strangely delicious in a very arresting kind of way. If you like spicy mustard of any sort—and you’re looking for a powerhouse nutritional kick—give mustard greens a try. (They’re not only purported to lower cholesterol, but they contain unique cancer-fighting phytonutrients and lots of Vitamins A, C, and K.)

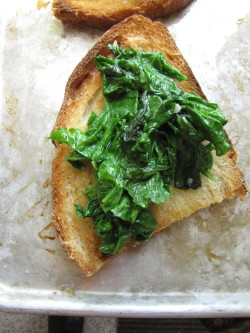
I especially like the young tender leaves I’m harvesting now because they don’t need par-boiling—just a quick turn in the sauté pan. Super quick and easy. Ginger and garlic both are natural partners for mustard greens, and not surprisingly, the spicy greens do really well with just a touch of something creamy to offset the zing. For me that creamy thing is often goat cheese. I’ve been making a really simple lunch/snack of toasted or grilled bread with sautéed mustard greens and a bit of warm goat cheese on the top (recipe below). I guess I have goat cheese on the brain these days, too.

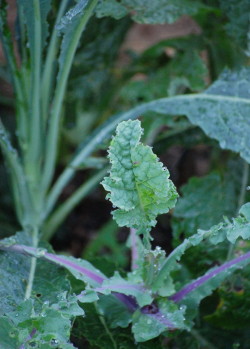
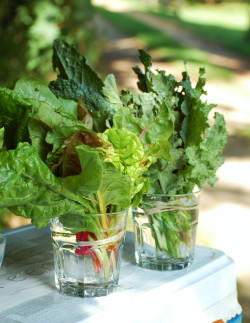
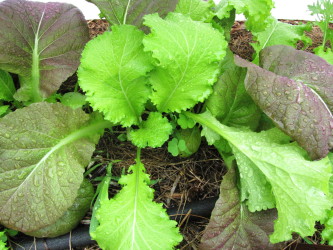
There’s one last reason why mustard greens are my heroes this spring. For some reason those wily flea beetles danced right past them on their way to the Tuscan Kale. (This was not good news for the kale, unfortunately.) Normally flea beetles feast on anything in the brassica family, including the milder mustard relatives, mizuna and tat soi (in the photo at right, top), that I put in my salad mixes. But they didn’t linger on the mustard greens, leaving them nice-looking enough to sell. Whew. The greens grow so quickly, too, that I’ve been able to harvest baby leaves for salad and come back the next day to find the rest of the leaves on the plant 6 inches tall–perfect for cooking. You could live on this stuff. Really.

Toast with Sautéed Mustard Greens and Warm Goat Cheese

This recipe is more like a thought-starter, so feel free to jiggle it around as you like. You probably have a favorite method for toasting or grilling good bread, too, so use it.  This makes a nice snack or light lunch for one person, but scale it up as much as you want to serve more, or turn it into a crostini for starters. Remove the tough stems from the mustard leaves before ripping them into smaller pieces. If you only have mature, large mustard greens, you would want to parboil them 3 to 4 minutes first and drain well before sautéing.

1 oval slice Artisan bread (about 6 or 7 inches long and cut 1/2-inch thick), cut into two pieces

extra-virgin olive oil

kosher salt

1/2 teaspoon minced garlic

2 to 3 ounces mustard greens, stems removed, leaves torn into small pieces (about 2 cups), washed and spun dry

2 tablespoons crumbled fresh goat cheese (or queso fresco or other cheese if you prefer)

Heat the oven broiler on high and arrange a rack 4 to 6 inches from the heating element. Put the bread on a baking tray or cookie sheet. Brush one side of the bread with a little olive oil, sprinkle with a little salt, and broil until lightly browned. Set the toast aside on the sheet tray. (You can lightly brown the other side, too, if you wish, though leaving the bread a little soft in the middle is nice.)

In a small skillet, heat 1 teaspoon olive oil over medium heat. Add the garlic and cook, stirring, just until softened and fragrant, about 30 seconds. Add the mustard leaves and a pinch of salt and cook, stirring, until wilted, about 1 minute. Remove from the heat.

Pile the mustard greens on each of the two bread pieces and crumble the goat cheese or other cheese on top. Place back under the broiler and cook just until the goat cheese is warmed and softened.

Serves 1