Category Archives: The Recipes

Slow-Sautéed Pole Beans with Shallots and Bacon — Not so Pretty, but Pretty Delicious

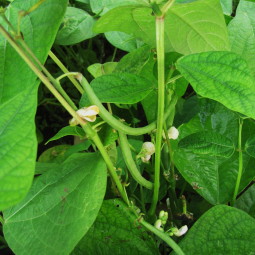
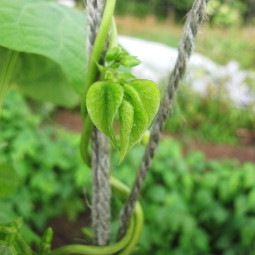
When the pole bean trellis blew down for the second time, we left it. Granted, we were a bit annoyed at the pole beans. They took a lifetime to germinate and what seemed like eternity to start yielding. Meanwhile the bush beans were churning out lovely filet beans by the pound every day.  We would have ignored the pole beans altogether except for this nagging voice I had in my head, “Pole beans are better than bush beans.” I grew up with this voice. My father’s.

My father and his mother (my grandmother Honey, who “put up” pole beans at the end of every summer) were always carrying on about the superiority of “pole beans” over bush beans. (Pole beans are green bean varieties like Kentucky Wonder that grow on vines as long as 12 feet, therefore needing support in the form of poles or some other trellising.)  I needed to find out the truth for myself, as it seemed to me that our bush beans (a variety from FedCo called Beananza) were pretty darn tasty—and oh-so-lovely to look at, too. The pole beans looked kind of gnarled up and blotchy the minute they appeared on the scene.
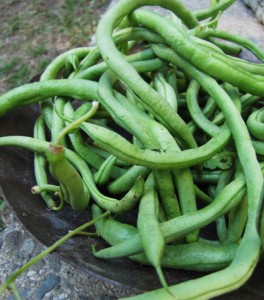
They didn’t get any prettier—but they did keep growing, even under the weight of a collapsed trellis. After neglecting them for a while (figuring we’d eventually till them back into the soil, as nitrate-fixing beans make great soil enhancements), we came along one day, lifted up the vines, and discovered dozens of big funky beans growing under them.  We surely weren’t going to sell these fallen beans, so I collected them that day—and every few days thereafter—and took them home for us. From the first time I picked them, I knew something was up. They just smelled “bean-y.” I realize that doesn’t sound too appealing, but I mean it in the best way—a really fresh, green, arresting aroma that followed through when I cooked them. It was green bean flavor times two! Really delicious. So now I have to tell my Dad he was right. Bummer.

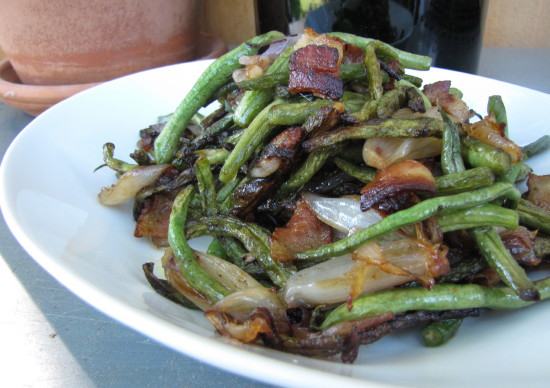
The pole beans (at least the varieties we grew—Kentucky Wonder and Fortex) do present one cooking challenge:  their texture is a bit, well… I wouldn’t say tougher exactly, just more substantial, I guess. Toothsome, in a good way. To me that texture is a clue to cook the beans a bit longer and with some heartier flavors. But by longer cooking, I don’t mean boiling them to death. I mean something like slow-sautéing, where the beans get brown and tender and pick up the flavors of other ingredients in the pan, like the shallots and bacon in the recipe below. I made this recipe yesterday because it felt comforting and warm, and we’ve had a bit of a nip in the air up here. Plus, I had some particularly gnarly beans to deal with. So it may not look so pretty (though, yes, everything is supposed to be that brown—brown is where all the flavor is), but it did taste pretty delicious.

Slow-Sautéed Pole Beans with Shallots & Bacon

If you don’t have pole green beans, don’t worry. This recipe will work great with any mature green beans—just choose the largest beans you can find when you’re shopping. This method of “slow-sautéing” involves a crowded pan (the opposite of what you would think of for a quick sauté), but I promise you it works great. Keep the pan at a gentle sizzle—you can always slow browning down by lowering the heat. The end goal is veggies that are cooked through and nicely browned, too.

__________________________________

2 teaspoons orange juice

1 teaspoon red wine vinegar

3 tablespoons extra-virgin olive oil

12 ounces pole green beans, trimmed and cut into 2- or 3-inch pieces

4 large shallots, peeled and cut lengthwise into ½-inch wedges (keep a little of the stem end intact if you can)

2 ounces bacon (about 2 pieces), cut into 1-inch pieces

kosher salt

½ tablespoon unsalted butter

__________________________________

In a small bowl, combine the orange juice and vinegar and set aside. In a 10-inch straight sided skillet, heat the olive oil over medium heat. Add the beans, shallots, bacon, and a scant teaspoon of salt. Using tongs, toss to break up the bacon and to coat everything with the oil and salt. Reduce the heat to medium-low. Cook, stirring occasionally at first and a little more frequently after browning begins, until the vegetables are all very-well browned and limp (the bacon will be cooked through and some pieces will be crisp), about 22 to 25 minutes. Remove the pan from the heat, add the butter and the orange juice mixture, and immediately stir to incorporate the liquids and melting butter into the beans. Transfer the vegetables to a serving dish or individual plates and serve hot or warm.

Serves 3 to 4 as a side dish

Squish-Squash: A So-So Day in the Test Kitchen

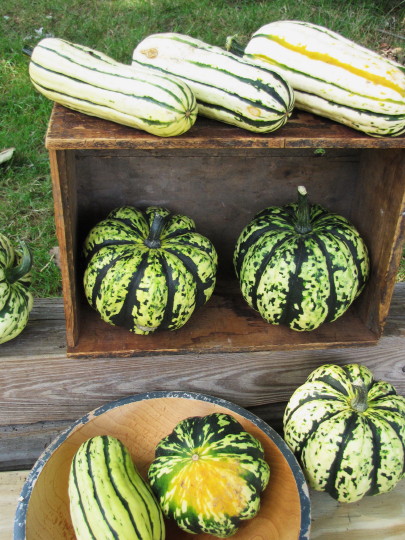
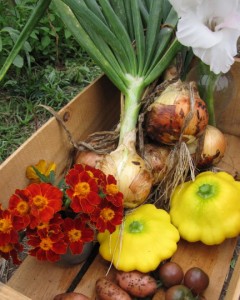
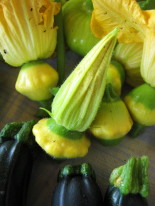
Not every day is a winner in a food writer’s test kitchen. In fact, yesterday was kind of a stinker, if I’m really to be honest. I made some stuffed winter squash which was just—not good. I’ll spare you the details about the stuffing, but I have to tell you, the most frustrating thing was this: The squash were under-ripe. And so, as beautiful as they were raw (see the lovelies at left), the squash were fibrous and bland when cooked. I know—I’m really making you salivate, now, huh?

I more or less suspected this was the case when I picked the squash in the days leading up to Hurricane Earl. Uh, I mean Tropical Storm Earl. Or maybe Lite & Breezy Earl is more like it. It just didn’t amount to much, but everyone was scurrying around plucking fruit—ripe or not—from vine and tree alike before the storm. I succumbed—before  I had solved this dilemma of “how do you tell when winter squash is ripe?”

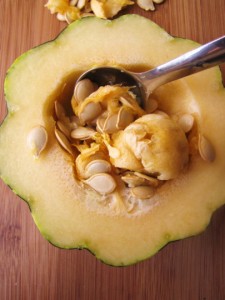
I know, I am supposed to be a vegetable expert. So I should definitely be hanged (or maybe something less dramatic) for continuing to cook the squash once I cut it open and started digging the seeds out of the hard, pale flesh. I knew for sure then that the squash (especially the Delicatas) were under-ripe. (You’ve probably had this experience with a slightly green butternut squash you’ve bought at the market.) The thing is, in the gardening department, I’m still a neophyte, and try as I might, I haven’t been able to get a straight answer from other gardeners on how to tell when my stripey Carnival and Delicata squash are ripe.

I’ve been told to wait for the stems to wither and dry up on the vine (uh-oh, I am not that patient),  and I’ve been told to look for a good spot of orange color on the underside  (this didn’t hold true when I cut into the one with color–the one in the bowl in the top photo). But I am beginning to suspect that it is, in fact, a color issue. I looked at pictures of Carnival squash online this morning, and they all had an orange hue on at least half of their surface. And I remember someone telling me a while back that Delicatas are ripe when the green stripes have an orange hue beneath them. So, if you’re color blind (or impatient, like you-know-who), I don’t suggest growing winter squash.

All is not lost, despite my stubborn “I’m going to get this darn thing in the oven anyway” approach yesterday. First, I have more squash in the garden (still ripening, theoretically). Second, I can, in fact, give you quick and easy directions for simple, delicious (unstuffed) roasted acorn squash halves, if you are smarter than me and actually buy your (ripe) squash at the grocery store. (Directions below.) And lastly, if you’ve got a copy of Fast, Fresh & Green on hand, you can turn to page 51 for my absolute favorite acorn squash recipe—Vanilla and Cardamom Glazed Acorn Squash Rings.

And if you don’t have a copy of Fast, Fresh & Green, you’d better get one! The third printing hit last week, and if it’s anything like the first two, copies will be scarce again soon.

———————————————————————————–

Simple Roasted Acorn Squash Halves

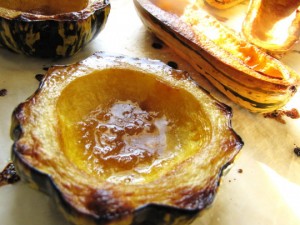
Heat the oven to 400° F. With a very sharp knife, cut a thin sliver off of both ends of the acorn squash, and then cut it in half crosswise. (Cutting the slivers off the ends will help each half sit flat in the baking vessel, rather than rolling around.) Line a shallow baking dish or small heavy sheet pan with foil or parchment paper and arrange the halves in it. Sprinkle them with salt. For each acorn squash you are baking, combine 1 ½ tablespoons of unsalted butter with 1 ½ tablespoons of maple syrup and a small squeeze of lemon (or dash of balsamic vinegar or soy sauce) in a small saucepan. Heat until the butter melts, stir, and brush all over the squash halves. Most of the liquid will pool in the center of the squash; that’s okay—just be sure that you’ve brushed the tops. Bake until very tender and nicely browned, about 1 hour and 10 minutes for a small acorn squash, 10 to 15 minutes more for a larger squash. Baste occasionally if you like. Serve warm as a side dish, one half per person.

A Sweet Tooth and Her Caramelized Onions

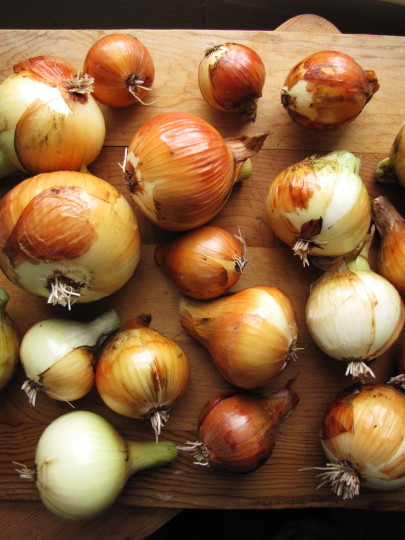
Since I have a sweet tooth, turning vegetables into candy is a favorite pastime (see roasted beets and roasted tomatoes). Last week, after the grand sopping we got (more on the way from Hurricane Earl), we pulled up most of our onions in the garden, as they don’t like wet feet and looked like they were sort of gurgling in the muck.  I know you are supposed to grow onions in order to keep them in long storage all winter. But that may not be happening around here. I couldn’t stand watching all those beautiful onions drying out in the kitchen. I wanted to slice them and dice them and sauté them and roast them and and and…well, you know, I couldn’t wait. Friday I stole three nice plump onions off the rack and sliced them up. And made caramelized onions. There, I had my way.

Caramelized onions are something unto themselves. With their amazing flavor and almost jammy, condiment-y texture, they go well in, on, and around just about anything. Eggs, crostini, pasta, steaks, salads. The other night I threw some in with chopped tomatoes for a quick-simmered pan sauce for chicken thighs. Last night we put some on pizza. They keep in the fridge for at least a week (if you don’t eat them all), so every morning I mix a little with some fresh corn kernels and fresh thyme and add that to my scrambled eggs.

And, ta da!, I just happen to have a good recipe for caramelized onions up my sleeve. It’s one I developed for Fast, Fresh & Green but ultimately cut when we had too much content. While I love this classic preparation, I don’t really think of caramelized onions as a side dish so much as a dinner-booster, so it made sense to take it out of a book of side dishes.
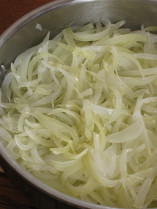
My recipe takes the classic, slow-cooked, slowly browned onions a small step further by adding a bit of balsamic, honey and thyme at the end. (You could leave them out but I think they give everything a lift.) There is some technique to caramelizing onions. First off, they won’t cook evenly unless you “sweat” them first in a covered pan until they are translucent (middle photo above). Then, and only then, can you procede to browning the onions. The next big tip I learned from my old chef boss Lenny Greene: When onions start sticking to a hot pan (and leaving behind all those delicious brown nubbins), pull the pan off the heat and the onions will immediately begin releasing moisture, which will allow you to “wash” all those delicious brown bits back into the onions. You can do this frequently while caramelizing the onions, and every time you wash the browned bits back into the onions, they will get more golden. Lastly, I like to caramelize my onions over moderately low heat so that they cook most evenly. But if you’re in a hurry, you can bump up the heat a bit (after “sweating”) and speed the cooking along. Happy caramelizing!

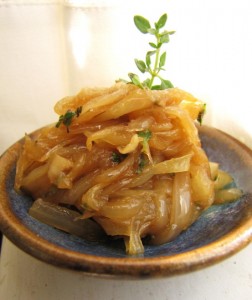
Caramelized Onions Agrodolce

__________________________________

2 pounds yellow onions

3 tablespoons extra virgin olive oil

1 teaspoon kosher salt, more for seasoning

1 teaspoon balsamic vinegar

1 teaspoon honey

2 teaspoons coarsely chopped fresh thyme leaves

________________________________

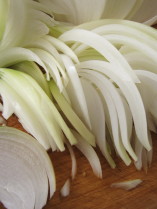
Slice the ends off of the onions, cut them in half lengthwise, and peel them.  Put each half, cut-side down, on a cutting board. Slice each onion half lengthwise in ¼-inch wide slices in a “radial” fashion by angling your knife in towards the core as you slice from one side to the other (as if you were slicing along longitudinal lines towards the axis of the earth). When you get half-way through, lay the rest of the onion over on its side for easier slicing and continue to slice towards the core. Discard any very thin or small pieces of onion. Slice the remaining halves in the same way. (See radial-cut onions in photo in text, above right.)

In a 10-inch straight-sided skillet, heat the olive oil over medium-low heat. Add all the onions and 1 teaspoon kosher salt.  Stir well, cover, and cook, stirring only every few minutes and putting the lid back on quickly, until all the onions are limp, translucent, and just beginning to stick to the pan, 12 to 14 minutes.

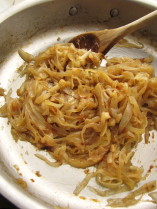
Uncover and cook, stirring more and more frequently, until most of the onions are the color of a caramel candy (some will be deeper amber), about 30 minutes. (Turn heat to medium if onions are browning too slowly for you.) The onions will stick to the pan frequently and will leave browned bits on the bottom of the pan. You will need to “wash” those browned bits back into the onions by doing two things. First, use a wooden spoon to scrape the brown bits up. Secondly, when there is a lot of browning in one place in the pan, pull the pan off the heat and let the onions sit for a few seconds. They will release moisture which will help unstick the browned bits; you can then sweep the onions back and forth across the browned bits to reincorporate them.

Mix the balsamic vinegar with two teaspoons water. Turn the heat to low, add the balsamic mixture, stir, and remove the pan from the heat. Continue stirring to incorporate all of the browning in the pan and to evaporate the liquids. Add the honey and thyme, and stir well again. Taste and season with a little more salt if needed. Let the onions sit a minute or two longer and stir again to incorporate any remaining browned bits in the pan. Let cool and transfer to a storage bowl if not using right away. They will keep in the fridge for a week.

Yields 1.5 cups

Today’s Tomato Destination: Easy Bruschetta

It blew like crazy last night. The garden is pretty disheveled—flattened in fact. The pole bean trellis (with all of its Jack-and-the-Beanstalk vines) is face down in the zinnias. The cosmos are hugging the ground like a dog that’s been chastised. And the little zucchinis on the new plants are bare and naked, exposed to the world after their protective leaves and stems snapped off like flimsy toothpicks.

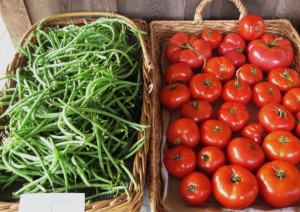
No matter; we will clean it all up this weekend. In the mean time, with the rain still coming down (and traffic at the farm stand sluggish), harvesting seemed like a silly idea today. We’ll have to go back later in the afternoon and get the beans; they grow too big if left for more than a day, and we have about 4 pounds coming in every day. (Bean picking is hard on the back and time-consuming, too, but if you just go with it, it can be Zen-like.)

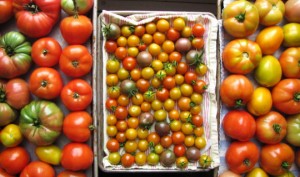
Fortunately we brought a ton more tomatoes in yesterday, as Mr. Rat is still on the loose. I was relieved to read on Facebook (yeah, what a source!) that real farmers are also bringing their tomatoes inside at first blush. Bad summer for pests, they say. Whew, this makes a start-up grower like me feel not so silly about the number (now in the hundreds) of under-ripe and semi-ripe tomatoes in our apartment.

However, the under-ripe tomatoes don’t scare me nearly as much as the ripe ones, as I don’t think there’s any way we will sell them all at the farm stand. (A good rainstorm like this comes along—and yesterday being Monday, too—and we only sell 2 pounds of tomatoes in a day, out of the 12 we put out on the stand!) I’ve given some to friends, and roasted a bunch this weekend, but deadlines (and life!) prevent me from spending time marketing them elsewhere. I’ve already told Roy that we’ll be eating green beans and tomatoes every night now for the next millennium, but I’m trying to make lunch out of this stuff, too.

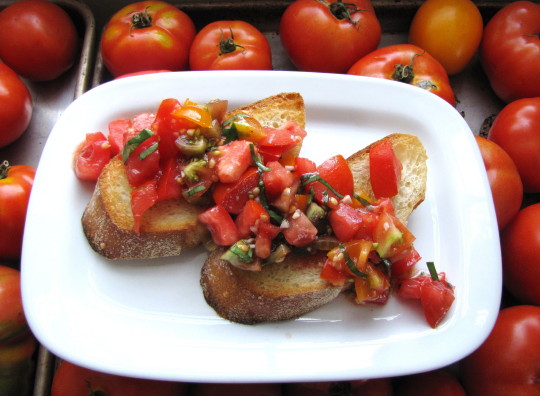
So yesterday I had my V-8 moment—Oh, Bruschetta! I remembered how good and easy bruschetta is to make with ripe summer tomatoes, and I had a nice rustic loaf of bread on hand. So voila—here’s what came of it. Easy, easy. Tasty, tasty.

Summer Tomato Bruschetta

______________________________________

2 to 2 ½ cups diced, cored ripe summer tomatoes (3 to 4 medium tomatoes; no need to skin or seed, just chop)

1 clove garlic, peeled and minced

10 to 12 medium-large leaves sweet basil, finely sliced or chopped

2 tablespoons extra-virgin olive oil, plus more for bread

few drops balsamic vinegar

few drops honey

kosher salt

4 to 6 slices rustic bread (each slice about 1-inch thick; I like a baguette cut on a sharp diagonal)

______________________________________

In a small mixing bowl, combine the tomatoes, the garlic, the basil, the 2 tablespoons olive oil, the balsamic vinegar, the honey, and about ¼ teaspoon kosher salt. Stir well to combine and let sit for 5 to 10 minutes, stirring occasionally.

Rub or drizzle the bread slices with a little more olive oil and toast them in a toaster oven or brown them under the broiler. Arrange the slices on two plates, sprinkle them with a tiny bit of salt, and spoon the tomato mixture over them. Let sit for a few minutes so that the bread soaks up a bit of the juices.

Serve for lunch or as a first course to dinner. You could also add some chopped grilled or sautéed shrimp to the tomato mix, and call this dinner.

Serves 2

We Won! We Won! Six Ribbons at the Ag Fair—Woo hoo!

This morning I got stung by a bee—twice. It was my fault—I was trying to harvest squash blossoms, and the bees weren’t  finished with their business inside them. One bee got so mad at me that he followed me all the way to the compost pile. And somehow, one got inside my pants. Yeah, ouch.

But I’m not in a bad mood—I’m as happy as can be. It’s impossible not be filled with excitement around here. Martha’s Vineyard in August—especially the third week in August—will make your head spin. Fireworks, the Fair, the President. Yesterday the President’s motorcade whizzed by our front door. The family stays just a quarter-mile up the road from us, so this will be a familiar site.

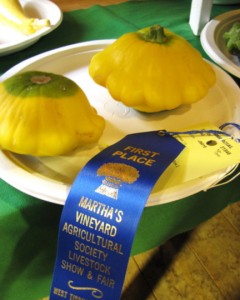
But the most exciting thing of all for us yesterday wasn’t the President—it was the blue and red ribbons we won at the Fair.  This past weekend, we carefully filled out the entry form after looking at what we had in our garden, and decided to enter in two flower categories and five vegetables. Since we grow our vegetables and flowers to sell at a farm stand, we had to enter as commercial growers.

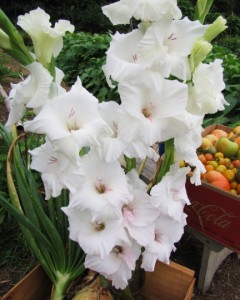
Wednesday morning, we picked our Fair entries after harvesting for the farm stand, took our goodies home and cleaned them up, and delivered them to the Ag Hall. We got a ticket for each entry and sat down at a picnic table to label everything. Next to us was a young family putting the finishing touches on all the artwork they were entering.  Kids and adults alike work all year long on Fair entries, and you see the coolest stuff on delivery day. My favorite was a giant piece of driftwood covered entirely with seashells and other shore treasures—so great.  Of course, I’ve never entered something in a Fair before, so I was pretty darn excited. Not nearly as excited as Roy, though, who was so proud of the gladiolas he grew.  He’d chosen three beautiful white stems that already were capturing oohs and ahs from friends we ran into, and he really wanted to win a ribbon.

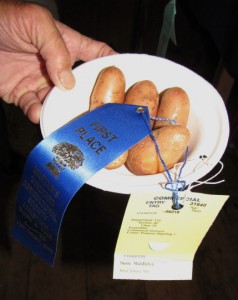
So last night, when we made our way past the Rock Climbing Wall, the Diamond Dragon Ride, the Cotton Candy and Fried Chicken trailers, and the Flintstones Game to push through the doors of the Ag Hall, I was worried Roy might be disappointed. No need for that—he rushed ahead and seconds later reappeared with a smile on this face. His glads got a red ribbon for second place, and he couldn’t have been happier.  I really didn’t have expectations on our other stuff, so when Roy kept finding things and coming back to tell me “the onions got a blue ribbon!” “the fingerlings got first place!” I was amazed.  We got six ribbons out of the seven categories we entered! How could that be, I thought? Well, I looked around and it seemed to me there weren’t a whole lot of commercial entries this year (many more home entries), and that we sort of won by default in some cases. No matter, I thought, this is still a thrill. But someone told me this morning that the judges don’t award a ribbon if they don’t think there’s something worthy in a category; so that means our stuff was at least pretty decent! So for now, I’ll let myself feel good about this—after all, some of those darn vegetables started as seedlings in our apartment almost six months ago, and there was a lot of love and hard work that got them to the Fair!

I celebrated with cotton candy (pink, of course)—Roy with a sausage and peppers grinder. We played a game or two (Roy had to win me a stuffed animal, of course). The moon was glowing in a clear ink-blue sky, and the night was as fine as could be—cool and dry. We strolled through the barn to see the draft horses, prize chickens, and magnificent oxen—and then headed back to the car. After all, we still had work to do—closing the farm stand for the night.

A Tale of a Thousand Roasted Tomatoes

My friends will most definitely give me a hard time about this. Here I am, writing about roasted tomatoes—again. I love roasted tomatoes so much that I’ve written about them every chance I’ve gotten. If you want to slow-roast big, juicy beefsteaks or heirlooms, read how I do it over at Fine Cooking magazine’s website. (I even include lots of suggestions for ways to use roasted tomatoes.) But if you want almost-instant gratification, read on.

The recipe I’m posting here is a quicker version of roasted tomatoes, one I developed for Fast, Fresh & Green. It uses seeded plum tomatoes (which contain less moisture) and a high oven temp to get quicker caramelization. The reason I’m posting this recipe today is to thank all of the folks (like my best friend Eliza’s Mom, Bran Johnston, with me at Stonewall Kitchens, right) who’ve showed up at all my book signings this summer and gobbled up hundreds and hundreds of these things.

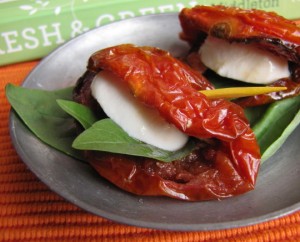
Early on in the whole book-publicity strategy plan, I decided that making the same recipe for every signing would keep my life a little simpler. Plus, I don’t have a lot of options for finger food in Fast, Fresh & Green, which is mostly side dishes. These roasted plum tomatoes conveniently fold up around a little piece of fresh mozzarella and a leaf of fresh basil to make “sandwiches” that I skewer with a toothpick (photo and recipe below). I can’t say that they’re the ideal finger food (caterer to the stars I am not), as they’re a little unwieldy and a bit messy. But they taste so intense that I absolutely don’t know anyone who hasn’t liked them on first bite.

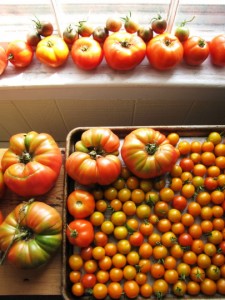
Fortunately, Roy likes them, too. (Actually he likes roasted tomatoes better than fresh tomatoes—that’s a good thing, because judging by the burgeoning pile of tomatoes at our windowsill (left), I’m going to have to roast a lot of tomatoes pretty soon.) Roy has not only been a huge help with assembling the sandwiches at the last minute, but he has been lugging the cooler and several other heavy bags of tools and ingredients up and down the East Coast in an effort to make my life easier. For that he gets a lot of roasted tomatoes!

If you’re not sure what all the fuss is about, take the 15 minutes to cut a few plum tomatoes in half, pull out the seeds, season them with salt, a little sugar, a few thyme leaves, a bit of garlic, and lots of olive oil and throw them in the hot oven, and enjoy the aroma while you wait to taste.

By the way, the Ag Fair (officially called the 149th Martha’s Vineyard Agricultural Society Livestock Show & Fair) starts on Thursday here on the Island. (The Obama family arrives on Thursday, too, so yes, it’s pretty much a circus around here.) We’re entering our black cherry tomatoes and a few other veg and flowers, so we’ll let you know if we win a ribbon!

Roasted Tomato, Basil, and Mozzarella “Sandwiches

These make great hors d’oeuvres or antipasto, but they’re also delicious on a dinner plate or tucked into a green salad, too.

_________________________________

1 recipe Caramelized Plum Tomatoes in an Olive Oil Bath (recipe follows), any excess oil drained

20 fresh basil leaves

8 mini-mozzarella balls (1 inch in diameter), each sliced into 3 to 4 pieces

kosher salt

__________________________________

Have ready a serving platter or shallow dish and twenty toothpicks or cocktail skewers.

Lay the plum tomatoes, cut side up , on a cutting board. Place a basil leaf, shiny side down, on each tomato half. Put a piece of mozzarella on one end of the tomato and sprinkle a little salt over it. Fold the other half of the tomato over the cheese and put a skewer through the “sandwich” at an angle, so that about 3/4 in of the skewer comes out the other side . It’s best to skewer through the folded-over ends of the tomato (and the cheese ), but not the middle , to prevent the “sandwich” from flopping open. Arrange the tomatoes on a serving pla tter in diagonal rows, tucking them close to one another.

Yields 20 sandwiches; serves 6 to 8

Caramelized Plum Tomatoes in An Olive Oil Bath

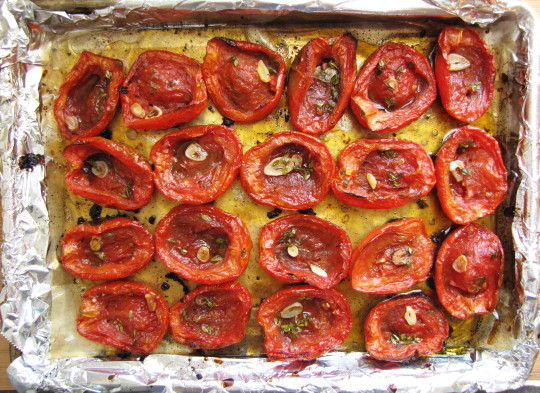
I’m always amazed at how a hot oven turns even the most pathetic, pale plum tomatoes into deeply flavored beauties. The generous amount of olive oil in this recipe has a purpose—as the water in the tomatoes evaporates, the oil replaces it and gently simmers and preserves the tomato flesh. When the tomatoes are finished cooking, you can lift one end and a good bit of the oil will spill out. Don’t be alarmed if the edges of some of your tomatoes (or some of the juices in the pan) look a little black ened. They will still taste delicious.  These tomatoes aren’t just a great side dish; they also make perfect crostini toppers, salad ingredients, or hors d’oeuvres (see page 42).

__________________________

10 plum tomatoes

½ cup extra-virgin olive oil

kosher salt

sugar

2 teaspoons fresh thyme leaves (4 to 6 sprigs)

balsamic vinegar

2 large garlic cloves, peeled and sliced crosswise into 10 to 12 slices each

_________________________

Preheat the oven to 425˚F. Line a large heavy-duty rimmed sheet pan with a piece of parchment paper. (I like to cover the sheet pan with aluminum foil, first, for easier clean up, but it’s not necessary.) Cut each tomato in half length wise, and, leaving in the core, scrape out the seeds and ribs with a tomato shark or a serrated spoon. Brush 1 tablespoon of the olive oil over the parchment.

Arrange the tomato halves, cut side up, on the parchment.

Season the cavity of each tomato half with a pinch of salt, a good pinch of sugar, and some of the thyme leaves. Drizzle a few drops of balsamic vinegar inside each tomato half. (An easy way to do this is to pour some vinegar into a small bowl and use a 1/8 tsp. measure to distribute it. Or just hold your thumb over the vinegar bottle opening to dispense drops!) Drop a slice or two of garlic in each half , and pour 1 teaspoon of the olive oil into each half. It will look like a lot of olive oil; that’s okay.

Roast the tomatoes until they collapse and are brown around the edges, the garlic is browned, and the juices are somewhat caramelized on the sheet pan, 30 to 40 minutes. (At this temperature, you can roast them up to about 55 minutes before the bottoms get too dark. Some of the really hefty—and underripe—plum tomatoes may want to go this long to be tastiest.)

Let the tomatoes cool for a few minutes on the sheet pan. Carefully transfer them to a serving plate. (If the juices are very caramelized, the tomatoes may stick a bit; take care not to rip the skin.) Serve warm or at room temperature. They will also keep in the fridge for about a week.

Yields 20 tomato halves; serves 6

Pick a Pint of Pattypans–For a Sizzling Indian Stir-Fry

Every morning when I stock the farm stand, I try to predict what will sell—and how much of it. It’s a fun guessing game, but I rarely get it right. Still, I get a tiny thrill of anticipation every evening as I’m walking up to the stand. Will the bean basket be empty? (Usually.) Sungolds all gone? (These days, most definitely yes.) Any herbs sold? (Most days, no. Though every few days, someone comes along and buys four bunches!)

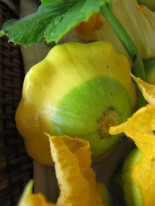
For some reason, the scallions rarely move, and it has taken a few weeks for the limey-green Flavorburst bell peppers to catch on. I understand that. But there’s one thing that really perplexes me: We have the cutest little Pattypan squash, and folks seem to eschew them in favor of the more familiar zucchini. I adore these little vegetables, not just because they’re charming, but because they have a firm texture and make great stir-fry ingredients. (In fact, they hold together much better than diced zucchini.)

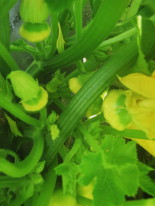
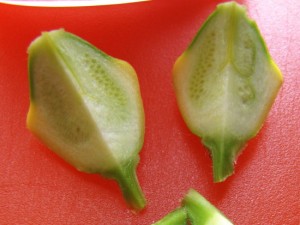
Because our Pattypans (actually a variety called Sunburst hybrid) are so prolific, we harvest them pretty small (between an inch and a half and two inches wide.) So when I’m ready to cook, I simply quarter them through the axis to get nice diamond-shaped wedges. Or if the squash are a little bigger, I cut them into six or eight wedges instead of four. It’s like cutting a pie if you look from the top. I use my stir-fry pan to cook the wedges over medium-high heat until nicely browned and just tender.

I think this how-to-cut-and-cook issue is probably what stops folks from buying the little Pattypans. So I heisted some from the stand this morning, with the specific goal of making a recipe to pass along to both you and our farm stand visitors.

You could certainly put Pattypans in any basic Asian stir-fry, but I opted for a slightly Indian-style approach today, not only because squash goes so well with these flavors, but also because the Pattypan’s firm texture is reminiscent of the kind of vegetable you’d find in a perfect curry.  But if you’re not a cumin & coriander fan, you could drop them from this recipe and it would still be delicious. Be sure to include the onion and garlic, though, for the deepest flavor. (You could also try this recipe with regular zucchini. Just choose small, firm, zucchini and cut them into ¾ to 1-inch pieces.)

If you happen to be growing Pattypans or Sunbursts or any other scalloped squash, remember that large ones (4-inches across and bigger) are perfect for stuffing, too. Also, cut into thick slices, they’re lovely grilled and topped with a bit of parmesan or fresh goat cheese. The slices also work well layered in a gratin. And don’t forget roasting—either the wedges or the slices will do well in the high heat of the oven. For summer vegetable soups, add the squash pieces at the very end of cooking so that they don’t lose their great texture.

Pattypan Stir-Fry, Indian-Style

The mustard seeds, with their surprise pop-crunch in the mouth, are a fun addition to this stir-fry. But you can make it without them. I have a really fragrant peppermint growing in a big tub in my garden, so I use it freely. But if you don’t like mint, cilantro is your next best bet here. Or parsley would be just fine.

_____________________________________

1/8 teaspoon ground cumin

1/8 teaspoon ground coriander

kosher salt

1 tablespoon peanut or canola oil

½ medium-small yellow onion, peeled and thinly sliced (about 2 ounces)

9 to 10 ounces small (1- to 2-inches wide) Pattypan or Sunburst squash, quartered if small, or cut into 6 wedges if bigger

½ teaspoon yellow mustard seeds

1 teaspoon fresh lemon juice

½ teaspoon unsalted butter

1 to 2 tablespoons finely sliced fresh mint

___________________________________

In a small bowl, combine the cumin, the coriander, and ¼ teaspoon kosher salt.

In a large nonstick stir-fry pan (or 12-inch nonstick skillet), heat 1 teaspoon of the peanut oil over medium-high heat. When the oil is hot (it will shimmer), add the onion and a pinch of kosher salt, and cook, stirring, until the onion is charry around the edges (brown in patches but still a little firm), about 2 to 3 minutes. Transfer the onion to a plate.

Add another teaspoon of peanut oil and the squash to the pan. Season the squash with another pinch of salt, and cook, stirring occasionally, until the squash is nicely browned on most sides, 6 to 8 minutes. (If the pan seems dry, add the third teaspoon of peanut oil.) Return the onions to the pan, add the garlic, the spice/salt mixture, and the mustard seeds (if using), and cook, stirring constantly, until the garlic and spices are incorporated and fragrant, about 1 minute.

Remove the pan from the stove, sprinkle the lemon juice over it, add the butter, and stir well until the butter has melted. Transfer the vegetables to a serving plate and garnish with the mint.

Serves 2 as a side dish
Who’s Eating the Tomatoes? Call in CSI, please!

There is a scene in the Nutcracker ballet where the evil Mouse king dances with his mouse-followers beneath the giant Christmas tree at midnight. When I look at our tomatoes every morning, I envision something like this having gone on the night before. There are tomatoes strewn everywhere, little bites taken out of just-ripening cherry tomatoes, and big bites taken out of bigger tomatoes. Mr. Mouse or Mr. Rat is, apparently, also joined by his close personal friends, Mr. and Mrs. Hornworm (and all their prodigy), and a flock (or several flocks) of sparrows, all of whom enjoy illicit tomato-tastings under the light of the moon. It’s not hard to imagine how fun this is—we planted our tomatoes way too close together, so the two big rows form sort of a hedge. It’s really more like a forrest, and even I can appreciate the magical wonder of that leafy canopy when I am crawling around on my hands and knees in there looking for signs of invaders. It’s like a cool fort, stocked with candy.

Today Roy bought an inflatable owl. A big one. And stuck it right on top of one of the tomato stakes.

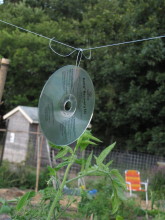
Last night, we strung monofilament line between the bamboo stakes, and hung shiny CDs and yellow streamers from it.  I also hung a few red Christmas ball ornaments around, which are supposed to lure birds into pecking at them instead of tomatoes (and thereby discourage further pecking).

Discouraging the rats and birds might work (will keep you posted). But we’ve yet to capture a hornworm. Normally, if you look hard enough, you can spot these big, ugly (and I mean UGLY) caterpillars, but we’ve looked and looked and haven’t seen one yet.

All this is incredibly frustrating, as we have 40 tomato plants, hundreds (maybe thousands because of the prolific little Sun Golds) of tomatoes ripening, and so many visitors (including POTUS, of course) coming to the Island in August, that we are looking at missing our best opportunity to make a little bit of real money at the farm stand.

In the short term, I’ve taken the advice of several farmers and started harvesting tomatoes that are just starting to blush. Apparently once they’ve started coloring, the quality will not be affected by ripening on a windowsill. (This doesn’t work with rock hard, dark green tomatoes that haven’t begun the ripening process.) This is hardly ideal, but right now, leaving anything with any color on the vine seems to be an automatic death sentence for the tomato.

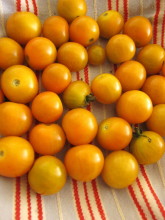
Roy remembered that putting tomatoes in a bag with an apple will help ripen them, too, so we tried that with a batch of Sun Golds.  We put them in a shallow bowl with a ripe apple cut into pieces and covered the whole thing with an upside down stainless steel bowl. In two days, most of the tomatoes had turned yellow and were heading for the even deeper orange color of a perfectly ripe Sun Gold. They tasted good, but some were still a tiny bit green on the inside. They’re best when they’re orange all the way through.

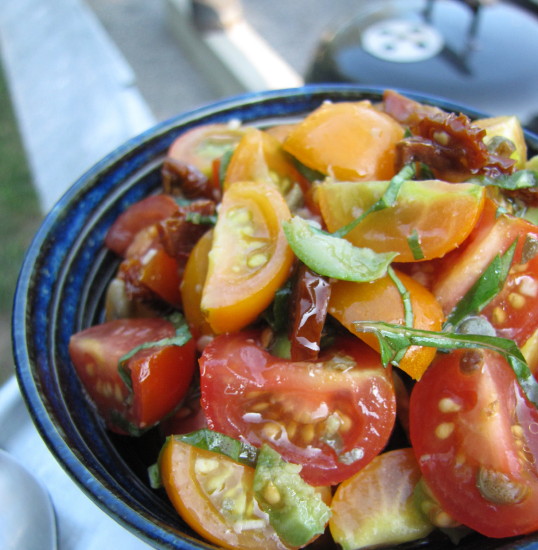
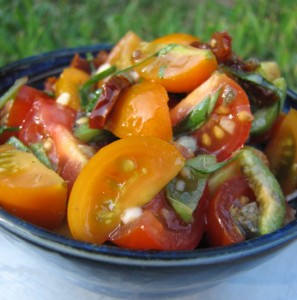
Nevertheless, we celebrated this small ripening feat by making one of my favorite easy summer cherry tomato concoctions last night. It’s a versatile dressing, kind of a loose salsa, that’s delicious over grilled vegetables, grilled meats, and even grilled bread. We had it atop a grilled sirloin and some grilled zucchini from our garden.

The version I made last night (below) is a variation on a recipe in Fast, Fresh & Green which I drape over a roasted pepper that is lightly stuffed with warm goat cheese. It’s a showcase for your tiniest, tastiest tomatoes, but it gets a depth of flavor from a bit of sundried tomato mixed in, too. The dressing has a Spanish-y feel, with a few minced capers, sherry vinegar, garlic, and sometimes a few sliced olives mixed in. I used mint and basil both last night, but any fresh herb would work. Fresh ginger is also a natural with tomatoes, so you could vary the dressing to include some ginger, too. Any way you make it, this no-cook versatile recipe is a fast flavor boost for a weeknight supper (or a weekend party). Of course, it’s a whole lot more satisfying with your own vine-ripened tomatoes, but take what you can get!

Summer Cherry Tomato Dressing, V2

Please don’t make this with those honking cherry tomatoes from the grocery store. They won’t taste great and will be too cumbersome for a salsa-like dressing, even if they’re quartered. Stick with small cherries, Sun Golds, Red Pears, and other fun little tomatoes. Be sure to get a brand of sundried tomatoes that isn’t marinated too heavily with overbearing dried herbs (I’ve had this experience—sundried tomatoes vary in flavor and quality a lot) as they might adversely affect the flavor of your dressing.

____________________________________________________

8 ounces small cherry or other tiny tomatoes, halved or quartered depending on size

3 tablespoons extra-virgin olive oil

2 tablespoons very finely sliced, drained, oil-packed sundried tomatoes

1 tablespoon finely sliced basil and/or mint leaves

2 teaspoons drained capers, very lightly chopped

4 green olives, pitted and sliced (optional)

1 tablespoon sherry vinegar

1 teaspoon orange juice

½ teaspoon minced garlic

¼ teaspoon teaspoon kosher salt

____________________________________________________

Combine all of the ingredients in a small bowl and stir gently to combine. Let sit for 10 to 15 minutes (or up to 30 minutes) to let the flavors mingle and to let the tomatoes marinate a bit. Stir gently again before serving.

Yields about 1 ¼ cups, enough to dress up four dinners

It’s About the Green Beans, Stupid!

For all the complaining I did about green beans as a child, I can’t believe I’m growing (and eating) more of them these days than practically any other vegetable. My green bean complaints started early. First, my mom seemed stuck on serving those frozen, stringy “frenched” beans about five times a week, no matter what else was on the plate. (‘Very mushy texture’ is the best thing I can say about them.) After her Julia Child-cooking enlightenment period, my mom moved on to fresh beans—but we still ate them, boiled with butter, a lot. Then my Dad got into vegetable gardening, and his pride and joy were pole string beans. I remember one summer (I think I was 10) when it seemed like we ate nothing but green beans. Ack. I’m pretty sure there was then a period of about 20 years when I didn’t eat any green beans at all.

But eventually I became editor of Fine Cooking magazine, and as such, privy to all kinds of reader feedback and issue surveys. I noticed that every time we did a feature with green bean recipes in it, the article topped the popularity scales. Finally, I had to say to myself, “It’s about the green beans, stupid.” Yes, I admitted, green beans are the most popular, most well-liked vegetable on the planet (or at least in America).

Fortunately somewhere along the way I also learned to love green beans—mostly because I began to cook them in lots of different ways. (I roast, grill, braise, and sauté them in Fast, Fresh & Green.) But there’s no getting around the fact that boiling is the quickest, simplest, and most efficient method for cooking green beans perfectly. And also the easiest way to ruin them.

There’s only one way to tell if a bean is perfectly cooked—by tasting it. Tasting as you cook is one of those concepts that chefs hammer into your head in culinary school, so I just thought I’d pass it along to you without screaming or throwing pots. There really is a practical (and rewarding) reason to taste as you cook. Actually, two reasons: flavor and texture. Unless you taste as you go, you won’t catch the subtle changes in flavor and texture that heat (both dry and wet heat) imparts to food, and you won’t be able to make the necessary adjustments in seasoning and cooking times that recipe instructions simply can’t tell you to do.

Green beans are a great example. Undercooked green beans are rubbery; overcooked are mushy. If you are boiling beans, simply begin tasting them after a few minutes. At first you will have a hard time biting through them. As the texture softens, the green beans are closer to being perfectly cooked. When you can just bite through with no resistance, they’re done. (If you walk away to check your email at this point and come back 5 minutes later, you will be sorry.) Yes, you will have to sacrifice a few green beans to tasting.

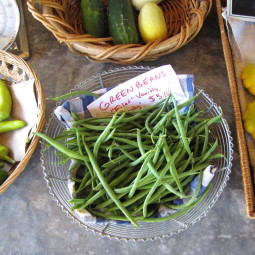
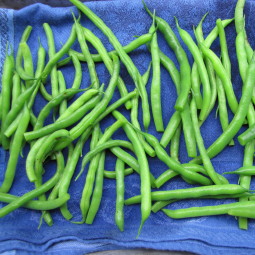
The thing is, different sized (and different aged) beans cook at different rates, so you pretty much need to taste every batch every time you cook them. In our garden, we are now harvesting “filet” beans—lovely slender green beans that are similar to French haricots verts—and they cook in just a couple minutes. But yesterday, I bought regular green beans at the grocery store to test a recipe for this blog (below), and they took about 6 minutes to be perfectly done. So tasting’s the thing.

By the way, in case there was any doubt, green beans are just as popular on Martha’s Vineyard as everywhere else. Even on recent days when hardly anything else at the farm stand has sold, the filet beans have disappeared. So of course, what have we gone and done? Planted more. (Bush beans are quick to germinate, flower, and fruit.) And the pole beans are coming, too. Yikes, I am going to be surrounded by green beans… having Jack-and-The-Beanstalk nightmares, don’t ya know. What goes around comes around.

The technique for perfectly cooked green beans is embedded in the recipe below. If you don’t feel like green beans with a Greek flavor profile, simply cook the beans and dress them as you please while they’re still a bit warm. Brown better, lemon oil, pesto, your favorite vinaigrette—whatever you like.

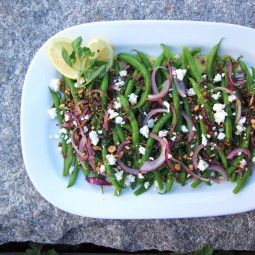
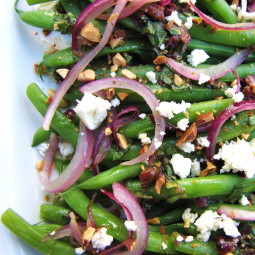
Warm Green Bean Salad with Feta, Olives, & Almonds and Lemon-Oregano Vinaigrette

3 tablespoons plus ½ teaspoon extra-virgin olive oil
¼ medium red onion, peeled and very thinly sliced
Kosher salt
12 ounces (3/4 lb.) green beans, trimmed
1 tablespoon balsamic vinegar
1 scant teaspoon freshly grated lemon zest
½ teaspoon honey
fresh pepper
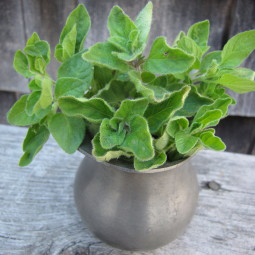
1 tablespoon chopped fresh oregano
1 tablespoon chopped, pitted Kalamata olives
1 to 2 tablespoons finely crumbled feta cheese
1 tablespoon finely chopped toasted almonds

In a small nonstick skillet, heat ½ teaspoon of the olive oil over medium-high heat. Add the sliced red onion and cook, stirring, until the onion has just softened (the smallest pieces will be wilted), about 2 minutes. Set the onions aside.

Fill a large saucepan half full with water and 2 teaspoons kosher salt. Arrange a few layers of dishtowels on a work surface to drain the beans. Add the beans to the boiling water and begin timing immediately. Boil until the beans are tender to the bite but still green, 5 to 8 minutes. (Begin tasting after 3 or 4 minutes; depending on the age of the beans and how quickly your stovetop brings water back to a boil, there can be a wide range in doneness times.) Drain the beans, or use tongs to lift them out of the water, and spread them out on the towels to let excess moisture drain and evaporate, about 5 minutes.

Make the dressing: Whisk together the 3 tablespoons olive oil, the balsamic vinegar, the lemon zest, the honey, 1/8 teaspoon kosher salt, and several grinds of fresh pepper in a glass measure or small mixing bowl. Add the chopped oregano and the chopped olives and stir or whisk again well to combine.

Arrange the cooled beans on a platter or in a shallow bowl and drizzle with all of the dressing. Arrange the red onions loosely over the beans and sprinkle with as much of the feta cheese and toasted almonds that you like. Serve slightly warm or at room temperature.

Serves 4

Peaches & Cream: A Taste of Summer in Lewes, Delaware

Traveling is not my forte. I always pack too much, eat bad fast food that I don’t want, and wind up becoming cranky and homesick.  I like to think this is because I was born under the sign of Cancer (with Cancer-rising, too—the double whammy). This accounts for both my extreme homebodiness and my crabbiness when hungry (and when my edible options are less than desirable). Every Zodiac sign has a body part associated with it. For Cancers, it’s the stomach.

In fact, if it weren’t for things like farmers’ markets, sweet shops (freshly made ice cream or artisan chocolates, preferably), and coffee joints, you would not want to travel with me. But if a town can supply me with these three things, I’m good.

I’d have to say, on the farmers market/sweet shop/coffee joint scale, it would be hard to rank as high as a town like Portland, Oregon, where I visited this spring. I slurped deep dark hot chocolate at Cacao (kind of a chocolate bar that sells chocolate bars—as well as chocolate drinks), squirreled away fresh hazelnuts, buckwheat honey, and aged cheddar from the knock-your-socks off Saturday farmers’ market, and treated myself to a cup of my favorite Major Dickason’s Blend at Peet’s every morning. Portland has a reverence for coffee, for farming, for cooking, and for hand-crafted artisan foods like no other town I’ve seen.

So it is hardly fair to talk about Lewes, Delaware, in the same breath. As food towns go, little Lewes is not going to burn a hole in your Zagat Guide. But I’m afraid it would be on Page One of the Susie Guide. It’s a sentimental thing, for sure. My Dad’s family has been living (and eating) in this coastal town for 300 years, and it’s there that I learned to pick crabs, eat corn on the cob with my new adult teeth, make homemade peach ice cream and Beach Plum jelly with my Dad, and dig clams with my cousins. My best food memories are all right there. Or at least they were last weekend when we traveled down to celebrate my Dad’s 80th birthday.

On Saturday, when I walked down Second St. past St. Peter’s Church where all my relatives are buried in the cemetery, past the old Victorian house my great-grandmother lived in, and onto Ship Carpenter Street and the grassy grounds of the Lewes Historical Society, I got goose bumps. Here was the farmers’ market in full swing. It’s a young market—only 5 years old—but it has caught on strong, and now it attracts growers and food artisans from all over the Delmarva peninsula. I looked around, and it seemed like a whole group of unknown friends had made a secret effort to keep all my childhood food memories alive.

Right there was the white sweet corn—the very sweetest, juiciest corn you will ever find anywhere (it’s the Delaware soil, they say). I embarrassed myself by asking if this variety was Silver Queen. “No, we haven’t grown that one in years,” the (young) kid told me. “This one’s called Argent.” “Argent as in A-r-g-e-n-t?” I said. “Something like that,” he replied. (That night, I discovered that Argent, however you spell it, is even better than Silver Queen—or at least my memory of it.)

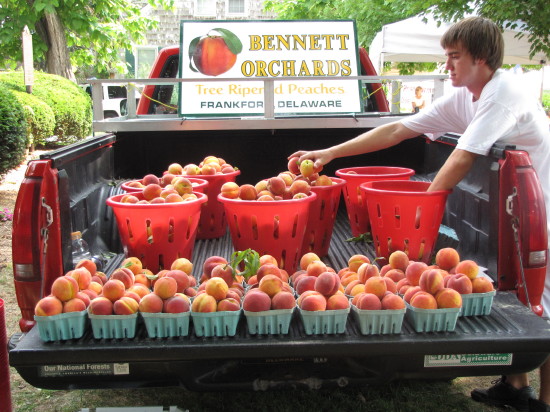
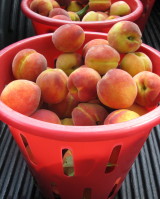
Stuffing a dozen ears into my bag, I lurched over to the big truck under the maple tree that was loaded up with red bushels of peaches. Peaches! Oh Boy! Real, tree-ripened, fragrant, soft Delaware peaches. Not my favorite white variety (they’ll be ripe next week, the nice folks from Bennett Orchards told me), but a very fabulous yellow variety called Red Haven. Bennett Orchards (in Frankford, Delaware, less than 30 miles from Lewes), I learned, grows 19 different varieties of peaches from July through early September, and I am already sad that I will not get to sample the other 18 varieties this summer. (I took my little stash home and sliced the first one up raw and drizzled it with what is arguably Lewes’ true claim to culinary fame—ultra rich, buttery yellow Lewes Dairy heavy cream.) This is the way my grandmother Honey served peaches. Peeled & sliced. With Lewes cream. Period. Nothing better.

By the time we waded out of the farmers’ market (it was 90+ degrees and 75% humidity, so we were literally wading), we also had a wedge of Talbot Reserve cheese from Chapel’s Country Creamery in Easton, Maryland, a jar of local honey, and, among other tidbits, a bumper sticker (“No Farms, No Food”).

I figured the farmers’ market would be the highlight of the day, but I didn’t know what my Dad and sister had in store for us that night: a ride out to Hopkins Creamery for ice cream. (I’d never been.) On the drive out through the cornfield-lined back roads of Lewes, Dad and Ellie kept talking about the smell of cow poo and the best ice cream ever in the same breath.

Sure enough, as twilight faded, we saw a huge silo looming ahead, silhouetted in the blue-grey sky, its painted decoration of ice cream cones barely discernible. We trolled around for a parking spot and eyed the long lines of folks outside the creamery—which is right next to the huge dairy barn full of cows. We didn’t have to get out of the car to breathe in the familiar odor of cow manure.  Judging by the long lines, this seems to be an experience most folks appreciate—knowing exactly the source of their ice cream. But it kept my mom at home in air-conditioned, odor-free comfort. Too bad, as she missed the best ice cream I’ve ever had. After our turn in a long line, I followed suit with Dad and Ellie and chose Cappuccino Delight, a coffee ice cream with bits of toffee in it. (Roy had his favorite—vanilla.) The rich, buttery, full-fat ice cream was heavenly, even better licked off a crunchy sugar cone while watching a new calf lounge in the hay of the open dairy barn.

What a great trip—sweet corn, peaches, cream, cheese, ice cream. Oh yeah, we did roast a lot of tomatoes and cook green beans, too. It wasn’t a total vacation from (green) vegetables. And I didn’t get a stomach ache; not even once.