Category Archives: The Recipes

This Business of Eggs: Green Island Farm Grows Up

Four years ago, Roy and I (newly besotted), rented a little plot of land on a Vineyard farm. We grew vegetables and sold them at the farm’s roadside stand. Living in a tiny apartment over a general store, we shuttled back and forth to tend our plot.

That fall, our friend Joannie tracked us down one day, took us by the hand, and led us to a little farm house on two acres of land. Right on the spot, she introduced us to the owners and insisted that they rent the farm house to us. I’m not sure if the owners knew what hit them, but in about an hour, we had all shaken hands and Roy and I were packing up the apartment. Our new landlords said, “Sure, grow whatever you want here.”

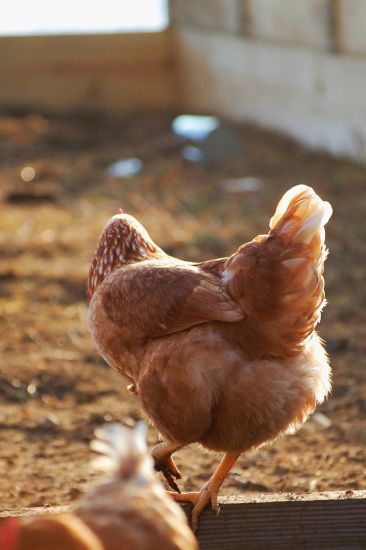
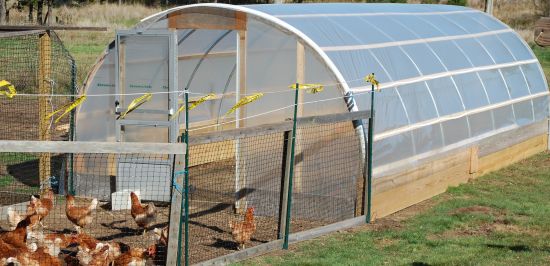
We moved into the little (uninsulated) 1895 farm house a few weeks later, and by spring we were turning over the soil and putting up the fences for our first vegetable plot. Roy built a little farm stand, and we stuck a sign out by the road. One summer, then two summers went by. We got 8 laying hens, and then 50 more. The garden doubled in size, and we built a hoop house. We made a tiny bit of money off our tiny farmette, keeping the farm stand open almost every day while writing books and building houses (our real jobs), too.

Then one day Tom came by. Tom and Roy talked, like men do, standing next to their trucks, arms folded. I watched from the kitchen window, my hands covered in olive oil and salt. Tom and Roy walked down to the fence line at the bottom of the farmette and looked out over the fields beyond, fields that have been in Tom’s family for hundreds of years. Tom and his mother Druscilla (yes, our landlords) lease some of that land to Morning Glory Farm to grow corn and squash. But there are eight grassy acres spiked with pines and cedars right behind us that long to be farmed.
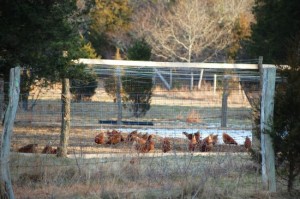
After a spell, Roy and Tom walked back up to the house. I wiped my hands and stepped outside. “We’re going to be chicken farmers, dear,” Roy informed me, Tom smiling beside him. They’d made a deal.

At that moment, our fuzzy dream snapped into focus and took on the shape of reality.

With the extra acres Tom would lease us (four to start), we’d be able to turn the farm into a real business. Roy knew he wanted to spend less time on big building projects and more time farming, and we knew from a bit of number crunching that laying hens would be profitable. We played the numbers out a bit more and decided to make a phone call. To our surprise, we hung up the phone with (gulp) an order of 200 16-week old pullets scheduled to be delivered to the island in only a few weeks time. That was late October.

While Roy and our friend Scott quickly built the new coops and erected the huge (60′ x 90′) initial yard for the pullets, I worked up a real business plan, shopped around for insurance, filed the LLC paperwork, got a Tax ID number—and ordered a whole lot more egg cartons!

Since the day the pullets arrived, Roy has worked feverishly to get all the systems in place—watering and feeding, cleaning the coops, haying the nest boxes, collecting the eggs, washing the eggs, packaging the eggs, marketing the eggs, delivering the eggs. He is Mr. Egg Man. (I have been conveniently “on deadline,” though I am told that when the next 200 chickens arrive this spring, my duties will be, ahem, changing.)

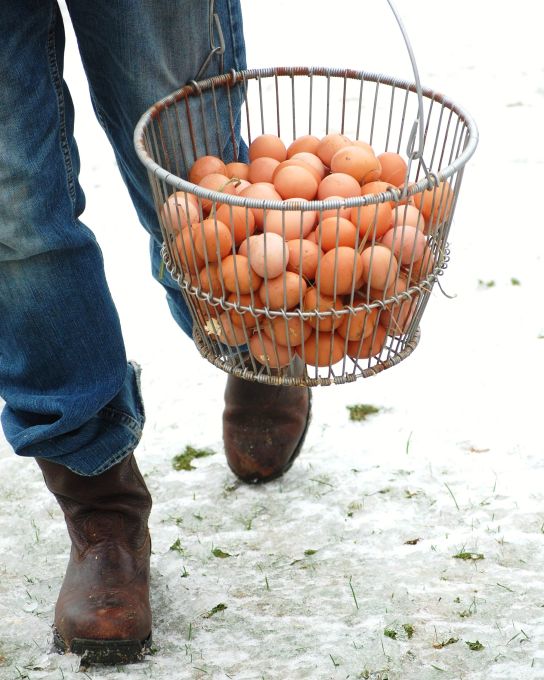
Mr. Egg Man and I are celebrating today, celebrating the end of our first real week in business. All our paperwork is complete. Nearly all of the pullets are laying, and Roy collected more than 1300 eggs this week. We have new customers—a restaurant, a grocery store, and a market; the farm stand cooler is stocked every day. Best of all, not a single one of those 1300 eggs is left in the fridge. All sold. Today, there will be 18 dozen more to pack up. And 18 dozen more tomorrow. Whew. Well, you can’t have a farm business without a farm product. Which is why I am off to transplant lettuce seedlings in the hoop house. This is the coolest part about the dream—coloring in the lines you’ve sketched for yourselves.


Christmas Morning Popovers: Which Pan To Use?

This Christmas especially I am wishing we could be with my Mom and Dad and sister in Delaware. But it is not to be, so I will have to make do, recreating the traditional Christmas morning breakfast we’ve cooked year after year. Popovers are the star, with scrambled eggs and scrapple on the side. Scrapple might be a bit hard to find in Massachusetts (!), but I will definitely be making my Dad’s famous popovers. Only I’m not sure which pan I’m going to use.

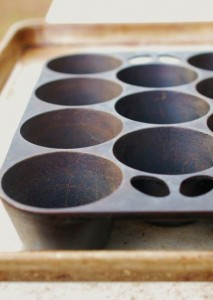
When I was a very little girl, my job was to stand on a stool, dip a paper towel into a can of Crisco, and grease the cast-iron muffin pan with the stuff. The Crisco kind of went by the wayside, but for some reason, that cast iron pan wound up with me, and has traveled around the Northeast for the last 25 years or so. I’m not sure how old the pan is (it’s marked “Griswold, Erie PA,” so I know for sure that it was made before 1957, when the Wagner company absorbed Griswold. But it is likely much older than that). But I think it is due a little more respect than I have given it lately.

The cast-iron pan got the cold shoulder when the groovy new deep-cup nonstick popover pans came along several years back. Even my Dad got one of those. And we all smiled smugly when our popovers popped as high as the weeds in August. These popovers are so light and airy that I featured a version of them in The Fresh & Green Table. And in their defense, these airy popovers are perfect for filling with a veggie ragout or dipping in a bowl of tomato soup.

But more air means more crust—and less eggy-custardy filling. That custardy stuff happens to be my favorite part, especially when it is slathered with butter. And if your popover is supposed to be the star of the breakfast plate, well, it just makes sense to have more of the eggy stuff. At least that’s what I decided yesterday after (literally) dusting off the old cast-iron pan and baking a test-run of popovers. (Deciding to do this the same week that I was developing both waffle and crêpe recipes might not have been the best idea. Taste-testing was fun at first but then I started to feel like I was going to explode!)

The cast-iron-pan popovers popped perfectly respectably (photo at right) but left a delightful amount of silky stretchy custardy filling to savor. Roy and Farmer both concurred that these were delicious and each had second and third helpings. (To be fair, these were Farmer’s first popovers, so he was pretty excited to be in on the taste-testing. His tail thumped a lot and he gave us that crooked smile of his with one tooth hanging over his lip. And the look—you know that look. And he got another taste.)

The good news is that the batter recipe I included in The Fresh & Green Table works fine in either pan, with some adjustments for greasing the pan (included in the recipe below). My cast-iron pan has 11 cups, so I distributed the custard between them (though not very evenly so some were kind of squat.) The nonstick popover pans have only 6 cups, so they hold a lot more custard (hence the mega-poofing). But no matter what pan you use, you’re safe to fill the cups up at least 3/4 full and even a bit more than that. If you think of it, take your eggs and milk out of the fridge before you go to bed Christmas Eve, so you’ll have room-temperature ingredients in the morning. And if you’re resurrecting an old cast-iron pan, you, uh, may need to buy a can of Crisco.

Popovers


I think popovers are best straight out of the oven, but they will keep for a day in a zip-top bag and can be reheated in a 350°oven, wrapped in foil, for 10 minutes.

_________________________

2 tablespoons unsalted butter, melted and slightly cooled, more softened butter for rubbing the pan and for serving

Vegetable shortening, such as Crisco (if using cast-iron pan)

4 large eggs, at room temperature

1 1/4 cups whole milk, at room temperature

1 1/4 cups (5.6 ounces) all-purpose flour

1/2 teaspoon table salt

_____________________

Heat the oven to 425°F. Arrange a rack in the center of the oven.

Grease the cups of a nonstick (6-cup) popover pan very generously with softened butter or the cups of a cast-iron pan generously with vegetable shortening.

Combine the milk, flour, and salt in a blender and blend thoroughly. Add the eggs to the blender and blend until smooth. Lastly, blend in the melted 2 tablespoons butter.

Pour the batter into the cups (they will be about 3/4 to 7/8 full), dividing it evenly. Put the pan in the oven and do not open the oven door for the entire baking time.

Bake for 20 minutes and then reduce the oven temperature to 325°F and continue baking (without opening the oven door) until the popovers are very puffed and a deep golden brown, about another 10 to 12 minutes for the cast-iron pan popovers and about 15 minutes for the popovers in the nonstick popover pans.
Serve right away with lots of butter or split and filled with roasted or braised veggies.
 

Photo at top by Annabelle Breakey from The Fresh & Green Table


The One-Dollar, Five-Minute Christmas Wreath…and Other Small Takes on Joy

All I want to do this week is eat chocolate and go for walks. If I’m to be completely honest, I’d say both of these things have something to do with firing up the endorphins. Thankfully, I’ve always been a bit of a hedonist, so I know how to cheer myself up in small ways when the darkness seems a bit too ever-present.

The sun sets a little after 4 o’clock around here—at which point I feel compelled to curl up on the couch with a good book and not move for five hours. (Well, okay, maybe not five hours, but after we eat supper and put all the chickens to bed, we do seem to auger into the couch.) Fortunately, we did wander out and cut down a Christmas tree last Sunday, so the living room feels at least a little festive with sparkly lights and candles in the windows. We moved the old ship-board pine table out of the living room and into the mudroom, and Libby and I set up the nativity scene with hay from the barn and some dry fountain grass for palm trees. I arranged three Waterford crystal votive candle holders (left over from my old life!) around on the table to light the scene like twinkly stars. With the rest of the lights turned off in the mudroom, the effect is breathtaking and more than anything reminds me that Advent is about hope.

I have an old cloth Danish Advent calendar too, with little pockets for candy. Roy eats the candy every day, only he rarely takes it out of the right date pocket. That’s okay. Roy is in mourning. He lost a close family member last week, and we are just working our way through this with the grace of time. Processing sadness during the dimly lit days of early winter is hard, but somehow also allows for needed reflection.

Me, I am holding extra-tight to the gratitude I’ve got for my life. I’m feeling especially grateful for my sister, who’s helping my parents with a difficult move this Christmas. She is there for them in every way. I wish I could be more help, but I understand that right now my job is just to be supportive from a distance. And to be present for Roy.

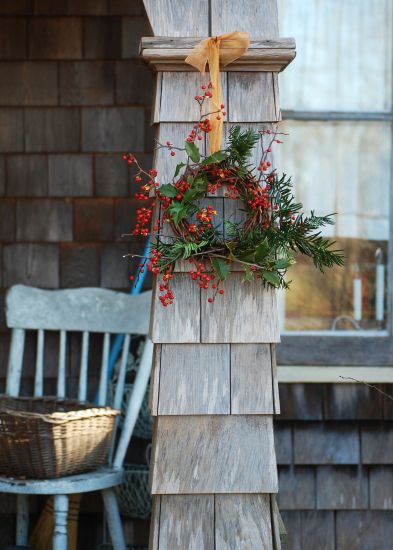
My other job is to find (and make) small bits of joy wherever I can. Yesterday, I made shortbread cookies (very buttery!) and a cute little wreath. I bought a miniature vine wreath for $1 from the thrift shop. I came home, pulled my boots on, and hooked Farmer up to his leash. We trotted out to the far field where the bittersweet tangles up on the old cattle fence line. I snipped some bittersweet and on my way back stumbled across a Christmas miracle—a holly tree with red berries! Right there in the middle of a cluster of cedar trees. I’d never seen it before, but it was happy to lend me a few sprigs.

I took my greens back, finagled them into my wreath, and hung my little front porch decoration up on a rusty nail. Feeling festive, I took an extra piece of red ribbon and tied it around Sammy the Seagull’s neck. Having Sammy on your front step is only slightly more dignified than having a flamingo in your front yard, but what the heck. He makes me smile. Just like the little red hen who wandered by my window a minute ago (she takes herself out of the pen every day) and the sheep I can see grazing in our neighbor’s field. And the starkly beautiful frost on the garden greens this morning. And a spoonful of cocoa in my coffee. And a million other little sparkles of light in an otherwise dim December day.

Winter Greens And A Lovely Salad Recipe to Use Them

In the early morning, when I open the garden gate to get Cocoa Bunny a leafy snack (if I don’t she attacks me when I refill her food bowl), the lettuce and kale and chard and mustard and arugula all have an eerie luminescence to them. They look frozen, but really there’s some kind of antifreeze science going on—a higher sugar content in the cells that keeps the leaves from truly freezing. By mid-morning, they look well, normal, again. Normal if it were September, I’d say.

But it’s December and it amazes me how many green leafy things are still thriving in the garden (see photos below). I only have a few things covered—spinach and some lettuce—but the rest are just hanging out in the elements and surviving. And not because of any magical horticultural genius on my part. So what if understanding the science is not my strong point? I’m happy to be able to make lovely winter-green salads for as long as the garden will let me. And when everything dies, I’m going to have to resort to buying something for Cocoa—unless Plan B works, and I wind up having a supply of greens in January.

I have four flats of gorgeous lettuce and bok choy seedlings growing in the cold frame. I’ve never had better looking seedlings, probably because we always have everything awkwardly crammed under indoor lights. The plan was to get these transplanted into the hoop house—under a double cover system that would effectively raise the temperature a few degrees. (The film on the hoop house being the first layer, another smaller hoop of film directly over the bed being another.) I’ve prepared the bed, but the problem is that the first layer of film is no longer on the hoop house. It got damaged in the Nor ‘Easter (after surviving the hurricane) and repairing it is now on a mounting list of things for Roy to do.

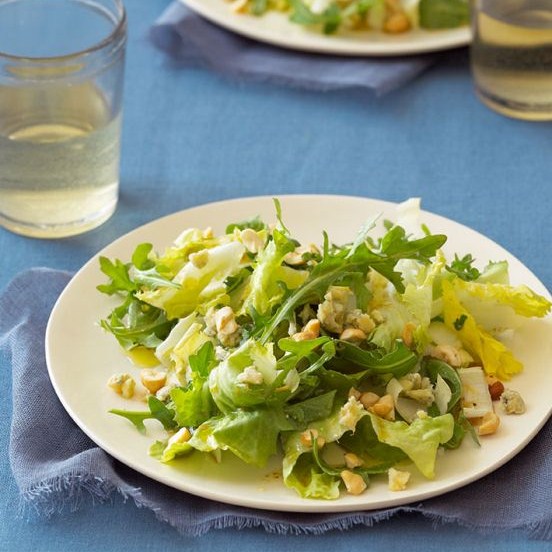
Certainly not worth spending more than a nanosecond worrying about that dilemma. Instead I want to offer you a fabulous winter salad recipe that you can use no matter where your greens come from. It’s a recipe from The Fresh & Green Table that I reluctantly cut from the “favorites” list last week because it’s a side salad, not a main event. But it is lovely nonetheless so I pass it along to you now. Refreshing, crisp, and bright, it pairs well with hearty dishes like gratins or ragouts, or it can star as a first or last course before or after the Christmas roast beef.

The salad features a trio of greens that I particularly like for their contrasting color and texture—endive, arugula, and frisee (or inner escarole leaves). For special salads like this, I prefer to make a custom mix of greens, rather than relying on store-bought mixes that often are past their prime or don’t hold up well when dressed. A sherry maple vinaigrette, blue cheese, and toasted hazelnuts offer all the right sweet and salty notes to bring this salad together. Be sure to use a nice blue cheese like Roquefort or Stilton, and don’t buy pre-crumbled blue cheese.

Winter Green and White Side Salad with Blue Cheese and Hazelnuts

Recipe copyright Susie Middleton. Photo at top by Annabelle Breakey. From The Fresh & Green Table (Chronicle Books, 2012.)

Any night you want to serve this salad, you can prepare the greens ahead; put them in a salad bowl, cover with a damp towel, and refrigerate. (Use leftover outer escarole leaves in soup.) And since the vinaigrette keeps for at least a week in the fridge, that’s a make-ahead too; just be sure to bring it to room temp before dressing. You can also easily double the salad ingredients to serve a crowd, since there’s plenty of extra vinaigrette here.

_____________________________

For the vinaigrette

7 tablespoons extra-virgin olive oil

2 tablespoons sherry vinegar

1 teaspoon orange juice

1 teaspoon maple syrup

1/2 teaspoon finely grated lemon zest

1/2 teaspoon Dijon mustard

Kosher salt

Freshly ground pepper

For the salad

3 ounces baby arugula leaves (about 6 cups, loosely packed)

3 ounces inner escarole leaves (white, yellow and palest green parts), torn into small pieces (about 4 cups), washed and very well dried

2 small endive (4 to 5 ounces each), cut crosswise into 3/4-inch wide pieces, core discarded (about 2 1/2 cups)

3 ounces Roquefort, Stilton, or other good-quality blue cheese, crumbled while still cold (about 1/2 cup)

1/2 cup very coarsely chopped hazelnuts, toasted

_____________________________

For the vinaigrette

Combine the olive oil, sherry vinegar, orange juice, maple syrup, lemon zest, Dijon mustard, about 1/8 teaspoon salt, and several grounds of fresh pepper in a glass jar or Pyrex liquid measuring cup. Whisk or shake well and taste.

For the salad

Put the arugula, escarole, and endive in a wide shallow bowl and toss with your hands to combine. Spoon 2 to 3 tablespoons of the vinaigrette over leaves and toss well. Taste and add just a bit more dressing if needed. Add the blue cheese to the salad and gently mix it with the greens (again using your hands) breaking the blue cheese up further to spread it throughout the greens. (A creamy blue will smear slightly—which is a good thing.) Mound the salad evenly onto four plates, and sprinkle the toasted hazelnuts over each portion. Serve right away.

Serves 4

Sleepless on State Road, Plus Twenty Reasons to Buy Cookbooks for Christmas

Lately I have been waking up in the middle of the night. I have trouble falling back asleep, so I play the alphabet game that Libby, Roy and I do on the ferry rides back and forth from Falmouth. It takes on a different guise every night. Sometimes I start naming our (ever-increasing) chicken coops in alphabetical order—an idea we’ve thought of to help identify the groups of chickens. So far we have the Aquinnah Ladies, the Beach Road Babies, and the Chilmark and Chappy Chickens. I have imagined a future of 26 chicken coops (God forbid!) with names that go all the way up the alphabet to Menemsha and No-Man’s Land and Quitsa and Wasque, too. These are all places on the Vineyard, of course.

The other night I got tired of naming chicken coops (but not tired enough to fall asleep) so I began to make lists. Lists of my favorite recipes in my first two books. Okay, I will just have to be honest and admit that I did fall asleep partway through this task, so it works. I hope, of course, this doesn’t mean that thinking about recipes is boring—I prefer to think of it as comforting and satisfying! (Actually, I got kind of boggled by all the choices and couldn’t quite make up my mind.)

I thought of this because I get asked a lot—especially on radio—what my favorite recipes in my books are. Of course everyone knows you’re not supposed to play favorites with your own children, but, um, recipes aren’t really children so I think it’s okay.

Also, I have been thinking a lot about shopping locally for Christmas and about supporting independent bookstores. This is really a make-or-break time of year for brick-and-mortar bookstores, so it is extra-important to patronize them. (On the Island that means Bunch of Grapes in Vineyard Haven, and Edgartown Books in Edgartown, where I will be signing books on December 8.) Besides, for whatever few extra dollars you spend there (which then goes into the local economy), you get the free experience of browsing in a cozy, friendly bookstore—looking at all those books, seeing friends, perhaps having a cup of cider—and just enjoying the whole experience.

So in that spirit (and because I feel guilty that I sometimes don’t promote my own books as much as I should—ah, but that’s a whole other story!), I’m giving you 20 reasons (10 each from Fast, Fresh & Green and The Fresh & Green Table) to visit your local bookstore, buy cookbooks for holiday presents, and have something to think about and savor if you wake up at night during the stressful holiday season! Here goes (And let me tell you, in the end it was NOT easy to narrow down to 10 for each!):

Top Ten Favorite Recipes from Fast, Fresh & Green:

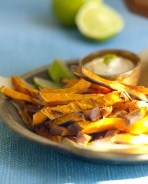
  • Sweet Potato Mini-Fries with Limey Dipping Sauce and Spiced Salt
  • Harvest Gratin of Butternut Squash, Corn, and Leeks
  • Caramelized Plum Tomatoes in an Olive Oil Bath
  • Roasted Brussels Sprouts with Orange Butter Sauce
  • Vanilla and Cardamom Glazed Acorn Squash Rings
  • Braised Fingerlings with Rosemary and Mellow Garlic
  • Corn Sauté with Chile and Lime
  • Bacon and Rosemary Sautéed Brussels Sprouts and Baby Bellas
  • Crisp-Tender Broccoflower with Lemon-Dijon Pan Sauce and Toasted Parmigiano Bread Crumbs
  • Grill-Roasted Bell Peppers with Goat Cheese and Cherry Tomato Dressing

  Top Ten Favorite Recipes from The Fresh & Green Table:

  • Chile Rice with Green Beans & Toasted Pecans
  • Spaghetti with Roasted Cherry Tomatoes & Spicy Garlic Oil for Two
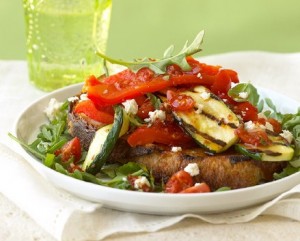
  • Grilled Zucchini, Bell Pepper, Goat Cheese & Grilled Bread Salad
  • Warm Winter Salad of Roasted Root Fries
  • Spicy Noodle Hot Pot with Bok Choy, Ginger, Lime & Peanuts
  • Crisp Red Potato Patties with Warm Asian Slaw & Limey Sauce
  • Savoy Cabbage, Apple, Onion & Gruyere Rustic Tart
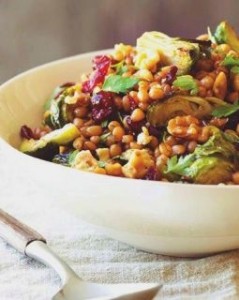
  • Warm Wheatberries with Roasted Brussels Sprouts, Toasted Walnuts & Dried Cranberries
  • Walk-in-the-Woods Grilled Pizza
  • Potato Galette with Rosemary & Two Cheeses


A Poem for Frosty Winter Mornings

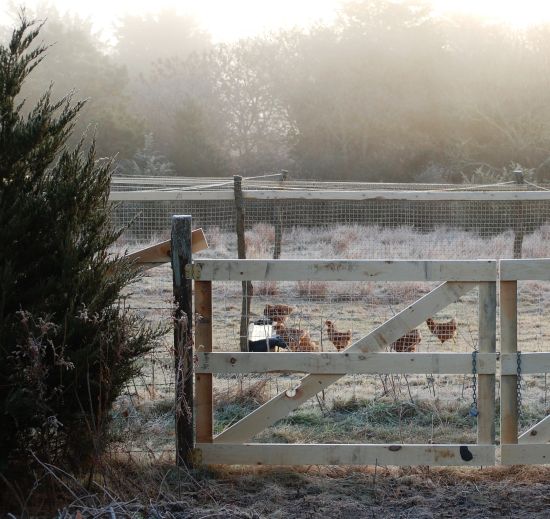
Up early the day after Thanksgiving, camera in hand to catch the frost and mist (and Roy’s new gate), I thought of this poem I wrote a few winters back. Figured I’d share it with you today for a sense of calm on a Monday morning.


Winter Relief

What use is the world

without

the quiet breath of winter,

that bare-branch season

of a thousand greys

and a smattering

of blood-red berries?


—Susie Middleton

A New Tradition—Crispy Smashed Potatoes—and More Thanksgiving Recipe Picks

We left the pot-luck early with an empty platter. It wasn’t the first time this had happened, but still I was surprised at the sheer snarfing speed of the crowd. The party was really just getting going when we had to dash off to take Libby to the boat, but somehow, between the freshly shucked oysters, the beer bottles twisting open, and the first bites of juicy roast pig, the crispy potatoes had evaporated. I’d never even taken the tinfoil off. But someone had, and a flashmob of snackers had downed 45 crispy potatoes in no time.

When we got in the car, Libby was grinning and wide-eyed, clearly ready to give me credit for this disappearing act. But I told her, “It’s a dirty trick, you know, putting a platter of fried salty potato thingies in front of hungry people, people who’ve probably been raking leaves or rounding up sheep or wading in freezing waters for scallops all morning. They don’t stand a chance against a crispy potato. Once you eat one, they’re like potato chips or popcorn—you have to have more.”

So, yeah, I did not invent potatoes+salt+oil, but I did noodle a fun variation on this theme some years ago for Fine Cooking magazine, and I noodled the idea a little further for The Fresh & Green Table, where I turned the crispy smashed potatoes into a warm salad with a bit of Asian slaw. And somewhere, some potluck along the way, I also discovered a bonus: These crispy smashed potatoes don’t have to be served hot. They’re just fine at room temperature, which makes them ideal for a buffet, or, say, something like Thanksgiving dinner, when keeping everything hot seems to be one of the biggest challenges. So after the potluck, I began to think I should hand over the recipe here at sixburnersue.com in time for turkey day.

Now I am really not suggesting that you replace the mashed potatoes with these smashed potatoes. (They are literally smashed—you boil little red potatoes until tender and then gently smush them down with the palm of your hand. Then you toss with lots of oil and salt and roast at very high heat. Because they’ve already been boiled, they wind up with a fluffy texture inside and a very crispy texture outside.) But if you have a big crowd and serve lots of different kinds of food, there’s no reason not to make these, too, since they can be partially done ahead and popped in the oven when the turkey comes out to rest.

Or, heck, forget about Thanksgiving day and make them over the weekend or some other time during the holidays. They’re pretty good with roast beef. Or just about anything else.

And if you need some other great side dish ideas for the holiday, see my top ten suggestions from last year or browse Fine Cooking‘s terrific collection of Thanksgiving menus and recipes.


Crispy Smashed Potato Patties

Recipe copyright Susie Middleton, adapted from The Fresh & Green Table, Chronicle Books, 2012

Baby red potatoes—about 1 1/2 to 1 3/4 ounces each—are my favorites here. You can use slightly bigger potatoes, but keep them all about the same size for the best results. I used to toss these with olive oil, but I found that some olive oil got an offer flavor from the very high heat. Now I use vegetable oil. Canola is fine, but lately I’ve been using Spectrum’s high-heat safflower oil and that has a really clean taste.

___________________________________

16 baby red potatoes (consistently sized)

kosher salt

1/2 cup canola or safflower oil

__________________________________

Preheat the oven to 475°F. Line a heavy-duty rimmed baking sheet with aluminum foil and a piece of parchment paper on top. Arrange a double-layer of dish towels on a large cutting board or your kitchen counter. Put the potatoes (preferably in one layer) in a large Dutch oven and cover with at least 1 1/2 inches of water. Add 2 teaspoons kosher salt, cover loosely, bring the water to a boil, and reduce to a simmer. Uncover and cook until the potatoes are tender all the way through, but not falling apart, about 18 to 20 minutes. (Check with a paring knife.)

Using tongs or a slotted spoon, transfer each potato to the dish towels, arrange them a few inches apart, and let them cool for a few minutes. Using another folded dish towel, gently press down on each potato to flatten it into a patty about 1/2 inch thick (or up to 3/4-inch). The patties don’t have to be perfectly even, and a few pieces of potato may break off (no matter—you can still roast them). Let the patties cool for a few minutes more, transfer them to the baking sheet, and let them cool for 10 to 15 minutes longer. (Or, at this point, you can hold the potatoes in the fridge for up to 24 hours, covered with plastic. Bring to room temp before roasting.)

Sprinkle 1/4 teaspoon kosher salt on the potatoes and pour the 1/2 cup oil over them. Carefully flip the potatoes over, and season this side with a scant 1/2 teaspoon kosher salt. Rub with some of the oil, making sure that the potatoes are well-coated with oil on all sides. Roast (turning once with a spatula—carefully—halfway through cooking) until they turn a deep orange brown (a little darker and crisper around the edges), about 28 to 30 minutes.


Raising Dinner

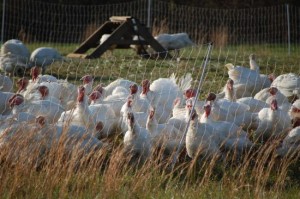
Our Thanksgiving turkey is walking and talking less than a quarter mile up the road. She is ranging around in a big pasture with a few hundred friends, enjoying the fresh grass, salt air, and rosy sunsets of rural West Tisbury. Even closer, a few paces down the road in the other direction, tasty lamb shanks graze in a spent hayfield. I drive by them every time I leave the house. Of course, I don’t necessarily think “rosemary and garlic” when I look at them. I think about how gorgeous their chocolate and cream-colored wool is and how funny their faces are, with their feral eyes and grinding jaws and devil’s ears. Baby lambs are cute; adult sheep can actually be sort of strange looking.

Cuteness factors aside, we are really fortunate to have uber-local, humanely-raised (delicious) meat available to us. And even though we can see how these animals are raised, they’re still living on our neighbors’ property—not ours—so we don’t have to deal with the whole personality issue. Yet.

Yesterday I was staring into the face of a charred pig with a spit in his mouth. It was the second Island pig roast we’ve been to in the last few weeks. As Libby and I nibbled on a particularly sweet and juicy hunk of pork, I said to her, “Do you really think we could do this—raise a pig and then eat her?” Libby just sort of giggled nervously. This is a girl who pays attention to what’s going on around her, and she knows. Knows how most meat animals in this country are raised (heard me talking about it enough) and knows what humanely raised animals look like (dozens of visits to Island farms, don’t you know). And she understands the difference between a farm animal (one that you spend lots of time and money feeding and watering in order to get a certain return on it) and a farm pet (like our dog Farmer, whose sole purpose in life is to be cute and provide lots of kisses and snuggles on the couch—and to chase chickens).

But still she is an animal lover. And she is 10 years old. I, on the other hand, am not 10. So I’m not sure what my excuse is. I’m just awfully afraid that we’re going to get piglets (already in the works for next spring) with the intention of raising them to slaughter weight (sometime next fall) but wind up with a couple of 600-pound sows (a decade from now) that have become the hugest hungriest farm pets ever. I keep thinking of James Taylor’s song about his pig, Mona, who he bought expressly to raise for meat and never was able to slaughter.  “Mona, Mona, so much of you to love, a little bit too much of you to take care of.” This famous pig actually lived on the Vineyard. Some of my friends remember her. And she was huge.

Not eating our own pork would be hypocrisy at its worst. I am (at least I think I am) 100 percent in favor of more locally, humanely raised animals. And 100 percent in favor of eating all the parts of those animals and making that meat stretch over many meals. Choosing to eat a little less meat overall and a little more locally-raised meat are the only ways I see to help fuel the shift away from factory farms.

And I am especially excited about a movement on the Island to build a USDA-approved four-legged humane slaughterhouse. This would be a big incentive for Island farmers to raise more meat animals, because they wouldn’t have to take the animals on an expensive and stressful ferry ride to a facility hundreds of miles away (and wait weeks to get the meat back). And by definition, an Island animal is a pastured animal—there’s no such thing as a feedlot here.

Most ludicrous is the thought that I might disdain eating our own pig and then turn around and go to the grocery store and buy a package of bacon (which I will do—there is certainly no point in pretending that I will never eat bacon again). This would be like giving the factory farms a big thumbs up and poking a stick in the eye of all the efforts to return animal raising to a natural and sustainable system in this country.

And here’s the kicker. We wanted to be farmers. So we started to grow vegetables. Then we got a few laying hens. Then we got some more laying hens. Then we decided we might actually like to get serious about farming as a small business. Then, just a few weeks ago, our landlord invited us to use the three acres of fields behind us for farming. So now we have 200 more laying hens arriving here—tomorrow. And once you decide to make eggs a business, you really have no choice but to “trade in” your hens every couple of years, because their productivity declines. It’s way too expensive (and not a smart business move) to feed hens that aren’t laying many eggs. (No matter how much pasture the hens graze on, they still need supplemental feed.) So your two-year-old hens go off to slaughter. They become chicken pot pies.

Ah. It appears we have already crossed the line into raising animals for meat. Making the leap from a chicken to a pig shouldn’t be that hard, should it?

P.S. The three acres are the reason why the pigs are now a possibility. And stay tuned for more about the arrival of the 200 chickens and photos of Roy’s new coops. The chickens are 17-week-old pullets, so they’ll be ready to lay in a few weeks. We’re skipping the baby-chick phase this time, so at least we don’t have to deal with that cute fest!

And thank you to The Good Farm, Cleveland Farm, and Mermaid Farm for letting me photograph their turkeys and sheep on State Road.


Stormy Minestrone, A Recipe for Comfort

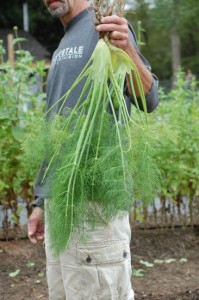
All I can think about today is soup. This may be because I have too many vegetables crowding up the fridge. After another round of recipe development and a pre-hurricane sweep of the garden, I am left with the clear makings of minestrone—everything from a five-pound bag of carrots to three awkwardly space-hogging baby fennel bulbs. I have a big basket of winter squash I keep stumbling over in the pantry, and I have a little handful of green beans I just plucked off the dying vines this morning. I even have a few cranberry beans that are finally ready to harvest, from plants that miraculously show very little storm damage.

Our storm damage, in fact, was minimal. Had circumstances been different—if Sandy hadn’t taken a left turn when she did—we would likely be facing a very different winter here on the farm. Instead the hoop house is still standing, the animals are all fine, and in fact, we have another flock of laying hens due to arrive here this week (more on that soon). So thankfully, Roy is building—rather than rebuilding. Now, of course, I hear that a big Nor ‘Easter is coming up the coast this week. So maybe we are not out of the woods yet. But still. I can’t stop thinking about Staten Island and the Rockaways and Seaside Heights. All those folks still without power and nights getting really chilly. And lots of friends on the coast of Connecticut with serious flood damage. We did have plenty of coastal erosion up here on the Island and flooding in the lowest harbor areas in the towns, but most homes were safe and dry (and warm).

Everyone knows it could have been different, though. One Island friend posted an idea on Facebook a couple days ago for a coats-and-warm-blankets drive, and seemingly overnight, boxes outside of Island businesses filled up with donations, and volunteers have come forward to drive the items down to a particularly hard-hit neighborhood in Queens.

I will be here, making hot and comforting soup, sort of a crazy response to feeling for other people who are cold. It’s like I have a sympathetic and not entirely imaginary chill that must be chased away. We human beings have strange responses to things—I know I can’t share my soup with those folks, but I’m hoping someone else will share their hot food with someone cold and hungry, and in the meantime I’m sending comfort-soup-karma out as best I can.

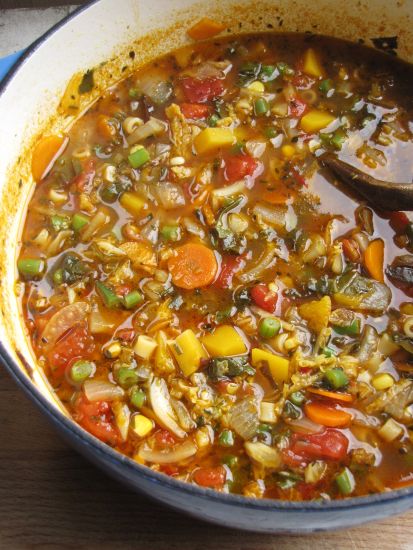
Here’s my Fall Farmers’ Market Minestrone recipe from The Fresh & Green Table. Deeply flavored without any meat at all, it’s a good starting point for comfort soup, but feel free to vary the veggies as you please.

Fall Farmers’ Market Minestrone  

Recipe copyright Susie Middleton, from The Fresh & Green Table (Chronicle Books, 2012).

The secrets to this meatless minestrone include lots of aromatic veggies and a Parmigiano rind. I usually finish the soup with grated Parmigiano and/or a bit of gremolata (a mix of freshly chopped parsley, lemon zest, and garlic). But if you don’t want to bother with the gremolata , it’s perfectly delicious without it.

______________________________

1/4 cup extra-virgin olive oil

2 cups medium-diced onions (about 1 large or 2 medium)

2 cups thinly sliced Savoy cabbage (about 1/4 small head)

1 cup thinly sliced fennel bulb (quartered and cored first, about 1/2 small bulb)

1 cup thinly sliced carrots (about 2 carrots)

Kosher salt

1 cup peeled, medium-diced butternut squash (about 4 to 5 oz.)

1 cup large-diced stemmed Swiss chard leaves (thinly slice stems separately and include them, too)

1 Tbsp. minced fresh garlic (plus 1/2 tsp. if making gremolata)

1 Tbsp. chopped fresh thyme

2 tsp. chopped fresh rosemary

1 tsp. ground coriander

1 Tbsp. tomato paste

1 14 1/2-oz. can diced tomatoes (I like Muir Glen), well drained

1 2-inch Parmigiano-Reggiano rind

½ cup ditalini pasta or other very small pasta

1 cup thinly sliced green beans (about 4 oz.)

½ to 1 cup fresh corn kernels (optional)

1 to 2 tsp. lemon juice

½ tsp. lemon zest (if making gremolata)

2 Tbs. chopped fresh parsley

1/3 cup coarsely grated Parmigiano Regianno

______________________________

a 5- to 6-quart Dutch oven or other large soup pot, heat the olive oil over medium heat. Add the onion, fennel, cabbage, carrots and 1 tsp. salt. Cover and cook, stirring occasionally, until the onions are softened and mostly translucent and the cabbage is limp, about 6 to 8 minutes. Uncover and continue cooking, stirring occasionally, until much of the cabbage is browning and the bottom of the pan is browning as well, about another 8 to 9 minutes.

Add the 1 Tbsp. garlic, the thyme, the rosemary, the coriander, and the tomato paste. Stir until fragrant, about 30 seconds. Add the butternut squash, the chard, the diced tomatoes, and 1 ½ tsp. salt and stir well until incorporated. Add the Parmigiano rind and 8 cups water.

Bring to a boil, reduce to a simmer, and cook, stirring occasionally, for 10 minutes. Add the ditalini and cook another 8 minutes. Add the green beans and the fresh corn (if using) and cook for 4 to 5 more minutes. Remove the pot from the heat, remove the Parmigiano rind, and stir in 1 tsp. of the lemon juice. Let cool for a few minutes; taste and adjust for salt, pepper, and lemon juice.

For the gremolata (optional), combine the 1 tsp. garlic, the lemon zest, and the fresh parsley in a small bowl.

Garnish each portion of hot soup with some of the gremolata or chopped parsely and some of the Parmigiano.

Yields 8 cups, Serves 6


Open House! The Hens Get a Preview

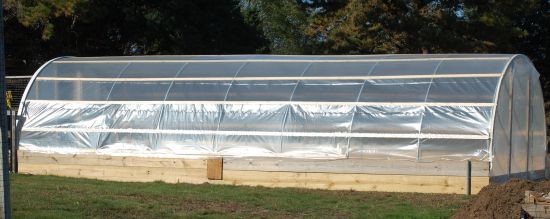
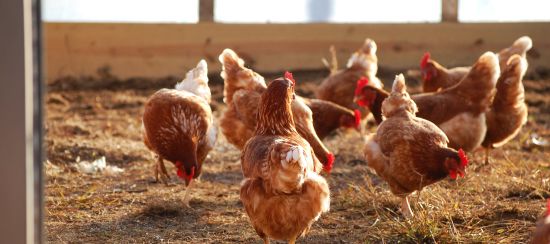
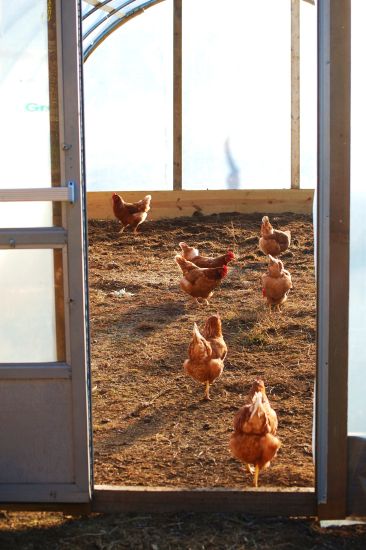
The chickens got to see the inside of the covered hoop house before I did. While I have been otherwise occupied (a funeral, a photo shoot, a TV filming), Roy has been humming along on the hoop house. Maybe humming isn’t the right word–more like whistling. Last week he reinforced the ends, put in a door, and nailed wooden battens along the hoops, and this weekend he slipped the cover film on so quickly that I’m still not sure how he did it. This is a task that usually takes a few people. Hmmm. Anyway, he then moved the chickens’ temporary fencing so that they could wander into the hoop house during the day, cleaning up the weeds and kicking up the dirt in the process. A nosey hawk has been circling around lately, too, so it’s a good time for the hens to be under a little more cover.

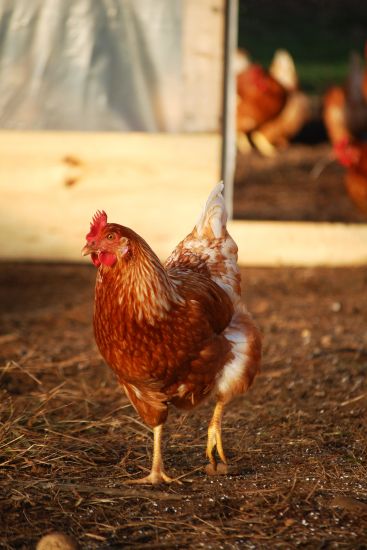
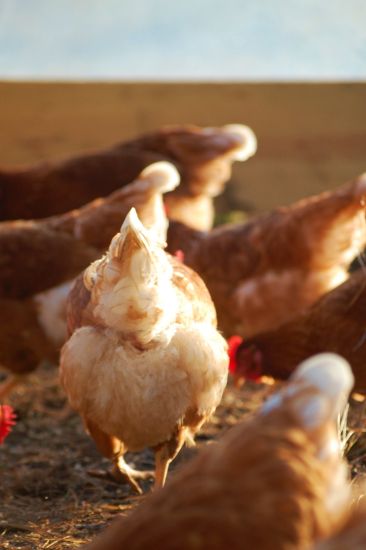
Finally this morning, with no big task ahead of me, I was able to get out, poke around, and take some pictures. I never get tired of watching the chickens, and the light inside the hoop house was lovely on this clear October day. It feels cozy and peaceful in there. I can only imagine the life it is going to take on when plants and hoses and boots and trellises and pots and buckets take over. Nothing like an empty space for the imagination to fill. But in the meantime, the chickens get the honor.